Permit Sales Window Management
Permit Sales Windows in OPSCOM define the specific timeframes during which parking permits can be purchased and when they are valid. This article guides OPSCOM administrators through the process of creating and activating new permit sales windows, ensuring that permits are available for sale and valid for use according to your organization's academic terms or operational periods.
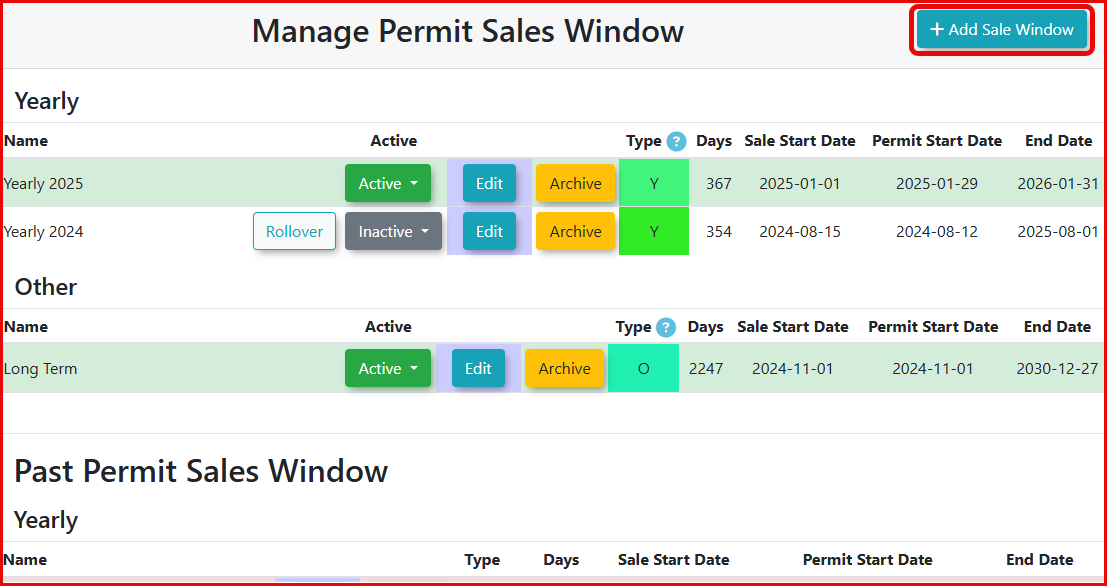
The Manage Permit Sales Window page allows you to create, configure, and activate sales windows.
Creating a New Sales Window
- Hover over Parking Management, and click Sales Windows.
-
Click the +Add Sale Window button.
- Enter a Name for your sales window.
- Choose your allocation type. Will it be Monthly, Yearly, Semester or Other.
- Enter your Sale Start Date, Permit Start Date and End Date (see the Defining your Key Dates section below).
- Choose a color for your sales window.
- Click Save Changes to save your information. The newly created sales window will now appear in the list on the Manage Permit Sales Window page.
Defining your Key Dates
When creating a new sales window, you will need to define the following key dates:
- Sale Start Date:
- Purpose: This is the first day that permits associated with this sales window will be available for purchase by users.
- Example: December 29, 2025.
- Permit Start Date:
- Purpose: This is the first day the purchased permit becomes officially valid and usable (e.g., scannable, recognized by LPR). This allows for pre-selling permits before their validity period begins.
- Example: January 1, 2026.
- End Date:
- Purpose: This is the official last day permits can be sold within this sales window, and also the date on which the permits become invalid.
- Example: December 31, 2026.
Example Scenario: If a sales window is configured with a Sale Start Date of December 29, 2025, a Permit Start Date of January 1, 2026, and an End Date of December 31, 2026:
• Permits can be purchased anytime between December 29, 2025, and December 31, 2026.
• These permits would be valid from January 1, 2026, to December 31, 2026.
Activating the Sales Window
Once a sales window has been configured, it needs to be made Active for permits to be sold.
- Locate the sales window you wish to activate on the Manage Permit Sales Window screen.
- In the Active column, click the dropdown menu for that sales window.
- Choose Active.
Note: If you activate a yearly sales window, other existing yearly sales windows will automatically switch to Inactive to prevent conflicts.
Best Practices & Considerations
- Overlap Prevention: Carefully manage sales window dates to avoid unintended overlaps that could confuse users or create accounting issues.
- Future Planning: Create sales windows well in advance of the sale start date to allow ample time for configuration, testing, and marketing of permits.
- Expiration Management: Regularly review the End Date of your sales windows. Past sales windows will be located under Past Permit Sales Window and cannot be reactivated; a new sales window must be created if similar dates are needed.
- Clarity in Naming: Use clear and descriptive names for your sales windows (e.g., "Fall 2025-2026 Annual Permit Sales," "Spring Semester 2026").