IncidentAdmin
- Active Dispatch Logs (BETA)
- Viewing an Incident
- Filling out the Incident Form (WIP)
- Incident Checklist
- My Incident Tasks
- View Cameras
- Related Occurrences
- Dispatch Logs
- View Open Incidents
- Incident Summary Report by Sub-Location
- Incidents Summary Report by Category
- Incidents Summary Report
- Recent Incidents Summary Report (Last 30 Days)
- Incident Reports
- Editing Incidents
- Incident Entry
- Search Incidents
- Configuring Incidents
- IncidentAdmin Workflow
Active Dispatch Logs (BETA)
When do we use this?
Dispatch Logs allows administrators/dispatchers to record and track all inquiries that come into the office through alerts or another system. These dispatch logs can be linked to incidents for further tracking if the alert that triggered the dispatch log did not already have a valid incident attached. The Dispatch Log also provides administrators with a summary of all open dispatch entries. Some systems such as Cisco Prime or ITS-NetworkingAlerts can push the incident number with an alert that creates a dispatch log with the associated incident assuming it exists.
Reviewing Dispatch Logs:
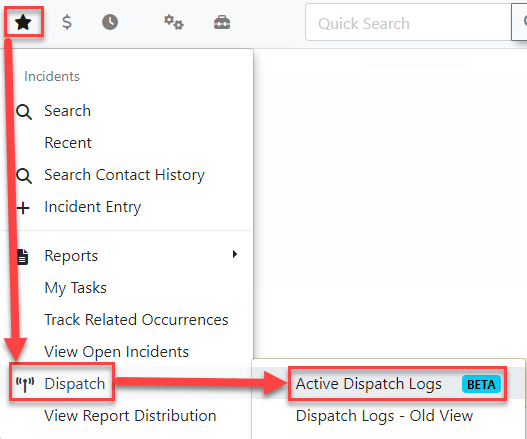
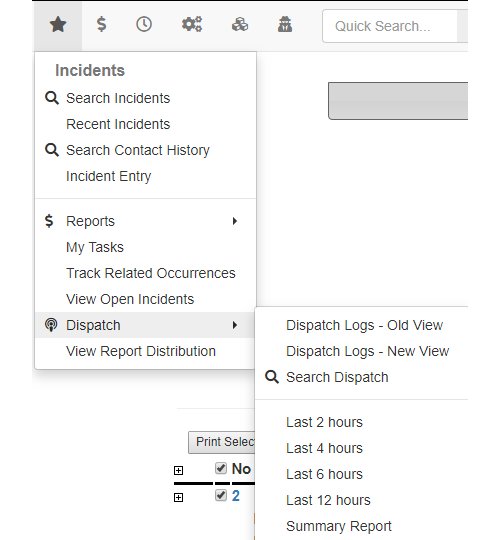
Hover over the Incidents icon, Dispatch, and select Active Dispatch Logs.
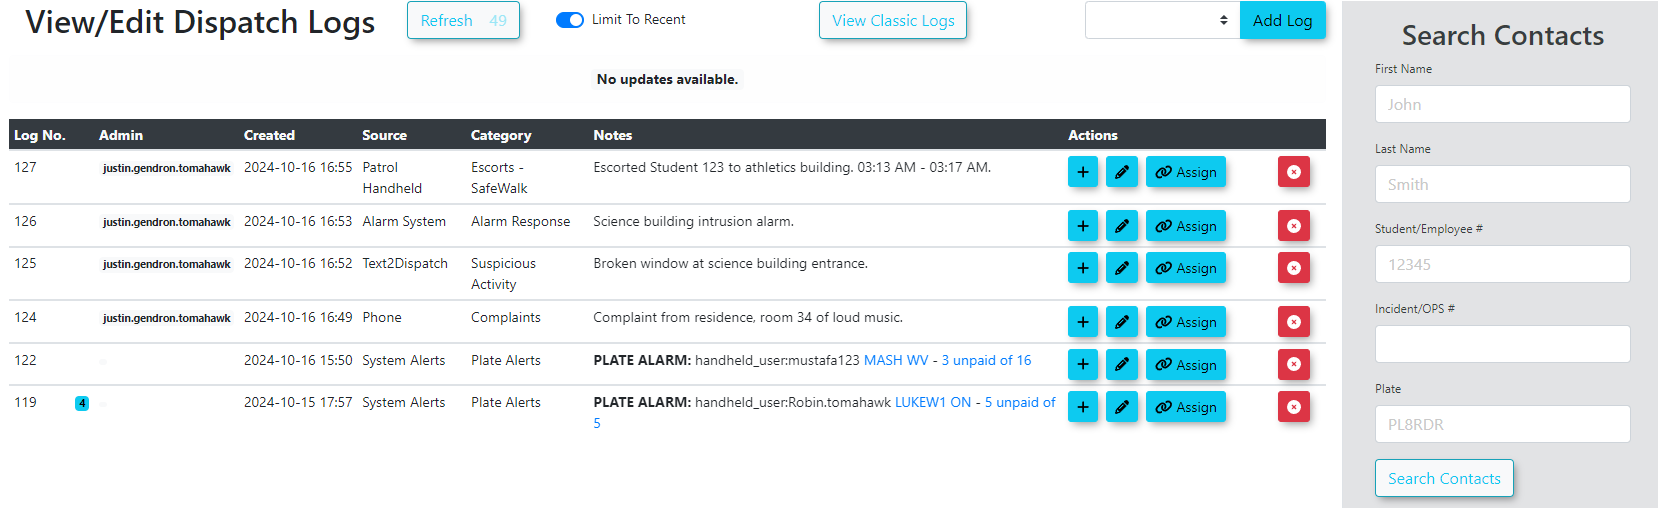
This will bring up the View/Edit Dispatch Logs page. Here administrators/dispatchers can view all open logs that still need to be followed-up on.
Creating new Dispatch Log Record:
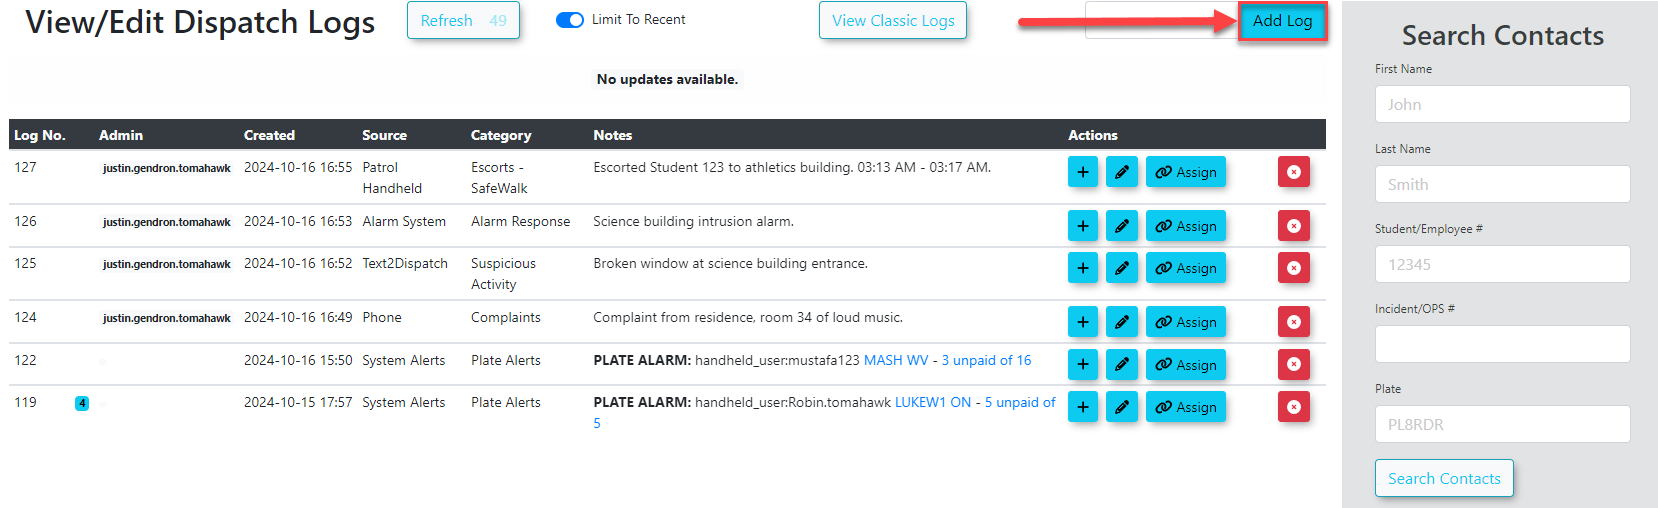
To create a new log record click the "Add Log" button in the top right of your screen:
This will bring up the Add New Log Record screen:
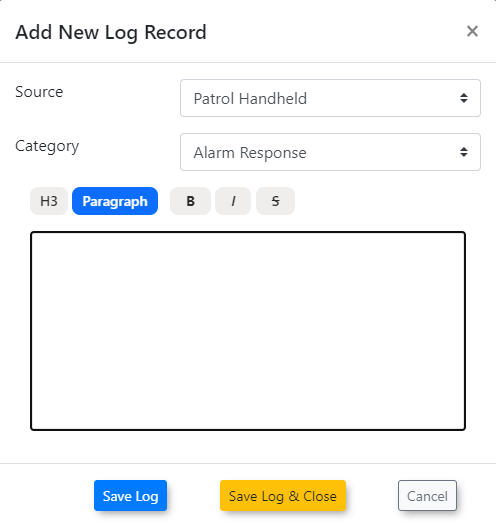
Select the appropriate Source and Category from the drop-down menus and type in any details that need to go with the log in the Note section. Depending on whether or not you want the dispatch log to be closed, click Save Log or Save Log & Close. If Save Log is clicked the information will be saved and the log will show at the top of the listing of Dispatch Log Records.
Adding Additional Log Notes:
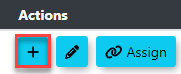
If dispatchers want to add a separate log that is attached to the first log, click the blue plus icon under actions:
This will bring up an Add New Log Note screen where dispatchers can include the Source of the information, the Category and any notes that need to be included:
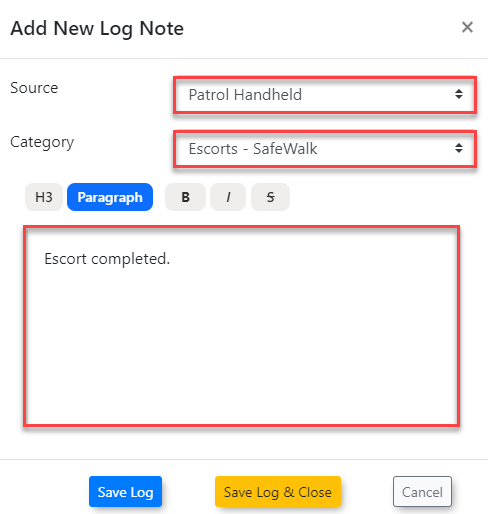
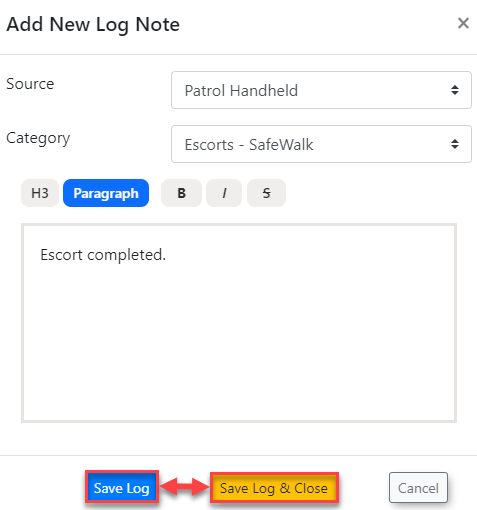
To save the log click the Save Log button. OR To save the log and to also close the log, if it is completed, click Save Log & Close button at the bottom:
Viewing Additional Notes / Rolled-Up Alerts
The dispatcher can view all of the available log records associated with the dispatch log on the View/Edit Dispatch Logs page by clicking a log that has additional notes/alerts associated to it. This is indicated by a blue number (the number being how many notes are linked to the log in question):
Assigning a log to an incident report:
If dispatchers want to assign an admin user to act on the log or if they want to attach an incident report, select the Assign button under actions:

The Assign an Incident Report window will open. The dispatcher can either assign the log to A new incident or An existing incident:
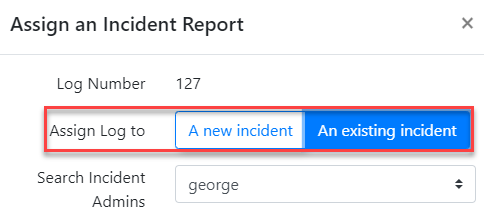
IF A new incident is selected and assigned to an admin user a new incident will be created.
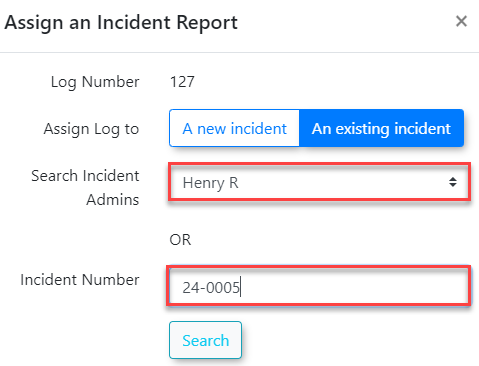
IF An existing incident is selected a new Incident Number field will appear. The dispatcher can either search incidents already assigned to an admin user OR enter in an incident number:
When an assignment is made, the incident number will appear in the listing of Dispatch Log Records. This link can be selected to gain access to view/edit the incident report if the admin account viewing the dispatch page has permissions to view and/or edit incidents:

Close Dispatch Logs:
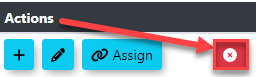
To close a log once it has been dealt with, click the red X icon under actions:
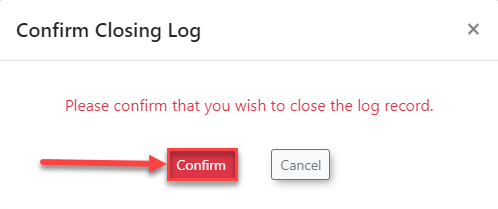
The Confirm Closing Log window will open with a Confirm button that can be clicked.
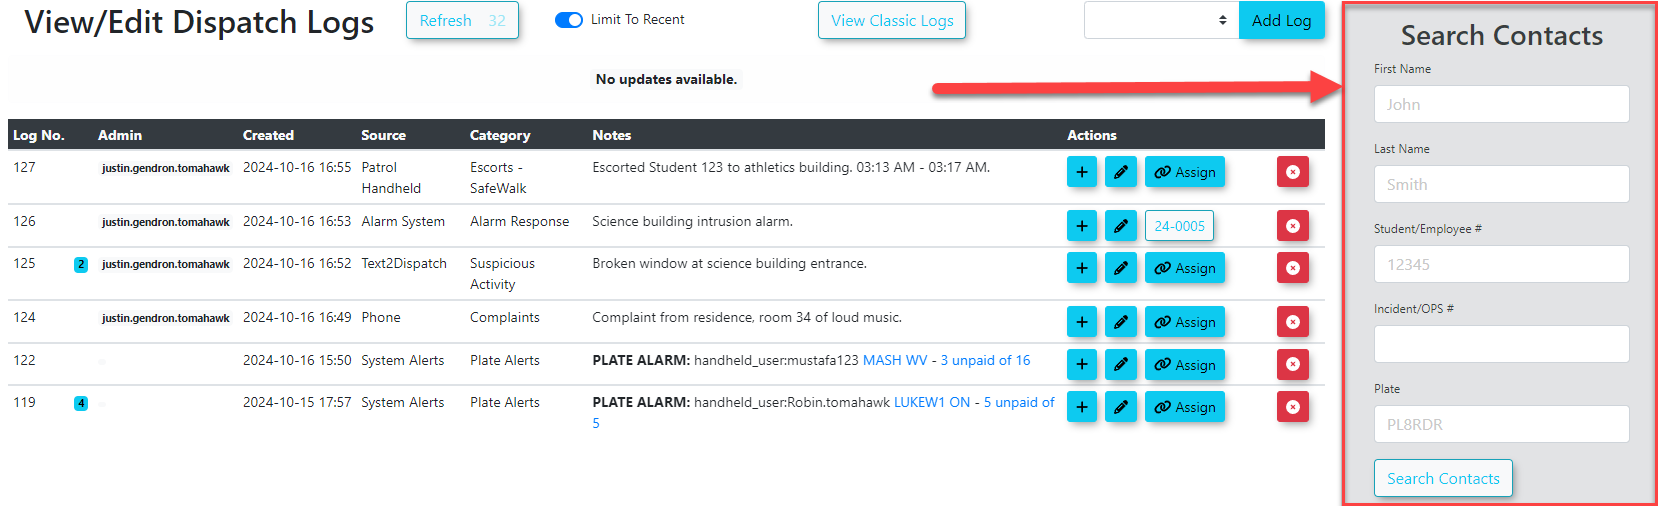
Search Contacts:
Depending on the width of the admin/dispatch users View/Edit Dispatch Logs page the Search Contacts area will either be located on the right side of the screen (for wide monitors/windows):
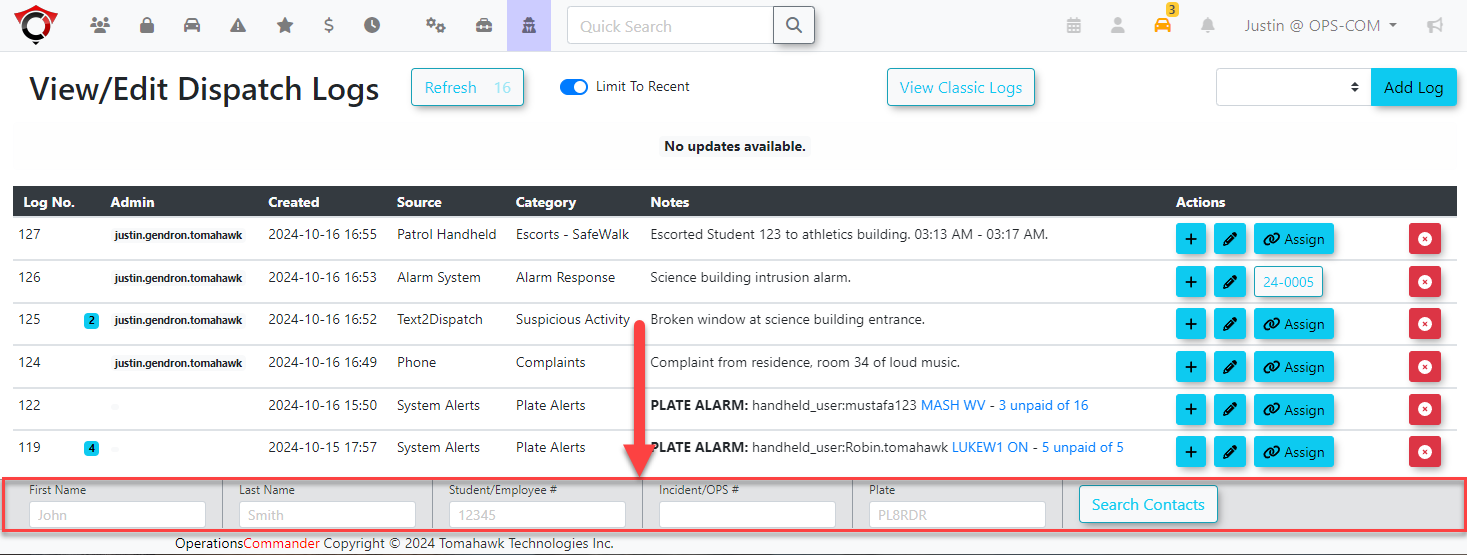
OR along the bottom of the View/Edit Dispatch Logs page:
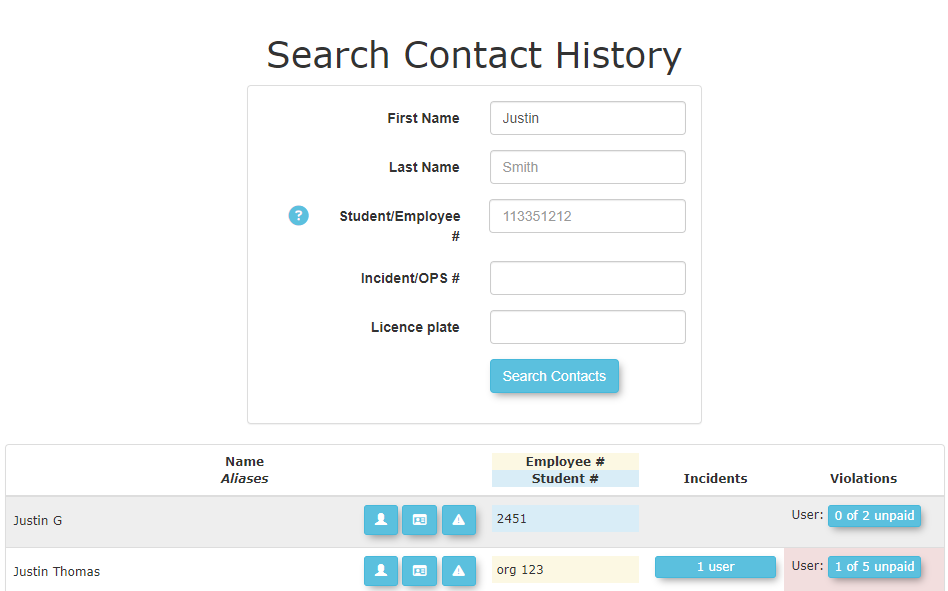
When Search Contacts Button is clicked the Search Contact History window will appear:
Miscellaneous buttons:

Refresh: The dispatch page will automatically refresh every minute by default. The Refresh number indicates how long until the page will automatically refresh. Some actions will stop the page refresh from occurring such as adding notes or assigning an incident.
Limit To Recent: Limit Dispatch logs to recent logs only. Toggle this setting to view older dispatch logs in addition to recent ones.
View Classic Logs: This will redirect the admin/dispatcher to the old dispatch logs view, this is a temporary feature that exists until the old dispatch log view is completely removed.
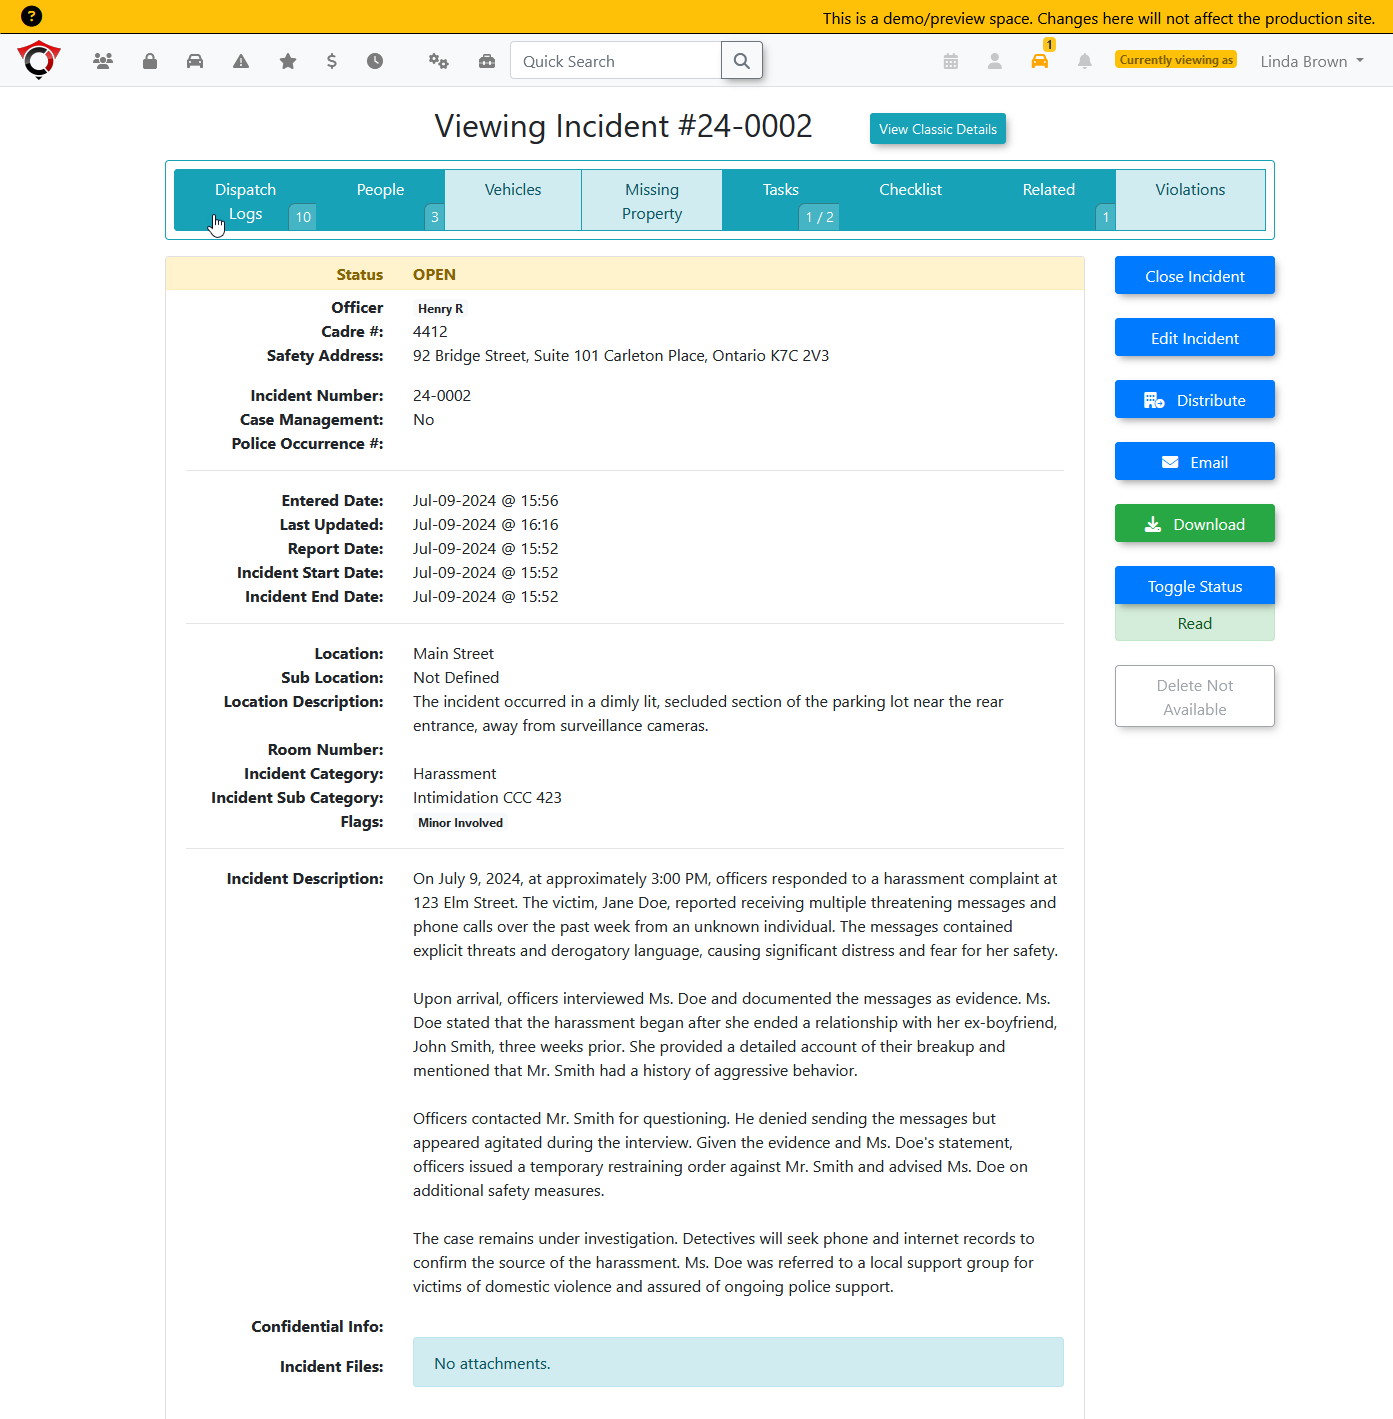
Viewing an Incident
You can get to the view incident screen from multiple areas. Searches, reports, links from other places.
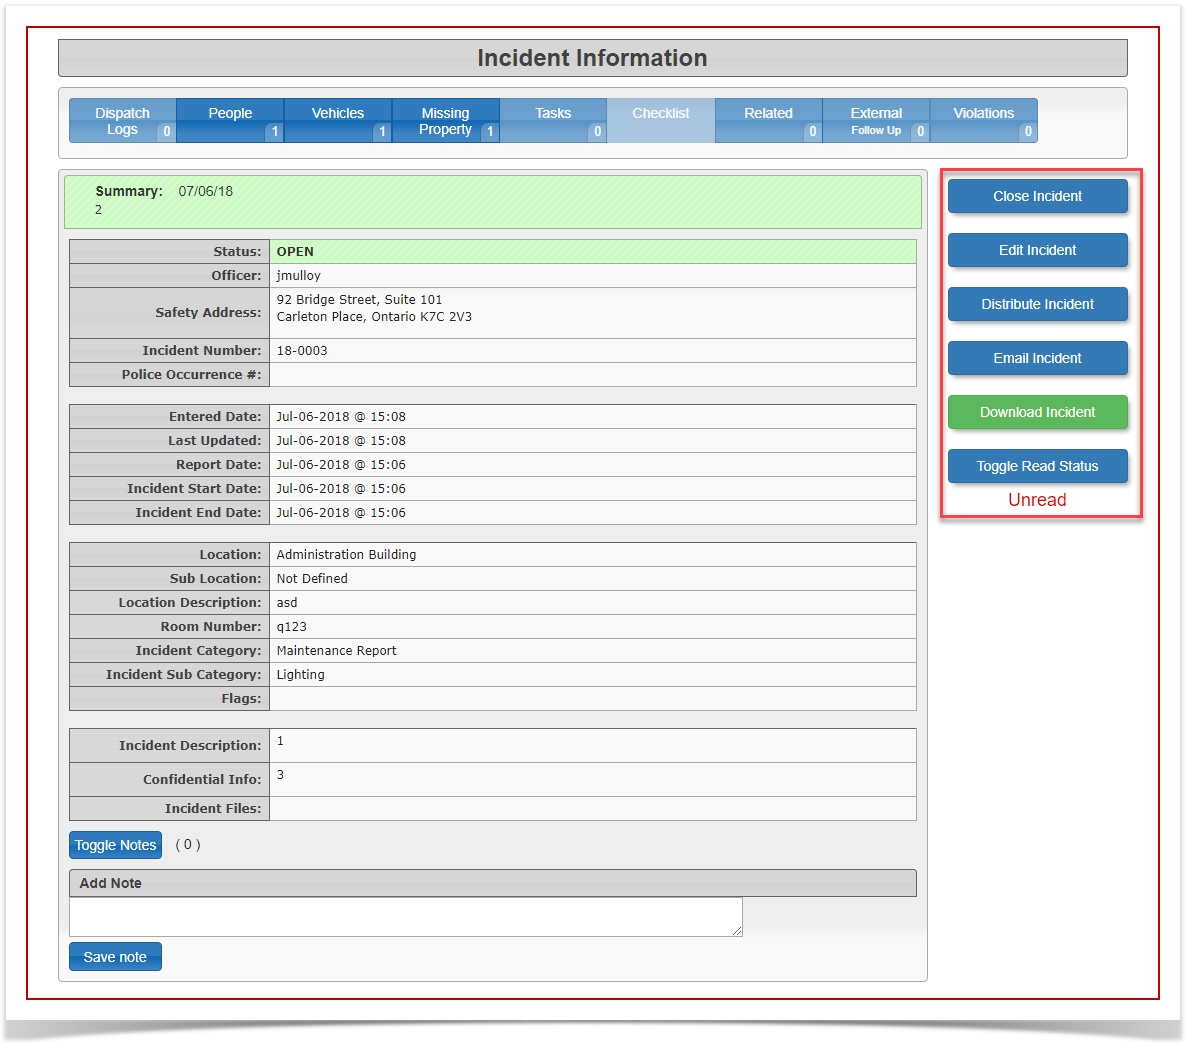
Once there, you can view something similar to this:
Viewing Permissions
To view the page, you must have one of the following permissions:
-
View All Incidents
-
View Incidents - Self
-
AND you must be one of the following:
-
The reporter
-
Primary Investigator
-
Case Manager
-
Be on a task group that’s assigned in the tasks
-
Be assigned directly to a task.
-
-
The edit option is only available if you have one of the following permissions:
-
Custom Permission - Open All
-
Edit Incidents
-
View Incidents - Self
-
AND you are the reporting admin
-
AND the incident is Open
-
-
If the incident is locked and the admin has the permission "incident_admin" - Incident Administrator, then they can view the lock reason.
-
If the admin has the permission: View/Edit Confidential Information, they can see a Confidential Info section near the bottom above files.
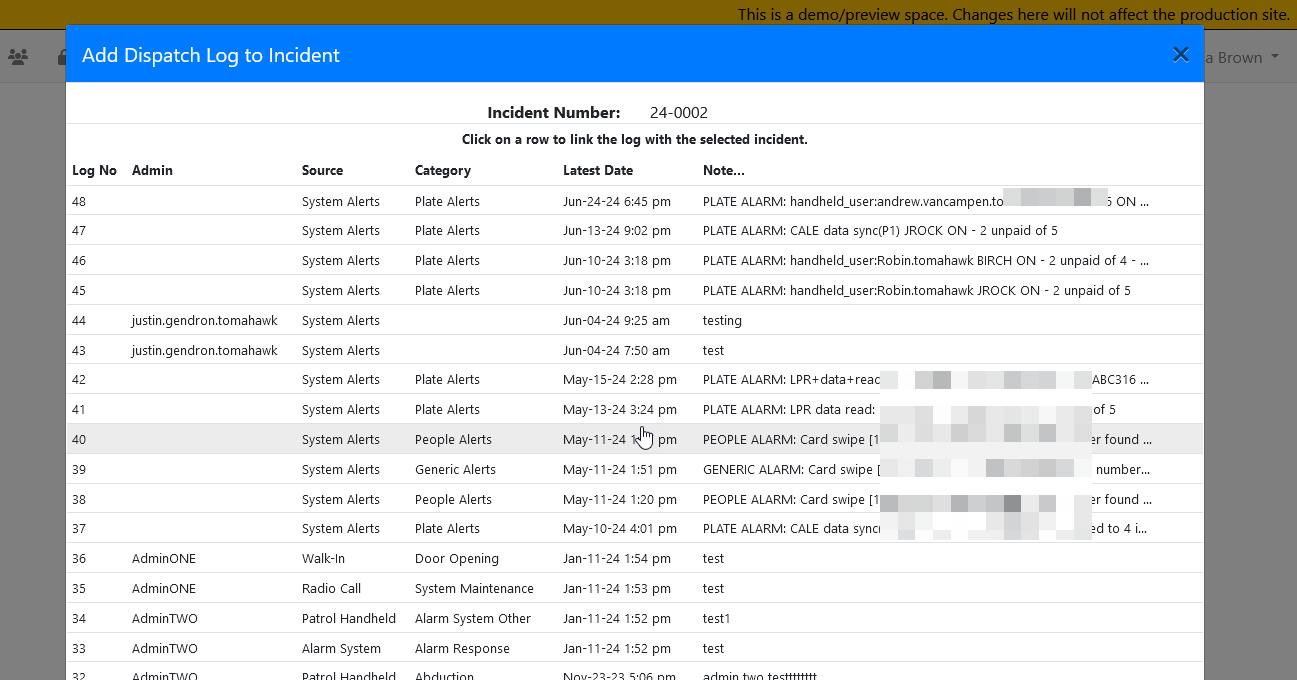
Dispatch Logs
Anyone who can view the incident can view the dispatch logs. To add or drop dispatch logs from this incident, the admin must have the permission: “Add/Drop Dispatch Logs.”
Linking dispatch logs can be done from either the dispatch entry screen or from the link Log button:
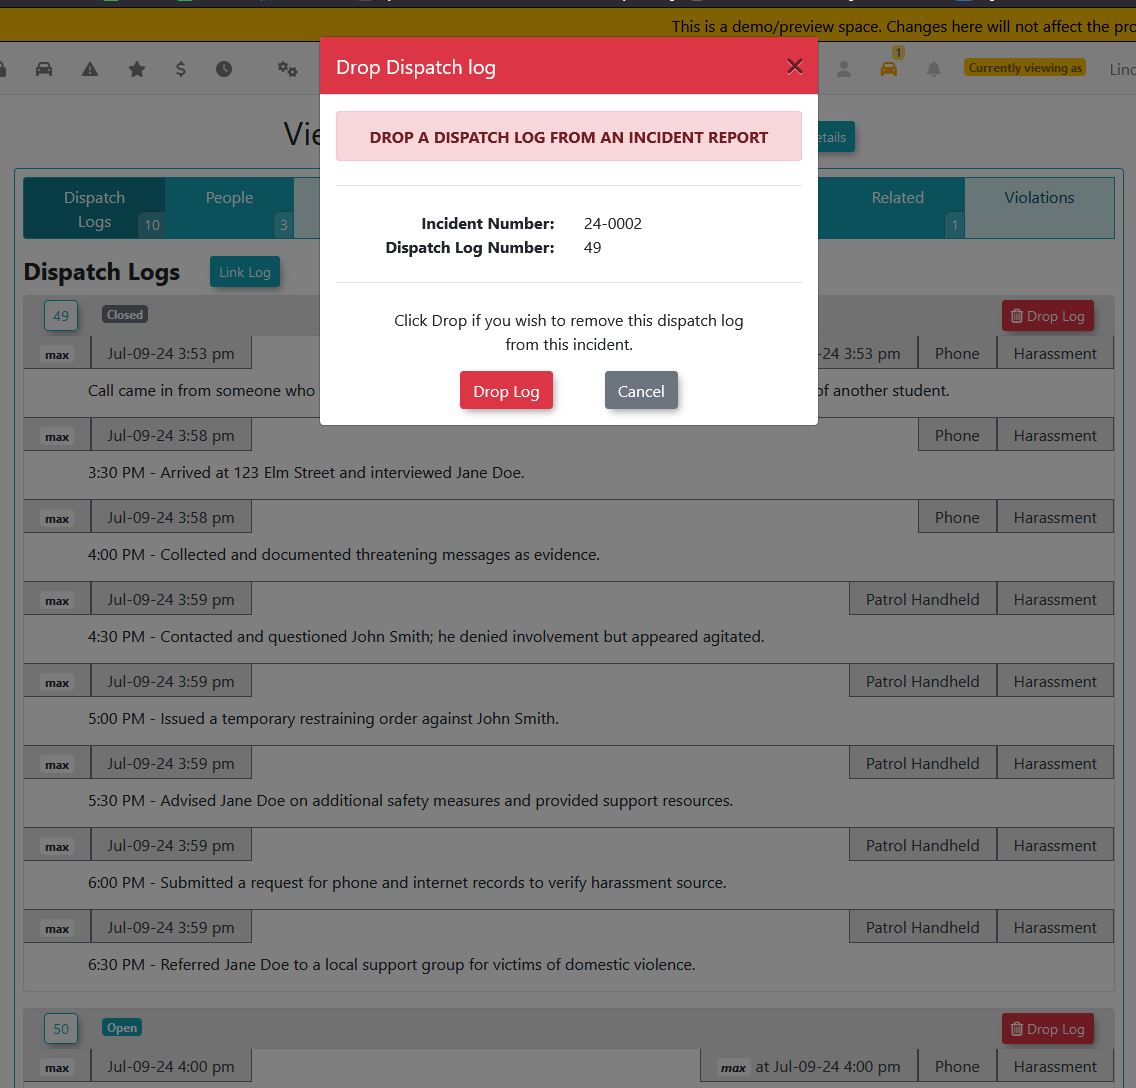
Dropping a log can be done from the Dispatch Logs tab. It will prompt the admin prior to dropping the log:
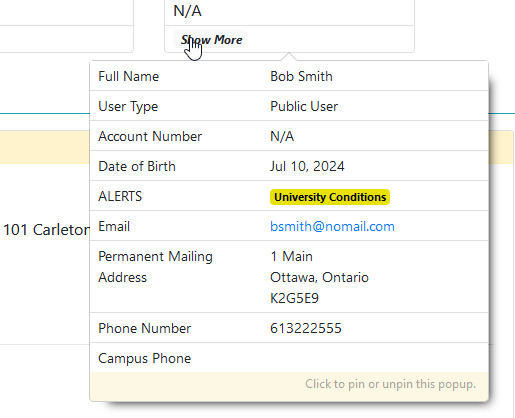
Linking People
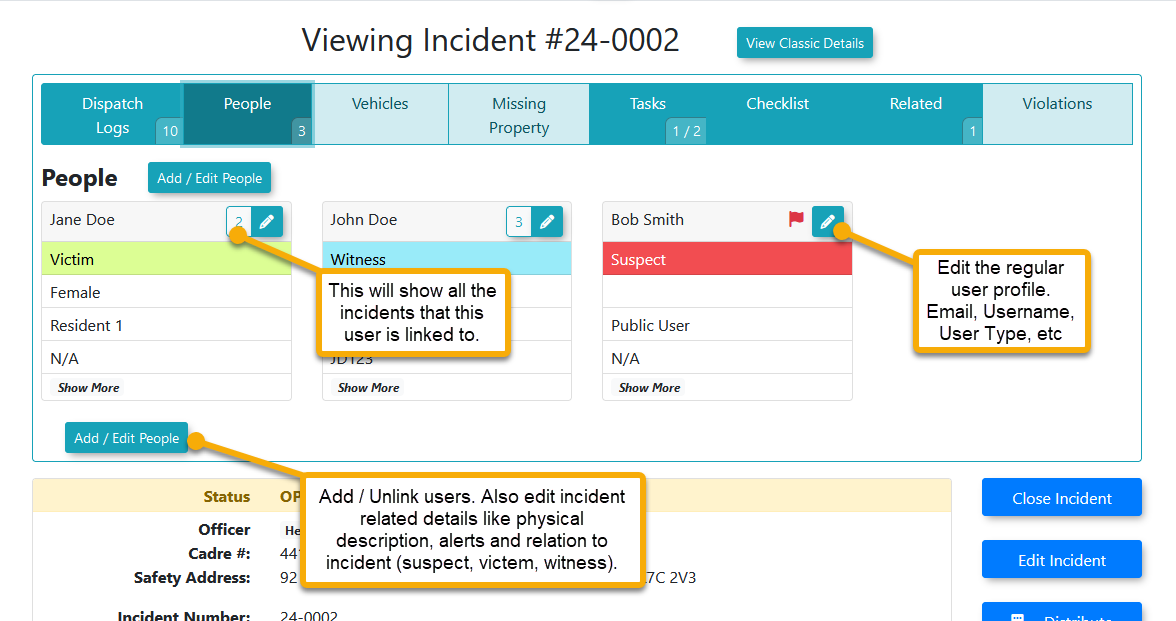
The show more section will show all the extended details about a user that isn’t on the screen above:
Linking Other Items
Linking other items such as vehicles, missing property and violations can also be done from here. There’s less information to show than with users.
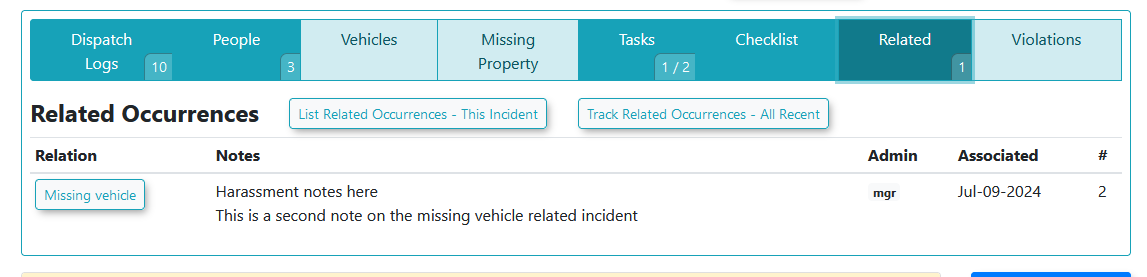
Useful for when several incidents are all related in some way. How these are linked and managed are done elsewhere.
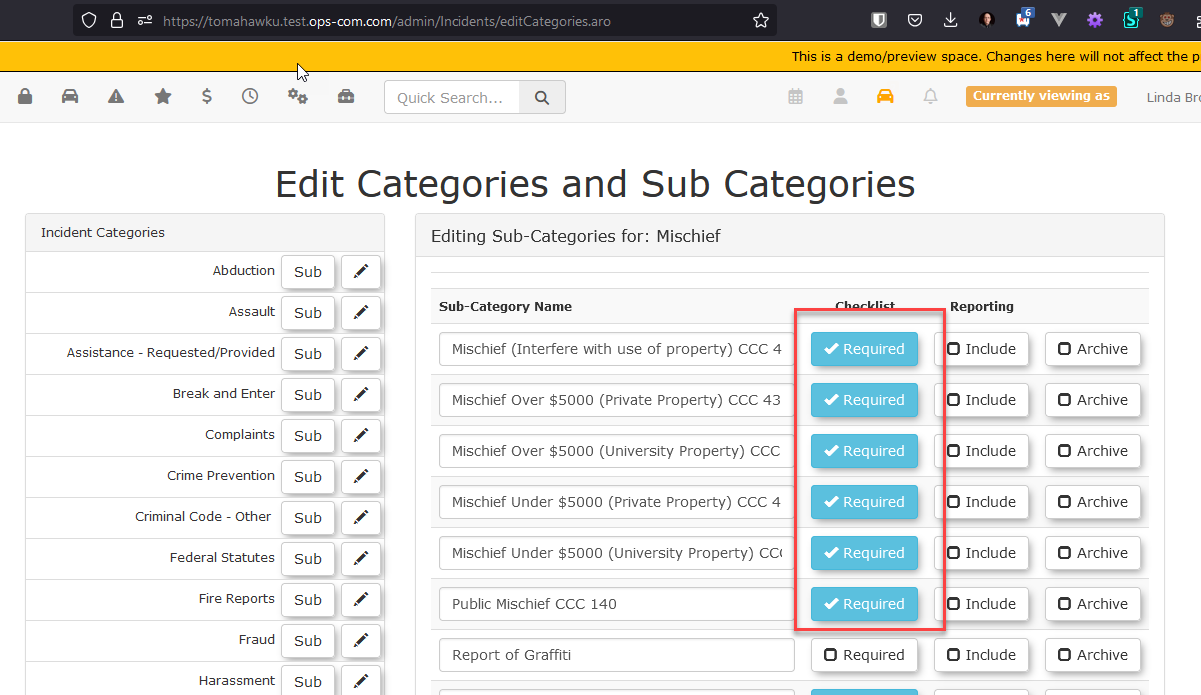
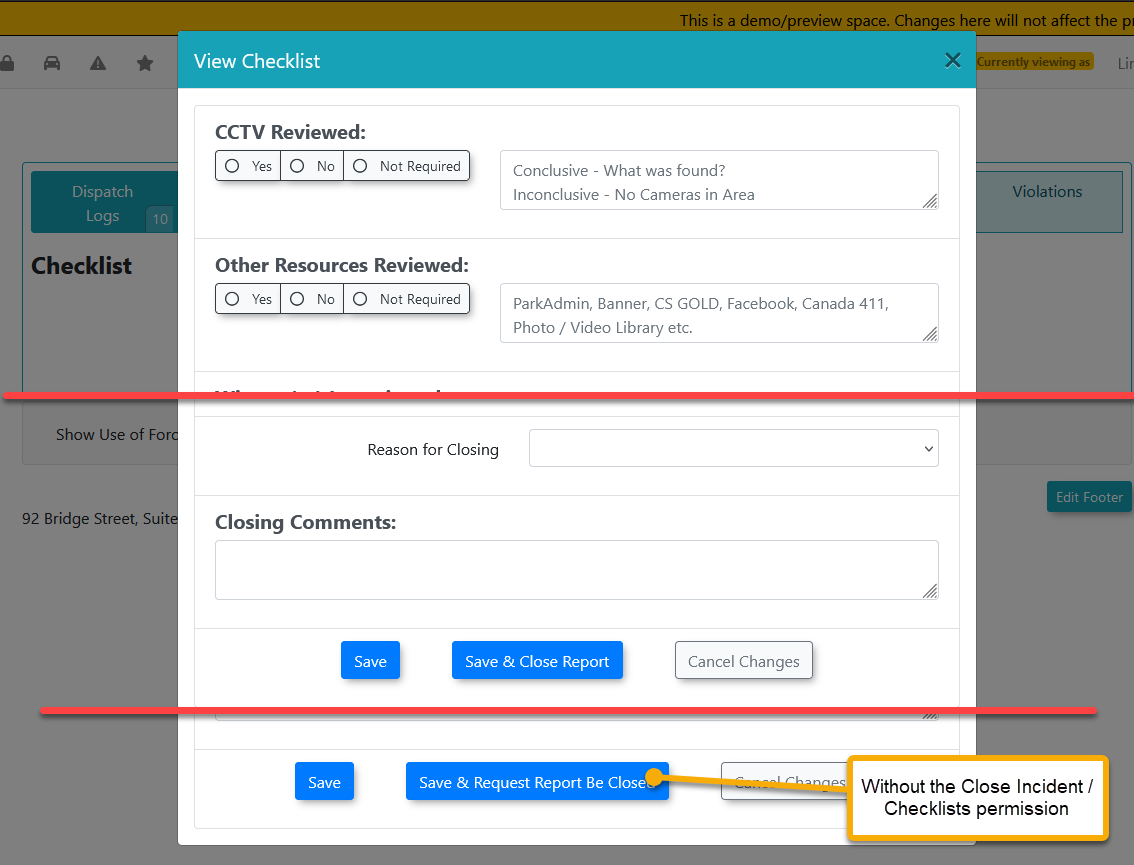
Checklists
Some incidents require a checklist to be filled out prior to closing or requesting the incident be closed. The subcategory is what defines this requirement:
To view the checklist, the admin must have one of the following permissions: View All Incidents or Incident Administrator.
When the issue is still open, a warning will appear:
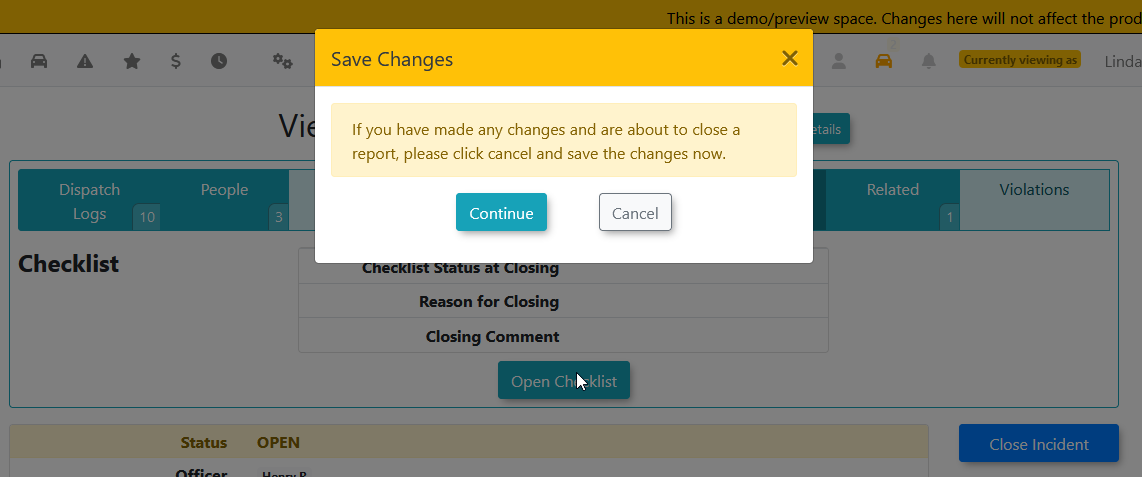
Then they can fill out the details and depending if they have the right permission, close or request the incident be closed:
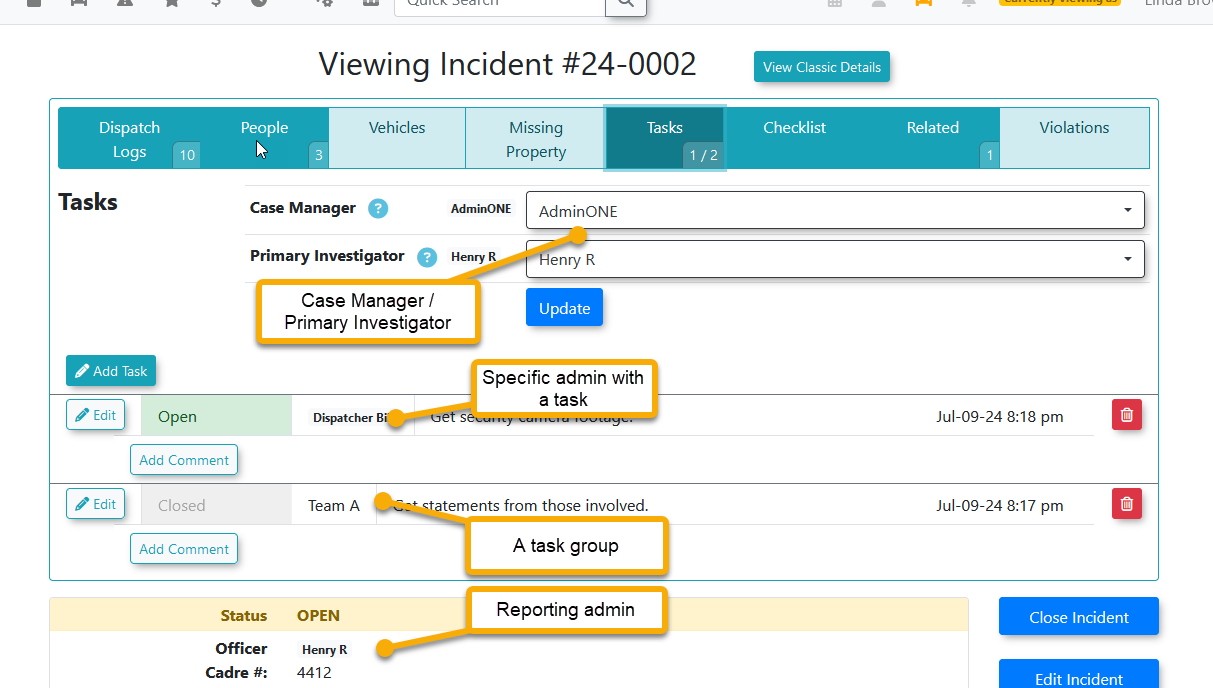
Tasks and assignment
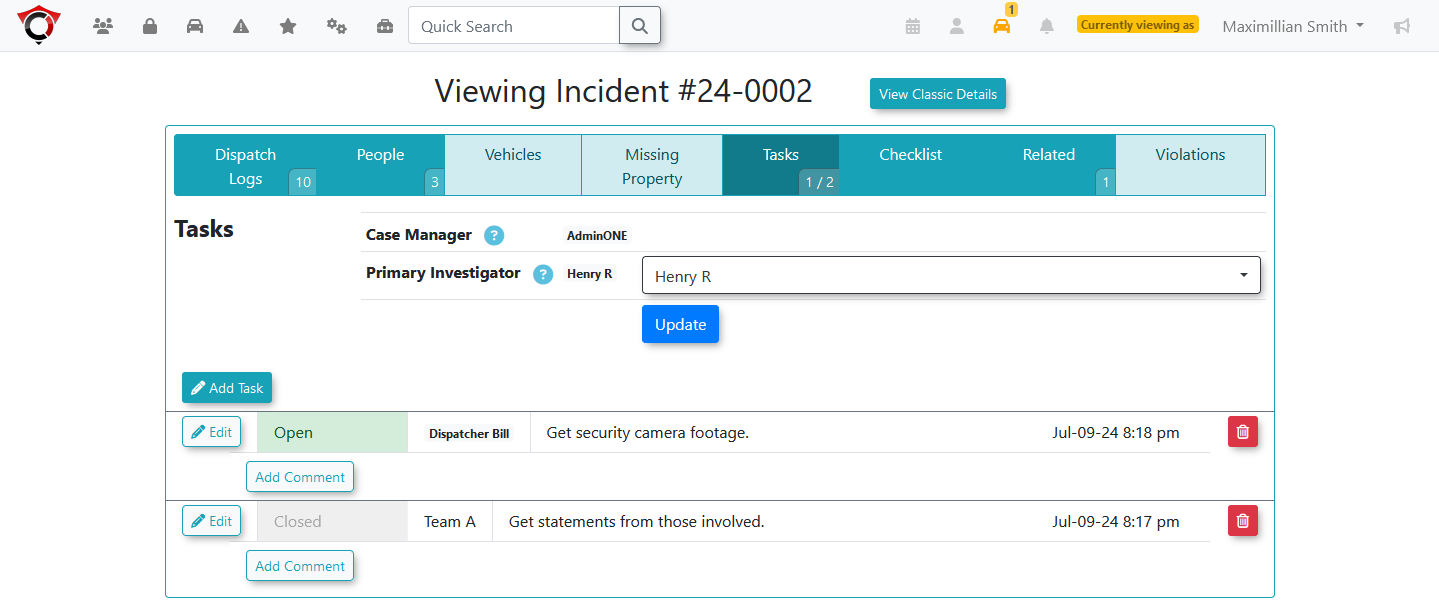
Case Manager assignment
To assign an incident to a case manager, the admin editing the report must have the permission “Assign Incident To Case Manager” or they must already be the case manager.
Further to this, to be able to be the case manager, only the admins with the permission “Is Incident Case Manager” or “Is Incident Shift Manager” will be available.
In the above example, Maximillion Smith is not the case manager, nor do they have the assign permission so they can only view who is assigned the case manager role.
Primary Investigator assignment
Similarly with Primary Investigator, the admin must meet one of the following criteria:
-
Permission: Edit Incident Tasks
-
Permission: Is Incident Shift Manager
-
Permission: Assign Incident To A Different Investigator
-
Role: Is the case manager for this incident
-
Scenario: No Primary Investigator is selected and they have the permission Assign Incident to An Investigator
Only admins with the permission “Be Assigned Tasks Directly” will be available.
In the above example, Max has the permission Edit Incident Tasks and therefore can change the primary investigator.
Editing Tasks and Comments
If the admin is:
-
Permission: Edit Incident Tasks
-
Permission: Is Incident Shift Manager
-
Role: Is the primary investigator or case manager
They can add and edit tasks. They can also edit the text in the task.
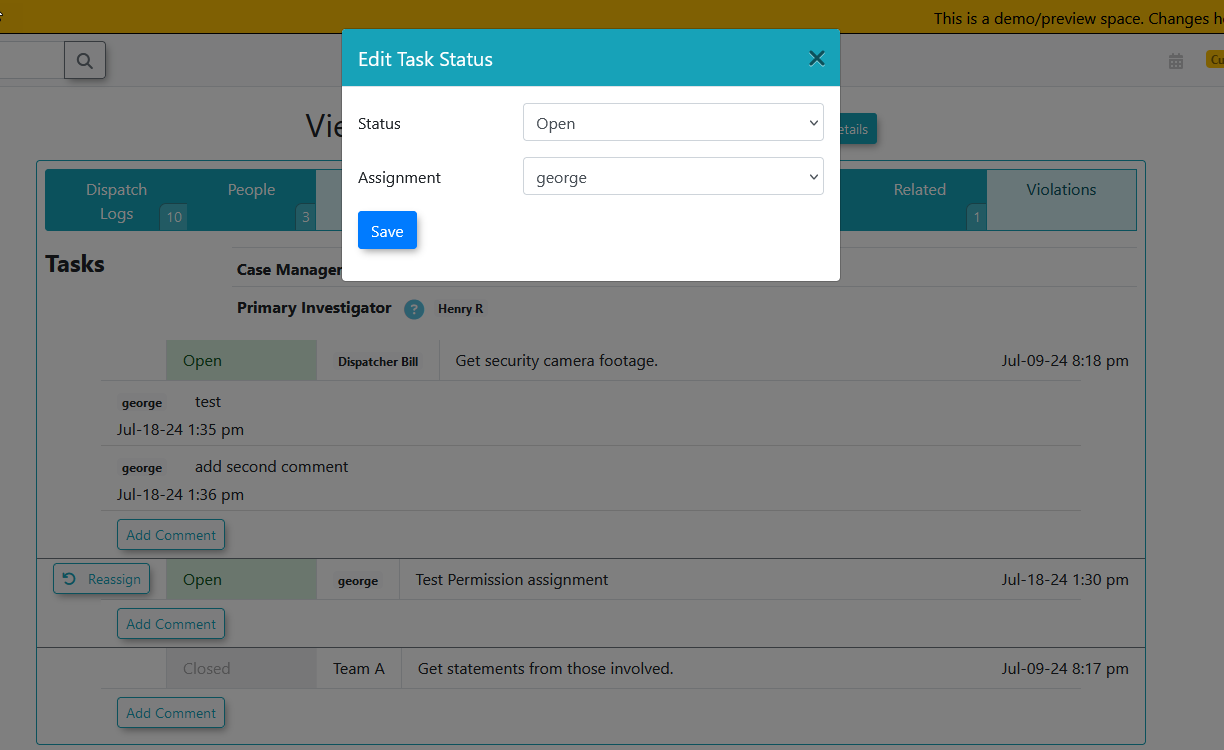
If the admin does not have the permission, but is assigned to a task either directly or they are part of the task group, they get the reassign option as indicated above.
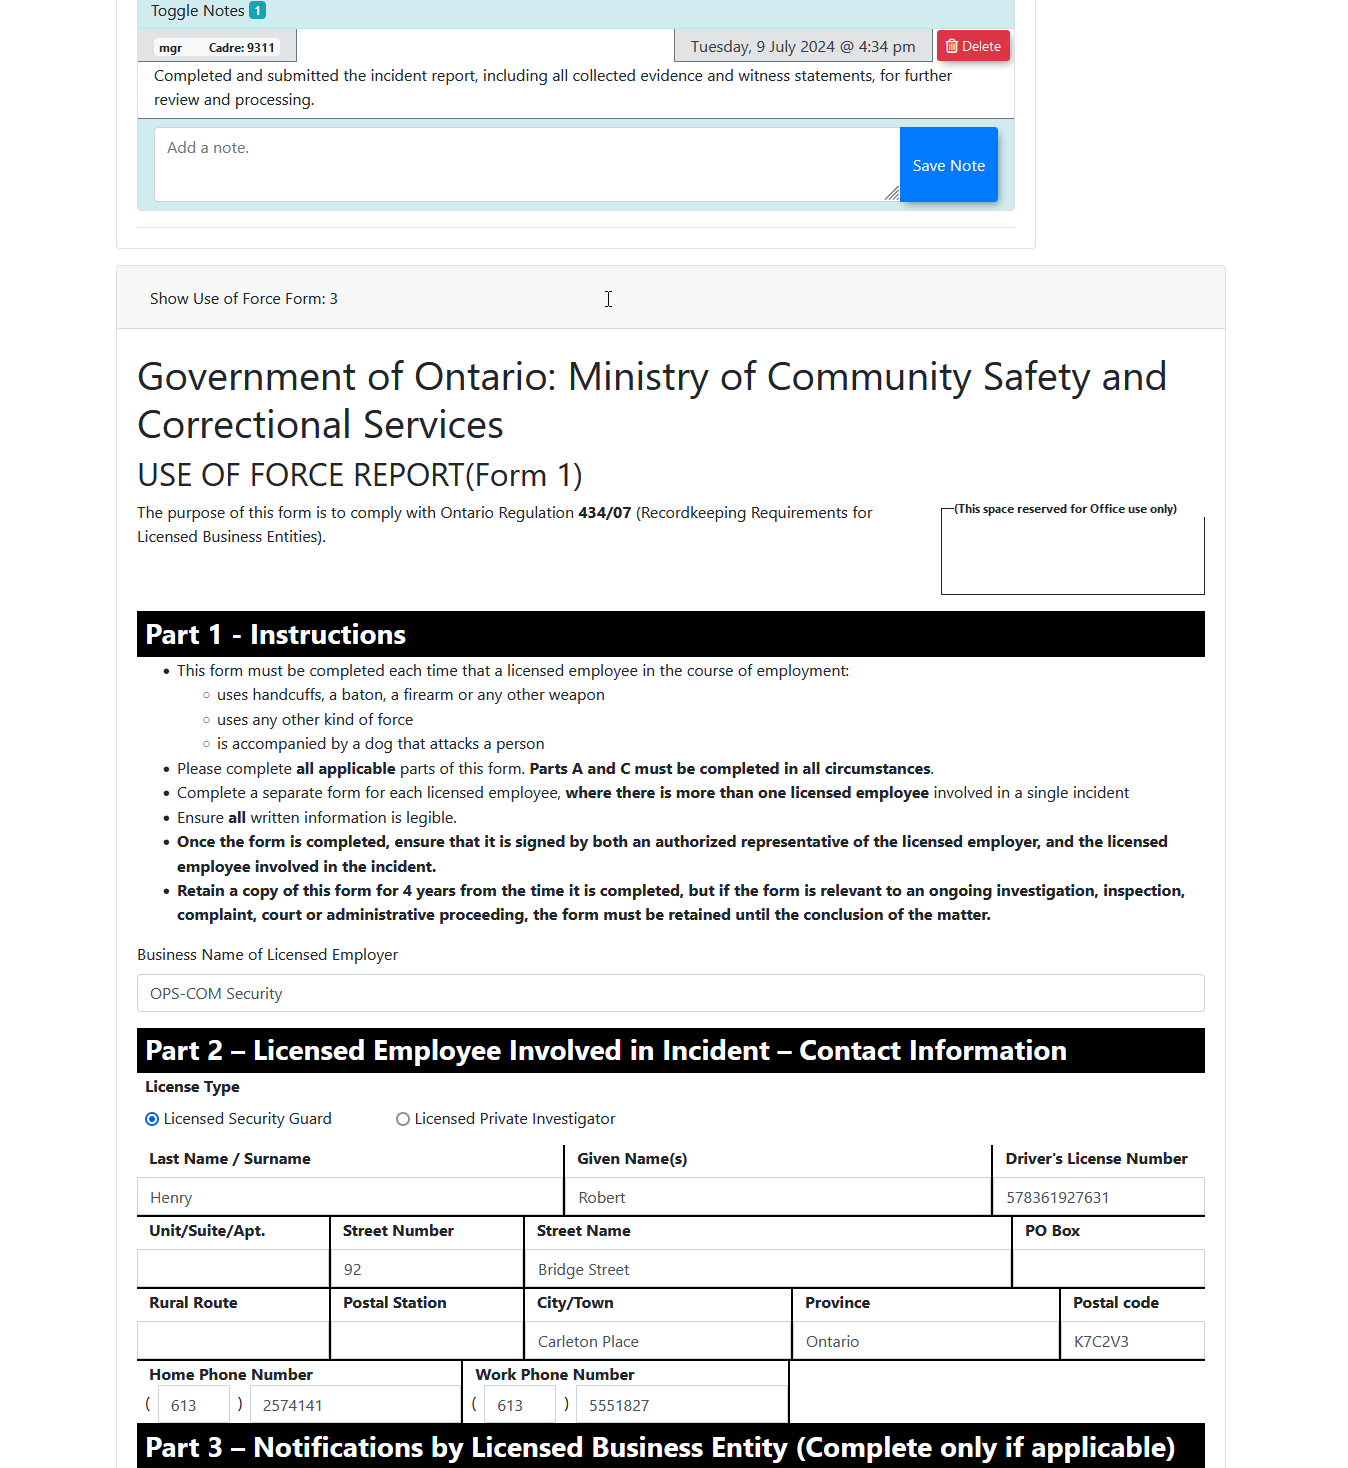
Use of Force Forms
The use of force form is available for clients in the province of Ontario as this is a Government of Ontario form as indicated below. It requires the setting for Use of Force to be enabled.
On the view incident page, the use of force forms are read only.
Side Buttons & Permissions
- Permission: Custom Permission - Open All
- Permission: Edit Incidents
- Permission: Edit Incident Summaries
-
Permission: View Incidents - Self
-
AND you are the reporting admin
-
- If the admin also has the Incident Admin permission then:
- AND the incident is open, the admin can edit the incident.
- AND the incident is closed, the link will take the admin to the edit summary screen.
- If the admin has the Edit Incident Summaries permission:
- AND the incident is locked, they can edit the summary.
- AND the incident is unlocked, they can edit the incident
- If the incident is open
- They can edit the incident
- If none of the scenarios above match, the admin is not able to edit this incident, nor the summary.
3. The Distribute & Email buttons are only available to admins with the Incident Admin permission.
4. The download incident only requires the admin can view the incident at all.
5. The toggling of read status will switch the state of the read status back and forth between read and unread.
6. If the admin has the Delete Incident permission, then they can see the next button.
- If the Incident can be deleted, a delete option will appear. This requires that all details on the incident are over seven years old. Any update to any item will render the delete option disabled.
- The message will appear as "Delete Not Avaialble" if the incident or any detail has been created or updated in the last seven years.
Filling out the Incident Form (WIP)
Here is a sample of what the Incident report looks like. Basic information describing what occurred can be registered here in the overview. This includes what one might consider the essential information about the incident.
- Description
- Status
- Time
- Place
- Any related information or events
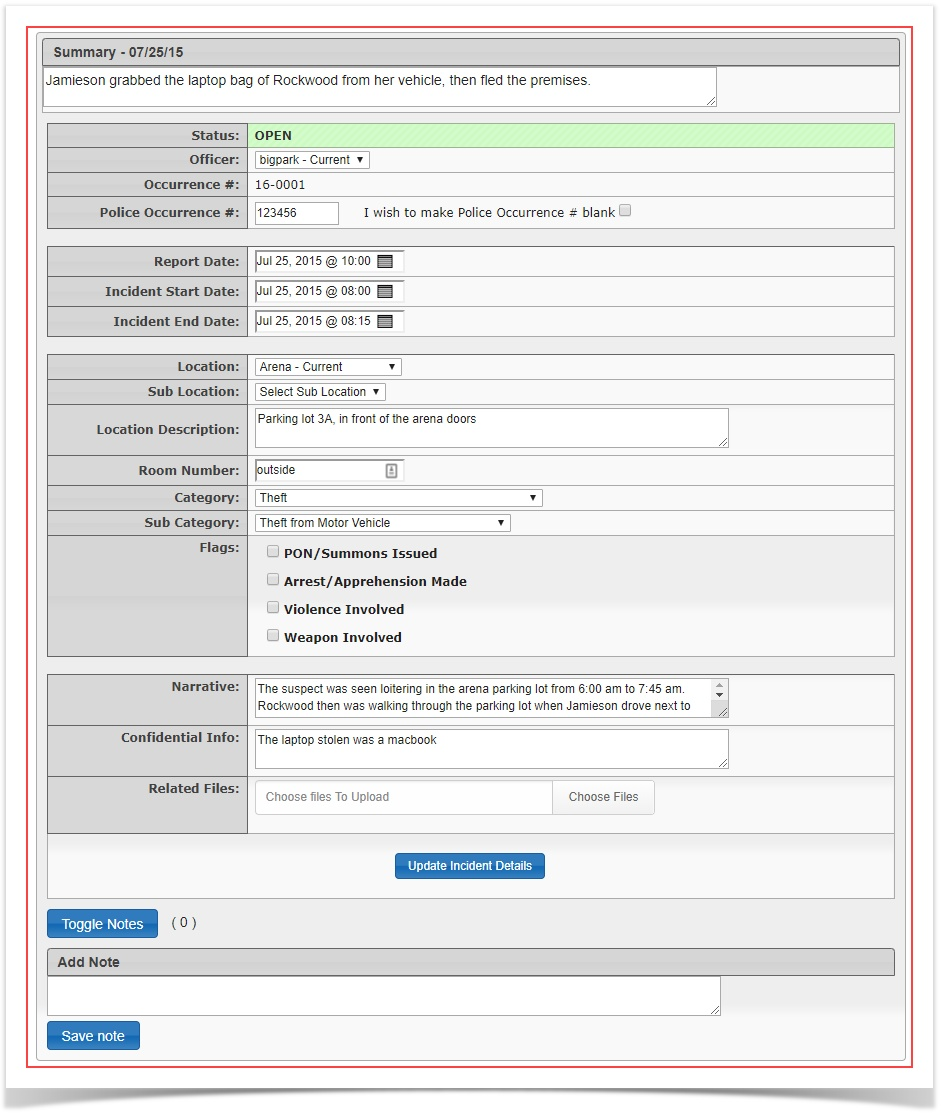
The incident report also allows the admin to record details:
- Dispatch Logs
- People Involved
- Vehicles Involved
- Missing Property if any
- Tasks to be completed
- Checklist (A Custom form that can be generated)
- Related issues or incidents
- External (Follow-Up Items)
- Related Violations

Incident Checklist
Accessing the Checklist
To access the checklist go into any incident and click on the Checklist tab. To access the form click on Open Checklist.
The checklist form will open.
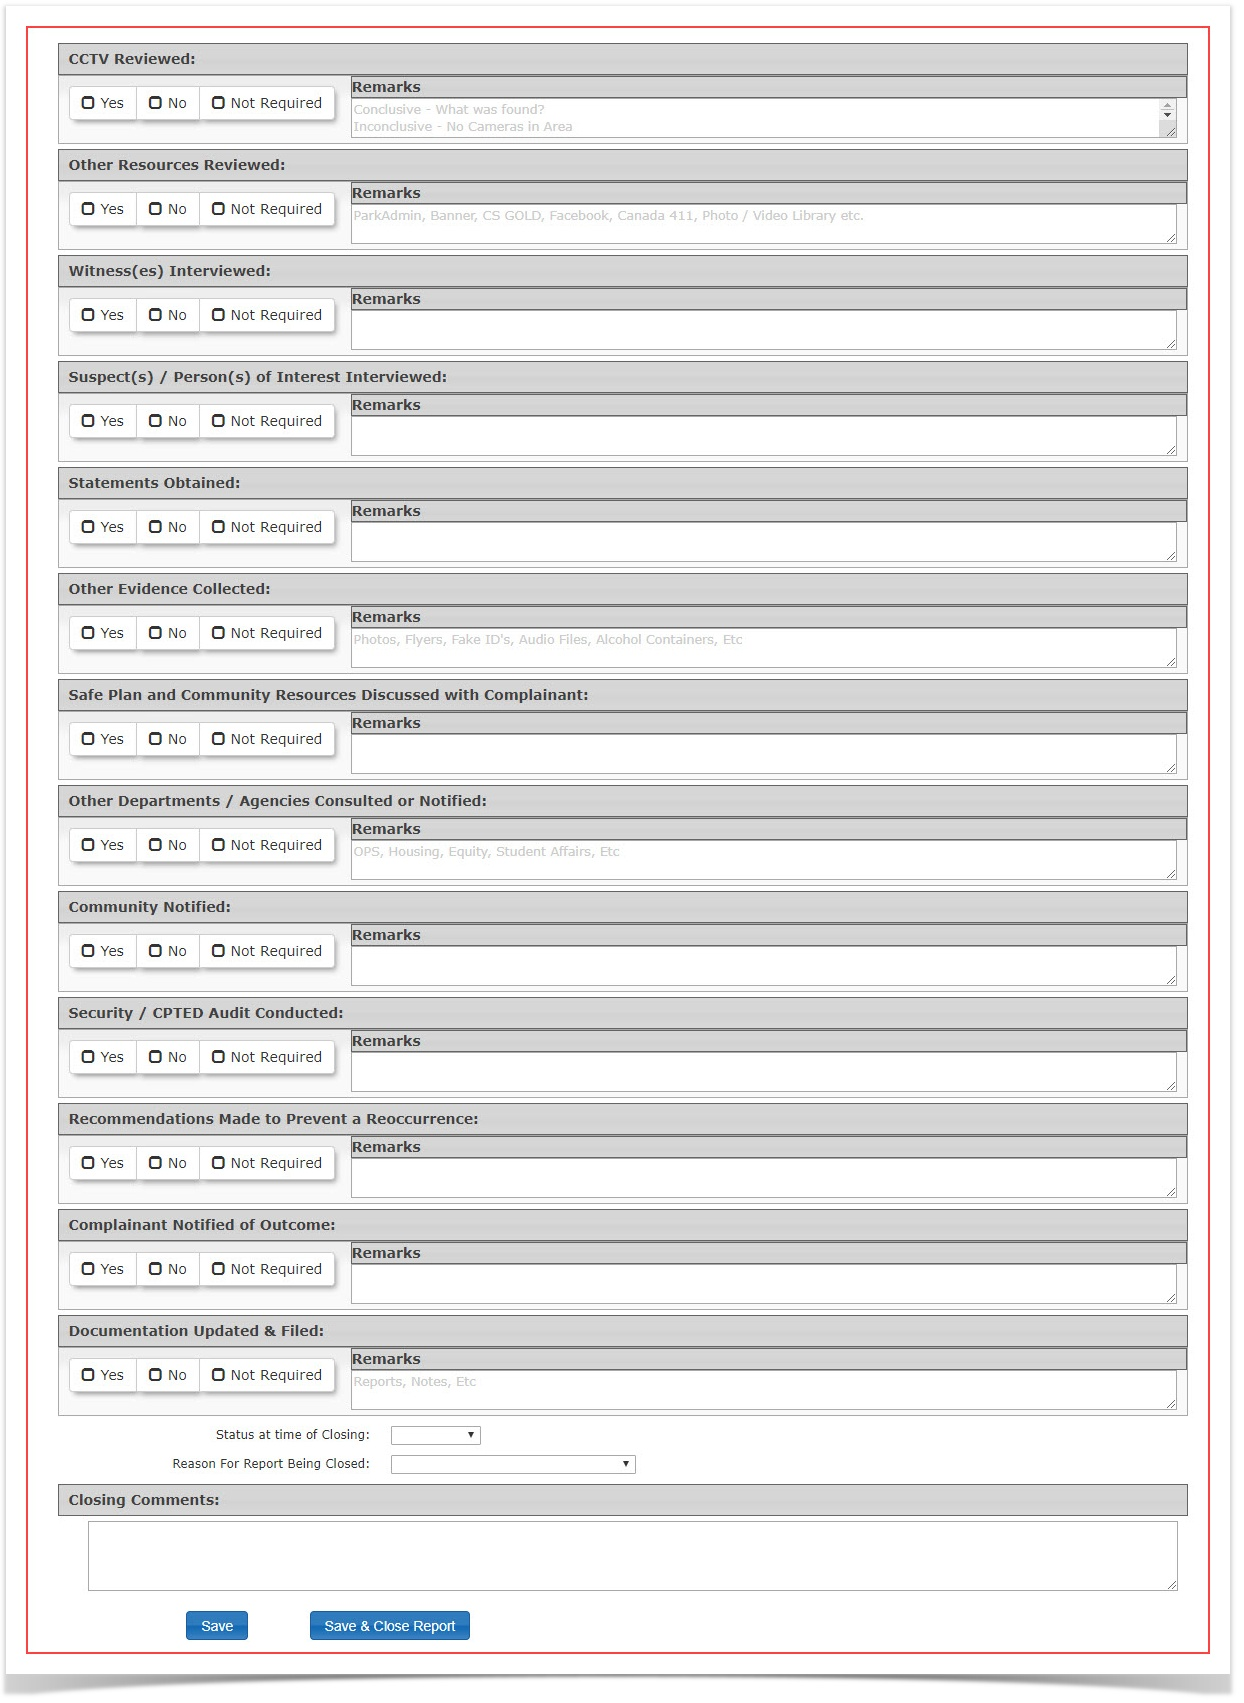
Checklist Fields Defined
CCTV Reviewed:
Indicate if the closed-circuit television cameras were reviewed. (Yes/No/Not Required) State the reason for what was selected or additional details. E.g. What was found in the footage? Why was the footage not reviewed?
Other Resources Reviewed:
Indicate if other resources were reviewed as a part of the incident. (Yes/No/Not Required) State all resources used or additional details. E.g. Social media, Canada 411 or OPS-COM.
Witness(es) Interviewed:
Indicate if witnesses were interviewed as a part of the incident. (Yes/No/Not Required) State all witnesses, and their contribution to the incident resolution or additional details. E.g. Mike Lawson - Saw the incident.
Suspect(s) / Person(s) of Interest Interviewed:
Indicate if the suspects were interviewed as a part of the incident. (Yes/No/Not Required) State all suspects involved, and their involvement with the incident or additional details. E.g. Sandra Morra - Admitted fault after evidence had been found.
Statements Obtained:
Indicate if statements were collected as a part of the incident. (Yes/No/Not Required) State all the statements provided in relation to the incident or additional details. E.g. No other people at the scene to make a statement.
Other Evidence Collected:
Indicate if other physical or virtual evidence was reviewed as a part of the incident. (Yes/No/Not Required) State all the evidence collected, where it is stored and important information about it, or additional details. E.g. Beer bottle - given to the police - had fingerprints of the suspect.
Safe Plan and Community Resources Discussed with Complainant:
Indicate if a safe plan and community resources were discussed with the complainant. (Yes/No/Not Required) State what specifically was discussed, or additional details. E.g. Complainant was informed that the police were updated on the case and that the complainant's information was given to them.
Other Departments / Agencies Consulted or Notified:
Indicate if other departments were notified as a part of the incident. (Yes/No/Not Required) State all departments notified and the reason why, or additional details. E.g. Housing - Students need to be moved to separate buildings.
Community Notified:
Indicate if the community was notified as a part of the incident. (Yes/No/Not Required) State how and why the community was notified, or additional details. E.g. Flyers put up on west residence building to inform other students of the case, due to its nature and school policy.
Security / CPTED Audit Conducted:
Indicate if security and/or CPTED (Crime Prevention Through Environmental Design) audit was conducted as a part of the incident. (Yes/No/Not Required) State what was audited, any problems found, and steps taken to resolve them, or additional details. E.g. Audit of residence building security shows blind spots in lobby cameras by front desks. Additional cameras were added.
Recommendations Made to Prevent a Re-occurrence:
Indicate if recommendations to prevent future incidents were made. (Yes/No/Not Required) State all recommendations, or additional details. E.g. An employee will be posted at the front desk of the residence building at all times, to ensure the safety of all in the main lobby.
Complainant Notified of Outcome:
Indicate if the complainant was notified of the outcome. (Yes/No/Not Required) State what the complainant was told, or additional details. E.g. Bob Gant was informed that there would be an employee posted at the front desk, who could help prevent future incidents.
Documentation Updated & Filed:
Indicate if documentation was updated and filed for the incident. (Yes/No/Not Required) State what documentation was updated, or additional details. E.g Security audit has been saved to the security network drive and camera layout has been updated for all buildings.
Status at time of Closing:
Indicate the status of the incident at the time the case is closed. (Solved/Unsolved/Unfounded)
Reason For Report Being Closed:
Indicate the reasons for the report being closed. (Drop down box) E.g Reason beyond the control of service
Closing Comments:
Indicate any final comments or details of the case. E.g. Case has been closed, recommendations have been implemented for security and staffing. This type of incident should no longer be possible on the lobby floors of all residence buildings across campus.
My Incident Tasks
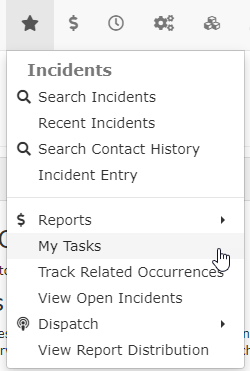
Accessing your Tasks
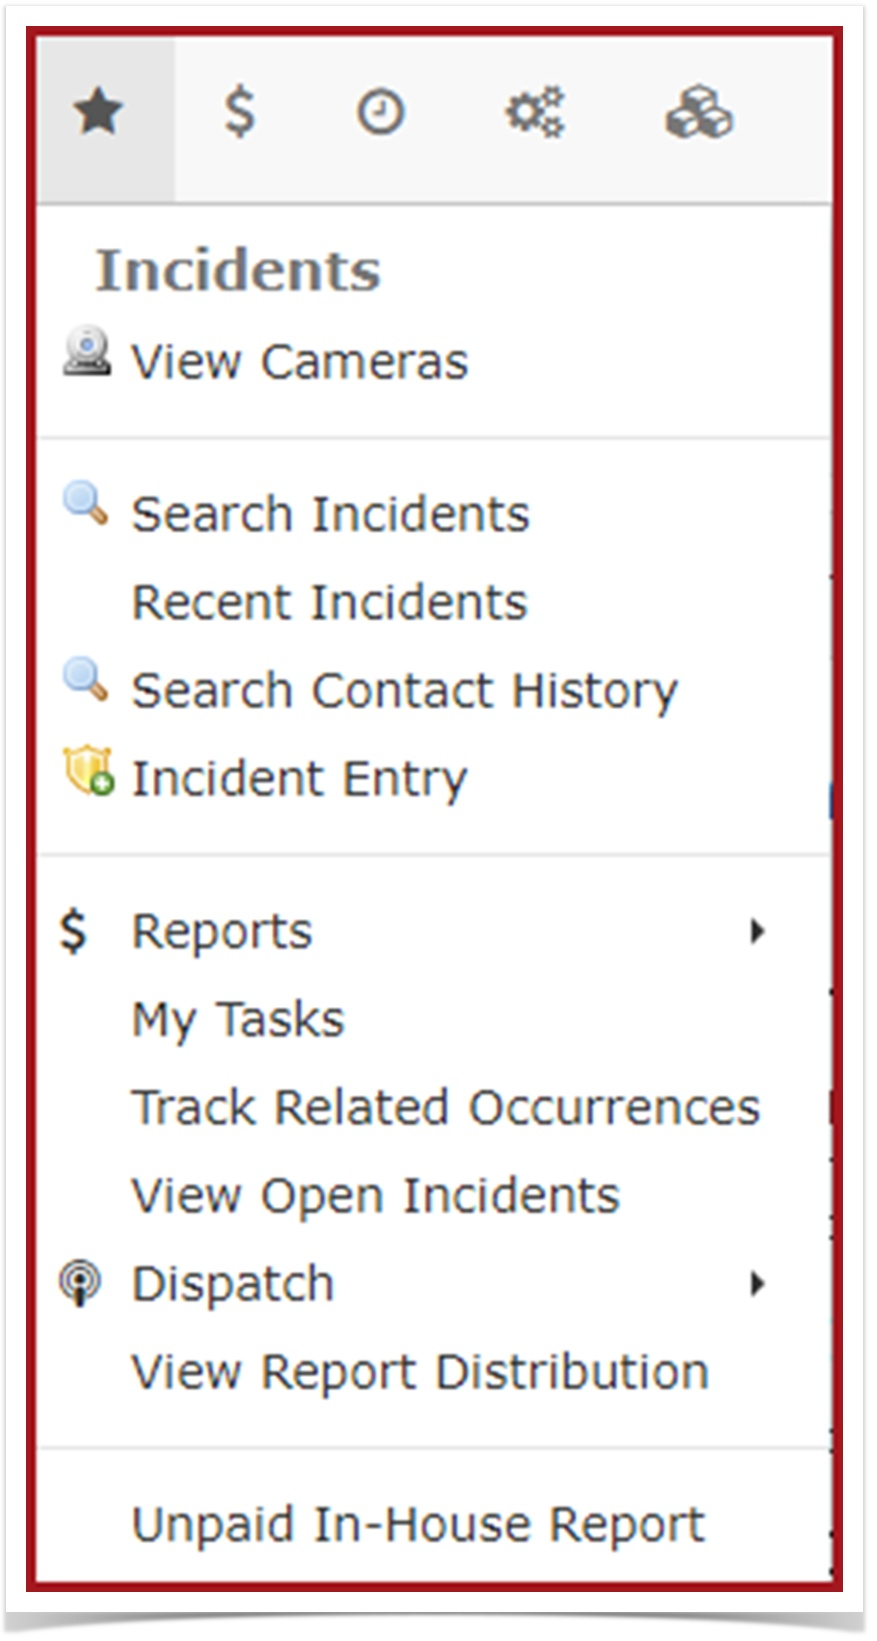
To access your tasks, click on Incidents, then click My Tasks
To view tasks, click on the blue drop-down menu, select your name.
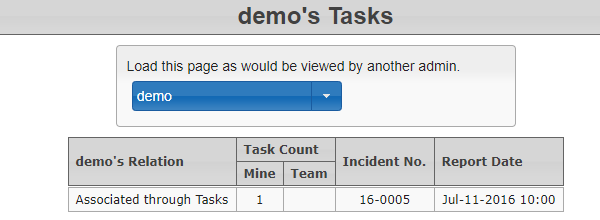
Click on the Incident Number to display the Incident information page for more information.

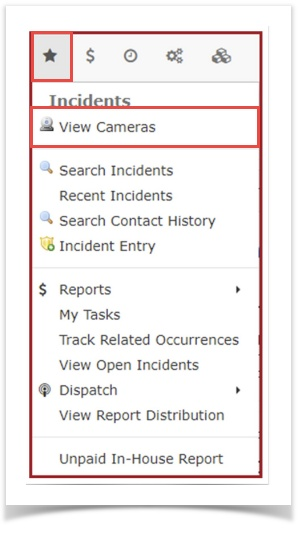
View Cameras
- To view the cameras, go to Incidents icon, and click on View Camera
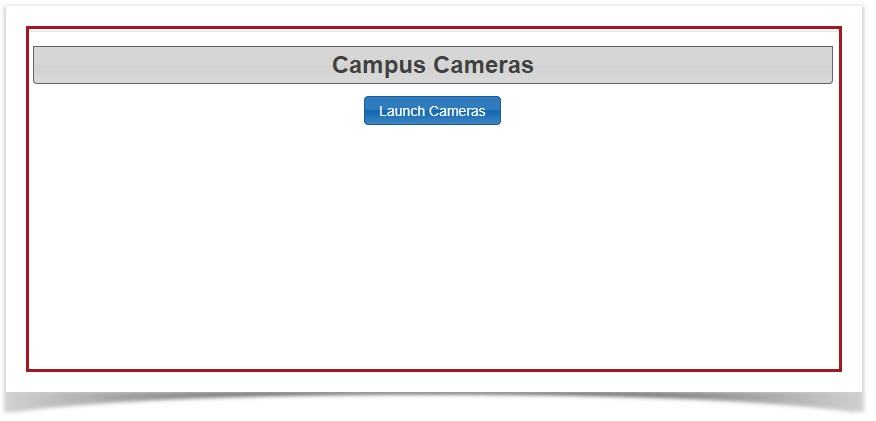
2. Next, you will see a page that has a button that says "Launch Cameras". Click on it
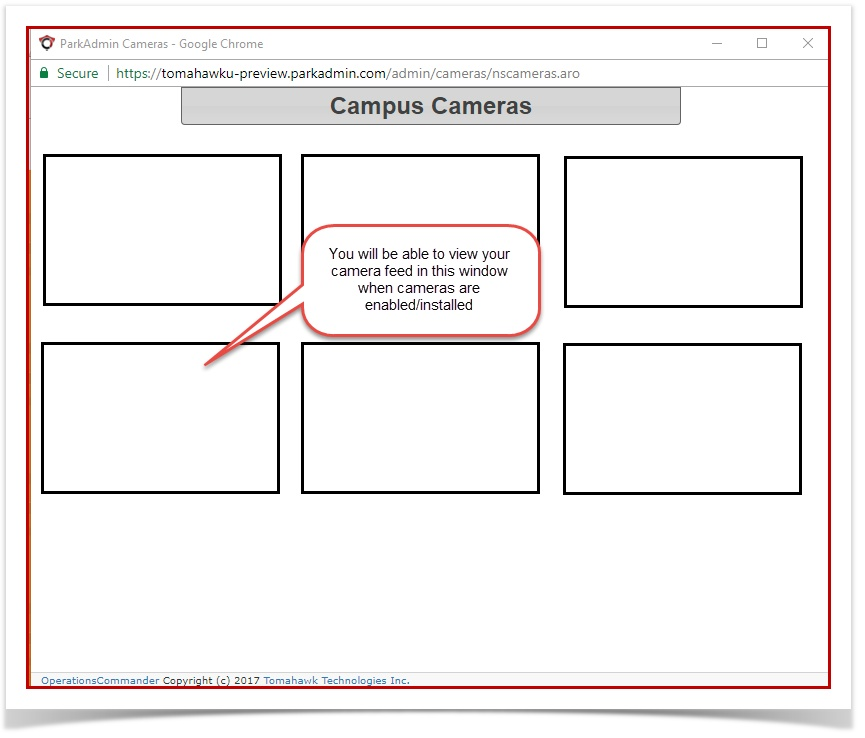
3. A new window will open so you can see the Cameras
Related Occurrences
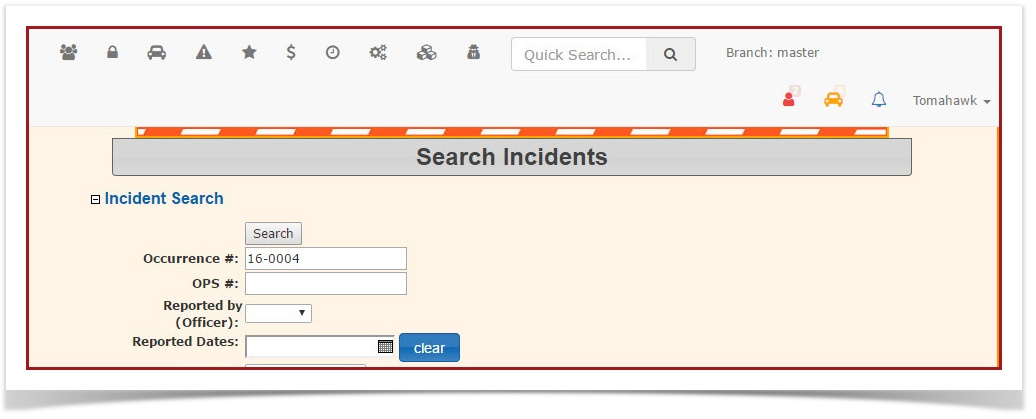
- Click the 'Incidents Menu' select 'Search Incidents'.

- In the Occurrence# field enter the Incident Number you wish to relate to another.

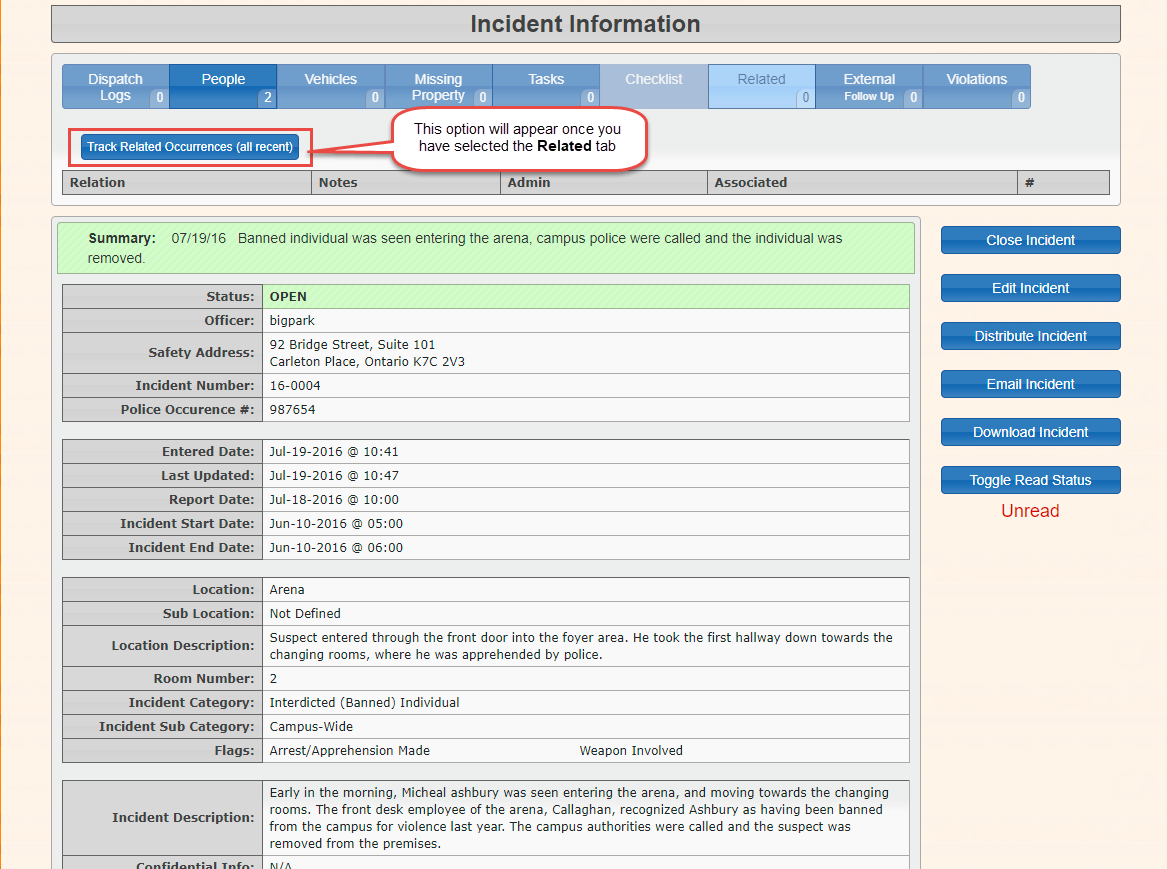
- The Incident Information screen displays. Note: the tabs along the top of the form, they provide a quick summary of information.
Under the 'Related' tab we currently see the numeral 0 indicating that there are no incidents related at this time. When you select the Related tab, the button to Track Related Occurrences will appear.

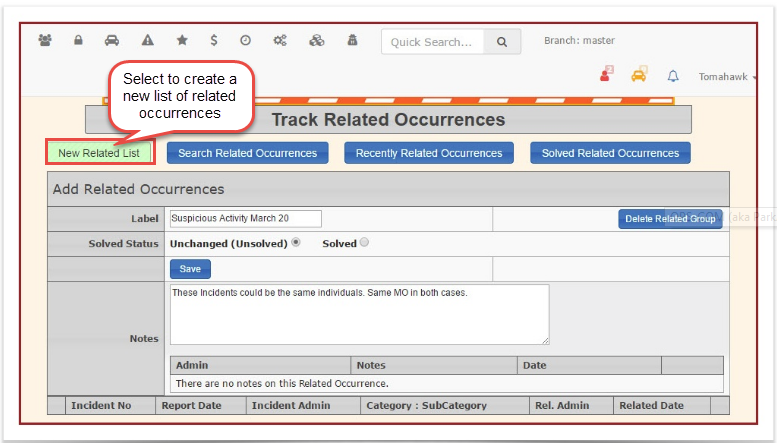
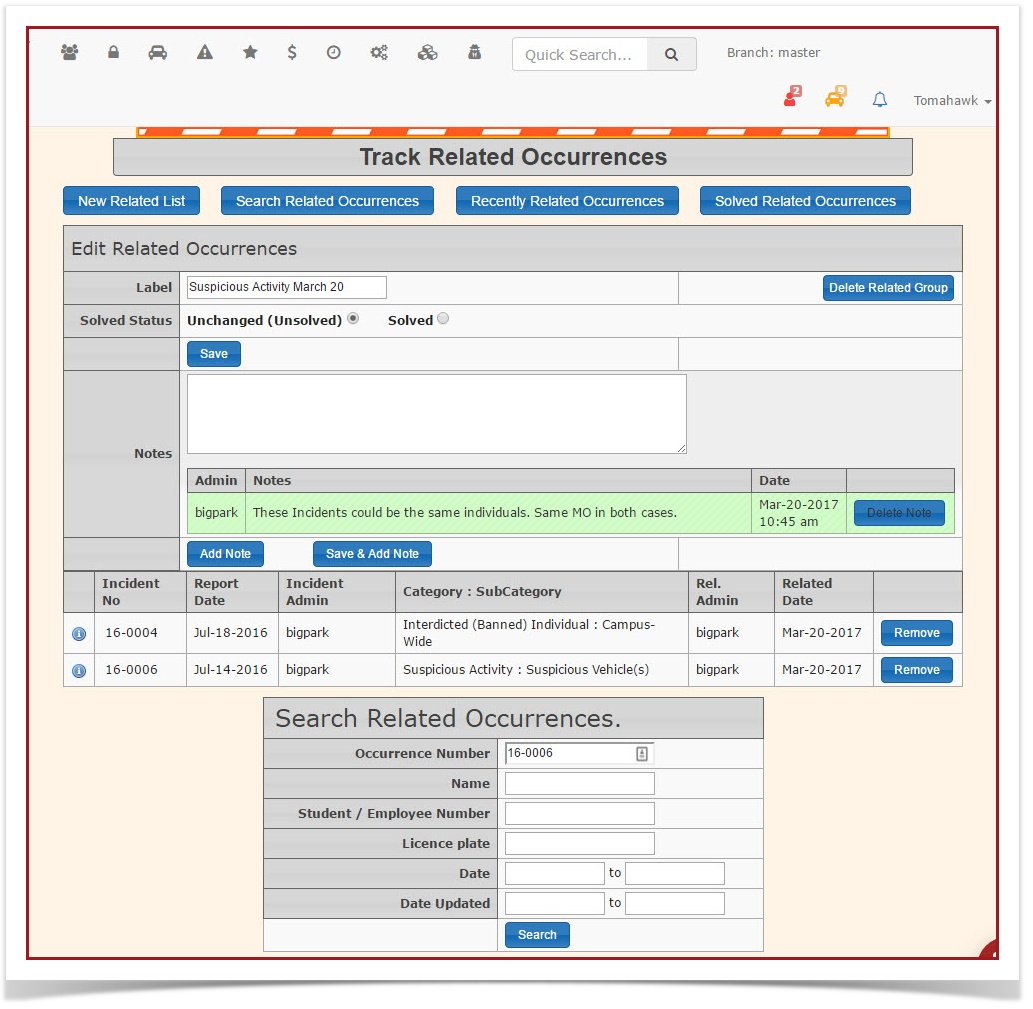
- Click the 'Track Related Occurrences' button to display the 'Track Related Occurrences' screen. The buttons across the top allow different options to search for. The 'Add Related Occurrences' form is now available, by selecting New Related List.

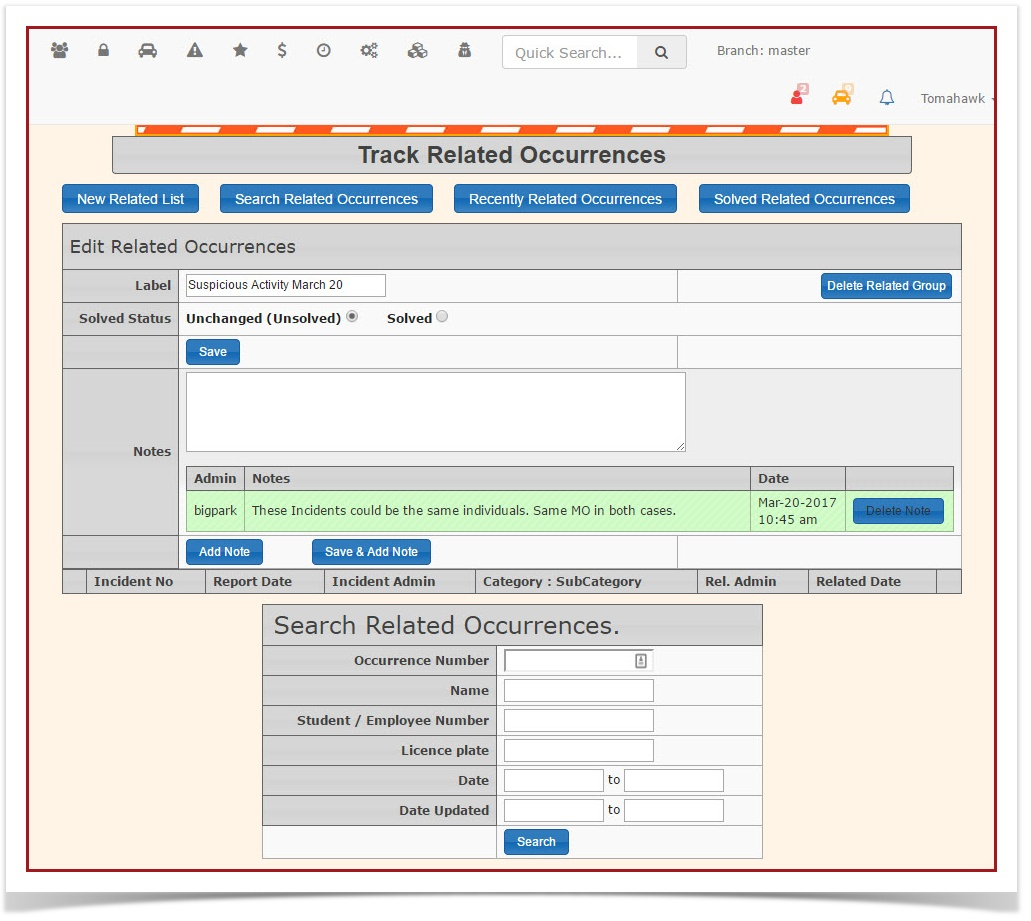
- The first step is to Name and Create the list. In our example, we are naming the list "Suspicious Activity March 20". In the notes field, you can add a description of what the purpose of the list is. Click 'Save' to save the list name and information. The screen will refresh with a Search box now showing at the bottom.

- Enter the Current Incident Number you are working with. For this example we are using16-0004. Click 'Search.'

- Click 'Add' to add this incident to the list entitled 'Suspicious Activity March 20th'.
- Repeat the search process by entering the Incident number you would like to relate to the first incident.
For example, Incident 16-0004 as 16-0006 and click 'Search'. Add this incident to the list. The resulting screen will look like this: Note both 16-0004 and 16-0005 are listed.

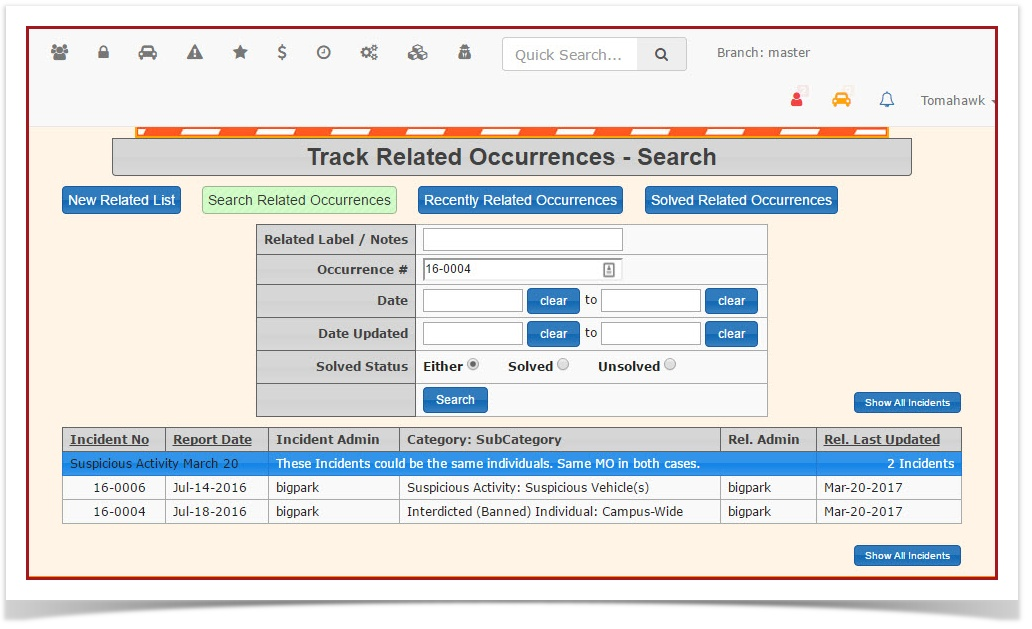
- To see the result of this process, search once again for the original Incident 16-0004 from the Search Incidents menu. Note the change in the Related Tab now indicates 1 related occurrence.

- Click on Related to see the Related Incident Information. Note: the related incident is now listed. This information will show up on the incident information for both incidents in question.


Dispatch Logs
Reviewing Dispatch Logs
Hover over the Incidents icon, Dispatch, and select Dispatch Logs.
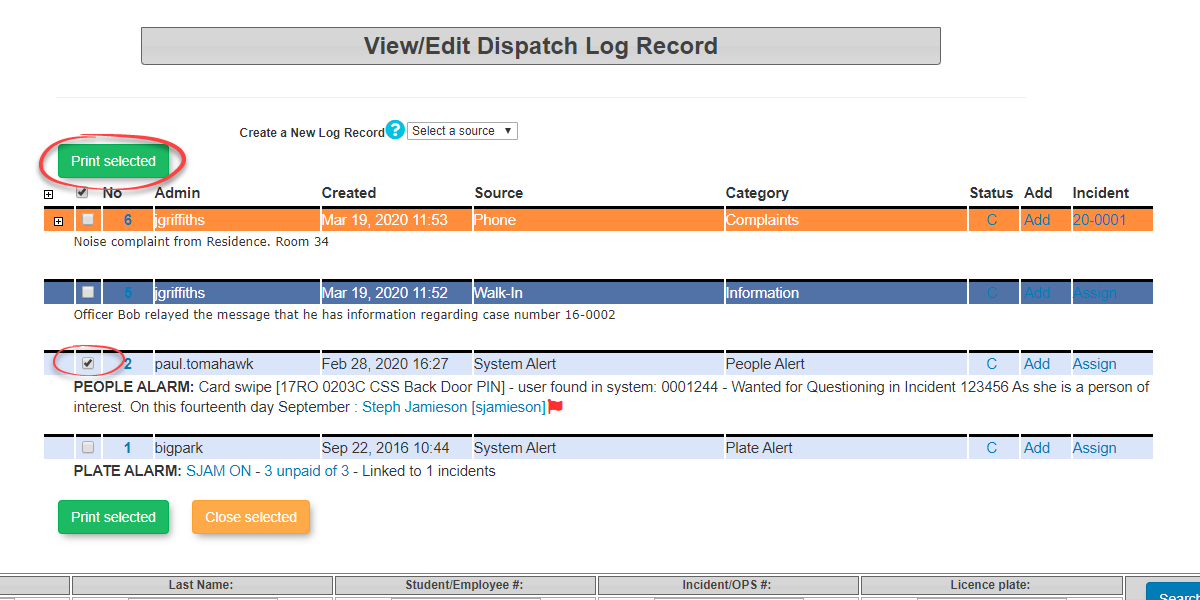
This will bring up the View/Edit Dispatch Log Records page. Here administrators/dispatchers can view all open logs that still need to be followed-up on.
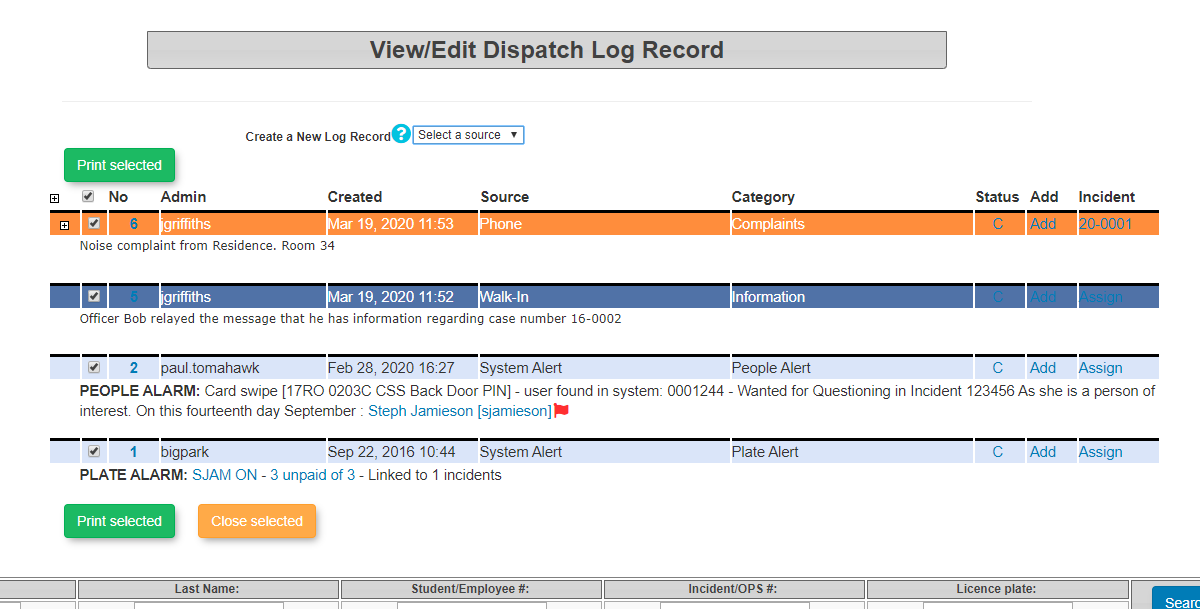
Printing a Dispatch Log
To print the currently selected dispatch logs, select the appropriate source in the list of current dispatch logs followed by Print Selected to get a printed list of these logs.
Creating new Dispatch Log Records
To create a new log record select one of the options from the Create New Log Record
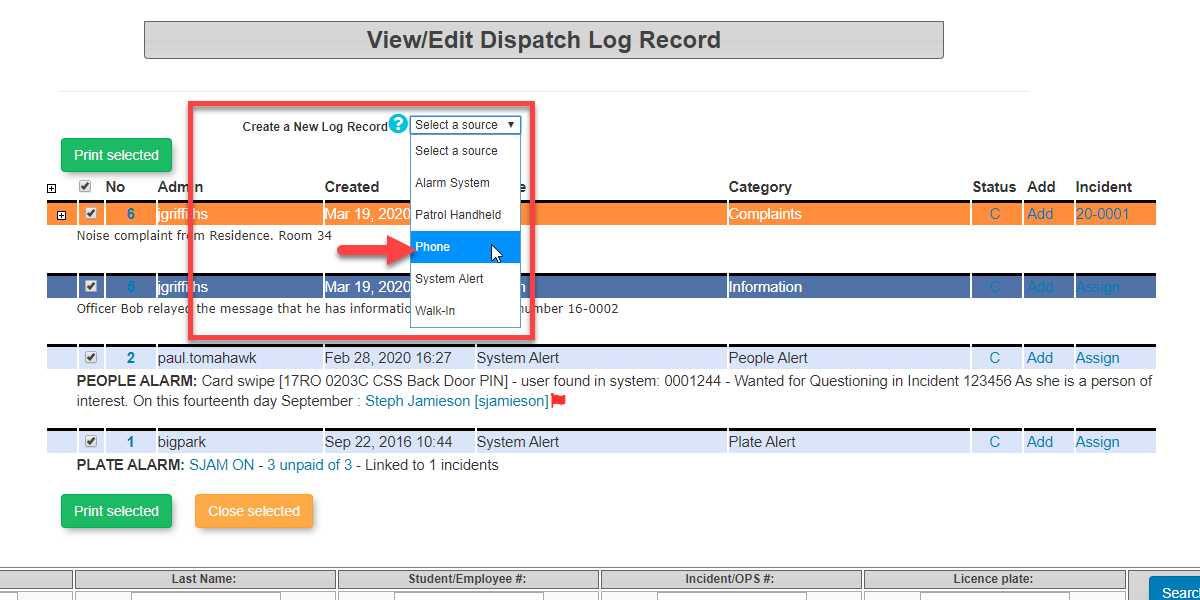
Once the source contact for the new log has been selected, this will bring up the Add New Log Record screen.
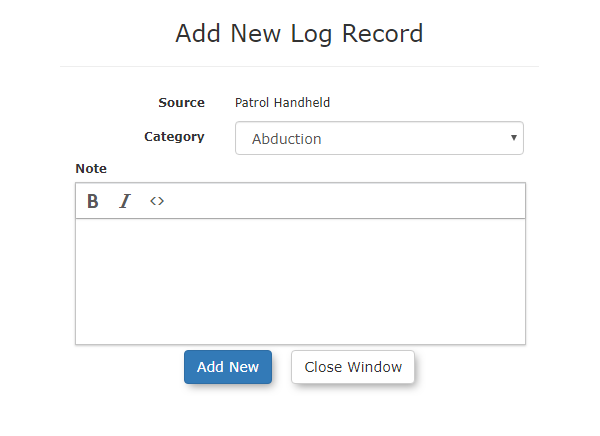
Select the appropriate Category from the drop-down menu and type in any details that need to go with the log in the Note section. Select the Add New button at the bottom of the screen to save the information. Once the information has been saved, the log will show at the top of the listing of Dispatch Log Records.
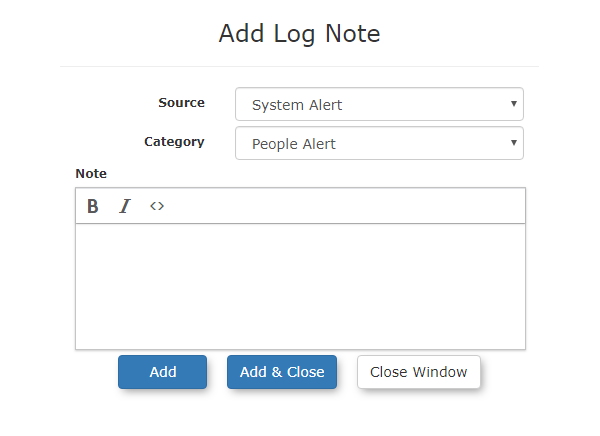
Adding Additional Log Notes
If dispatchers want to add a separate log that is attached to the first log, select the Add link in the Add column. This will bring up an Add Log Note screen where dispatchers can include the source of the information, the category and any notes that need to be included. To save the log select the Add button at the bottom. To save the log and to also close the log, if it is completed, select the Add & Close button at the bottom.
If dispatchers want to assign an admin user to act on the log or if they want to attach an incident report, select the Assign link at the far right of the log. When an assignment is made, the incident number will appear in the listing of Dispatch Log Records. This link can be selected to gain access to view/edit the incident report.
Viewing Additional Notes / Rolled-Up Alerts
We can view all of the available log records associated with the dispatch log In the View/Edit Dispatch Log Records, by selecting the + symbol to the left of the log.
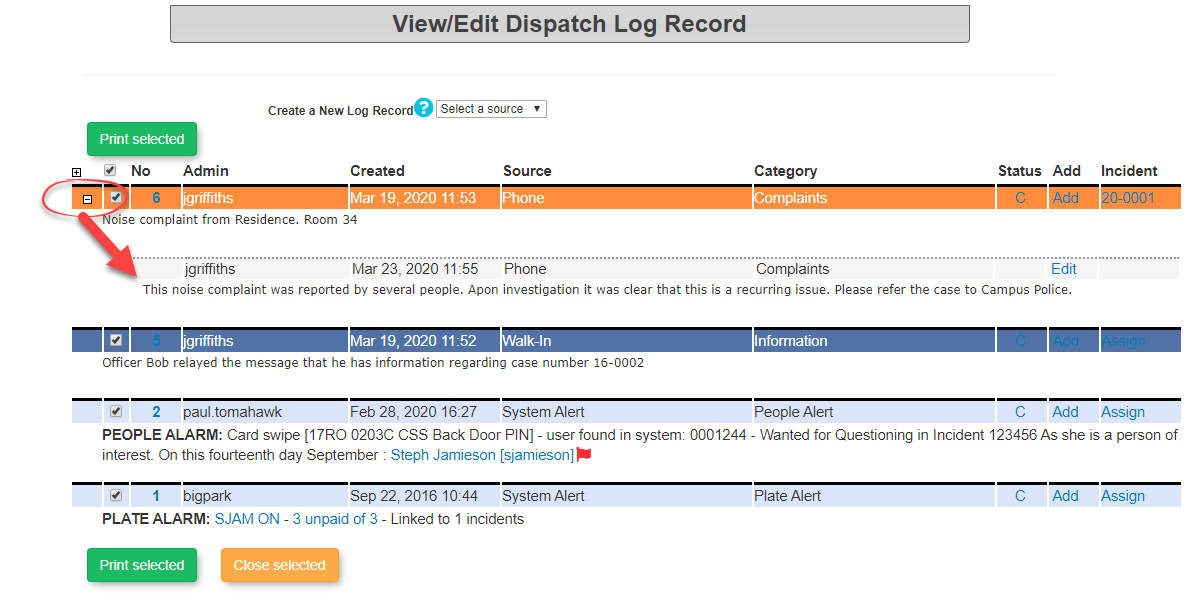
Dispatchers can add additional information to the initial log by selecting the link for the dispatch number. To close a log once it has been dealt with, select the "C" in the Status column to change the status to closed.
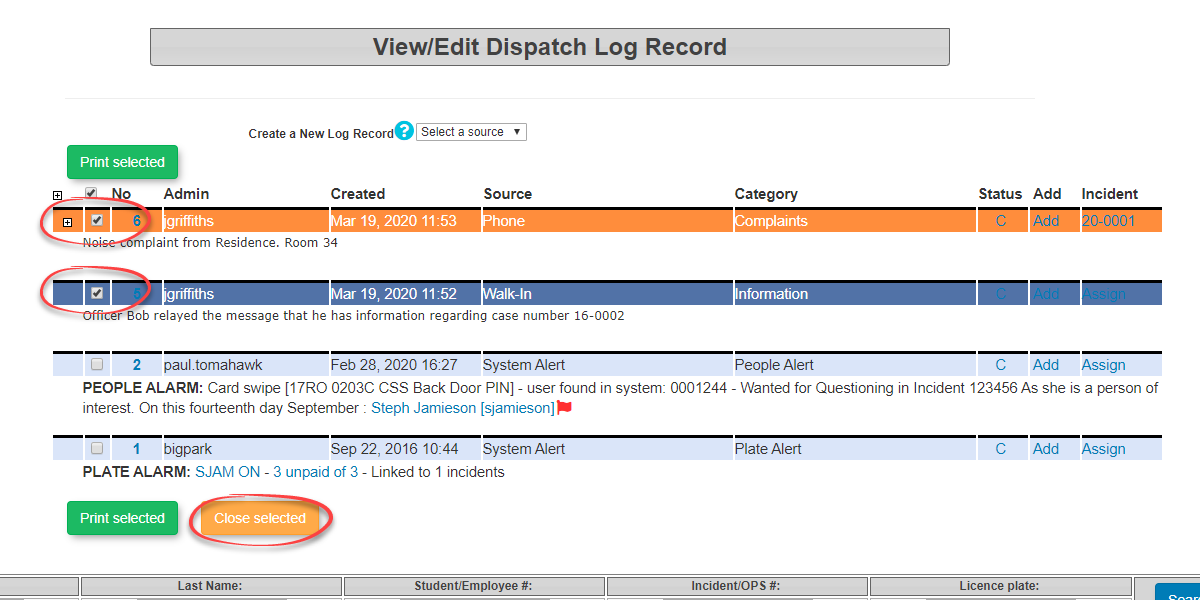
Bulk Closing of Dispatch Logs
It is also possible to close multiple Dispatch Logs in bulk. Select the logs you wish to close by selecting the checkbox associated with the log in question. Once you have selected all the log records you wish to close, click on Close Selected.
View Open Incidents
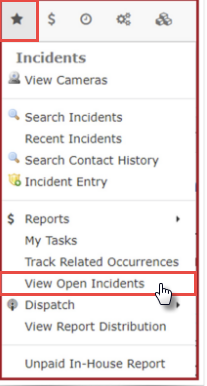
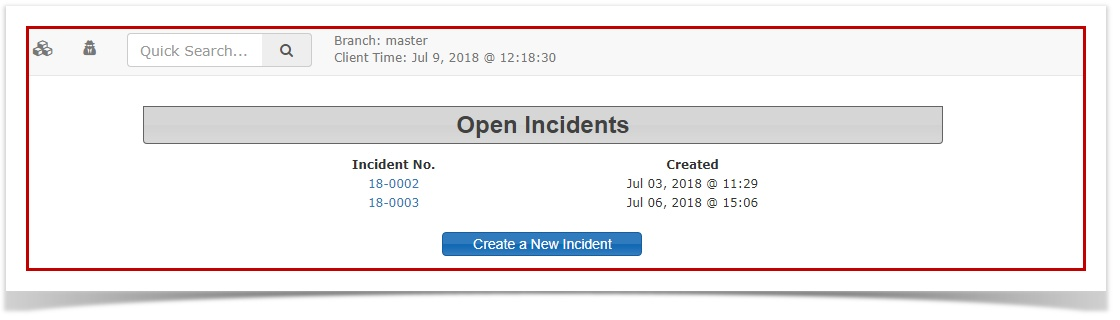
1. Hover over the Incidents icon and select View Open Incidents.
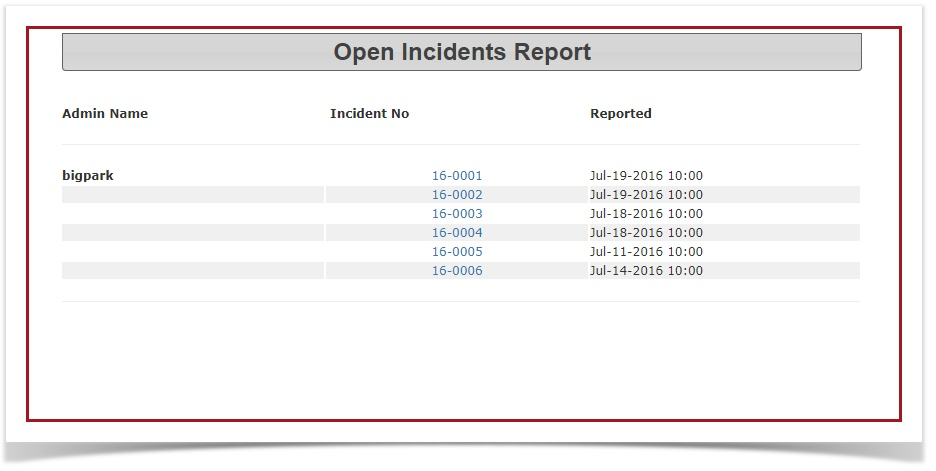
2. This will take administrators to the Open Incidents Report Page. Administrators can select the specific Incident Number link to view/edit that particular incident.
Incident Summary Report by Sub-Location
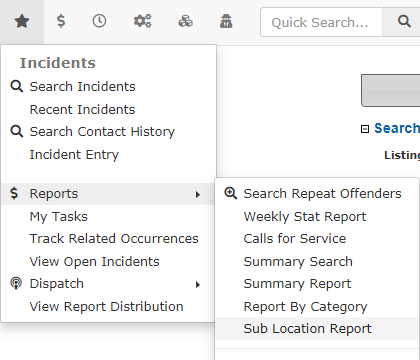
1. Hover over the Incidents icon, click Reports and select Sub-Location Report.
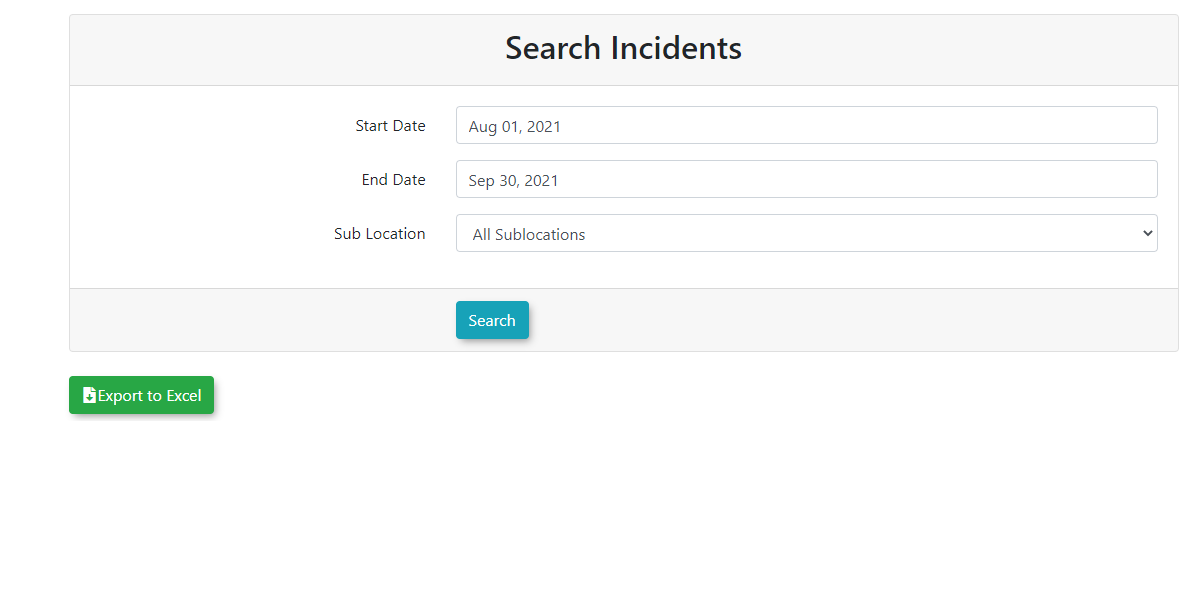
2. This will bring up the Search Incidents page. Select the specific dates that they want to search as well as the specific sub-location that they want to search. Select the "Search" button when all criteria have been entered.
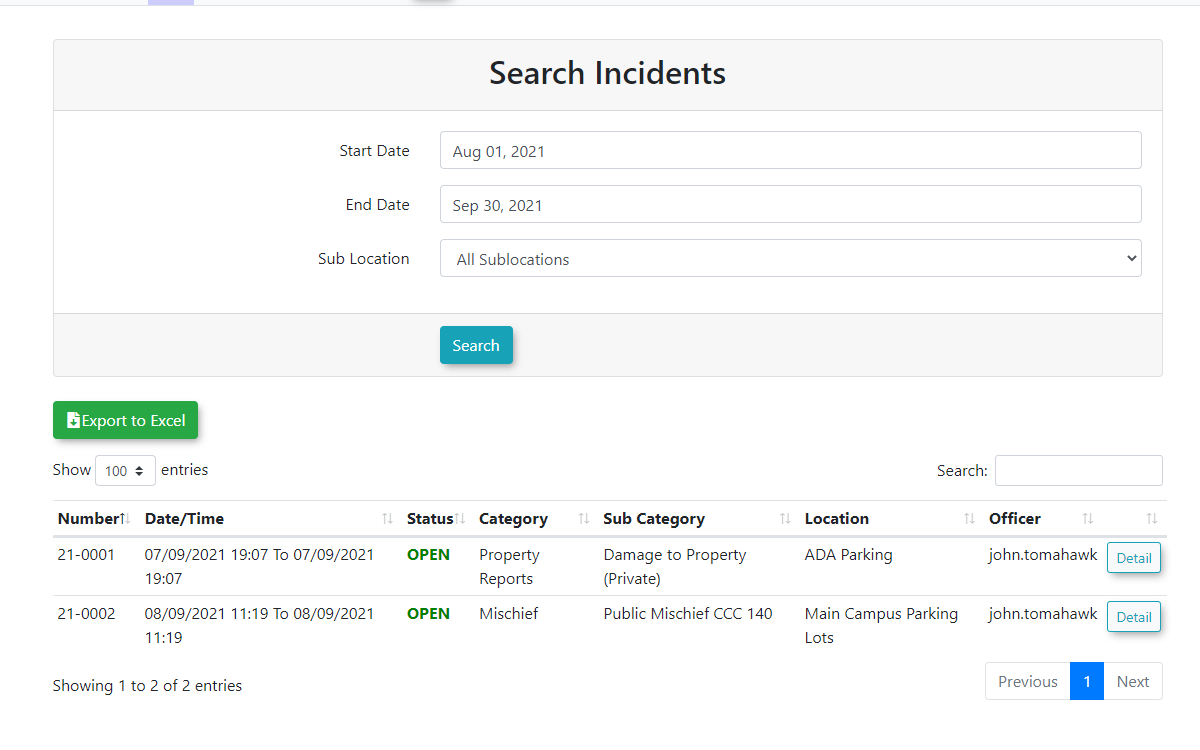
3. This will bring up a table at the top of the page that provides an overview of the incidents that have occurred in each sub-location based on the time frame specified (sample below). Administrators can also select the Details link to the right of a particular incident to view/edit that particular incident.
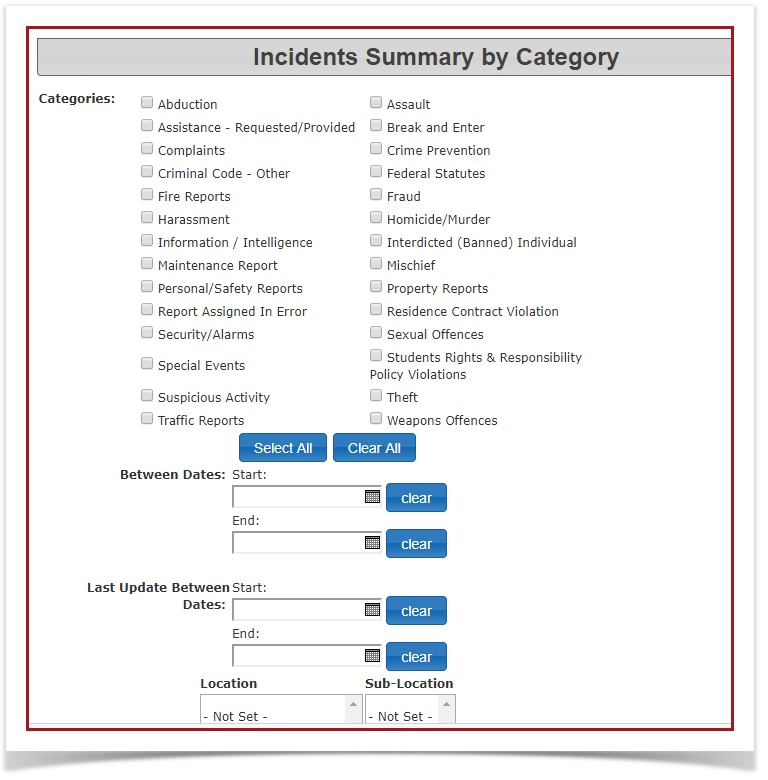
Incidents Summary Report by Category
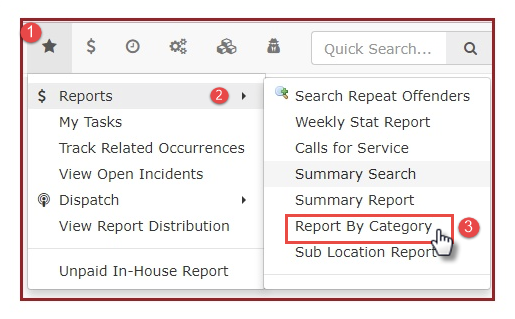
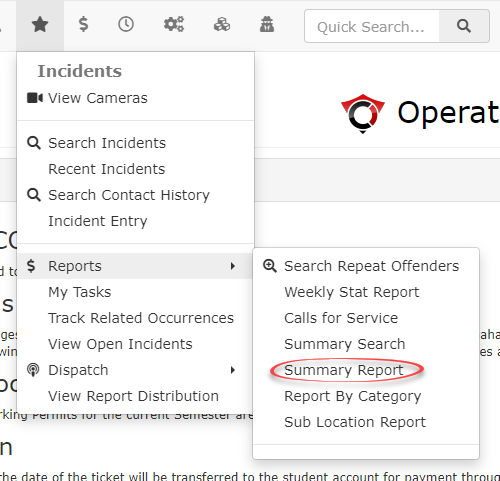
1. Hover over the Incidents icon, click Reports and select Report by Category
2. This will take you to the Incidents Summary by Category screen. Select the selection boxes beside the categories that you want to include in your report, select the dates that you want the report to include, select location and/or select the sub-location. Select the Search Incidents button at the bottom once you have selected all of the criteria that you want to search by. Note, you do not need to select an option in all sections, only the ones that you specifically want information on.
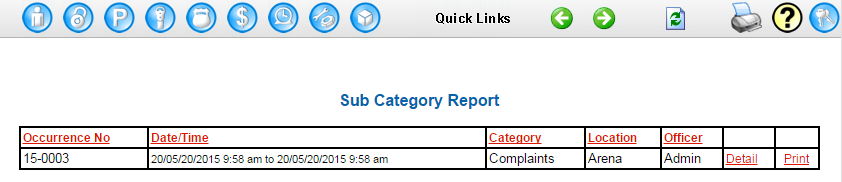
3.This will bring up a table at the bottom of the page that provides an overview of the incidents that have occurred in each category based off of your search criteria (sample below). From here you can select any of the links listed as a sub-category to get a Sub-Category Report.
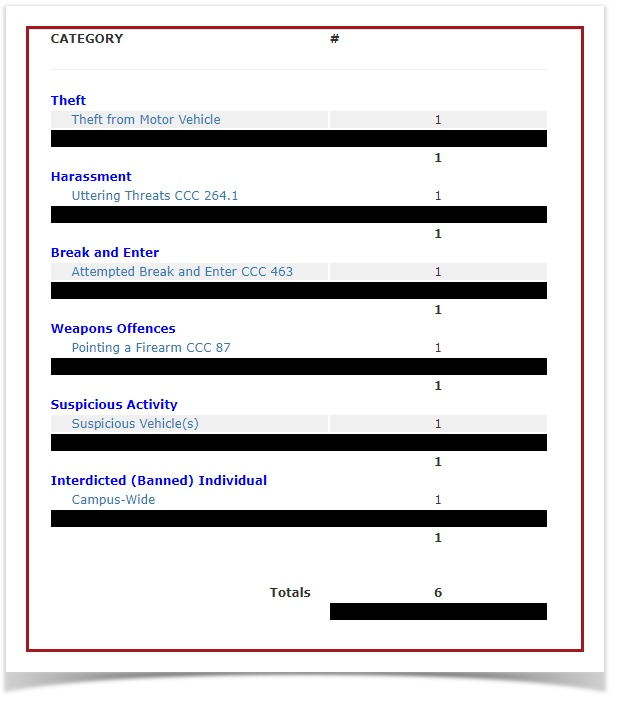
4. In the Sub-Category Report, administrators can sort the table by selecting the column headings. Administrators can select the Details link beside a particular incident to view/edit details within that incident.
Incidents Summary Report
Hover over the Incidents icon, click Reports then select Summary Report.
This will take you to the Incident Summary Report page. Here you can get a summary of all incidents that have been recorded within a specified time frame.
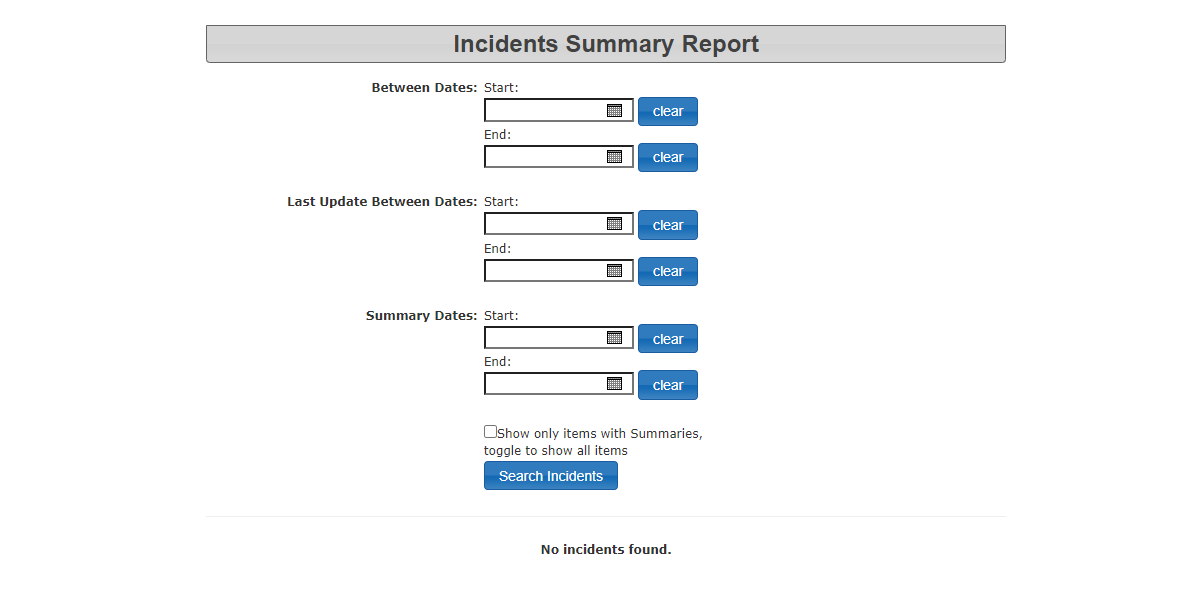
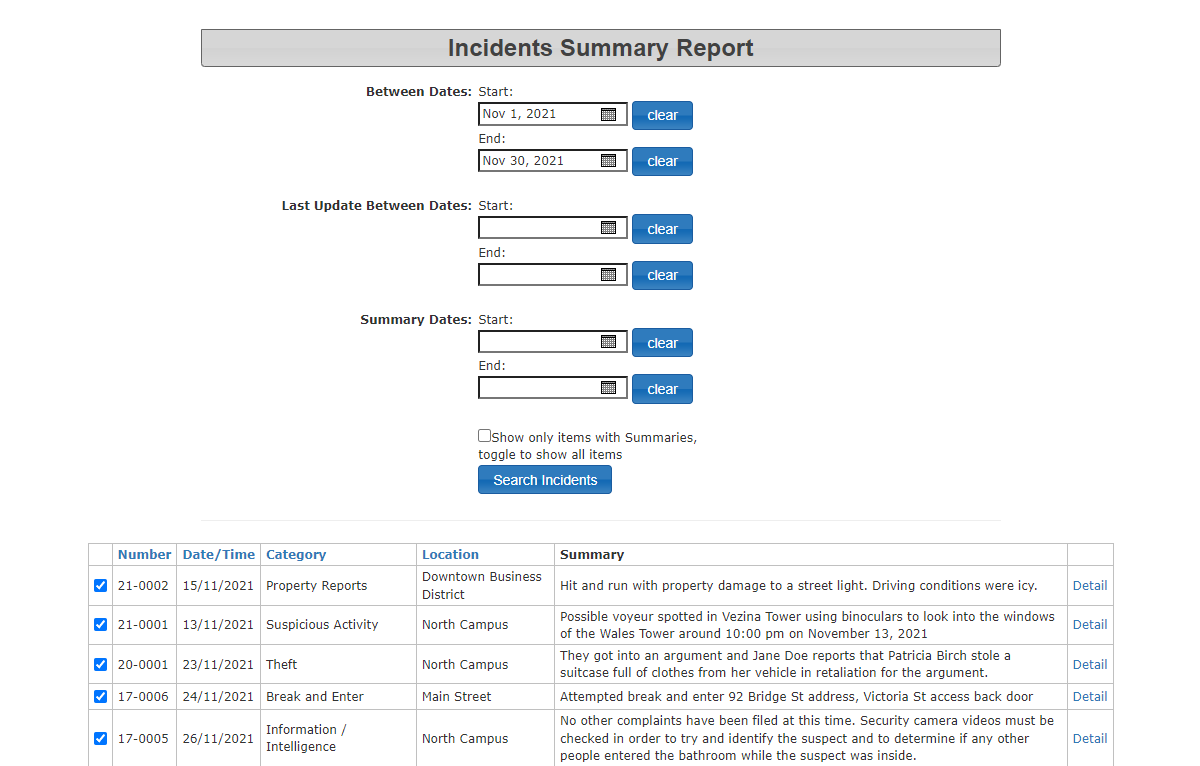
Enter the start date and end date for the report that you want to create and select the button at the bottom for "Search Incidents".
If you wish to include incidents that do not have a summary in the results, uncheck the Show only Items with Summaries checkbox.
This will bring up the Incident Summary Report at the bottom of the screen. You can export this information to an Excel file by selecting the "Export to Excel" button.
You can also get the details of an individual incident by selecting the "Details" button to the right of the particular incident that you want to review.
Recent Incidents Summary Report (Last 30 Days)
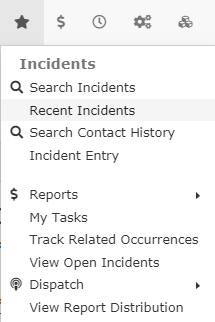
1. Hover over the Incidents icon and select Recent Incidents.
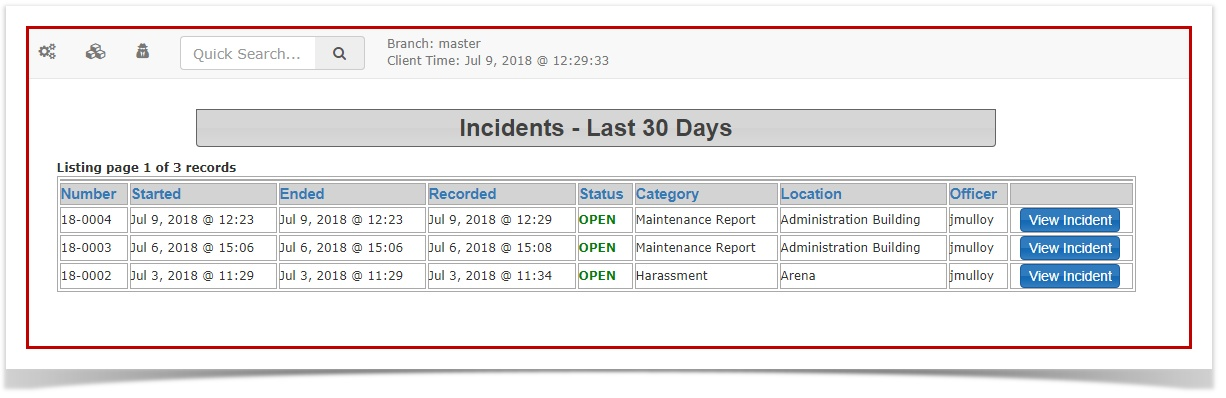
2. This will bring up a table of all incidents that have been recorded in the previous 30 days.
You can get the details of an individual incident by selecting the "View Incidents" button to the right of the particular incident that you want to review.
You can also sort the table by selecting the column heading to sort by.
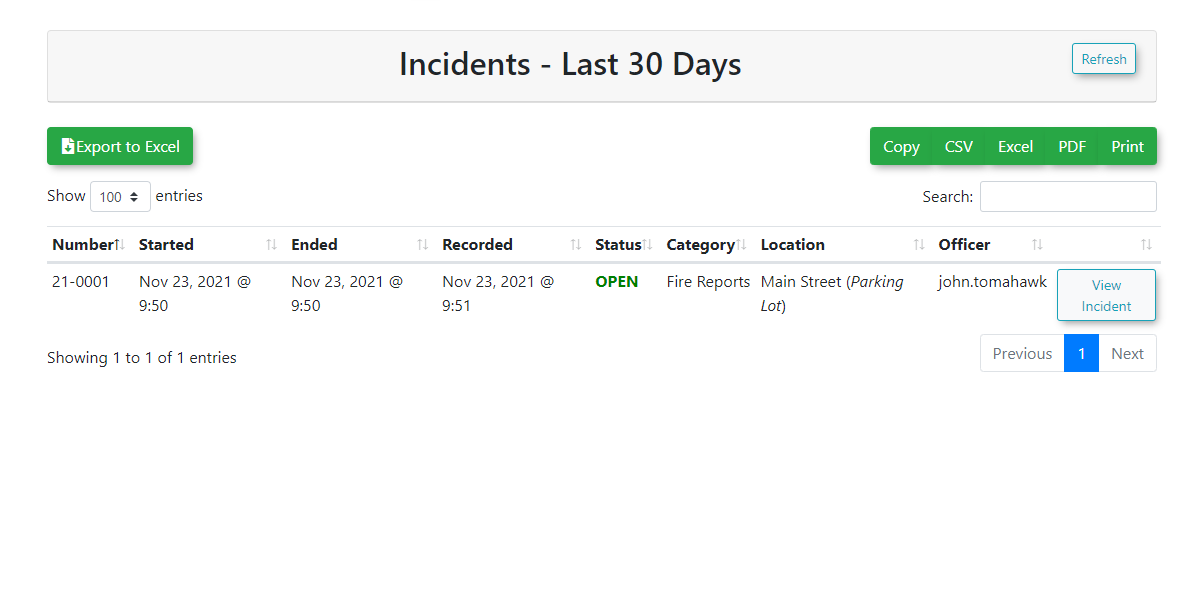
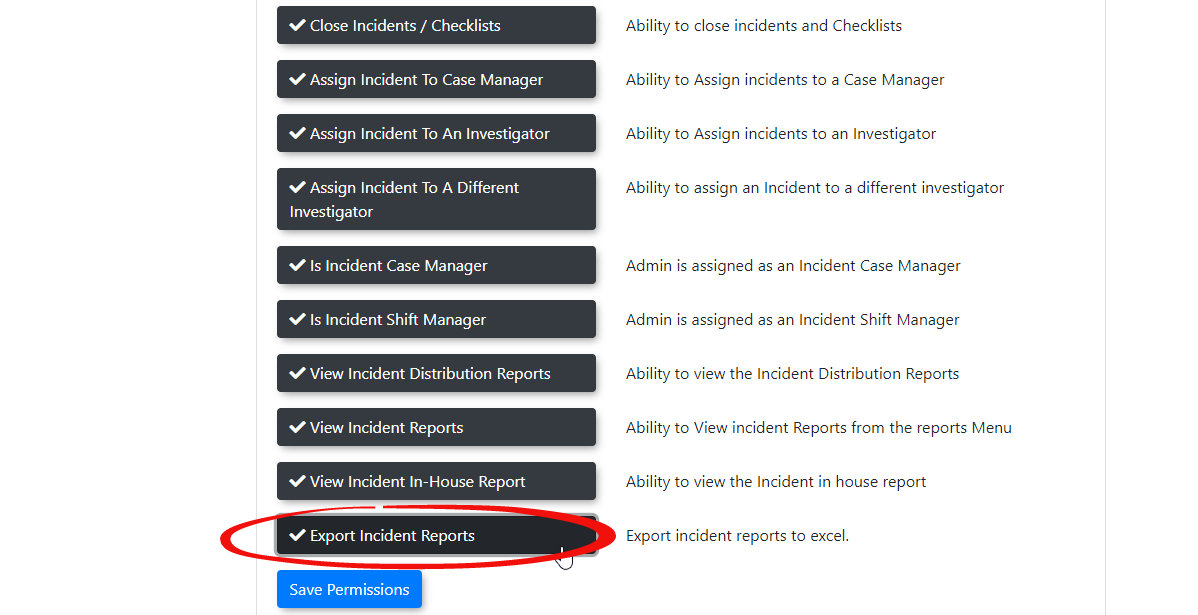
Note: The ability to export this report to excel is now a permission that can be given to admins.
Incident Reports
- Incidents Summary Report
- Incidents Summary Report by Category
- Incident Summary Report by Sub-Location
Editing Incidents
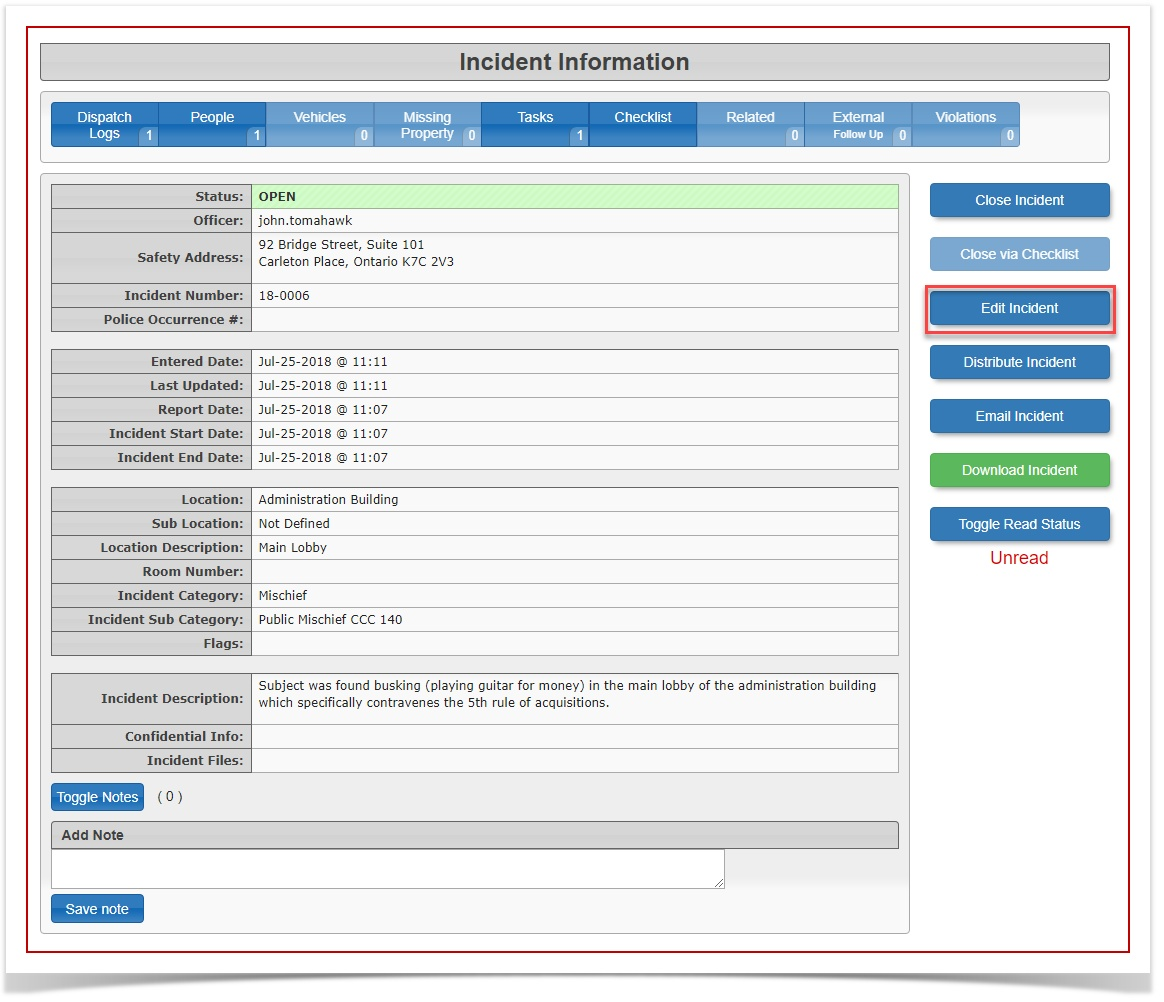
- From the Incident Information page, select the 'Edit Incident' button

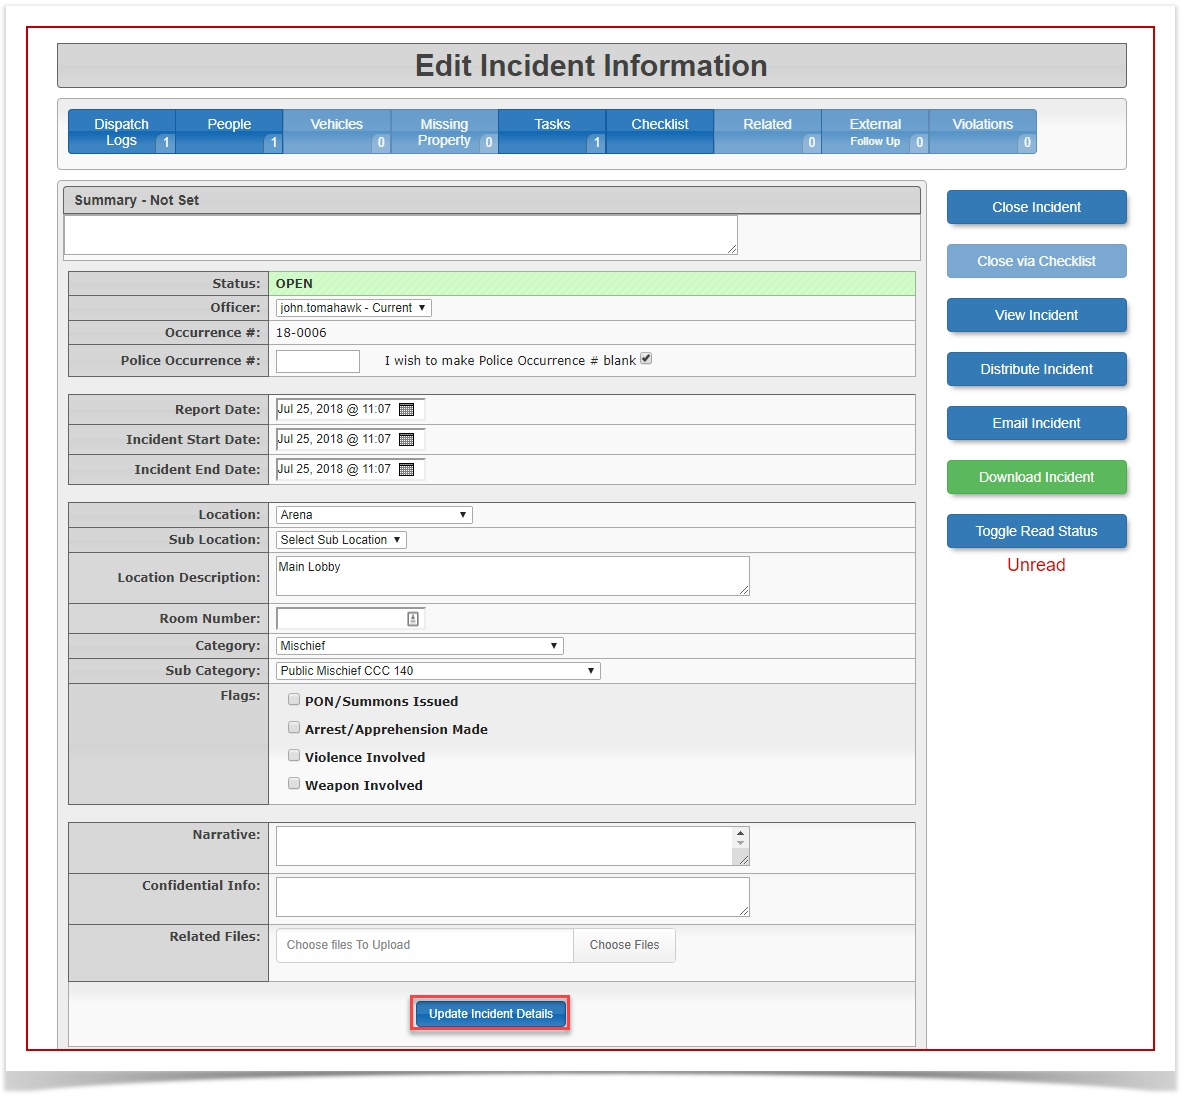
- Enter or change any new information, then select 'Update Incident Details'

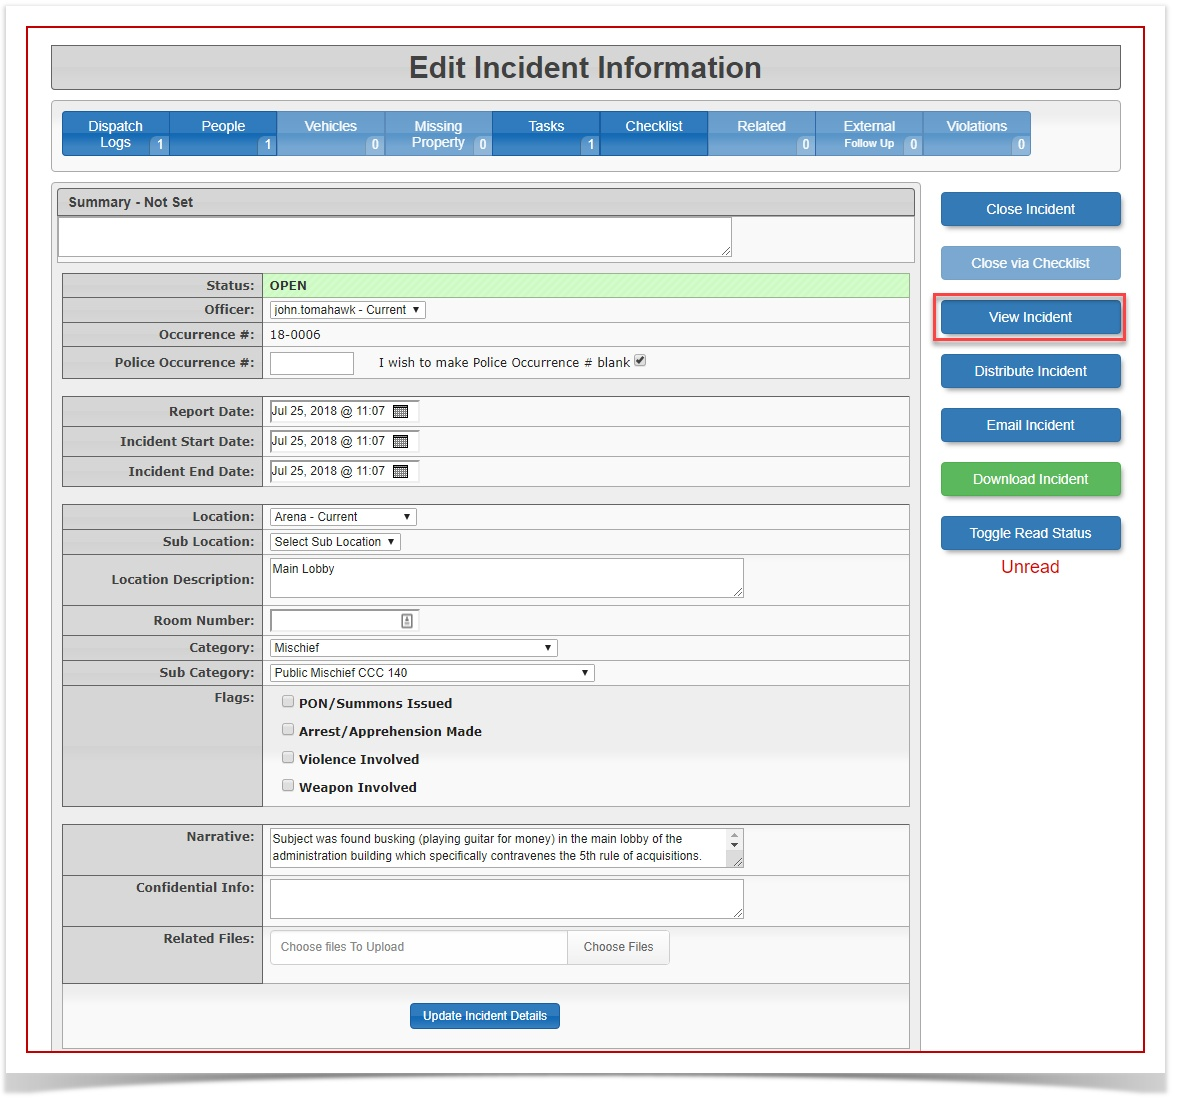
- Select 'View Incident' to return to the Incident Information page

- There are other options listed down the side bar. An explanation for each button is below:

Close Incident - Select this button to toggle the incident between Closed and Open.
Edit Incident - Select this button to toggle between viewing and editing the incident.
Distribute Incident - Select this button to create a distribution report. This locks the incident from being edited.
Email Incident - Select this button to generate an email about the incident.
Download Incident - Select this button to download a PDF copy of the incident. This locks the incident from being further edited.
Toggle Read Status - Select this button to toggle the read status from 'unread' to 'read' or 'read' to 'unread'
Incident Entry
1. Hover over the Incidents icon and select Incident Entry.
2. This will take you to the Opened Incidents page. Here you can select the link for a particular Incident Number to view the details of that particular incident or you can select the Create a New Incident button.
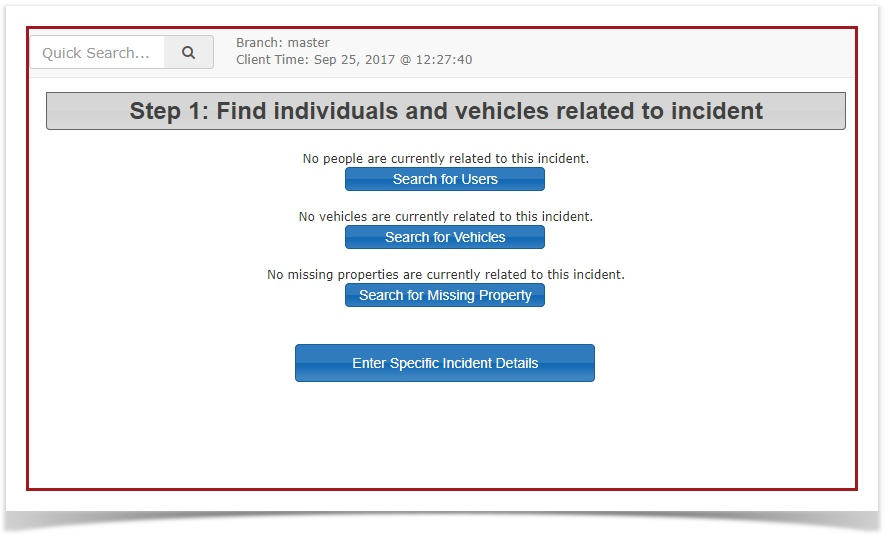
3. When you select the link to Enter New Incidents, this will take you to STEP 1: Finding individuals and vehicles related to an incident. Select the appropriate link to search by Users, Vehicles or Missing Property.
If the incident is not associated with a particular user, vehicle or missing property, select the "Enter Specific Incident Details" button.
4. Once you find the user that you are looking for, select the "Add User to Incident" button at the bottom right.
If there is no user found with the information you are searching, you can select the "Add a New Individual to the Database" button at the very bottom, in the center.
This will take you to the STEP 1: Quick Registration Form where you can enter all the details that you have on the individual.
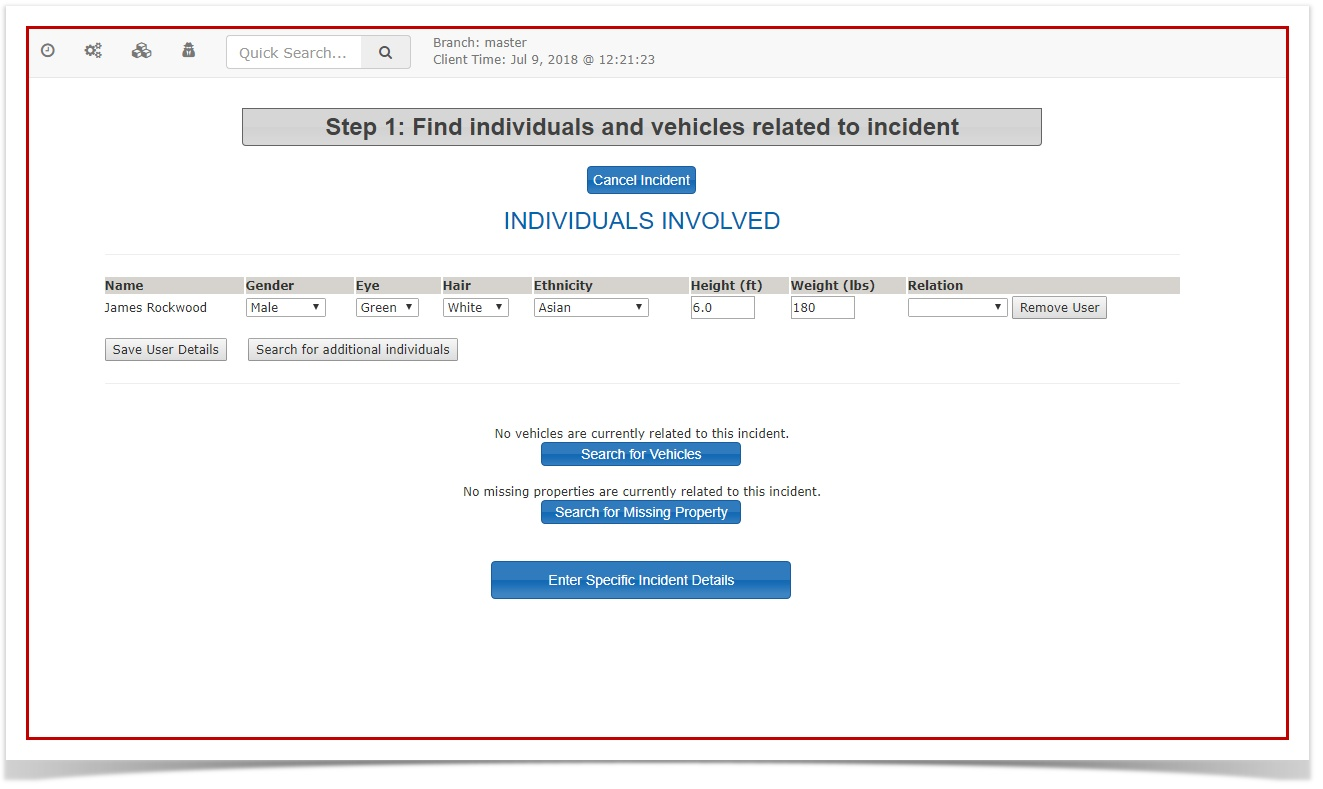
5. Once the user is selected or added you will be taken to a page where you can identify specifics about the individuals involved in the incident. Fill in all the details that you have. You must fill in the Relation field which identifies person's relationship to the incident (e.g. victim, witness, prime suspect, etc.)
Select the "Save User Details" button to save the details. Select the "Search for Additional Individuals" button to add other individuals involved in the incident. You can also add vehicle details and property details by selecting the appropriate link.
You can also select the "Enter Specific Incident Details" button at the bottom right if there are no other details to add related to people, vehicles, and property.
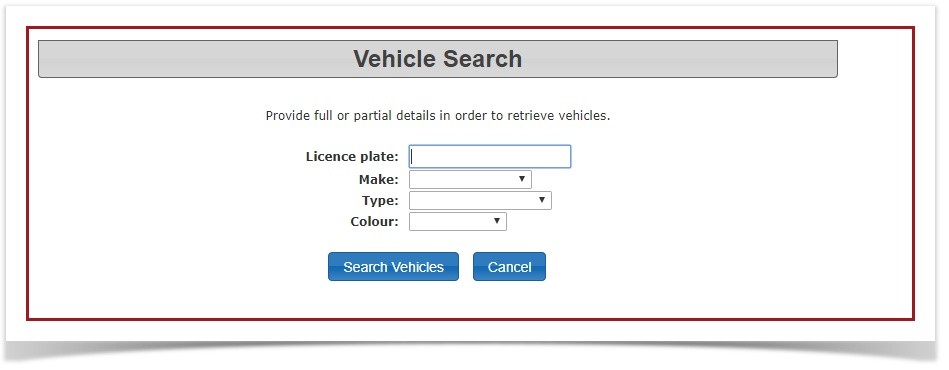
Sample Vehicle Search
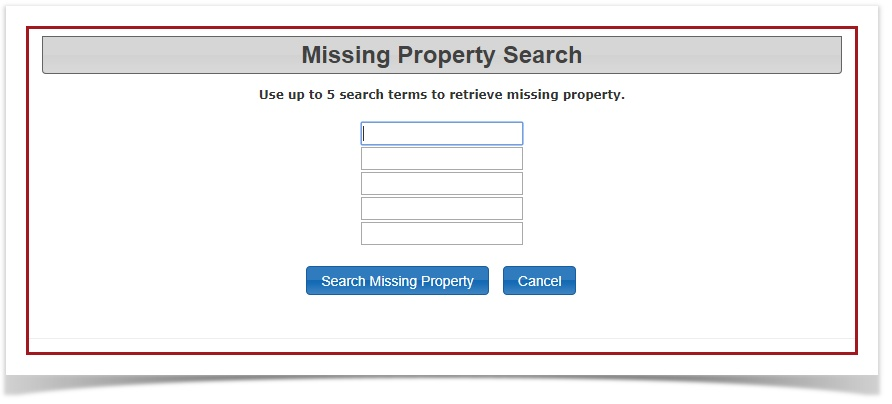
Sample Missing Property Search
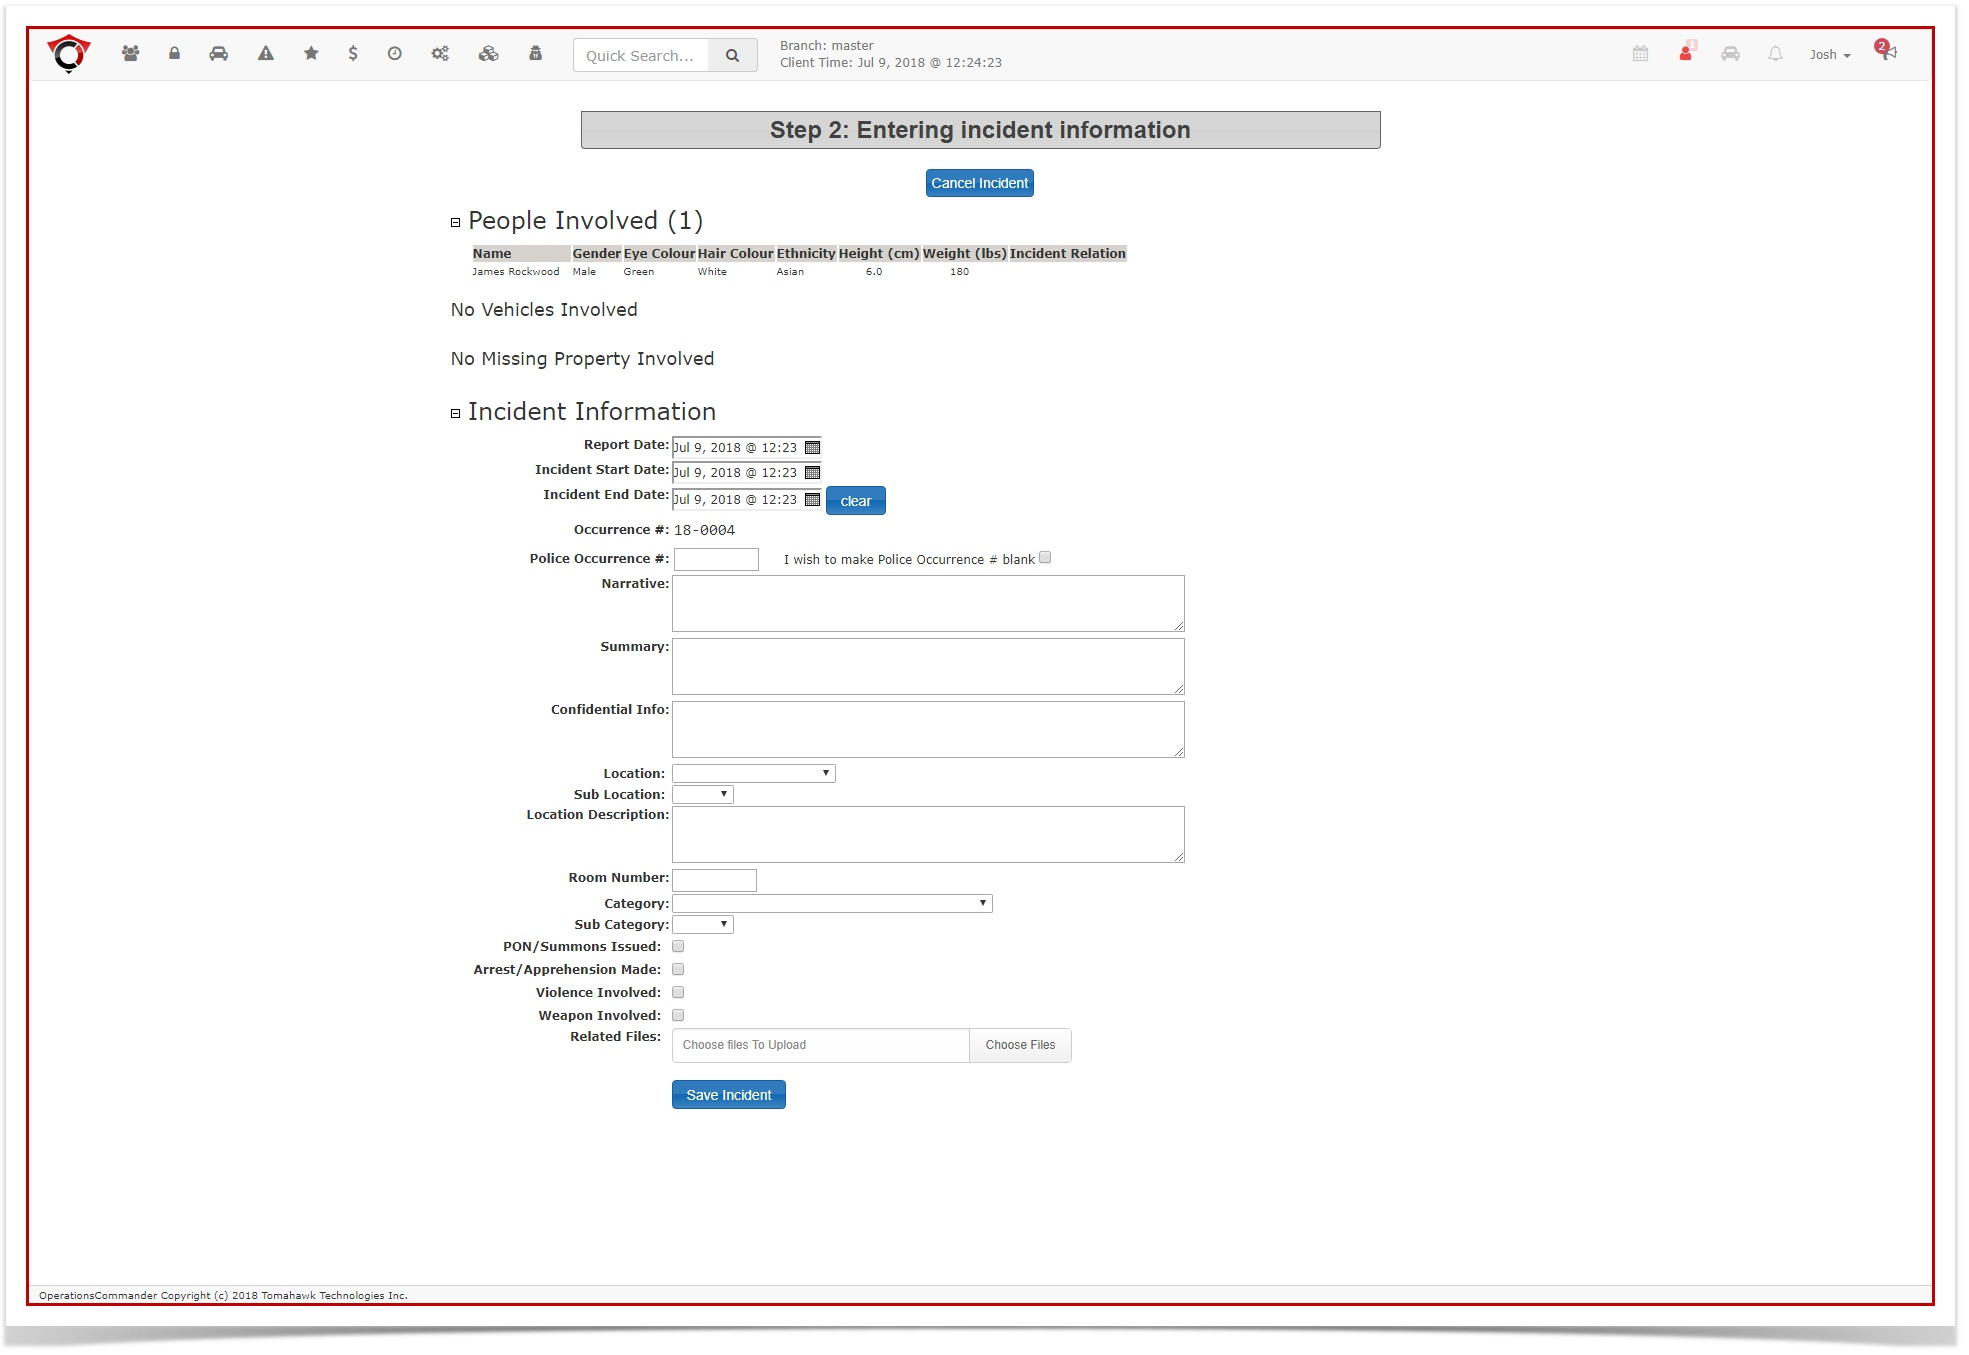
6. Once you select the "Enter Specific Incident Details" button you will be taken to STEP 2: Entering Incident Information.
A summary of the people involved, vehicles involved and/or the missing property involved will appear at the top of the page. Next, you will find the Incident Information section where you will fill in all information that you have on the incident. (OPS Number is an abbreviation for Other Police Services Number used for tracking the incident. PON Summons is an abbreviation for Provincial Offences Notice Summons.)
To attach images, select the "Choose File" button beside the line for Attach Image, find and select the file that you want to attach and select the "Open" button. This will upload the file and attach it to the incident.
When all information is submitted in the Incident Information section, select "Save Incident" at the bottom of the page.
7. Once the incident has been saved you will be taken to the "Incidents - Last 30 Days" summary screen. If you need to edit any details, select the "View Incident" link to the right of the incident that you want to reopen.
Search Incidents
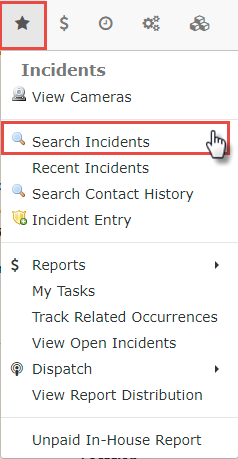
1. Hover over the Incidents icon and select Search Incidents.

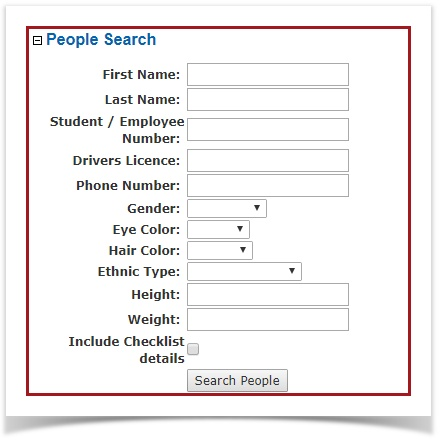
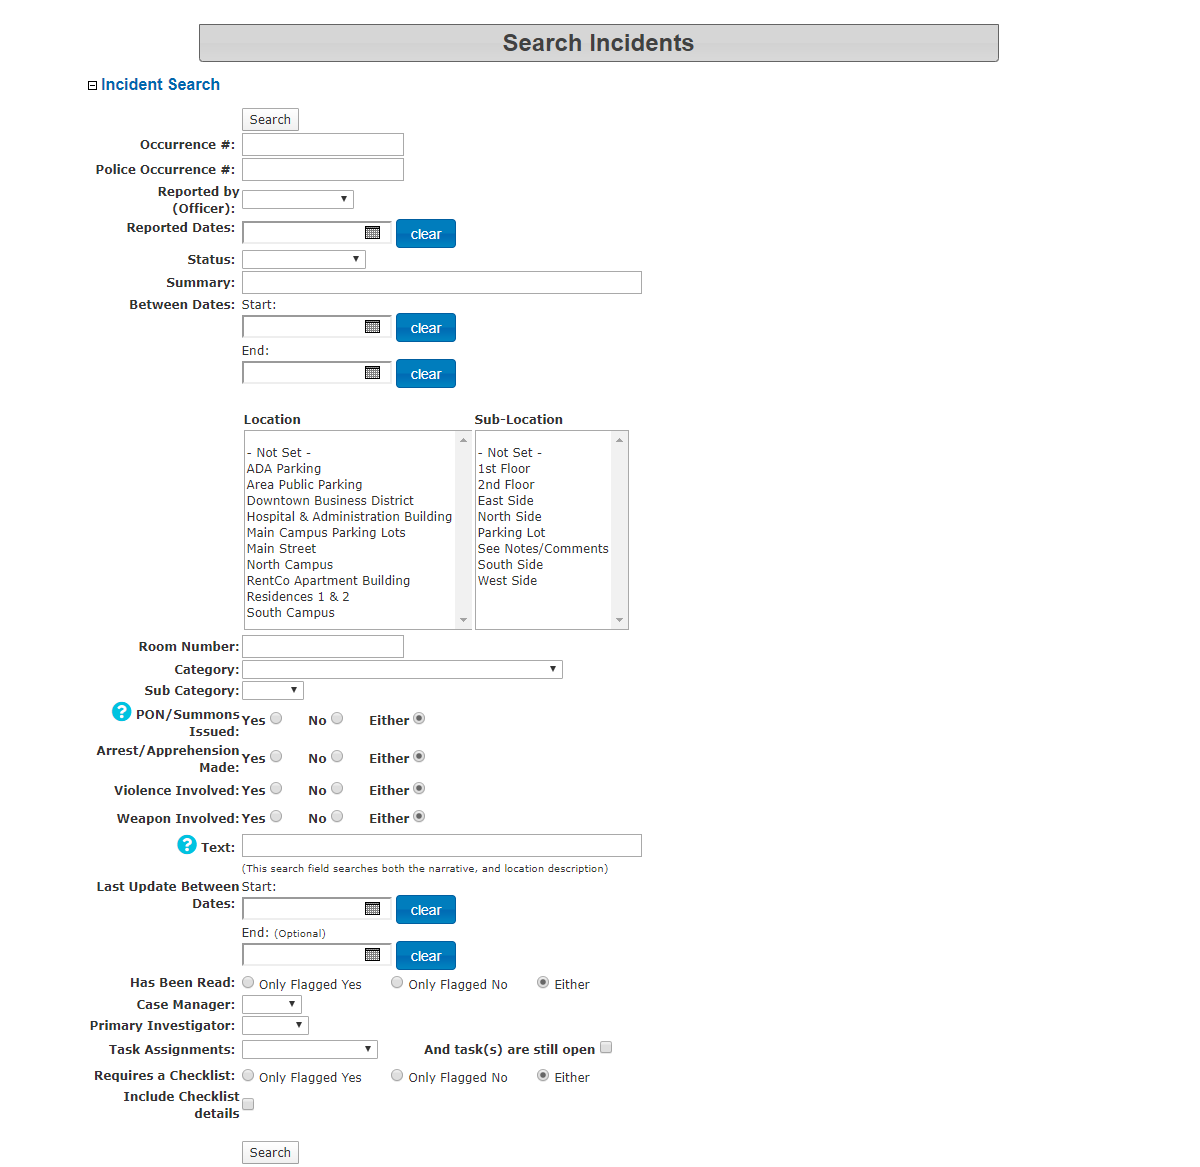
2. This will take you to the Search Incidents screen. Here you can do an Incident Search, People Search or a Vehicle Search.
Fill in the information you want to search by and select the "Search" button at the bottom of that particular section.
Search Criteria
Occurrence #: When an incident is created in the system a unique ID number is designated to the incident that can be referenced in this search module.
Police Occurrence #: If you partner with a police force they may have a reference number that can be assigned and searched.
Reported by (Officer): This search filter will narrow your search to incidents reported by specific officers selected from a drop down pick list.
Reported Dates: Enter the date on which the incident was reported.
Status: Select from a drop down pick list incidents that have a status of Open, Closed, or Close Requested
Summary: Enter a short description of the incident in question.
Between Dates: Enter a date range in which the incident occurred.
Location and Sub-Location: Select areas where the incident occurred.
Room Number: If the incident occurred in a specific room on campus, enter the room number here.
Category: Select the general type of incident being searched from a drop down pick list.
Sub Category: Select the specific type of incident in relation to the general type being searched from a drop down pick list. The list changes based on which general category is chosen.
PON/Summons Issued: Select whether or not a PON (Provincial Offence Notice) or Summons has been issued.
Arrest/Apprehension Made: Select whether or not an arrest or apprehension of an individual was made.
Violence Involved: Select whether or not violence was involved in the incident.
Weapons Involved: Select whether or not weapons of any kind were involved in the incident.
Text: Use this field to enter related key words, descriptions, locations etc. This search field searches both the narrative, and location description.
Last Updated Between Dates: Select a date range of when an update to the incident information might have occurred.
Has Been Read: Select yes, no or either. This will select incidents that have been previously reviewed or those that have not.
Case Manager: Select from a drop down pick list to filter on specific case managers assigned to the incident in question.
Primary Investigator: Select from a drop down pick list to filter on specific primary investigator assigned to the incident in question.
Task Assignments: Select from a drop down pick list to filter on a specific assignee who has been tasked with investigating the incident in question.
Requires a Checklist: Select whether or not the incident has a related checklist.
Include Checklist Details: If the item above it checked as yes or either, check this box if you wish to have the checklist details appear in your search results.
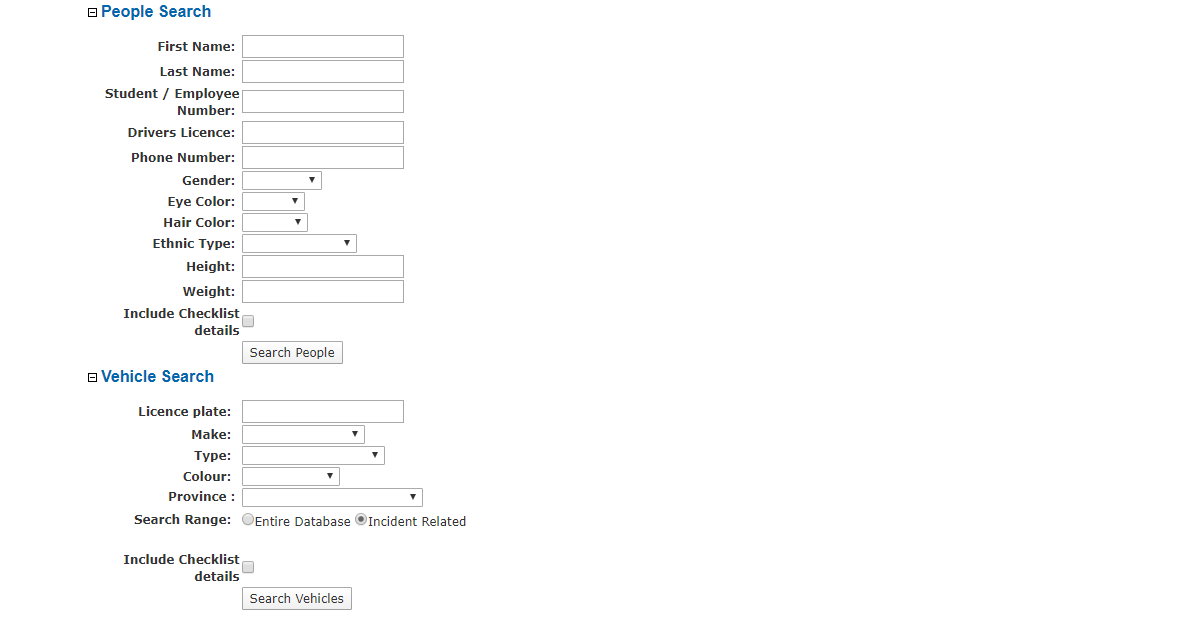
People Search: In this section you can enter typical details about a specific person to perform an incident search on.
Vehicle Search: In this section you can enter typical details about vehicles that are involved in the incident being searched.
Configuring Incidents
Here is the list of items that would have to be set up in the system prior to using the incident module.
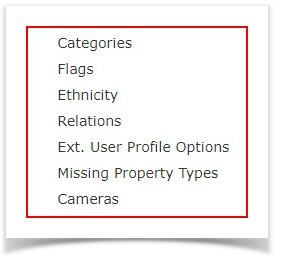
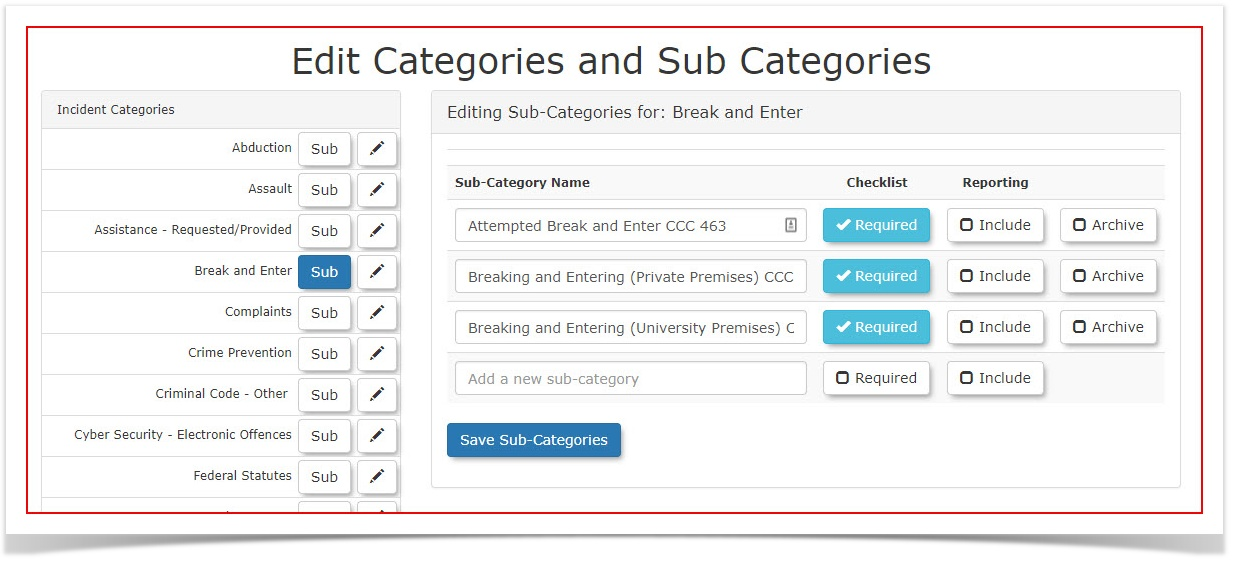
- Categories: Incident Categories are a listings of the types of Incidents that occur. Each Category can have multiple sub categories.
Here's an example of a category and it's sub-category items. In this case the category is Break and Enter. The subcategories appear on the right.

- Flags: Incidents may be flagged for information, and/or importance.
An example would be: "Was violence involved?" or "Were there weapons involved?"
For more information Refer to this Article. - Ethnicity: Within incident reporting you have the ability to enter a description of people associated with the incident, whether it be the victim, a related person, the suspect or person who committed the incident.
Ethnicity is one of the descriptors typically used in identifying a person related to an incident. - Relations: In this area you can define the relationship/involvement the individual has with the particular incident.
Examples could be: Complainant, Witness, Victim etc. - Ext. User Profile Options: These items are extended values used in describing an individual within incident reporting.
Examples could be: Physical descriptors such as hair colour, hair style, Body Build Type, Clothing Style etc.
(Note: These descriptions will only be seen in the incidents module and not in the user's profile.) - Missing Property Types: An incident may include theft or damage to property. This item allows you to create pick lists that can describe property involved in an incident.
Examples could be: Vehicles, personal property such as jewelry, computers, electronic devices, money, etc. - Cameras: In this section admins can configure input from surveillance cameras that may have captured the incident.
IncidentAdmin Workflow
Incidents can be reported in several ways:
- Campus Security may observe violations as they occur
- Individuals may contact campus security to report incidents
- Staff may report incidents on behalf of fellow staff or students
- Requests to investigate may come from campus administration
- Incidents may be caught on surveillance cameras etc.
Initiating the entry of incidents into the system can be done in a couple of ways.
- Dispatch Logs
- Incident Entry
These items can be generated in any order.
Once an incident is recorded in the system Security Administrators can track the progress of any resulting investigation or follow-up events related to the incident.
Tasks can be created and assigned to officers, primary investigators, case workers and security administration through the incidents tool.
Investigators can track their progress from initial discovery through to resolution.
Steps taken in the process as well as the outcome for individuals involved can be recorded, and in turn reported on through IncidentAdmin.
The following subjects are the main highlights in the workflow process in IncidentAdmin.
- Searching, viewing and editing incident records
- Working with related occurrences and violations
- Viewing "My Tasks" within IncidentAdmin
- Generating reports from records stored in IncidentAdmin
A Word About Reports
There are a number of reports that can be generated in IncidentAdmin.
- Recent Incidents Summary Report - Lists the last 30 days of incident records.
- Search Repeat Offenders - Report on individuals involved in multiple incidents
- Weekly Stat Report - Reports on the number of all types of incidents that happened during a specified time span
- Calls for Service
- Summary Search - Allows administrators to get a summary of all incidents that have been recorded within a specified time frame.
- Summary Report - Allows administrators to produce a list in a spreadsheet format of incident summaries based on a date range.
- Report by Category - Search for incidents under defined categories within a specific time frame.
- Sub Location Report - Search incidents filtered by sub location.