Real-Time Parking Map
System Settings
To begin using Real-Time Map for a specific lot, you must set up the functionality in Lot Administration under the Temporary Parking tab.

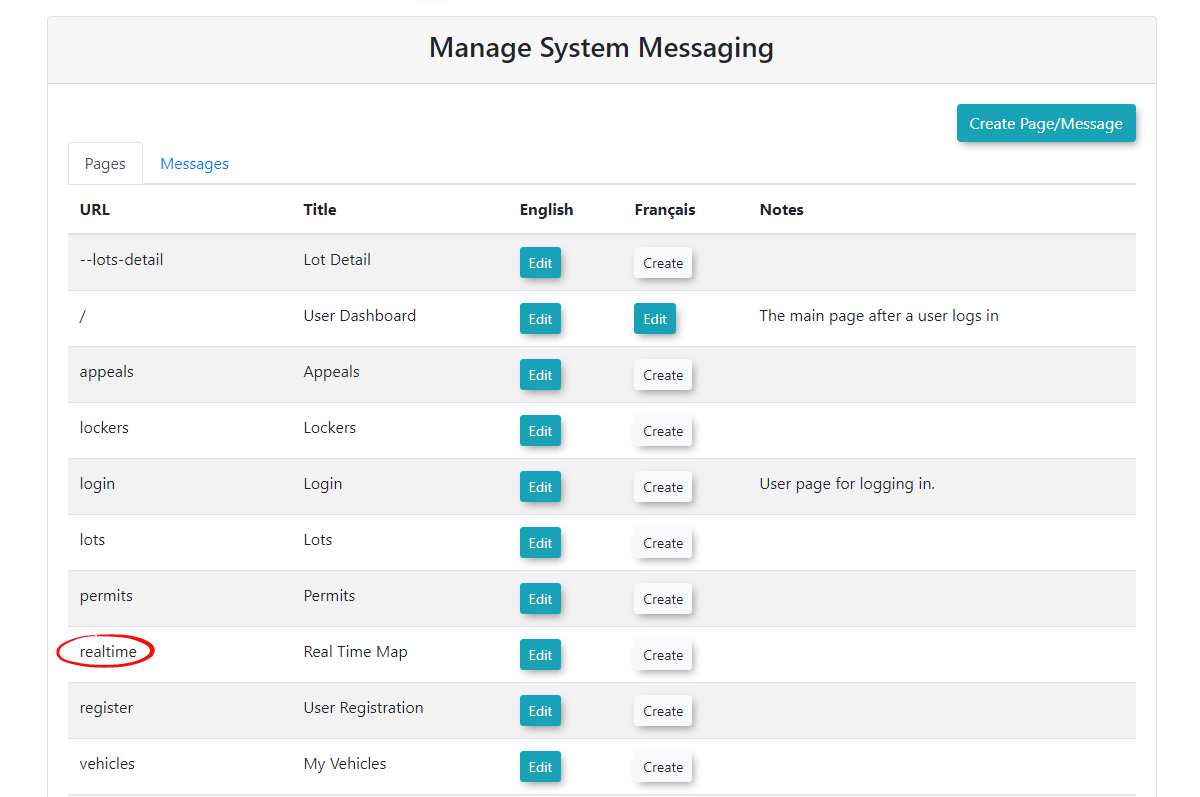
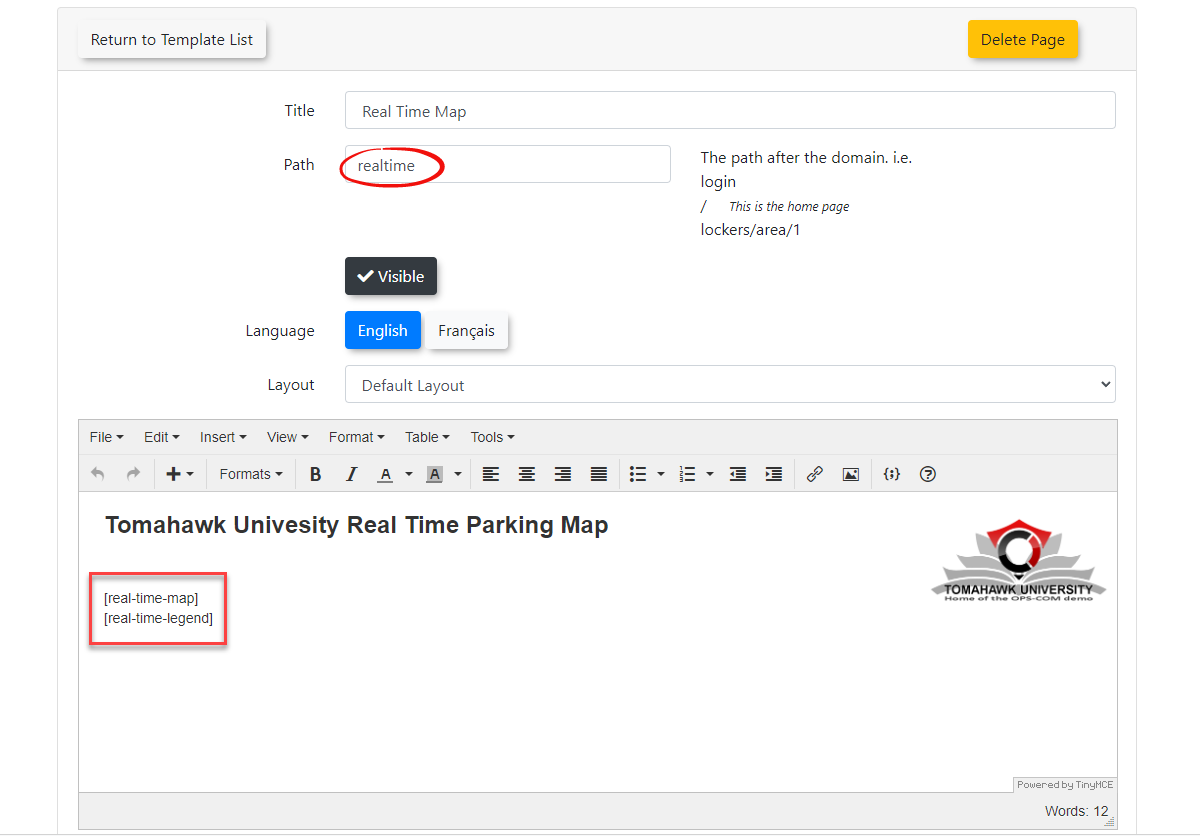
You must also create a page in System Messaging under the page tab.
The page you create needs to house two lines of short code:
[real-time-map] will display a google map style window
[real-time-legend] will display a legend indicating a definition of what the colors in the map marker represent
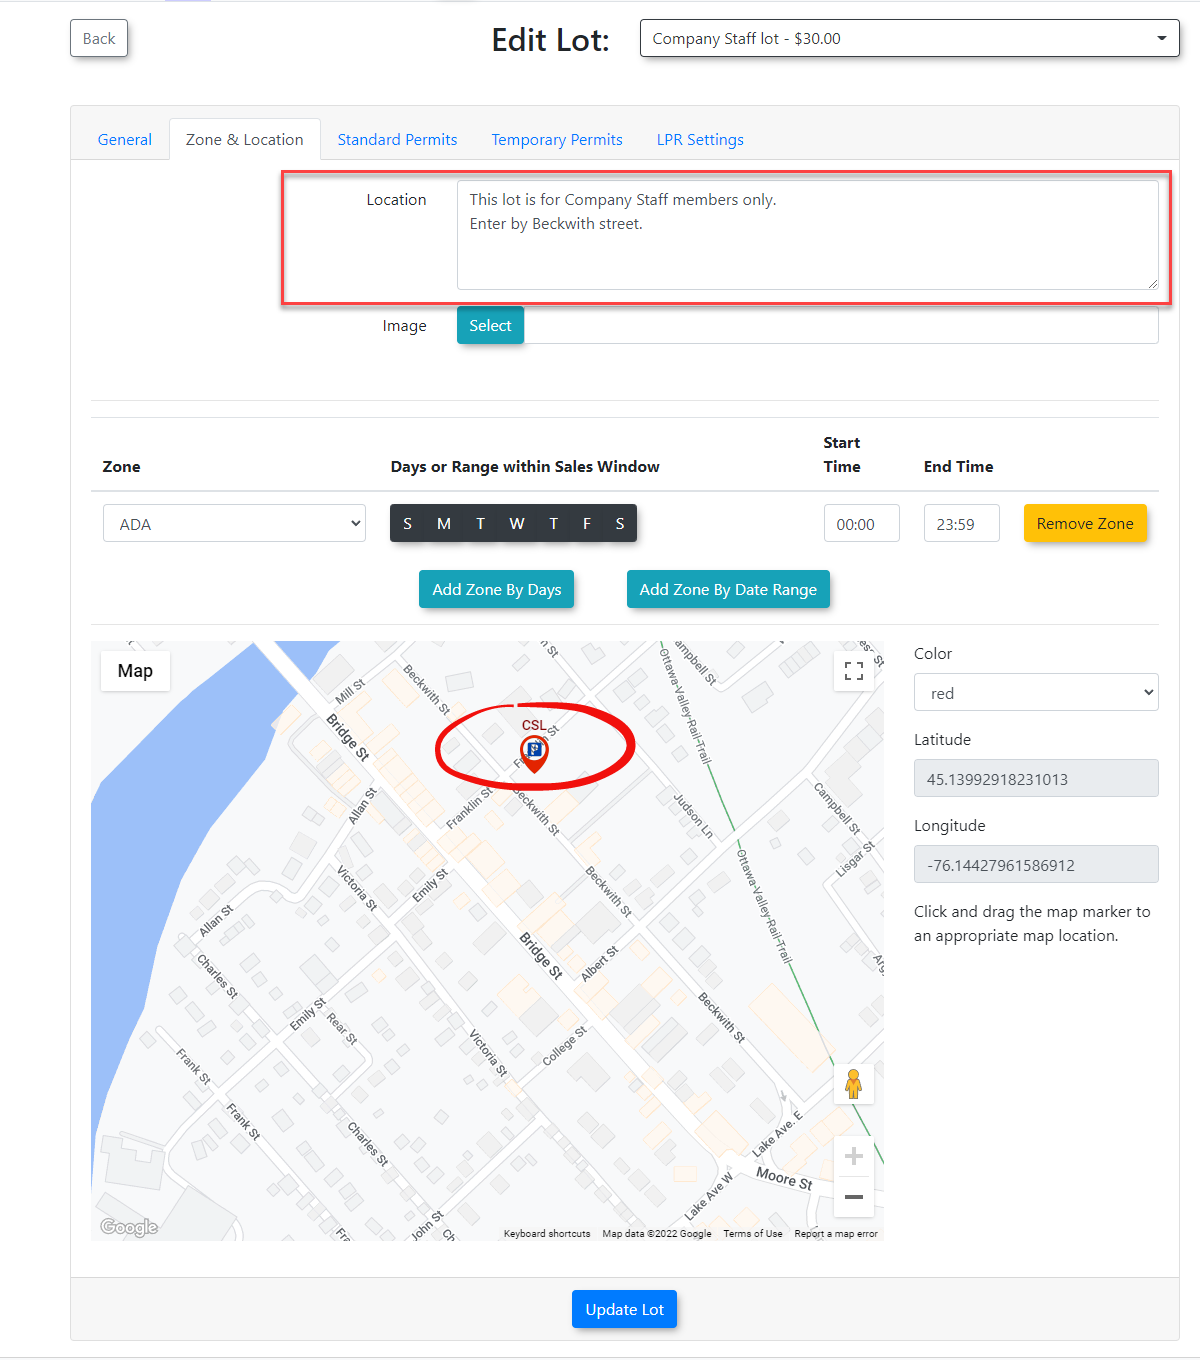
In the Zones and Locations Page, you must set a map marker. The color of the marker can be whatever you like in the configuration as the color will be controlled by the lot availability on the actual Real-Time map.
It is preferable to have a description, or information about the lot, in the Location field.
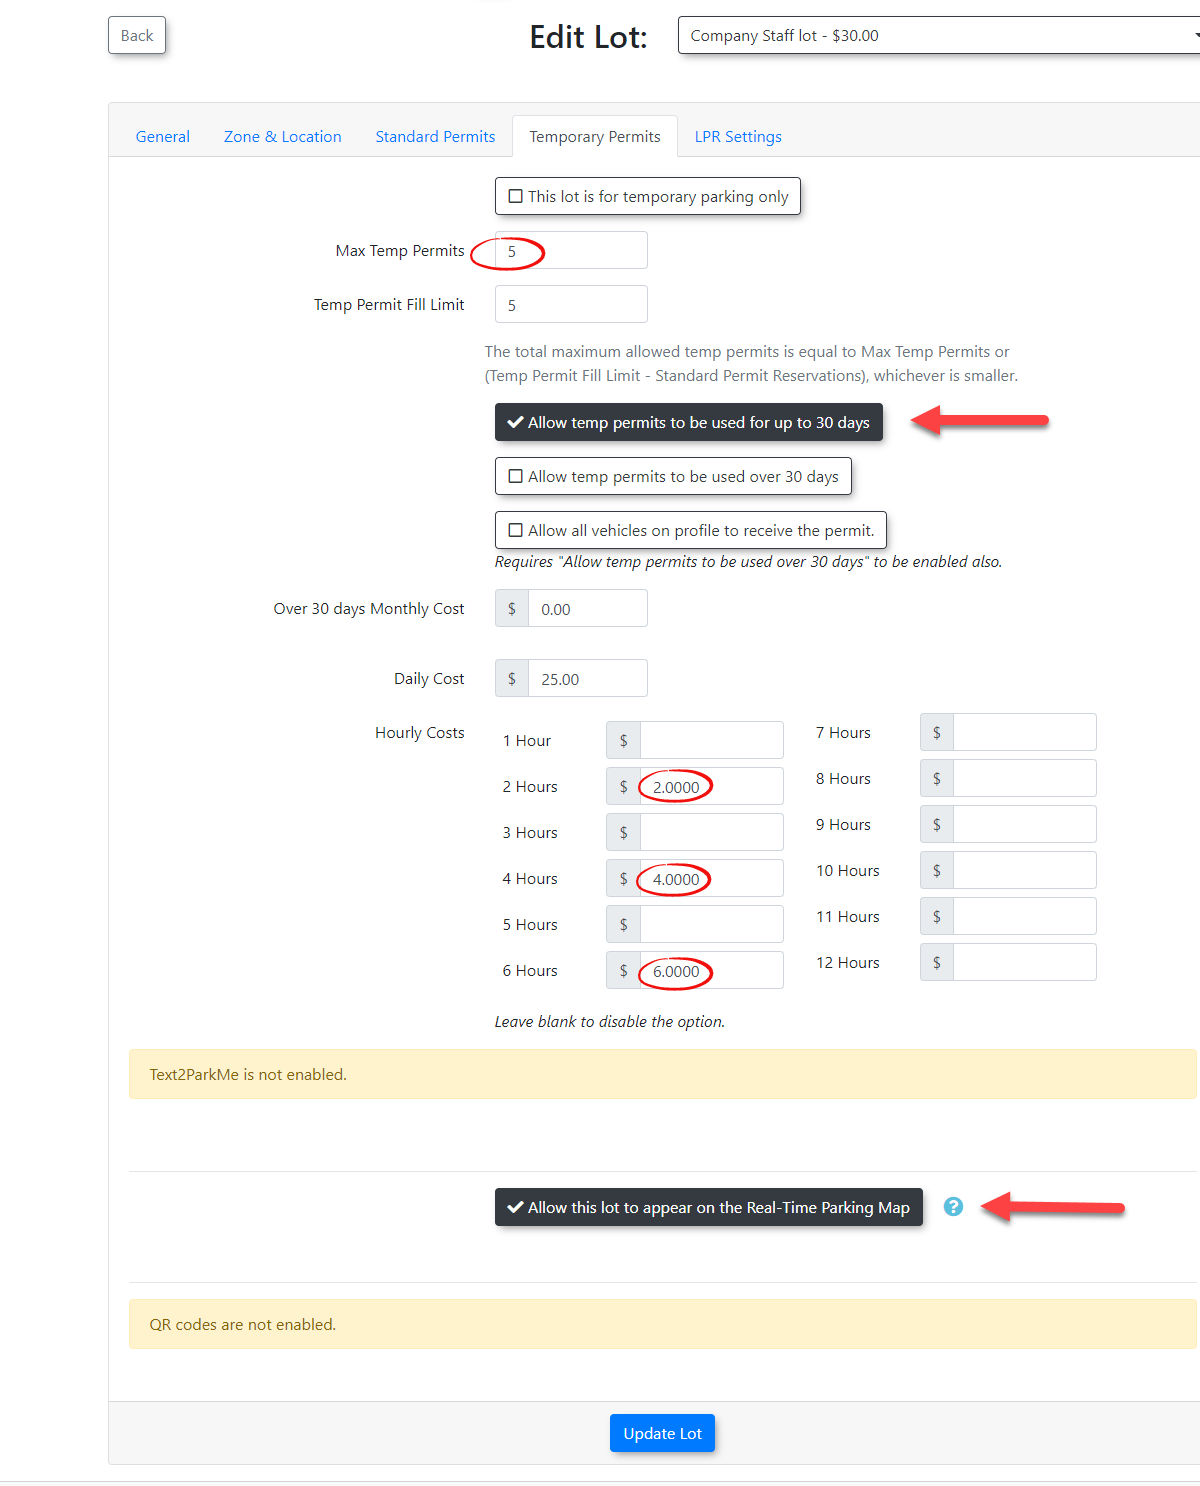
In the Temporary Permits tab it is essential to select the following:
- The Maximum number of Temp Permits
- You must select either of the 30 day settings which are: Allow temp permits to be used up to 30 days or Allow temp permits to be used over 30 days.
-
If selecting the Over 30 Days setting, you must indicate a monthly cost in the Over 30 days Monthly Cost field (otherwise, nothing is required in this field)
-
You must enter a Daily Cost
-
You must enter Hourly costs. These can vary as required.
-
You must also select the Allow this lot to appear on the Real-Time Parking Map checkbox.
Viewing the Real-Time Map from a Publicly Accessible Link
Once this information is configured you will be able to display the Real-Time Map by going to https://yourdomain.parkadmin.com/real-time.
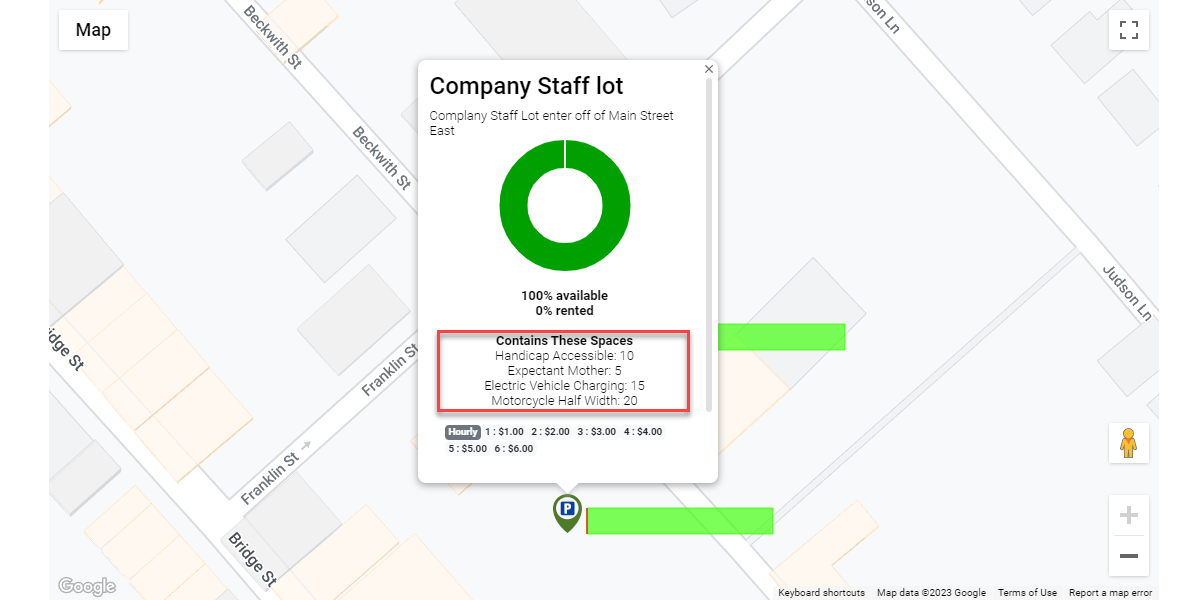
Hovering over the map marker will display the Lot Name and the Location Description you configured above.
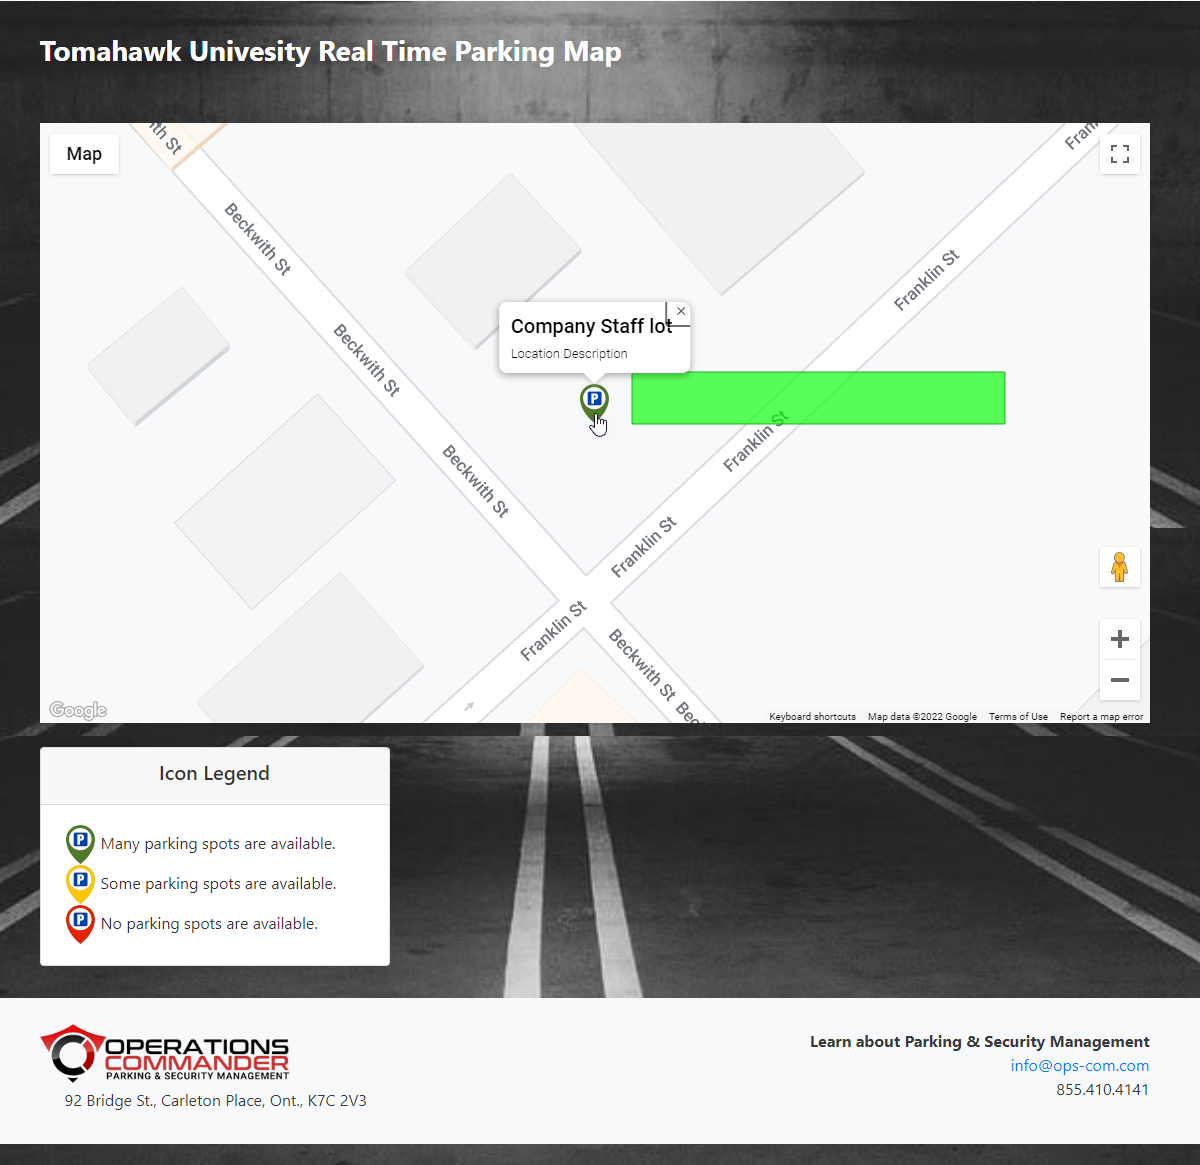
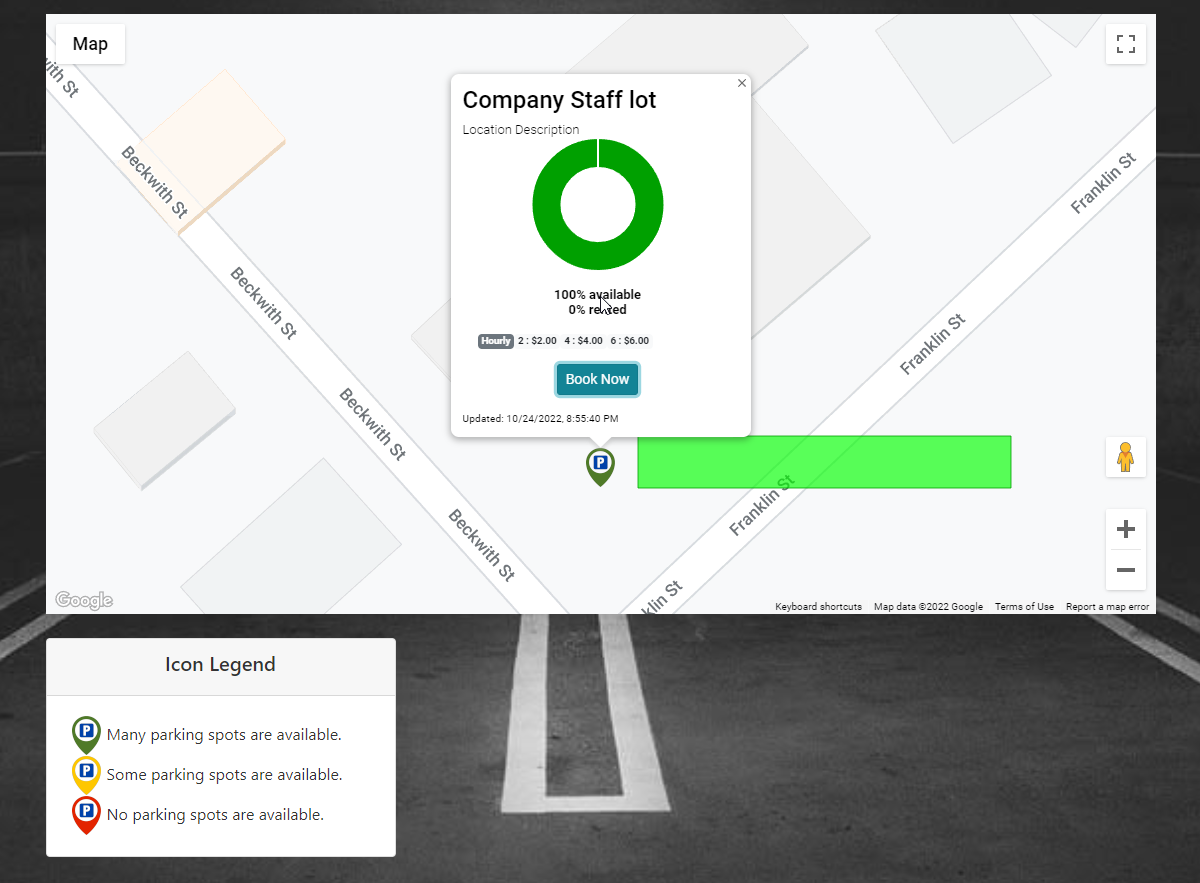
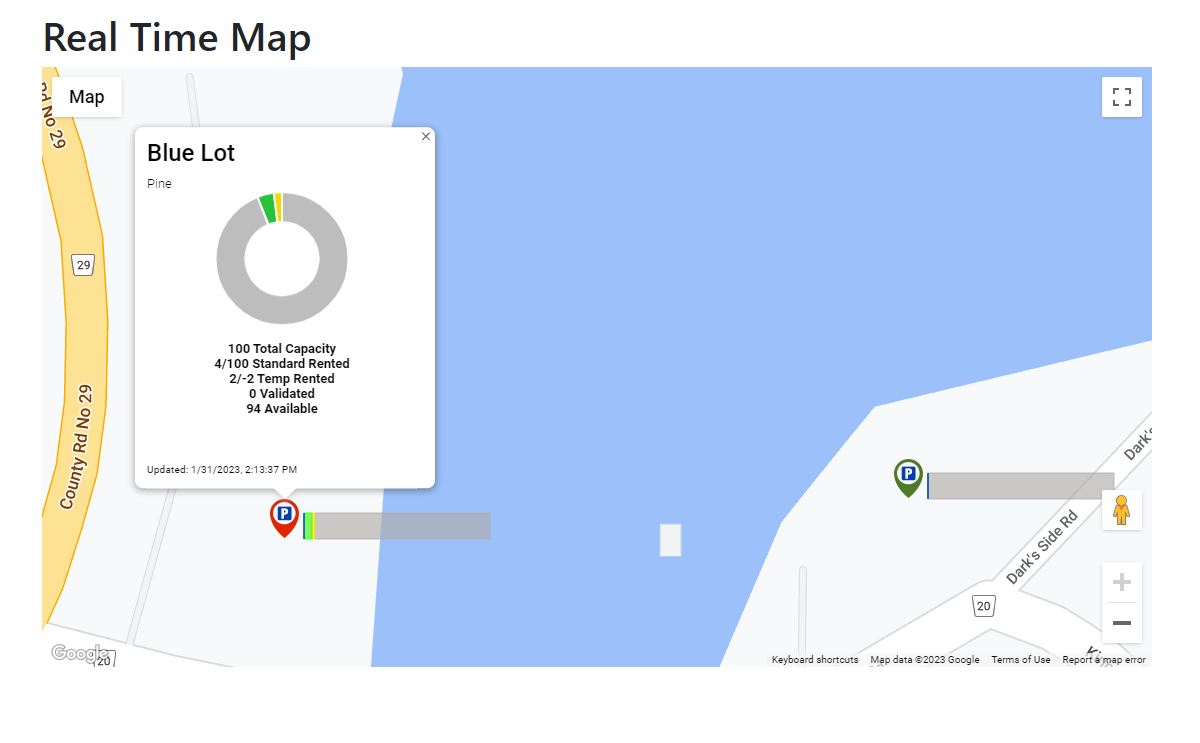
Clicking on the map marker will bring you to an interface that shows more information about the lot availability and present a button whereby you can purchase a permit.
Click on Book Now to continue.
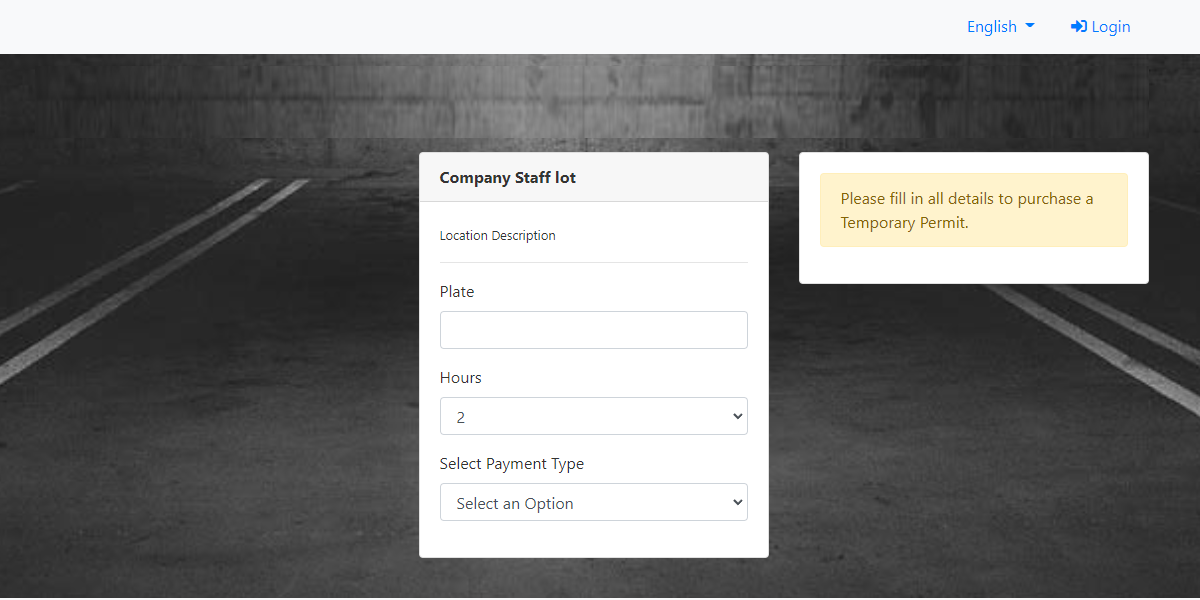
Purchasing a Permit
This will bring you to the Permit Purchase screen where you can enter your vehicle plate number and select the length of time you wish to park.
Viewing the Real-Time Map from an Admin Portal Menu
Admins can also view the Real-time map from within the Admin Portal. To do so, go to the Parking Management menu and click on Real-Time Map.
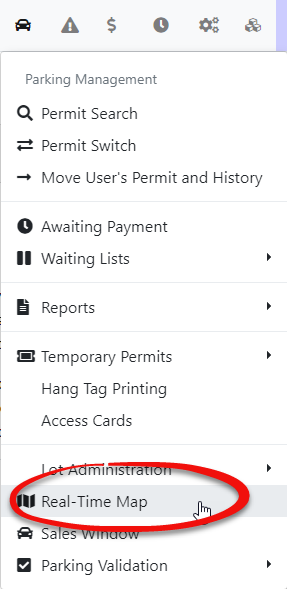
The map will present itself in a similar fashion to the public view.
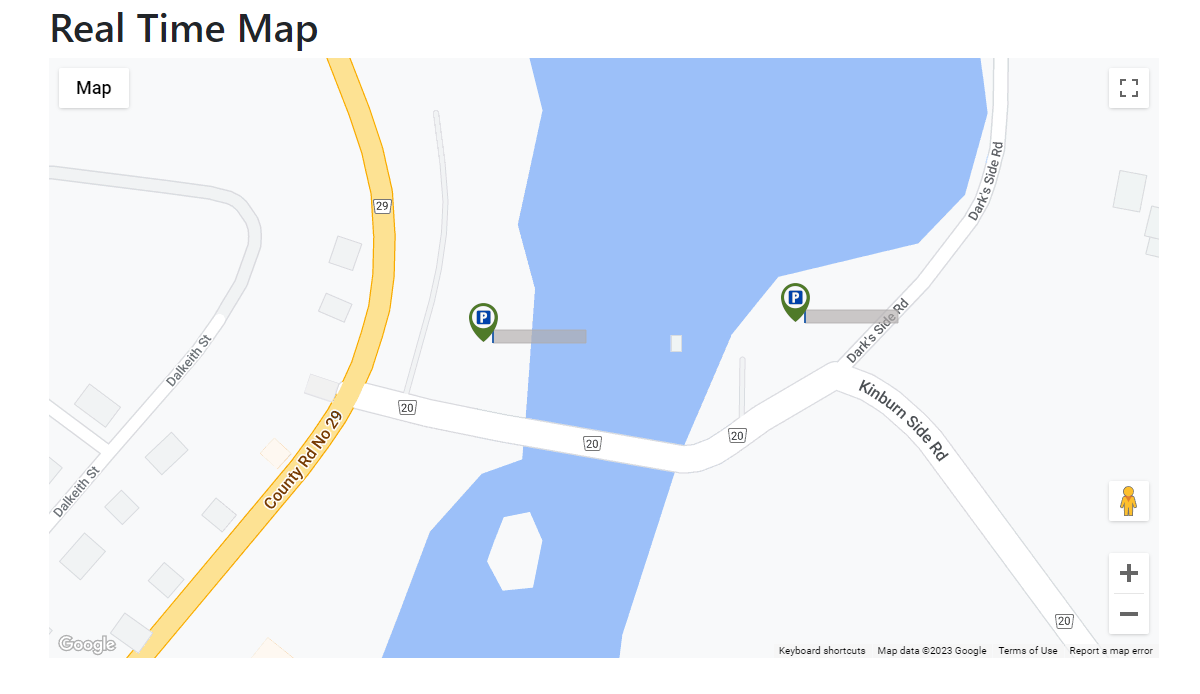
Admins can click on the map markers to see stats on the lot.
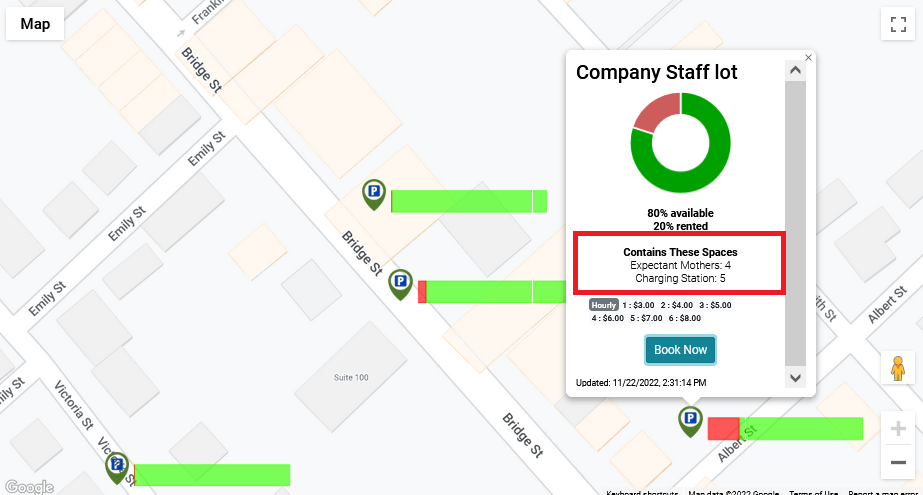
Special Spots
Admins can indicate special spots in each lot. This information is displayed in the Real-Time Parking Map in the lot detail. As indicated this is informational only.
This information may contain such details as the number of spaces designated for special purposes. ie: Electric Vehicle Charging, Expectant Mothers, Handicapped Accessible, etc.
To configure the special spots go to the parking management menu and hover over Lot Administration. Select Manage Special Space Types.
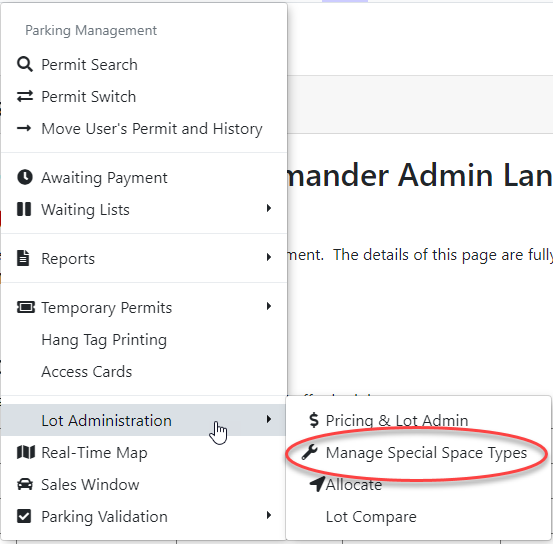
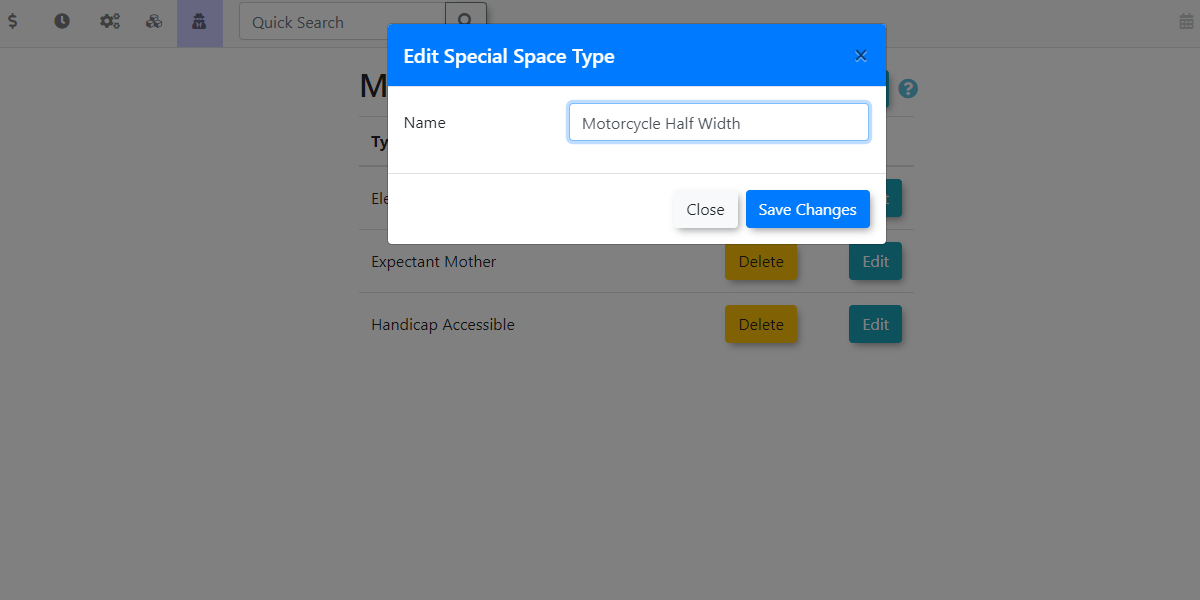
The page will refresh with the list of special space types. Click on Add New to add a Special Space Type.
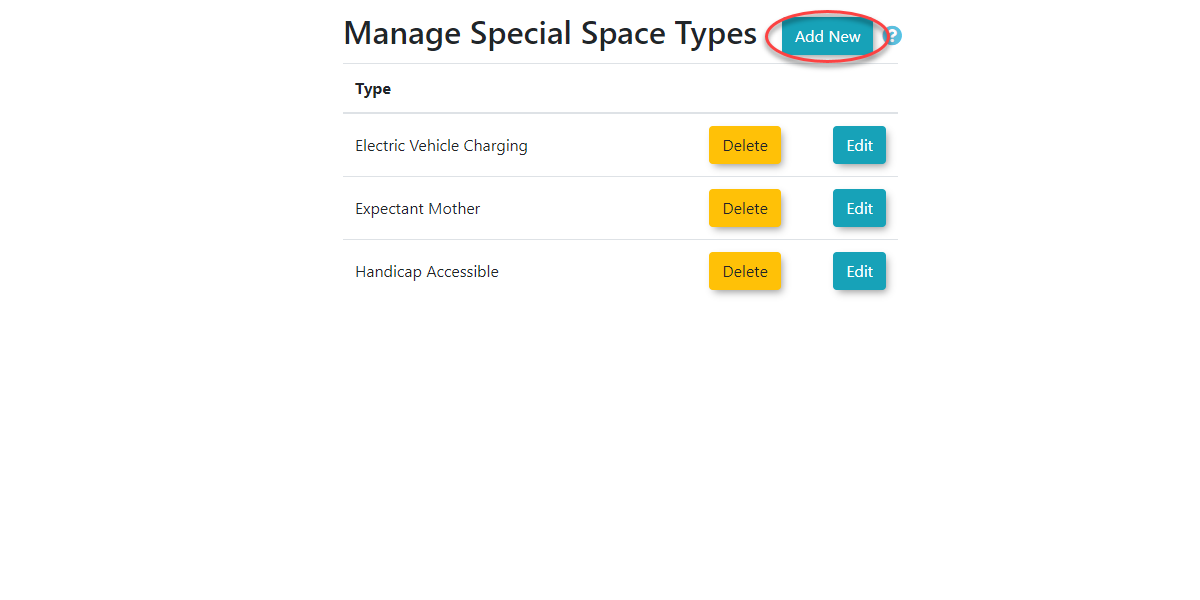
Enter the description of the Special Space type.
To add this information to a lot, go to Lot Admin for the specific lot you wish to add information to and select the General tab.
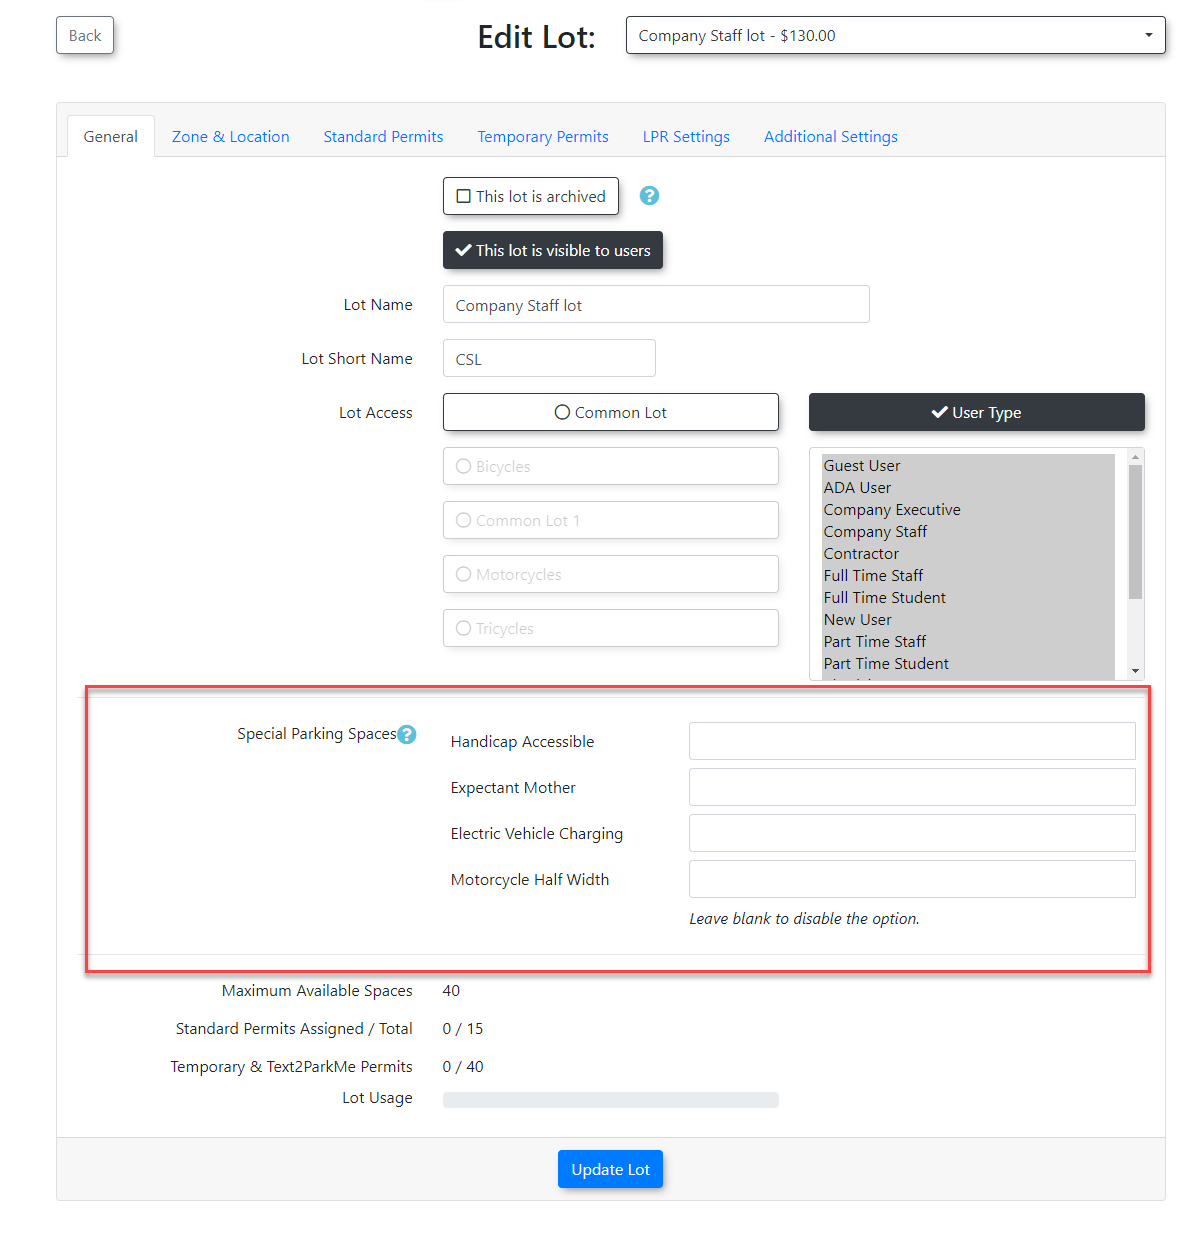
Enter the number of spaces available for each Special Space type.
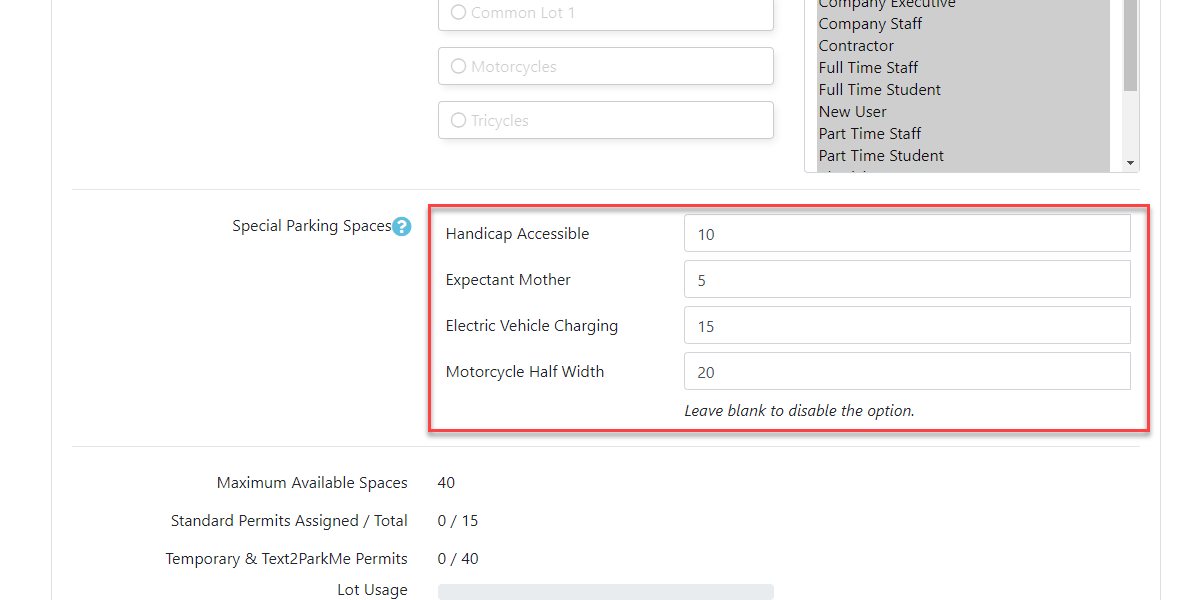
This information will show on the public facing Real-Time Parking Map.