Setup Installation and Maintenance
- First Time Installation - Android
- Manual Update or Installation
- Reinstalling OPS-COM for Android
- Uninstalling the Application
- Install Bluetooth Printer
- Changing Bluetooth Mode
- Choosing and Configuring Printers
- SM-T300 Printer
- Zebra Printer
- Retrieve Local Tablet Backups
- Connecting as USB Hard Drive
- Google Account
- Using OPS-COM For Android in DEMO Mode
First Time Installation - Android
Google Play Store Access
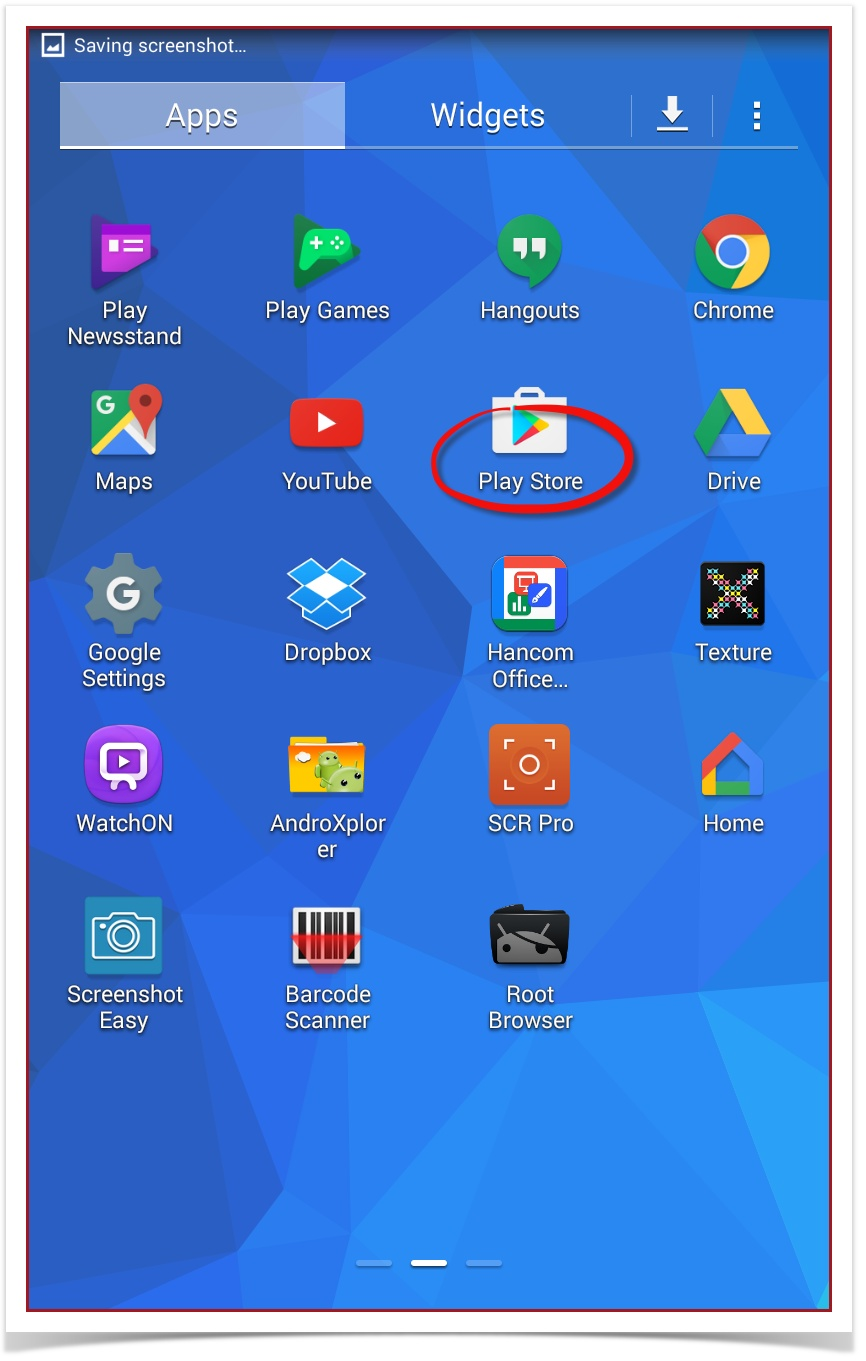
On the device Apps screen, locate the Google Play Store app.

Tap to open the app and search for OperationsCommander or OPS-COM.
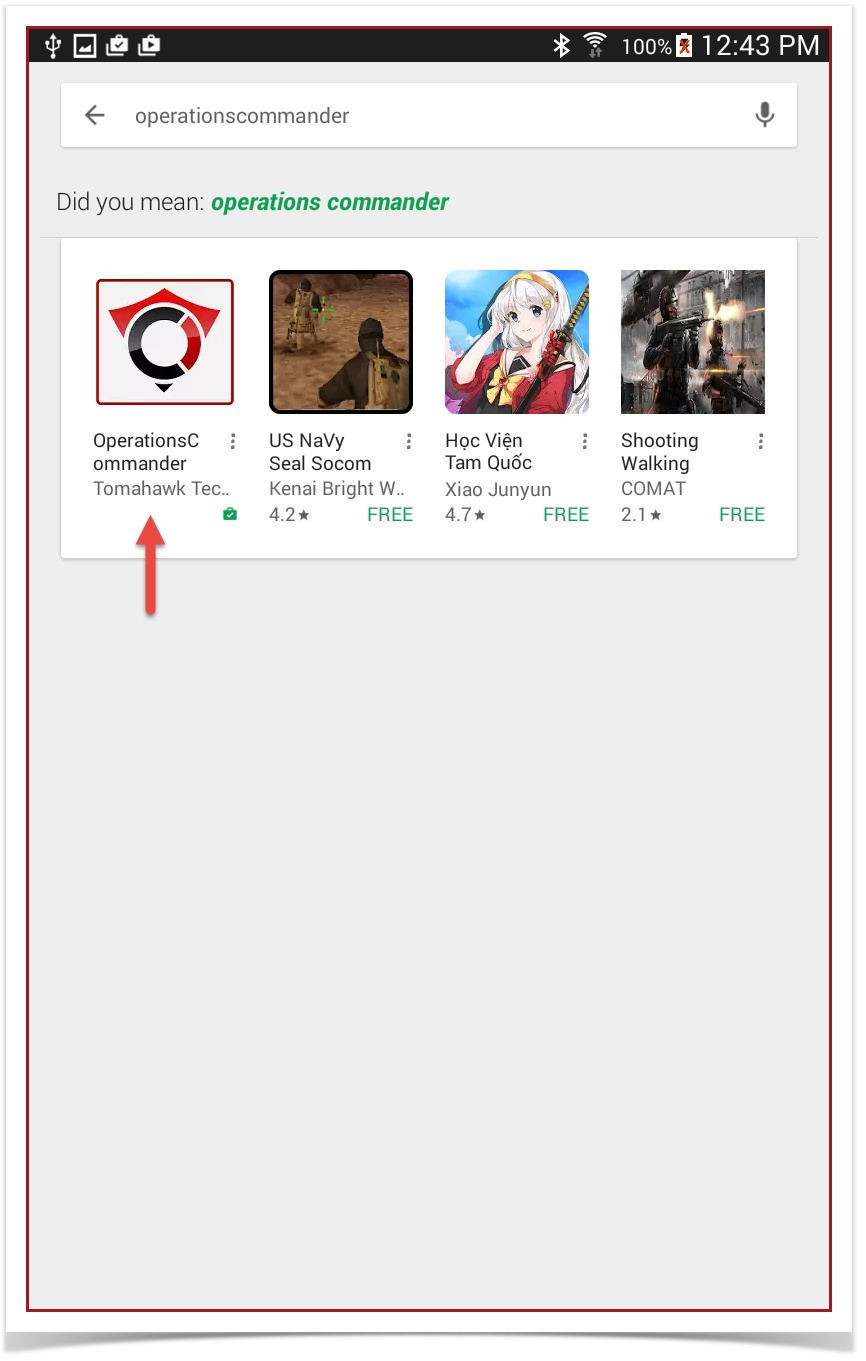
Tap the icon to begin the install process.
Install the OPS-COM Application
The following window opens, tap the Install button.

This settings window will pop up to allow access to integrated apps on the handheld device.
Tap Accept.

Once the app has installed the screen will refresh with the following:
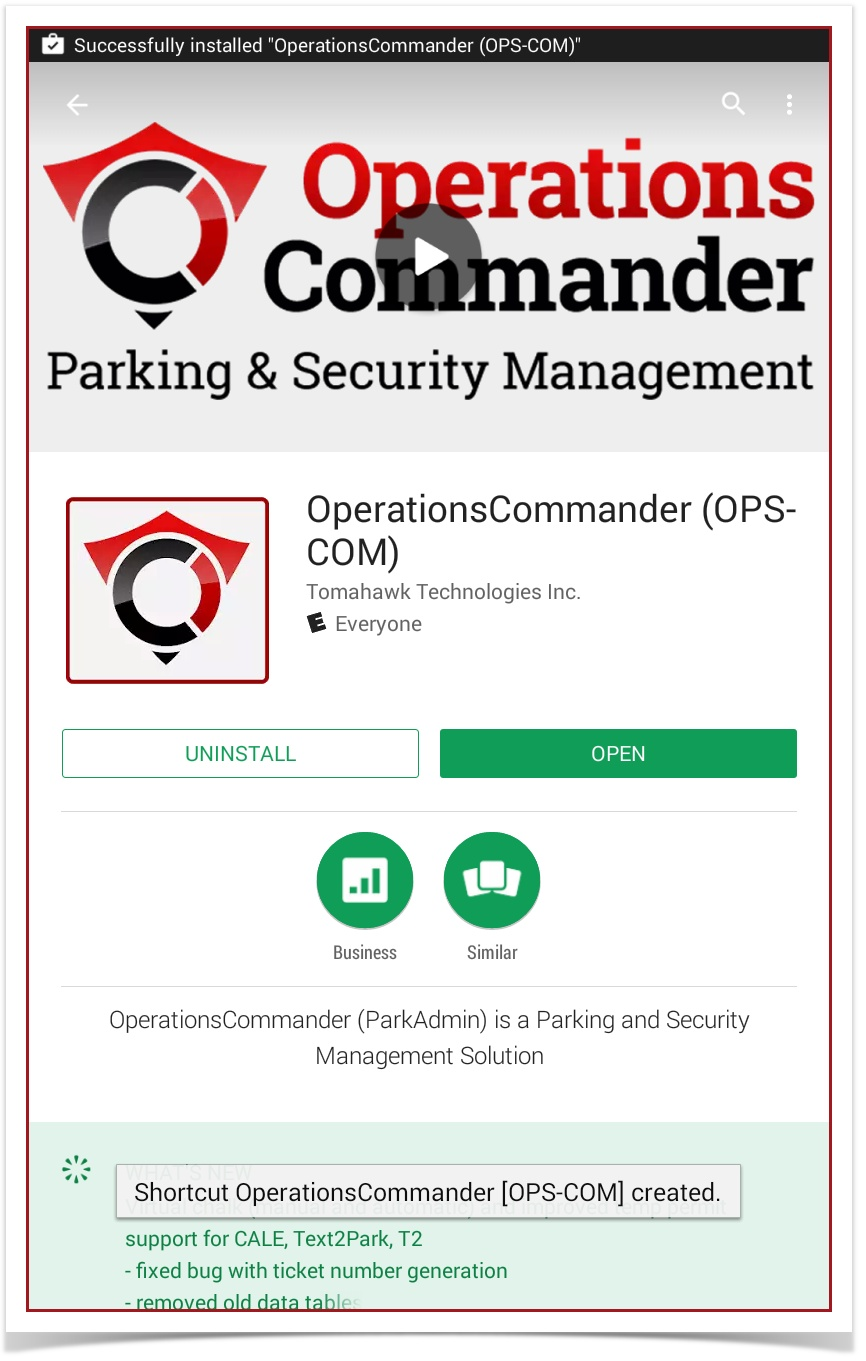
Launch the Application
To launch the application, use the Open button, or go to the device's main screen and start the app from the shortcut.
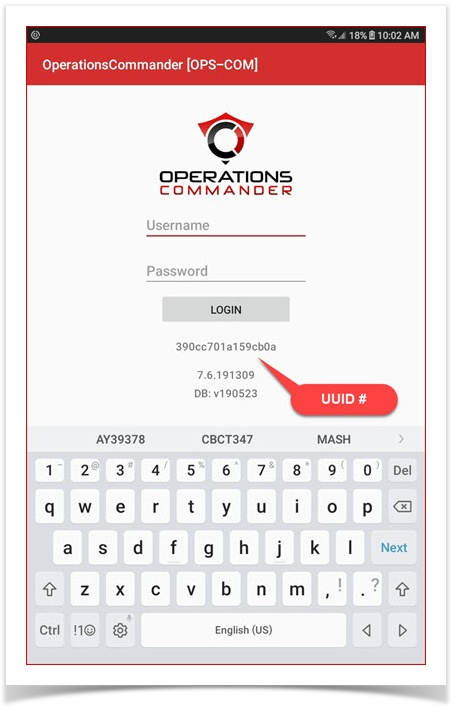
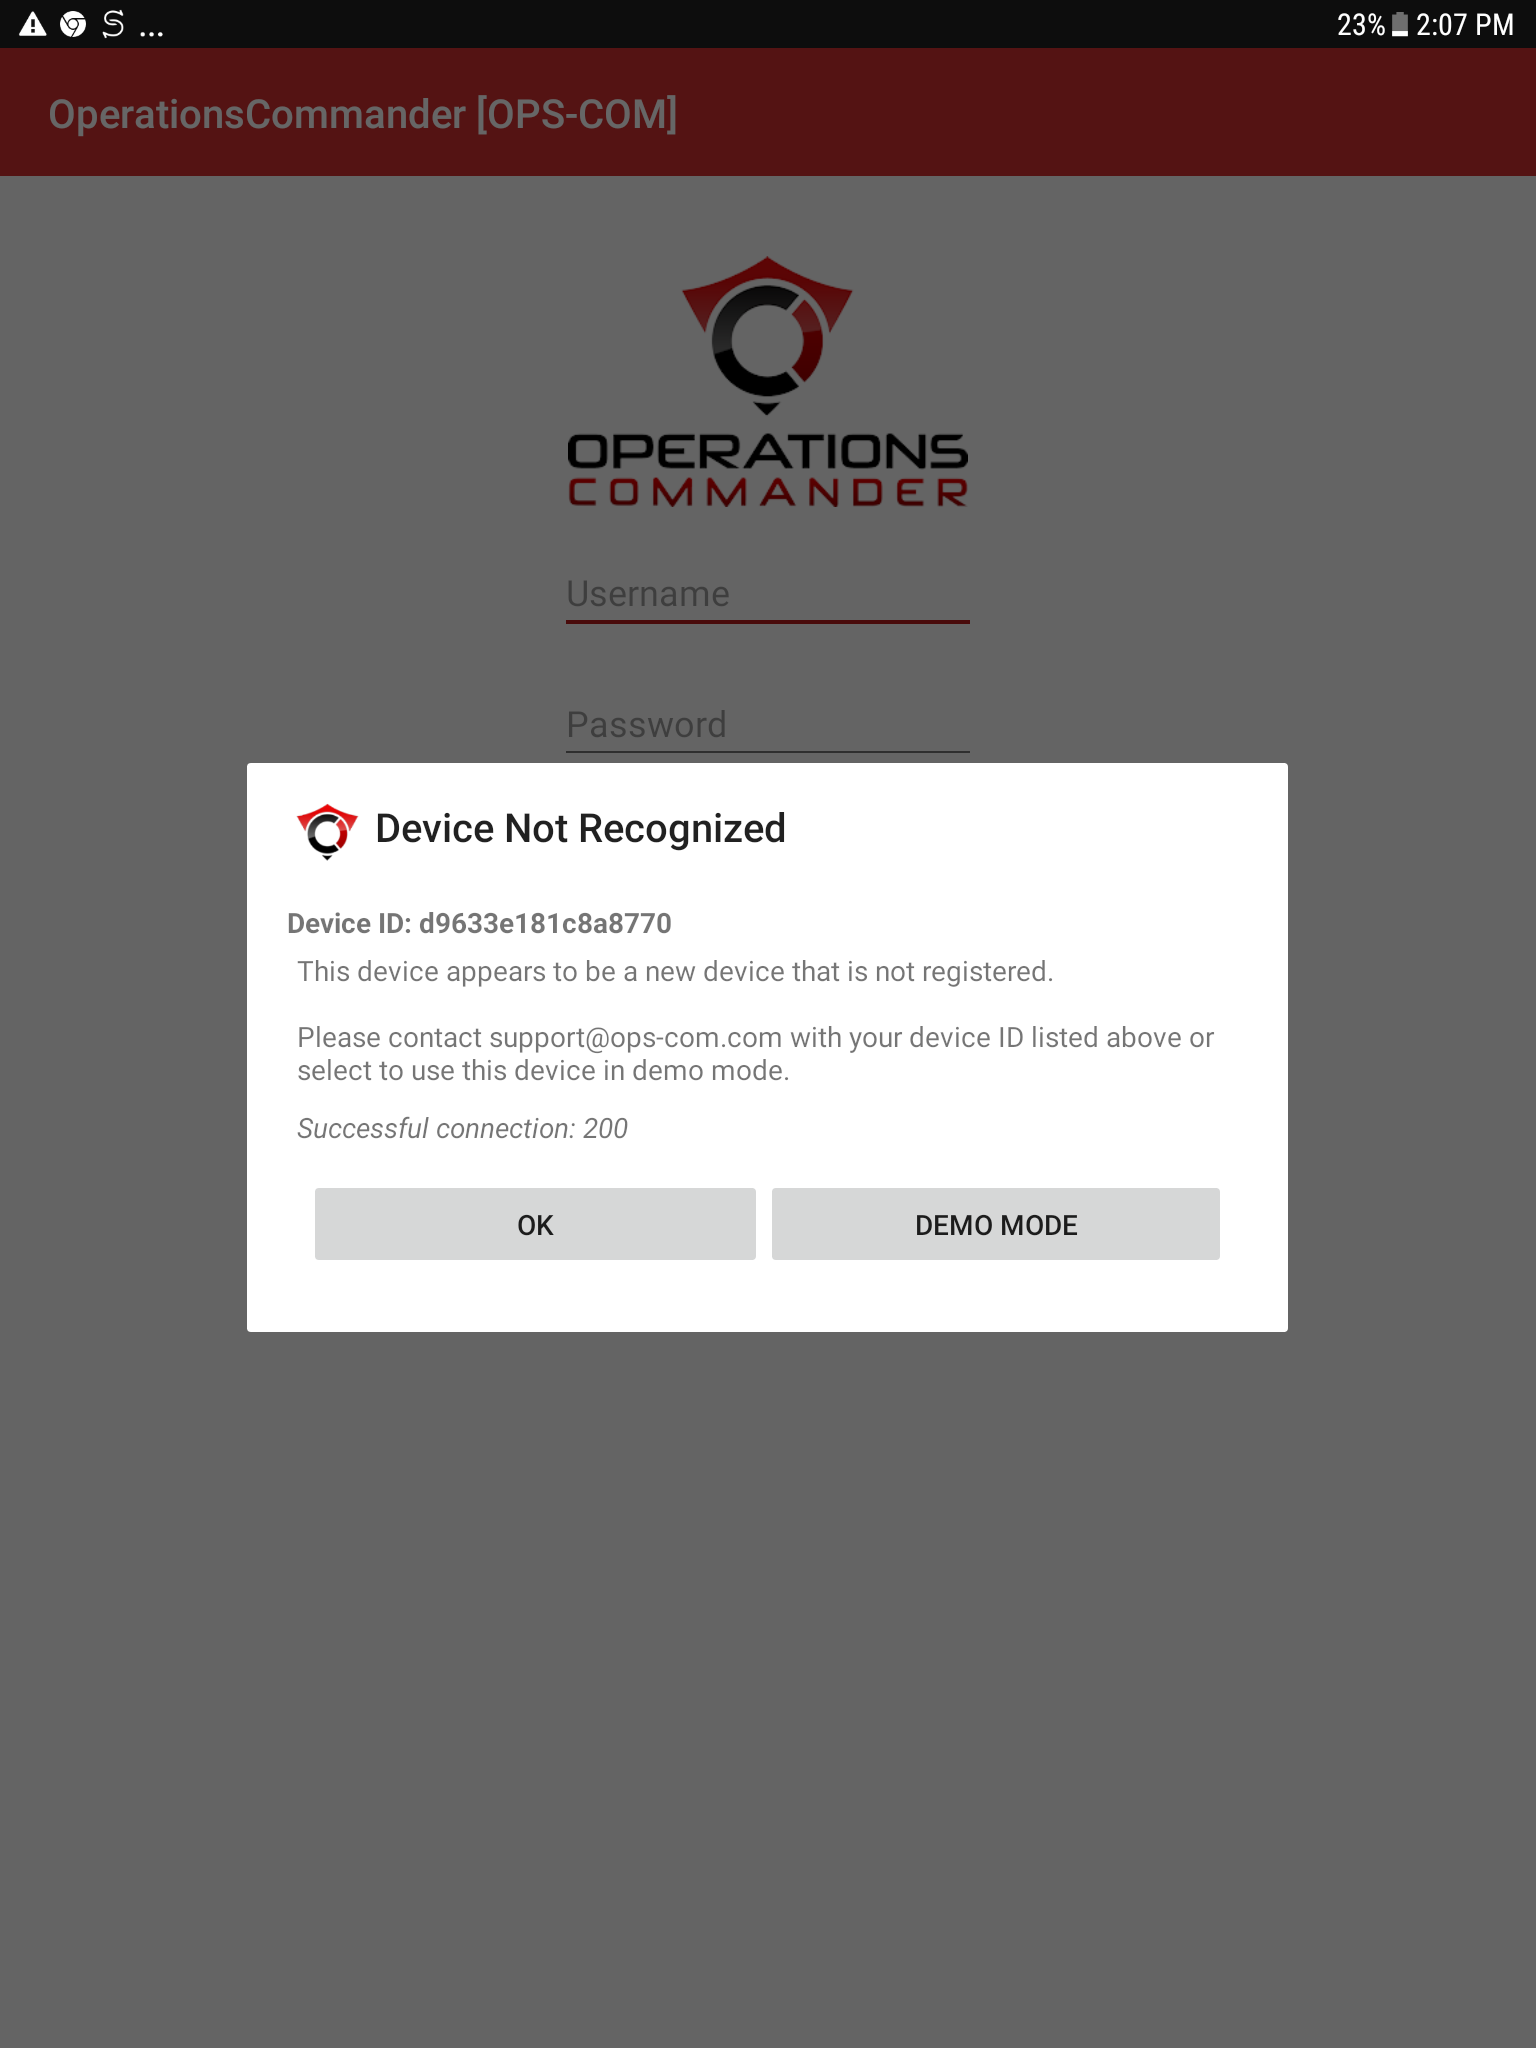
Application UUID
On first launch of the application a message will pop up saying the device is not registered; The message will include a UUID number.
Permission to Use the Software
To use this software, your user profile must have the "Add New Violation" permission under Violations Permissions.
If your account login does not work, please contact the OPS-COM high-level administrator for your organization.
Your application admin will ensure your user account has been given the appropriate permissions to use the handheld devices.
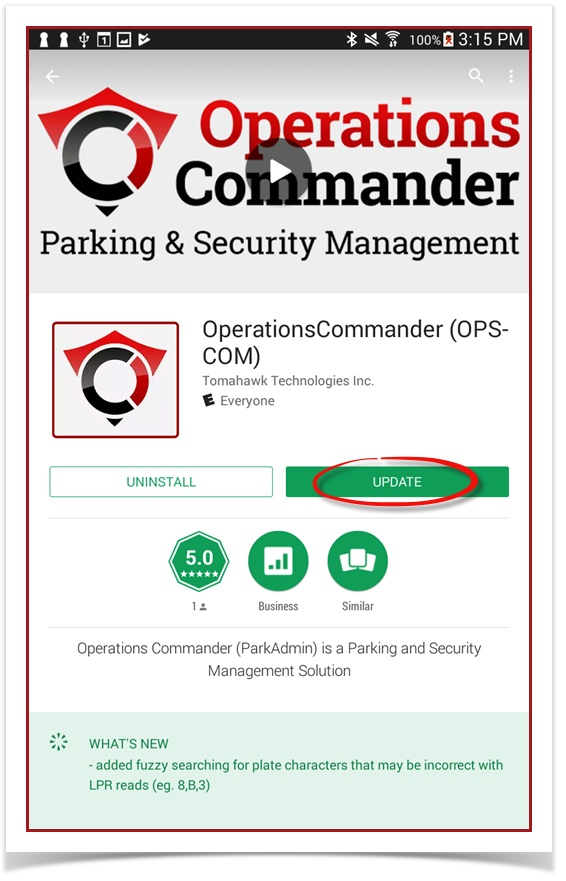
Manual Update or Installation
Open Google Play
On the device Apps screen, locate the Google Play Store app.
Search for OperationsCommander for Android
Tap to open the app and search for OperationsCommander or OPS-COM.
Tap the icon to start the install / update process.

Options Install and Update
- shortcut will be created
- database will be created
- database will not be created and existing data should not be disrupted
Application and Device Permissions
At the install/update stage, permissions relate to the access granted by the operating system to the application.
This settings window will pop up to allow access to integrated apps on the handheld device.
Tap Accept
In newer tablets, permissions will be displayed during initial startup of the application.
It is important to grant access for the software to work correctly.

Open or Start the Application
To launch the application, use the Open button, or go to the device's main screen and start the app from the shortcut.

Note: To use this software, your user profile must have the OPS-COM "Wireless handheld" permission.
If your account login does not work, please contact the OPS-COM high-level administrator for your organization.
This is accessed through, System Config > Manage Roles
Select one the Administrator Roles you wish to add this ability to. Logically it would be something like Patrol Officer.
Click on Permissions beside the specific role you wish to edit.
Go into the Violations tab.
Select Display as Ticket Writer.
Reinstalling OPS-COM for Android
Step one - Uninstalling
To uninstall the OperationsCommander app for Android follow these steps.
From the main applications select Settings
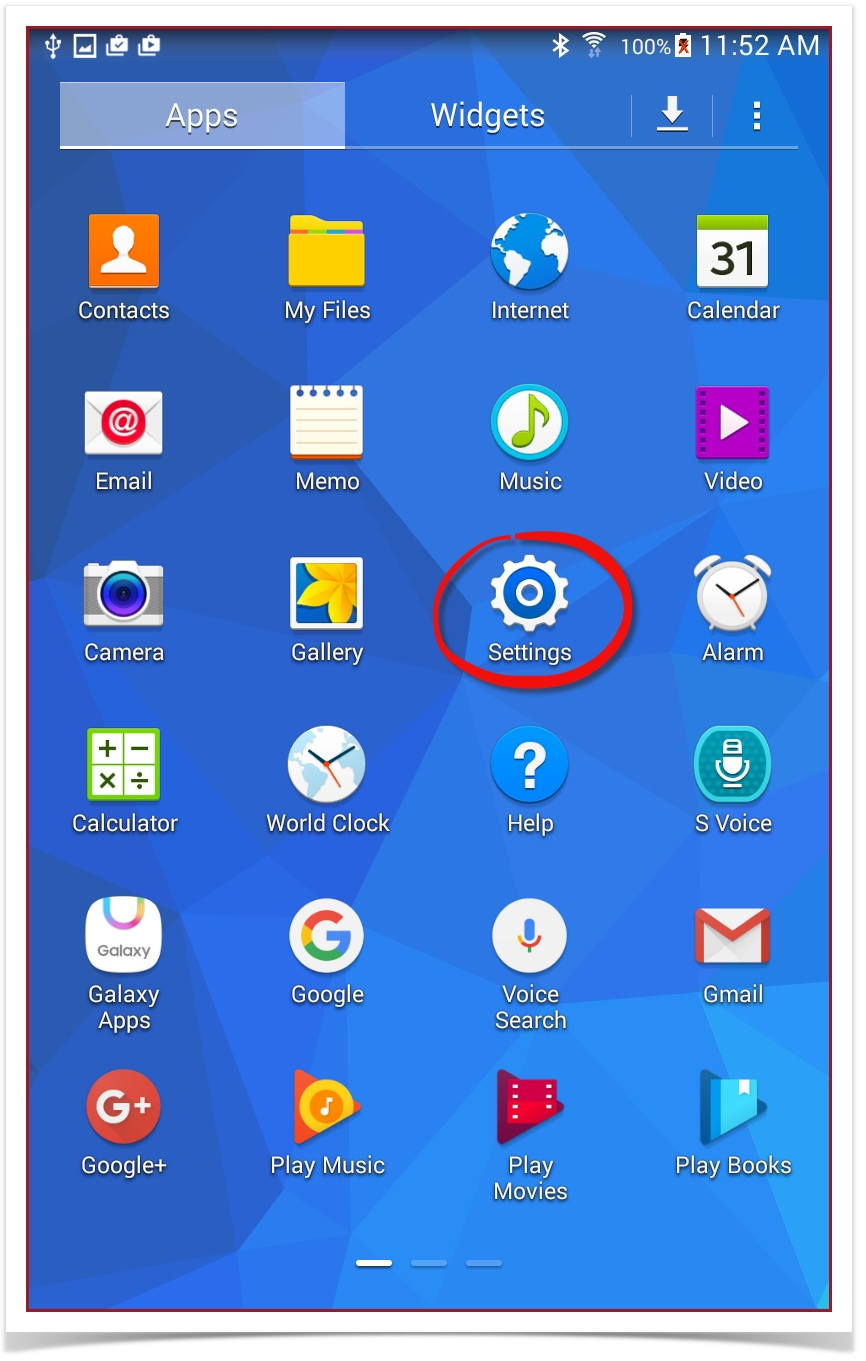
Once in settings:
Select the General Tab.
Under Device Manager on the Left of the screen Tap Applications to bring up a list of Apps on the right.
Locate the OperationsCommander application in the list.
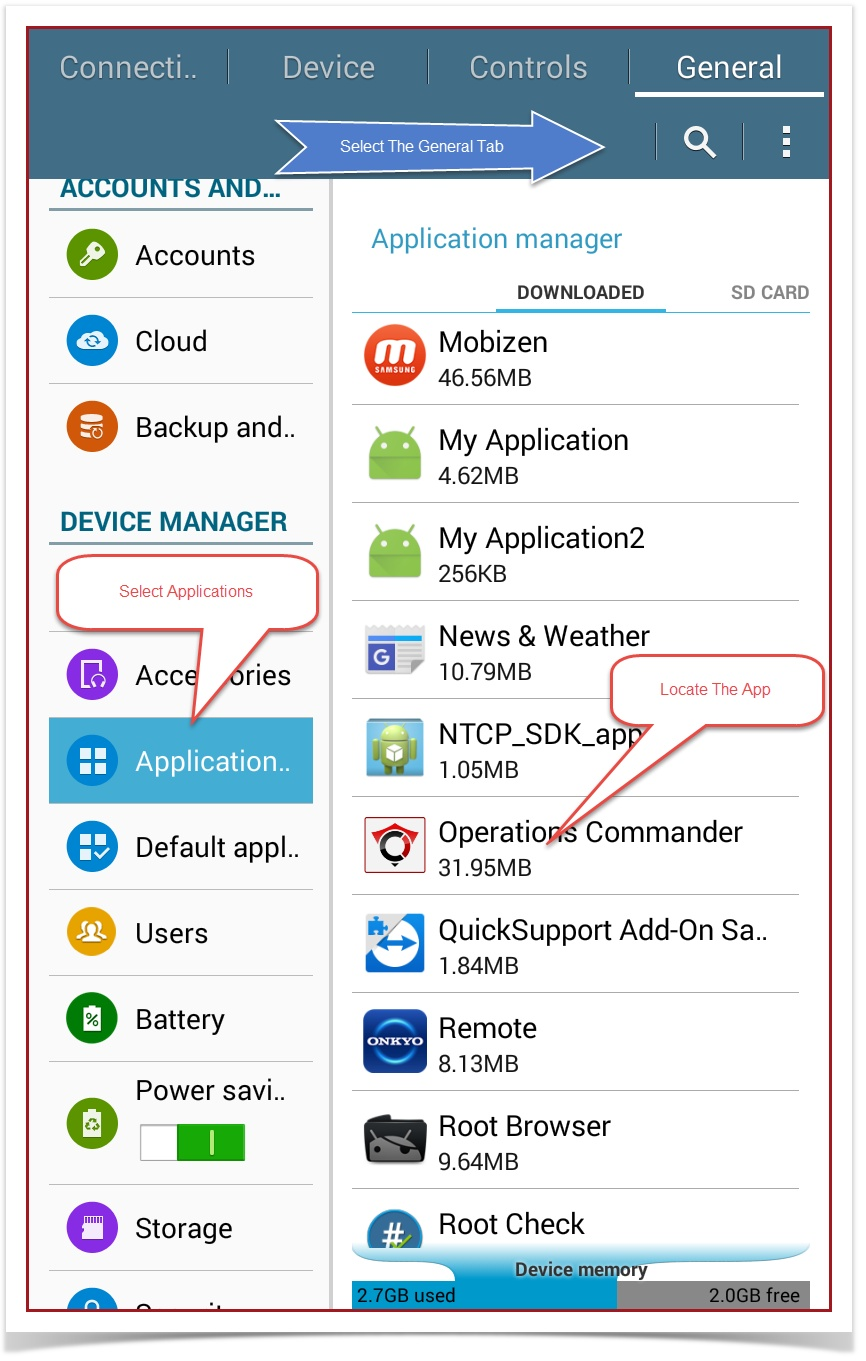
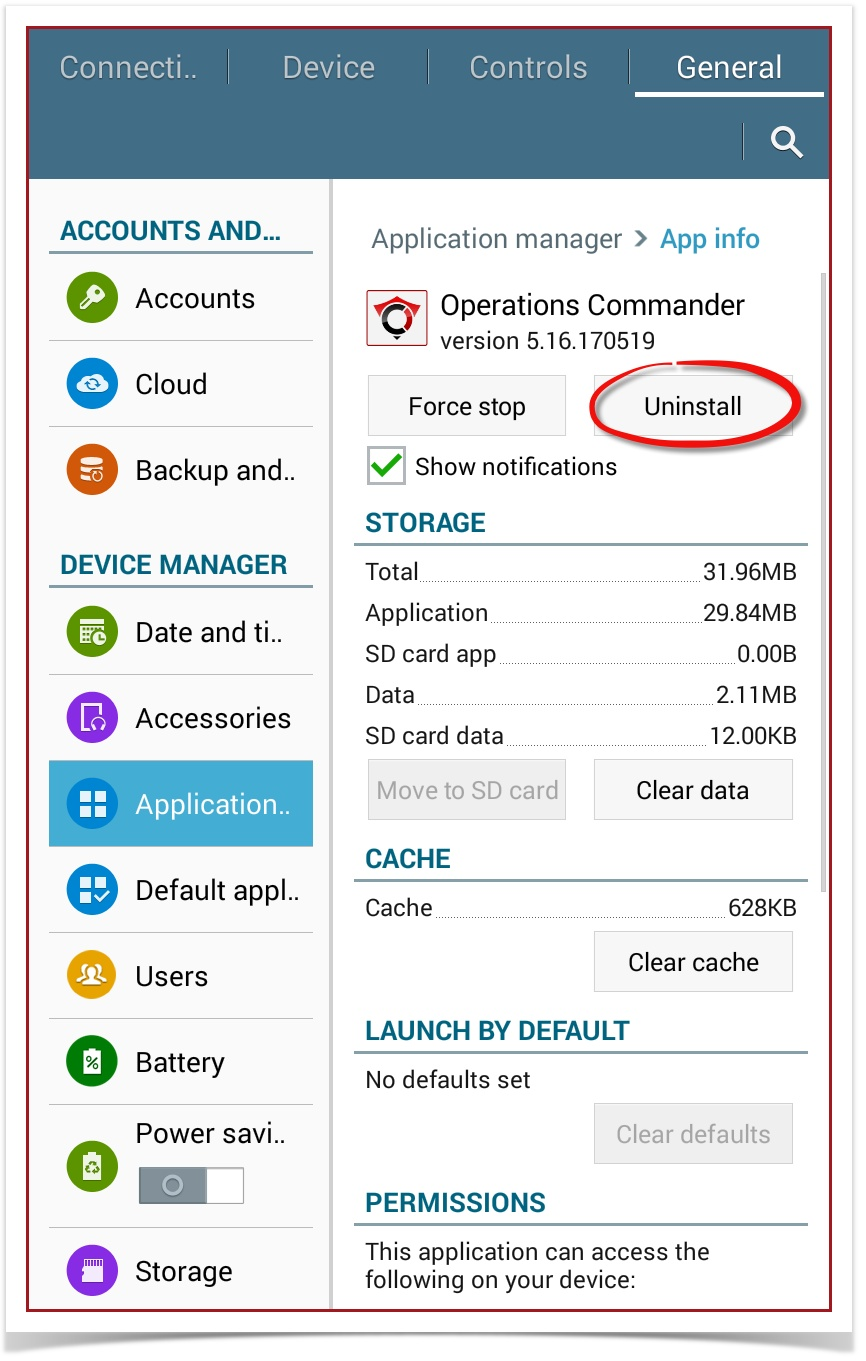
Tap the application to bring up the following screen:
Tap Uninstall to remove the application from the unit.
Step two - Reinstalling
Uninstalling the Application
Application Uninstall
To uninstall the OperationsCommander app for Android follow these steps.
- From the main applications select Settings

2. Once in settings:
3. Select the General Tab.
4. Under Device Manager on the Left of the screen Tap Applications to bring up a list of Apps on the right.
5. Locate the OperationsCommander application in the list.

6. Tap the application to bring up the following screen:
7. Tap Uninstall to remove the application from the unit.

Full Clean Install with Data Purge
In some rare cases, you may be asked by OPS-COM support to do a full clean install that requires removing not only the OPS-COM app, but all it's associated files as well.
To do so, you will need to first uninstall the software as described in steps 1 to 7 above.
Warning
It bears repeating that if you are uninstalling the software to then reinstall it, do not uninstall the software if ViolationTransfer and/or VehicleTransfer tables contain data (view under Replication Status). These tables must be replicated to the server first to avoid data integrity issues.
There are two methods to remove these files for the android handheld device. It can be done directly from the handheld unit or by connecting the device to your PC.
The following instruction describes both processes.
Delete files with Handheld Tools
- Tap on the App Tray at the bottom right of the home screen display.

- Locate and tap on the icon labeled My Files.

- The screen will refresh with a listing of file folder on the device. Locate and Long Press the folder labeled OPS-COM.

- A pop up window will appear giving you three options. Tap Delete to remove the folder.

- A confirmation screen will appear. Tap on OK to confirm. This will remove the OPS-COM folder and all it's contents.

Delete File using PC Connected via USB Cable
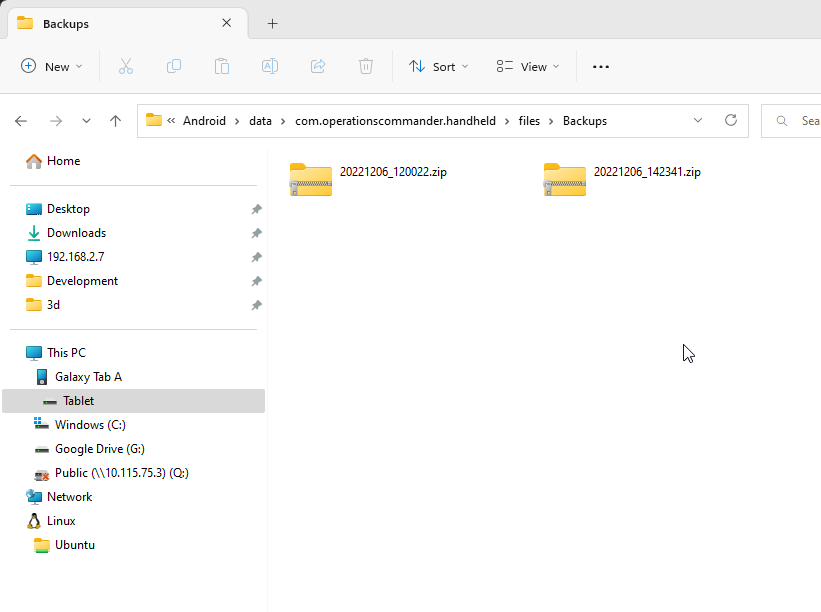
- Go into Windows Explorer and locate the device under This PC. In this example the device is called Tomahawku-Galaxy Tab S.
Click on Tablet to see the file content of the device.
- Locate the folder entitled OPS-COM.
Right mouse click to bring up the drop down menu.
- From the list click on delete to remove the OPS-COM folder and all it's contents.

You are now able to reinstall the software with no possibility of artifacts from older installs affecting the new install.
Install Bluetooth Printer
Connect the Hardware
First step is to make sure that the device can see and talk to the printer. This has nothing to do with the OperationsCommander commander and can actually be setup before installing the software.
Once the operating system sees and connects to the printer OperationsCommander can use that printer.
Initial Setup
- ensure the printer is setup and able to connect to the tablet
- if the printer is Star Micronics please review our supporting documentation
Changing Bluetooth Mode
- if the printer is Star Micronics please review our supporting documentation
- ensure that the tablet has bluetooth enabled
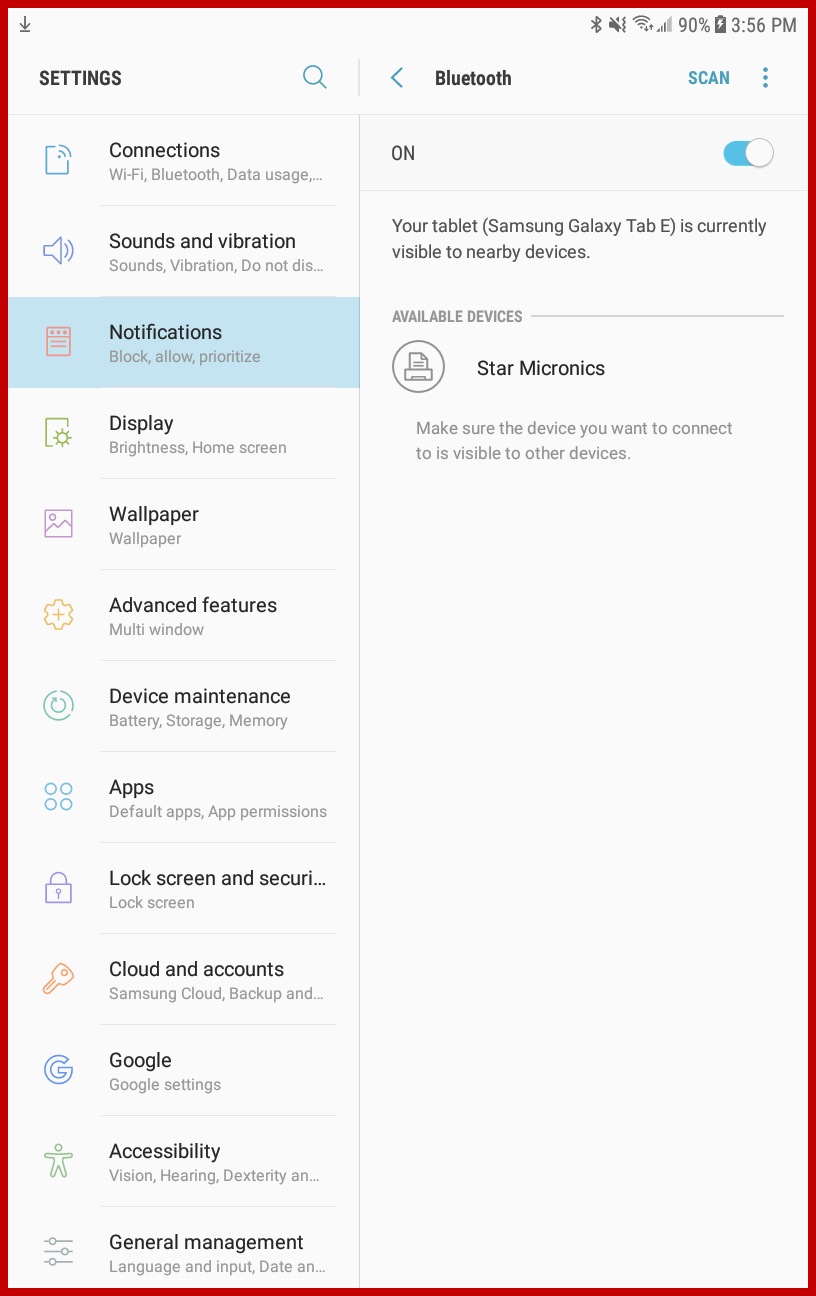
Enable Bluetooth on the Tablet
Make sure Bluetooth is enabled on your device. Tap on Bluetooth to get more options.
Select the option to Search for Devices.
Your printer should appear in the listing.
Pair the Printer
Tap on the printer to pair/link your printer and tablet together.Type in the printer PIN if your printer requires one.
Changing Bluetooth Mode
Android Bluetooth Mode
Some Star Micronics printers have a mode called Bluetooth (iAP). This mode is intended for Apple/iOS devices only and won't work properly with Android devices.
Even if the device appears to be pairing with the printer in the bluetooth settings area.
To fix this you must go into the printers settings and change the Bluetooth Mode from Bluetooth (iAP) to Bluetooth Mode or Bluetooth.
Changing the Printers Bluetooth Mode
- To begin power on the printer by holding the Power Button down for 3 seconds until the printer beeps.
-
To enter the Printer Settings hold down both the Power Button and Feed Button simultaneously for roughly 5 seconds. You should see the printer enter settings mode (LED will flash). After 5 seconds have passed let go of the buttons. You have now entered the Printer Settings configuration area.
When in the Printer settings mode:
- Selecting the Power Button will change the setting you're currently looking at (Bluetooth iAP most likely).
- Selecting the Feed Button will skip to the next available setting that can be changed.
- When you first enter the Printer Settings you should be looking at the Bluetooth (iAP) mode which is shown on the LED indicator. Simply click the Power Button to change the current mode to either Bluetooth Mode or Bluetooth (whichever one doesn't have iAP).
- Once you have a Bluetooth mode selected hold down the Power Button and Feed Button simultaneously for another 5 seconds to exit and save your changes to the Printer Settings.
Your device will print a detailed list showing your new settings. - The correct Bluetooth mode should now be shown on the LED indicator screen (i.e. iAP shouldn't be selected).
Confirm Settings
Follow the instructions to pair your device to the OperationsCommander Android application.
- Install Bluetooth Printer
Once done, perform a test to ensure you can print from your Android device.
Choosing and Configuring Printers
Selecting a Bluetooth Printer
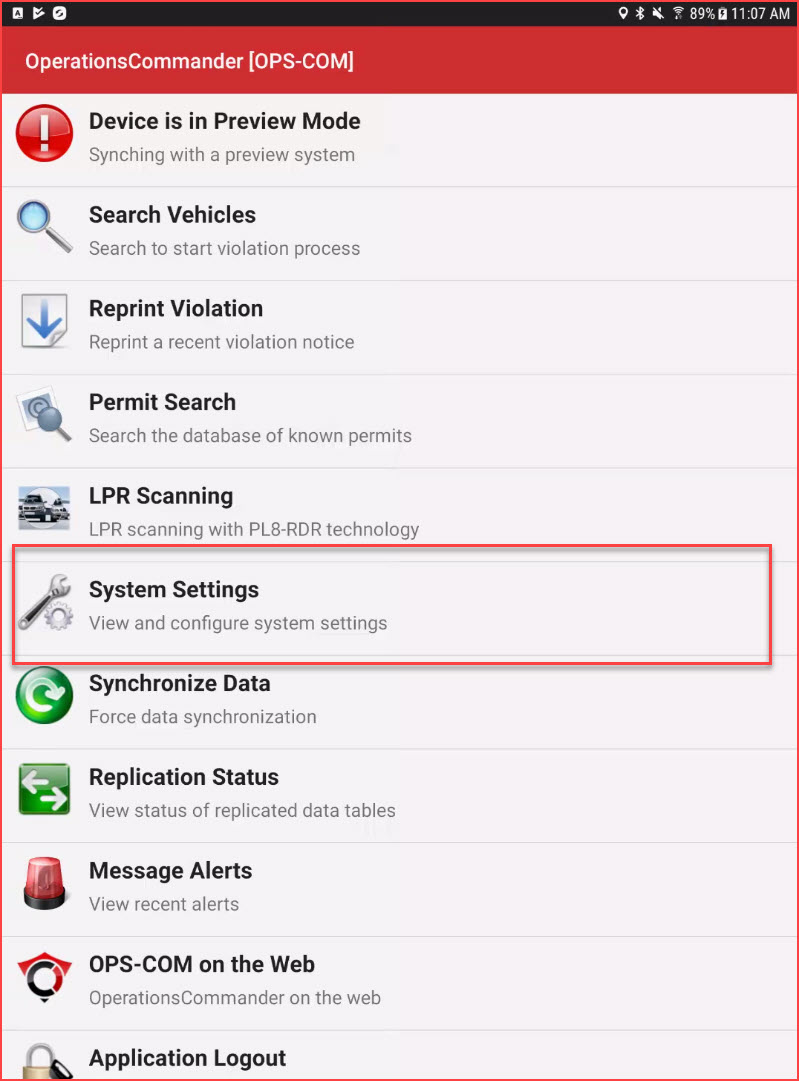
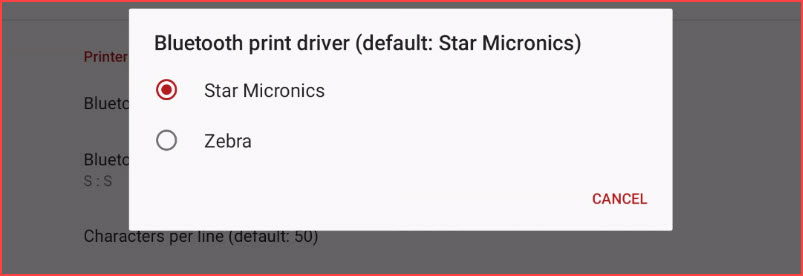
Access System Settings
Once in System Settings look for the following two items:
- Bluetooth print driver
- Bluetooth Printer
Select the Printer
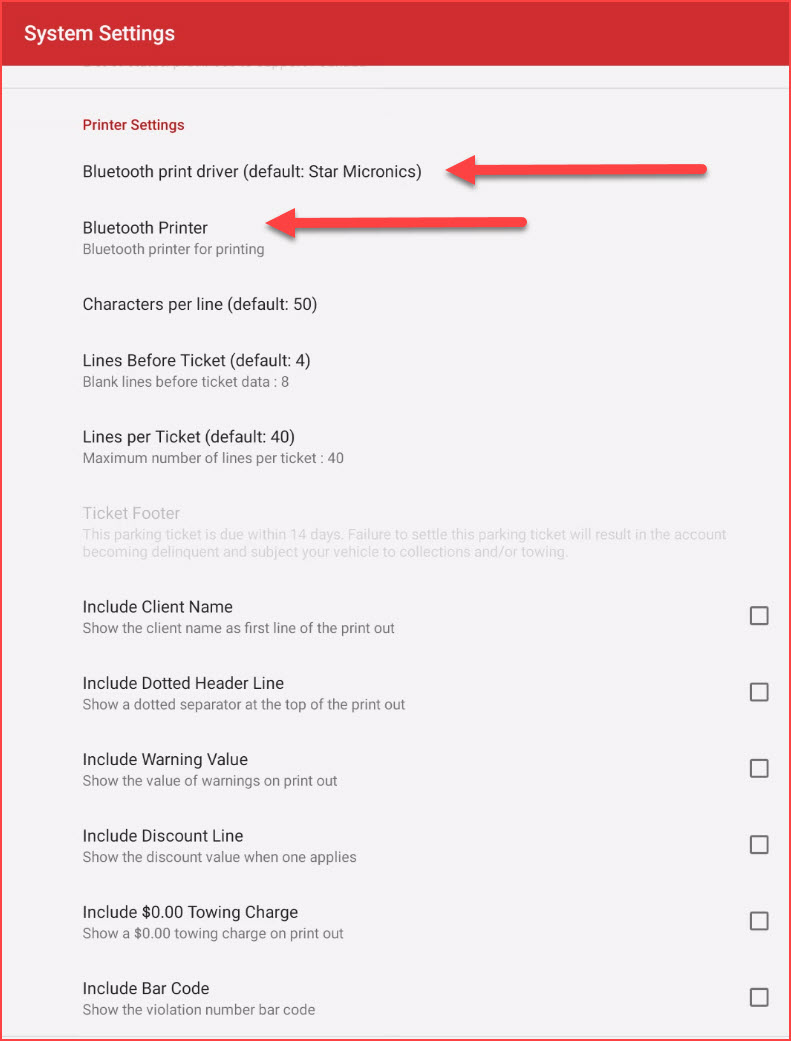
Tap on Bluetooth print driver to select the proper driver for the printer you are using.
By default the printer is set to Star Micronics. If you are using a Zebra printer, tap to select Zebra.
Selecting the driver will close the pop up and return to the main settings menu.
Click on Bluetooth Printer to select the printer you are using.
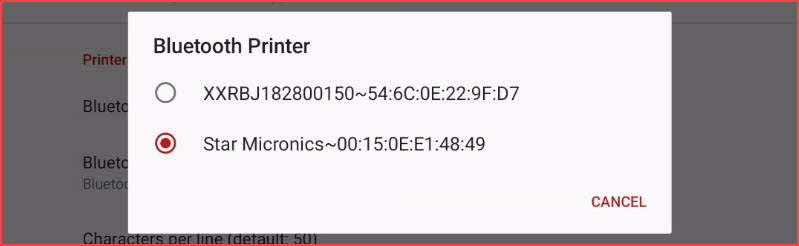
It is important that these two setting match as far as printer type.
If they do not match the printer will either not work or it will start to print odd code and characters.
Testing the Printer
It is always a good idea to issue a test violation to ensure that the printer is working as expected.
SM-T300 Printer
Reset mode on SM-T300
To change the settings on the printer, you need to hold down the feed and power button at the same time until it enters setup mode (about 6 seconds).
Once in setup mode, press the power button to go through the modes.
The three (possible) modes are: Bluetooth, UART, and Bluetooth (iAP).
Once you’re on the mode you want, (Bluetooth) press both buttons down again (about 6 seconds) to confirm the setting.
Setting the Power Down
You may need to ensure your time out (power down) is set properly. It can be set as no power down in use, or power down anywhere between 1 minute to 5 minutes.
To check your setting, turn the printer on, then press the power button first and then keep it down while you press and hold the feed button until you see the screen change to the Settings mode and will be backlit. (about 5 seconds)
You can then step through the settings using the feed button. Step through until you see PWDN X min off (where X will be the number of minutes to power down) you can change the setting by pressing the power button to step through the different times.
Once you have selected your desired wait time before power down press both the power button as well as the feed button. The printer will print out a short summary of your settings and go back into standby mode.
Supporting References
Star Micronics Settings (Android) Application
Zebra Printer
Pairing the Printer
Note: When using a Zebra Printer you must ensure the Android version on your tablet is at least Ver. 12
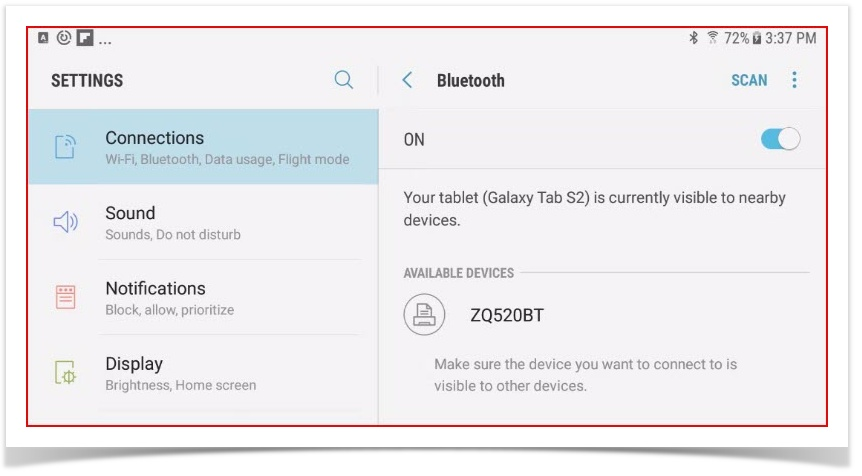
- Go into the device settings and select Connections, then Bluetooth. The printer you are attempting to pair with should be listed as available. In this case we see the ZQ520BT printer is available.

- Tap the printer name to begin pairing. A number will appear on the printer screen as well as on the Android device. A message instructing you to ensure the numbers match will also appear. Tap the check mark button on the printer and then tap the message on the Android device. You will see a message indicating the pairing was successful. If not simple repeat the process.

Setting up the Printer for Use
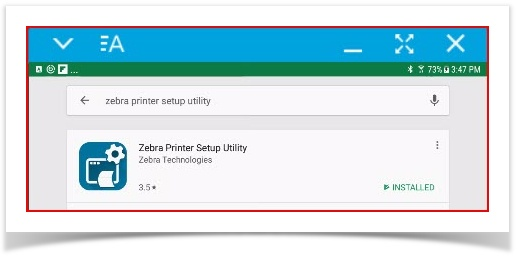
- You must install the Zebra Printer Setup Utility from the Google Play store. Note, you must be using Android 10 or higher.

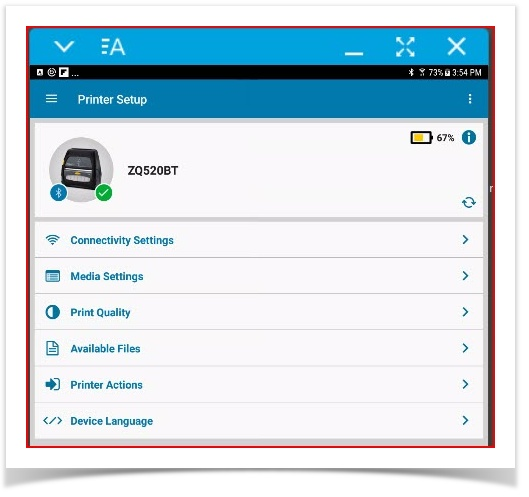
- This utility will allow you to set up the configuration for the printer. (Media size, Orientation etc.)

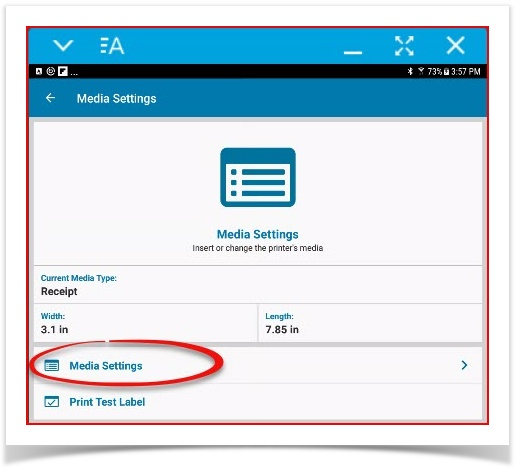
- Tap the Media Settings menu and then tap Media Settings again.

- In Media settings we are setting up for a 3x7 printer roll. To do this enter the following:
- Set the format to Receipt
- Set the width to 3.1
- Set the Length to 7.85
- Set the Orientation to Inverted

- Tap Next.
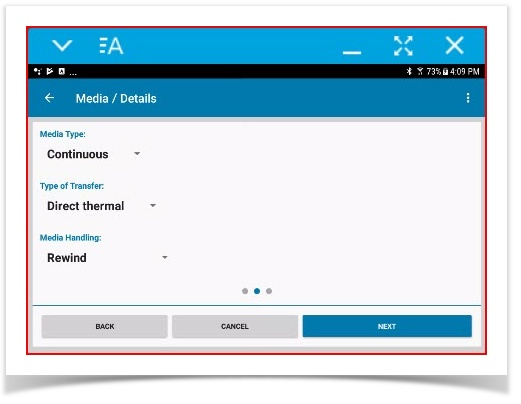
- Set the Media Type to Continuous.
- Set The Type of Transfer to Direct Thermal.
- Set The Mobile Handling to Rewind.
- Tap Next

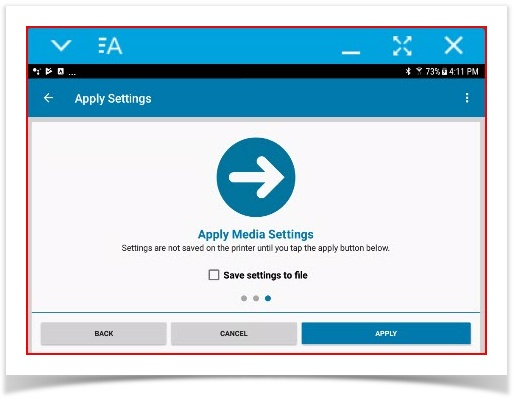
- On the last screen tap Apply.

- On the Media Settings screen tap Print Test Label to check that the print is centered and oriented properly.
- You are now ready to select the printer from apps on the Android device.

Supporting References
Retrieve Local Tablet Backups
By default all violations created on a tablet through the OPS-COM Android app are stored in local backup files in-case they ever need to be retrieved should anything happen to the violations before they are uploaded to our servers (software is uninstalled, data tables are manually removed/dropped, etc).
To retrieve the local tablet backups do the following:
Plug the tablet into your computer via USB
-
Make sure the tablet is unlocked once plugged into your computer, otherwise it won't appear.
-
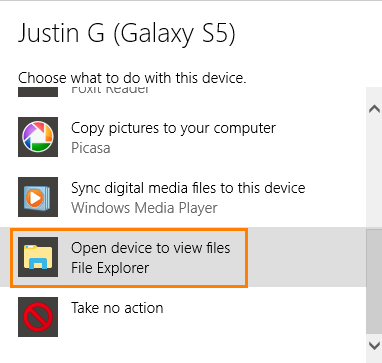
Once you plug the tablet into your PC you should see a notification appear, similar to plugging in a USB thumb drive.

-
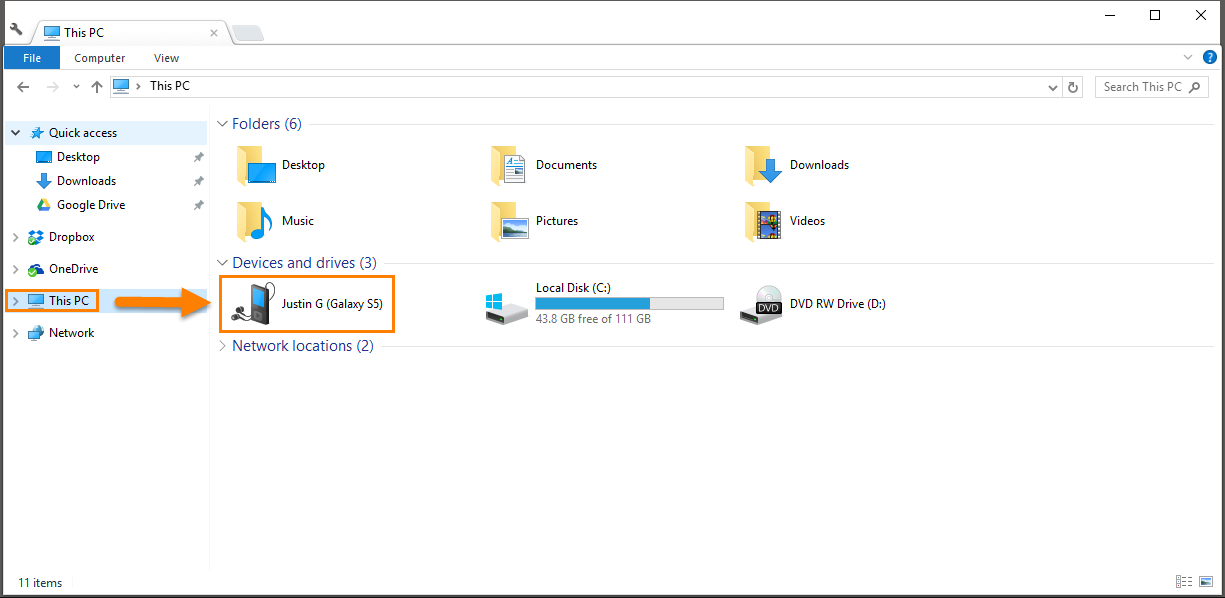
If you don't see anything you may just need to navigate to the tablet manually by going into windows file explorer and going under computer (where you normally see your C drive, D drive, network shares, thumb drives, etc).

If you don't seem to have a wire to plug the tablet into your PC check where you charge the tablets, most of the time the plug of the tablet charging wire can be removed to allow USB connections instead of power outlet.
Navigate to appropriate folder
-
At this point you should see all backup files located on the tablet. Either copy the specific files you have been requested to send, or copy all backup files. The copy location can be anywhere on your local computer (this is a temporary file location before we upload the backups to Google Drive). As an example you could create a folder on your Desktop called "tablet backups", then copy and paste the backup files into it.

Share your backup with Support
- Email backup to support@ops-com.com
-
or Login to Google Drive.
-
Go to https://drive.google.com
-
Upload the backup files into Google Drive
-
Once logged into Google Drive Select New > Folder Upload, navigate to and select the folder you copied the the backup files to (mentioned in step 2.b above).

-
Wait for the backup files to upload to Google Drive, this could take some time depending on how many backups you are uploading.
There should be a upload status window along the bottom right of Google Drive. - Share the file with support@ops-com.com
-

Notify us once you have uploaded the backup files so we can retrieve them.
You can remove the backup files and folder you created on your computer at this point since said files have already been uploaded to Google Drive.
Connecting as USB Hard Drive
On the Android Device
1. Turn on USB debugging by click Menu > Settings > Applications > Development > USB debugging
If you do not have the Development option, please follow these steps:
-
- Go to the Settings menu, and scroll down to "About phone." Tap it.
- Scroll down to the bottom again, where you see "Build number."
- Tap it seven (7) times. After the third tap, you'll see a playful dialog that says you're four taps away from being a developer. Keep on tapping, and *poof*, you've got the Developer setting.
2. Plug the USB cable into your PC and connect it to your device. A USB icon will![]() appear in the status bar when the device has been recognized.
appear in the status bar when the device has been recognized.
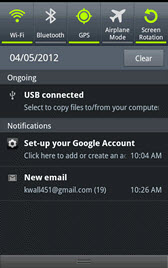
3. In the main screen of your Android device, use your finger to pull down the top status bar. Then touch the USB Connected and select the button to mount the USB device (Connect USB storage or Mount).
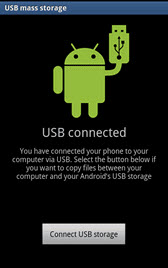
Tap “Ok“. When the green Android icon turns orange, the phone is now in USB Mass Storage mode and should now appear as USB disk drives in “Devices with Removable Storage” and be assigned drive letters.
NOTE: Turn off USB hard drive mode when you are finished copying files to avoid issues with the OPS-COM (ParkAdmin for Android) software.
On the Desktop Computer
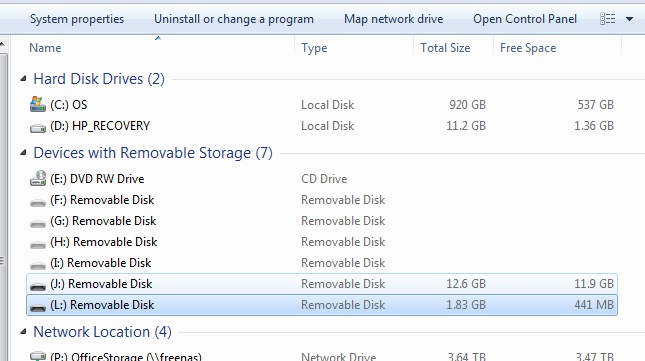
Two hard drives appeared on this desktop. Navigating each of them, and one has an OPS-COM (ParkAdmin) folder (J: in this case)
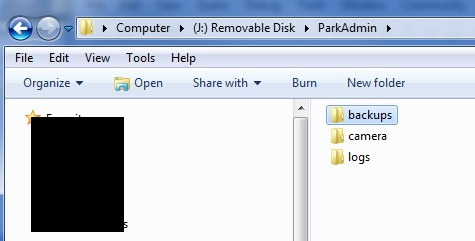
Descend into the appropriate folder to copy or transfer files.
Google Account
Clearing Google Play Cache
Google Play will cache application details for hours to even a day or more.
Clearing the cache ensures that the most recent version that is available is accessible.
Other troubleshooting options related to not seeing an app on the Play Store:
https://www.maketecheasier.com/fixes-for-google-play-store-my-apps-not-showing/
The below video demonstrates clearing everything from memory and then accessing the Google Play properties to "Clear cache"
OPS-COM Beta Program
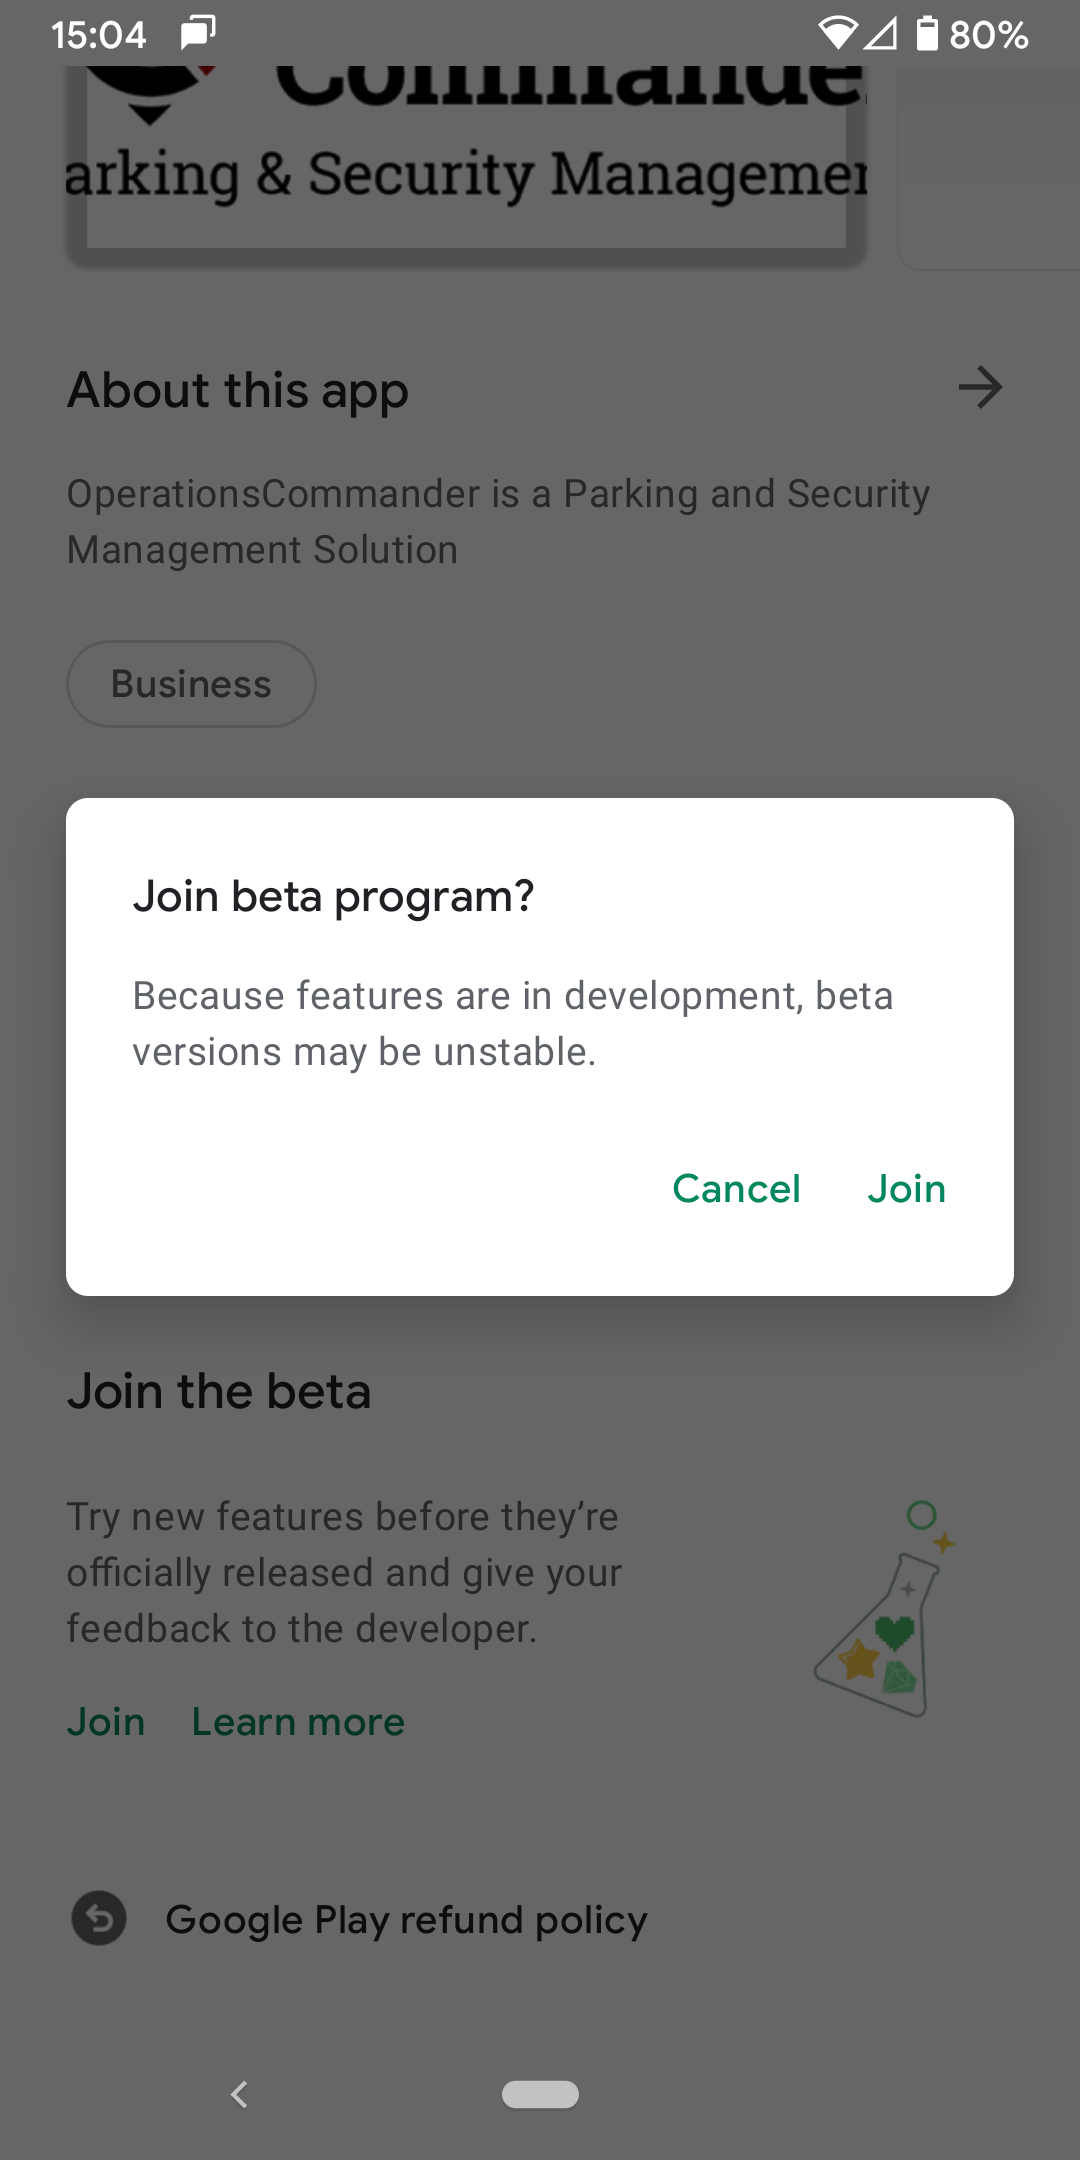
We recommend that only one device be used for the Beta program as these releases may be unstable.
Our BETA program is open, which allows users to self-manage (add or remove) themselves from the beta testing group at any time.
At times, new beta (non-production) releases may be offered that address client reported issues or new functionality. Clients may test the beta versions to ensure issues are resolved and that normal functionality is not disrupted. If you are a beta tester you will have access to these updated versions.
At any time you can remove yourself from the beta program to not receive these updates.
| Join on the web | https://play.google.com/apps/testing/com.operationscommander.handheld |
| Join on Android | https://play.google.com/store/apps/details?id=com.operationscommander.handheld |
The handheld operates under a specific profile and that profile should be the one that is added to the Beta program.
If you are not sure what account you are using, you can review the linked accounts under settings within Android.
Alternately, just follow the above link to use whatever profile you are currently logged into.
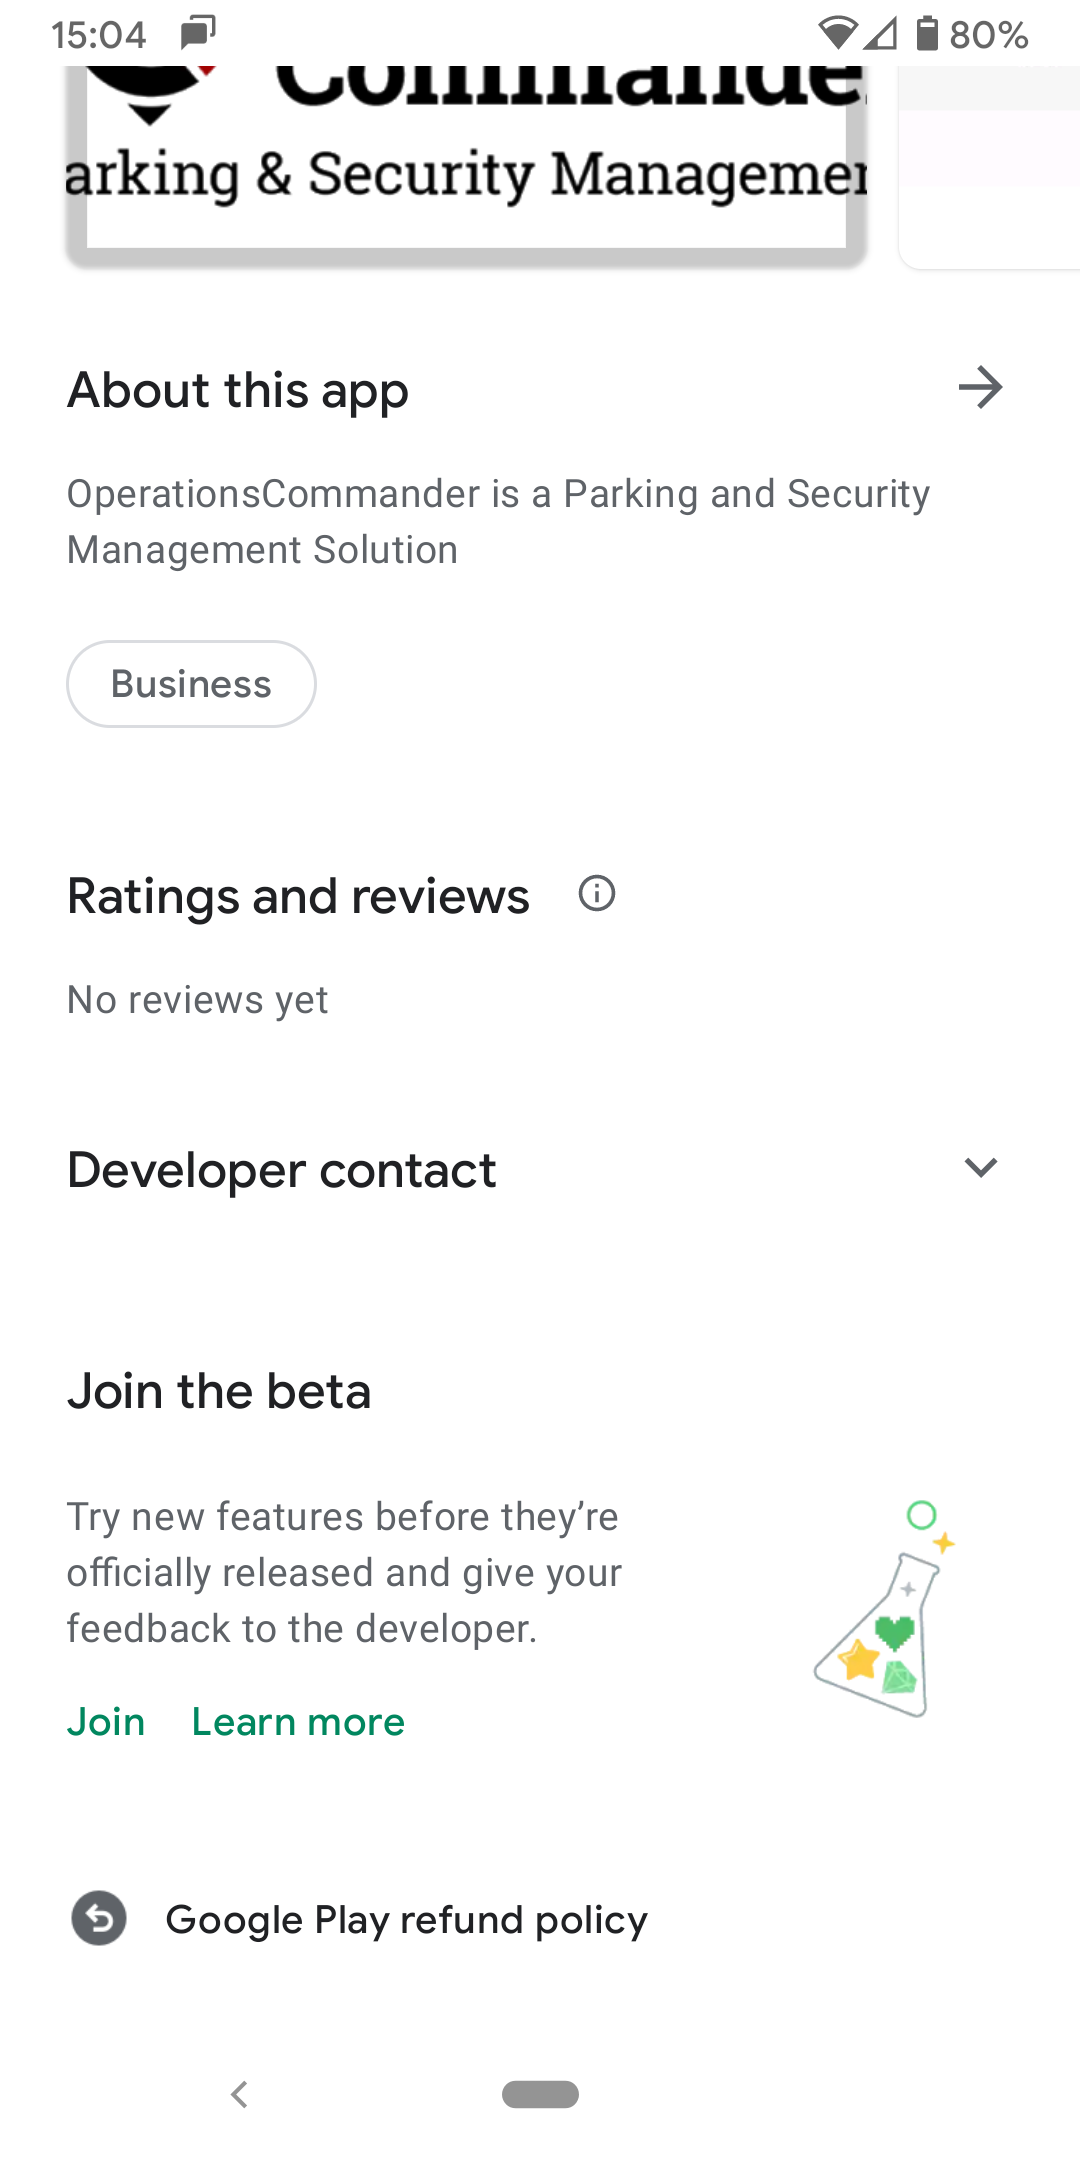
Joining or Leaving the Beta Program
Simply follow the link listed above (on Android) and scroll down to determine your status.
Notice that you can select either to "Join" or "Leave" under the Joining Beta.. header.
| Join | Confirm | Leave |
|---|---|---|
|
|
|
|
Step-by-step guide
This guide outlines how to add an OPS-COM (ParkAdmin) Google account to an Android enabled device.
Depending on your Android version the steps may be slightly different, however mostly similar.
You will require a GMail email account and password to access the Google Play Store
Using OPS-COM For Android in DEMO Mode
Demo Mode
The OPS-COM for Android app can be used in Demo mode without the need to register a device. Booting up the device after installation will bring you to a screen where you can choose to register the handheld unit or run in DEMO MODE.
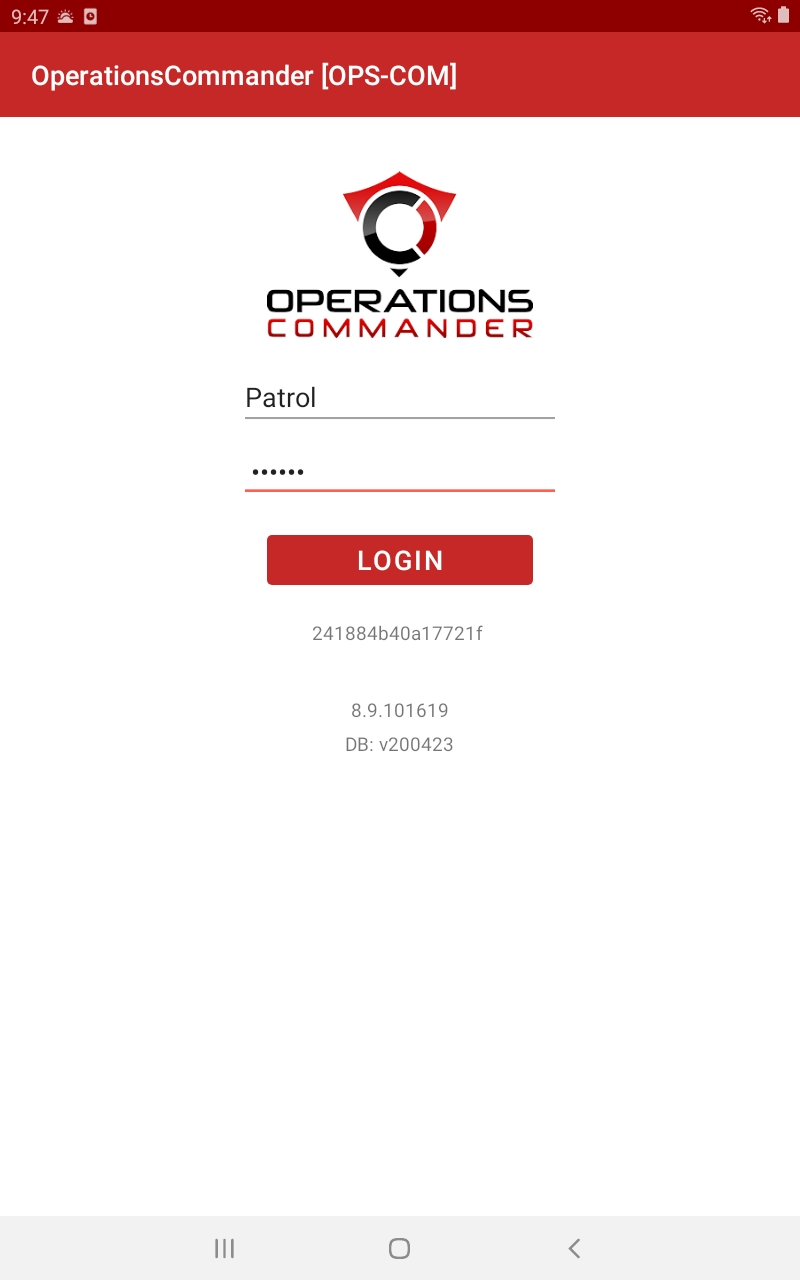
DEMO Login
By tapping on DEMO MODE the user will be sent to the sign in screen where the sign in credentials are already supplied. The user will be able to sign in with these credentials and explore the app.
Simply tap on LOGIN to access the Main Index screen.
Testing in Demo Mode
Once you log in to DEMO mode you may test:
- Searching Vehicles
- Searching Permits
- Searching People
The following chart supplies a sample of the data available for testing in the demo site.
|
Username |
First Name |
Last Name |
User Type |
Plate |
VIN Number |
Violations |
Permits |
|
spencer |
Spencer |
Carr |
Full Time Staff |
SPENCE |
|||
|
jparsons |
Julie |
Parsons |
Complimentary |
JULPAR ASDA347 |
1q21242143124213 |
COM100 - Unpaid |
|
|
jrockwood |
James |
Rockwood |
F/T Student |
JROCK |
5SXHANDC38RZ55506 |
R102 - Red Student Lot W |
|
|
sjamieson |
Steph |
Jamieson |
P/T Student |
SJAM SJAM2 |
2T1BU4EE5DC972469 1N4AL3AP5DN517821 |
TT-10001 |
100 - Red Student W 102 Red Student W |
|
johndoe |
John |
Doe |
F/T Staff |
ABC316 |
1FMCU0EG1CKB65454 |
501 - Unpaid |
|
|
skjones |
Jones |
Sarah |
Daily Reserved |
AKRJ259 |
|||
|
vcosta |
Voula |
Costa |
Daily Reserved |
VCOST |
2GCEC19V531113601 |
L103 - Unpaid |
|
|
bcameron |
Brady |
Cameron |
Complimentary |
BCAM |
COM100 - Unpaid |
||
|
sbyers |
Sheldon |
Byers |
Daily Reserved |
SHELBY |
1G8ZN12871Z117051 |
L100 - Unpaid |
|
|
pbirch |
Patricia |
Birch |
F/T Staff |
BIRCH No Plate |
1N6AD0ER5FN709323 1GKS1AKC7FR518845 |
TT-10003 |
None |
|
mashbury |
Micheal |
Ashbury |
P/T Staff |
MASH ASDA437 BDHE385 |
JNAMA43H9XGE50339 |
15-170420 TT-10010 |
Monthly 0005 - Red Staff Lot West 0002 - Red Staff Lot West 50 -After 4PM 500 - Green Staff Lot East - UNPAID |
Some Things to Test
The following is a list of articles that will guide you through some features of the software.
-
Searching for a plate.
-
Issuing a Person Violation
-
Issuing a Plate Violation
-
Virtual Chalking
-
Permits Search