Flex Permits
Introduction
Flex permits allow clients to specify variable prices for a lot, with the possibility of a different price for every hour. This allows more options for the customization of permit prices, useful for situations like making permits more expensive during peak hours.
Flex permits are counted as type of temp permit, as an addition to the existing daily and hourly permits. They function most similarly to hourly permits and their uses have some overlap.
It is intended for a site to choose between hourly permits and flex permits and not use both, although clients are not restricted from using both at the same time if they choose to.
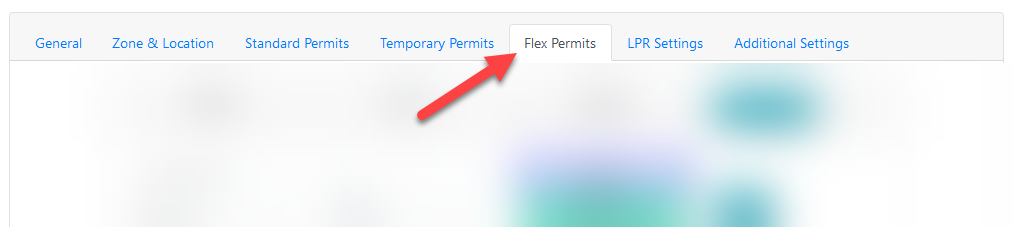
Flex Permits Tab
Flex permits and related sections can be accessed on the lot edit page, from the new flex permits tab.
The page consists of three sections:
- An options section
-
A time slot section, used for defining prices
-
An hourly grid, used to assign prices to hours in the week
Options

- Enable flex permits - this will enable the use of flex permits for this lot.
- If not enabled, users will not have the option to selected flex permits for this lot, even if the hourly grid is filled out.
Time Slots
Flex permits are controlled by a grid of customizable timeslots, which are configured for each lot from the lot edit page.
The time slot section is located below the options section.
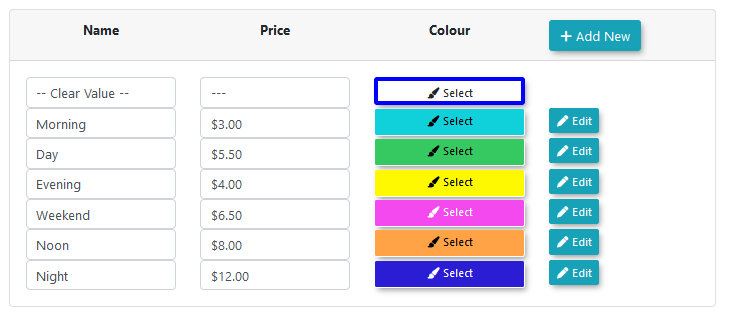
Time slots created by the admin are located here.
-
Name - a user-friendly name to identify what the slot should be used for
-
Price - the price of booking a permit for the selected hour
-
Colour - the colour that the time cells in the week grid will be marked with when they are assigned this price
Time-slot Creation
Click the add new button to bring up the add time slot modal.
Fill in the required fields and press save changes to save the new time slot.

The time slot selection menu will reload and the saved item will appear.
The modal will also be brought up when editing the details of an existing time slot.
Once a time slot has been created, there is no way to delete it .
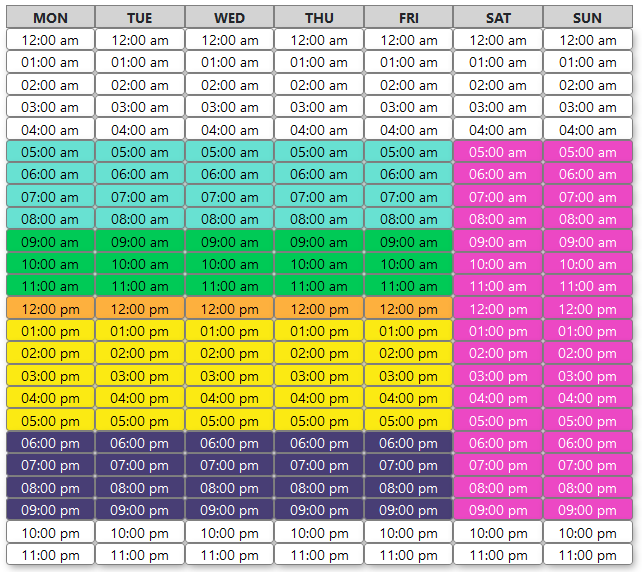
Hourly Cell Grid
Below the time slot section, the hourly cell grid can be found. This is a representation of each hour within the week.
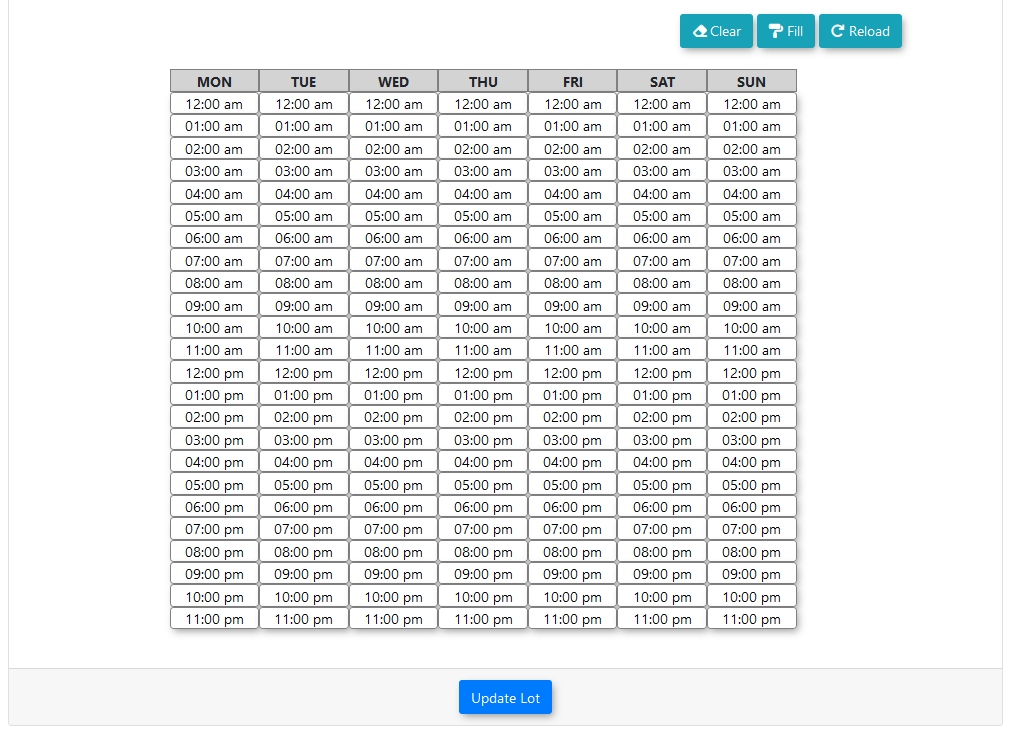
Here, each hour time slot within a week can be assigned a specific cost. When a user books a permit for a number of hours, the final price will be calculated using the prices associated to each hour selected within the booking.
Above the cell grid, several buttons can be found.
-
Clear - will clear the grid of all filled cells
-
Fill - will fill in the grid with the selected colour
-
Reload - will reload the grid data stored within the database, erasing any changes that were made
Hourly Price Assignment
To fill in the cell grid, first select one of the prices to assign to cells on the grid.
This can be done by clicking on the one of the selectable colours.
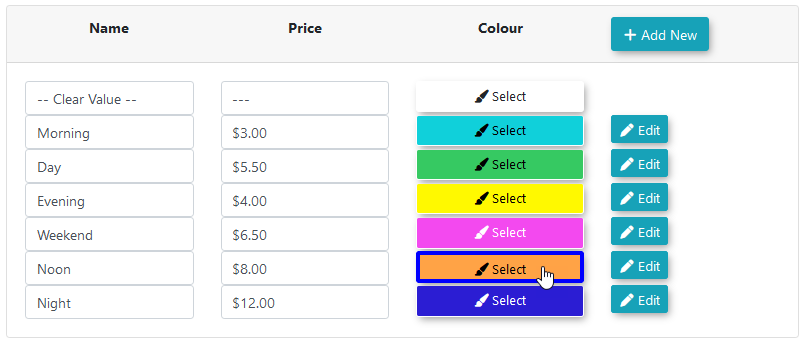
This will change the active colour to the colour selected, as indicated by the blue outline.
Cells on the grid can now be filled in by clicking and dragging the mouse across the cells.
The grid can be filled in using any number of time slots.
Note that any sections left blank (using the default option) will be set to free.
Cell price layouts will only be saved upon clicking the update lot button.
User-Side Permits
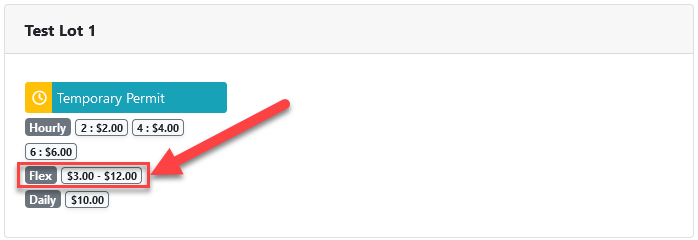
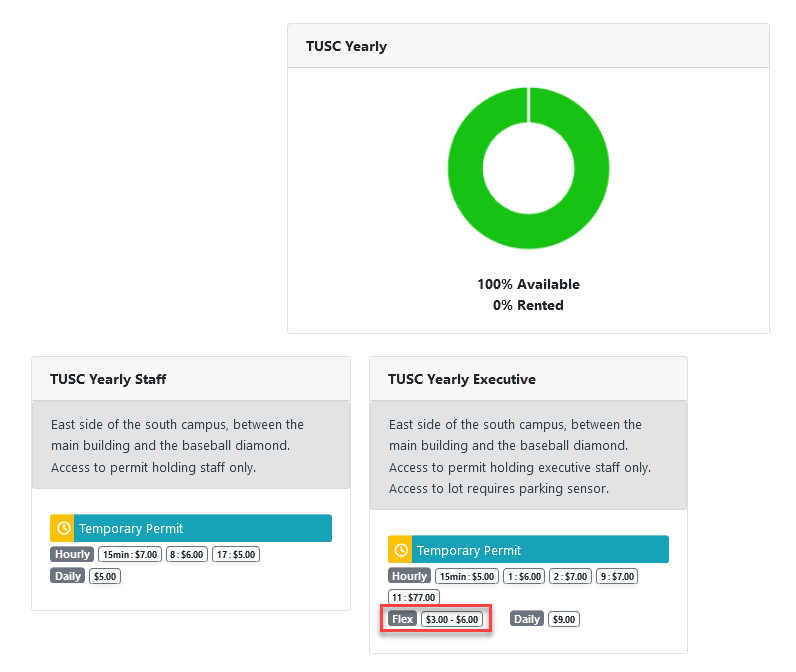
Once the flex permits have been filled in, they will begin to appear for sale on the user side.
On lots where flex permits are enabled, the permits page will show a preview of flex permits as a price range.
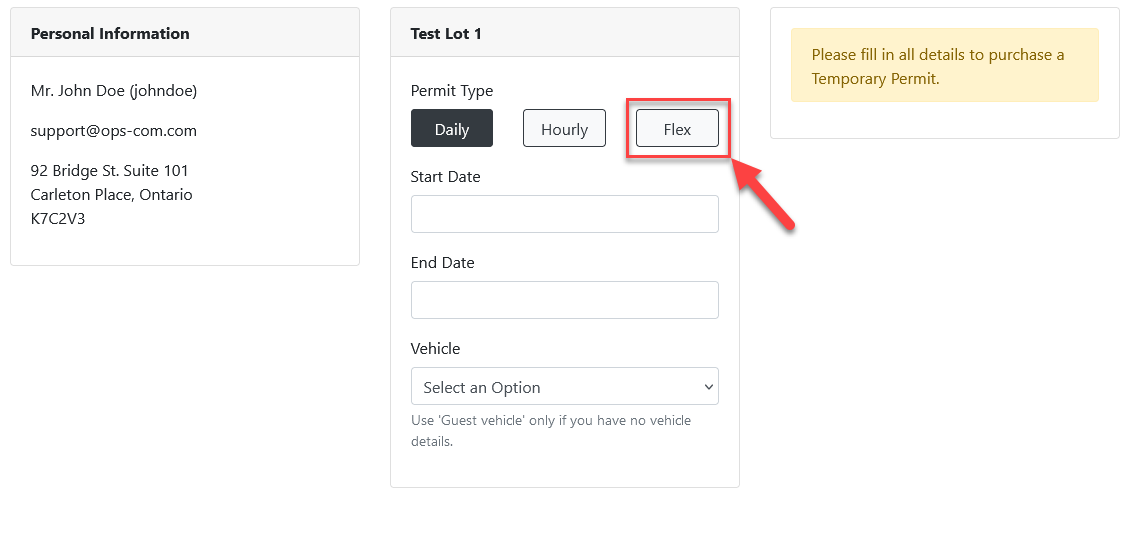
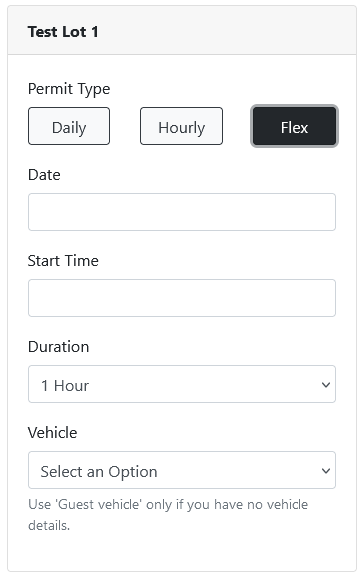
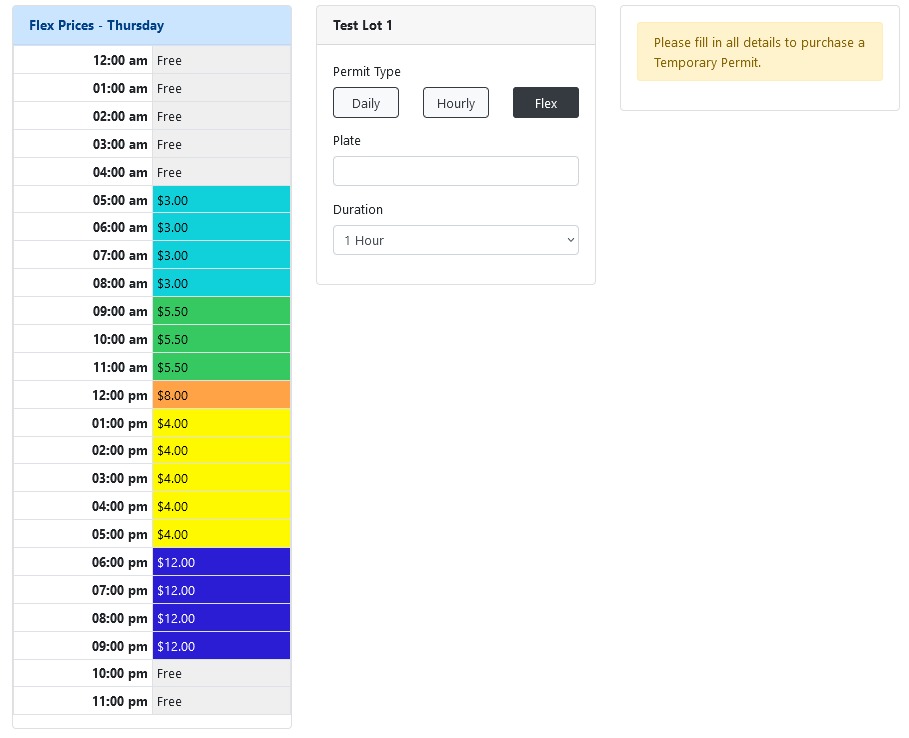
Flex permit inputs:
- Date - the day the permit is being booked for.
- Start Time - The time the booking will start at.
- Flex permits are limited to booking on the hour. They do not currently support proration, meaning if a user arrives during the middle of an hour, they must pay for the entire price of the hour.
- Flex permits are limited to booking on the hour. They do not currently support proration, meaning if a user arrives during the middle of an hour, they must pay for the entire price of the hour.
- Duration - the number of hours to book the permit for.
- A permit can be booked for a limit of 12 hours. If the booking would go beyond the bounds of the day, the user will be required to pick a shorter duration.
- A permit can be booked for a limit of 12 hours. If the booking would go beyond the bounds of the day, the user will be required to pick a shorter duration.
- Vehicle - like normal for temp permits, the user can either select a vehicle on their account or enter a new plate as a guest vehicle.
- If the user selects one of the other options after selecting flex, the flex prices box should disappear again.
- Selecting flex again should make it reappear.
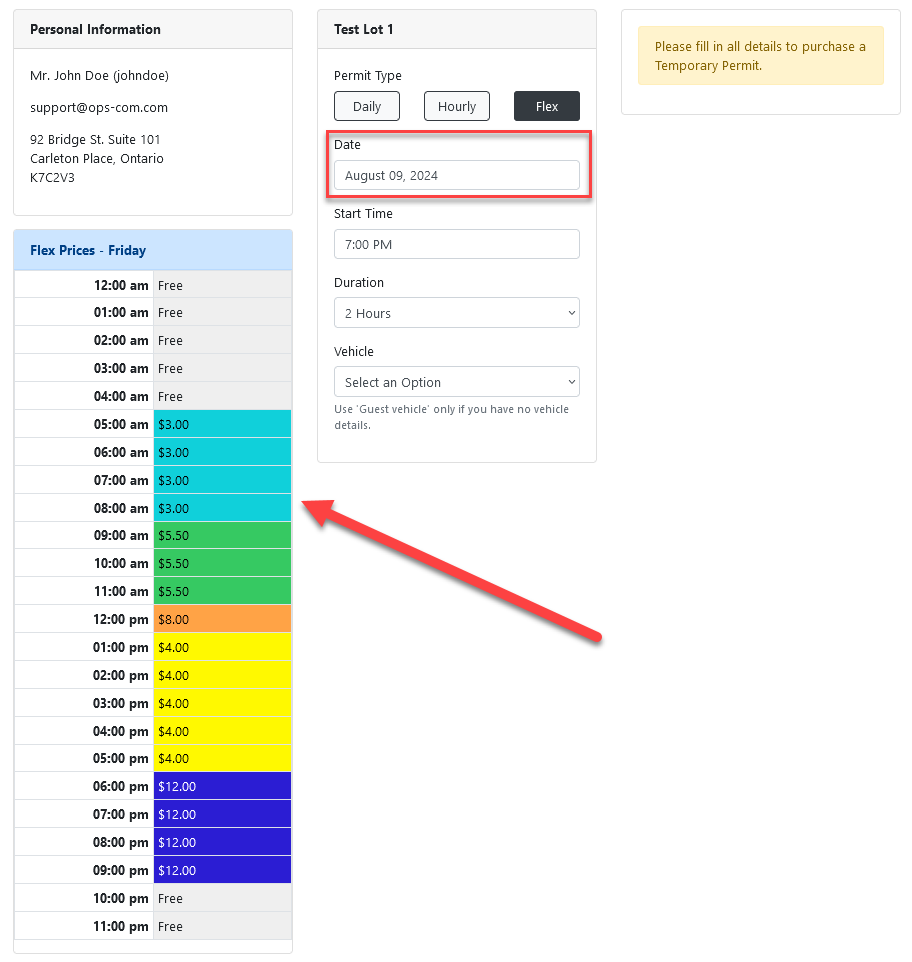
Selecting a different day will cause the flex prices box to reload with the new day's prices.
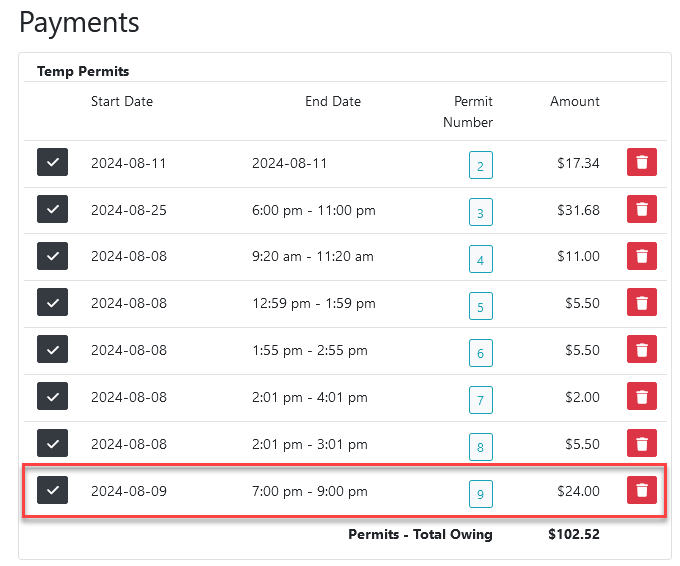
The cost of the permit will be calculated using the prices of each hour in the selected range added together.
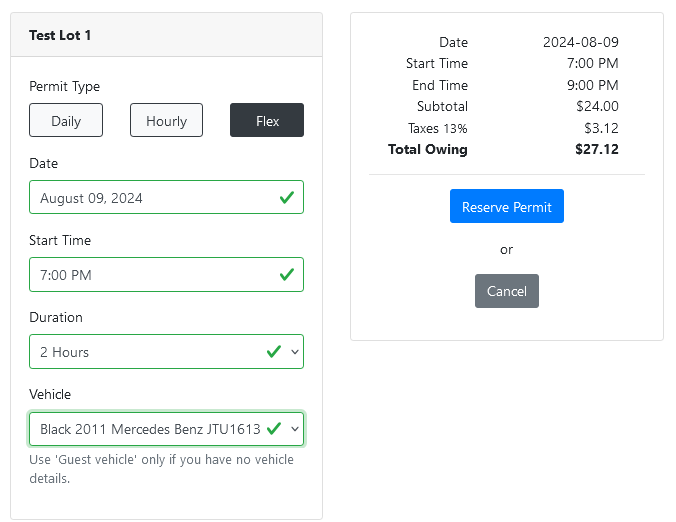
Pressing to reserve the permit, the permit will be added to the user's cart.
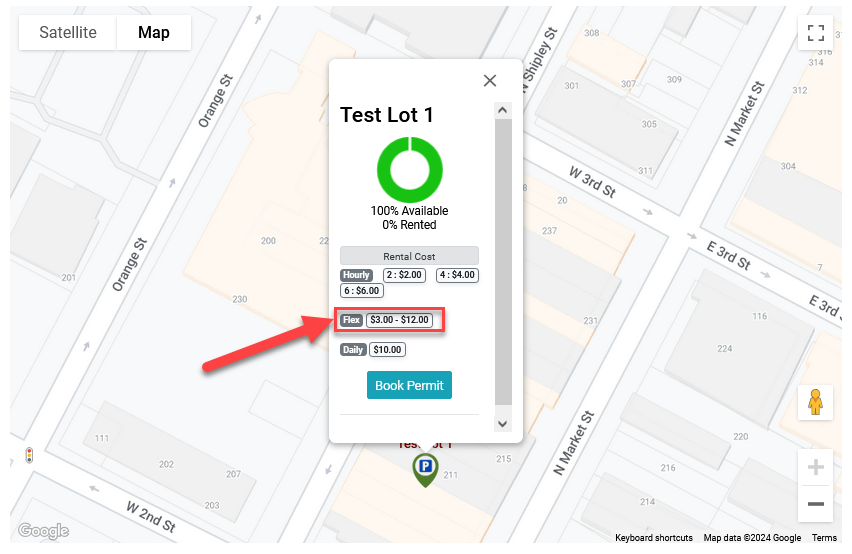
Real-Time Map
On the real-time map, the flex permits range of cost will be listed under rental costs.
Clicking here to book a permit will take the user to the guest checkout page, the same place as if they had scanned a QR code to access the lot.
If enabled, the user does not need to be logged in to access this page.
In the case where a lot group is used as an icon in place of a single lot, it will also show the range on the lot groups page.
QR Code / Guest Checkout
Similar to the standard temp permit checkout, the flex permit prices for the day will be displayed to the left side of the page.
As guest checkout permits are intended for immediate bookings, the day and time will be limited to the current date.
Upon filling in the information, the permit cost will be calculated and the user will be able to checkout immediately.
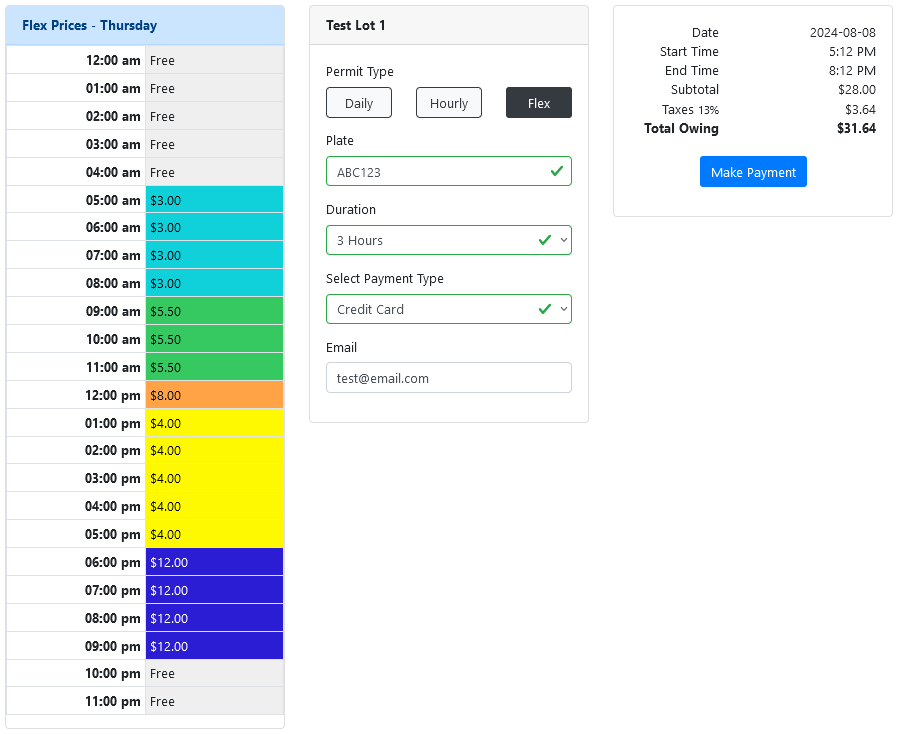
Clicking on make payment, the user will be redirected to their selected payment gateway to make a payment.