For the Survision LPR Camera configuration, go to [Survision LPR Camera Configuration](https://opscom.wiki/books/mobile-lpr-installation-manual/page/part-3-handheld-set-up)
## Connecting Wirelessly The first step is to connect to your **PL8RDR** device via wireless connection. To do so bring up your systems **Network Settings** by following the steps below Click on the **Windows Home Button** and start typing **Control Panel**. It should pop up under Best **Match** as you are typing. [](https://opscom.wiki/uploads/images/gallery/2024-06/ljlimage.png) Click on **Control Panel** to access your **Computer's Settings**. [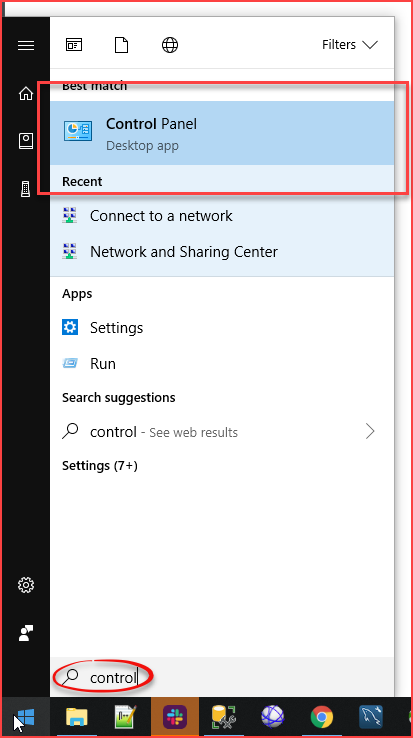](https://opscom.wiki/uploads/images/gallery/2024-06/72jimage.png) A list of all available configuration items will appear. Click on **Network and Internet.** [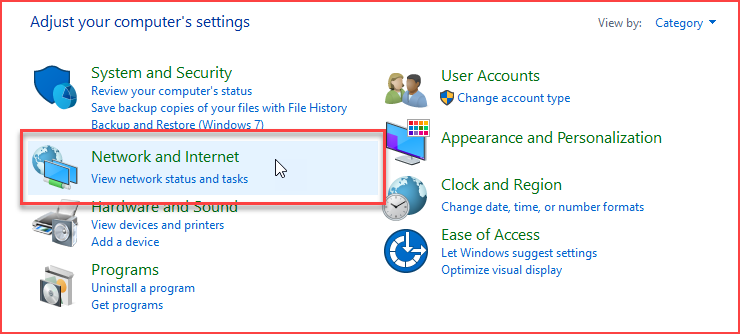](https://opscom.wiki/uploads/images/gallery/2024-06/Fn0image.png) In **Network and Sharing Center** settings click on **Connect to a Network**. [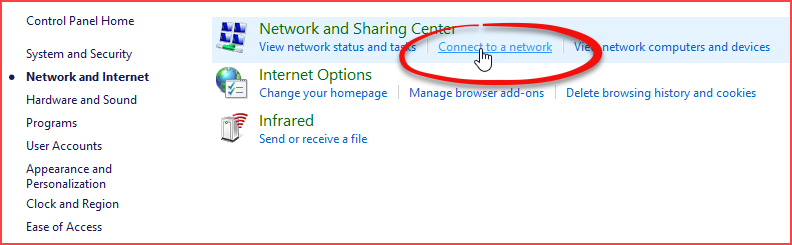](https://opscom.wiki/uploads/images/gallery/2024-06/zIjimage.png) ### Connect to pl8rdr.opscom First make sure **Wi-Fi** is turned on by clicking the network icon at the bottom right of your screen. You will see a list of networks available to you. In this case we are looking for the **pl8rdr.opscom** network. [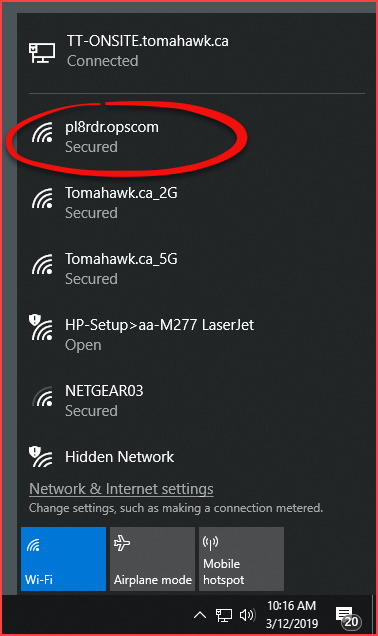](https://opscom.wiki/uploads/images/gallery/2024-06/nDzimage.png) Clicking the **pl8rdr.opsom** network will open a screen where you can click on **Connect** to join the network. You can also utilize the **Connect automatically** check box do avoid having to connect manually each time. [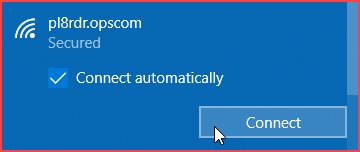](https://opscom.wiki/uploads/images/gallery/2024-06/kNtimage.png) Since the network is secured a password/PIN is required to connect. Click on **Connect using a secure key instead** to bring up a seperate password entry field. [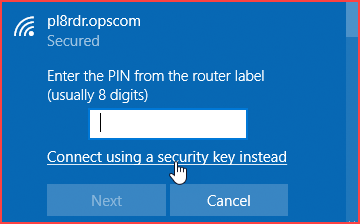](https://opscom.wiki/uploads/images/gallery/2024-06/6VNimage.png) Enter the password into the empty field and click on **Next**.**Note:** The password is provided by OPSCOM. If you do not know your password please contact
| Username | Password |
|---|---|
| superuser | superuser |
| Wired | Wireless | Port |
|---|---|---|
| 192.168.0.21 255.255.0.0 | SSID: Anpr-###### 192.168.150.1 | 1080 or 8081 |
| [](https://opscom.wiki/uploads/images/gallery/2024-06/P0Jimage.png) | [](https://opscom.wiki/uploads/images/gallery/2024-06/5cNimage.png) | [](https://opscom.wiki/uploads/images/gallery/2024-06/KL9image.png) |
| [](https://opscom.wiki/uploads/images/gallery/2024-06/cgsimage.png) | [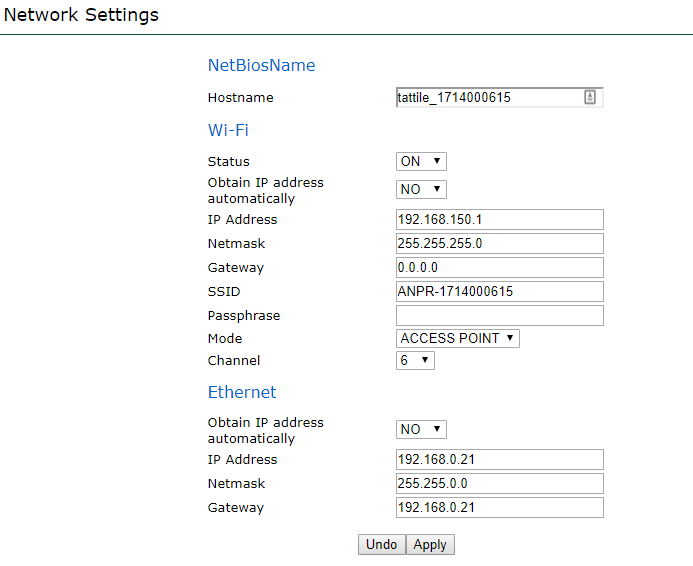](https://opscom.wiki/uploads/images/gallery/2024-06/OAvimage.png) | [](https://opscom.wiki/uploads/images/gallery/2024-06/VCKimage.png) |
| [](https://opscom.wiki/uploads/images/gallery/2024-06/RQZimage.png) | [](https://opscom.wiki/uploads/images/gallery/2024-06/iibimage.png) | [](https://opscom.wiki/uploads/images/gallery/2024-06/TIBimage.png) |
| [](https://opscom.wiki/uploads/images/gallery/2024-06/zvgimage.png) | [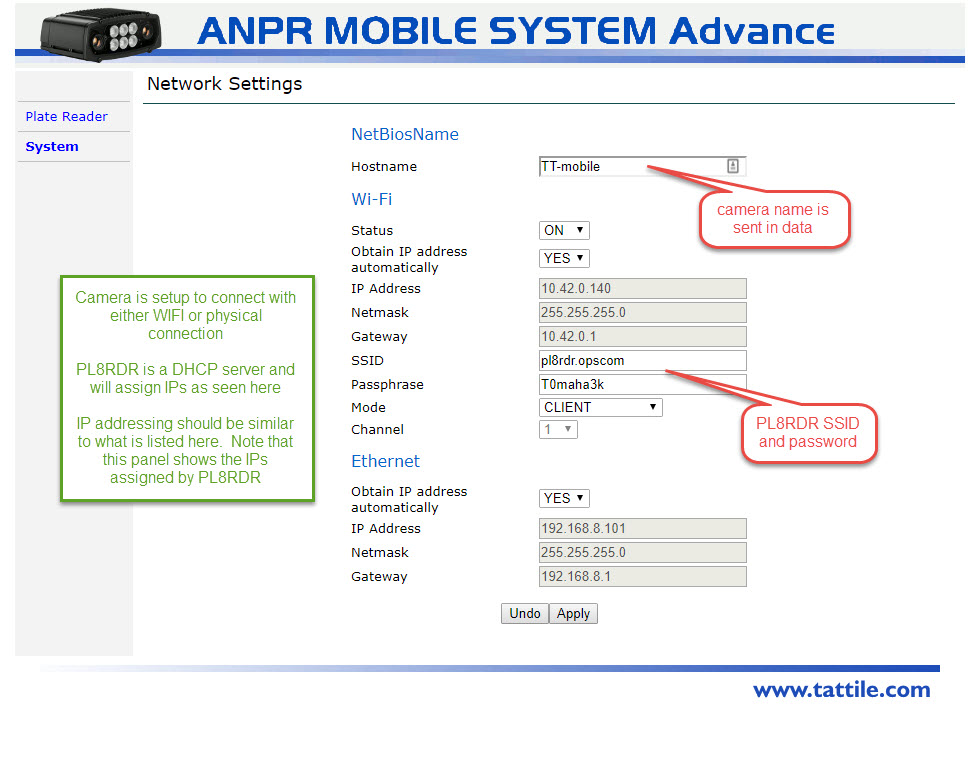](https://opscom.wiki/uploads/images/gallery/2024-06/nXiimage.png) | [](https://opscom.wiki/uploads/images/gallery/2024-06/qLnimage.png) |