The Flex Payments process allows administrators to create a prepaid credit balance on a user's account by issuing a zero-dollar placeholder permit and applying a manual negative adjustment. Its primary purpose is to provide flexible funding options for specific user groups, allowing them to apply this prepaid credit toward future parking purchases on the user portal. This article is intended for OPSCOM administrators.
## Setup and Configuration To utilize flex payments, administrators must first configure a dedicated zero-dollar lot and allocate placeholder permits to it. ### Configuring the Flex Payment Lot 1. Hover over **Lot Administration** and click **Pricing & Lot Admin**. 2. Create a new lot and enter a descriptive name (e.g., Flex Payment Lot). 3. Set the cost of the lot to $0.00. 4. Select the specific demographic utilizing flex payments from the **Usertype** drop-down menu (e.g., Full Time Staff). 5. Set the **Sales Window** to Yearly. 6. Save your lot configuration. 7. Hover over **Lot Administration** and click **Allocate**. 8. Add a block of dummy permits to this new lot (e.g., FLX001 through FLX010). [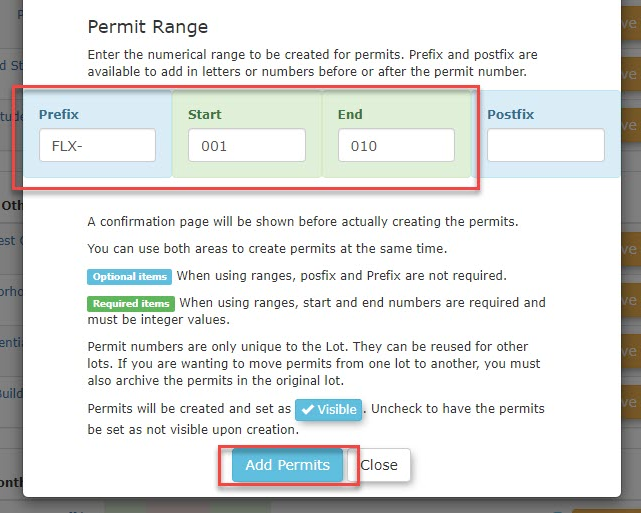](https://opscom.wiki/uploads/images/gallery/2026-07/oijimage.png)**Lot Visibility:** This placeholder lot does not need to be visible to standard users, as this functionality is executed exclusively from the administrative portal. You can safely hide this lot from public view in the lot settings.
## Using this Feature Once the placeholder lot is established, administrators can apply a flex credit to a user's account by "selling" them one of the zero-dollar permits and adjusting the transaction total. ### Applying the Flex Credit 1. Navigate to the specific user's profile and click the **Parking** tab. 2. Select a permit from the newly created Flex Payment Lot. 3. Click the **Purchase this Permit** button to proceed. 4. Click the **Proceed to Payment** button on the Payments Due screen. 5. Select a manual payment type, such as Cash, and process it as a zero-dollar purchase. 6. Click the **Adjust** button on the final confirmation screen to open the adjustment interface. 7. [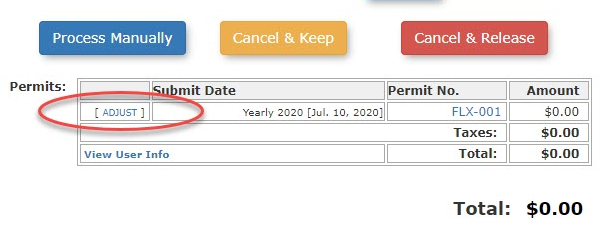](https://opscom.wiki/uploads/images/gallery/2026-07/YD62ydimage.png) 8. Enter a negative value to represent the credit amount (e.g., -200.00). 9. Enter a clear description in the **Comment** field (e.g., Flex Payment Adjustment). 10. Click the **Add Adjustment** button. ### Key Information Displayed - **User Portal Credit:** Once the negative adjustment is applied, the user will see a credit balance displayed directly on their dashboard when they log into the user portal. This balance can then be selected as a valid payment method when they check out to purchase their actual parking permit.**Do Not Process the Credit:** After adding the negative adjustment, **do not attempt to process a refund or payout for the credit balance**. Leave the negative balance on the user's account so the system recognizes it as available funds they can apply toward future permit purchases.
--- ## Best Practices and Considerations - **Audit Trails:** **Always use clear and standardized comments** when adding the negative adjustment (e.g., "Fall Semester Flex Funding"). This ensures your financial team can easily identify why a manual credit was applied to the user's profile during an audit.