# Payment Data Export via Banner SFTP
# Configuration
There are several items that must be configured in order for the right information to display in the exported CVS file.
# User Profile
In the user profile, a **unique user ID** must be configured.
This information will likely be populated by a user data import.
[](https://opscom.wiki/uploads/images/gallery/2024-06/XOEimage.png)
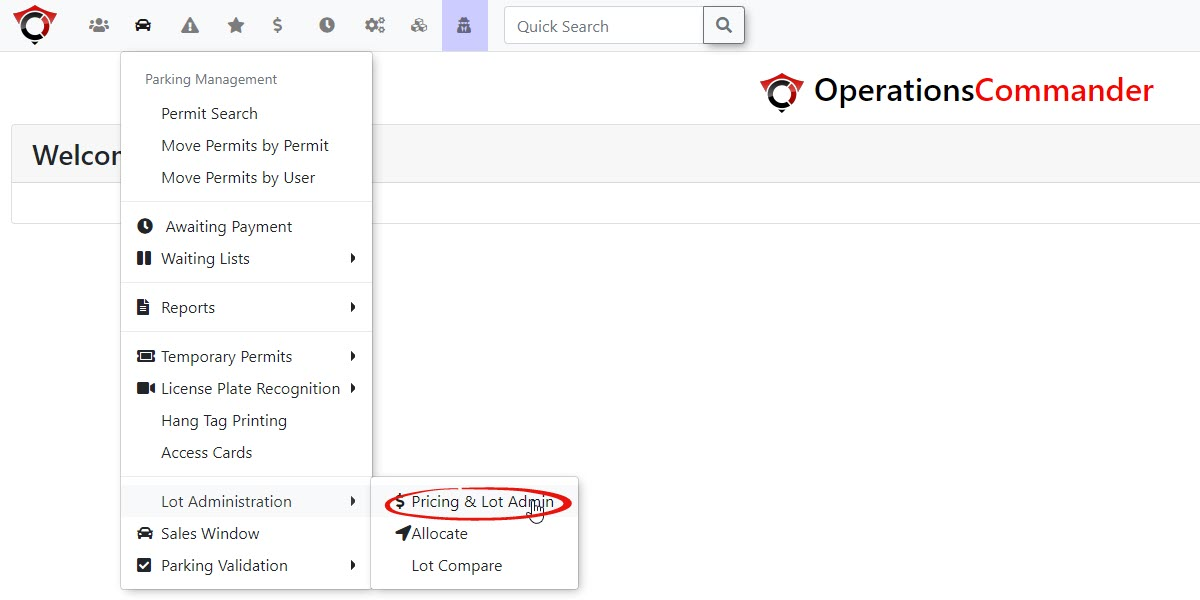
# Lot Administration
Each lot requires a unique **banner detail code**.
To set the banner detail code, go to **Lot Administration** and click on **Pricing & Lot Admin**.
[](https://opscom.wiki/uploads/images/gallery/2024-06/AWoimage.png)
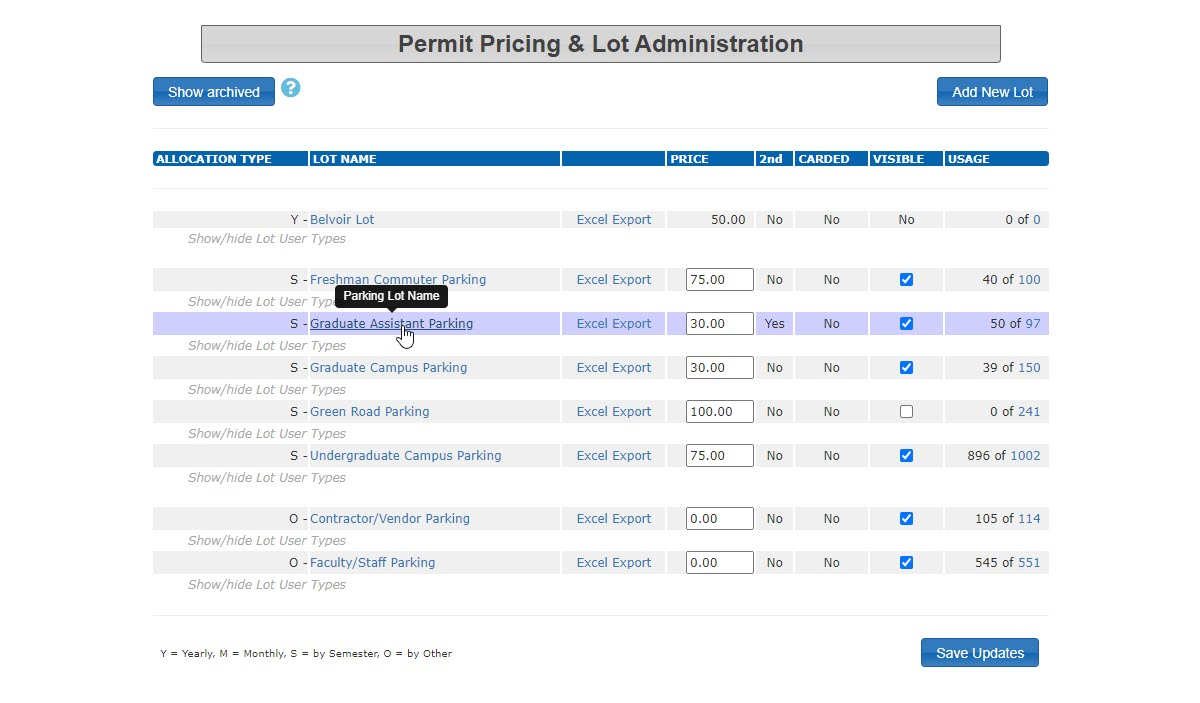
Select the lot you wish to add the detail code to. Click on the **lot name** to access the configuration screens.
[](https://opscom.wiki/uploads/images/gallery/2024-06/K1pimage.png)
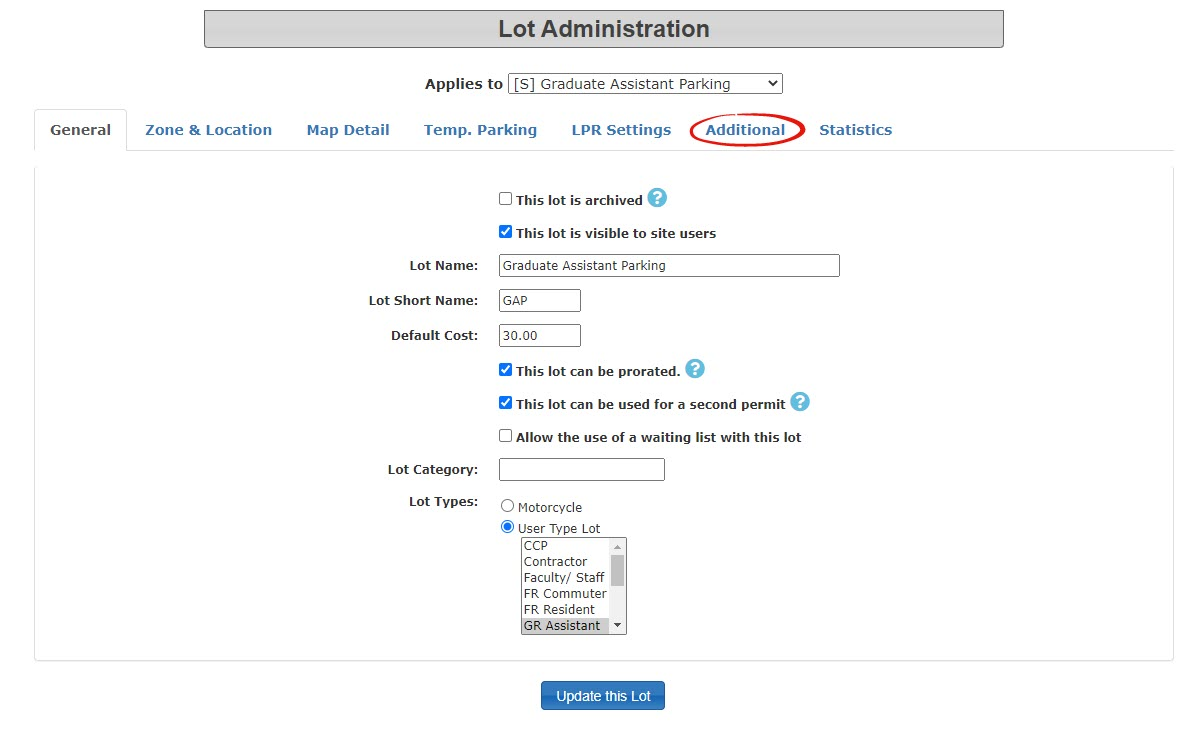
Once you are in the lot configuration tool, select the **Additional** tab.
[](https://opscom.wiki/uploads/images/gallery/2024-06/X5Aimage.png)
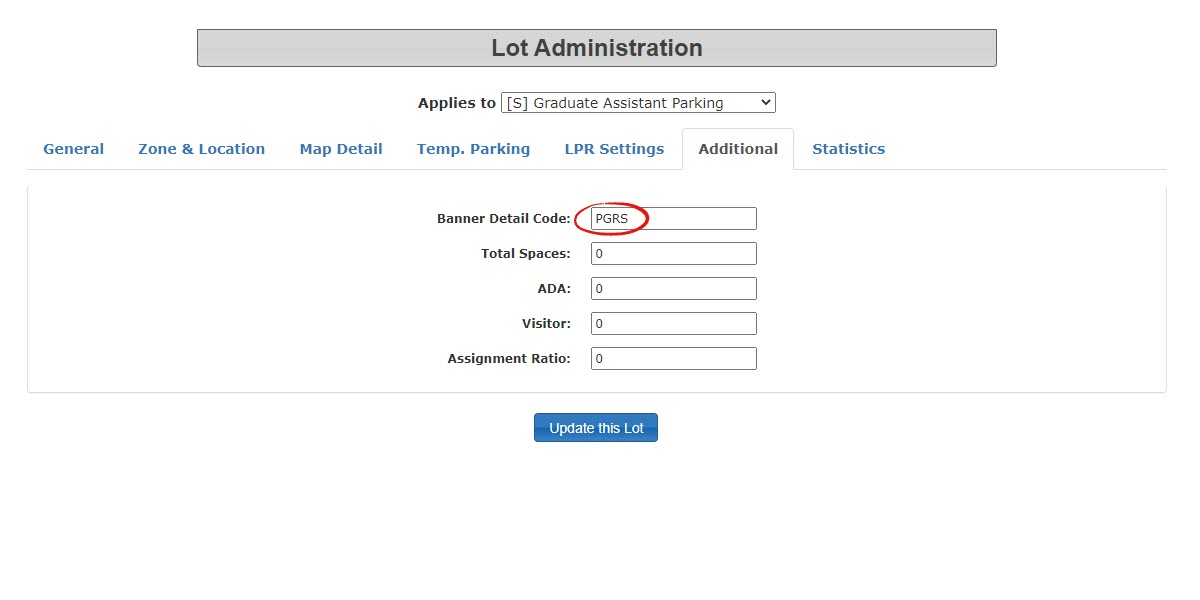
Enter the **Lot Detail Code**. (These codes are established in the preliminary planning phase of the project)
[](https://opscom.wiki/uploads/images/gallery/2024-06/64Eimage.png)
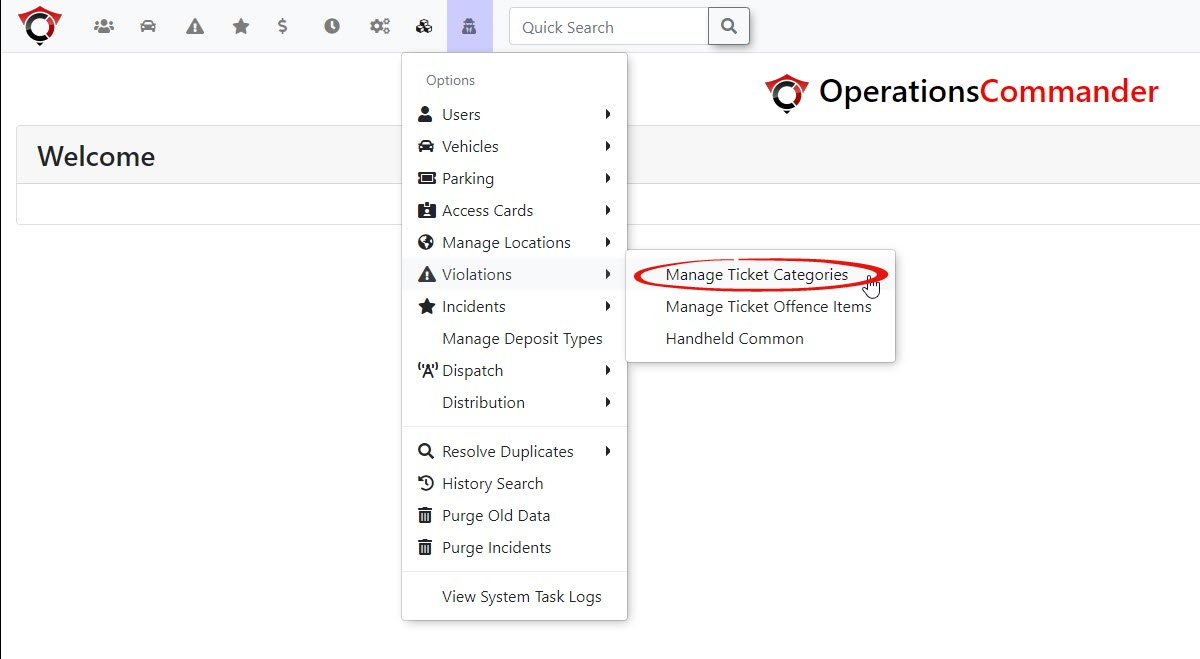
# Ticket Categories
From the **Options Menu**, hover over **Violations** and select **Manage Ticket Categories**.
[](https://opscom.wiki/uploads/images/gallery/2024-06/Hb9image.png)
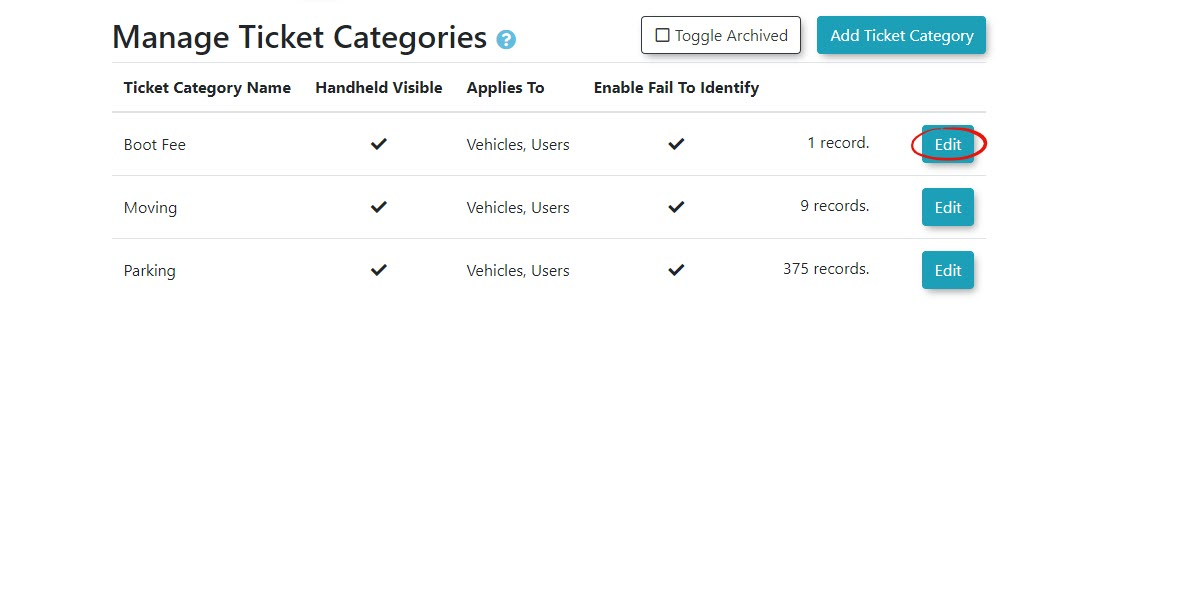
Click **Edit** on the **Category** you wish to configure.
[](https://opscom.wiki/uploads/images/gallery/2024-06/tgCimage.png)
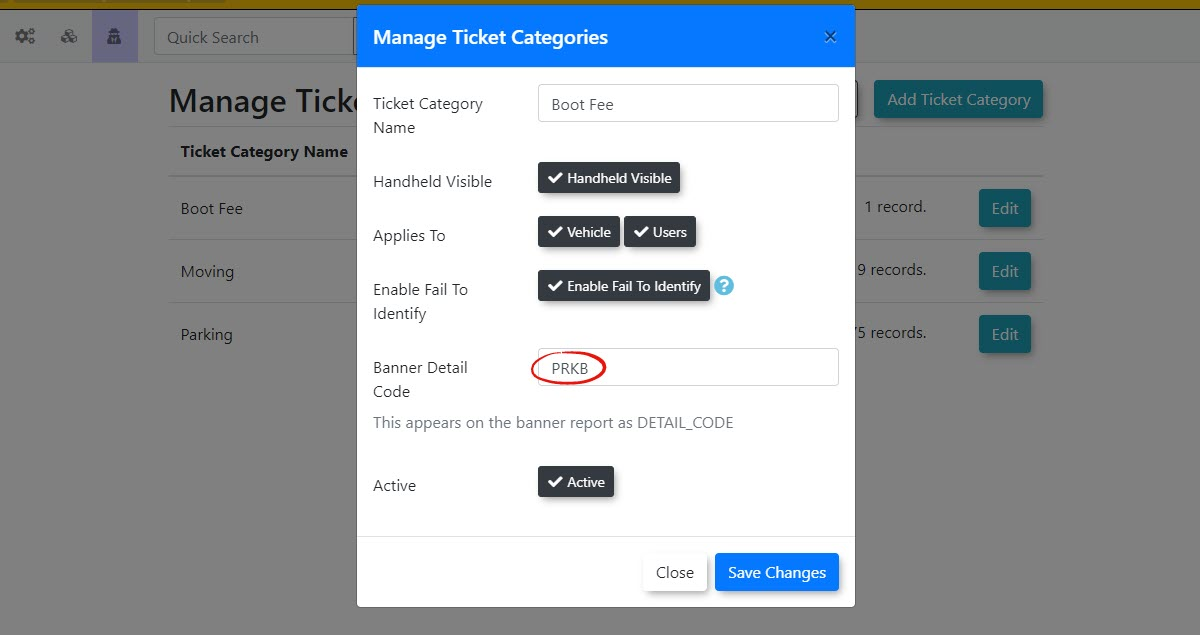
Enter the detail code for the ticket category.
In this case, the Detail Code is **PRKB** for the **Boot Fee** category.
[](https://opscom.wiki/uploads/images/gallery/2024-06/h12image.png)
# Sales Window
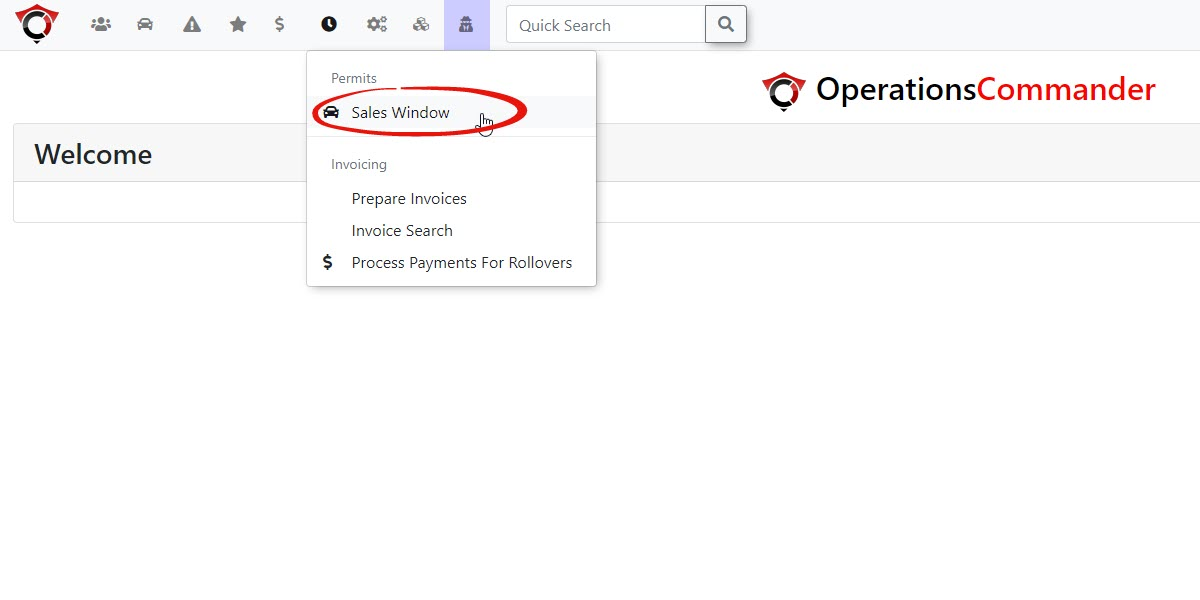
On the sales window configuration page, we need to enter a **Term Code** used for **Permits** only.
To do so go to the **Permits** Menu and select **Sales Windows**
[](https://opscom.wiki/uploads/images/gallery/2024-06/pXJimage.png)
To access the configuration screen, click on **EDIT.**
[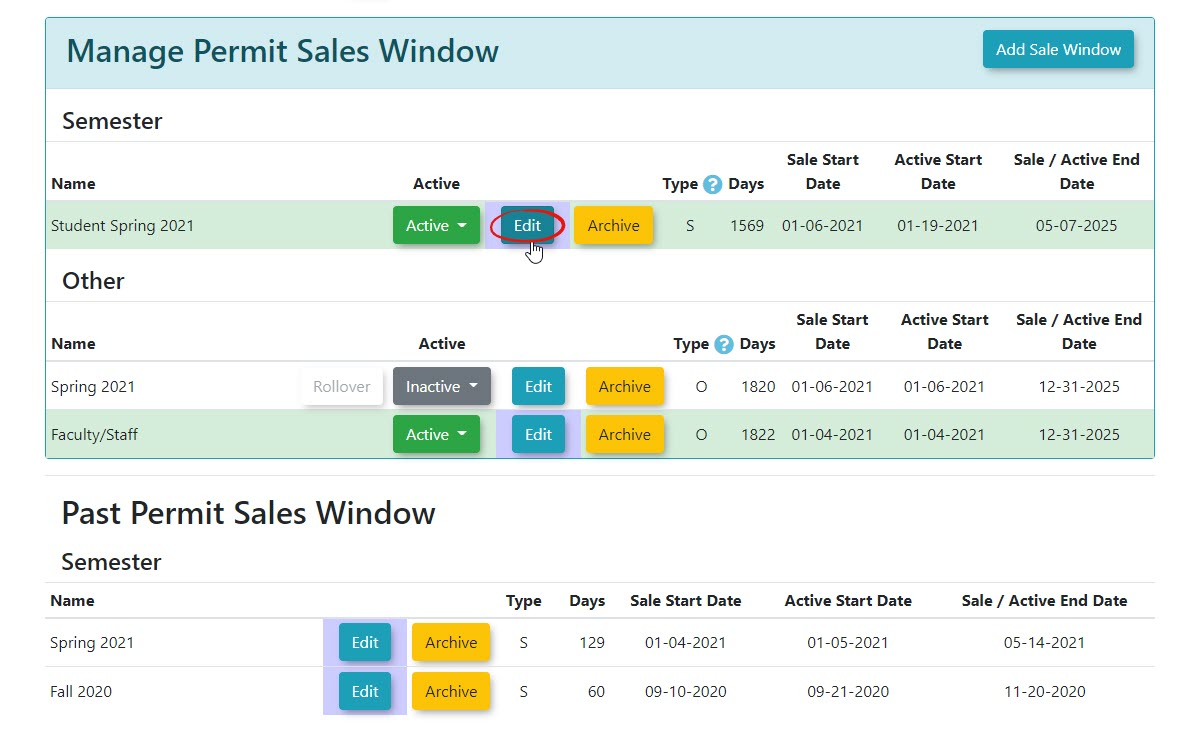](https://opscom.wiki/uploads/images/gallery/2024-06/Qzwimage.png)
Here you will enter the **Term Code** for the selected **Sales Window** that you want to appear on the permit purchases export.
[](https://opscom.wiki/uploads/images/gallery/2024-06/cl1image.png)
# Activate Script to Run on a Schedule
You must now ensure the **System Task** is set to active and has an active schedule set.
In the **Options** menu, click on **View System Task Logs**.
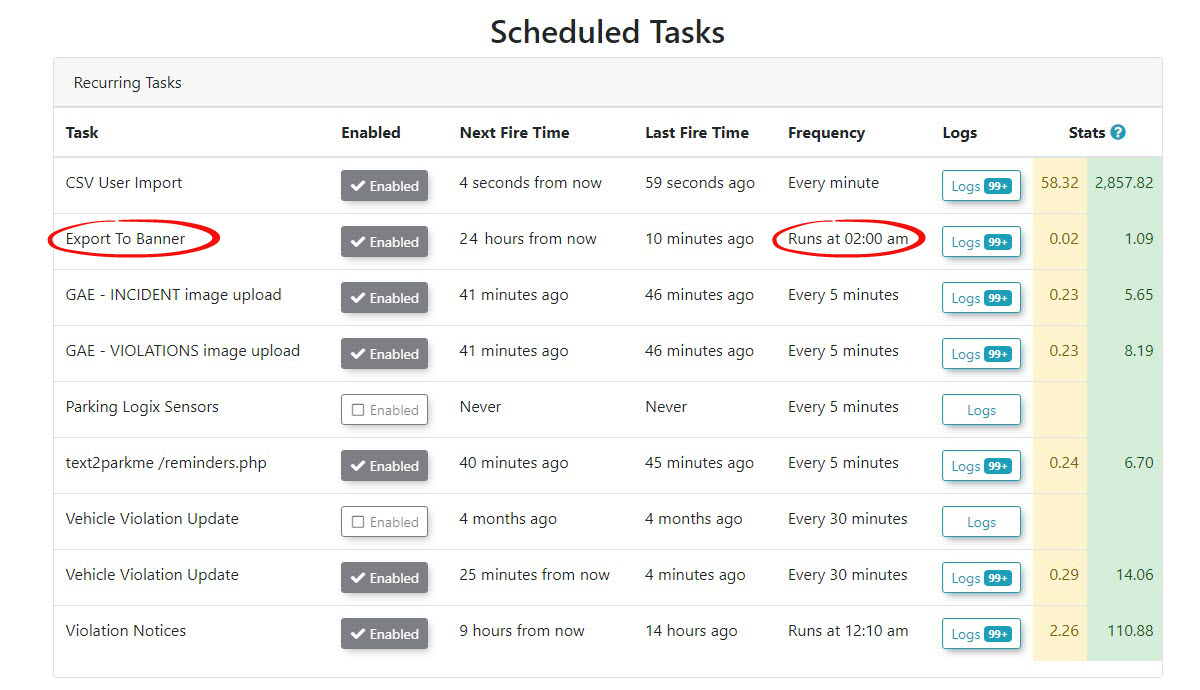
[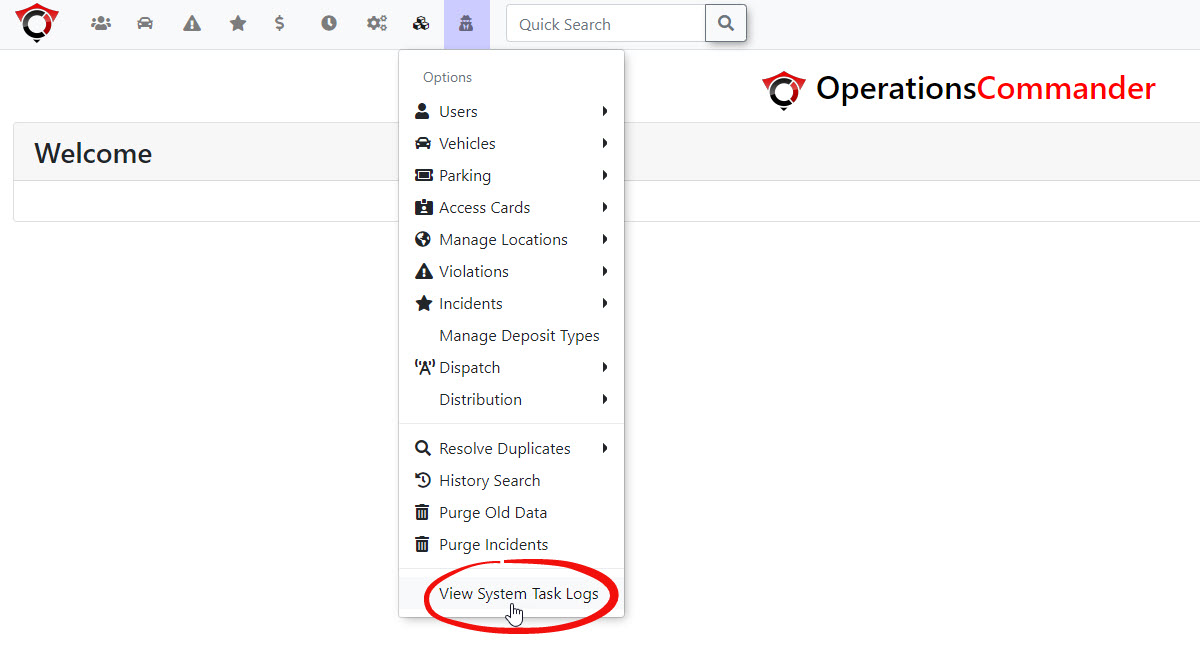](https://opscom.wiki/uploads/images/gallery/2024-06/5eEimage.png)
In this example, the Task is set to run at 2:00 am Nightly
[](https://opscom.wiki/uploads/images/gallery/2024-06/bBeimage.png)
# The User Portal
You are now set to make a payment on the user portal. In this example, we will purchase a permit.
Go to the user portal and click on the **Permits** menu item.
[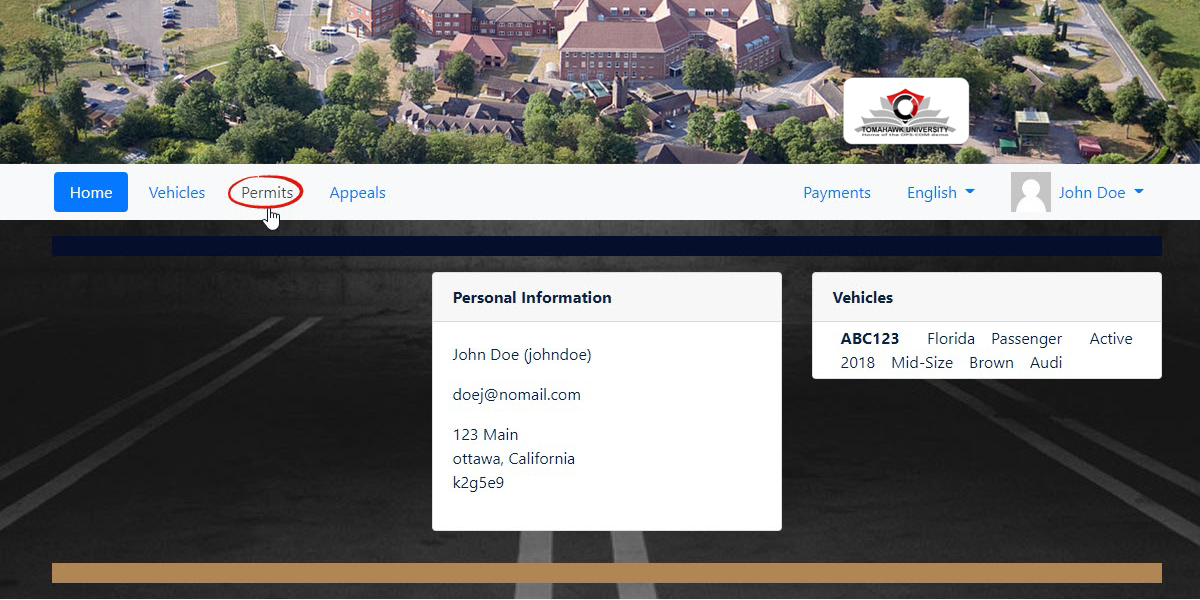](https://opscom.wiki/uploads/images/gallery/2024-06/3kCimage.png)
Select the Lot you wish to purchase a permit in.
[](https://opscom.wiki/uploads/images/gallery/2024-06/BtDimage.png)
Click **Reserve Permit**
[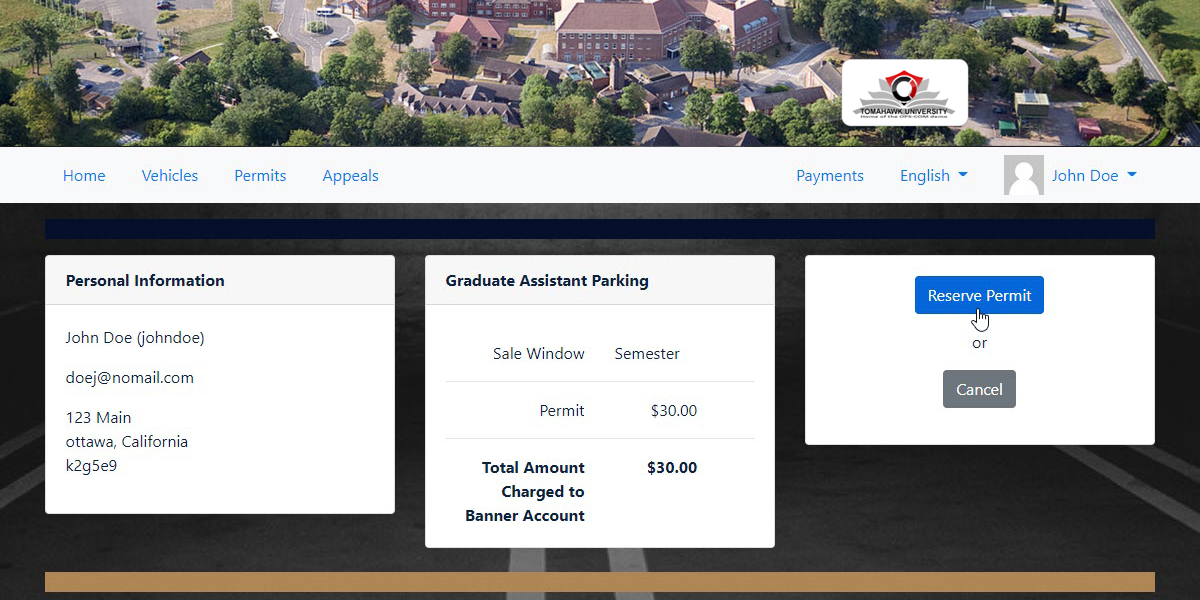](https://opscom.wiki/uploads/images/gallery/2024-06/9DBimage.png)
**Continue to Checkout** to view your **Cart**.
[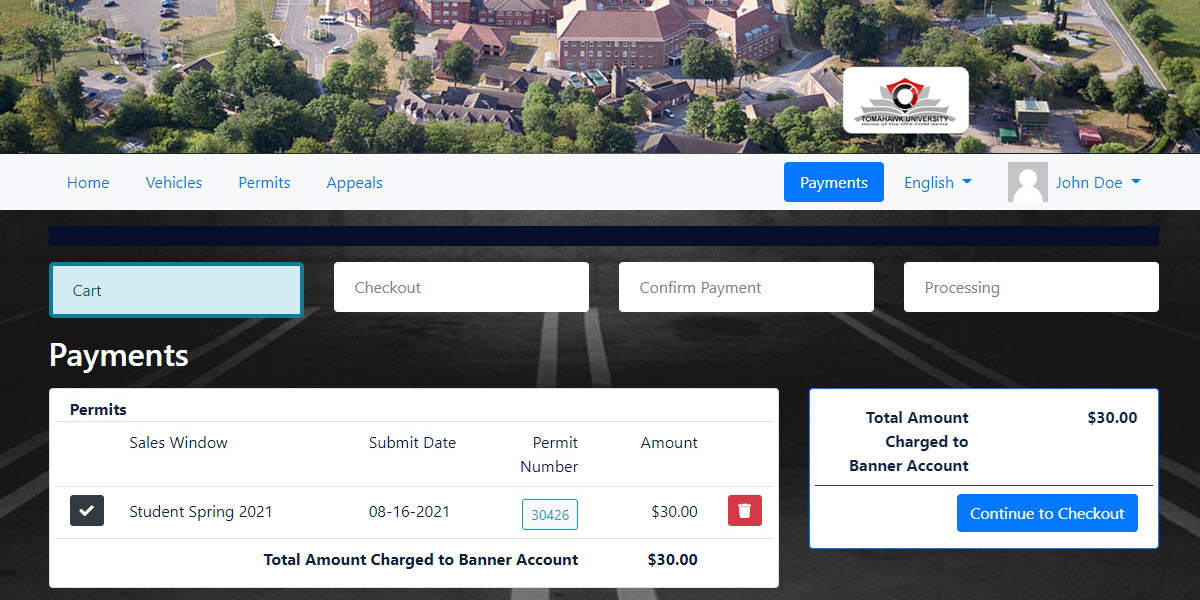](https://opscom.wiki/uploads/images/gallery/2024-06/0QZimage.png)
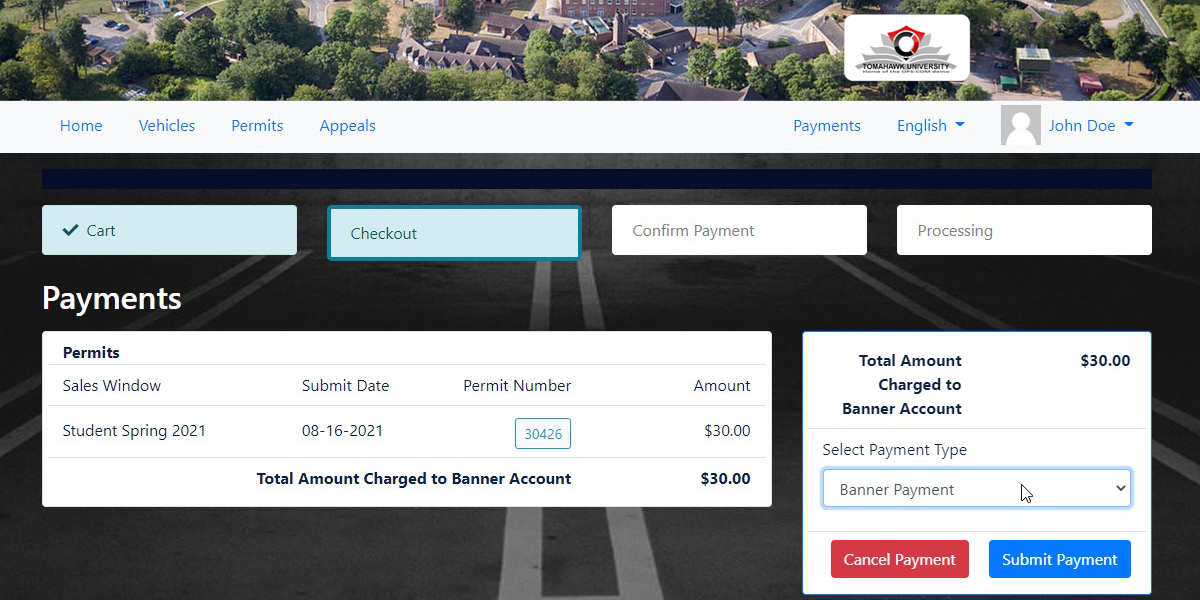
Select **Banner Payment** as your **Payment Type.**
This can be configured so that Banner Payment is your only selection available.
[](https://opscom.wiki/uploads/images/gallery/2024-06/KGCimage.png)
Click **Submit Payment.**
The screen will refresh to show the **Confirm Payment** page.
Click on **Confirm Payment.**
[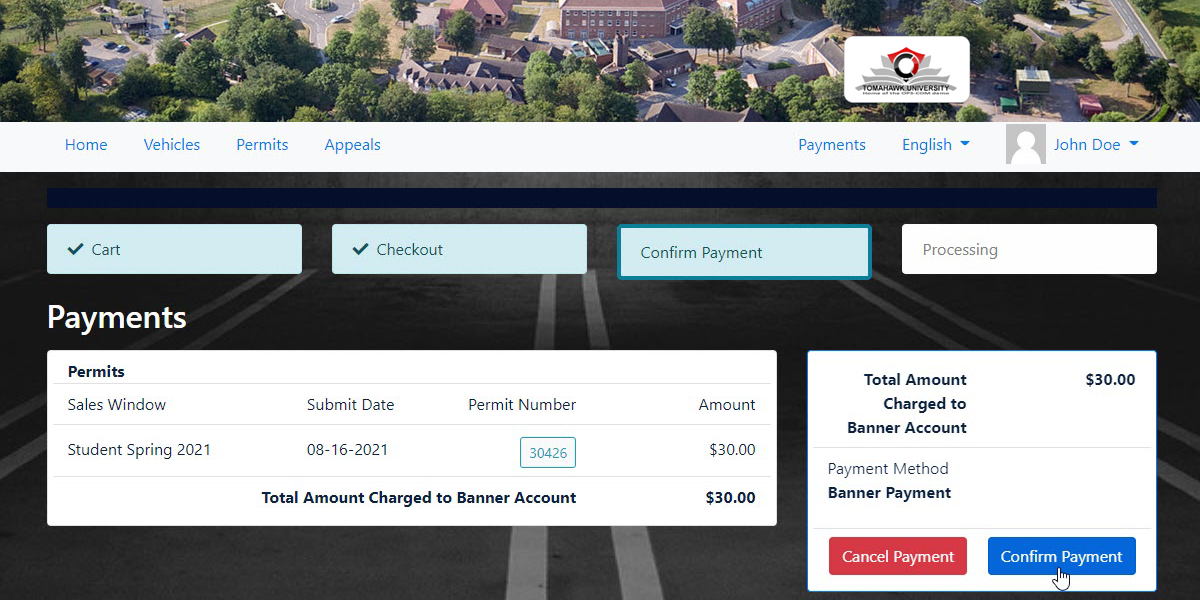](https://opscom.wiki/uploads/images/gallery/2024-06/6Xgimage.png)
Once the payment is processed, you will get an online receipt.
[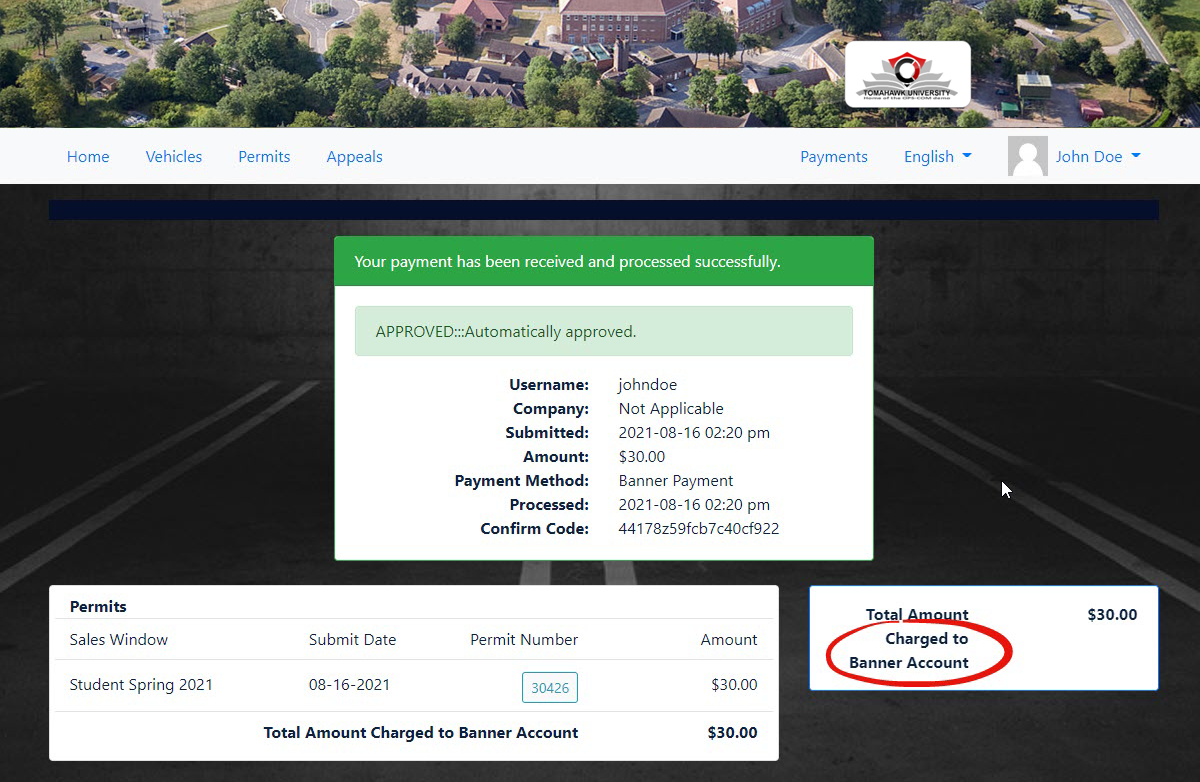](https://opscom.wiki/uploads/images/gallery/2024-06/32Iimage.png)
Some additional information on how the Banner export process works:
Export to Banner will run whenever the system task is set to, and gathers any violations that can be sent to banner that haven't been exported yet. When a violation has been exported by the system task, it has a flag put on it that marks it has been exported to Banner.
It will export the violations it found into a new file, and does not affect any previously output files, meaning it doesn't create a cumulative file that gets more added each day. Rather, it creates a new file every time it runs; this isn't necessarily daily, it runs at whatever interval the client has decided for it.
This would mean if they missed a day, there would be more than one new file in the output folder for them to process in Banner.