
Forms
Introduction
This article describes how to use the Forms module to create, manage, and deploy custom forms for users. This feature allows administrators to collect specific information for processes like applications, appeals, or feedback.
Setup & Configuration
The formsprimary modulesetup hasstep beenis refactored,creating and hasconfiguring a new functionality.form using the three-tab interface.
This is a refactored module. Existing form data from older versions of the system is not compatible, with the new format, which means anyand old forms will need to be recreated inusing this tool.
Creating a New Form
-
Go to User Management, then hover over Forms, and click List Forms.
-
On the
page,newFormsformListformat.Accessing FormsThe forms module can be found underclick themenuAddtree:Form button. -
On the Form Basics tab:
-
User Management → Forms → List Forms
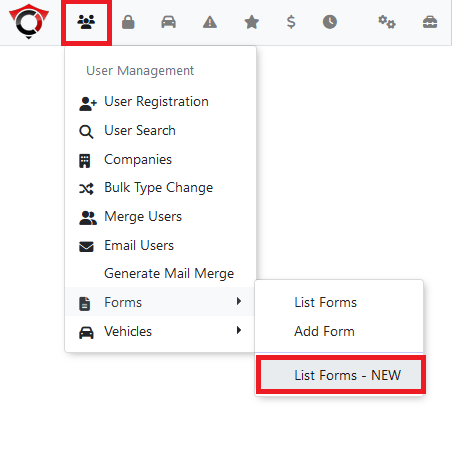
Forms ListThis will open the forms list page.

Several options are presented to the user from this page.Add new- createsEnter anewTitle and Description for your form.-
Enable the Visible checkbox to make it accessible to users.
-
Optionally, set a Show At and Hide At date and time to schedule the form's availability.
-
-
On the Post Form Actions tab:
-
Configure what happens after a user submits the form. You can choose to send a notification email to an administrator by selecting Mail to specific email, and you can define the Completion Text message that is displayed to the user.
-
-
On the Questions tab:
-
Drag and drop the desired field types from the right-hand panel into the questions area on the left.
-
Click the edit icon on each field to configure its options, such as its Label, Help Text, and whether it is Required. For a detailed breakdown of each field type, please refer to the Form Field Types article.
-

Using this Feature
Once forms are created, you can manage them and their submissions from the Forms List page.
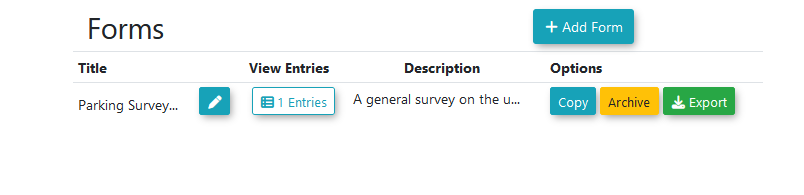
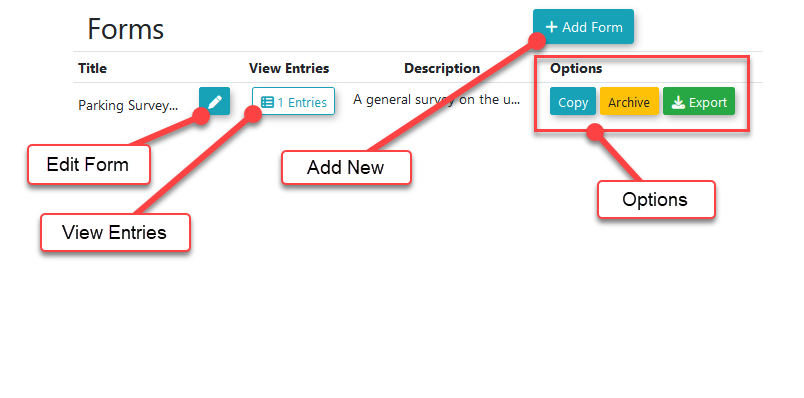
Managing Forms in the List From the Forms List page, you can perform several actions on existing forms:
-
Edit
formForm:- existing forms can be edited by clicking onClick the pen iconnexttothemodifyformantitle.existing form's settings and questions. -
View Entries: Click the entries
-buttonentriestosubmittedviewbyallusersuser submissions forathatformform.canForbemorevieweddetails,by clickingsee thebuttonsManaginginUsertheFormcolumn.Entries article. -
Options:Copy:
- this will createCreates a duplicate of the formwithout any of the entries. Useful when changes are to be made to the formstructure withoutaffecting existingits entries.-
Archive:
- this will archiveRemoves the form and all itsentries, removing thementries from view. -
Export:
- this will exportDownloads the form and all its entry data to an Excel file.
Creating a New Form
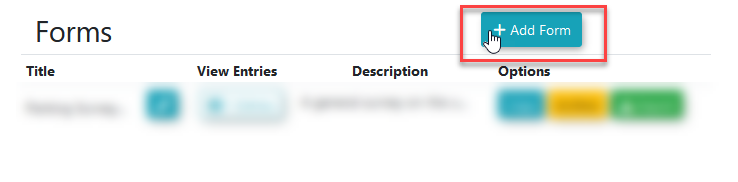
To create a new form, click on the Add Form button.
Upon opening the add new form screen, the user is presented with a menu with three tabs.
Form BasicsPost Form ActionsQuestions
Form Basics
The initial form setup.
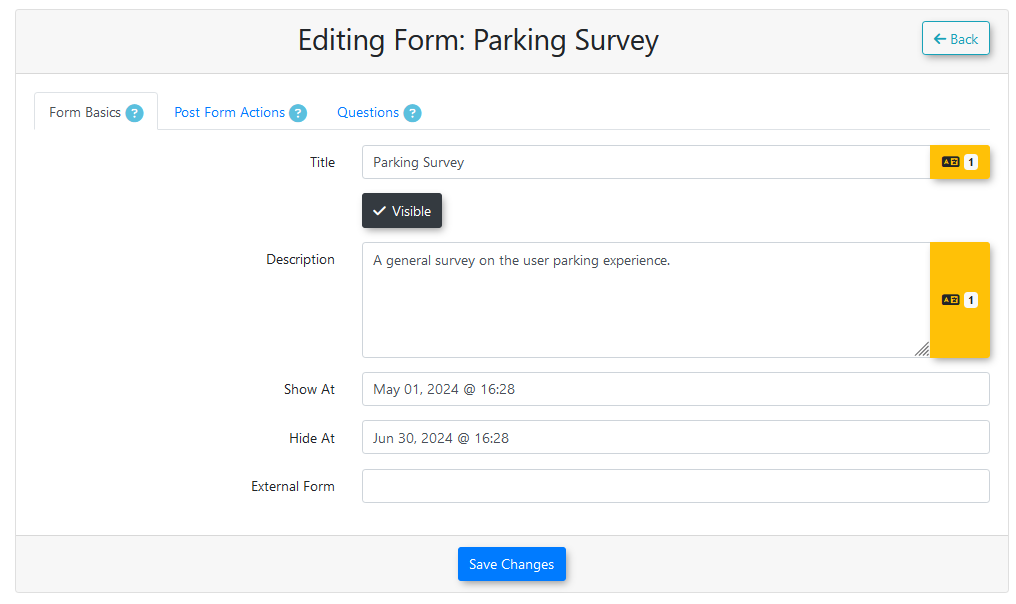
TitleUnderstanding- the name of the form. The orange box to the right of the text field is used to set the title in each language installed on the site.Visible- whether or not the form is visible to users.Description- text describing the purpose of the form. The orange box to the right of the text field is used to set the description in each language installed on the site.Show At- the date and time at which the form becomes visible to users.Hide At- the date and time at which the form becomes hidden from users.External Form- a URL to a form on an external site. If this field is provided, below sections can be ignored.
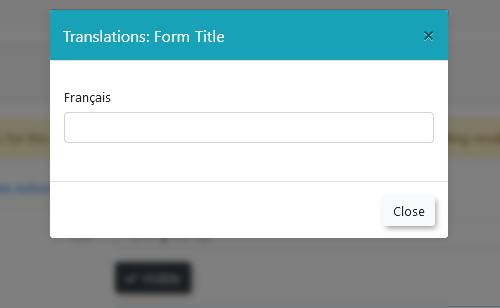
Clicking one of the orange boxes next to a text field will open a modal where the translation for the field can be set for each language installed on the site.
Post Form Actions
Set the actions to take after the user submits the form.
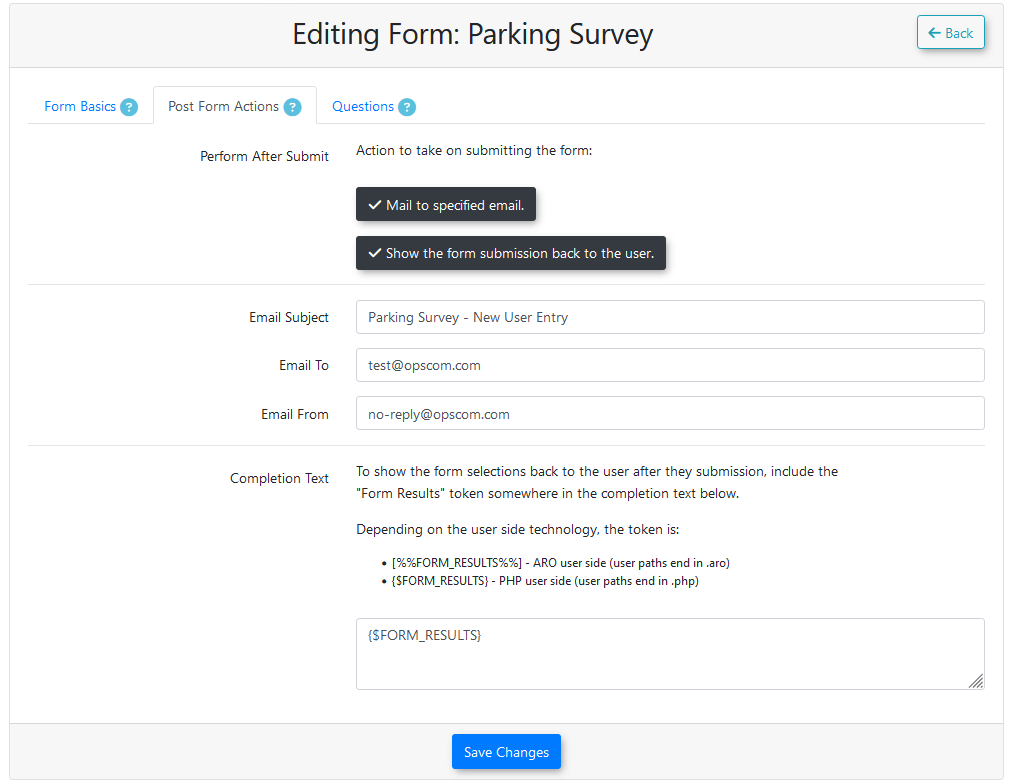
Perform After SubmitMail to specific email- after a submission is made, a notification email will be sent to the email address specified below in the email to field.Show form back to user- after a submission is made, the form data will be shown back to the submitter.
Email Subject- the subject line of the email notification to be sent back to the creator of the form when a submission is made by a user.Email To- the email address the notification email is sent to.Email From- the from address assigned to the notification email.Completion Text- the message shown back to the user after making a submission.
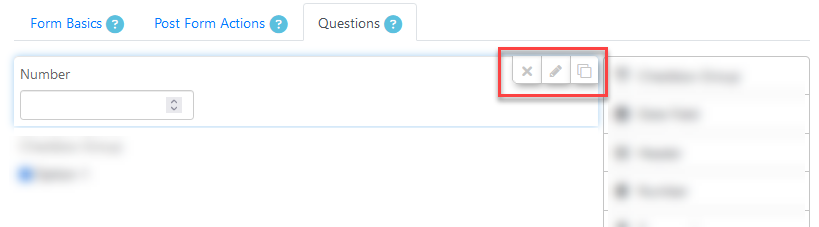
Questions
Under this tab is where the form questions are built.
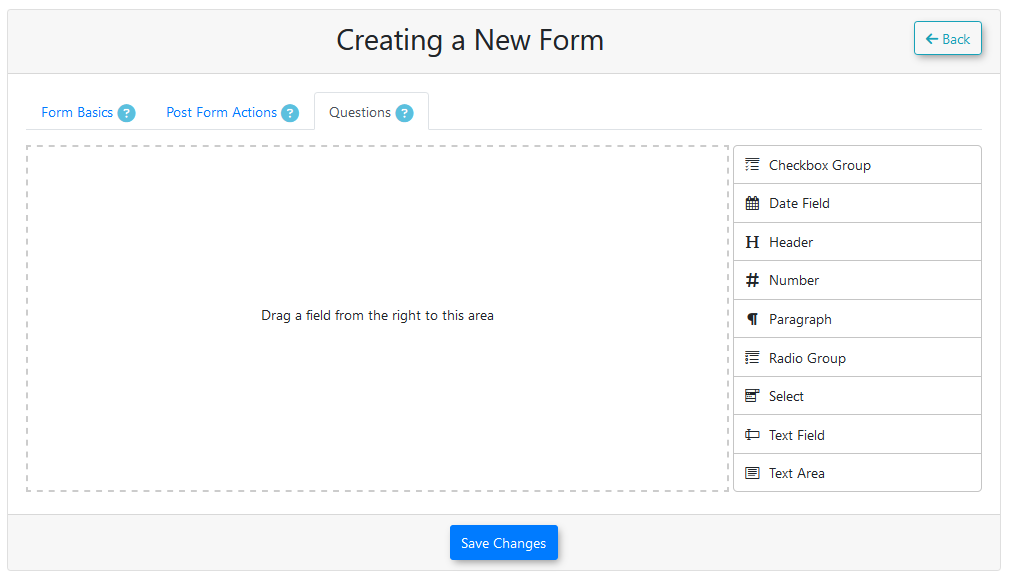
The right side of the form builder contains the field types that can be added to the form. This can be done by dragging and dropping the fields from the box on the right into the questions area on the left.
After the question has been created, the details can be filled in.
Each field can be removed, edited, or copied by using these buttons:
Question Types
For a detailed breakdown of form field types, refer to the Form Fields Type wiki documentation.
Checkbox Group - presents the user with a list of checkboxes, from which they can choose multiple options.
Date Field- a selectable date time for user input.Header- a header or title to present information to the user. No information is entered by the user.Number- a number for the user to input.Paragraph- a paragraph of text to present information to the user. No information is entered by the user.Radio Group- presents the user with a list of radio buttons, from which they can choose one.Select- presents the user with a dropdown menu of multiple pre-defined options. Multiple items can be selected if enabled, or only a single when not.Text Field- a short text field used for user input.Text Area- a long text field used for user input.
Question Options
When editing a question field, therethe following options are some common attributes to lookout for:available:
-
Required:
-Makesenablingthethisquestionwillmandatorymake it sofor the usermustto answerthe questionbeforethey are able to submit the form. Label- the name or title of the question.Help Text- will give the user additional information or context about the question. Makes a question mark icon appear next to the question that will display the text in a tooltip when clicked.Placeholder- for a question where the user provides the answer, will display the text in the background of the text field before the user enters a value.Value- the default value for a question.submitting.-
Searchable:
-Allows the answers for thisenables thefieldcontentsto be searched onwhenthesearchingFormthroughEntriesform entries.page. -
Admin Only:
-Hidesquestionsthemarkedquestionas admin-only will not be shown tofrom users. It isusedonlyfor adminsvisible toaddadministratorscommentswhen viewing ornoteseditingtoan entry.
Best Practices & Considerations
- Avoid editing a form
entry submitted by a user, such as if an application was approved or denied.
Form Options
Editing a Form
A form should only be edited whenafter it doesn’thas have anycollected user entries,entries. as it may cause existing entries to display their data incorrectly.
If changes need to be made to an existing form, it should be copied first, and the changes be made on the copy while it doesn’t have any entries.
Archiving a Form
Archiving acts as a form of deletion for forms.
When a form has been archived, the form and all its entries will be removed from view and can no longer be accessed.
Exporting a Form
Exporting a form will take all user entries given for a form and place the contents into an Excel document that will be downloaded by the browser.
Viewing Form Entries
User form submissions can be viewed by clicking on the view entries button nextChanges to the form title.
Further detailsstructure can because foundexisting inentry data to display incorrectly. If you need to make changes, use the ViewingCopy Formfunction Entriesto wikicreate documentation.