
Handhelds Devices Settings (Handheld Commons)
Navigate
The Handhelds Devices section in OPS-COM allows administrators to manage and configure handheld devices used for enforcement and data collection. This includes registering new devices, pushing messages, and updating device settings, ensuring seamless operation for field personnel and accurate data synchronization.
Using this Feature
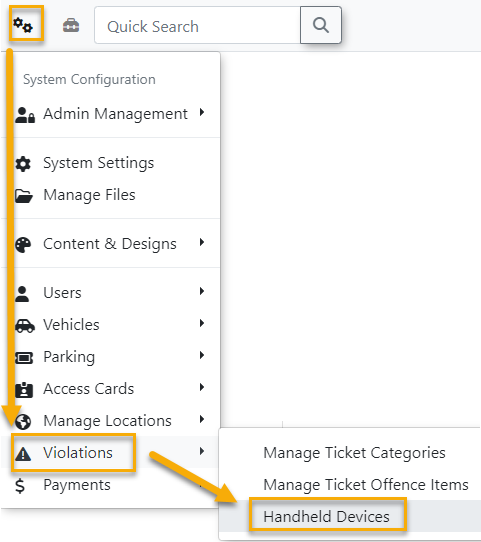
- Click Tools, Handhelds Devices.
SelectAlternatively, you can access this on the ViolationsSystemmenuConfigurationas→well. - The
→Handhelds Devices.
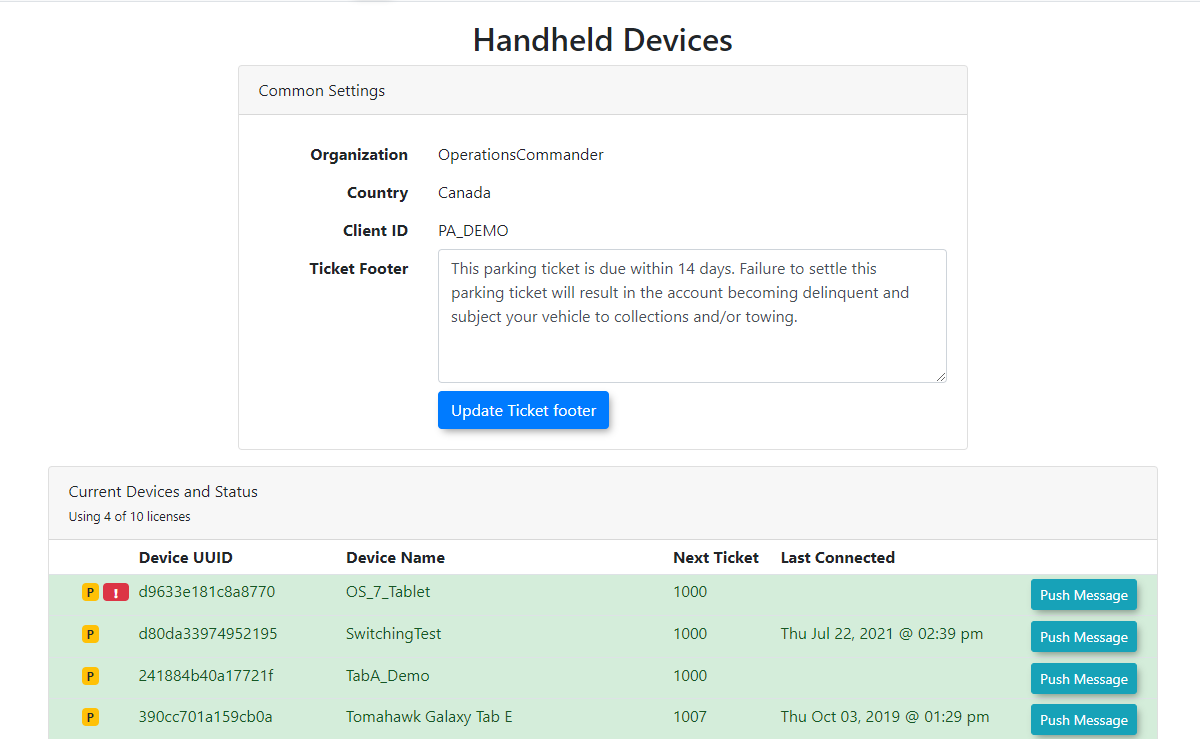
Theappearsappears, where you caneditmanagethevariousnumberaspects ofdaysyourbeforehandheldafleet. From here, you can edit settings such as ticketisduedue,dates, customizetheticketfooter,footers, view device information, and add or managehandhelds.individual
handheld units.
Adding Aa New Device
When adding a new handheld device, the process involves both the device startitself and the OPS-COM system configuration.
- Install Software: Start by installing the OPS-COM for Android
software.software on the handheld device. - Obtain UUID: After the first login
youattemptwillongetthe device, you'll receive a noticethatindicating the deviceisisn'tnotregistered.registered and theThis message willgive youdisplay a UUIDnumber(UniversallytoUniquebeIdentifier)used.number.It'sThis is a1616-digit alphanumeric codethattypicallyappearsfound under your loginscreen.screenUseonthattheUUIDdevice. - Register
configureDeviceyourinHandheldOPS-COM:- Once on the Handhelds - Common
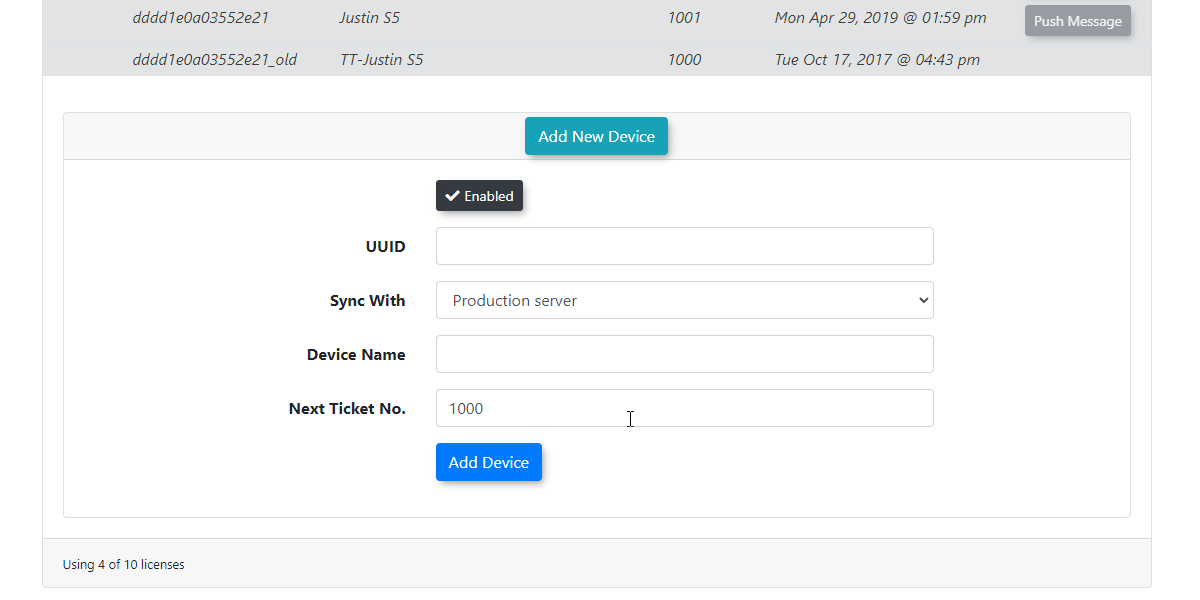
registrationSettingsprocess.Oncepage inHandheldtheCommonadmin portal, clickonAdd New Device. - A new screen will
openopen.up where youYou mustadd:add the following information:TheUUID:(Where isEnter theUUID?UUID obtainedFirstfromTimetheInstallationhandheld- Android)device.Set aServer to Sync with:(alwaysAlways startwithby selecting the ProductionServer)Server. This is a critical step for initial device registration, regardless of whether the device will eventually be used for testing on a Preview server (explained further in "Important Note - Additional Information").AName: Enter a descriptive nameyou'd liketouse toeasily identify this deviceby.(e.g., "Patrol Unit 1," "Enforcement Officer John's Device").
- Ensure
AlsotheimportantEnabledis to ensure Enabled is selectedcheckbox at the top of the entryform.Onceformyouishaveselected.
thisinformation - Once on the Handhelds - Common
- Click Add Device
once
all information is in place.
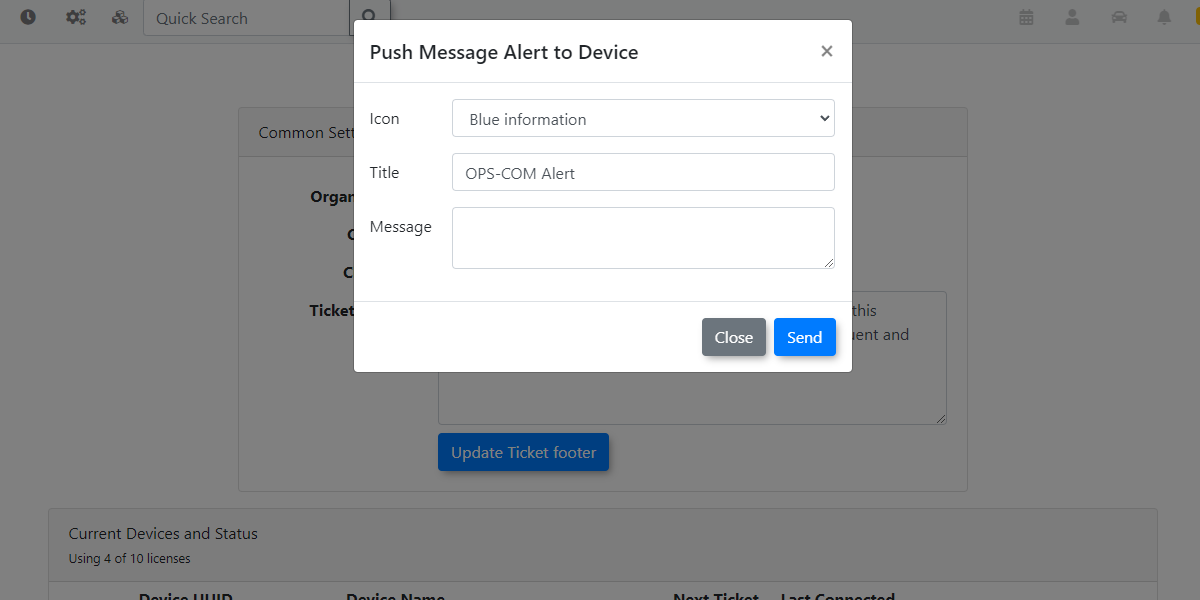
Pushing Messages
You can also pushsend messages outdirectly to your configured handheld units.units:
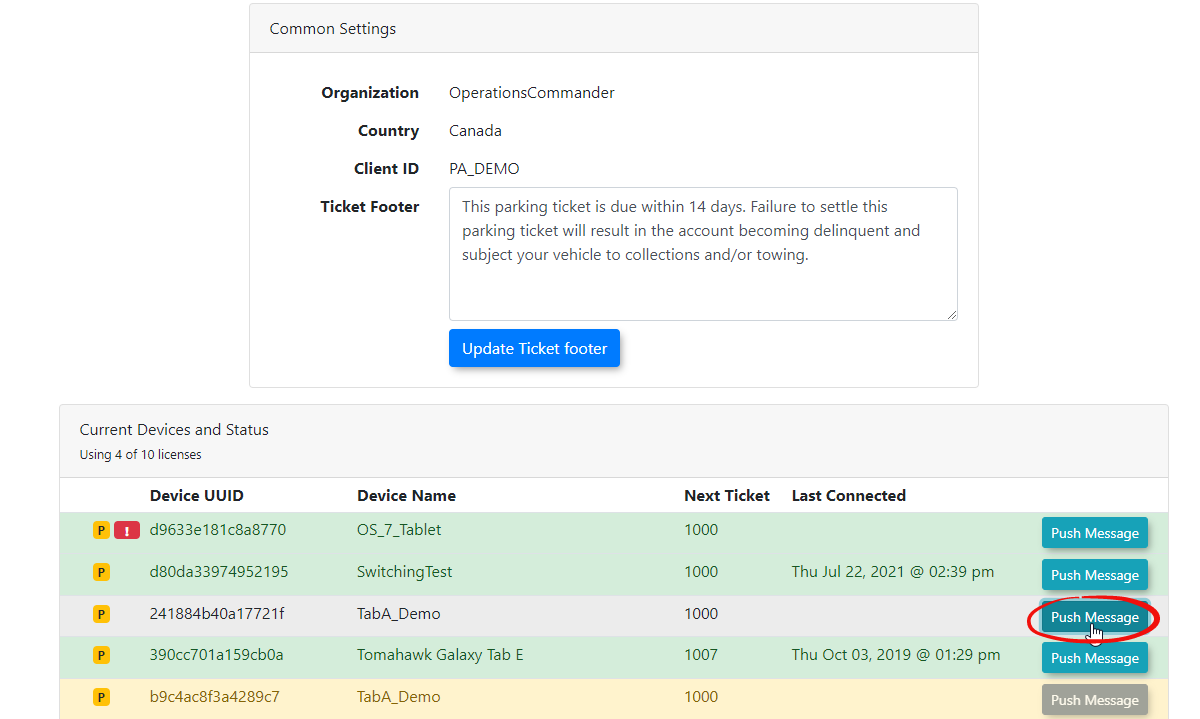
- On the
'Handhelds - Common Settings screen, click the Push Message'buttonbutton. - Follow the prompts to compose and
followsend your message to theprompts.selected devices.
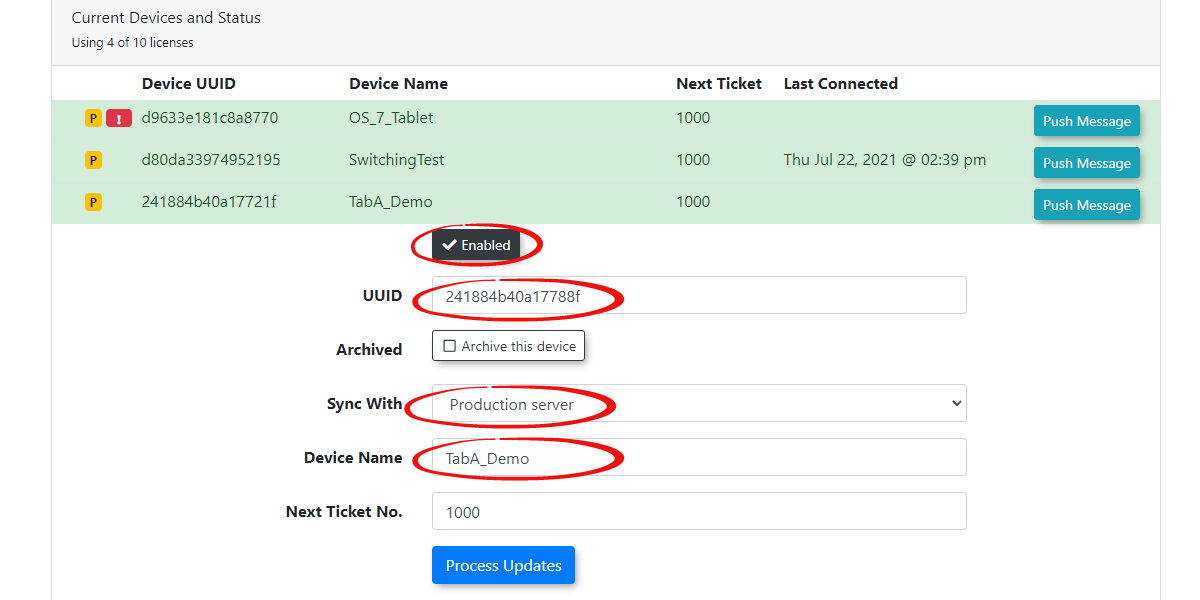
Updating Device Data
ClickTo modify settings for an existing handheld device:
- On the Handhelds - Common Settings screen, click on the device name you wish to
updateupdate.toThisgetwill open a drop-down list of editable settings. - Make your desired changes to the
settingsdevice's configuration. - Once finished, ensure you
can change.
yourMake sure you selectclick ProcessUpdatesUpdateswhentoyousaveareandfinished.apply
changesto the device.
Best Practices & Considerations
- Production Server First (Crucial):
- Important Note:
-DueAdditionaltoInformationtheByunderlyingvirtuelogic ofhowthe Handheld Commontooltool,functions.youIt'smust alwayspart of the process to start setting upregister a new handheld unit on theproductionProductionsideadminregardlessportaloffirst,whetherevenitif its ultimate purpose istoforbetestingused in Production or ason atestPreviewunitsite. - The system
alwaysinitially connects to the productionfirst,server, thenlooks atreferences thePA Common/handheld assignmenttablewhere(whichtheisunitswrittenarefrom production) to determine if a unit is registeredto then know if they are registered onfor Production or Preview.That'sThis ensures thelogiccorrectpath so itrouting isimportantestablishedto always writein thetablesdatabase. - This
productioninitial production-sidefirst.Additionally, thisregistration is also whyweyou can refresh preview sites withoutloosinglosing theHandheldhandheld unitsthat areconfiguredtoforspecificthem.
on Preview.For initial handheld connection, thefrompreviewsites. - Important Note:
- Adding a Handheld Unit to Preview for Testing:
To- First, add
athe handheld unit topreviewHandheldsyou-mustCommonfirst add it to handheld commonSettings on the production adminportal.portalYouaswould fill everythingdescribed inas"Addingnormala New Device," but selecttheyourpreviewPreviewserverServerasin theentryServerinto SyncWithwith.field. This
will setsets the properroutedatabaseforroute. - Next,
handheld unit in the database. You will then need to gonavigate to the previewserveradmin portal and enter the exact same device information intotheitspreviewHandheldssite.Then- Common Settings section. - Finally, perform a
reinstallreinstallation of thesoftware.OPS-COM for Android software on the handheld device itself. Thiswillreinstallationallowallows the handheld to pick up thenewnewly set path to the previewthatserver.
theyouhave - First, add
- Switching Between Production and Preview:
- Once
thea handheld entryisexists in both Production (configured for Preview sync) andPreviewPreview, you can generally switchbackbetweenandenvironmentsforthbyfairly easily. You repointre-pointing thesyncSyncwithWith settingto the preferred pathon both the Production andPreview.YouPreviewhaveadmin portals todoyour preferred path. - However, remember that you must perform a
reinstallreinstallation of the software on the handheld unit each time you change the synchronization path inorderthe system for the handheldunitdevice itself tobe updatedupdate with the selected path.
- Once
- UUID Accuracy: Ensure the UUID is entered precisely, as any error will prevent the device from connecting.
- Descriptive Naming: Use clear, identifiable names for your handheld devices to simplify management and troubleshooting.