Using SAML SSO with OPS-COM
What is Single Sign-On (SSO)
Single Sign-On, or SSO, is a way to make it easier for your users to access OperationsCommander using your existing managed accounts. Your users will not have to remember a separate username and password and will instead login directly to your corporate service provider.
Configuring SAML Setup
Important - You must first follow the instructions to setup login sources found here.
Service Provider Fields
The The Unique Identifier is part of the XML communication between OPSCOM and your SAML system. It is supplied by your SAML system and it is what OPS-COM uses to match against our UniqueID field.
The The Entity ID for for Service Provider defines the SAML integration path of the URL in the metadata. If there is more than one SAML integration in the system, each ID needs to be unique. The value supplied ends up in the path like this: "https://client.ops-com.com/auth/saml2/ ENTITY_ID_FIELD /acs"
The The x509 certificate can be generated and added to the service provider. You, the Identity Provider provide this.
Identity Provider Fields
These fields come from the system you are working with, such as SAML, when communicating with OPS-COM. For example, SAML should display its metadata under under Federation → Show Metadata on the SAML installation page.
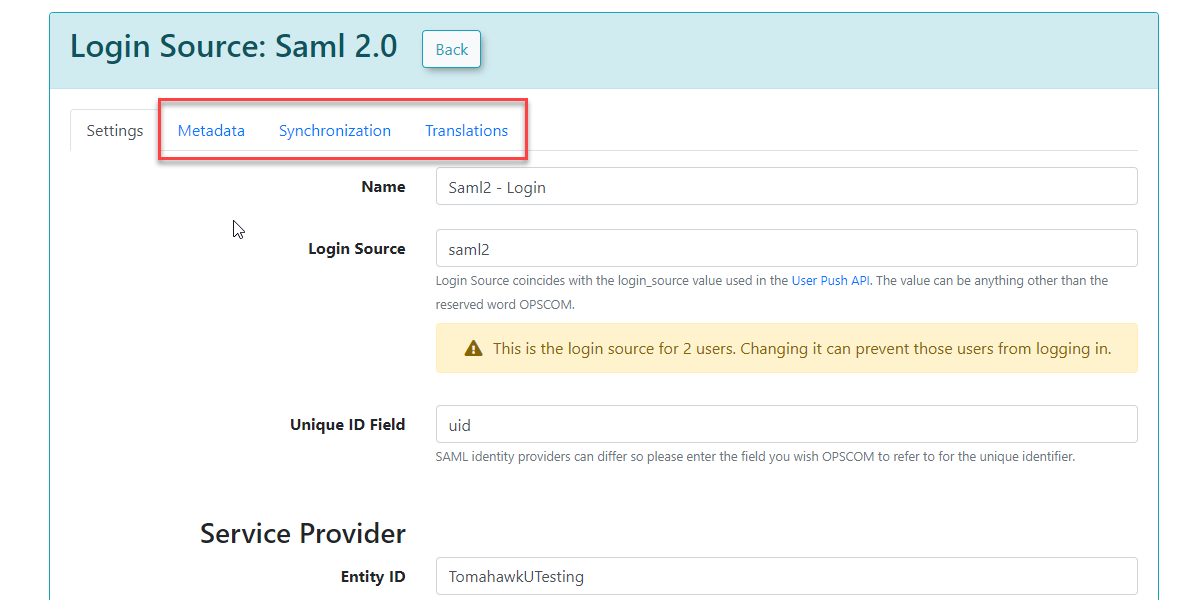
Once the settings have been completed and saved, you will have access to the the MetaData, Synchronization, and and Translations tabs.
Metadata
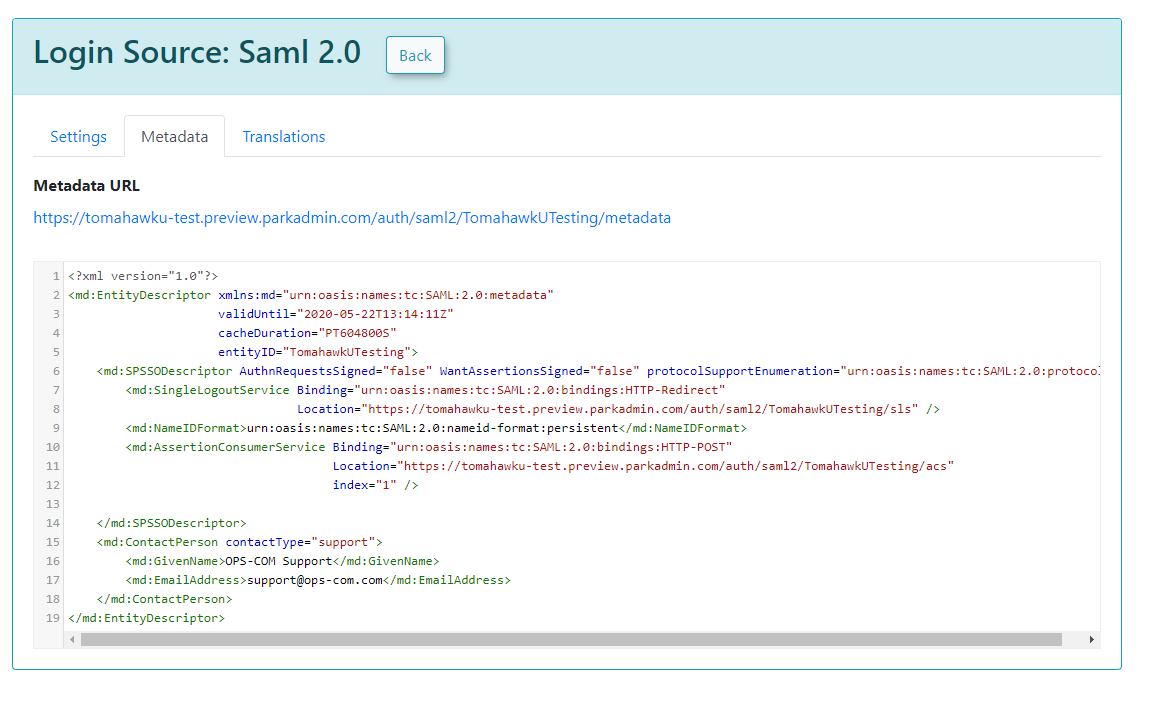
The Metadata tab provides the XML that would be provided to the Service Provider.
Sample XML File
The following is an example of a response from an external system to OPS-COM. In this case, it is a SimpleSAMLPhp service set up as the identity provider. At the bottom, are several attributes within an saml:AttributeStatement tag. These are required for our system to match to a user within our system. The one field that matters in this attribute section is the value being used as the permanently-unique identifier for a user. In this case it is "uid". Since "uid" is being sent back, then the setup for Identity Provider Fields should have "uid" as the Unique ID Field. If the unique ID is something else, such as SAMaccountName, then that should be used for the UniqueID.
<?xmlversion="1.0"?><samlp:Responsexmlns:samlp="urn:oasis:names:tc:SAML:2.0:protocol"xmlns:saml="urn:oasis:names:tc:SAML:2.0:assertion"ID="_aa1963115aa6490e728c7376f4c8849813bbb...">...<saml:Assertionxmlns:xsi="http://www.w3.org/2001/XMLSchema-instance"xmlns:xs="http://www.w3.org/2001/XMLSchema"ID="_9efd79bf6425983ee9176f3d33a99d1a9176180...">...<saml:Subject><saml:NameIDSPNameQualifier="MinionOpsComStaff"Format="urn:oasis:names:tc:SAML:2.0:nameid-format:transient">_7a426e0be71f14c1f349db00d7d543b6f7dcb52baa</saml:NameID><saml:SubjectConfirmationMethod="urn:oasis:names:tc:SAML:2.0:cm:bearer"><saml:SubjectConfirmationDataNotOnOrAfter="2021-08-24T16:00:41Z"Recipient="https://minion-3.dev.parkadmin.com/auth/saml2/MinionOpsComStaff/acs"InResponseTo="ONELOGIN_bb8a09203c888cf59af4c621a71cfa8f7559c016"/></saml:SubjectConfirmation></saml:Subject><saml:ConditionsNotBefore="2021-08-24T15:55:11Z"NotOnOrAfter="2021-08-24T16:00:41Z"><saml:AudienceRestriction><saml:Audience>MinionOpsComStaff</saml:Audience></saml:AudienceRestriction></saml:Conditions><saml:AuthnStatementAuthnInstant="2021-08-24T15:34:46Z"SessionNotOnOrAfter="2021-08-24T23:34:46Z"SessionIndex="_a7a68666092117d24aab8adecf1b0830622855b85..."><saml:AuthnContext><saml:AuthnContextClassRef>urn:oasis:names:tc:SAML:2.0:ac:classes:PasswordProtectedTransport</saml:AuthnContextClassRef></saml:AuthnContext></saml:AuthnStatement><saml:AttributeStatement><saml:AttributeName="uid"NameFormat="urn:oasis:names:tc:SAML:2.0:attrname-format:basic"><saml:AttributeValuexsi:type="xs:string">6ddf4027-3397-4e45-8628-0189f60fe91e</saml:AttributeValue></saml:Attribute><saml:AttributeName="full name"NameFormat="urn:oasis:names:tc:SAML:2.0:attrname-format:basic"><saml:AttributeValuexsi:type="xs:string">Sarah Knowles</saml:AttributeValue></saml:Attribute><saml:AttributeName="email"NameFormat="urn:oasis:names:tc:SAML:2.0:attrname-format:basic"><saml:AttributeValuexsi:type="xs:string">sknowles@tomahawk.ca</saml:AttributeValue></saml:Attribute></saml:AttributeStatement></saml:Assertion></samlp:Response> |
Translations
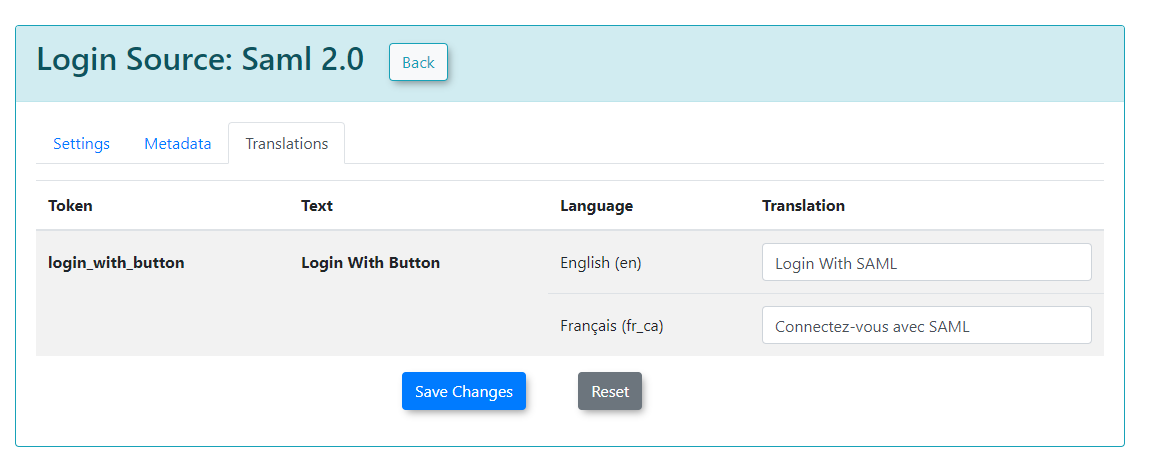
Translations can be used to change the text displayed on your login button from the user side. We can create as many different translations as we have available on our system.
For this example, we have English and French.
Synchronization
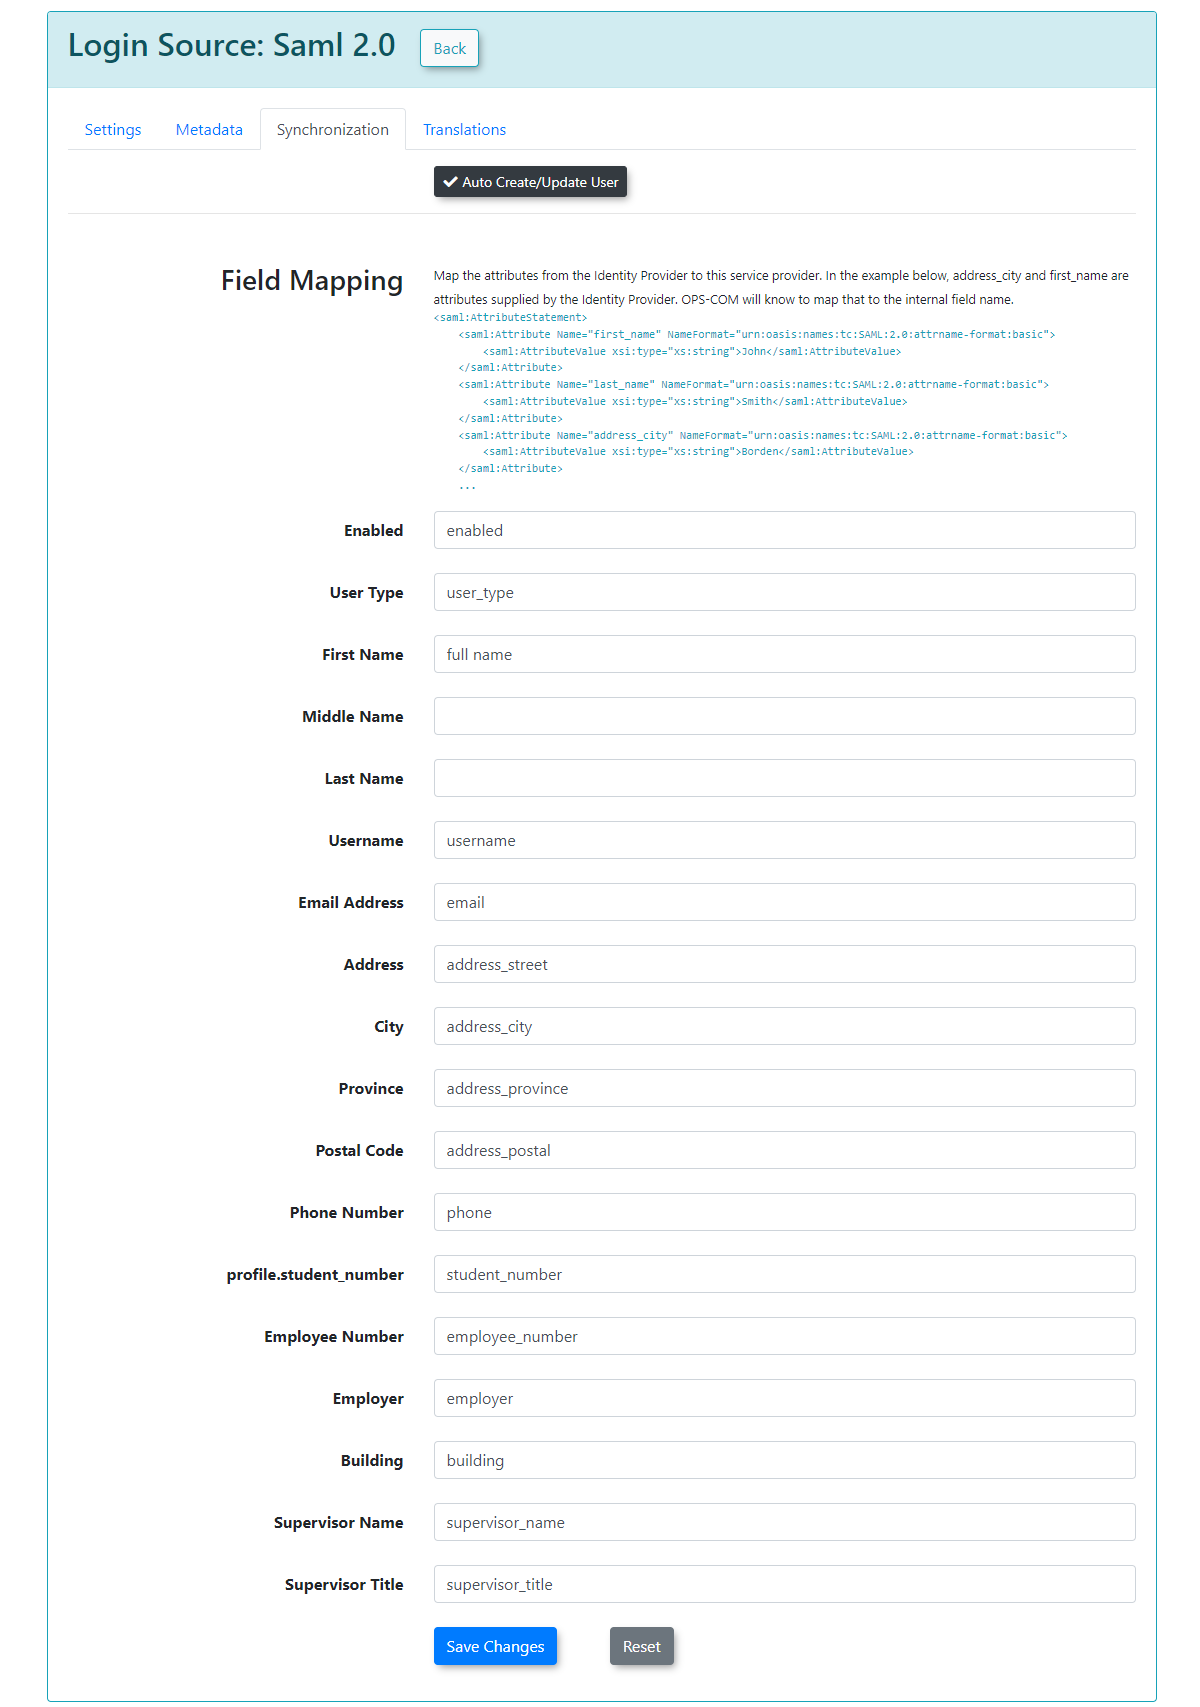
The synchronization tab allows you to create users in OPS-COM when they login from SAML if they do not already exist by mapping your user attributes to our system. This also lets you update existing users information in the system.
In this example, any field that is mapped and has a value from your SSO side should get updated to the value from SAML.
To begin, ensure that you enable enable Auto Create/Update User. Keep in mind that these are sample values from our test system, and that your SAML system may differ.
After you have supplied the information in each field, you can click click Save Changes and your users will begin to be created/updated.
If any of the supplied fields are incorrect, then the information will be blank when the user logs in, or it will be unchanged if the user already existed.


