
Login Sources (SSO)
Understanding
Login Sources
Ain "loginOPSCOM source" is justdefine the wayvarious amethods userby signswhich users can sign into the system. ForThis example,feature aprovides administrators with flexible control over user canauthentication, logallowing infor directly throughstandard OPSCOM logins or integration with theirexternal usernameidentity and password—this would be the "OPSCOM" login source. Other login sources,providers like SAML or LDAP, allow users to log in through an external system instead.
This setup gives you control over how users access OPSCOM and allows you to offer multiple login options forenhancing convenience and flexibility.security for diverse user populations.
Setup & Configuration
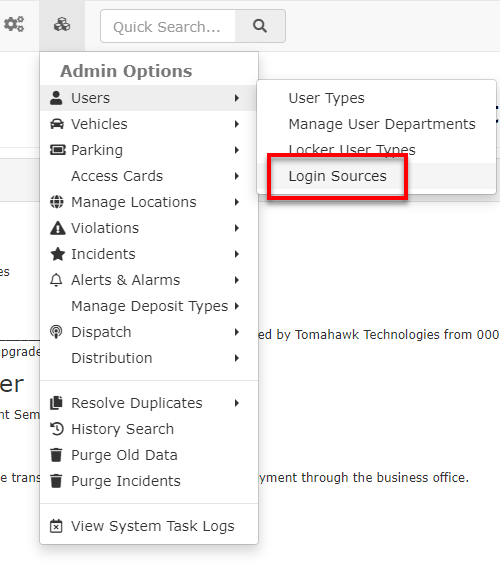
You can add or change loginLogin sources byare going to the Admin Optionsmanaged under the Admin Options menu, within the Users section.
- Hover
overSystem Configuration, Users and click Login Sources.
- The Login Sources page opens.
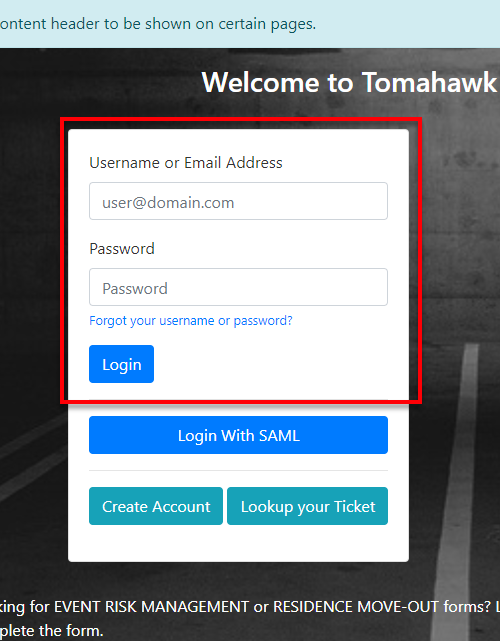
Default Login Source
- OPSCOM is the default login source. This means
thatthat, by default, users will log inwithdirectlyanto OPSCOM using a username and password created within the system itself on the standard login screen. - If you disable
thisthe OPSCOM default login source, then only other configured login sources,likesuchSAML,as SAML or LDAP, willwork.be
active
foruser logins.

Adding Login Sources
ToOPSCOM addsupports amultiple login sources, allowing some users to utilize SSO while others log in directly.
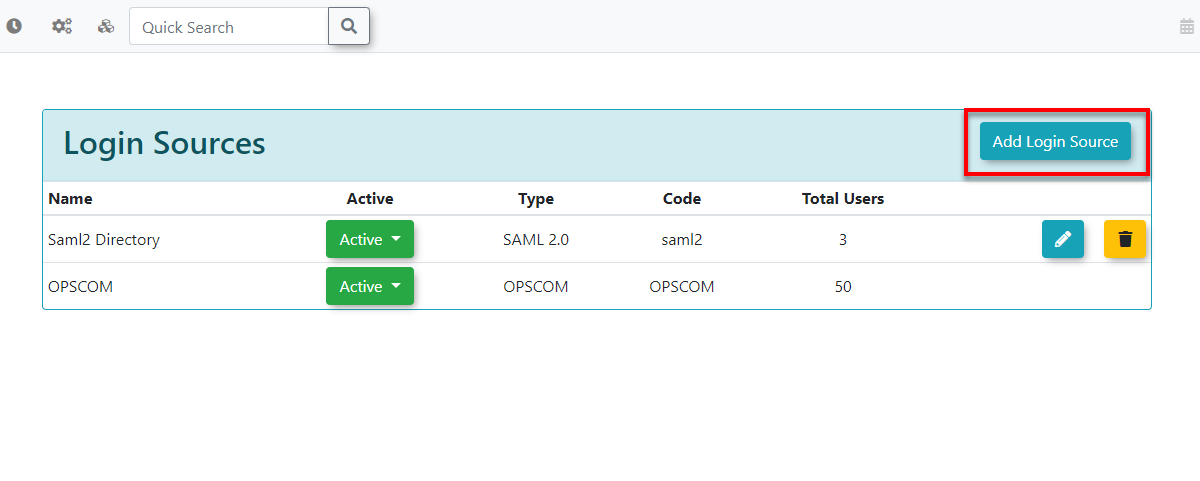
-
On the Login Sources page, click the Add Login Source button located at the top right.
-
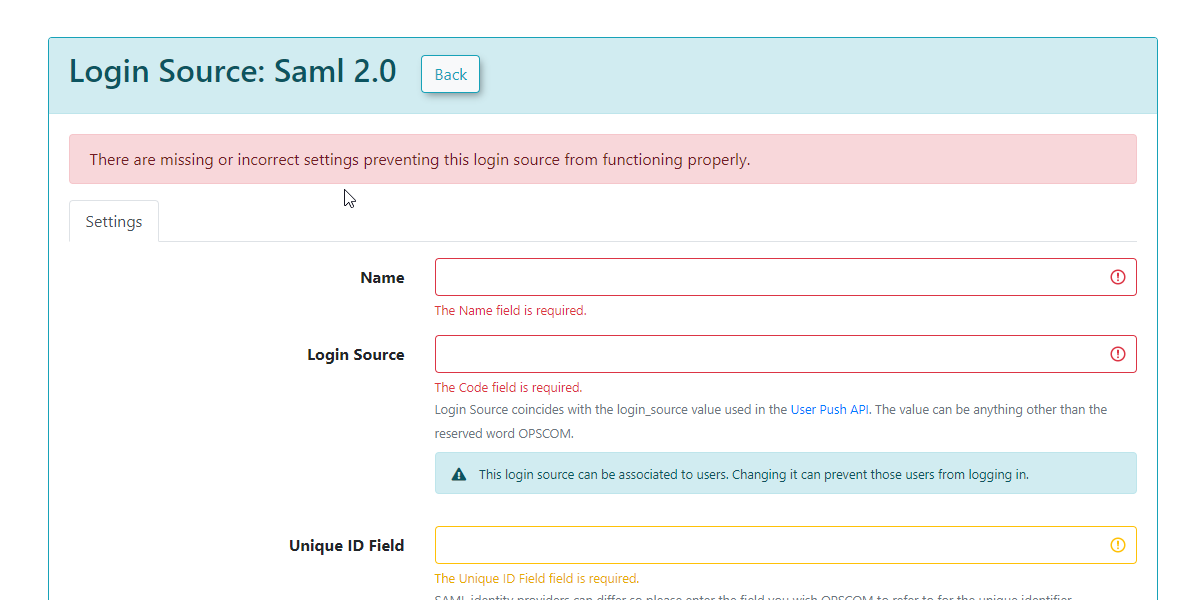
A form will appear for the new login
source,source.clickFill out the“AddrequiredLogin Source” button on the top right of the page.Important - OPSCOM can support a system where some users require SSO and some do not, there can be multiple login sources. The source name is up to the Identity Provider, except for OPSCOM.
- Red fields
fieldsare required to be filled before you can clicksave.Save. - Yellow fields
fieldsare technically required for the login source toworkfunction correctly, but they will still allow empty or invalid values to besaved.saved initially. Yellow fields can also indicate that a change has beenmade.made to the field.
Important -The Login Source - Code field is crucial as it's what the user profile will match against whenaddingassociating userstowiththethis new login source. However, only one login source code can be activated at atime.time for a particular type (e.g., you can have multiple SAML configurations, but only one primary 'SAML' code active for user matching at a time if the system differentiates by 'type' of code rather than unique code string across all). The source name (code) itself is typically determined by your Identity Provider, with the exception of 'OPSCOM' for direct logins. - Red fields
-
Click Save Changes to add the new login source.

Using this Feature
Once login sources are added, you can manage their status and properties.
Managing Login Sources
OnceFrom youthe addLogin loginSources sources,page, you can manage themyour byconfigured editinglogin or deleting themsources using the buttons next to each source.entry:
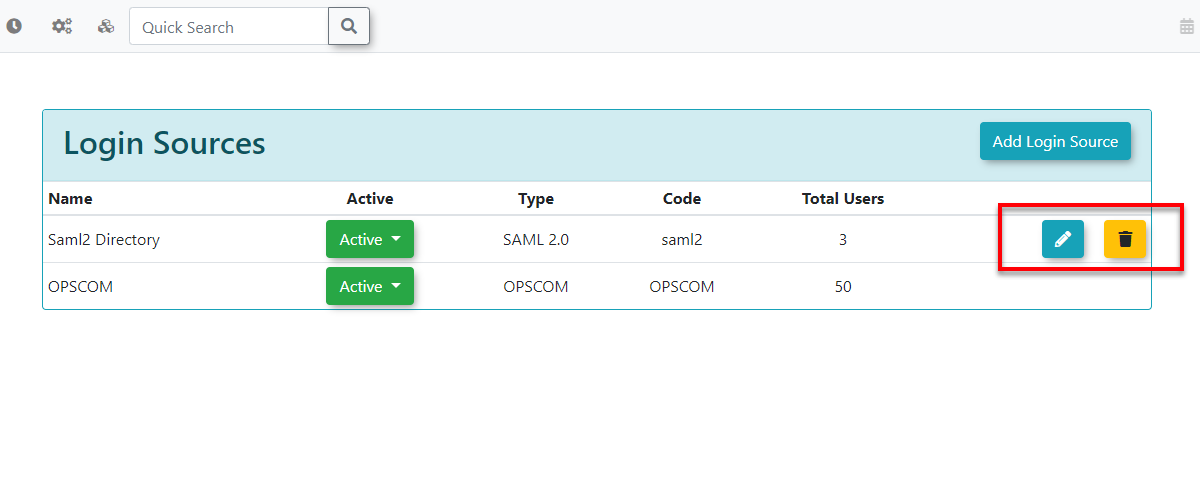
- Click
ArchivingEditatoLoginmodifySourcean existing login source's details. This will bring up the same form used for adding, allowing you to update its configuration. - Click Delete
:Archivingto permanently remove a login sourceremoves itfrom theloginlist.optionsAusersconfirmation pop-up will usually appear before deletion.
Active/Inactive/Hidden Login Sources
You can see,make andLogin usersSources Active, Inactive or Hidden. Hidden equates to an Archived status. Users who were previously connected to thisa hidden login source will no longer be able to log in using that method.
Best Practices & Considerations
- Strategic Planning for Multiple Sources: Carefully plan your login source strategy. Determine which user groups will use which login method (e.g., students via SAML, staff via LDAP, public users via OPSCOM direct login).
- User Provisioning: Consider how users will be created and linked to their login sources. Will they be auto-created on first login, or pre-imported? This linkage uses the Login Source - Code field.
- Disabling Default OPSCOM: If you intend for all users to access via an external SSO, ensure you disable the OPSCOM default login source. Test thoroughly before making this
way.change in a live environment. - Testing New Sources: Always thoroughly test any new login source after configuration to ensure users can successfully authenticate and access the system.
- Communication with Users: Clearly communicate to your users how they are expected to log in, especially if you introduce new SSO options or change existing methods. Provide clear instructions and links.
- Archiving vs. Deleting: Use the Hidden function for temporary deactivation or if you foresee needing to reactivate a login source in the future. Use Delete only when a login source is permanently no longer needed and has no associated active users.