
Permit Invoicing
Invoice Preparation
Before invoices can be prepared, there must first be an invoice number set.
Locate the invoice number settings on the settings page.
The settings page can be found under:
- System Config > System Settings
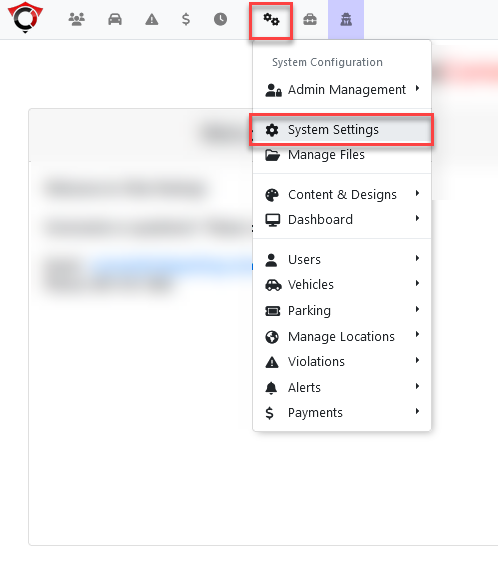
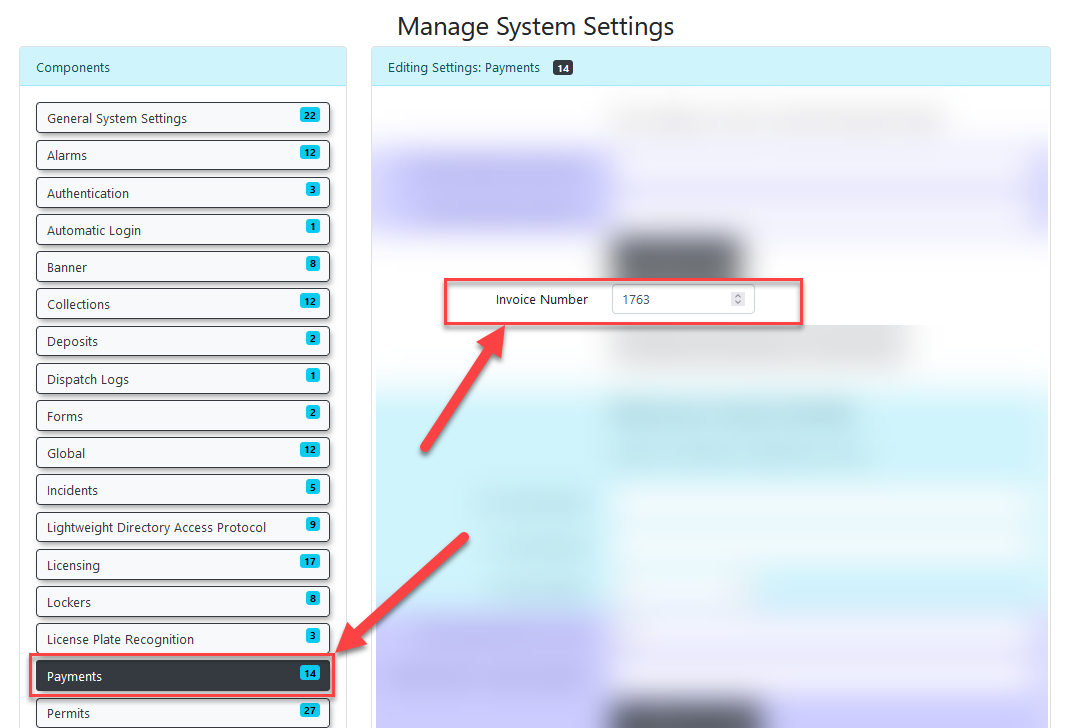
The invoice settings can be found under the Payments menu option.
The starting invoice number can be set here.
The permit invoice template must also be setup from the templates page.
Decide if unpaid permits will be allowed to rollover to the next period.
Setting Invoice Contacts
Different flags must be set to ensure that companies and individuals that require invoices will receive them.
- User Management -> Companies
From this page, enter the search criteria and bring up the company that invoices will be set up for.
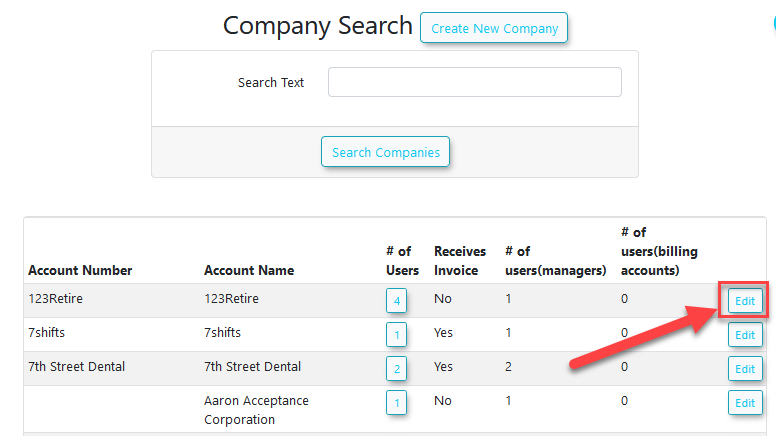
Clicking on this will bring up the company edit page.
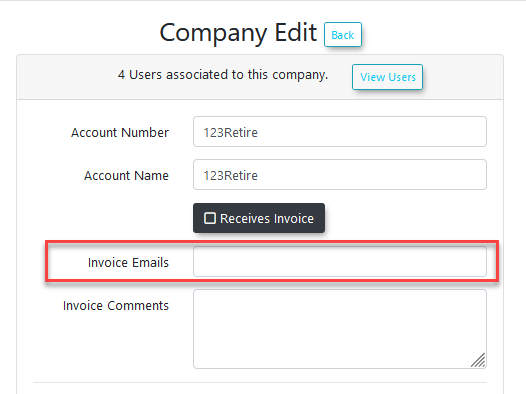
The relevant field here is invoice emails.
To ensure invoices are received by the correct recipients, populate the 'Invoice Emails' field on the company edit screen with the email addresses of the recipients.
These addresses can be separated by colons ( : ) or commas ( , ).

User Configuration
A user can be set as part of a company from the user's profile.
After configuring a user as part of a company, additional configuration options will appear in their profile.
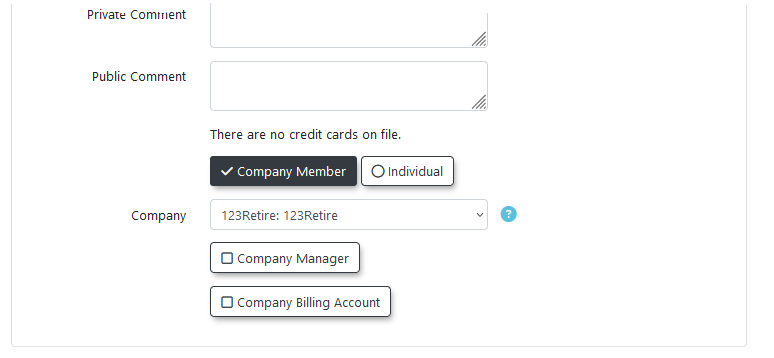
For Company Members, an admin must designate a member to act as Company Billing Manager. This will be the company member that receives invoices.
Note: The Billing Manager does not need to be a Company Manager, though they are often assigned both roles. While there can be multiple Company Managers, there should only be one Company Billing Manager.
Designating a Billing Manager is required to activate invoicing.
Invoicing Individuals
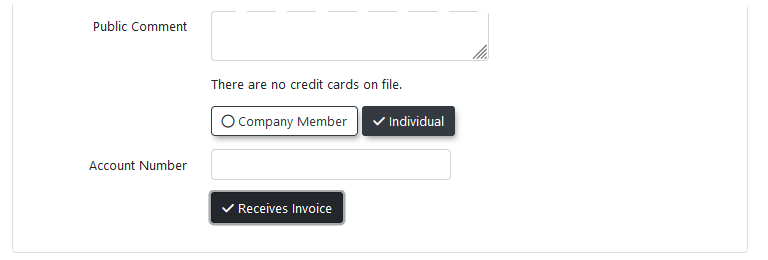
For individual users who are not part of a company but need to receive invoices, edit their user profile and check both the 'Individual' and 'Receives Invoice' checkboxes.
Creating Permit Invoices
To start creating a permit invoice, first navigate to the page under the menu:
- Permits -> Prepare Invoices
The prepare invoices page will be displayed.
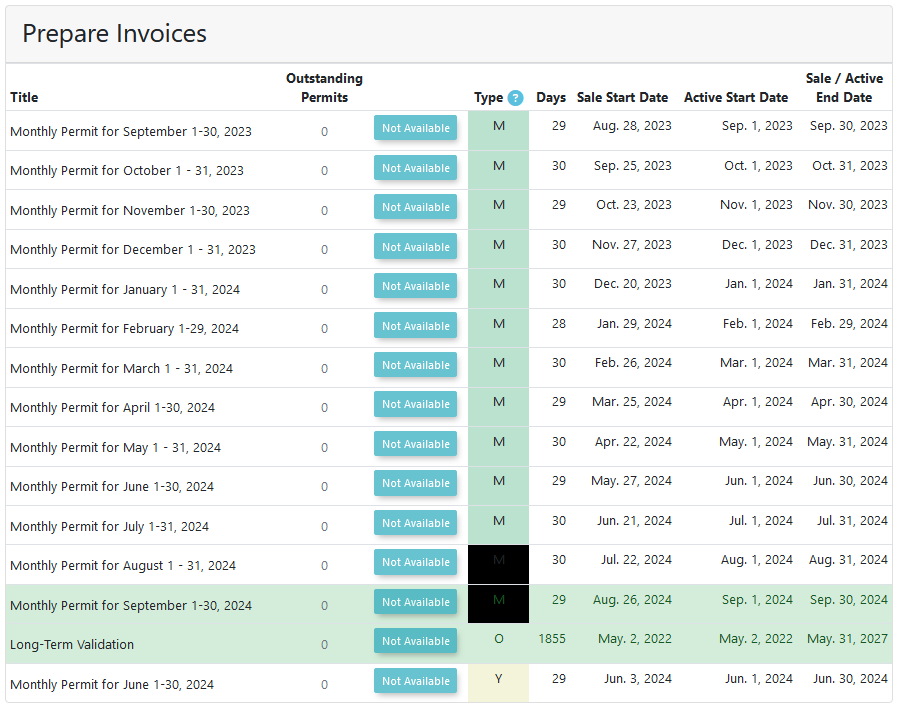
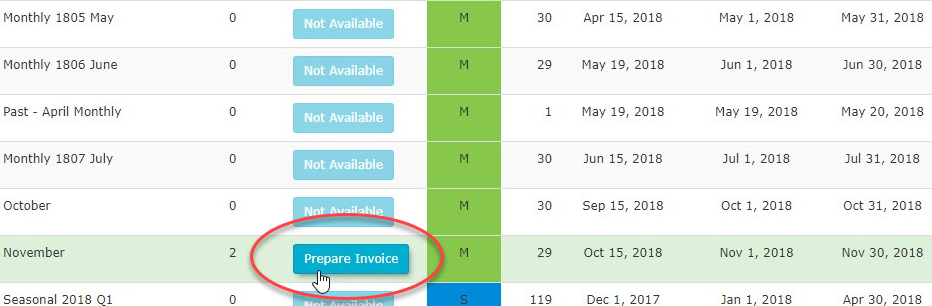
In sale windows where there are outstanding permits, a button will appear for prepare invoices.
Click on prepare invoices to start the invoicing process.
Note - Currently, only permits for user types that are not Student or Staff will be shown as available for invoicing.
Setting Invoice Billing and Due Dates
A list of invoices will be displayed for the sale window. All invoices will be selected by default, but specific invoices can be excluded by toggling them off.
As part of the process, the the Billing Date and Due Date for the invoices can be set.
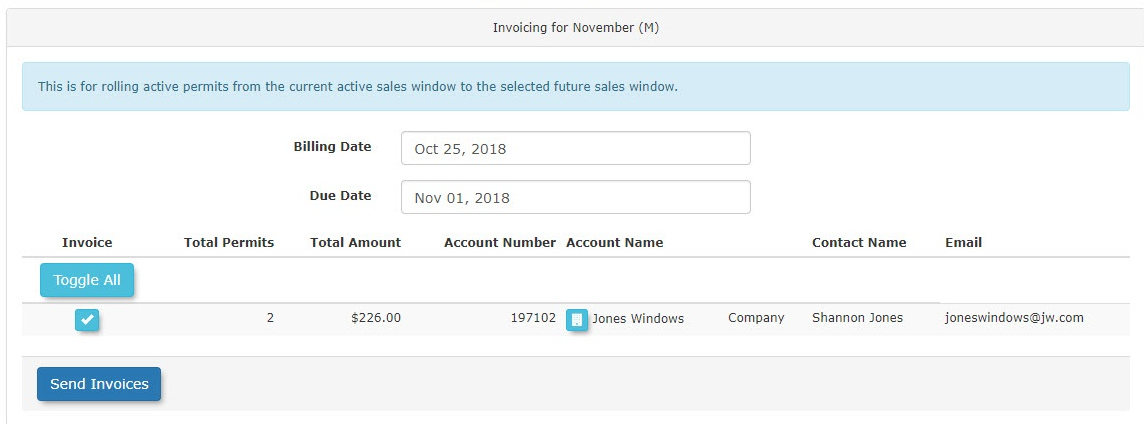
Click Send Invoices to schedule the invoices for sending.
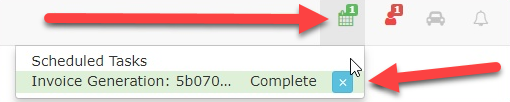
The following message will appear:

The invoicing task will appear under the calendar icon.
When clicked, the status of the task will be displayed; in this case, it shows as complete.
The task can be cleared by clicking the blue X button.
Emailing
At this stage, the invoices will be emailed to the companies selected.
By default, the email will be formatted as follows:
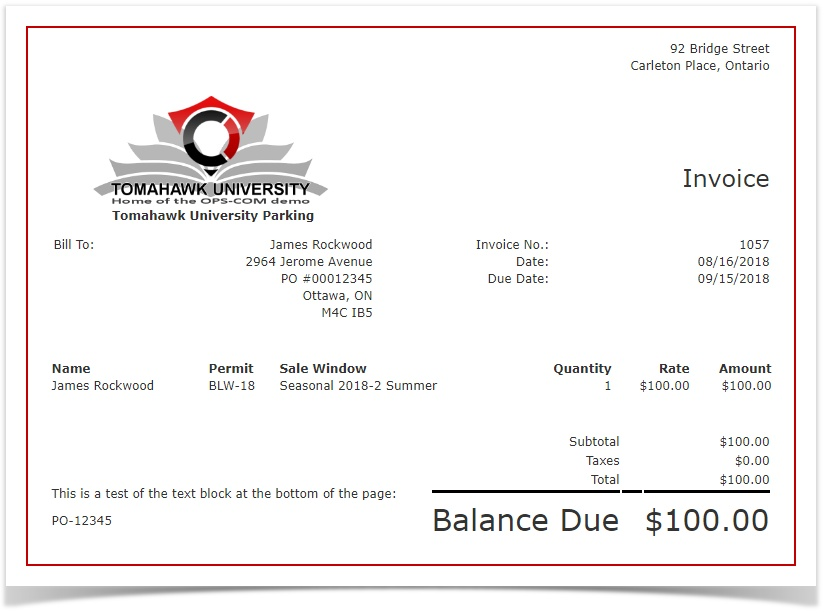
The invoice will contain a list of users as well as the permit numbers being purchased.
Note the dates:
- The billing date is the date the invoice was sent.
- The due date is the date the invoice is expected to be paid by.

Searching for an Invoice
Click Allocations > Invoice Search.

The 'Search for Invoices' screen displays. You can search for a specific invoice or for an invoice issued during a range of dates. You can also eliminate canceled or paid invoices from the search parameters.
In this case we are searching for a date range.
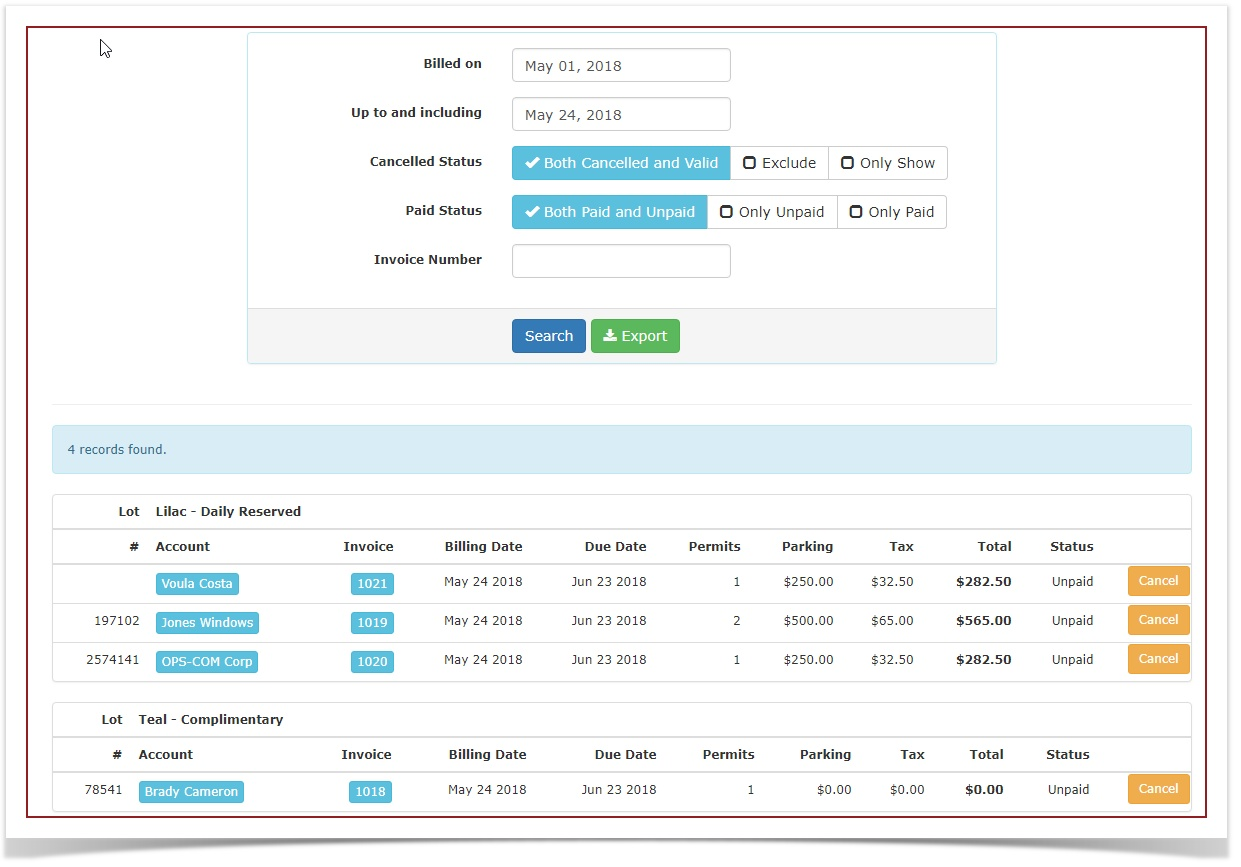
Click on an invoice number to see a copy of the invoice that will be sent to the client.
Note: If you wish to print this you can right click and print it out of your browser. You can also print to a PDF if required.
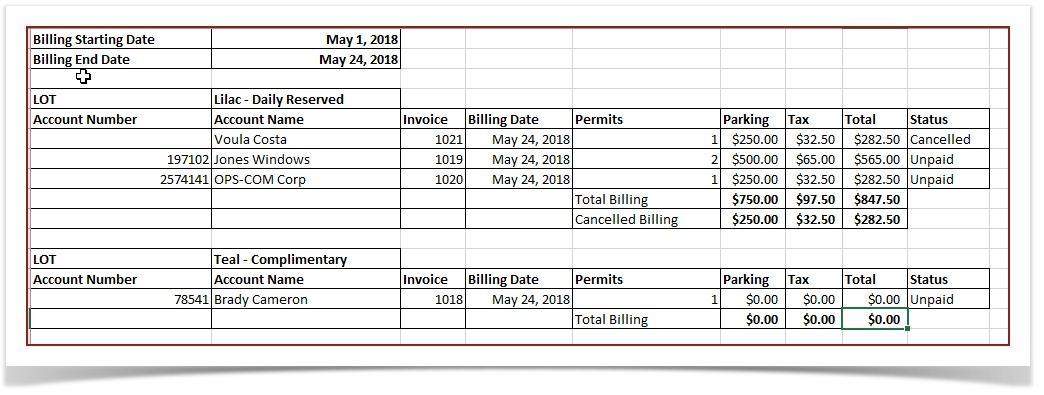
You can also export this report to Excel. This will show you the revenue for a selected date range by Lot.
Re-Sending an Invoice
In some cases, it may be necessary to resend an invoice.
For example, if the client mistakenly deleted the email, the admin can search up the original invoice and send it again.
There are two different methods through which this can be done.
- Through the user's history.
- Through the search invoice page.
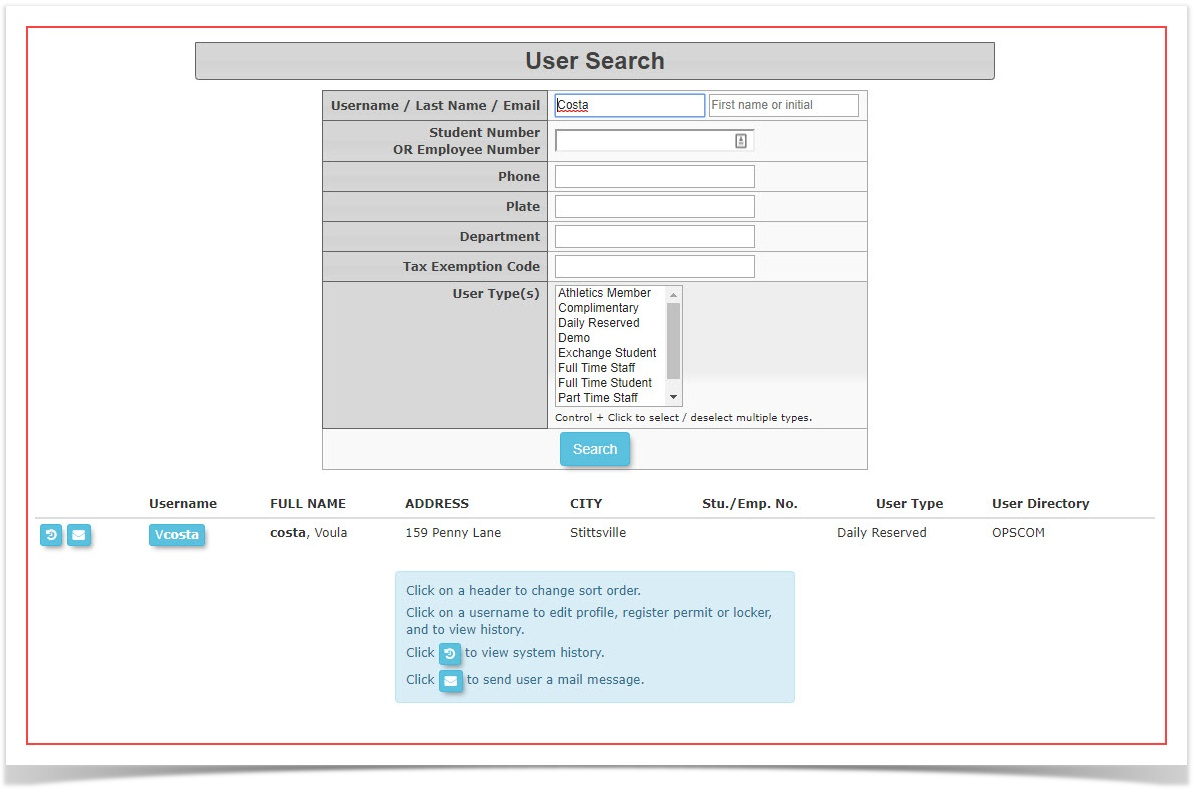
Click on the username to access the user's profile.

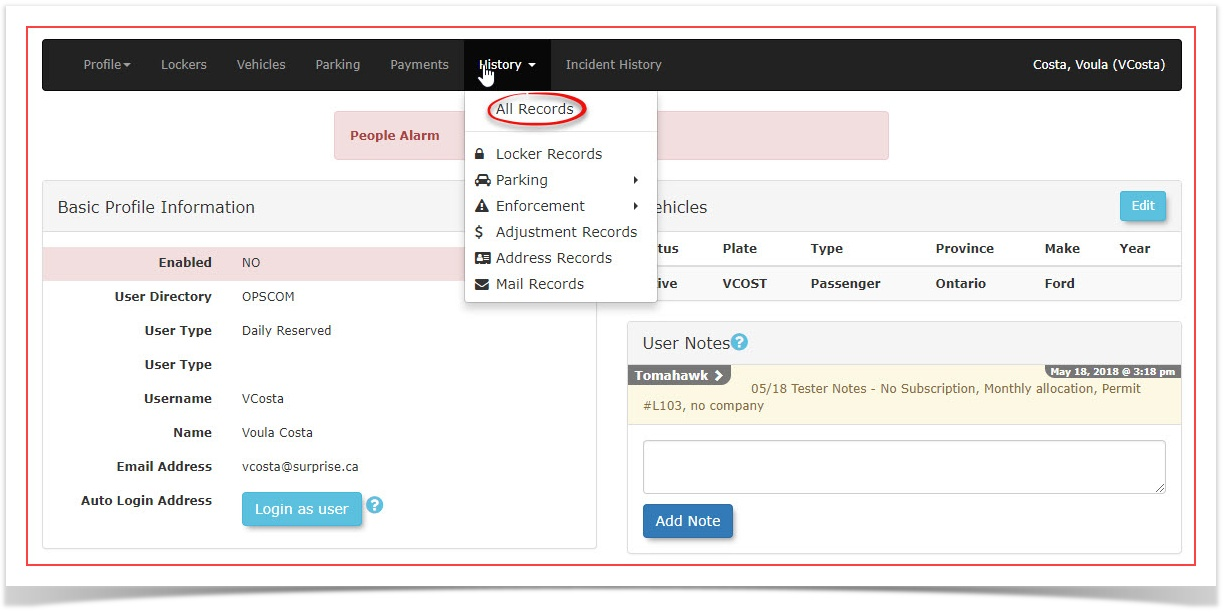
Once in the user's profile hover over History and click on All Records to access the list of this user's transactions.
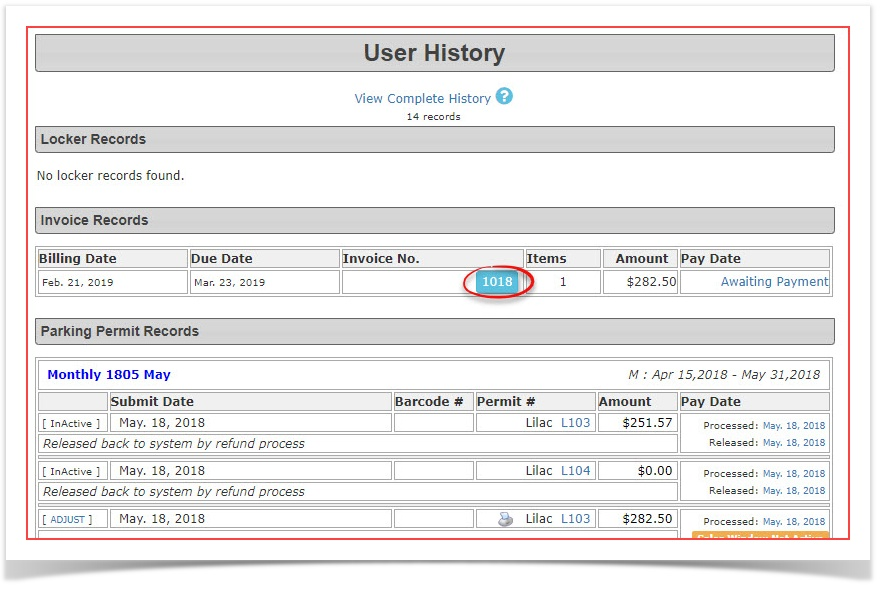
Locate and click on the invoice number that you wish to resend.
Once in the invoice preview you will notice the Re-Send Email button. Click on this button to re-send the invoice.
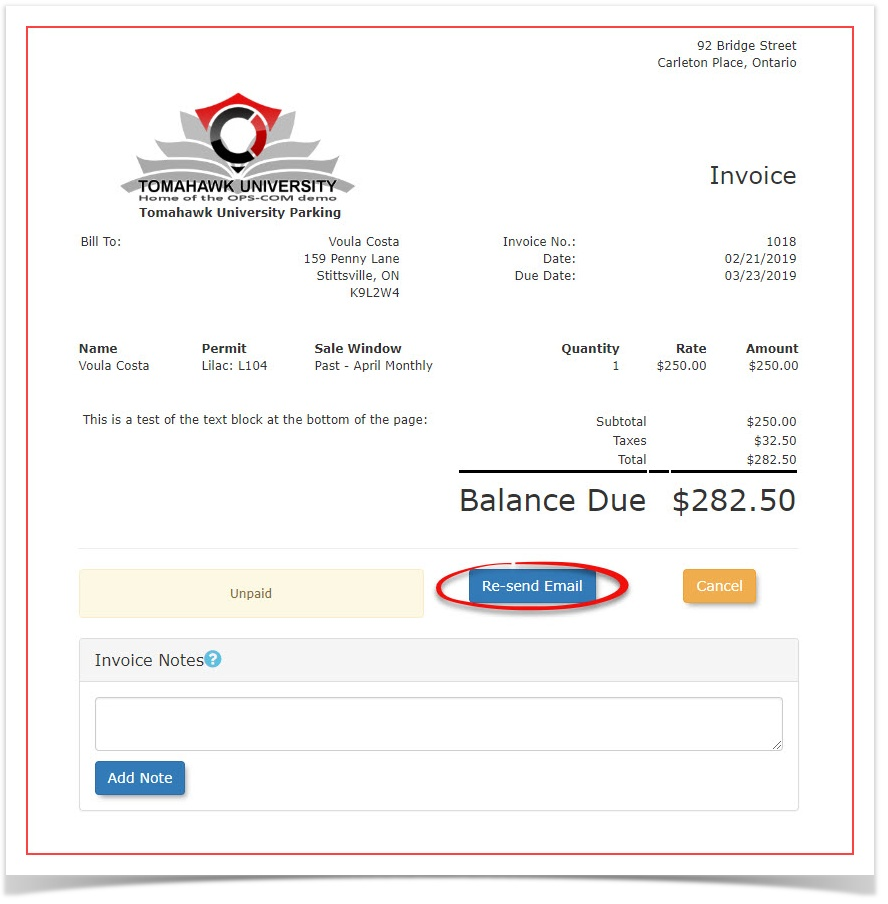
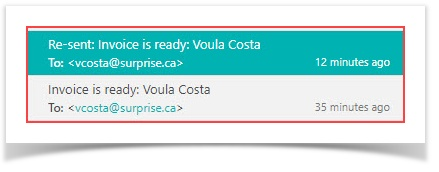
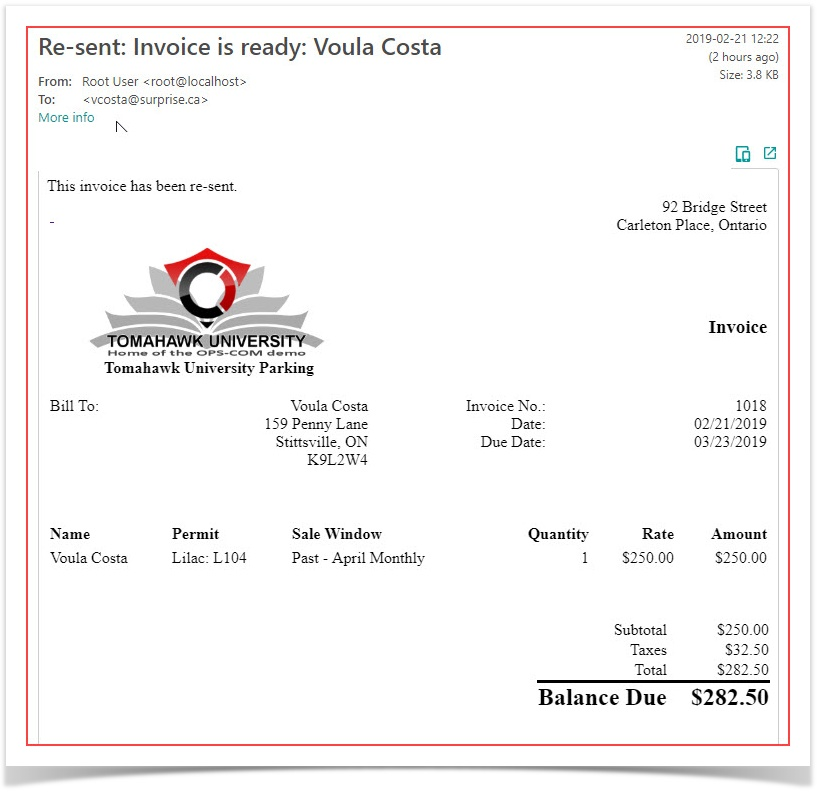
The invoice will be re-sent. In the sample below there is an original invoice send as well as a re-send. Notice the email title for the re-send has a prefix added indicating this is a Re-sent invoice.
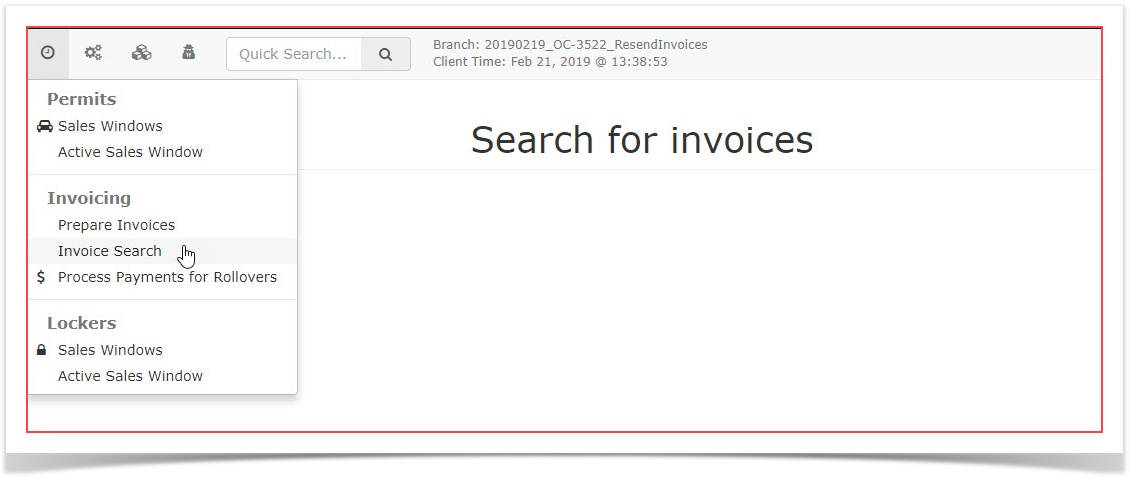
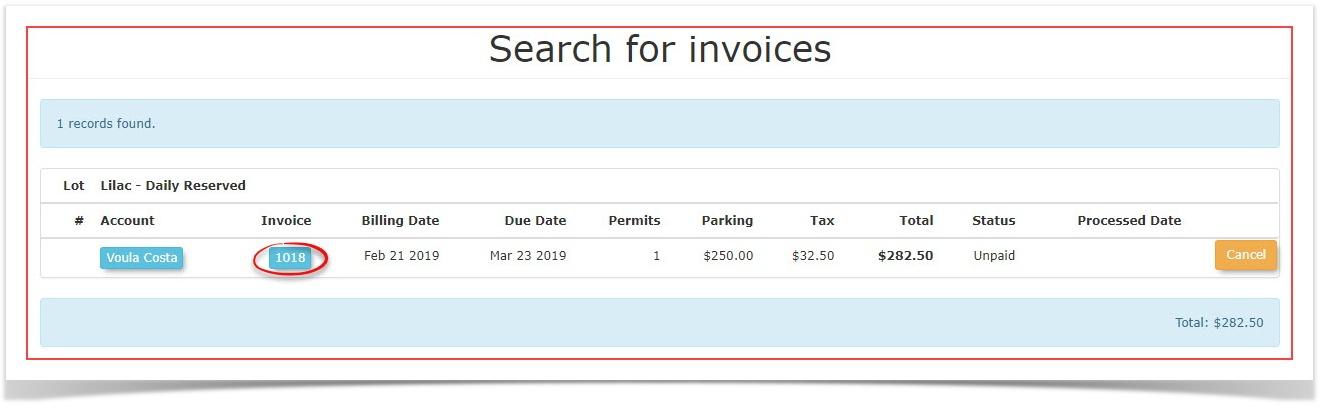
As mentioned above you can also find the invoice you wish to resend using the Invoice Search tool. To do so access the tool under the Permits menu.
Hover over Permits and click on Invoice Search in the drop down menu.
In the search criteria window enter the Invoice Number in question and click search. In this case Invoice Number 1018.
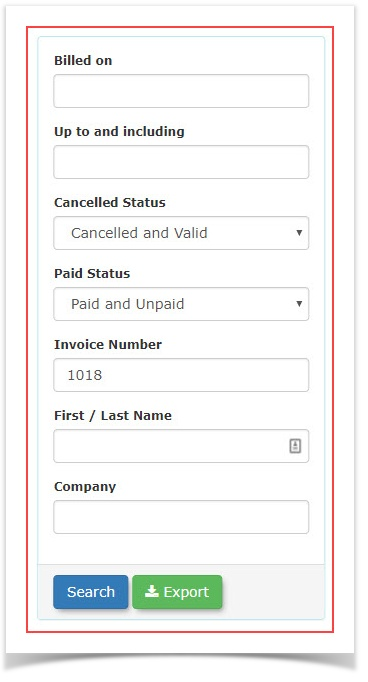
From the resulting search result click on the Invoice Number to access the Invoice Preview Window.
The process after this point is identical to step 6 and 7 above.
The Re-Sent Invoice will look identical the original invoice format:
Printing From Emailed PDF
It is important to note that in order to print this PDF document you should follow these next steps
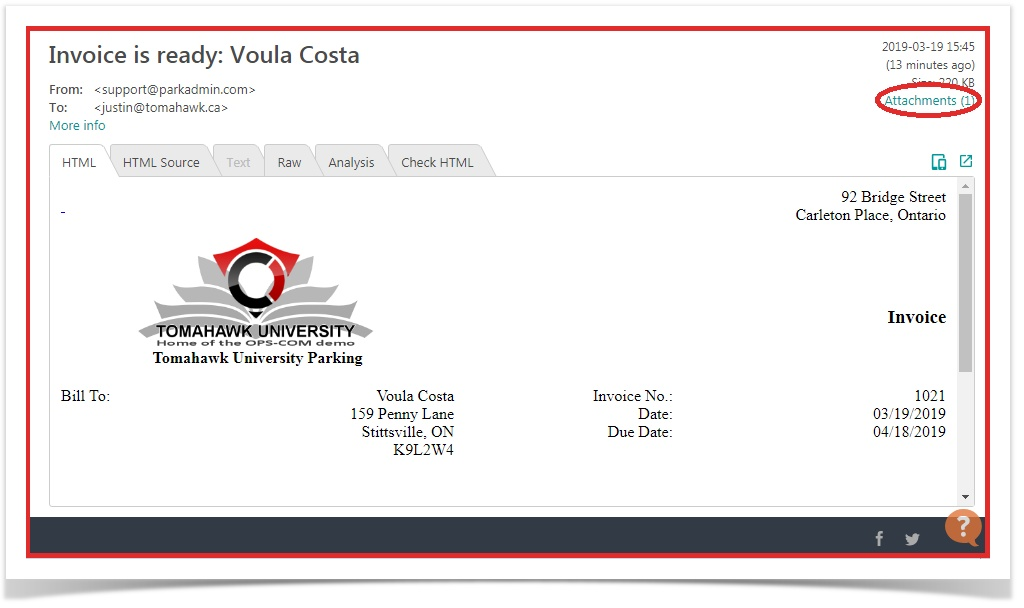
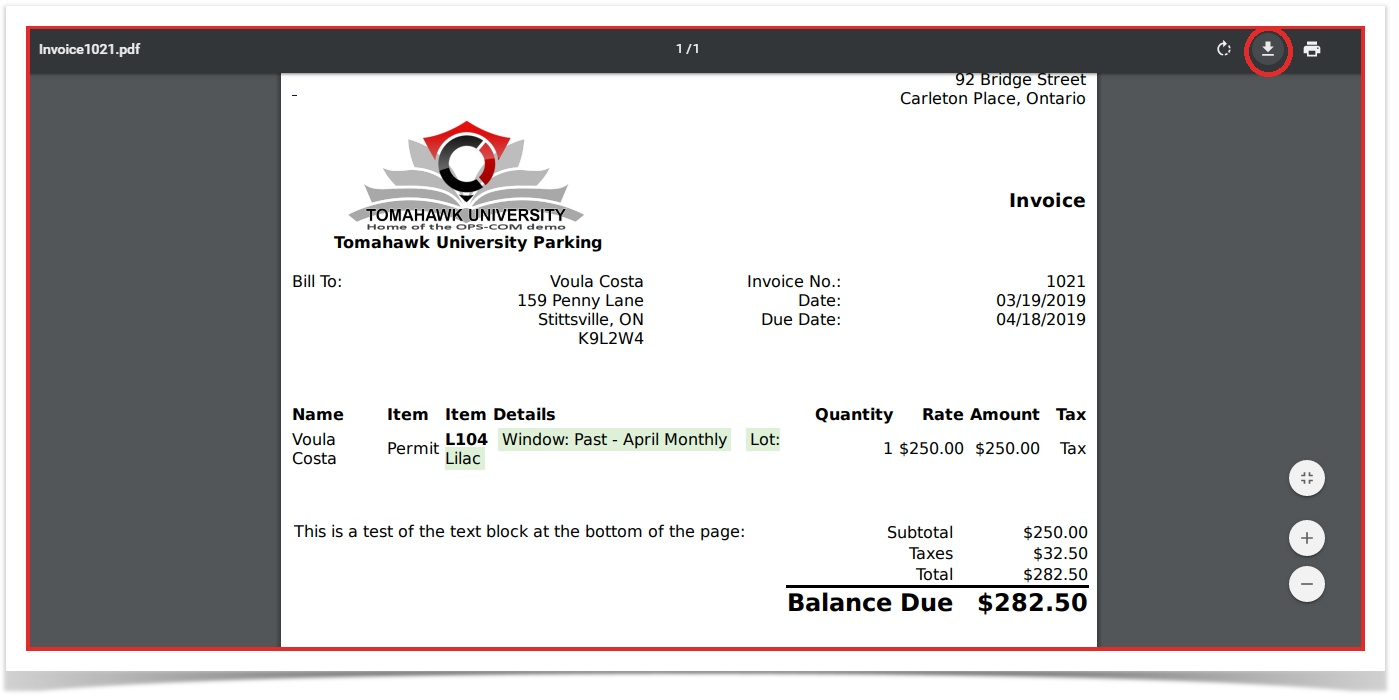
After opening the attached PDF file you will be brought to the file opened in the web browser.
If you print form here you will receive a cut off version of this PDF. In order to prevent this you should download the file by pressing this button:
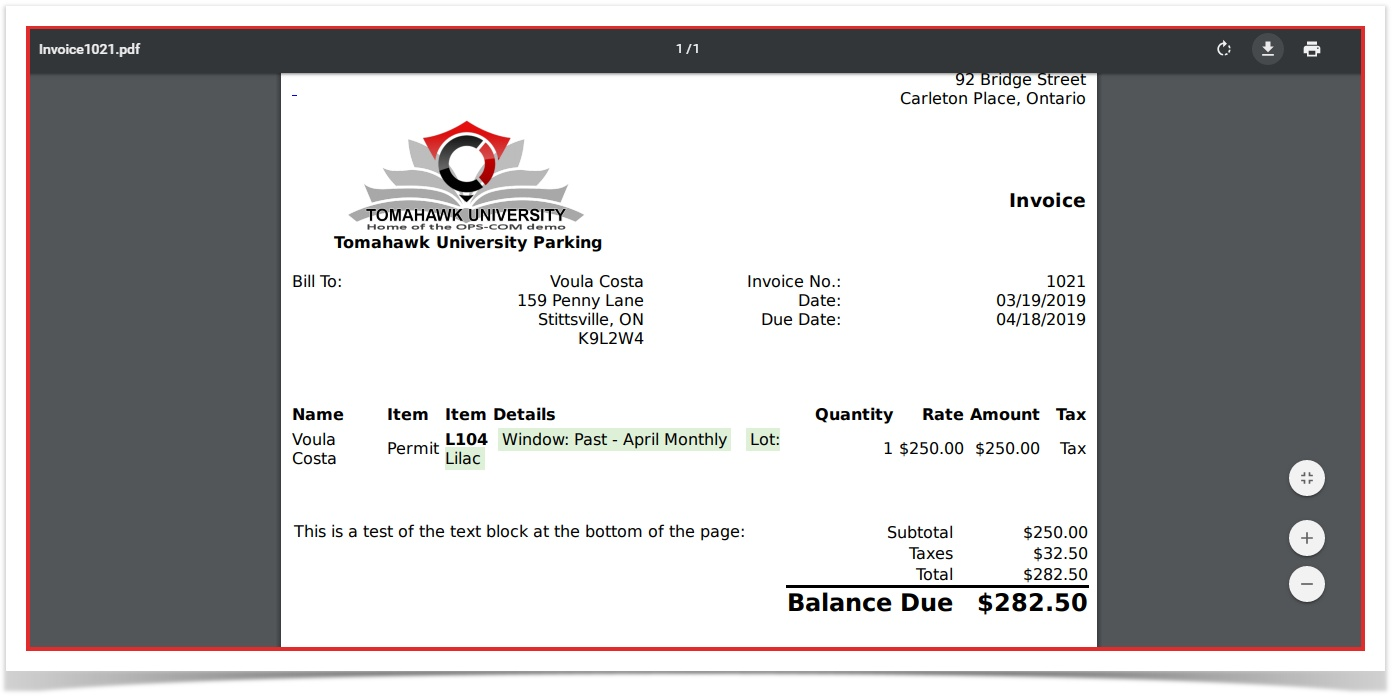
Save it to your preferred location and open it with the PDF reader of your choosing
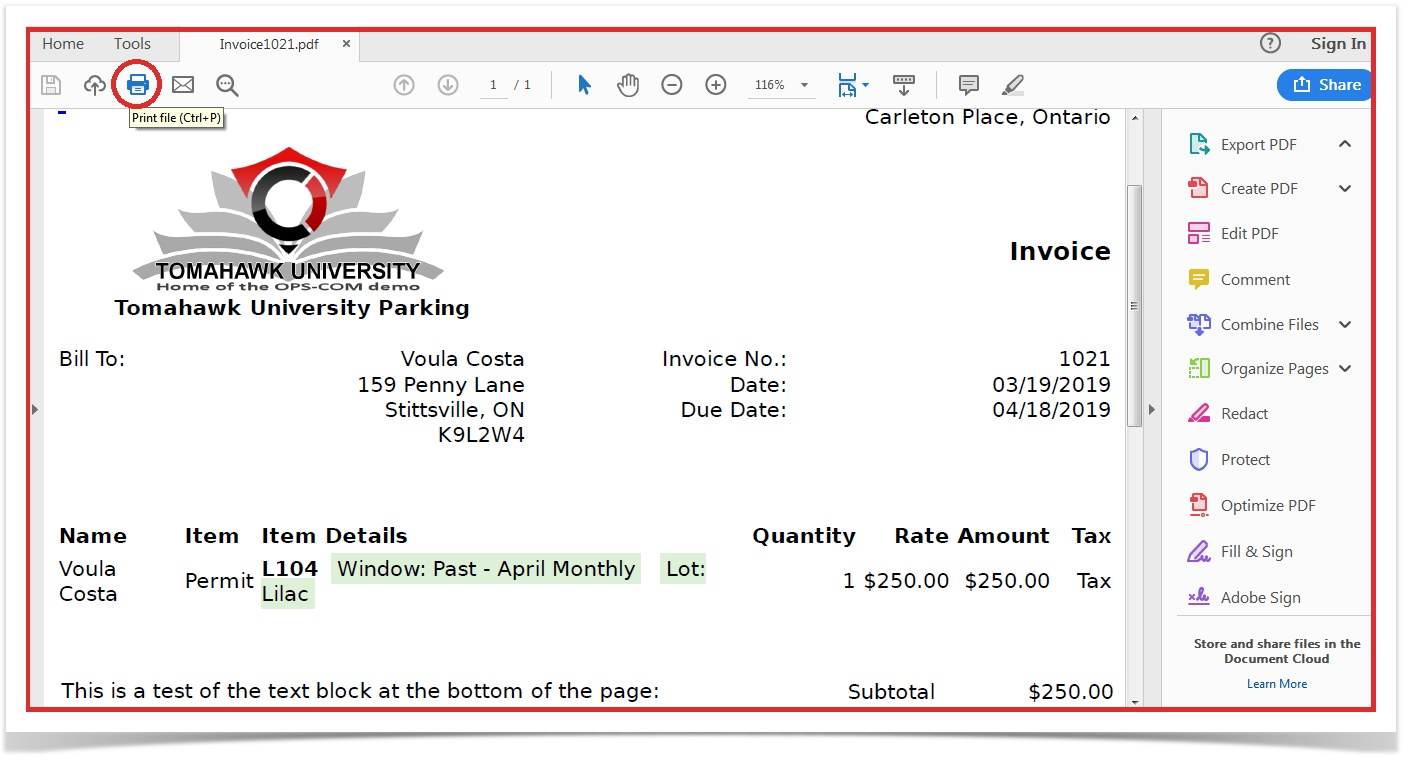
From here you just print the invoice like you would a normal document ensuring that the print scale is set to 100%

Cancelling an Invoice
Note: If you have issued an invoice then the company would like users removed or changes made, you MUST cancel the invoice from the Invoice Search page. If you don't it will show up twice as revenue for that month and both invoices will be due for payment. You cannot remove invoices directly from users payment tabs.
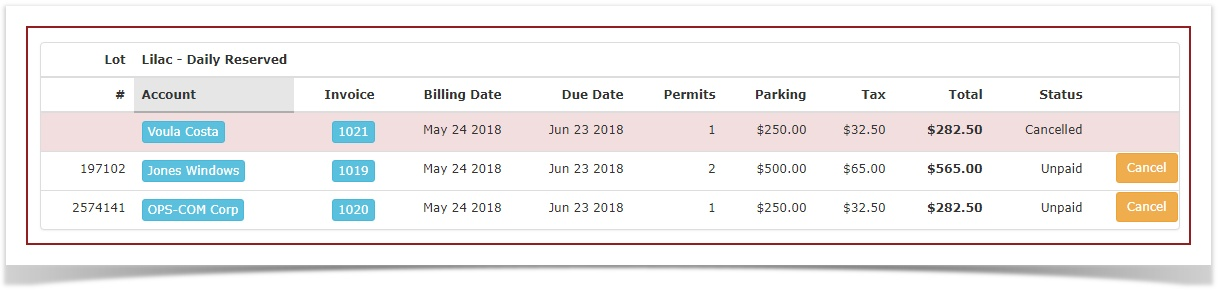
If you wish to cancel and invoice click the cancel button. The following prompt will display.

Click 'Cancel Invoice' and the invoice will now show up as Cancelled on the report.
Make your changes as required to the permits and users then go back to Prepare Invoices. That company should be there to reissue as long as the changes you made are not further back than a year.