Setting Up a Survision Picopak LPR Camera
Follow these steps to set up a new Survision Picopak LPR camera for use with OPS-COM.
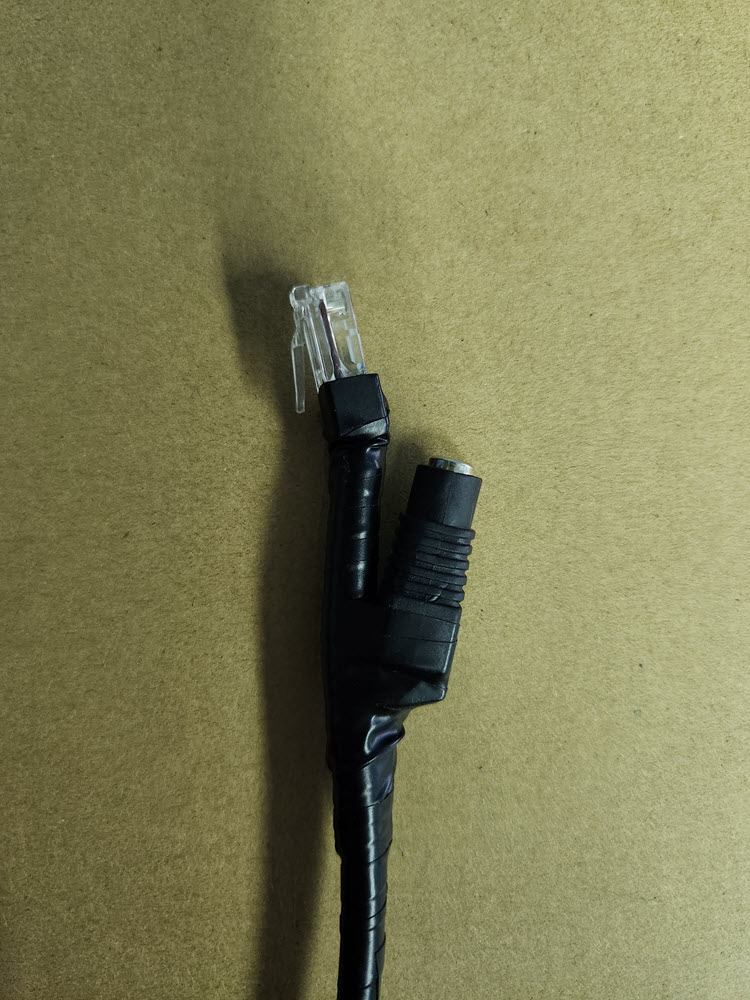
- Power on the camera and connect it to a computer (this document assumes Windows 11) via ethernet. You’ll need a cable that can supply both power to the camera and an ethernet connection (refer to this pinout if you need to create such a cable); for example:
-
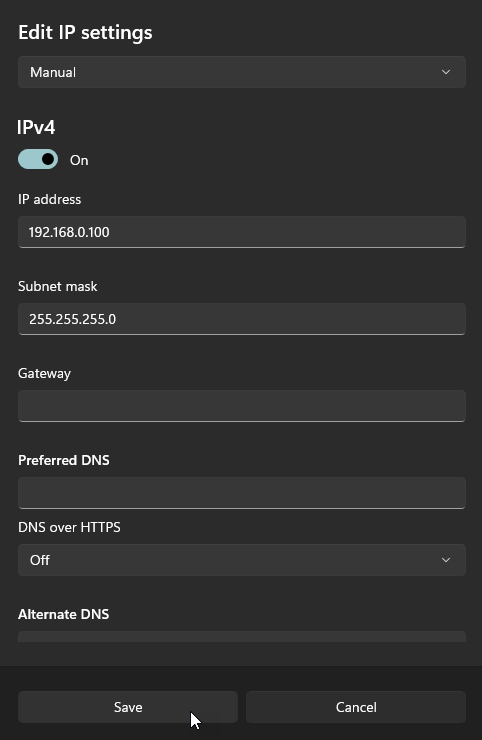
On the computer, go to Settings -> Network & internet -> Ethernet. Next to “IP assignment”, click “Edit”. Change the drop-down field from “Automatic (DHCP)” to “Manual”, toggle “IPv4” to “On”, and save the following (leave everything else as is):
- IP address: 192.168.0.100
- Subnet mask: 255.255.255.0

- Open VSS (can be downloaded here) on the computer.