Zebra Printer
PairingThe Zebra Printer configuration process allows enforcement officers to properly pair and format Zebra mobile Bluetooth printers for use with the Printerlegacy
Note:Android Whenenforcement usingapplication. aIts Zebraprimary Printerpurpose youis mustto ensure the Android versiondevice oncommunicates yourcorrectly tabletwith the printer hardware and formats tickets accurately for a standard 3x7 receipt roll. This article is intended for OPS-COM administrators and field enforcement personnel configuring their handheld devices.
Setup and Configuration
Before configuring the printer within the OPS-COM application, the physical printer must be paired to the Android device, and its media settings must be configured using a specialized Zebra utility application.
Admin Side: Administrators must ensure that field tablets are updated to at least Ver.Android Version 12 to successfully pair with Zebra printer models (e.g., ZQ520BT).
GoSideinto(Enforcement Staff): Enforcement officers must download the Tap thespecific printer name (e.g., ZQ520BT) from the list of available devices to begin pairing.AVerifynumberthewillpairingappearcode that appears on both the printer screenas well as onand the Android device.A message instructing you to ensure the numbers match will also appear.Tap the check mark button on the physical printerandtothen tapconfirm the code. Tap the confirmation message on the Androiddevice.deviceYoutowill see a message indicatingfinalize thepairingpairing.was successful. If not simple repeat the process.
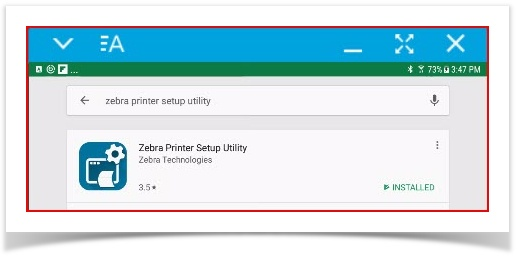
User deviceofficial settingsZebra andPrinter selectSetup Utility from the Google Play Store to configure the printer's specific media settings.
Using this Feature
Enforcement personnel must first pair the hardware via the Android operating system, then configure the print dimensions using the downloaded utility app.
Pairing the Printer
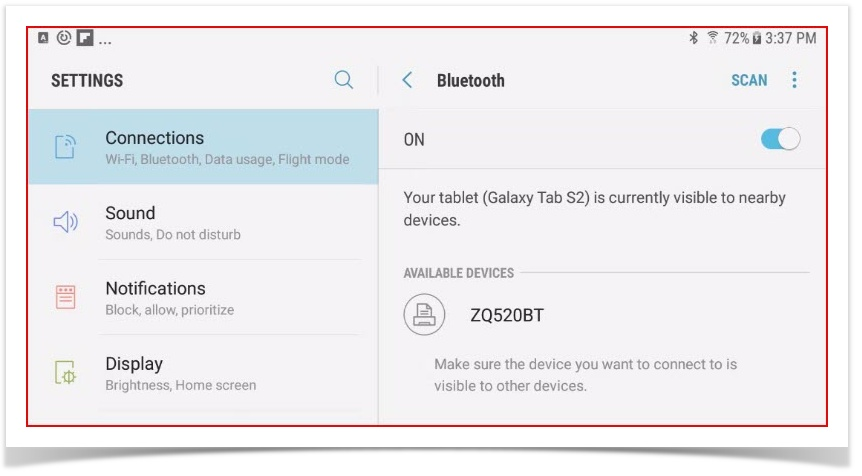
Tap Connections, within the Android device settings, then tap Bluetooth. The printer you are attempting to pair with should be listed as available. In this case we seeTap the ZQ520BT printer is available.
Setting up the Printer for Use
You must installOpen the installed Zebra Printer Setup Utilityfromonthe Google Play store. Note, you must be usingyour Android10 or higher.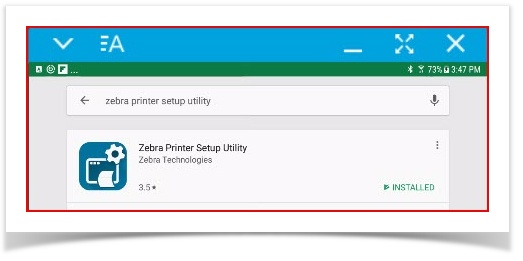
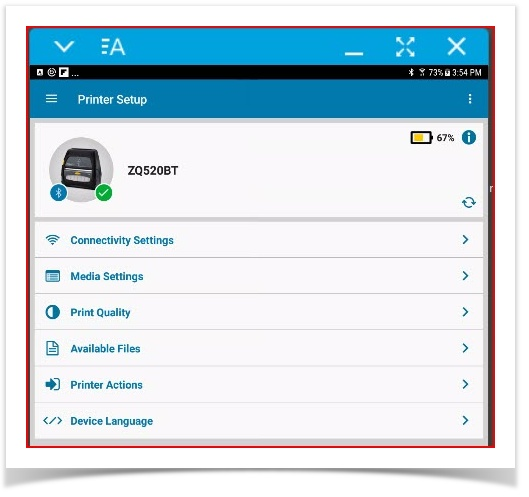
This utility will allow you to set up the configuration for the printer. (Media size, Orientation etc.)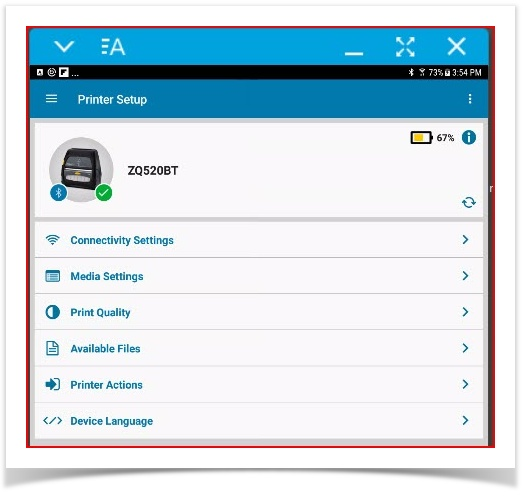
device.- Tap the Media Settings
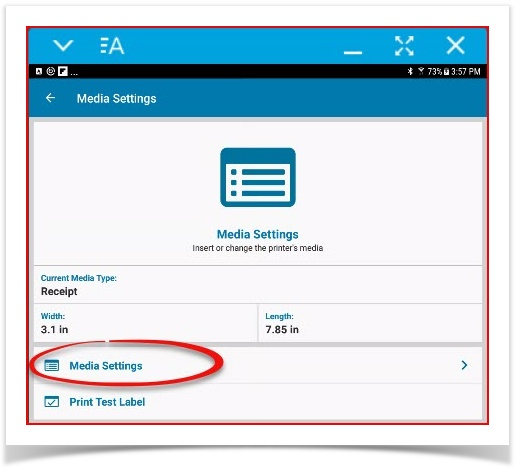
menumenu.and then tapTap Media Settingsagain.
again
on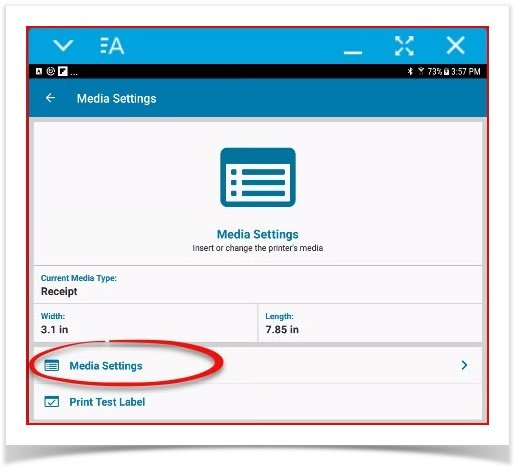
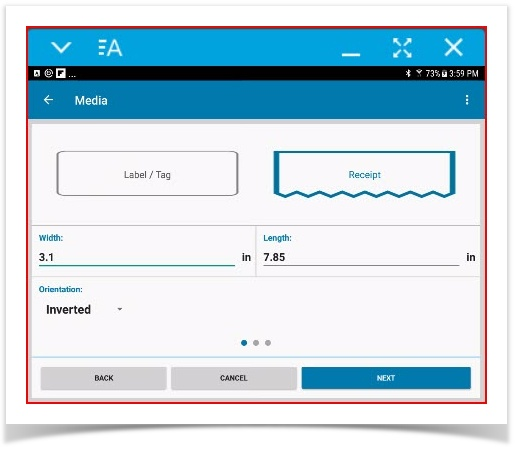
the subsequent screen. InEnterMediaReceiptsettingsforwetheareformat to begin setting upfor athe 3x7 printer roll.ToEnterdo3.1this enter the following:Set the format to ReceiptSetfor the widthtoand3.17.85 for the length.SetSelect Inverted for theLengthorientation.- Tap Next to
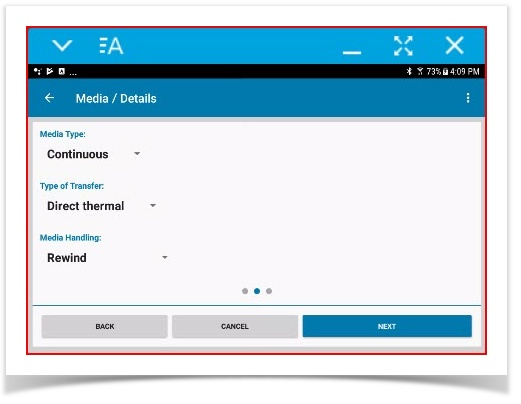
7.85proceed to the next configuration screen. SetSelect Continuous for theOrientationMediato Inverted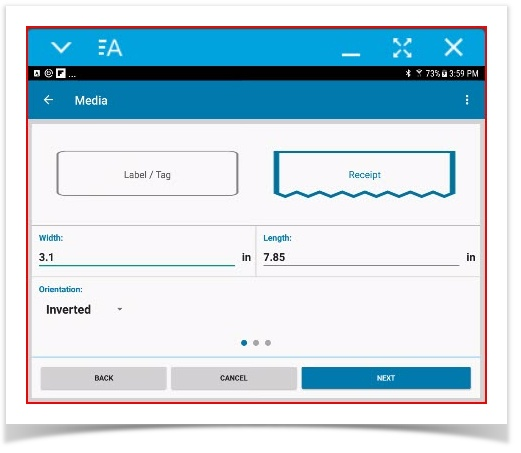
- Select Direct Thermal for the Type of Transfer.
- Select Rewind for the Mobile Handling setting. Tap Next.
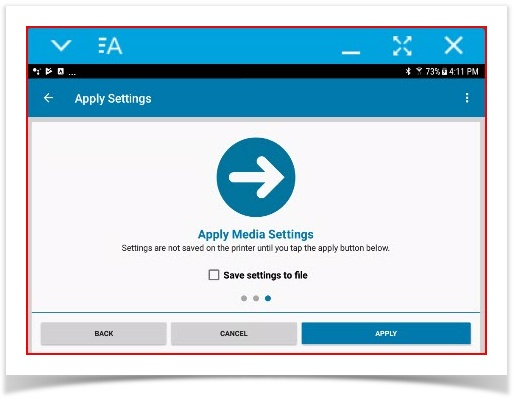
SetTap Apply on theMediafinalTypescreen toContinuous.save your Set TheType of Transferconfiguration toDirecttheThermal.Set TheMobile HandlingtoRewind.printer.- Tap
Next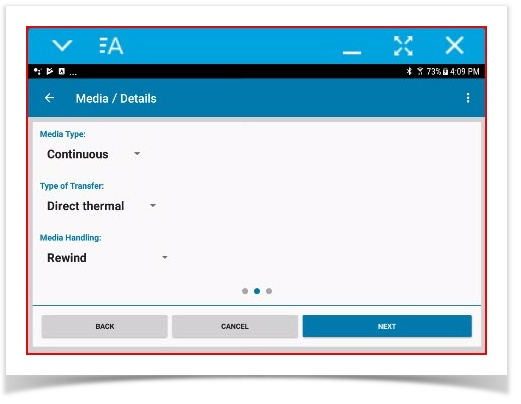
On the last screen tapApply.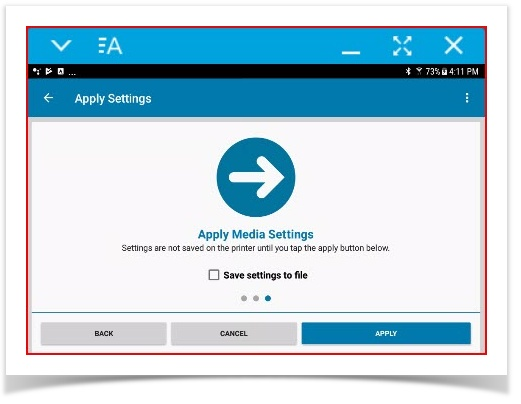
On theMedia Settingsscreen tapPrint Test Label from the main Media Settings screen tocheckverify that the print is centered and oriented properly.YouareVerify
nowyourreadyAndroid OS version: Ensure your tablet is running at least Android Version 12 before attempting to pair. Older versions of the Android operating system may struggle to maintain a stable Bluetooth connection with modern Zebra hardware.-
Always print a test label: Do not skip the Print Test Label step within the utility app. Confirming the physical alignment of the 3x7 formatting saves time in the field and prevents wasted receipt paper from misaligned citations.
-
Complete the software setup: Remember to select the newly configured Zebra printer
from apps onwithin theAndroidOPS-COMdevice.app. Once this hardware configuration is complete, you must still log into the legacy enforcement app and select the Zebra driver under the internal system settings.