Translations
Where
The areLanguage Translations Supportedfeature
Currently,allows translationsadministrators areto onlymanage supportedmulti-language onsupport and customize specific terminology displayed across the user side,portal. however,Its theyprimary purpose is to ensure that all user-facing text, labels, and system messages are managedaccessible and setalign upperfectly onwith your organization's local terminology (e.g., changing the adminword side, by admins that have the correct permissions set up"ticket" to work"citation"). withThis languages.
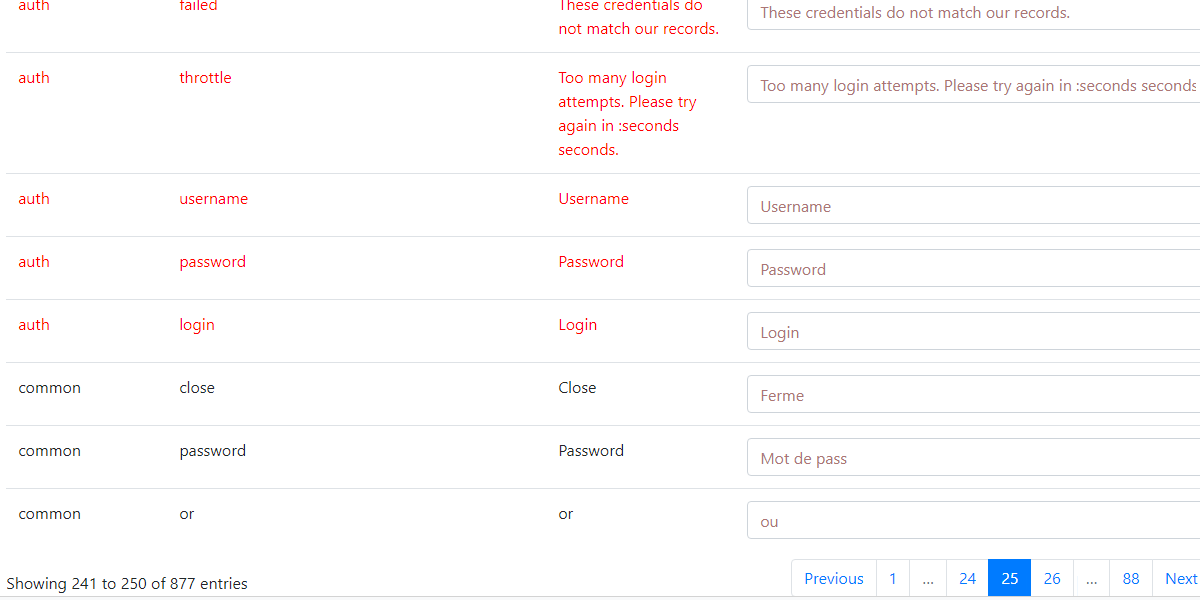
Translations that are inred,are translations on the adminside which are not yet supported. Since they are not supported you will see them come up in English only until the adminsidearticle issupported.intended for TranslationOPS-COMthatadministratorsareresponsibleinforblack,managingareportaltranslationscontentthatandare on the userside that can currently be changed.
NavigatingSetup toand TranslationsConfiguration
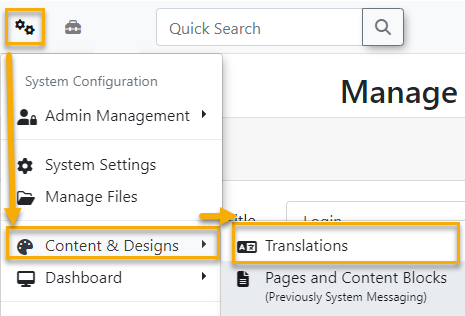
To begin reviewing, editing or creating your translations/languages, you will need to navigate to System Config → Content & Designs → Translations.
This willfeature takeis youa core administrative tool used to the Installed Languages page where you can begin managing your current languages.
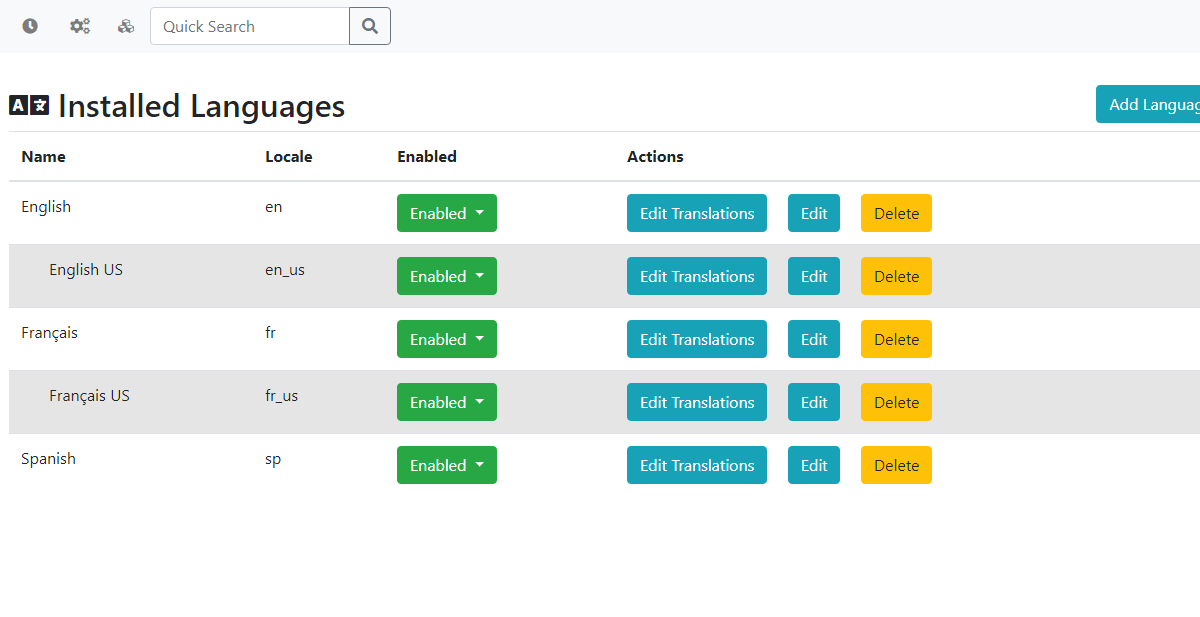
Adding New Languages
To begin adding your own languages simply click Add Language ondictate the Installedtext Languages page which will bring up a new modal to add a label and locale.
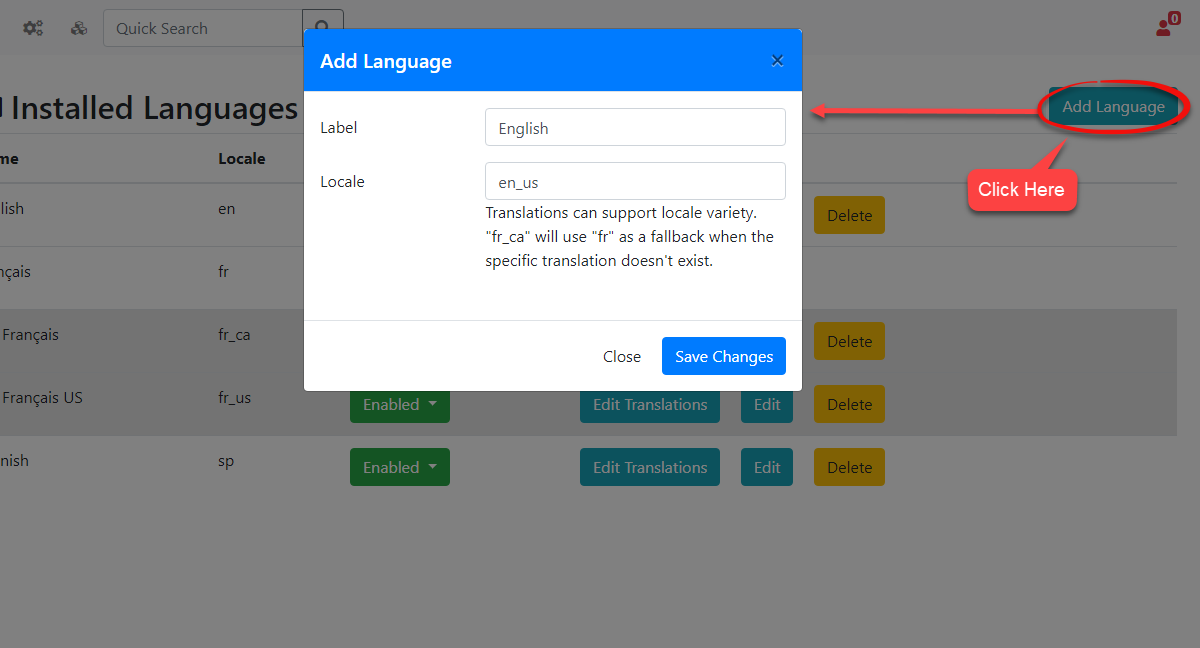
When you are finished click Save Changes and your new language will be instantly added to the list. Once the language has been added, your users can begin using itdisplayed on the user-side assumingportal.
Admin Side: Administrators must have the appropriate system role permissions enabled to manage language enabled.settings and edit translations.
-
Hover over System Configuration, click Content & Designs, then Translations to access the Installed Languages page.
User Side: The translation configurations directly control the language options and specific wording available to end-users navigating the parking portal.
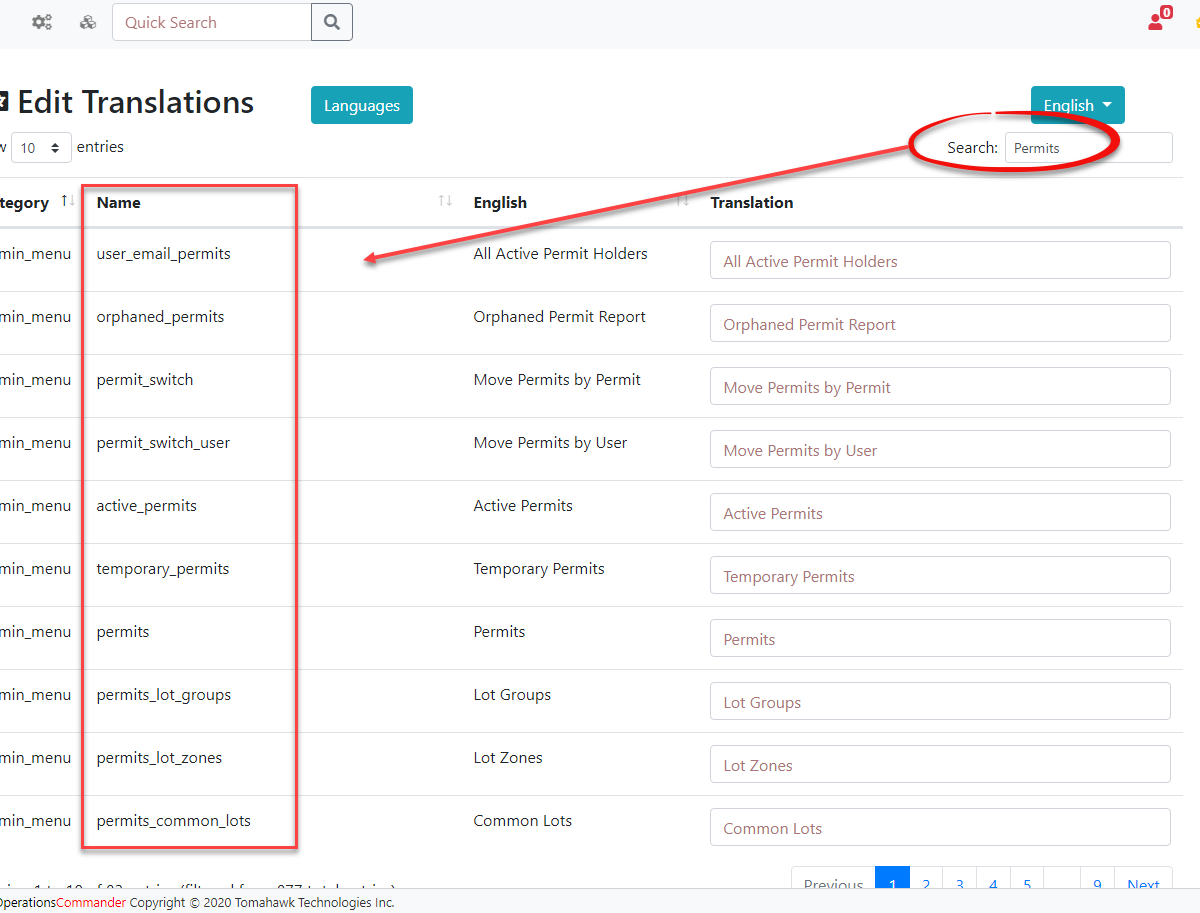
TheWhen localesreviewing the translation list in the backend, translations displayed in black text are usedactive whenon wethe wantuser side and can be freely changed. Translations displayed in red text are located on the admin side and are not currently supported for localization; they will remain in English until admin-side translations are fully supported.
Using this Feature
Administrators can use the following instructions to add new languages, create localized sub-languages, whileand manually edit specific terminology across the label is used to identify our translations throughout the site. system.
Adding Sub LanguagesInstalling and HowAdding doLanguages
They
Work
Sub-Install Default Languages: If base languages like English or French are createdavailable bybut usingnot ayet locale that currently exists with an underscore '_' followed by the sub-language that you want to set up.
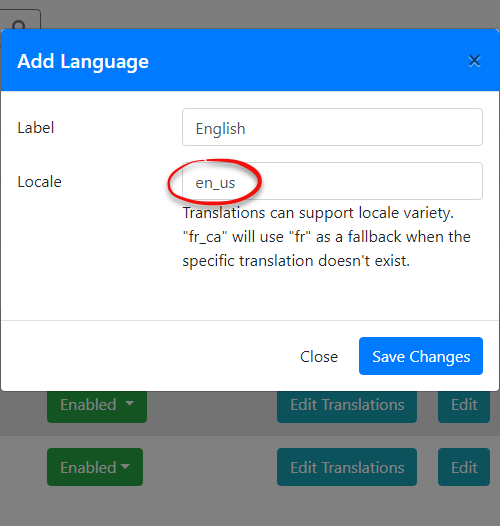
For example,installed, you can supportinstall multiplethem variationsdirectly ofto the English language for your users. In the image below I have createdload a sub-languagecomplete forpreset American English using the locale en_us.
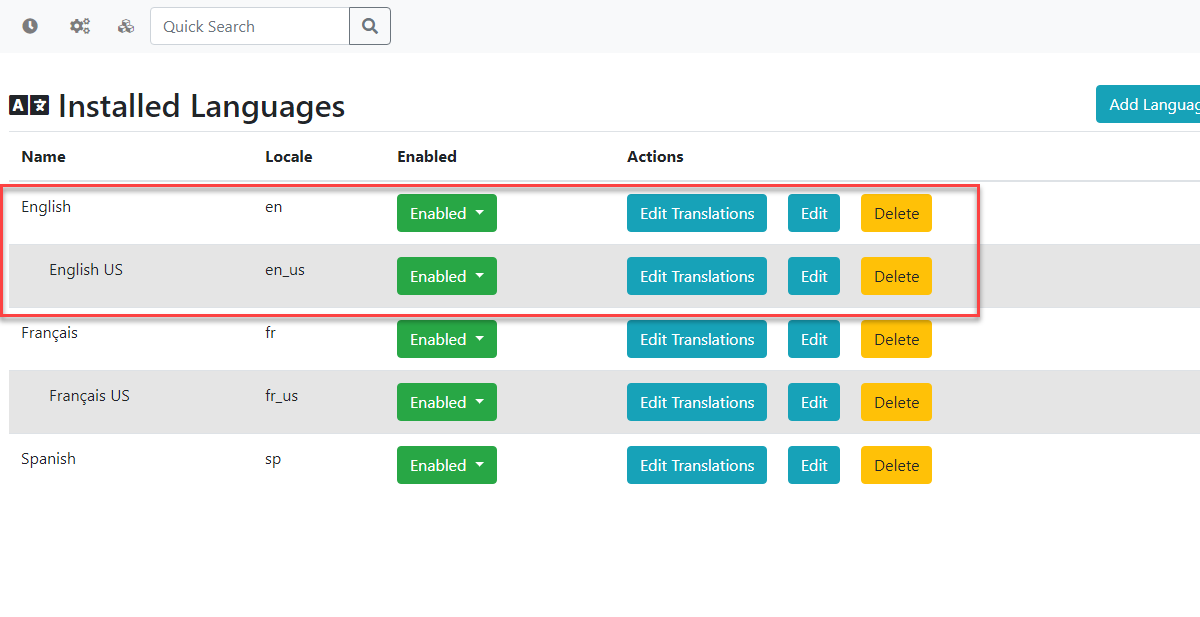
When you create a new sub-language, it will automatically use the translations that have been set up on the main language, which is the locale on the left side of the underscore, such as en_us. You will need to create the main language first before creating any sub-languages, otherwise the sub-language will always default to English instead of the main language you may have intended to use.
Installing Languages
Installing a language will create a new languagetranslation template with thea translationsdefined weName haveand setLocale.
Add asCustom wellLanguages: asClick the NameAdd Language button to bring up a modal. Enter a custom label and Locale we have created for you. You canlocale, then click EditSave TranslationsChanges. toThe adjustlabel identifies the presettranslation translationsthroughout tothe yoursite, liking.while Ifthe therelocale is notused afor languagesystem alreadyidentification.
Enable or Disable Languages: Toggle the system that can be installed you will need to add a new language and setup the translations yourself. Currently, we only support the ability to install French and English.
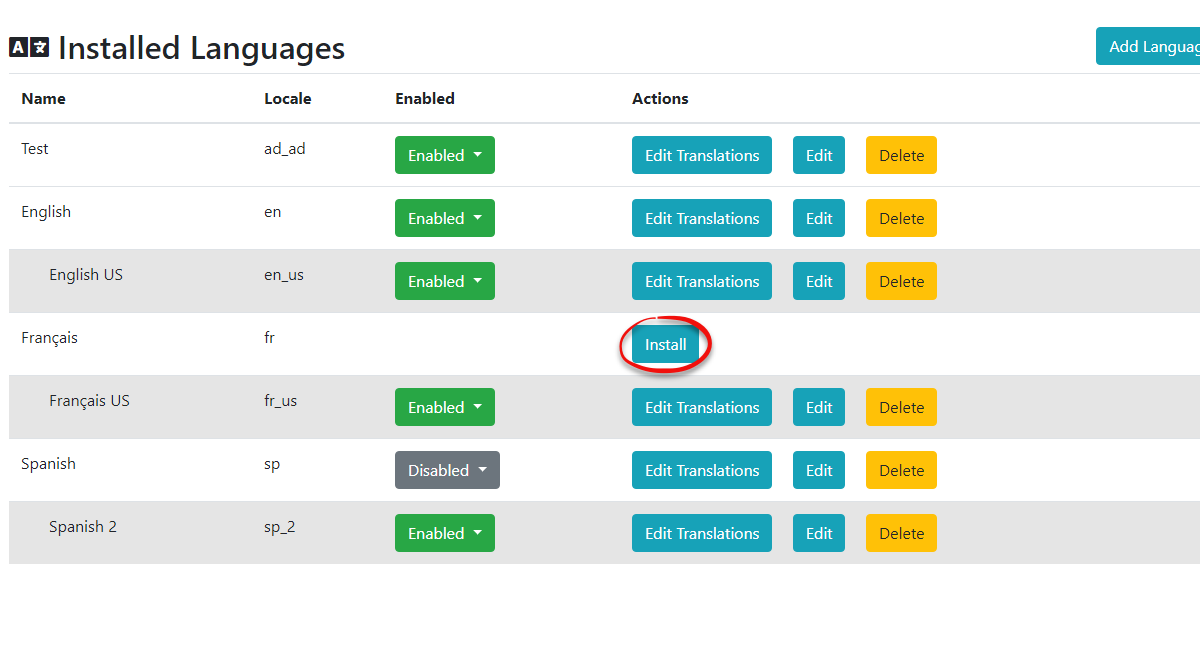
Disabling or Enabling Translations
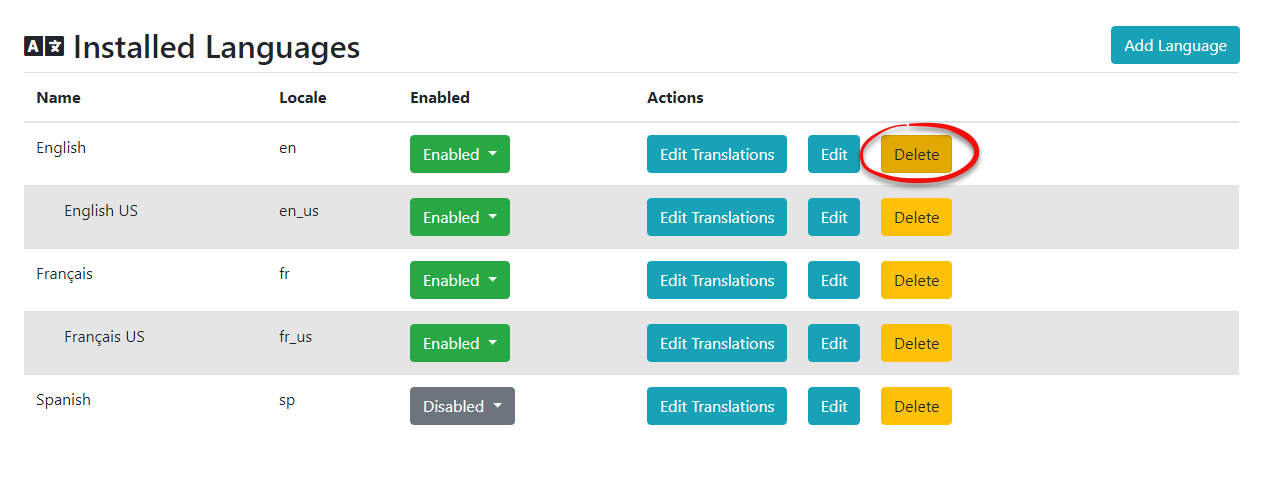
We can choose to disable particular languages that we don't want to be selectable from the user side. To do this we can toggle the visibly of our languagesswitch under the Enabled column on the Installed Languages Page.
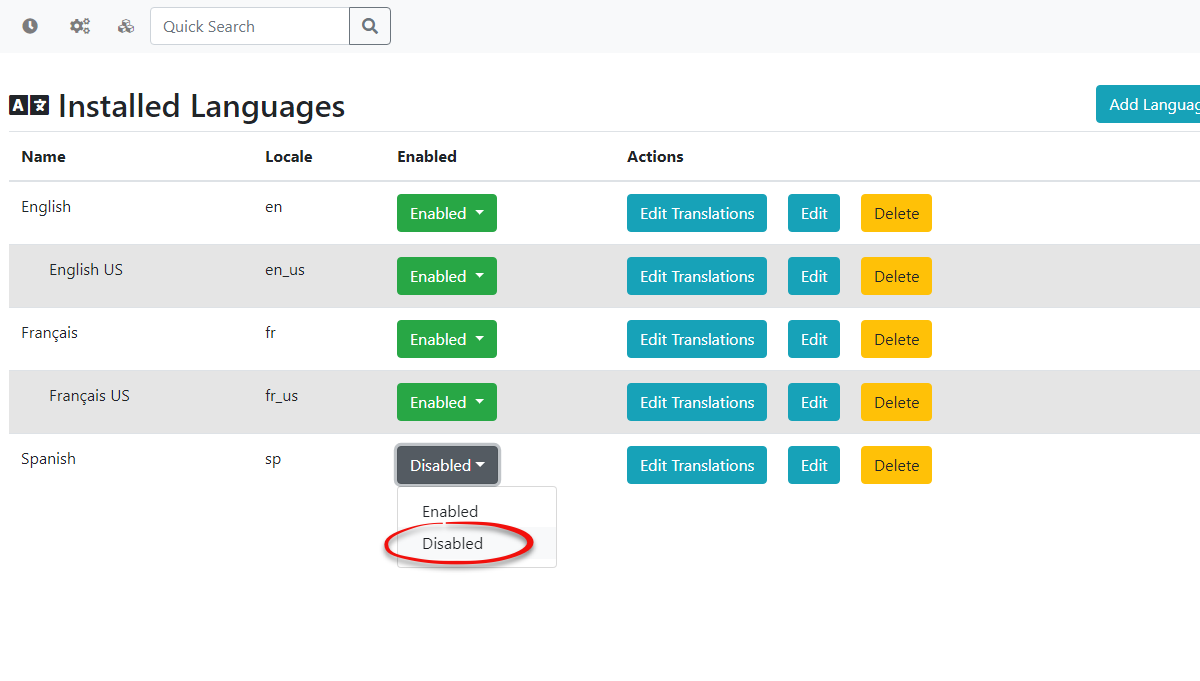
OnceDisabling a language isimmediately toggledremoves it as a selectable option for end-users on the portal.
Adding Sub-Languages
Sub-languages allow you to support regional variations (e.g., American English vs. British English).
-
Ensure the primary "main" language is already created and installed.
-
Click the
DisabledAdd Language button. -
Enter the existing main locale, followed by an underscore
_, and the sub-language identifier (e.g., enteringen_usfor American English). -
Click Save Changes. The sub-language will automatically inherit the translations set up on the main language.
Editing Translations and Terminology
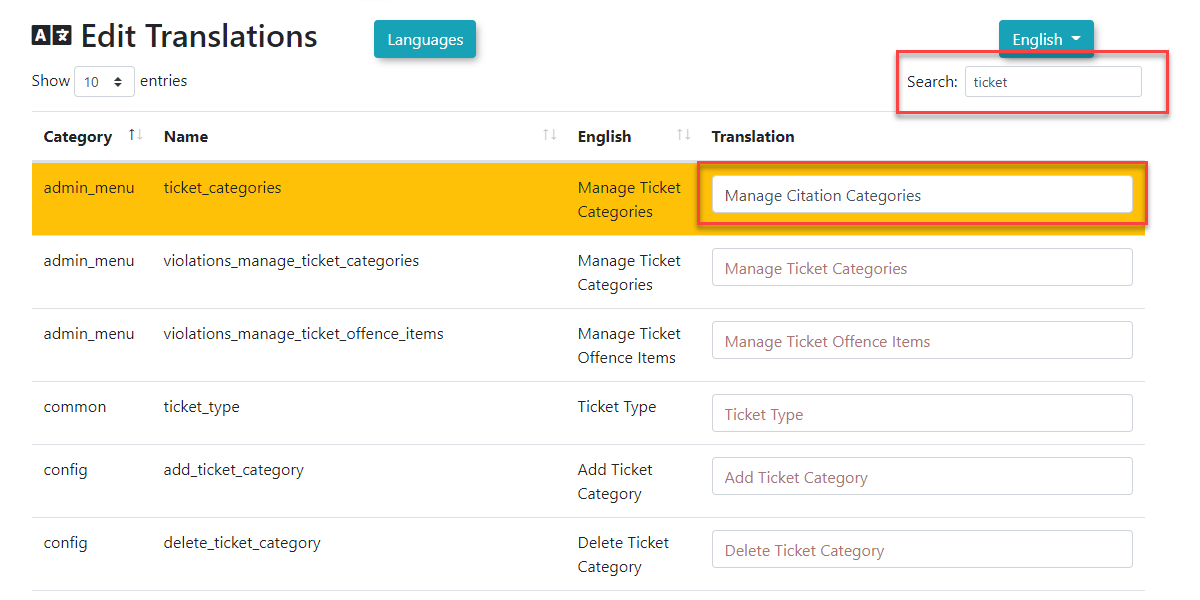
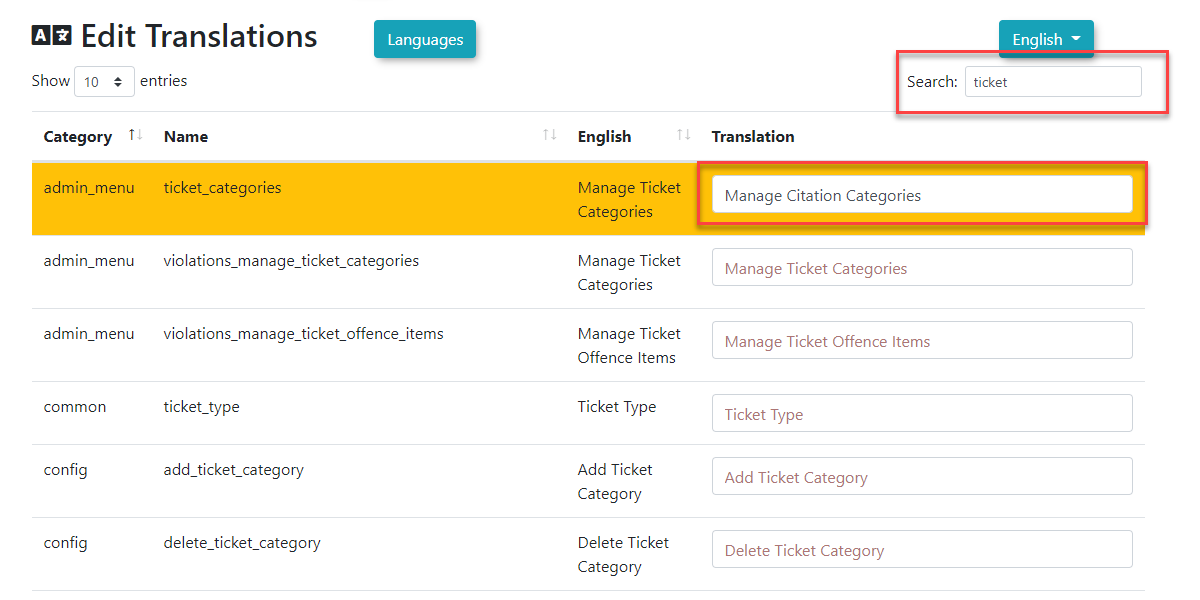
The translator is not just for foreign languages; it canis noessentially longera belist selectedof bycode terms and their corresponding display text, allowing you to easily replace local terminology (e.g., changing "ticket" to "citation" everywhere on the users of your site as seen in the example image below.portal).
-
Click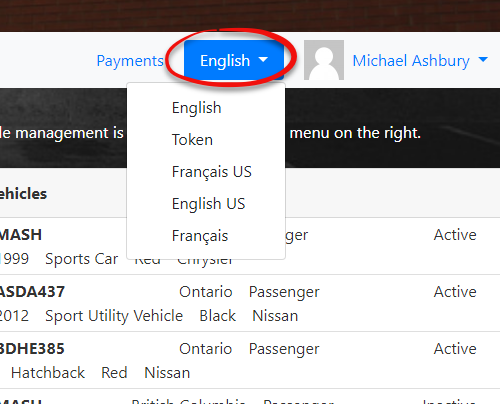
Searching LanguageEdit TranslationsYou can search for all translations that relatenext to a language. -
Enter a specific word or component
in(e.g.,the"permit"systemorusing"ticket") into the search bar at the top rightofto filter theEditlist.Translations -
ForClick
example,thewespecificcantextsearchbox forpermitsthe term you wish tofind all permit related translations.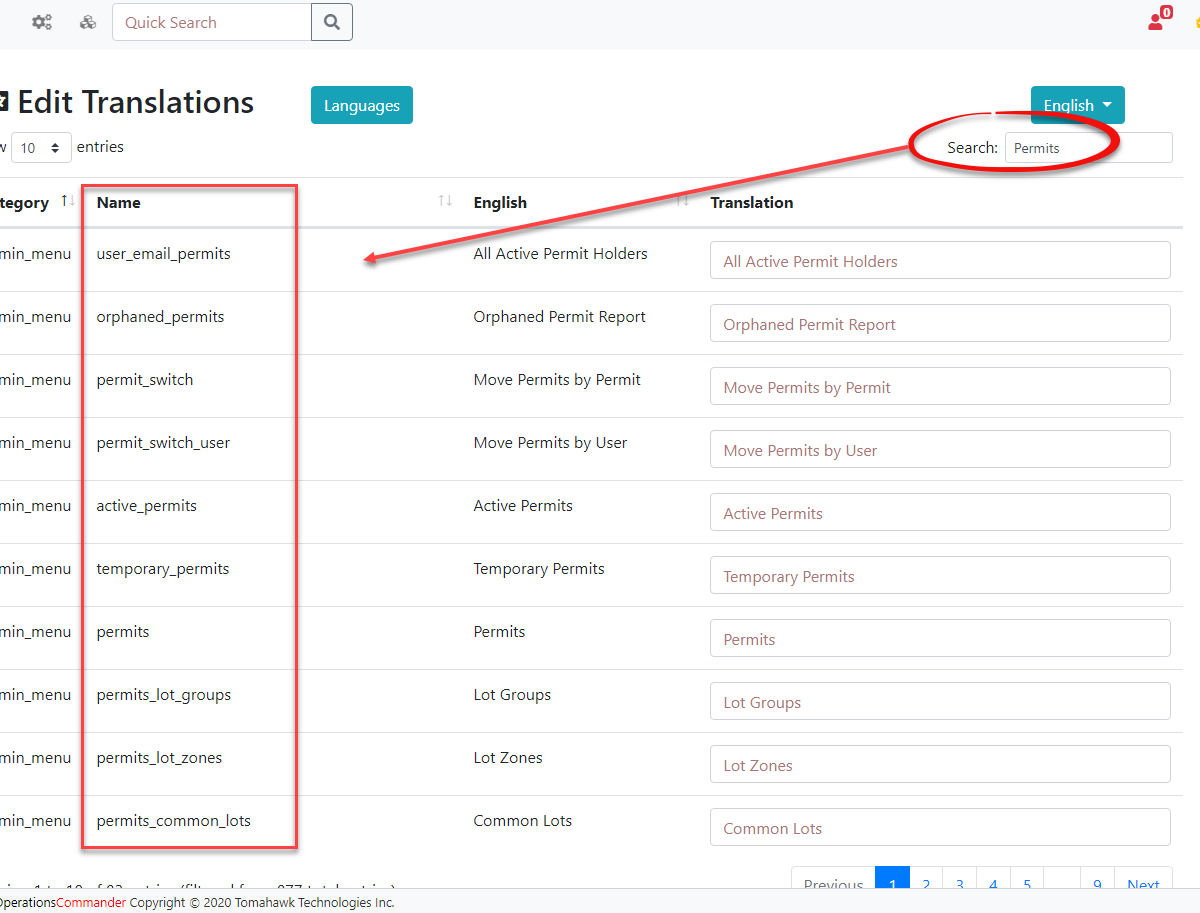
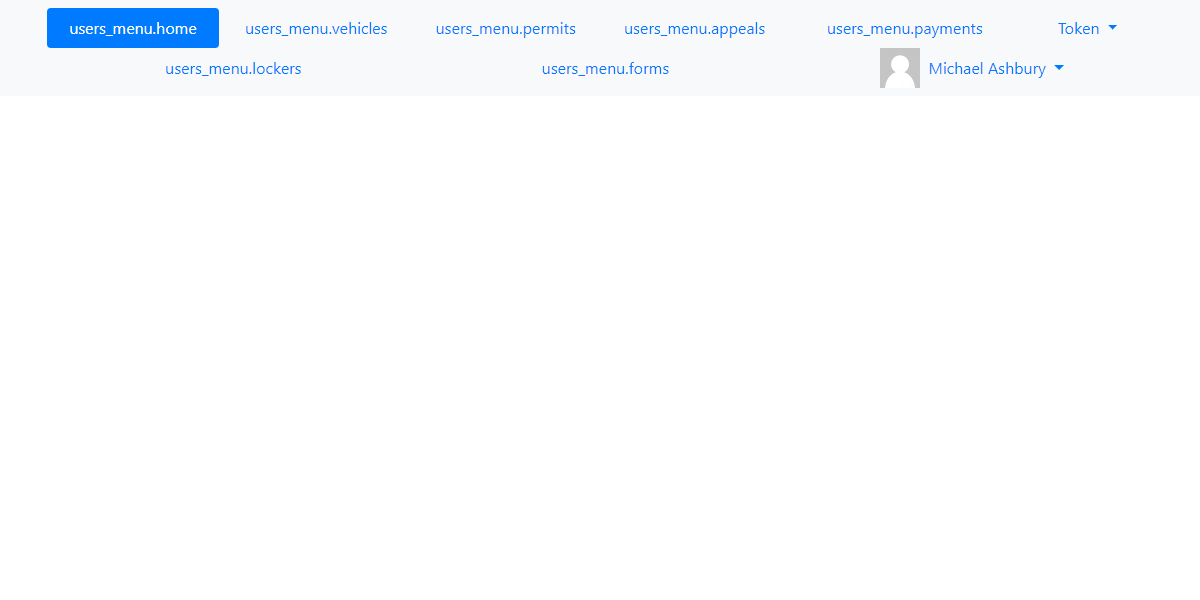
We can also go onto the user sidemodify andusetypetheTokenlanguage, which will show all of theNamesfound on theEdit Translationspage, under theNamecolumn, (See the image above) to find where that translation exists so it can be changed. This can't be seen by logging is as the user from the user side but requires an admin to go to the profile of a user and click theLogin as Userbutton from the admin side. This is to ensure thatin yourregularpreferreduserslocalizeddon't see the token language option.text.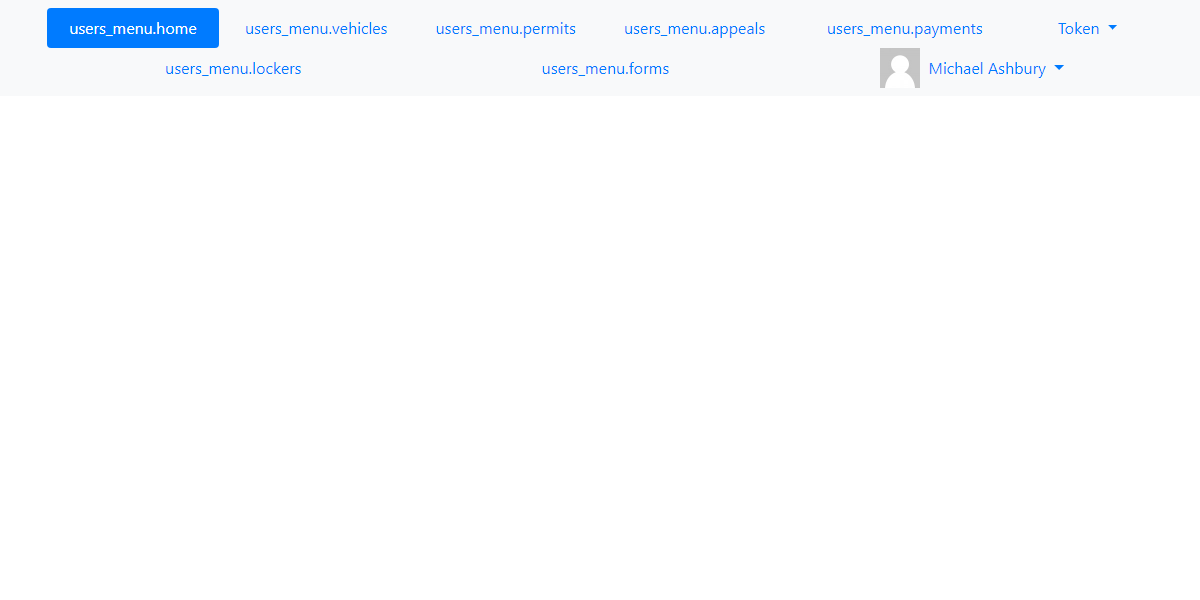
-
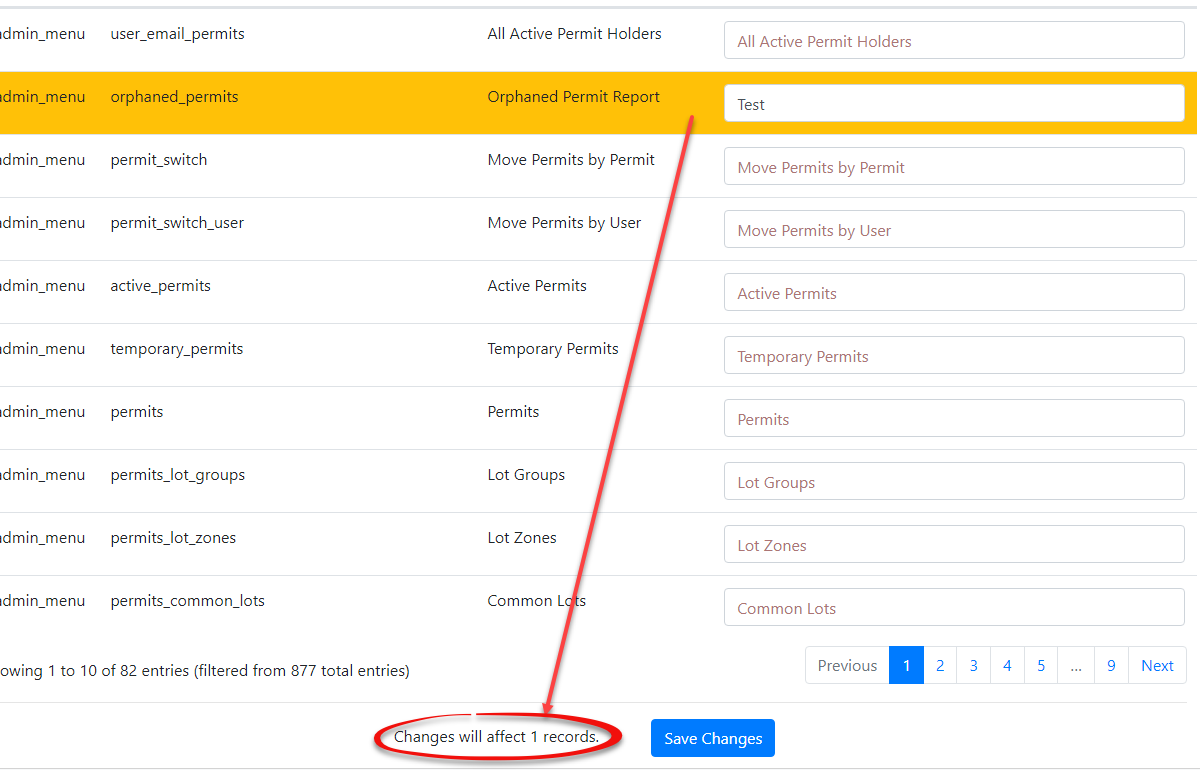
The token language finds the tokens used so you can better search where the translations are being used on the user side.Edit TranslationsTo begin editing language translations you have to make your changes and then clickClick away from the input field.OnceTheyou do this youtranslation willsee that the translation gets highlightedhighlight in yellowindicatingtothatindicateaanchangeunsavedhaschange,beenandmade. Thethe number of affected records willalsodisplay at the bottom of thetranslationspage.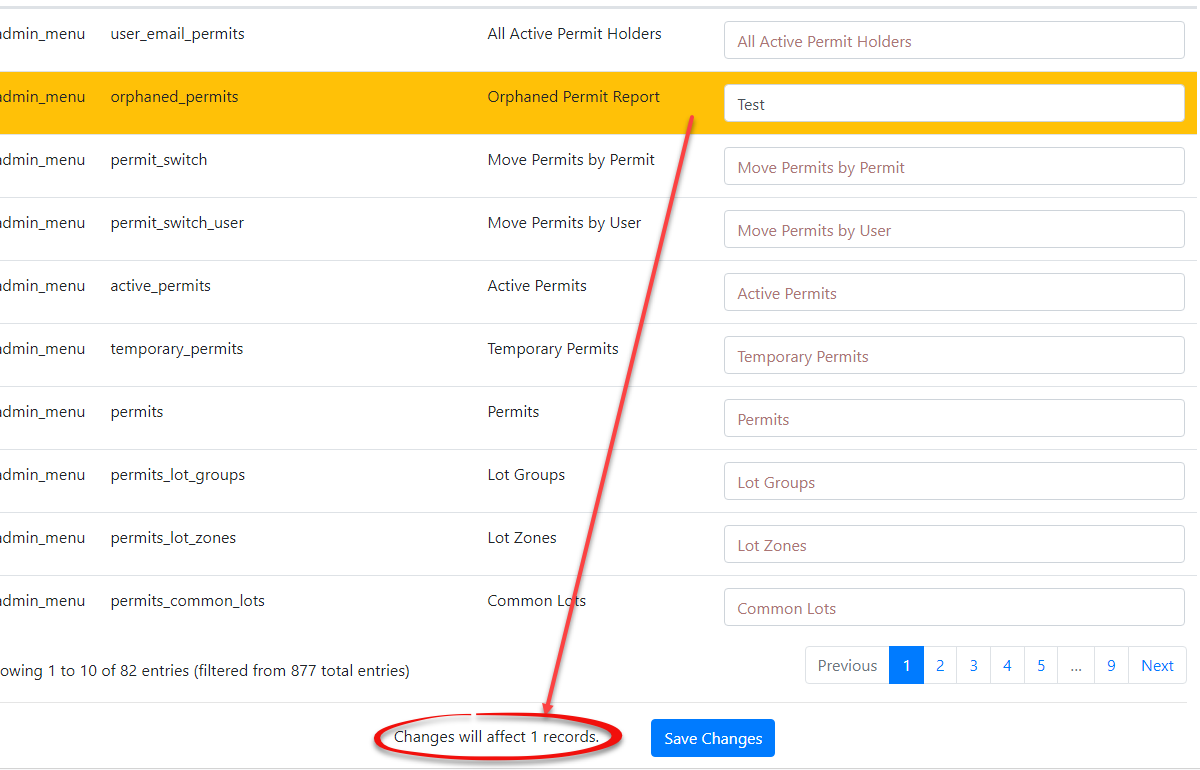
-
WhenClickyou are finished making your changes clickthe Save Changesforbutton to apply theupdatetexttoupdatestake effect.Delete LanguagesTo delete languages, you can clickacross thedelete button next to the language you want to remove. Keep in mind that if you remove the base English and French language it can be re-installed. However, if you delete a language that we do not provide you, then this data will be lost and you will need to contact support for assistance with recovering these translations.system.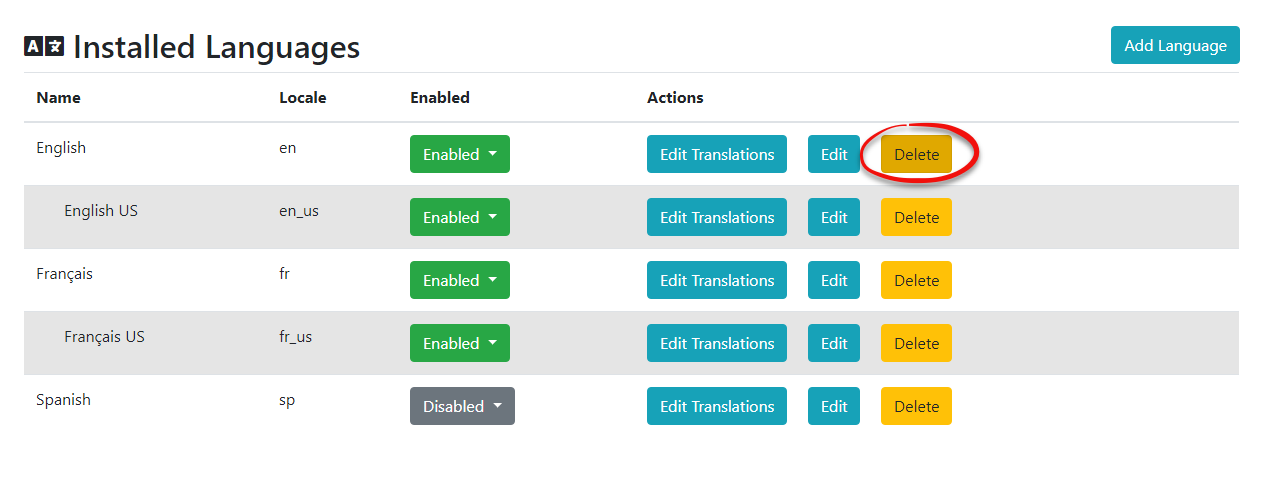
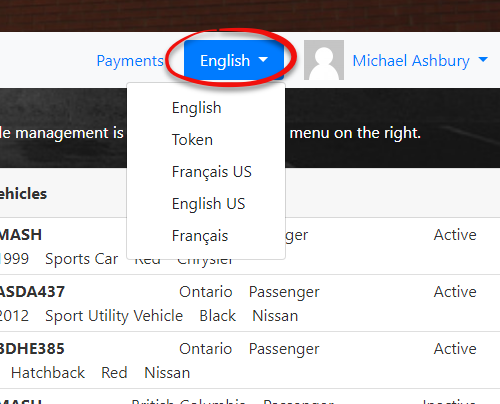
Keep
Creating Templates and Messaging for New Languages
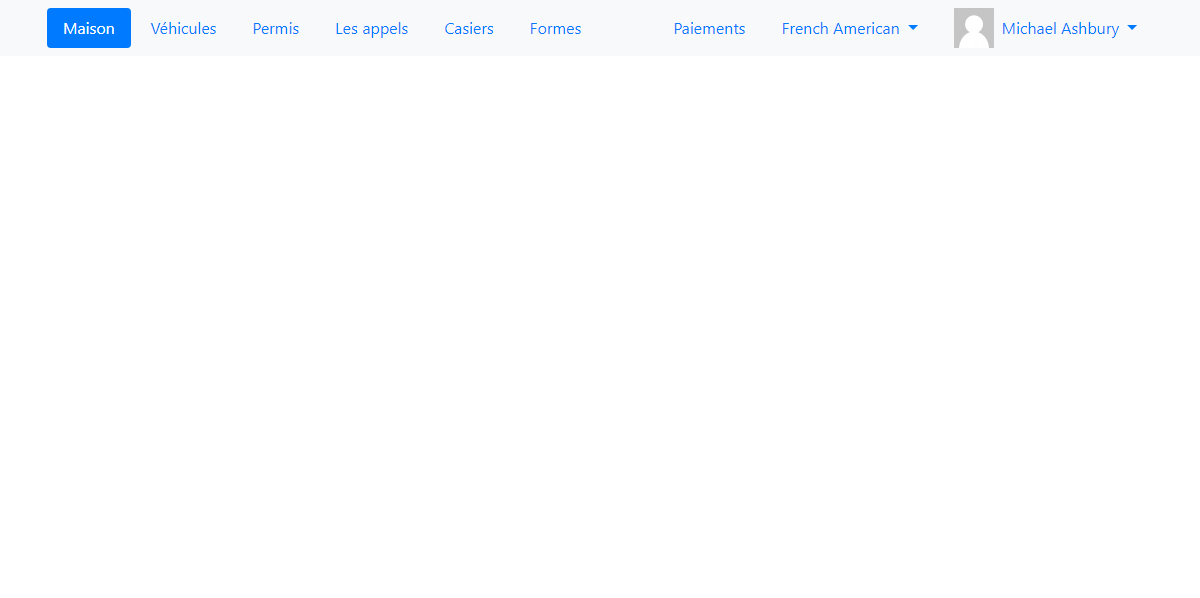
It's important to note that whenWhen you create a brand new languagecustom language, it will not automatically rely on the default templates and system messaging thatset you have setupup for your previous languages. For example, if I use the new French American language I created, and go onto the user side where languages are supported, then IThey will see aappear blank templateuntil as well as blank messages.configured.
-
ToHoveraddoveraSystemnewConfiguration,templateclickforContentyour&languagesDesigns,that you create you will need to go intothen Templates & Design.followed -
Click Toggle Templates for the templates
that arecurrently being used.From -
you will have the option to clickClick the Create button to add the new
template.templateIf you just wantfor yournewlanguage, or click Edit on an existing language touse the same template, from a language that is already in the system, just go intoEditandcopytheits text overintotoyourthe newlanguage,one.after -
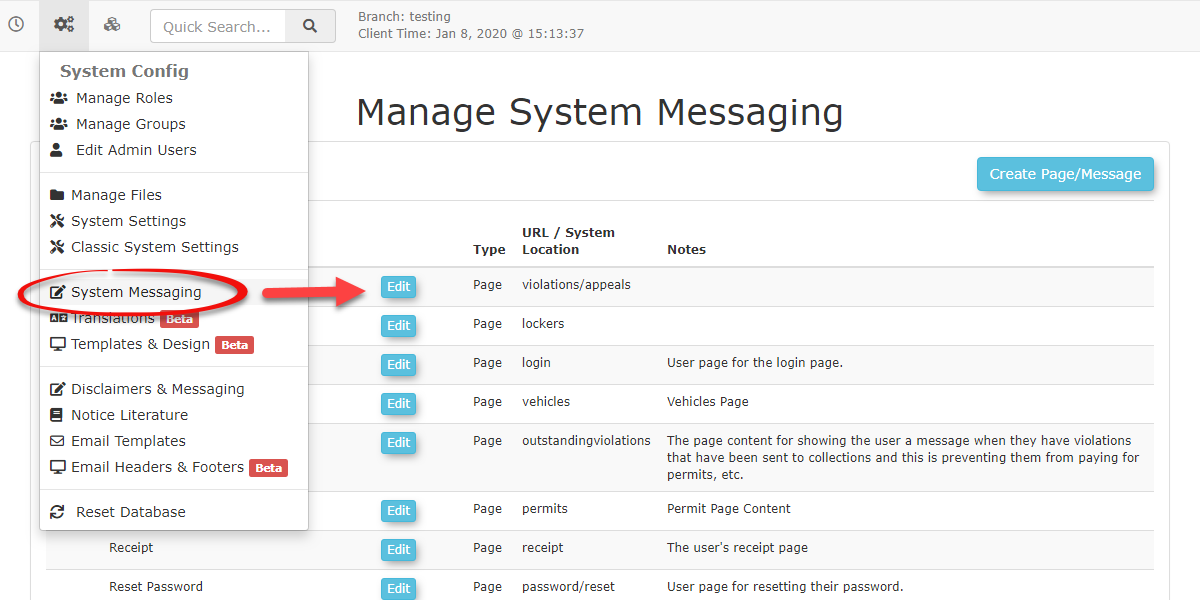
theHover over
clickCreateSystem Configuration,button.
Content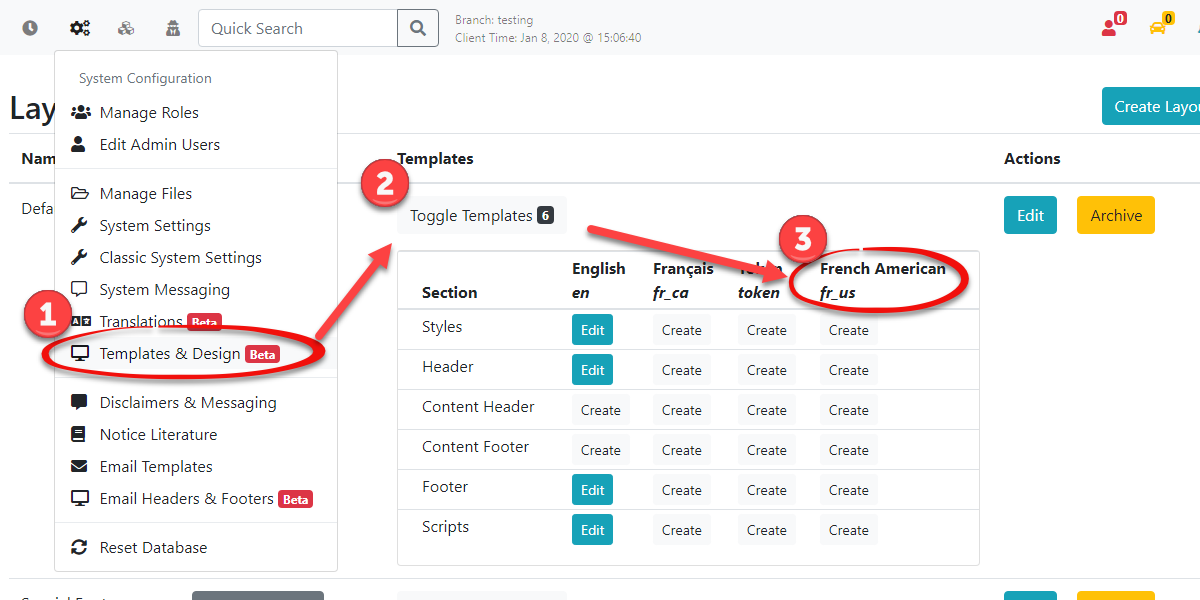
, then System Messages.Adding& Designs -
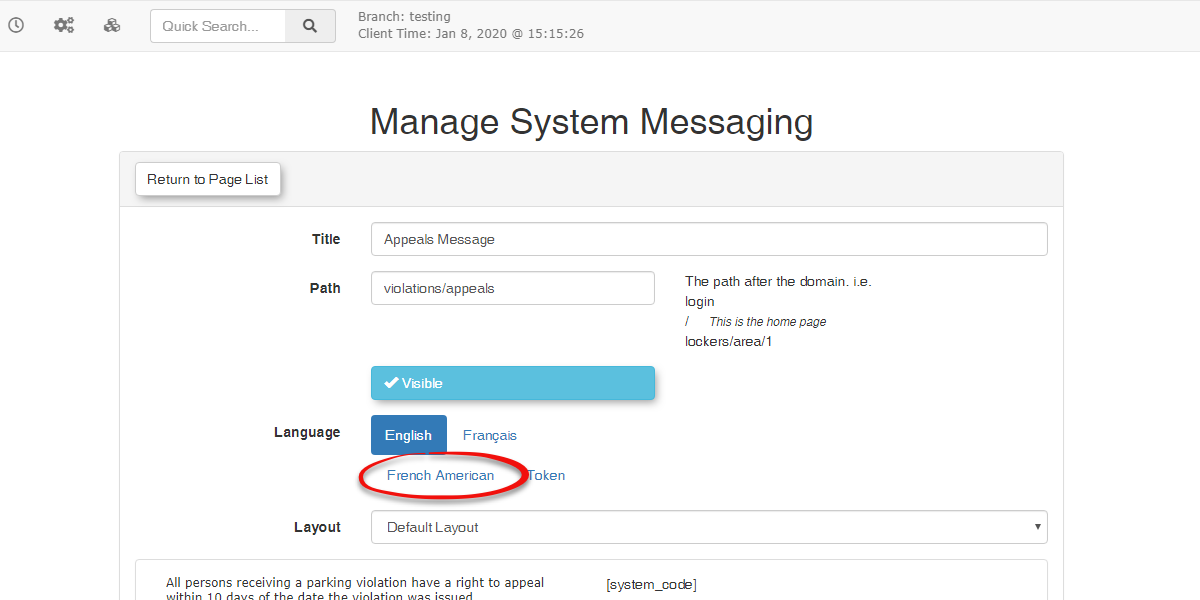
individualSystem messaging will work a bit differently than templates as you will need to go into each individual message and clickClick the Edit button next tothatanmessage.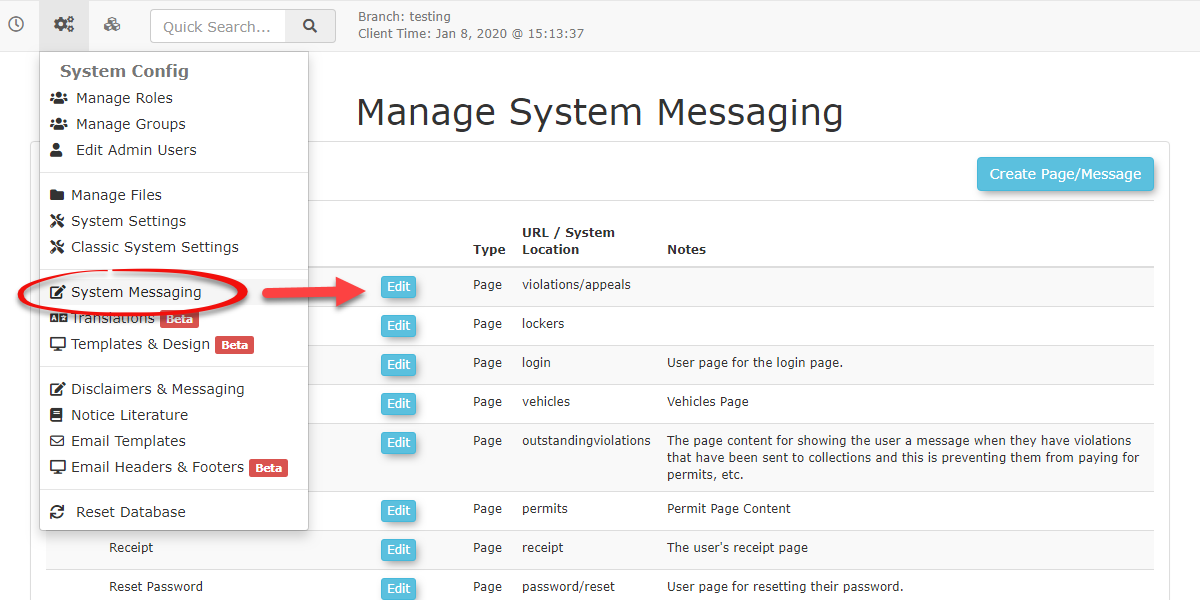
From there you should be able tomessage, select your newlanguage.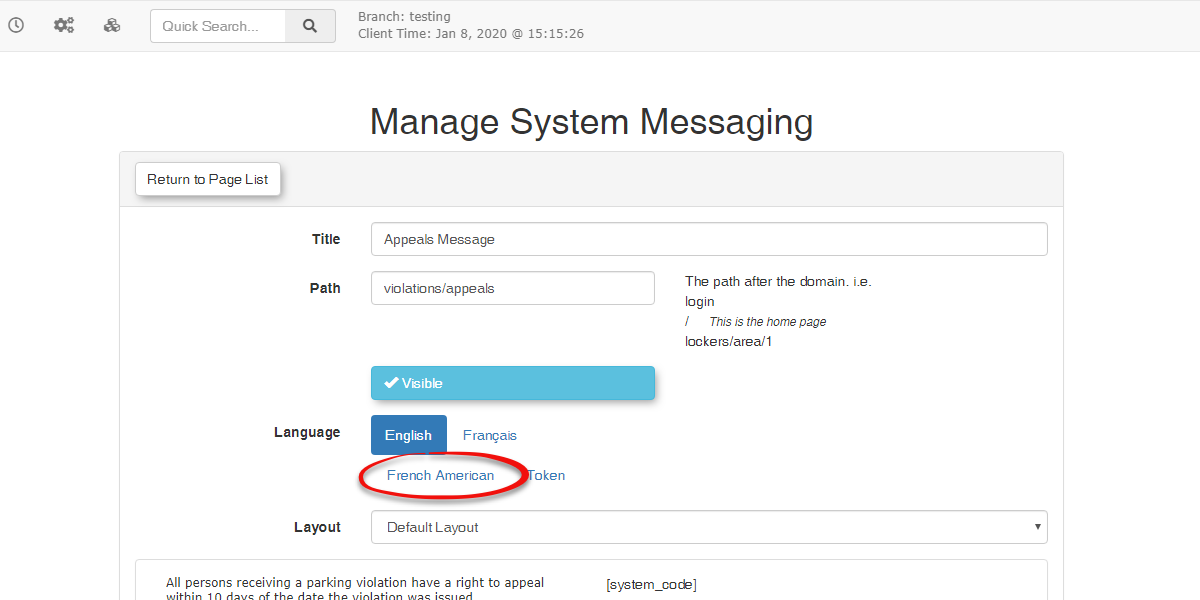
If you want multiple messages to display for all your languages you will need to create a new system messagelanguage, and type out thetranslationslocalized translation.
Adding Templates
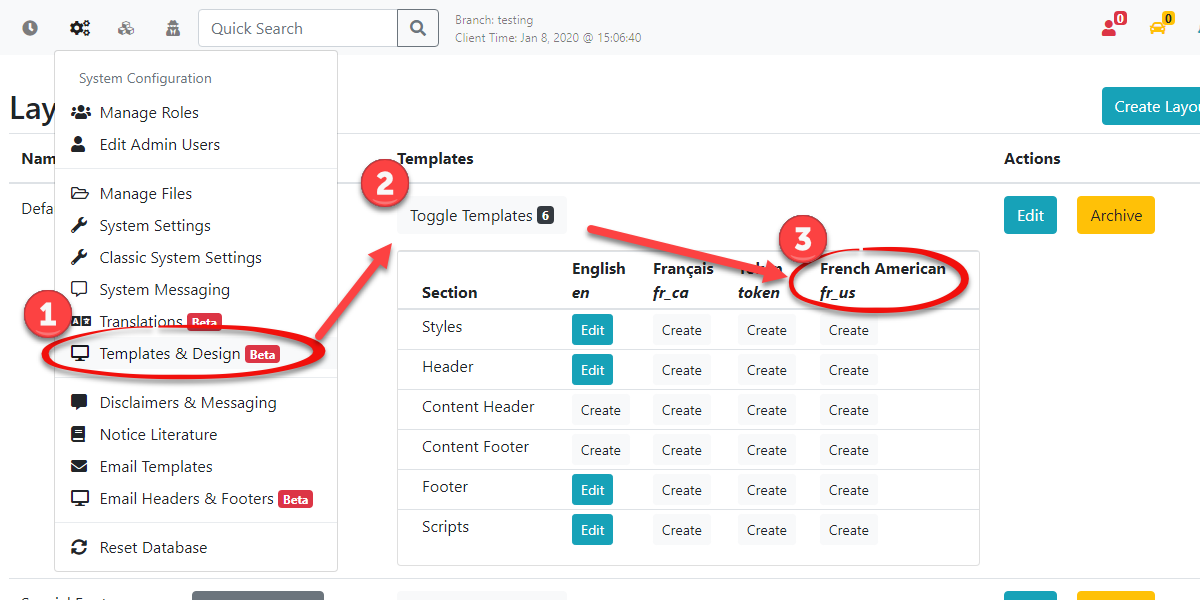
Best Practices and Considerations
-
Use the Token language for
thattroubleshooting: Use the "Token" languagetemplate.Changing Terminology Usingon theTranslatoruser side to easily identify exactly where a translation exists so it can be changed. To do this securely, navigate to a user's profile on the admin side and click the Login as User button. Switching to the Token language reveals the backend code names for every text element on the screen. Regular users cannot access the Token language. -
ThereEstablish the main language first: You must create the main language first before creating any related sub-languages. If the main locale isanother use formissing, thetranslationsub-languagetoolwill fail to inherit the correct text and will default back to standard English. -
Protect custom language data: Be aware that
maydeleting a custom language permanently removes its data, requiring OPS-COM support to recover. While base languages like English and French can be easily re-installed, custom entries cannot. Note that deleting a main language will notbedeleteobviousitsatassociatedfirst.sub-languages.Since -
translatorLeverage
isbulkessentiallyterminologyaupdates:listWhenofeditingcode terms and a corresponding list of what is actually displayed on any page not only can you edit the various languages but for each language you can also edit the display termterminology to fitalocal"version"phrasing,of the term. A perfect example of this is in some areas one might refer to receiving a"ticket" as receiving a "citation". It is entirely possible to replace any spot in the interface where the termticketis used with the termcitation.To do so go into the language editor and search for the term you wish to localize. In our example simply enterticketin the search bar and hit return. A list ofupdate alltranslatableinstances of the wordticketbefore saving. Searching for a term like "ticket" willappear.pullClickuptheallboxtranslatablewhereinstancesthe(e.g.,term is editable and type in your preferred term. In this case we are changingManage Ticket Categories,toPayManage Citation CategoriesTicket).OnceEditingyouthemsaveall at once ensures complete consistency across thechangesuseryou have made the displayed text associated withManage Ticket Categorieswill display asManage Citation Categoriesthroughout the system. You may edit the remaining instances of the word Ticket that are in the list before saving to change the term in bulk for all entries listed.portal.