
Active Dispatch Logs (BETA)
WhenThe doActive we use this?
Dispatch Logs feature allows administrators/administrators and dispatchers to recordrecord, track, and trackmanage all incoming inquiries thatand comeautomated intosystem thealerts. officeIts throughprimary alertspurpose or another system. These dispatch logs can be linkedis to incidents for further tracking if the alert that triggered the dispatch log did not already haveprovide a validcentralized incident attached. The Dispatch Log also provides administrators with a summarydashboard of all open dispatch entries.entries Someand systemsseamlessly suchlink them to actionable incident reports for further tracking. This article is intended for OPS-COM administrators and dispatch personnel.
Setup and Configuration
The Active Dispatch Logs feature is a core component of the Incident module. While it requires no special setup to operate, users must have the appropriate incident and dispatch management permissions enabled on their administrative role to view, edit, or assign incidents to logs.
Using this Feature
The Active Dispatch Logs page serves as Cisco Prime or ITS-NetworkingAlerts can push the incidentprimary numberworkspace withfor andispatchers alertto view all open logs that createsrequire afollow-up, dispatchadd lognew withrecords, theand associatedassign incidenttasks assumingto itother exists. administrators.
ReviewingAccessing Dispatchand Logs:
Creating Logs
-
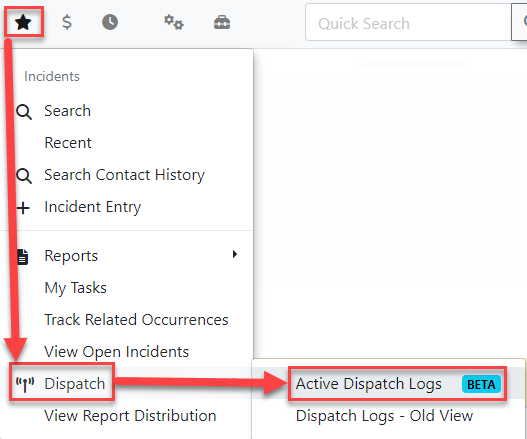
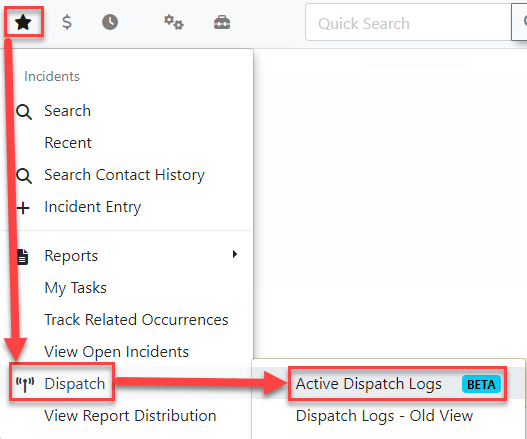
Hover over the Incidents icon, click Dispatch, and select Active Dispatch Logs
.
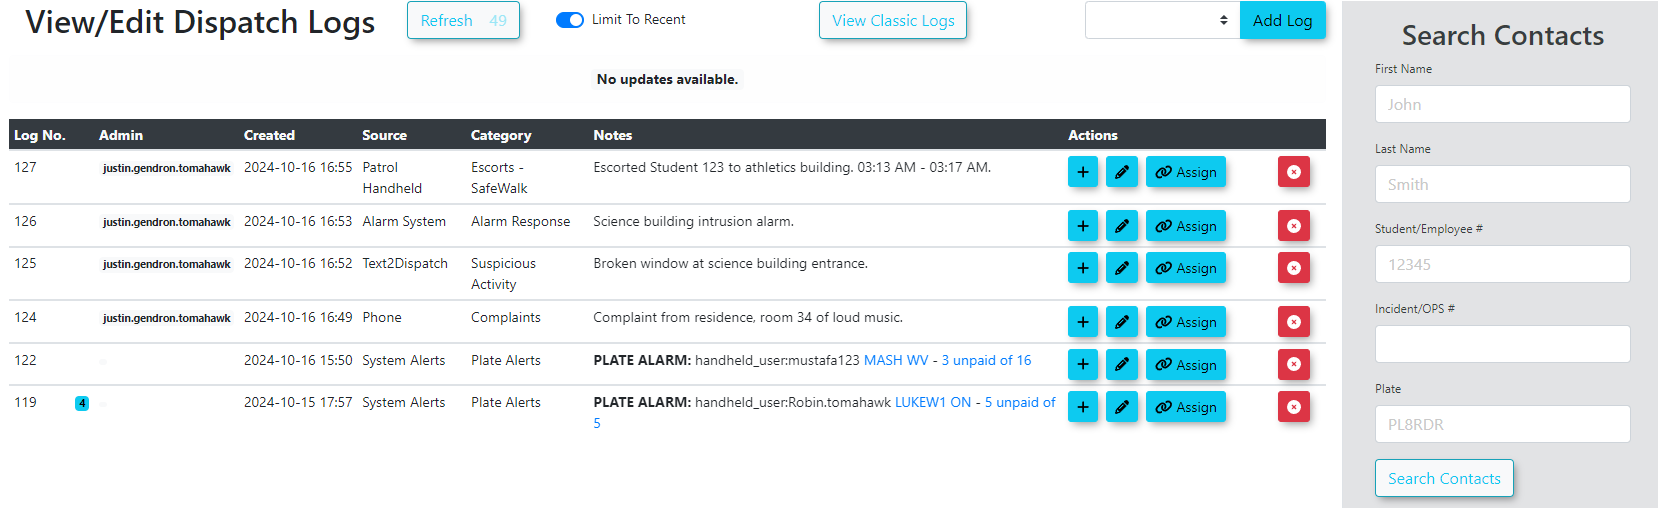
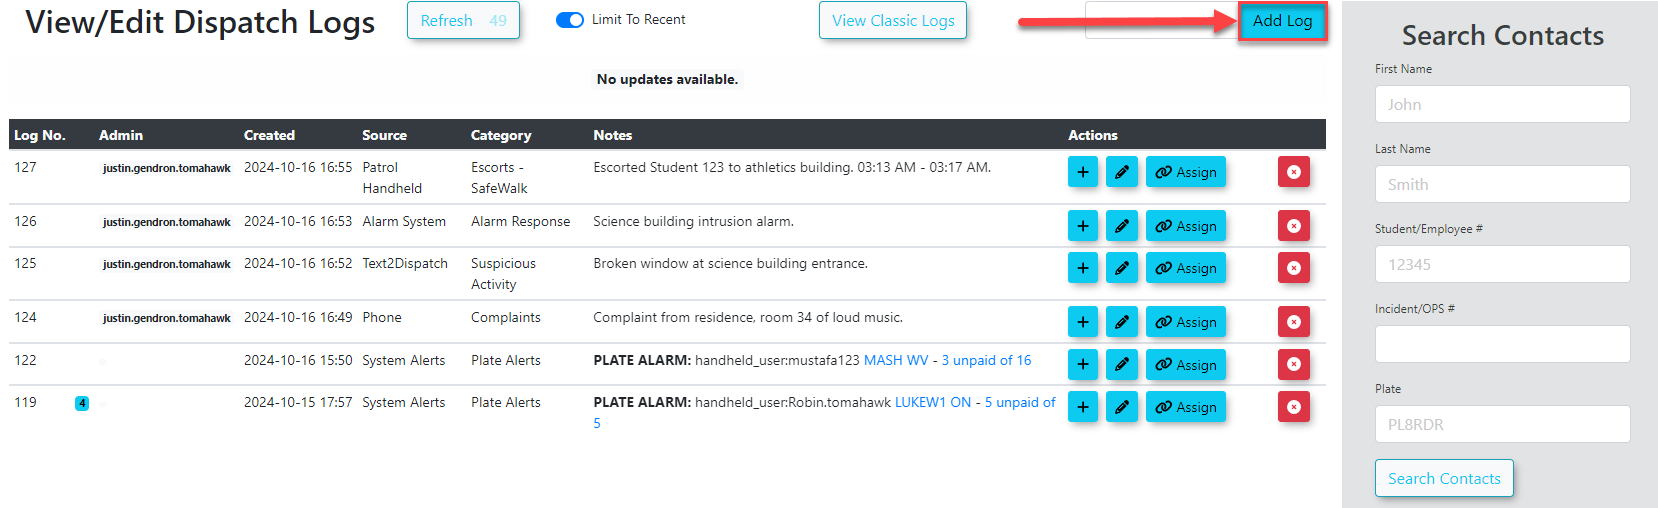
This will bring up theView/Edit Dispatch Logspage. Here administrators/dispatchers canto view all openlogs that still need to be followed-up on.
entries.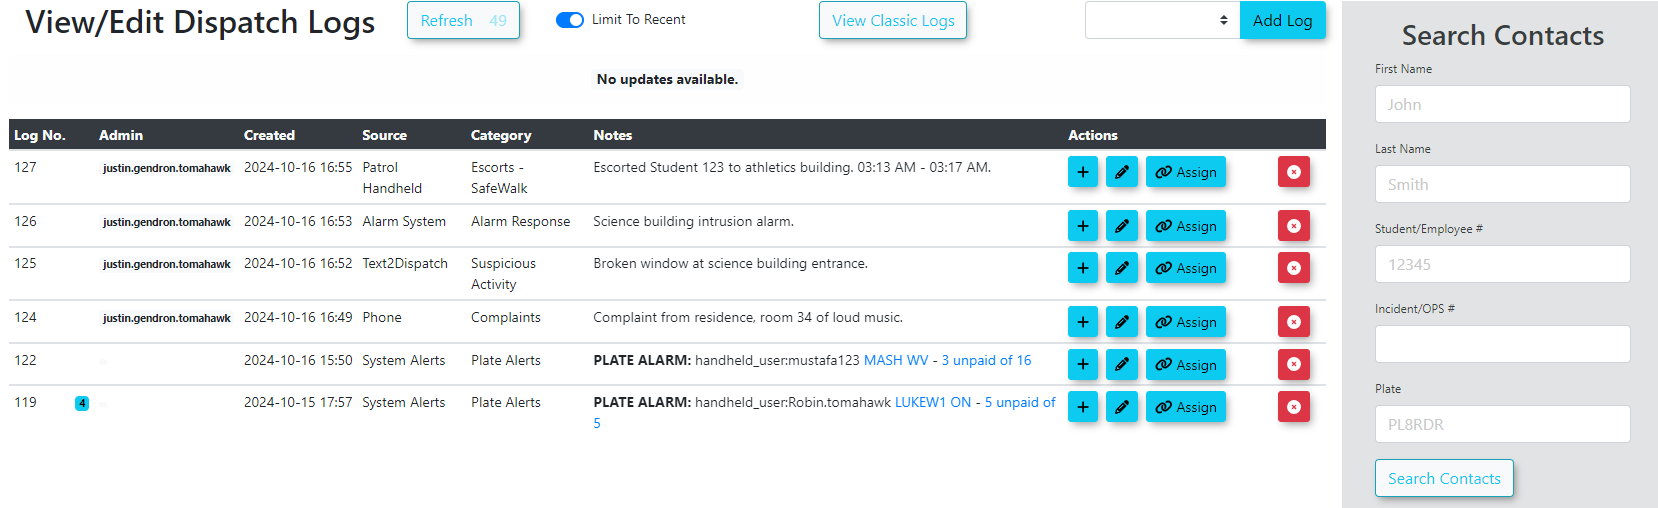
-
To create a new log record clickClick the"AddLog"Log button in the top right of yourscreen:screen to create a new record.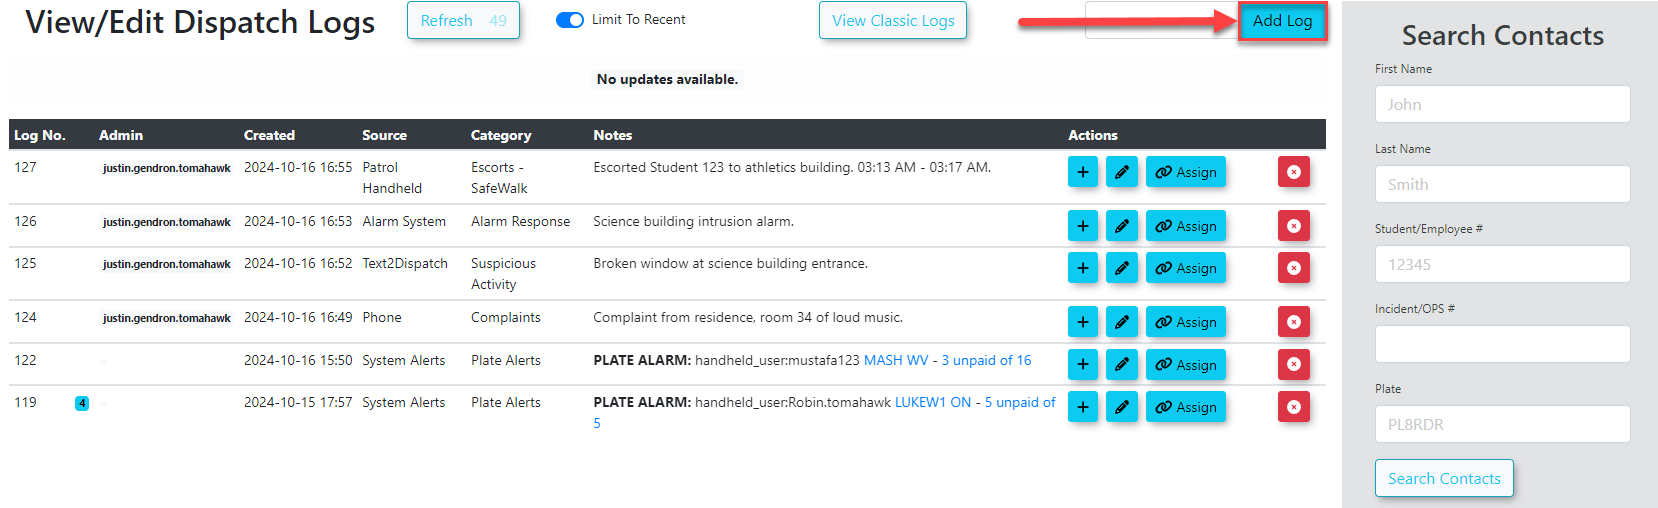
-
Select the appropriate Source
Sourceandandmenusmenus.and -
inType
anythe necessary detailsthat need to go withinto thelog in theNote section.Depending -
whether or not you want the dispatch log to be closed, clickClick Save Log
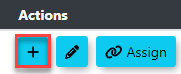
ortoSave Log & Close.IfSave Logis clickedkeep theinformationrecordwill be savedopen andtheactive,log will show at the top of the listing of Dispatch Log Records.Adding Additional Log Notes:If dispatchers want to add a separate log that is attached to the first log, click the blue plus icon under actions:
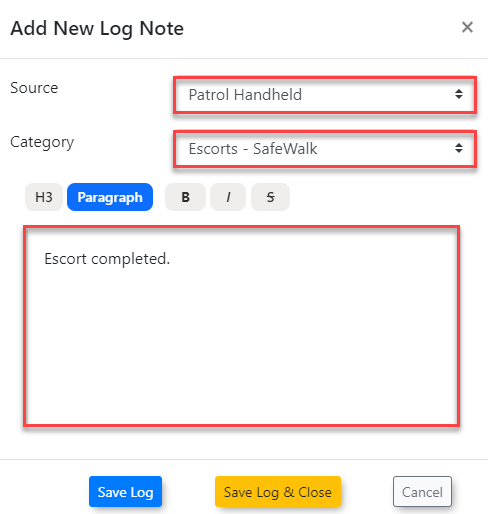
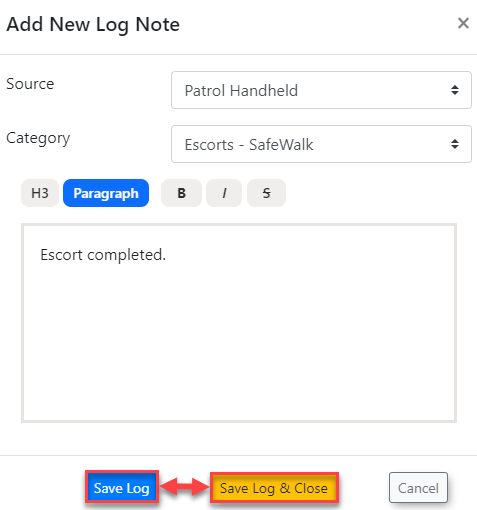
This will bring up anAdd New Log Notescreen where dispatchers can include theSourceof the information, theCategoryand any notes that need to be included: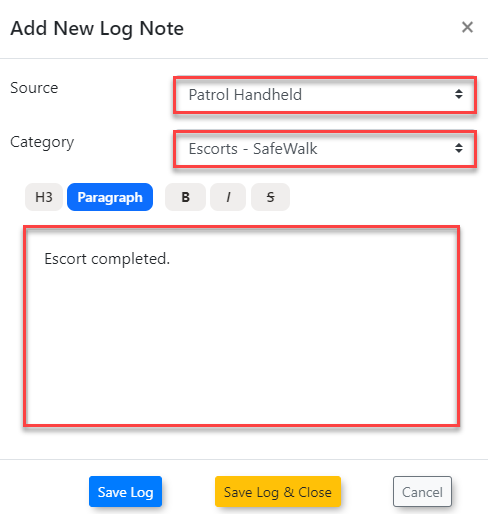
To save the log click theSave Logbutton.ORTo save the log and to also close the log, if it is completed,or click Save Log & Closebutton at the bottom: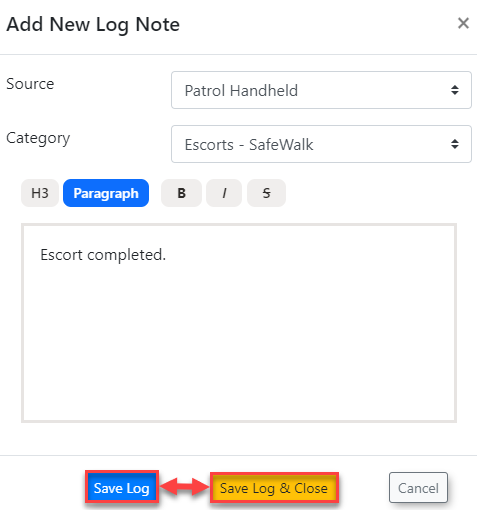
Viewing Additional Notes / Rolled-Up AlertsThe dispatcher can view all of the available log records associated withif the dispatchlogisonalready resolved.
Creating new Dispatch Log Record:
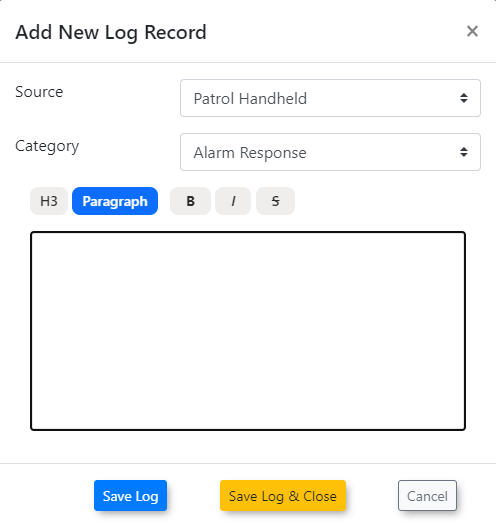
This will bring up the Add New Log Record screen:
If a dispatcher clicks the View/Editincident Dispatchnumber Logslink page by clickingwithin a log thatbut receives an error, ensure their administrative role has additionalthe notes/alertsproper associatedpermissions configured to it.view Thisand isedit indicatedincidents.
Adding Additional Log Notes
-
Click the blue plus icon under the actions column of an existing log to add a
blueseparate,numberattached(note. -
Select the
numberSourcebeingandhowCategory,manyandnotesenterarethelinkedsupplemental details. -
Click Save Log to append the
lognote,inorquestion):click Save Log & Close to append the note and close the entire dispatch log.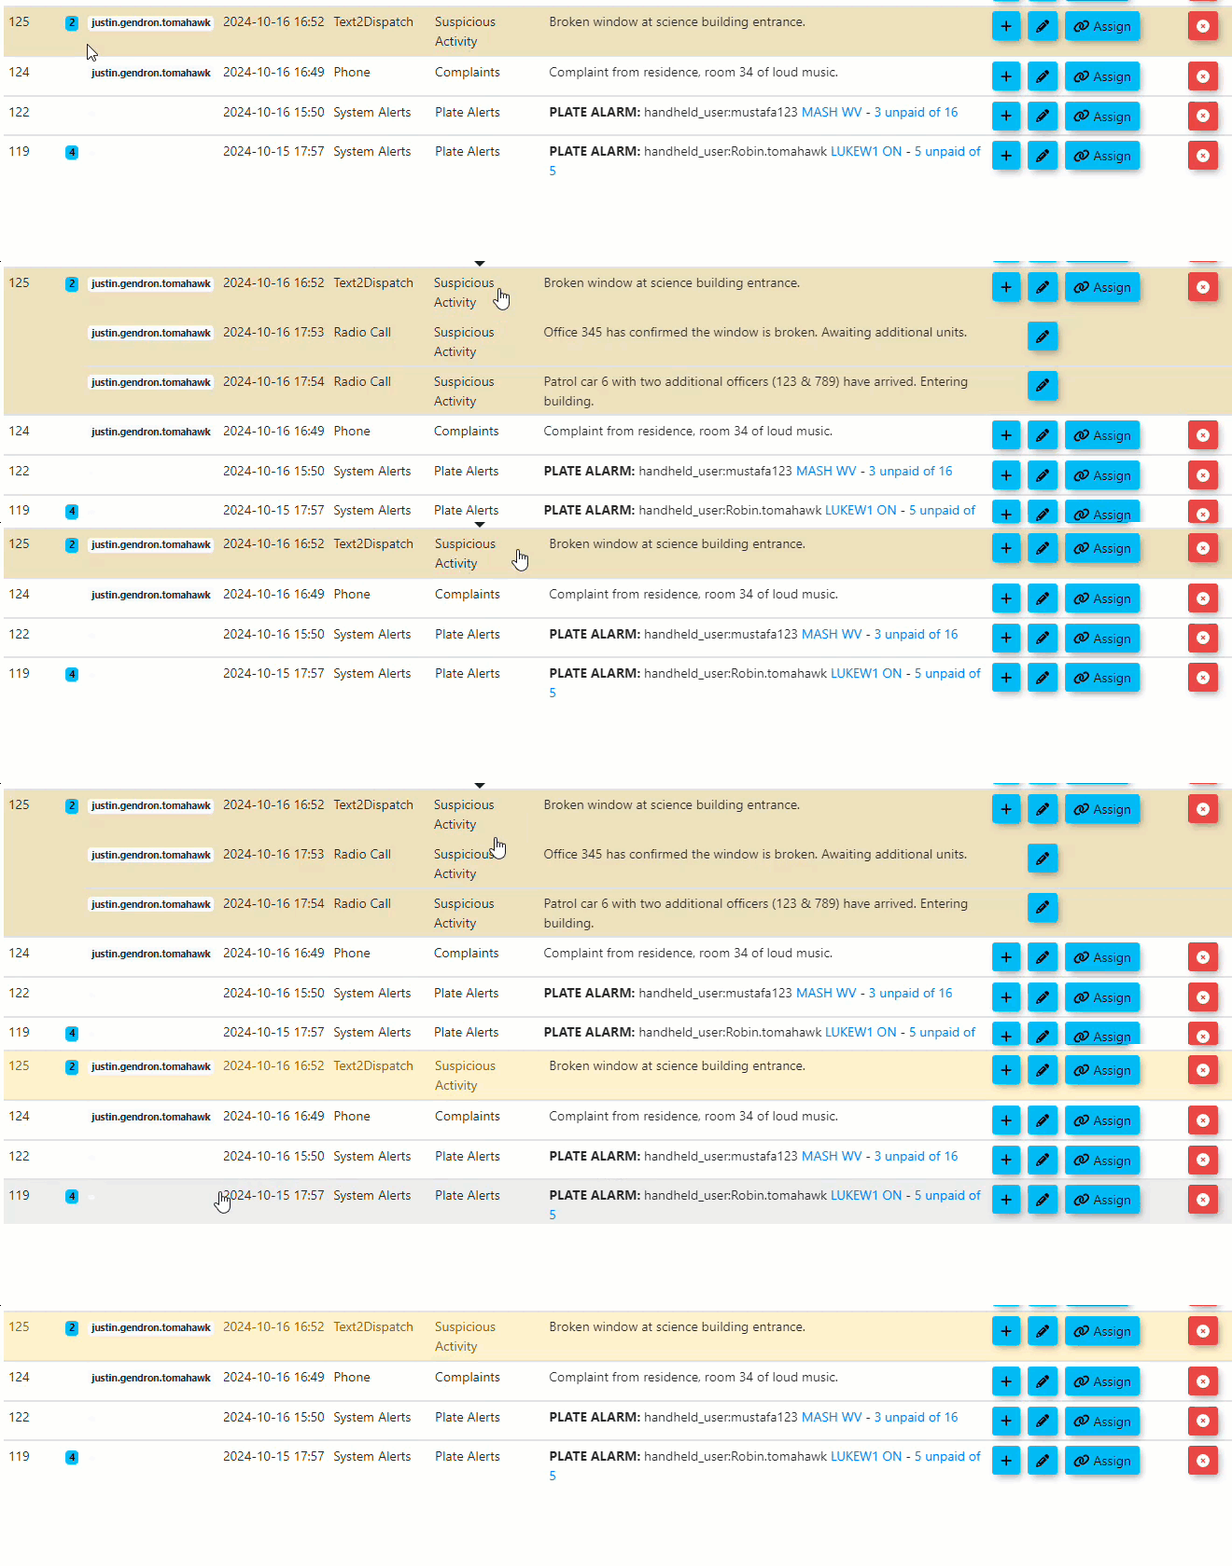
Assigning a Log to an Incident Report
-
Click the Assign button under the actions column to attach the log to an incident
report:If dispatchers want toor assign an admin user to act onthe log or if they want to attach an incident report, select theAssignbutton under actions:it.
-
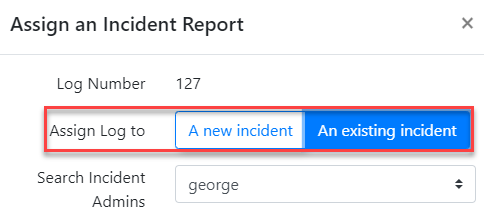
TheAssign an Incident Reportwindow will open. The dispatcher canSelect eitherassign the log toA new incident or An existingincident:incident.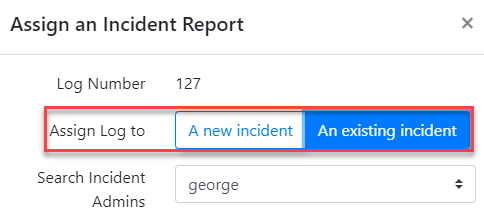
-
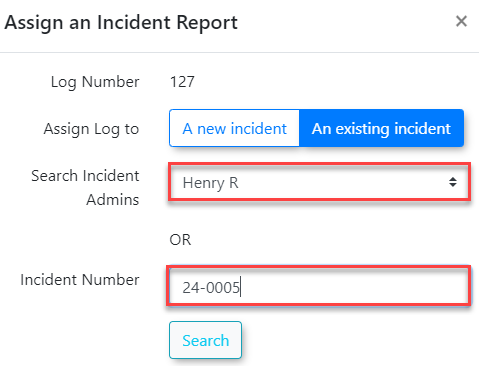
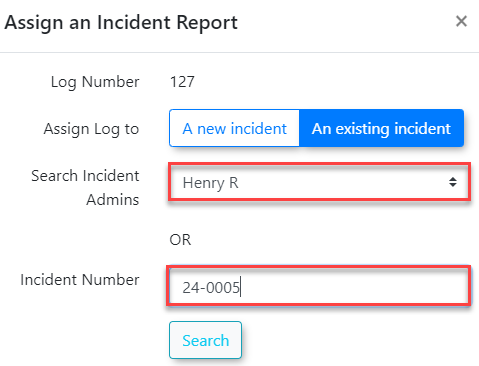
IFAssignAthenew incidentis selected and assignedlog to an adminuseruser.aIfnewyouincidentselectedwill be created.IFAnan existingincidentis selected a new Incident Number field will appear. The dispatcher can eitherincident, search for the incidents already assigned to an admin userORor manually enterin anthe incidentnumber:number.

Closing Dispatch Logs
-
-
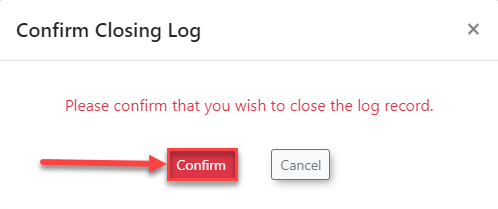
WhenClick the Confirm button in the pop-up window to remove it from the active list.
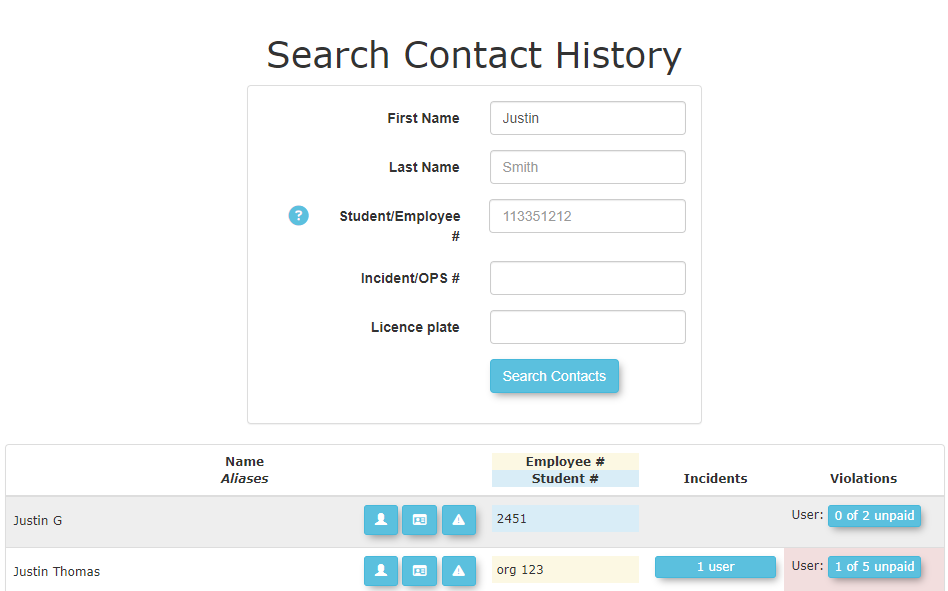
Searching Contacts
-
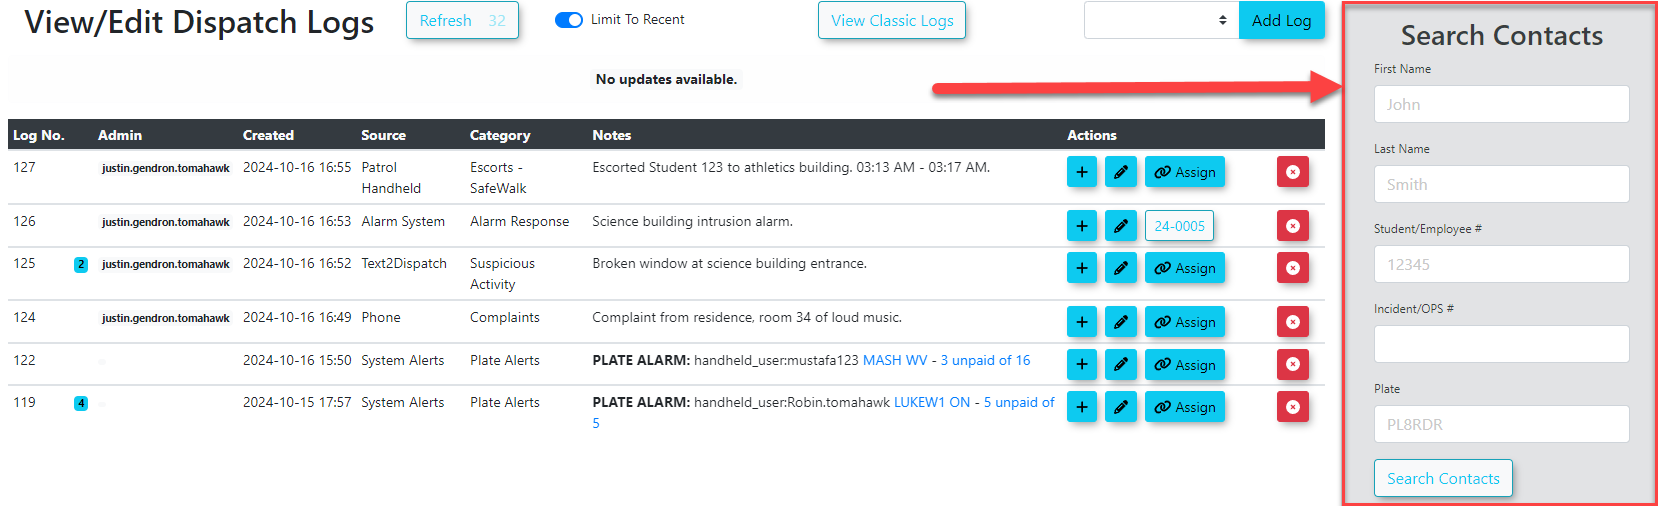
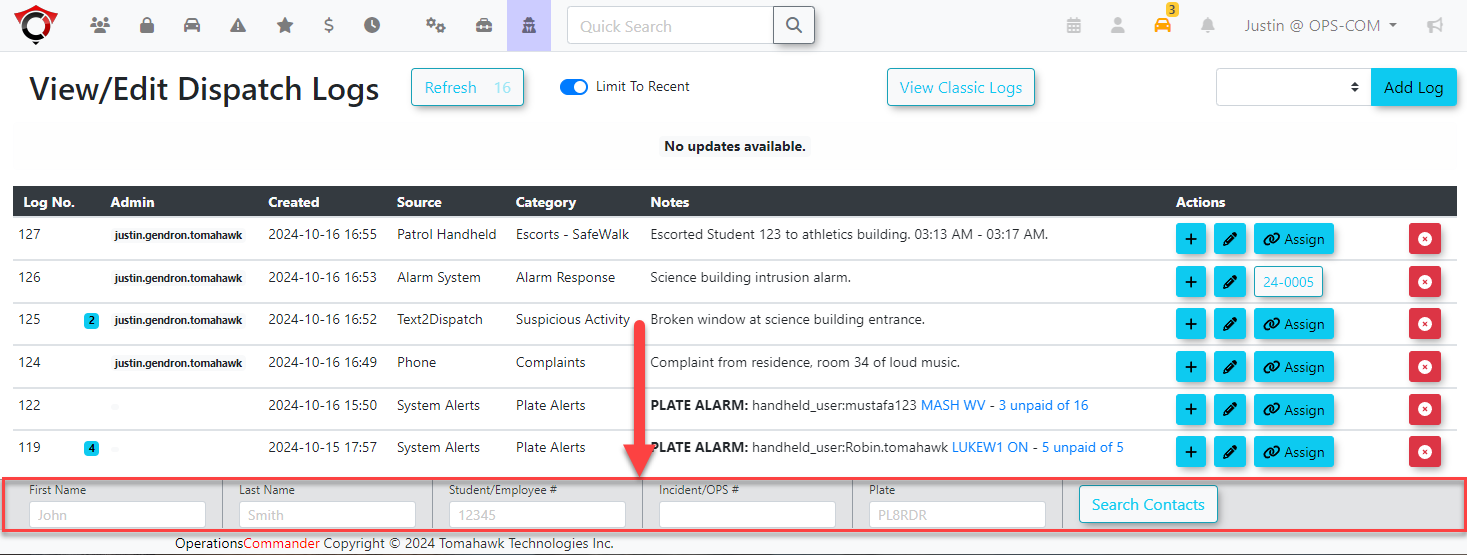
Click the Search Contacts button to open the Search Contact History window. Depending on the width of your monitor, this button will be located either on the right side of the screen or along the bottom of the page.
Visual Cues and Status Indicators
-
Blue Number Icon: Indicates how many additional notes or rolled-up alerts are linked to the dispatch log. Click the log to view all associated records.
-
Incident Number Link: Once an assignment is made, the incident number
will appearappears in the listing of Dispatch Log Records.ThisClick this linkcan be selectedtogaindirectlyaccessviewtoorview/edit the incidentreport if the admin account viewing the dispatch page has permissions to view and/or edit incidents:report.

Close
Available Logs:Actions and Buttons
-
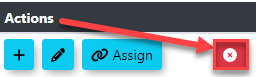
ToRefresh:closeDisplays alogcountdownonce it has been dealt with, click the red X icon under actions: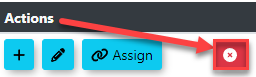
TheConfirm Closing Logwindow will open with aConfirmbutton that can be clicked.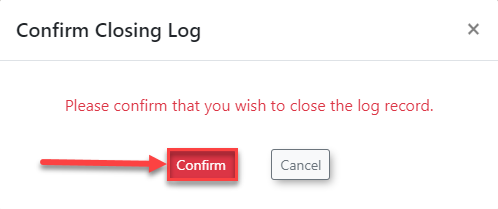
Search Contacts:Depending on the width of the admin/dispatch usersView/Edit Dispatch Logspage theSearch Contactsarea will either be located on the right side of the screen (for wide monitors/windows):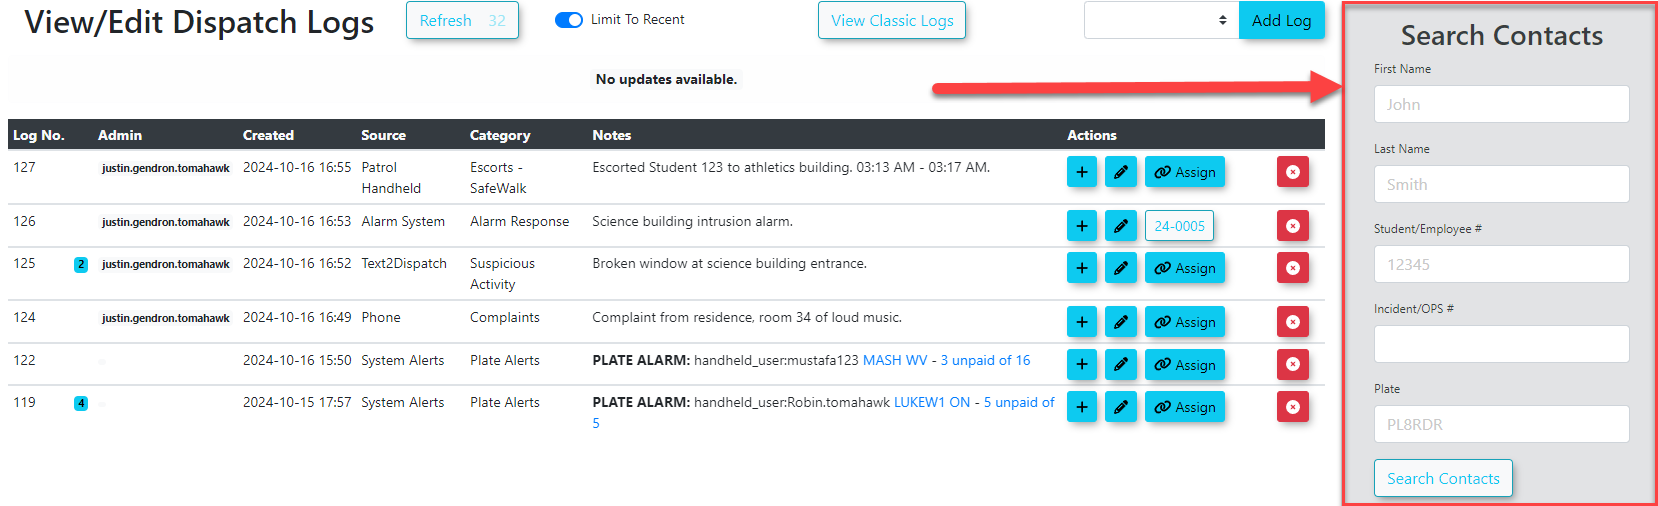
ORalong the bottom of theView/Edit Dispatch Logspage: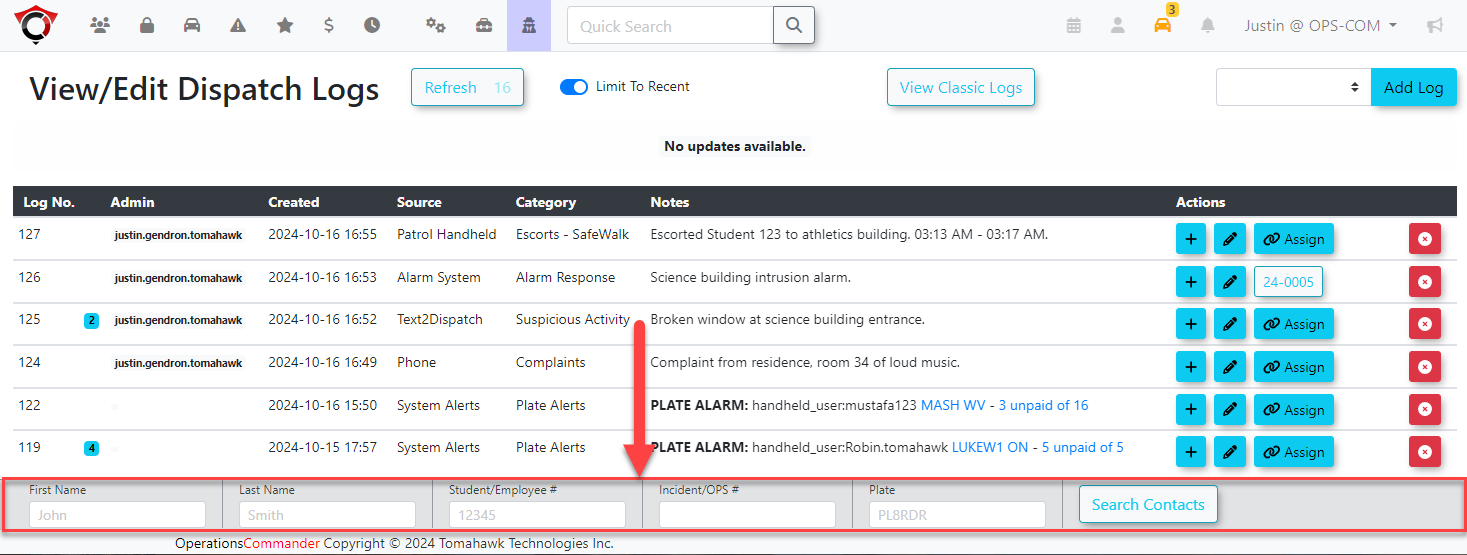
When Search Contacts Button is clicked the Search Contact History window will appear: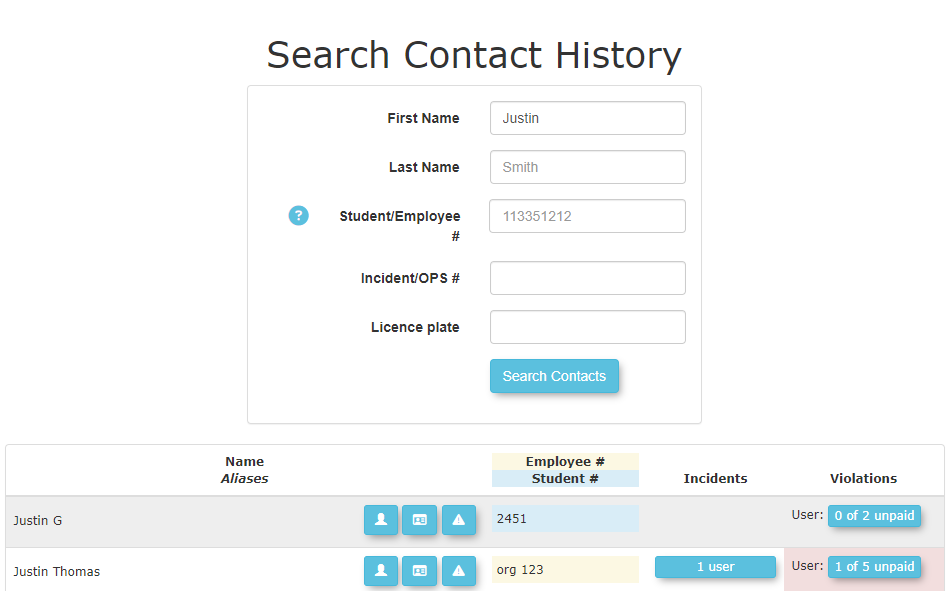
Miscellaneous buttons:
Refresh: The dispatch page will automatically refresh every minute by default. The Refresh number indicatesindicating how long until the pagewillautomaticallyrefresh.refreshesSome actions will stop(thepagedefaultrefreshisfromoneoccurringminute). Actions such as adding notes or assigning anincident.incident will temporarily pause the page refresh. -
Limit To
RecentRecent:: Limit Dispatch logs to recent logs only.Toggle this setting to view older dispatch logs in addition to recent ones. -
View Classic
LogsLogs::ThisClickwillthis button to redirectthe admin/dispatcherto theoldlegacy dispatch logsview,view.this

Best featurePractices thatand existsConsiderations
-
Keep the
olddashboard clear: Always close dispatch logs once they are resolved using the red X icon or the Save Log & Close button. This ensures your active dispatch view remains uncluttered and focused on actionable items. -
Leverage external integrations: Organizations should take advantage of API integrations where possible. Systems such as Cisco Prime or ITS-NetworkingAlerts can be configured to push an incident number alongside an alert, automatically creating a dispatch log
viewwithisthecompletelyassociatedremoved.incident already attached.