
Apply Temp Permit to User Vehicles
Toarticlebegin,explainsyou must set the abilityhow toapplyconfiguretheand issue a single temporary parking permit that applies to multiple vehiclesinon a user's profile. This feature streamlines the permitting process for administrators managing users who need temporary access for more than one registered vehicle. This guide is intended for OPS-COM administrators.Setup and Configuration
Before issuing a temporary permit for multiple vehicles, you must configure the specific lot to allow this functionality.
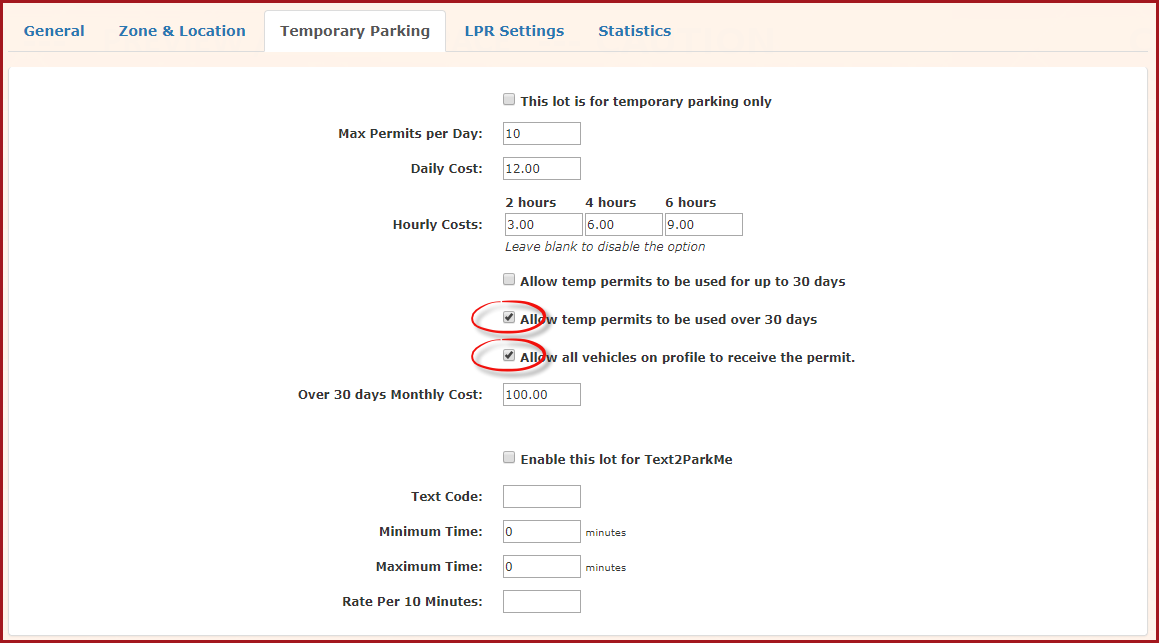
OnceUsing this Feature
Once the lot is
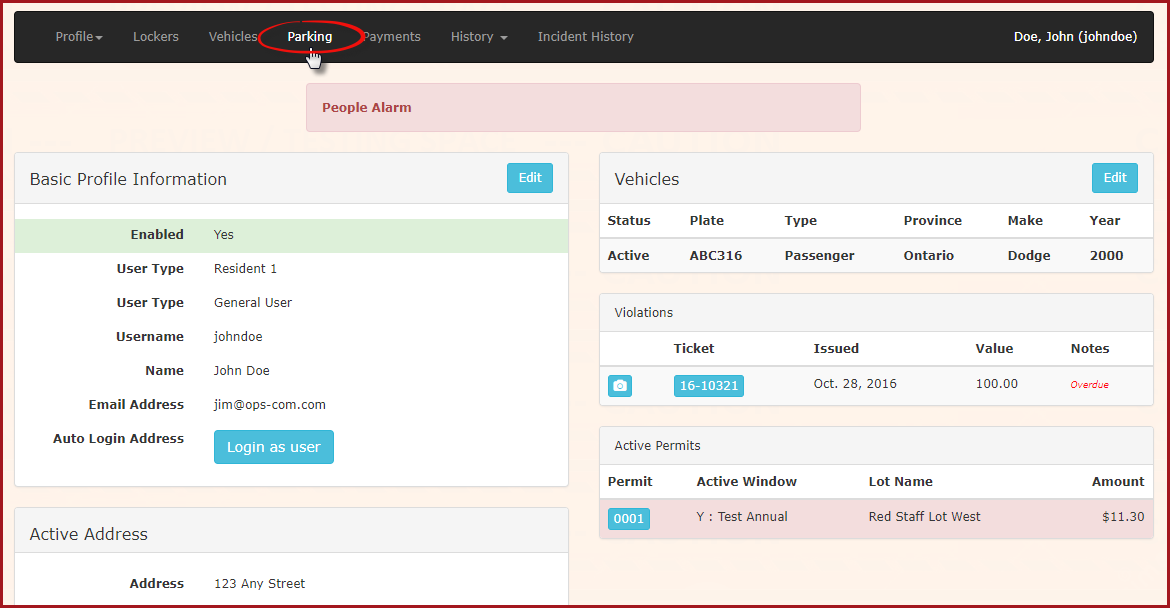
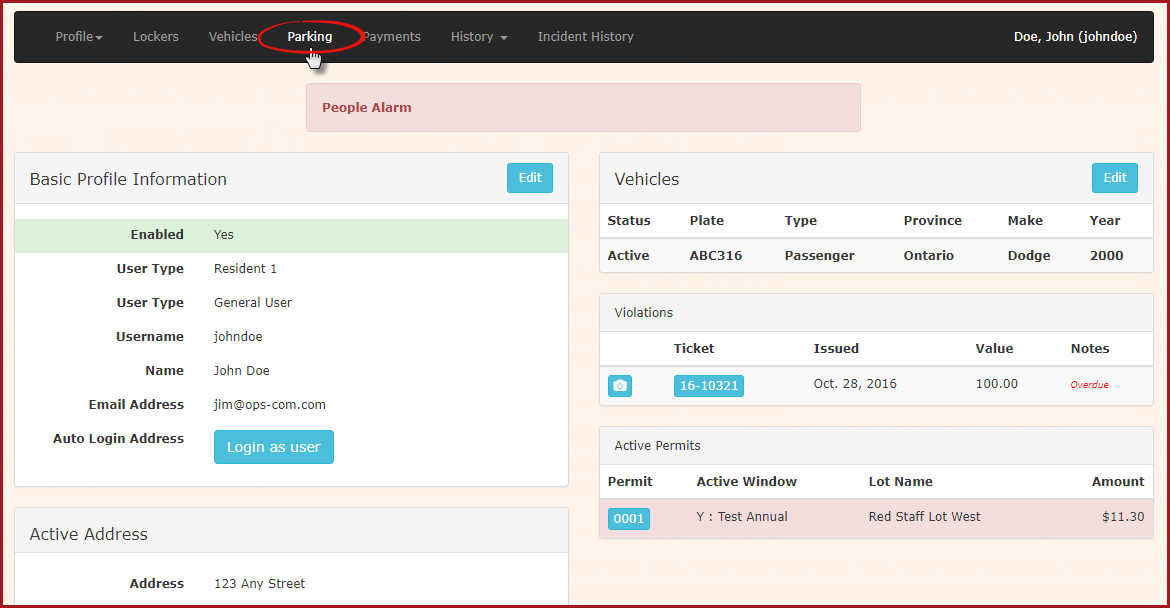
set,configured,youadministratorsare ready tocan issueathe multi-vehicle temporary permittodirectlymultiplefromvehicles.theTouser'sbegin,profile.go- Navigate to the desired user's profile and click
onthe ParkingTab.tab.
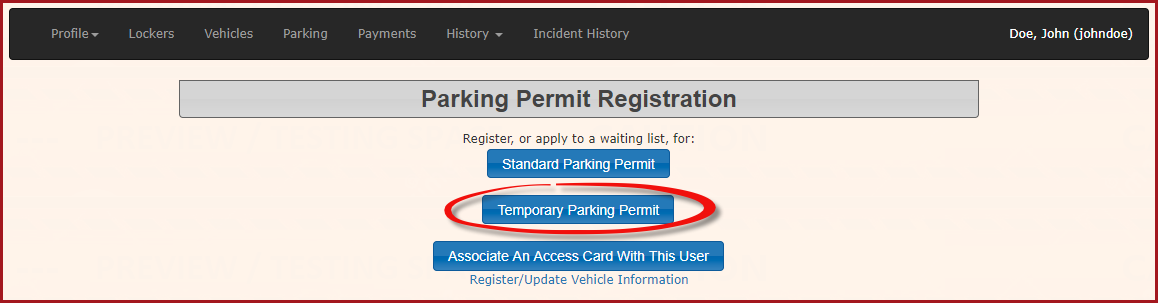
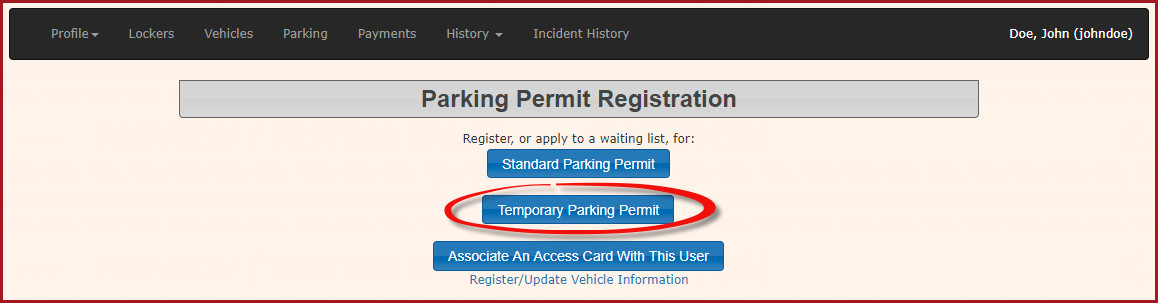
SelectClick the Temporary Parking Permit.button.
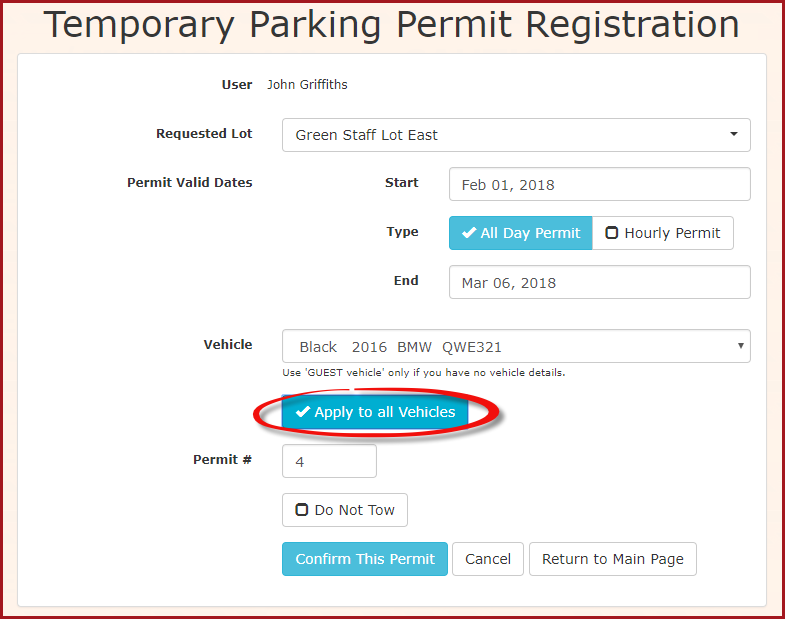
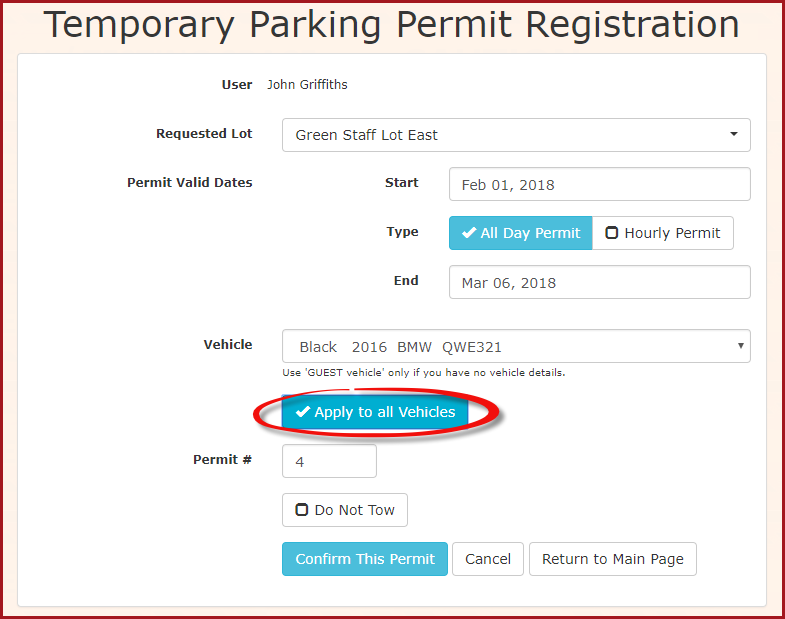
TheSelect the configured lot within the Temporary Parking Permit Registrationwindowwindow.- Set the start date and
- Click the Apply to all Vehicles button.
Clickthe button to apply the permit to all vehicles.
- Click the Confirm This Permit button to proceed to the
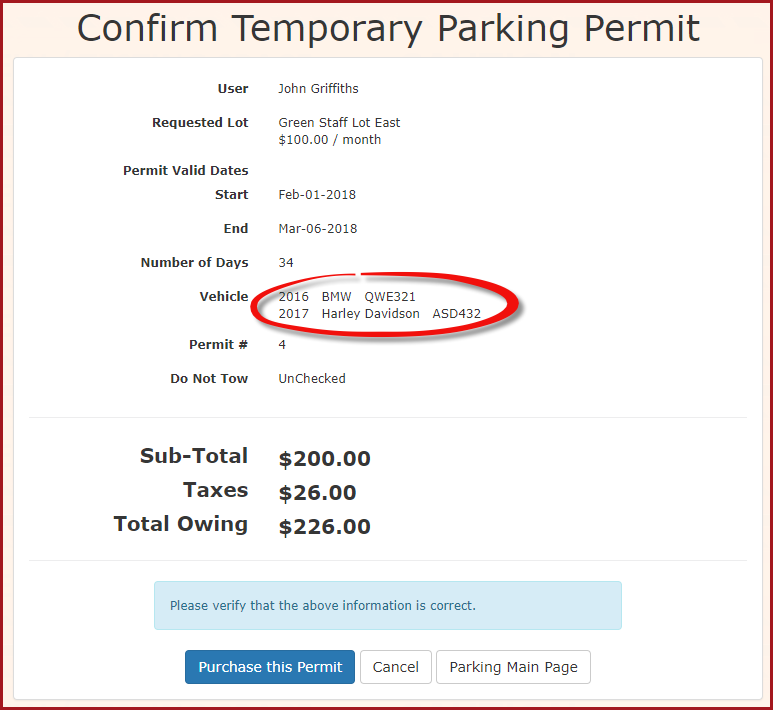
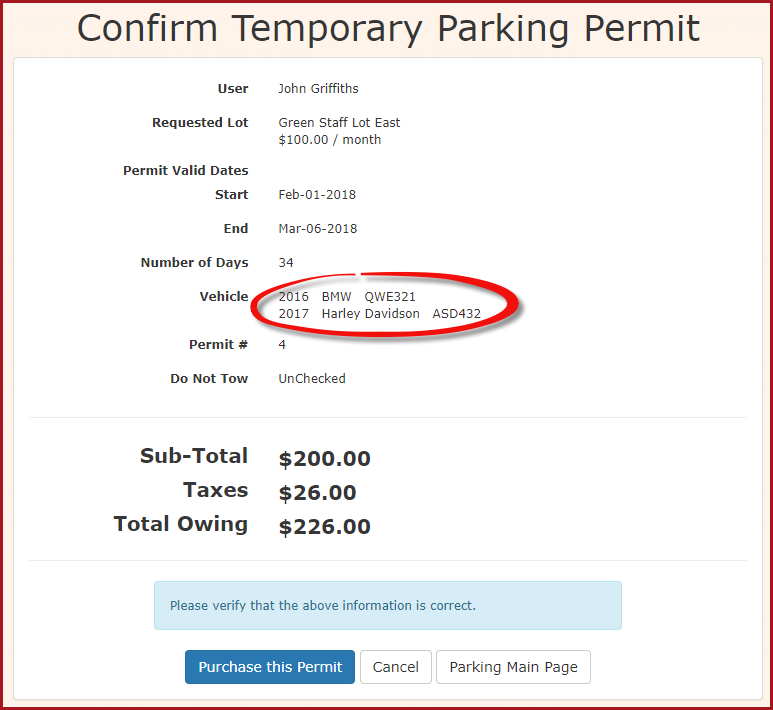
Confirmationconfirmation window. - Verify
canthatverifyallthe information before proceeding to purchase the permit.Note: the twointended vehicles arelistedlisted,inthen click theVehicle list.ClickPurchase this Permitto continue.button.
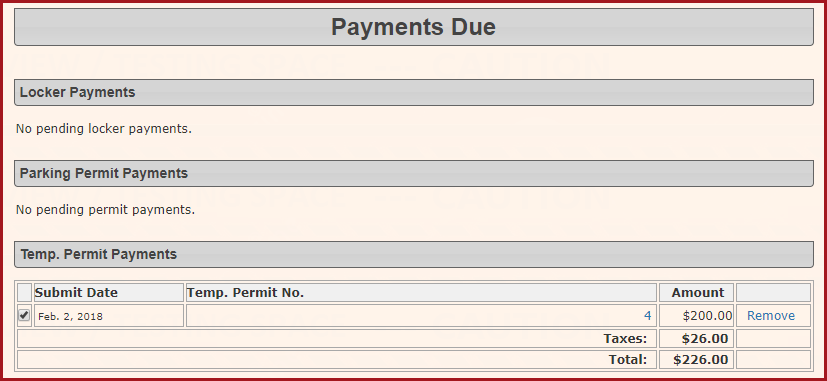
The payment screen displays. StartSelect thepurchase process.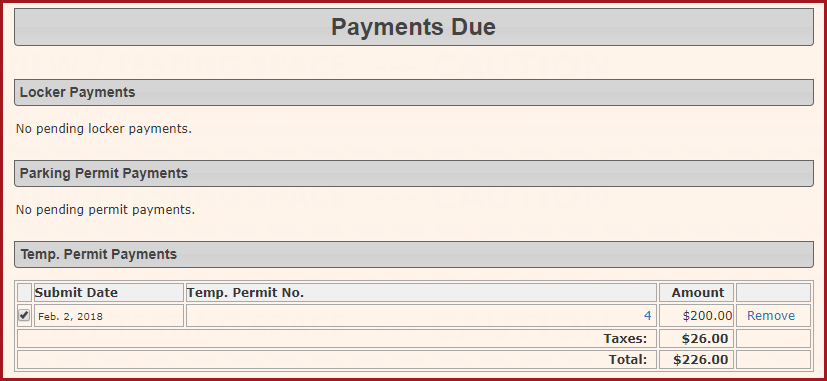
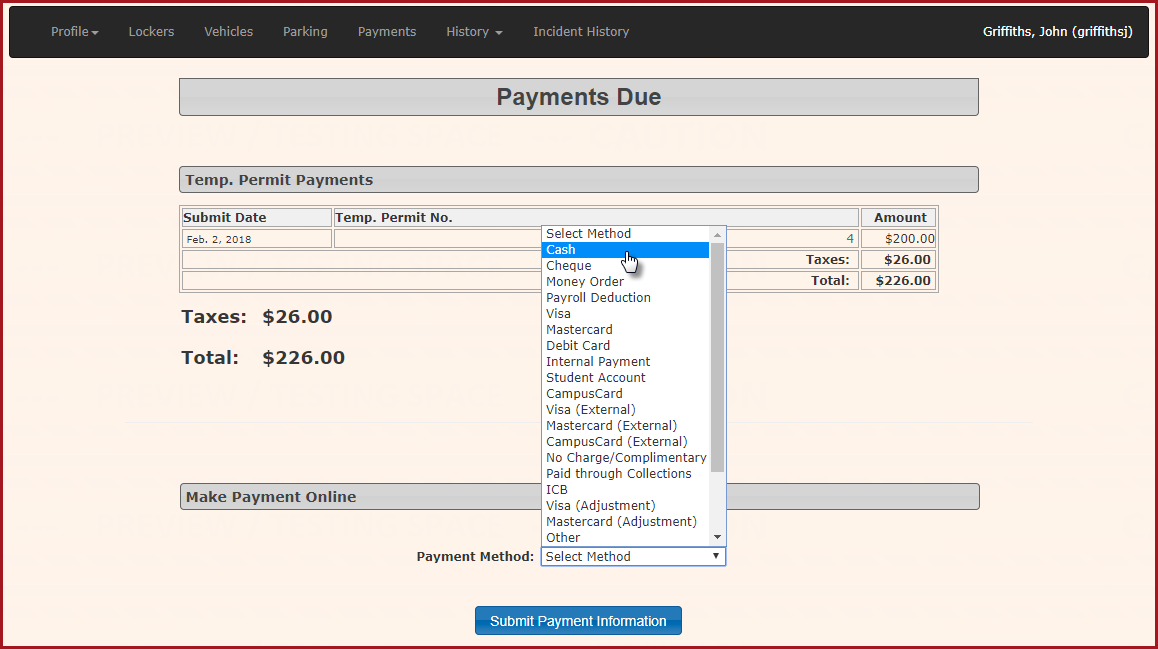
Select yourmethod of paymentandon the payment screen then click the Submit Payment Information button.
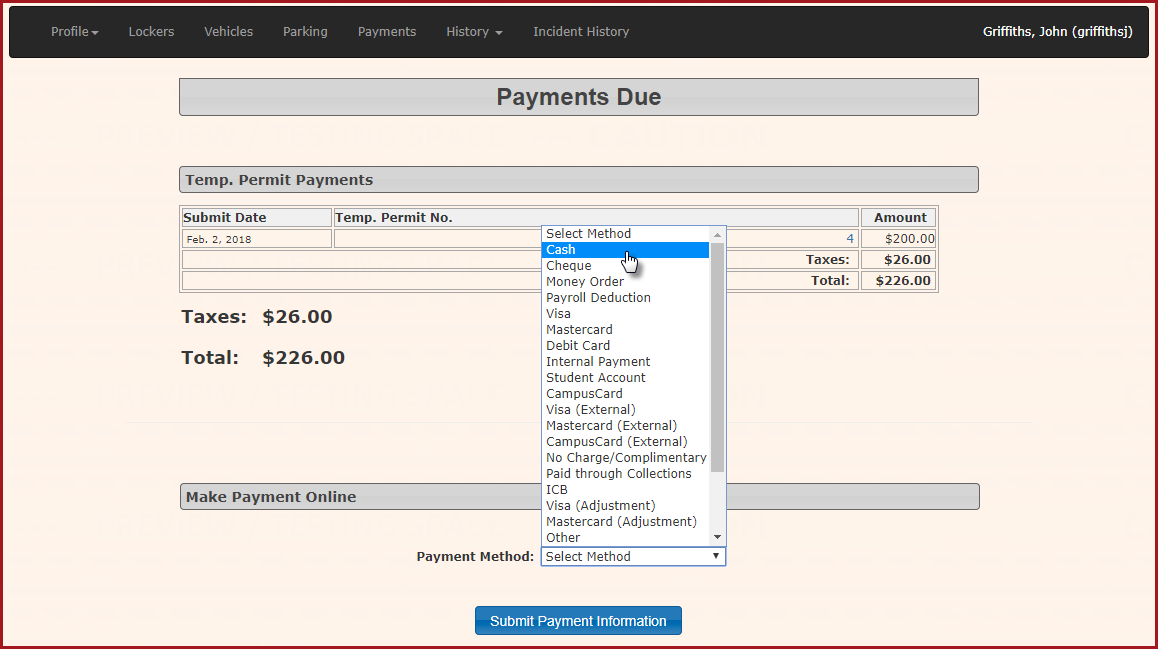
- Select Confirm Payment Information to proceed.
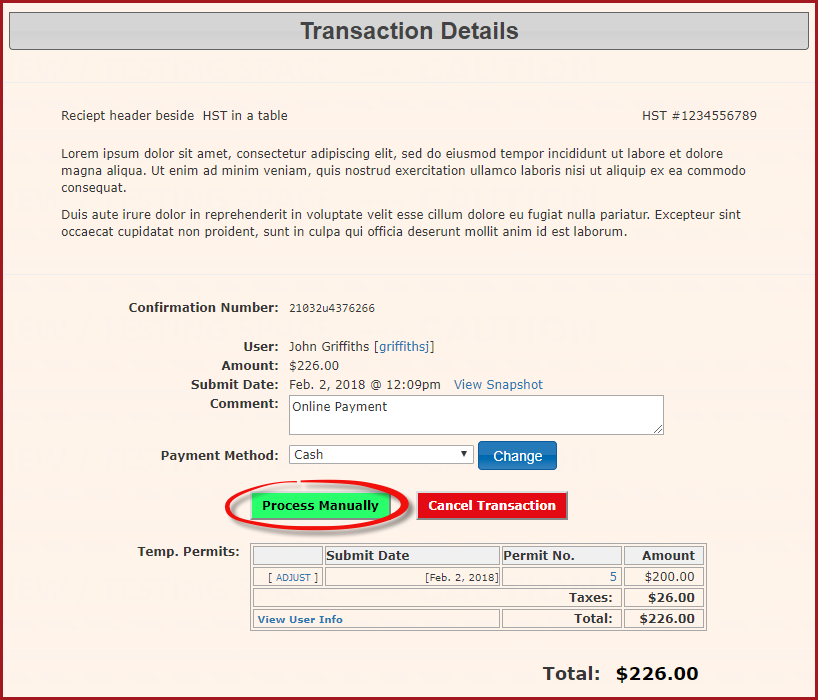
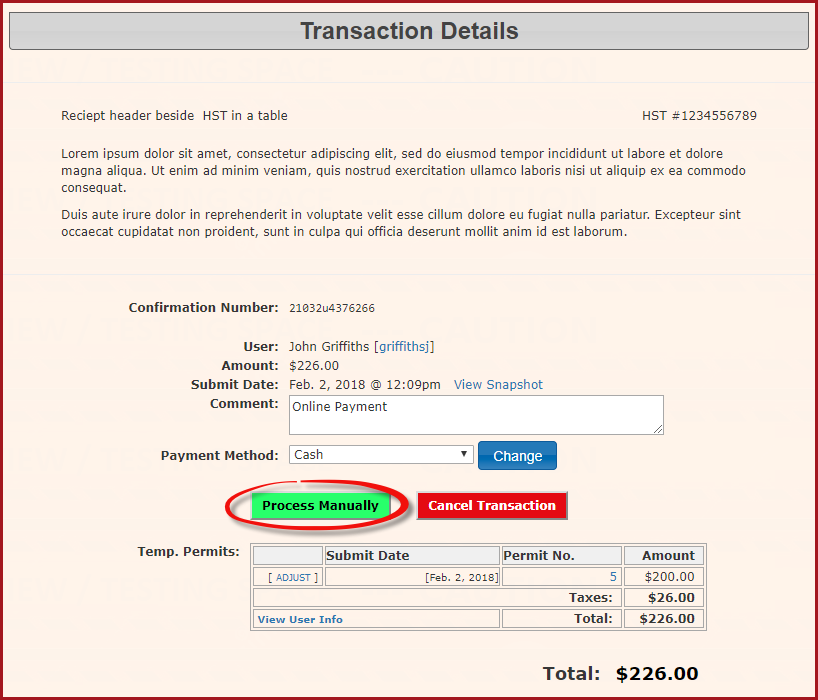
- Click the Process Manually button to
completefinalize thepurchase.transaction.
You
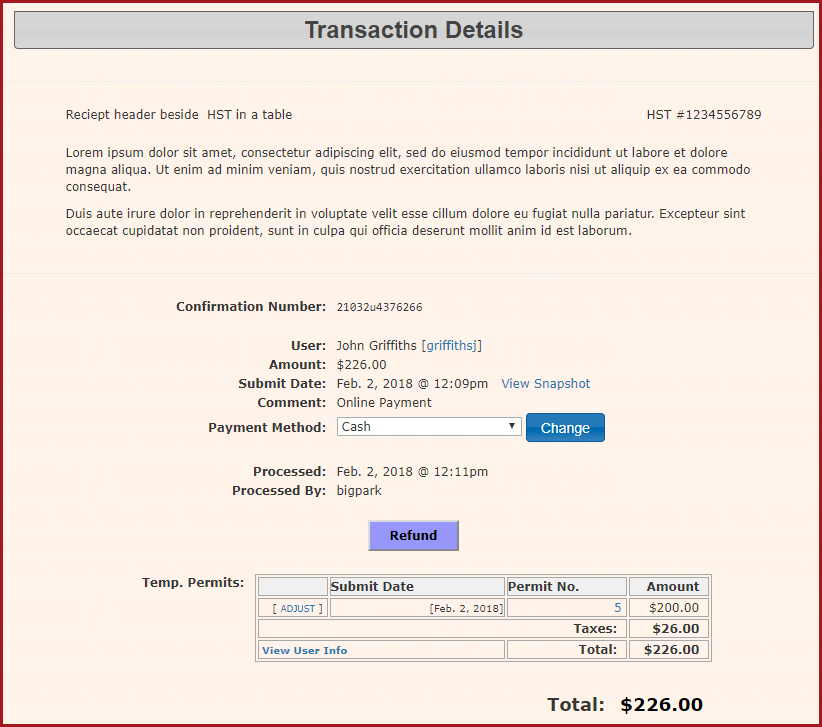
opens.In our example, we will select theGreen Staff Lot Eastwhere we had configured the ability to apply the permit to all vehicles (Step 1 above)The date range must be for a period longer than 30 days in order to activateYouUpon completion, you will be taken to the Transaction Details screen, where you can
seeview a final record ofyourthe purchase.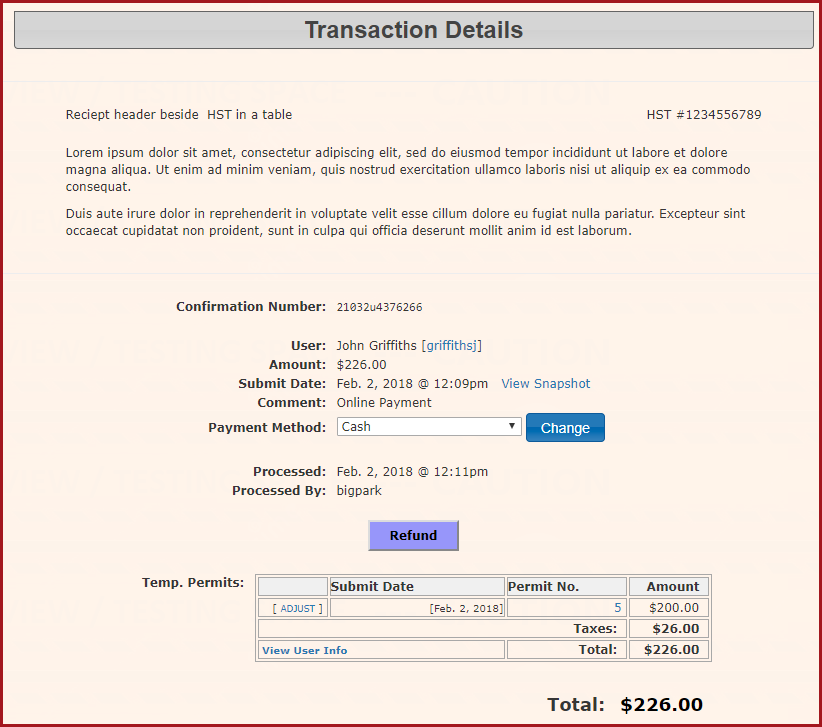
Best Practices and Considerations
Date Range Requirement: The selected date range between the start date and end date must be for a period longer than 30 days. If the duration is 30 days or less, the Apply to all Vehicles button will not activate.
-
Vehicle Verification: Always review the vehicle list on the confirmation screen before clicking Purchase this Permit to ensure the user has all necessary vehicles properly registered to their profile.
- Navigate to the desired user's profile and click
This
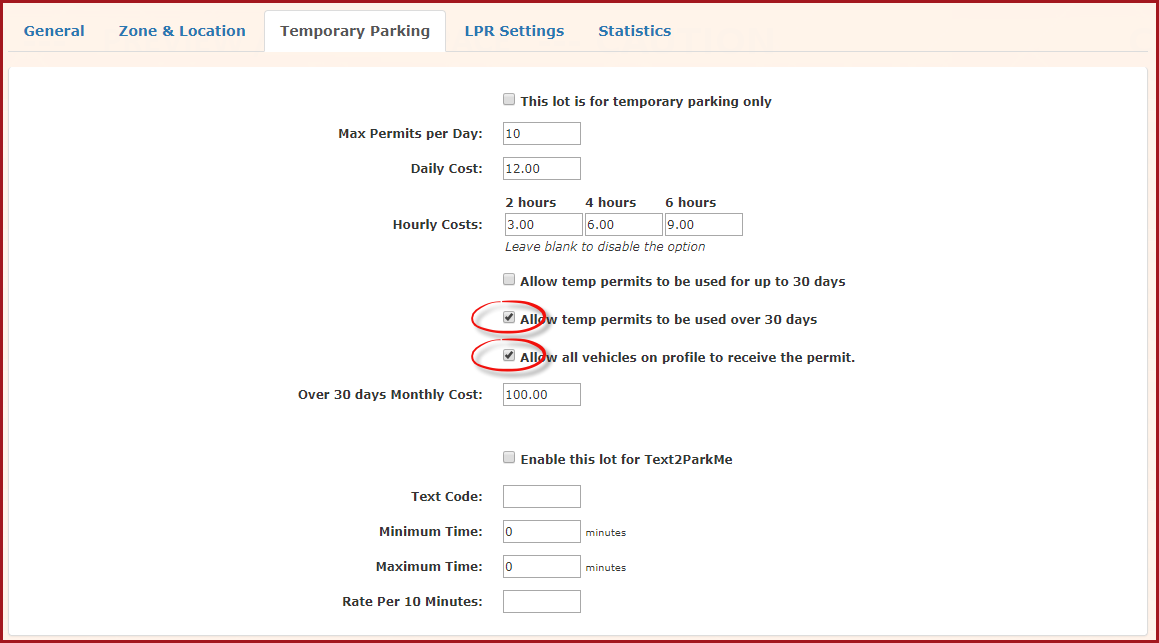
Lot Configuration: Remember that the multi-vehicle option is lot-specific. If you expect administrators to use this feature across different areas, ensure all relevant lots are updated under their respective Temporary Parking tabs.