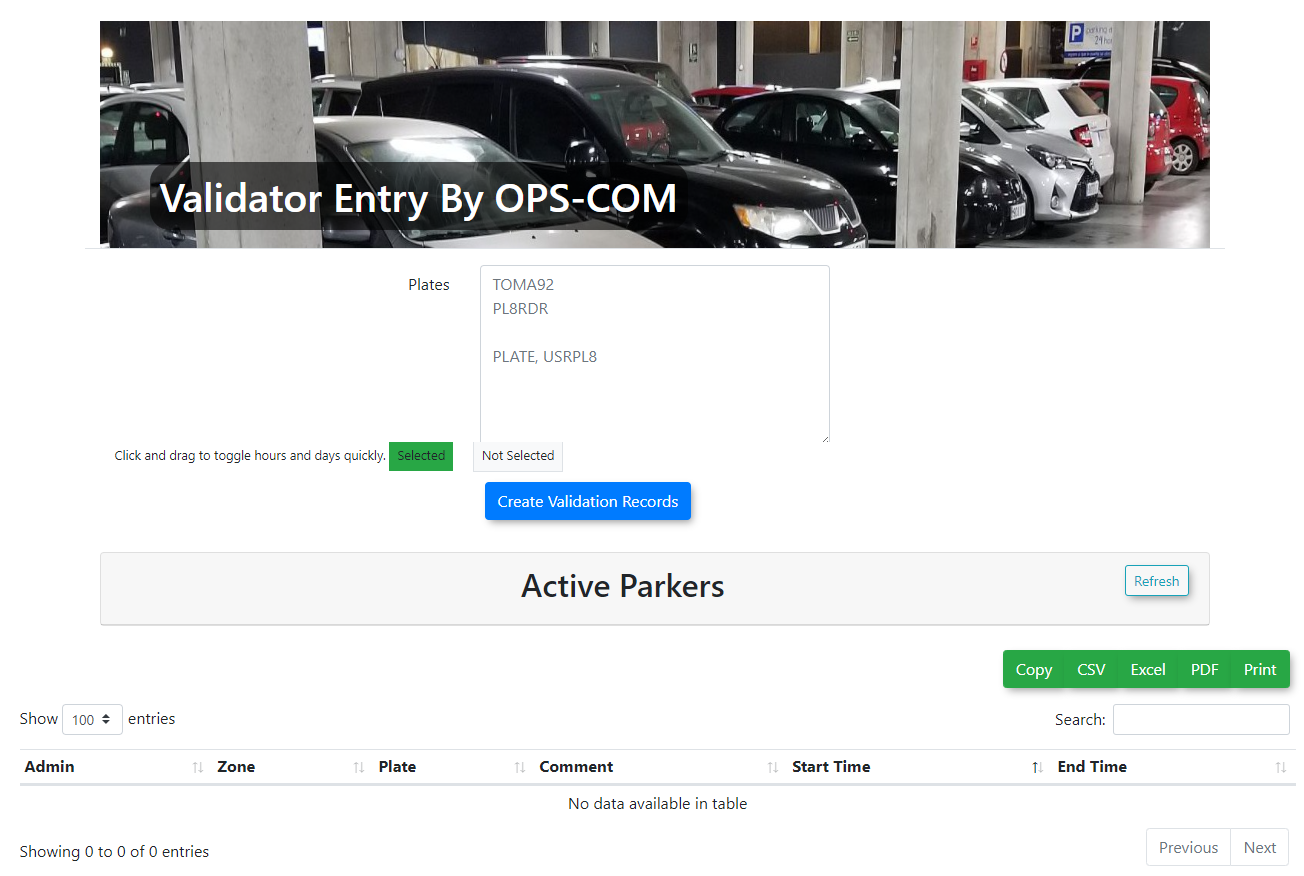
Branding the Validator Tool
Accessing
This article outlines how to customize the visual appearance of the Validator PagesTool pages using the system messaging editor. This allows organizations to Editbrand the Lookvalidator interface with custom headers, text, and Feellayouts to provide a consistent user experience. This guide is intended for OPS-COM administrators responsible for system configuration and design.
Setup and Configuration
FromTo customize the look and feel of the Validator Tool, you must first access the specific system messages associated with these pages.
-
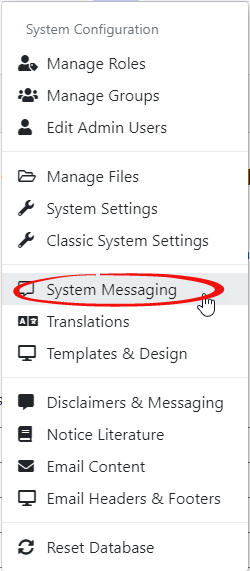
Hover over System
ConfigConfigurationMenuand clickonSystem Messaging.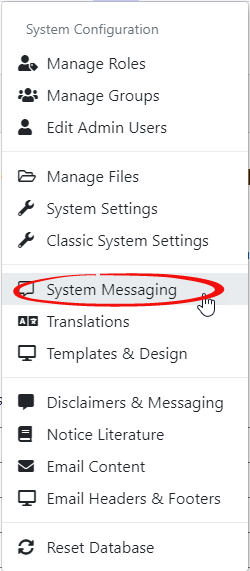
-
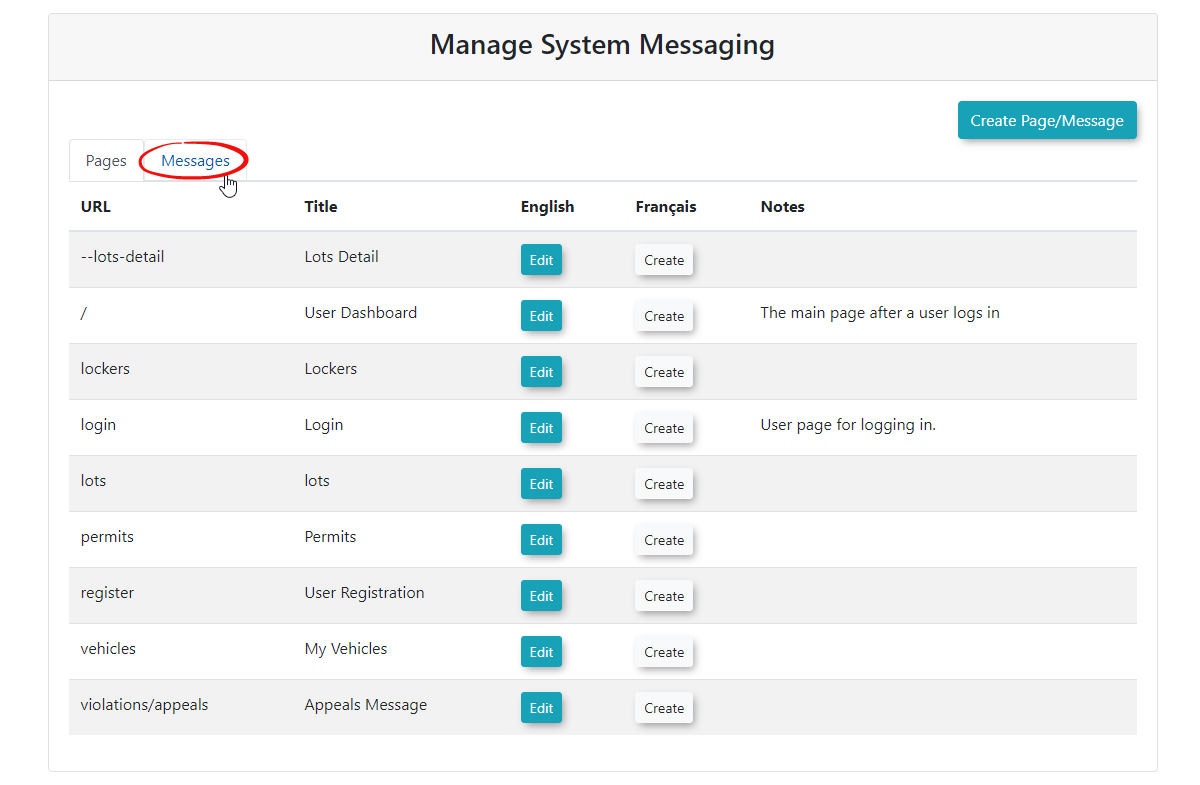
A page with two tabs will appear.Clickonthe Messages tab to access the list of editable system messages.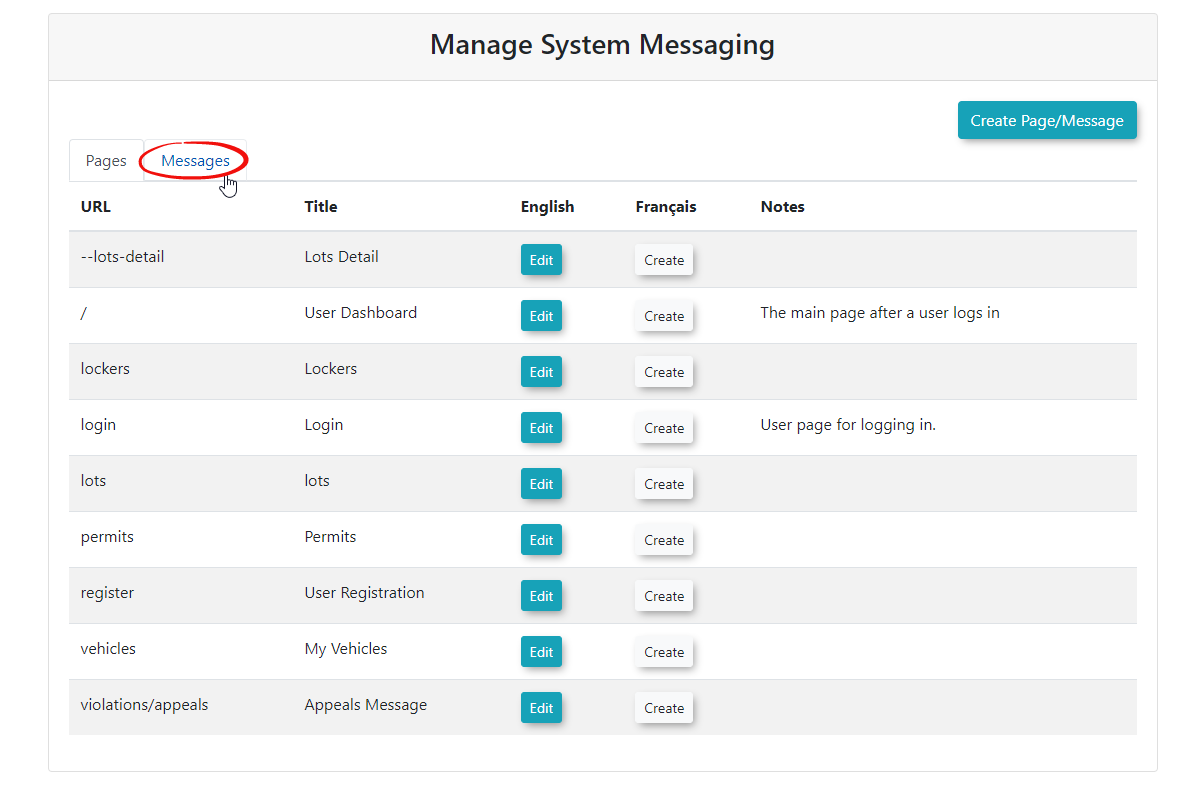
-
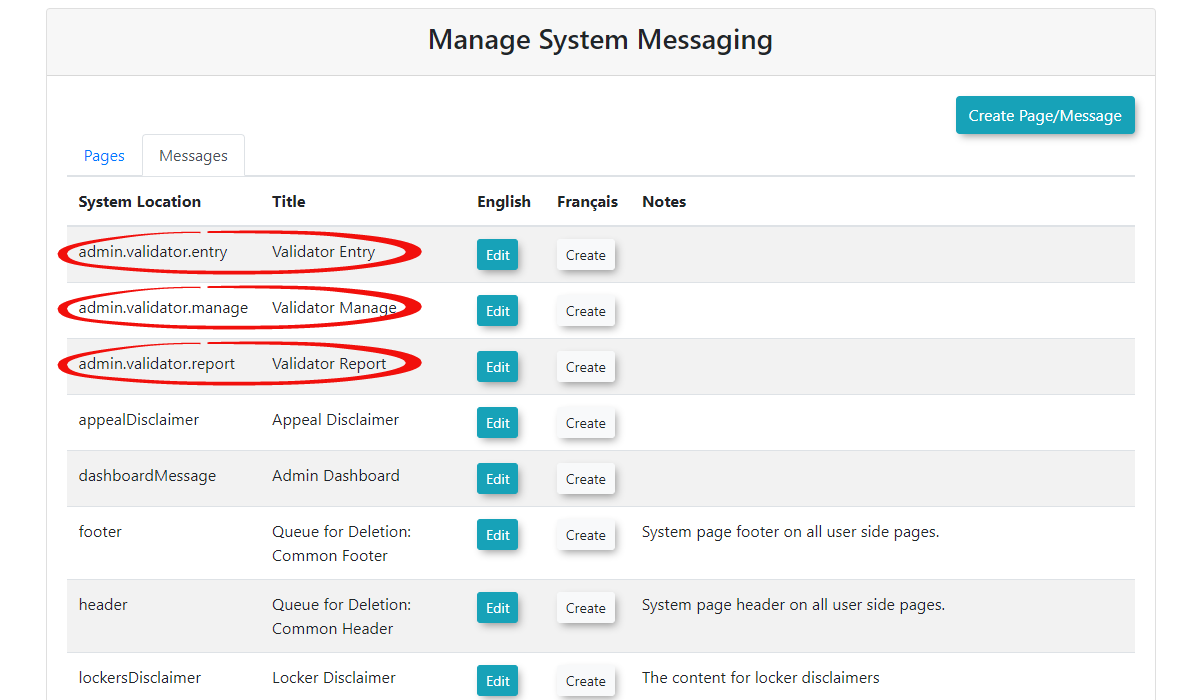
ThereLocatearethe three specific messagesto editused for the ValidatorTool.They are:Tool:-
TheValidator EntrymessageThe -
Validator Manage
messageThe -
Validator Report
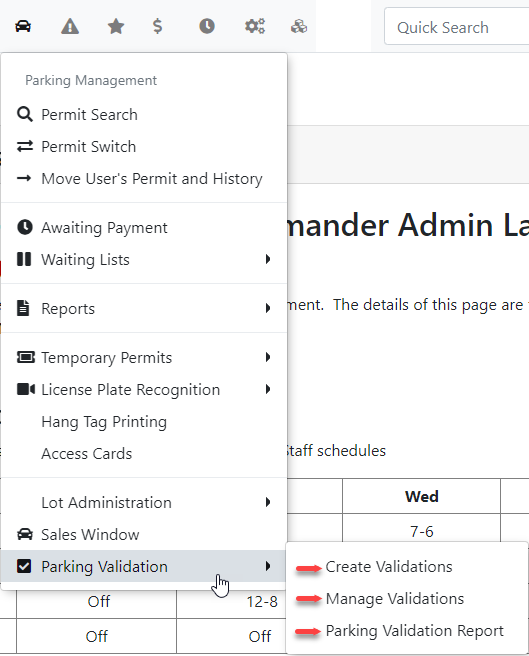
messageEach of these pages represent the three Validator Tool Pages.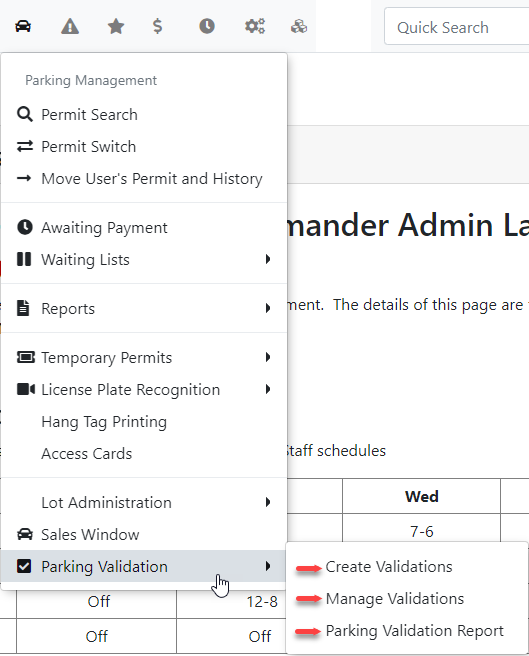
Here'swhat -
Using this Feature
ToAdministrators can edit the messagecontent clickand onlayout of the Validator Tool pages using either a visual WYSIWYG editor or direct HTML code.
-
Click the Edit button
next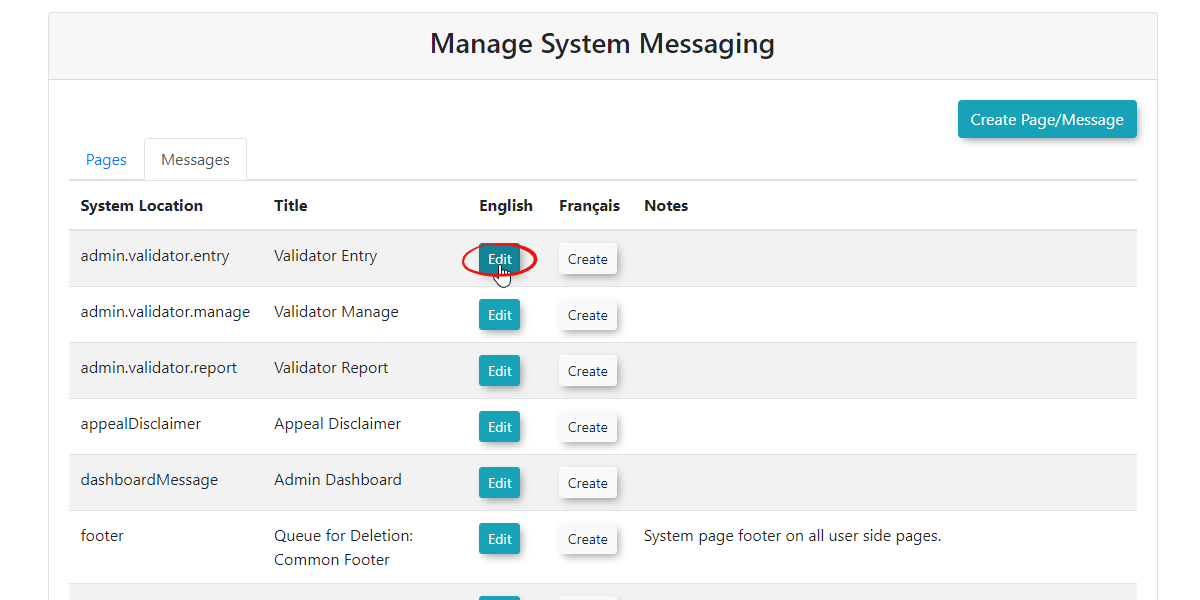
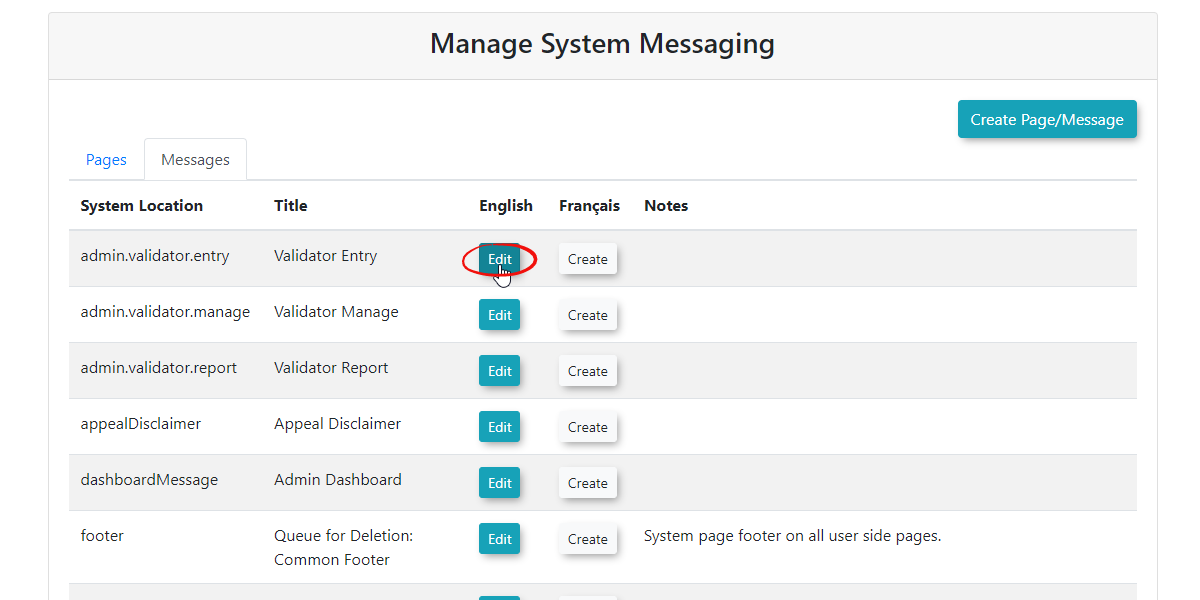
Thetoeditthe specific Validator pagewillyoudisplay.wish to modify. -
On this screen you will enterEnter a descriptive title for your pageasinwelltheasTitleanfield.identifier. -
Enter a unique identifier
mustforbetheunique.Youpagemayinalsotheselectappropriateafield. -
Select the desired language setting for your page.
-
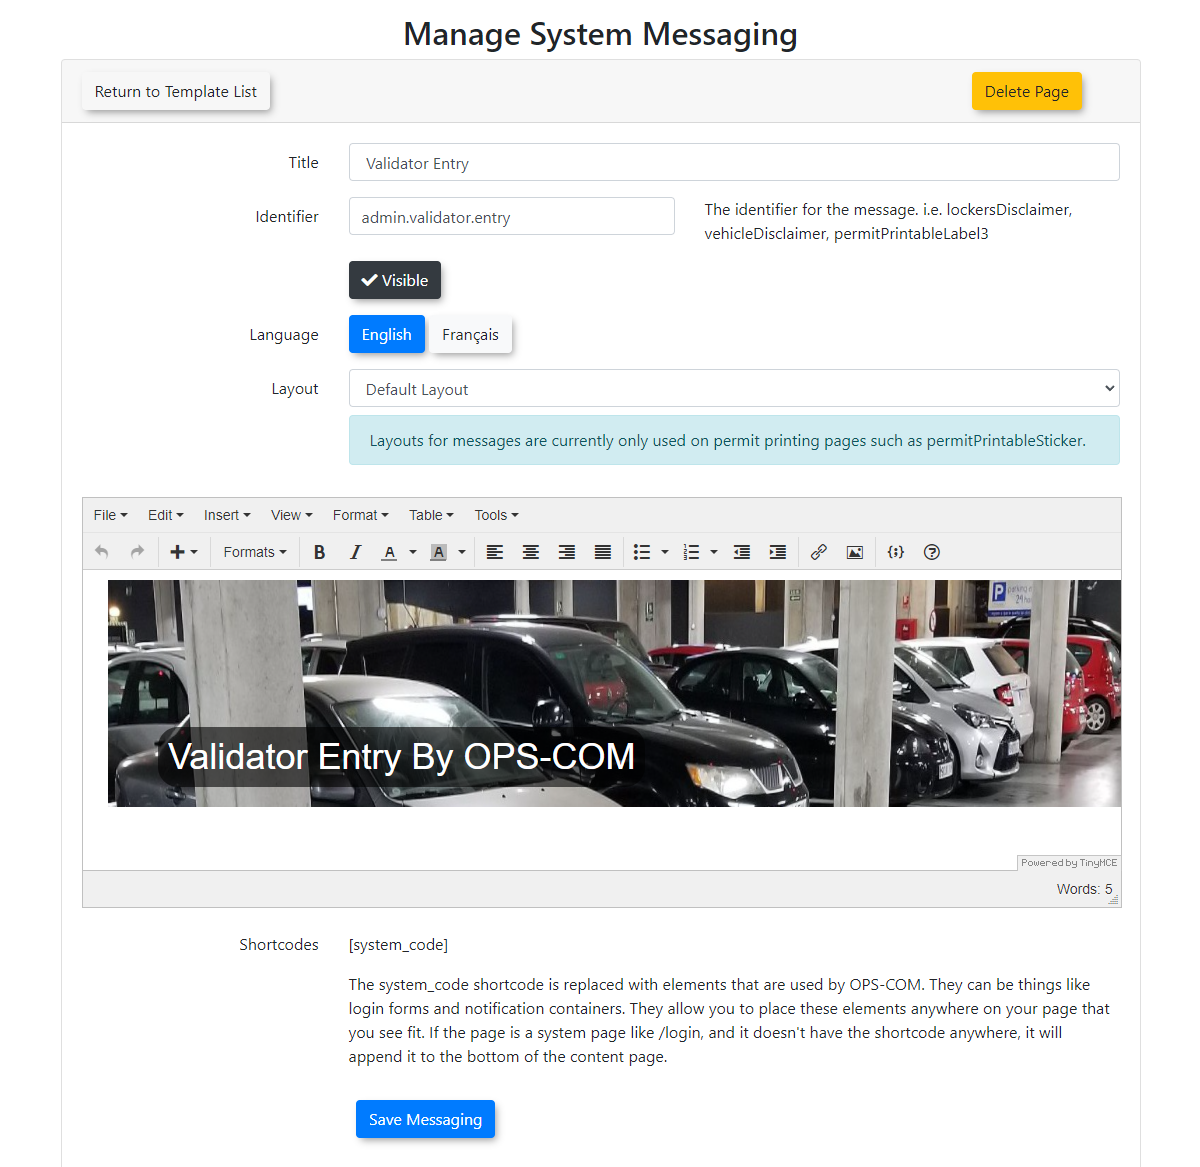
TheModify the pagecanlayoutbeandediteddesigninusing the visual WYSIWYGeditoreditor.where
Best Practices and Considerations
-
NOTE:Unique Identifiers: The identifier entered on the edit screen must be completely unique to prevent page routing conflicts within the system. -
Image Sizing:
TheWhen adding a main graphicimageorusedheaderinimage,ouritexampleismeasuresbest1448practicepixelstoinmaintain a consistent widthandof2271448pixelspixels,in height.Best practicewould be tomaintainthough thesame widthbut theheight can be adjusted to your preference (e.g., 227 pixels). -
File Management:
.UploadBefore inserting a custom graphic into your page design, be sure to upload the preferred image to your system's Files Folder using the Manage Files functionality.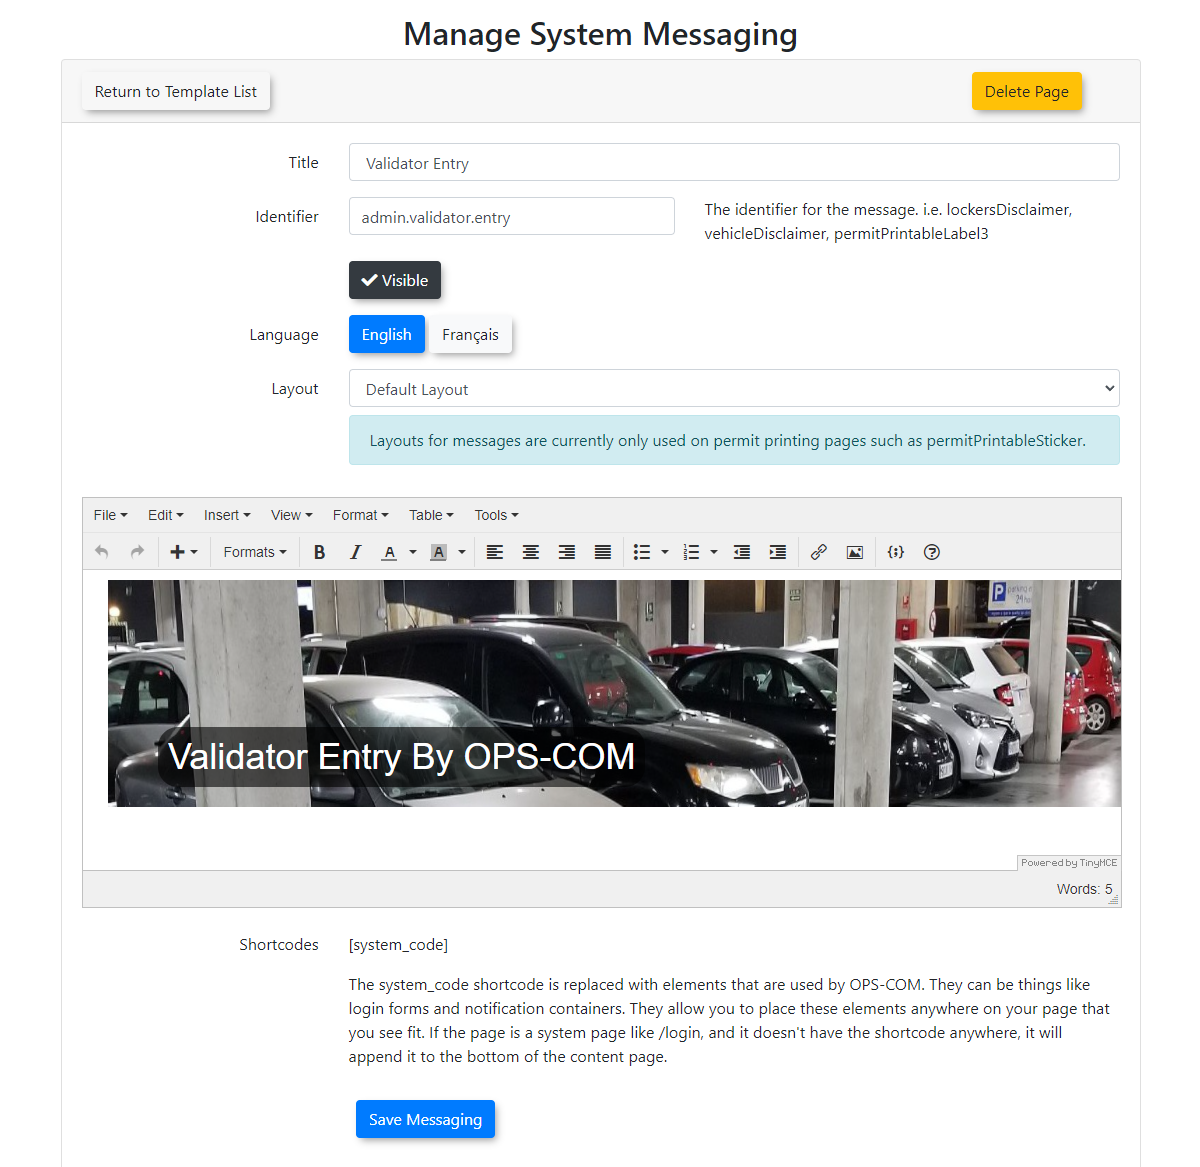
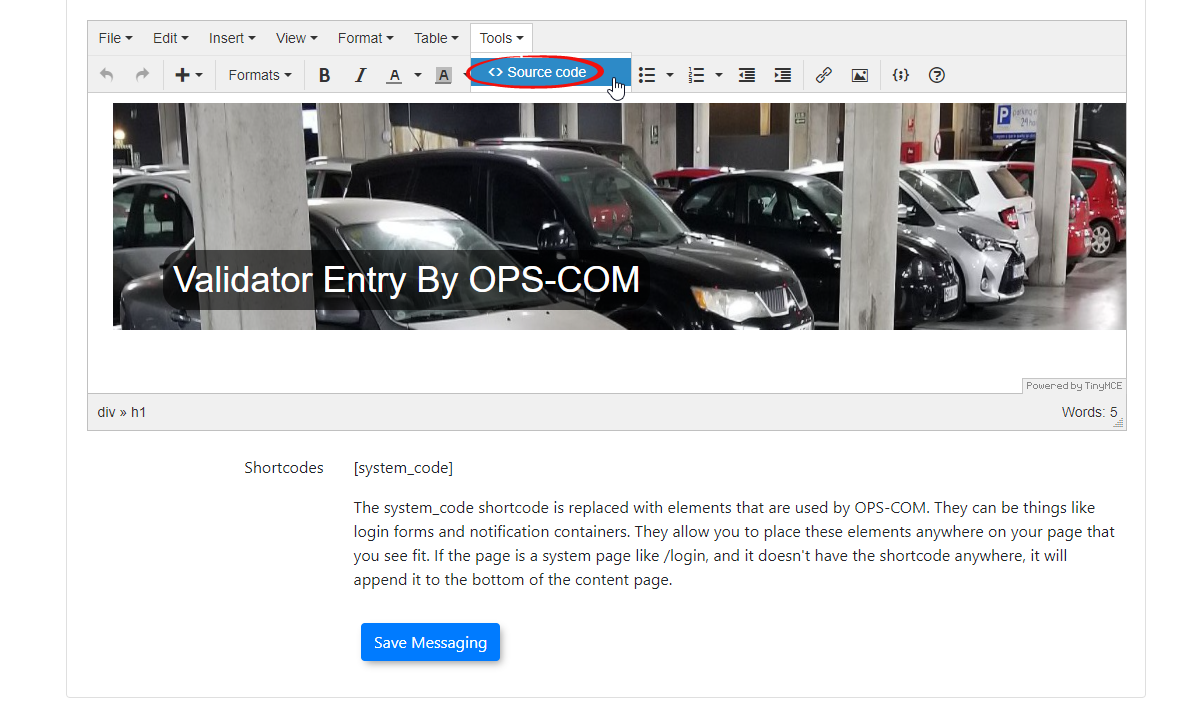
It is also possible to edit the page in straight HTML. To do so go to the Tools menu and click on <>Source Code.
A popup will appear with the code presented.
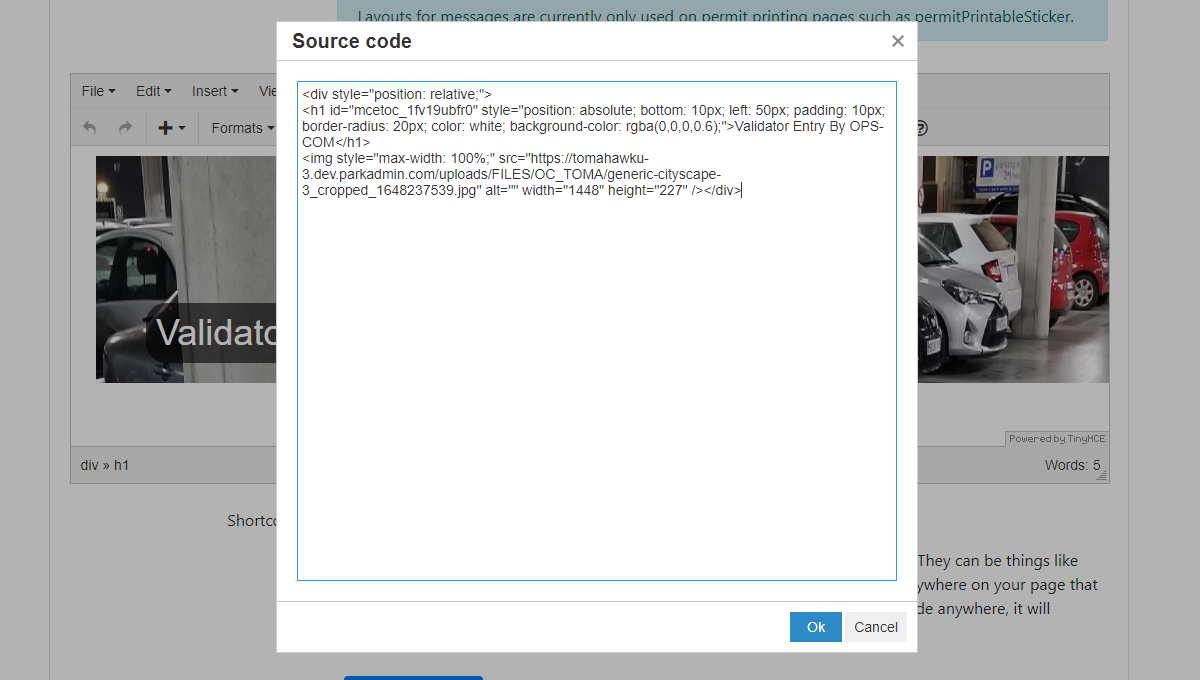
Sample Code
The Resulting Page