Dispatch Logs
Reviewing
The Dispatch Logs feature allows dispatchers and administrators to record, track, and manage incoming communications, system alerts, and operational tasks. Its primary purpose is to maintain a centralized and actionable record of all dispatch activities to ensure timely follow-up and resolution. This article is intended for OPS-COM administrators and dispatch personnel.
Setup & Configuration
The Dispatch Logs tool is a core component of the incident management system. It requires no specialized setup, but administrators must have the appropriate dispatch and incident management permissions enabled on their user role to view, create, or close log records.
Using this Feature
Administrators can use this page to create new manual logs, review automated system alerts, append notes, assign tasks, and print records.
Reviewing and Creating Logs
-
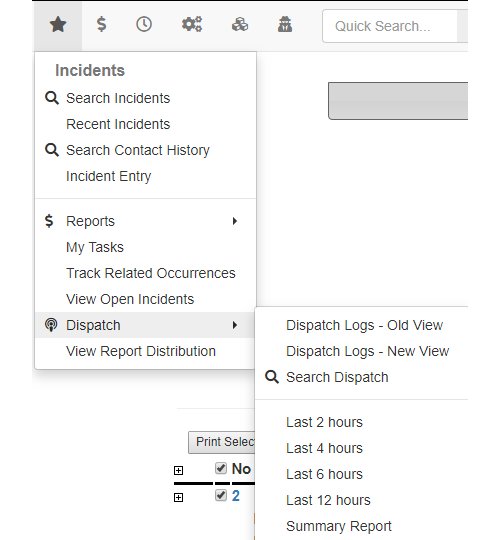
Hover over the Incidents icon, click Dispatch, and select Dispatch Logs
.
to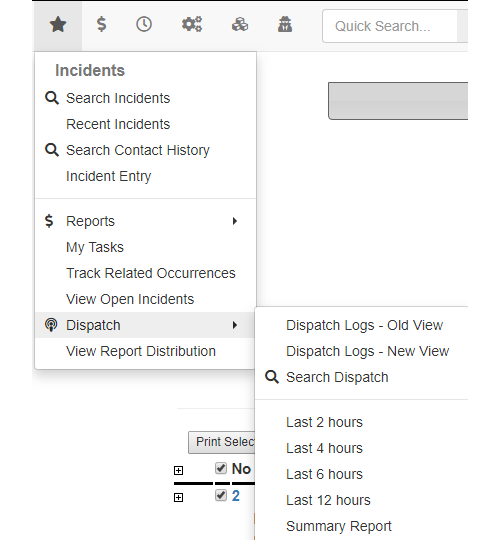
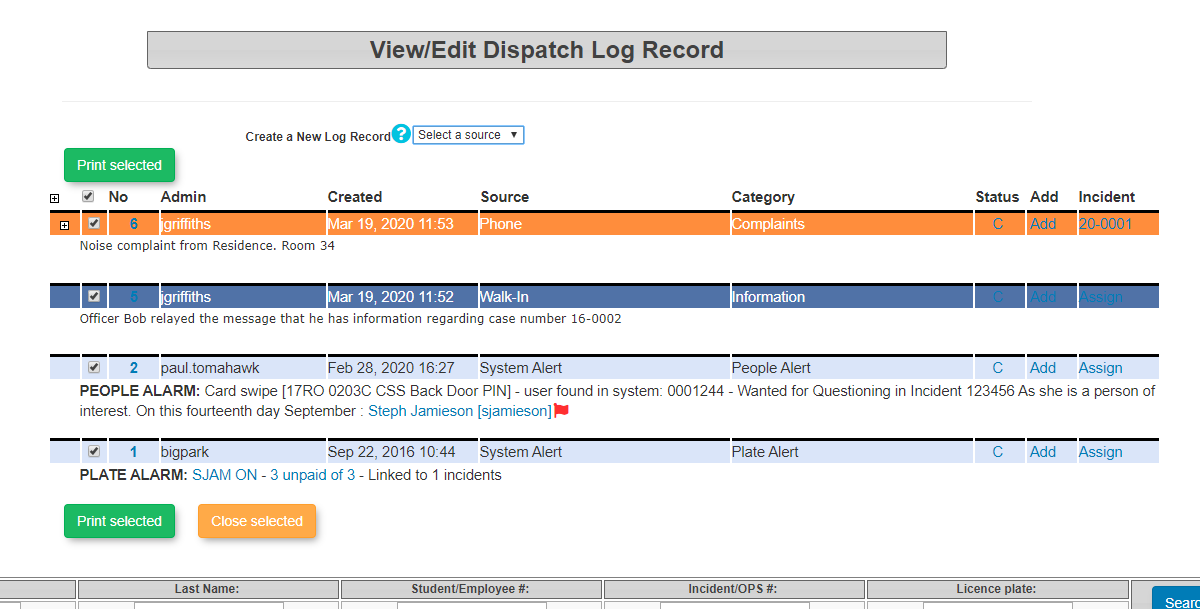
This will bring upopen the View/Edit Dispatch Log Records page.Here administrators/dispatchers can view all open logs that still need to be followed-up on. -
Select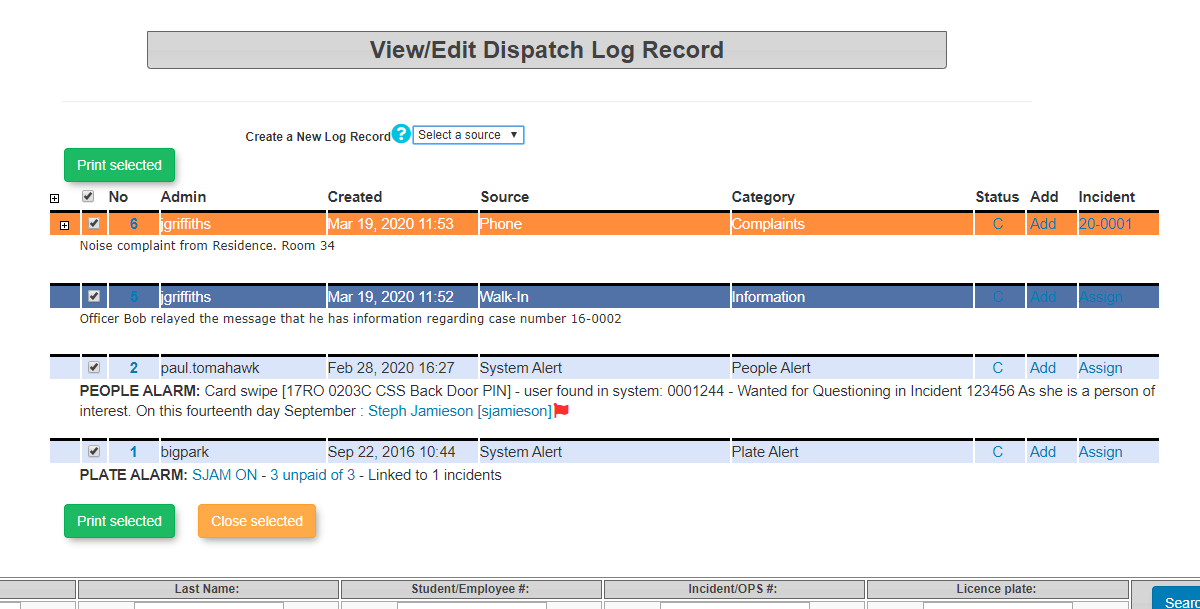
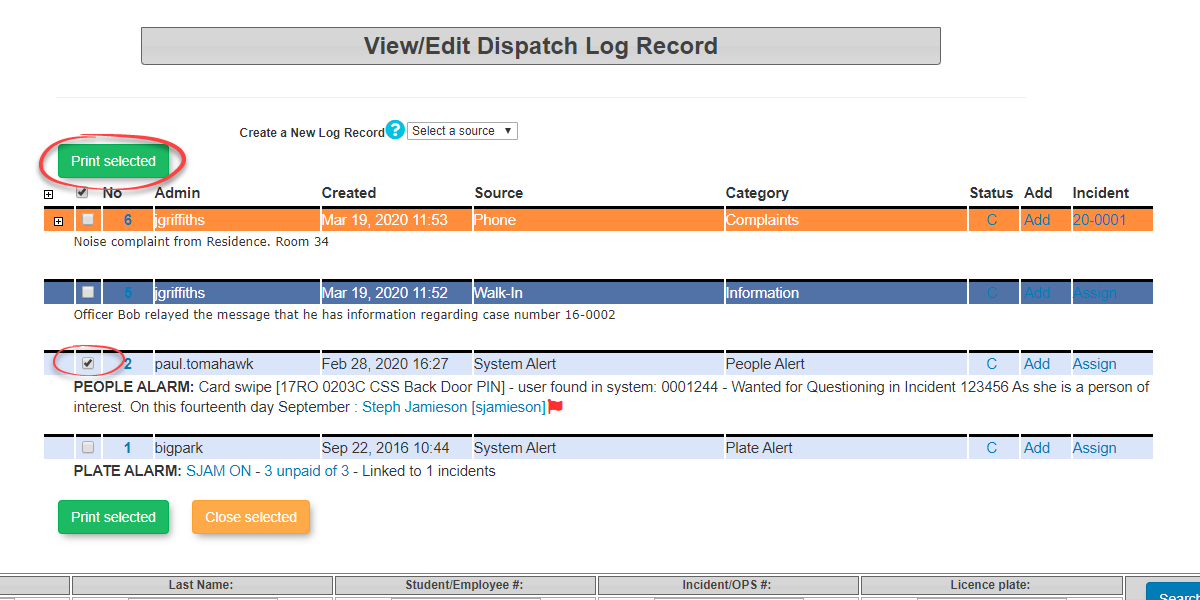
Printingana Dispatch LogTo print the currently selected dispatch logs, select the appropriate source in the list of current dispatch logs followed byPrint Selectedto get a printed list of these logs.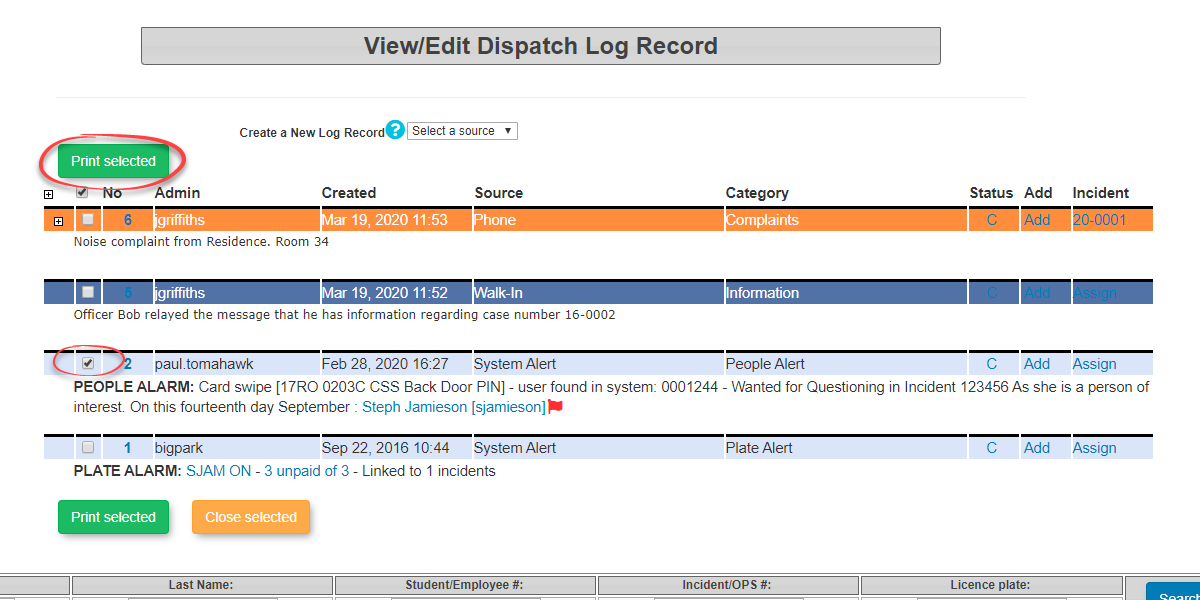
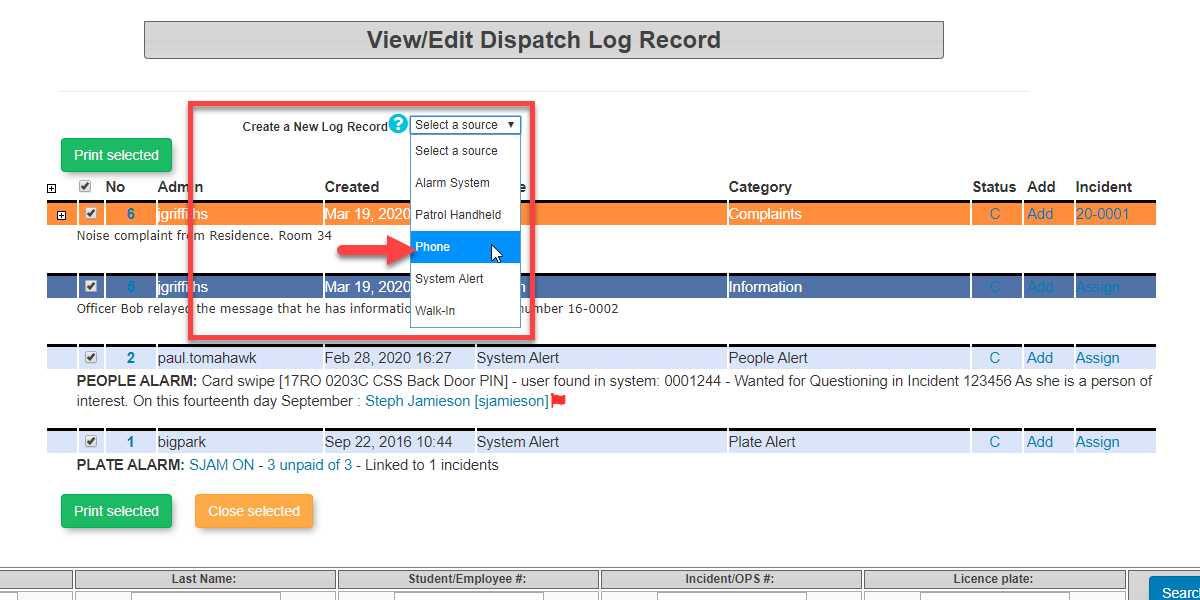
Creating new Dispatch Log RecordsTo create a new log record select one of the optionsoption from the Create New Log Record
drop-down
menu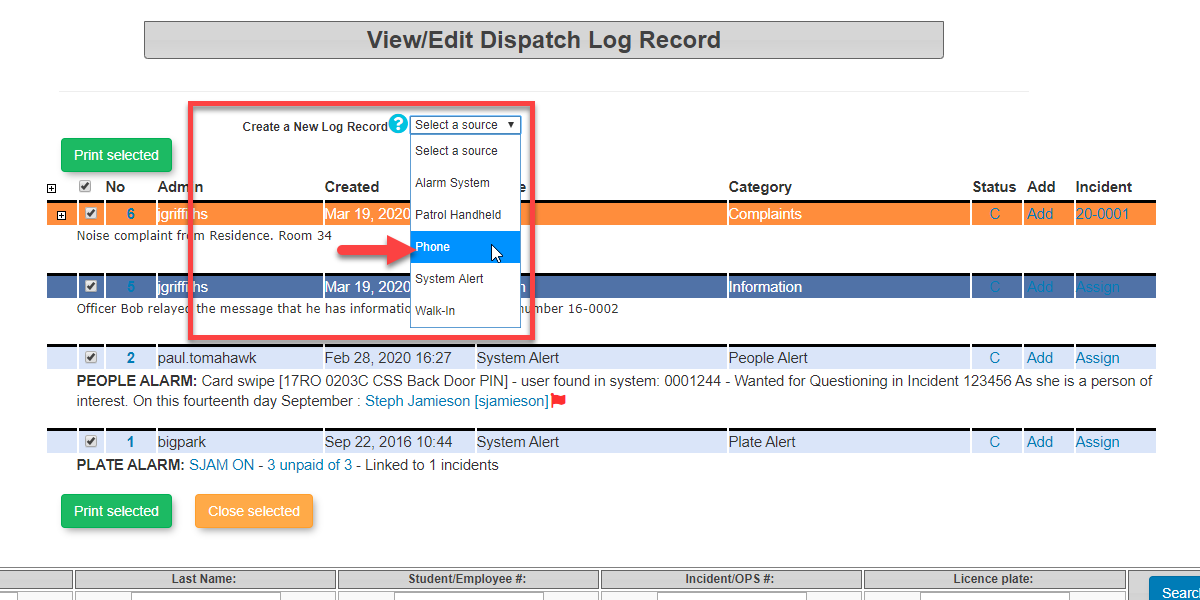
Onceto define the source contact forthea newlog has been selected, this will bring up theAdd New Log Recordscreen.
log.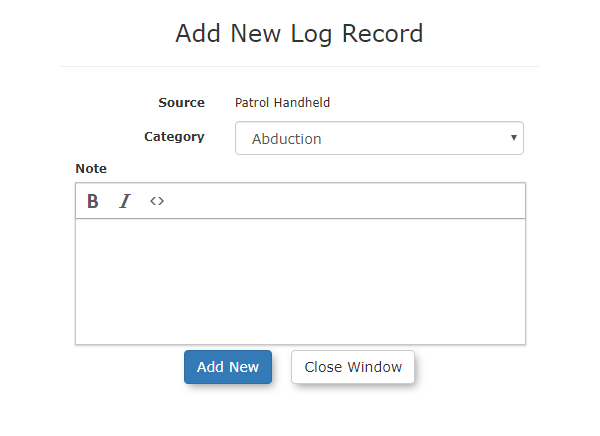
-
Select the appropriate
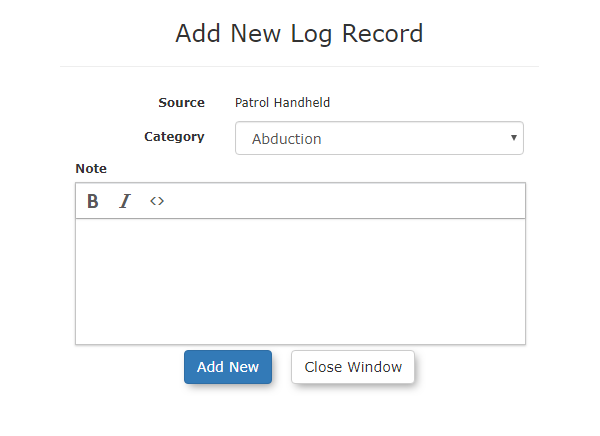
andontypetheinAdd New Log Record screen. -
Type any required details
that need to go withinto thelogNoteinsection. -
Click the
Note section.Select theOnceThethe information has been saved, thenew log willshownow appear at the top of thelisting ofDispatch LogRecords.Records list.
Adding AdditionalNotes Logand NotesAssigning Logs
-
If dispatchers want to add a separate log that is attached to the first log, selectClick the Add link in the Add column.Thisnextwilltobringaupspecificanlog to attach a supplementary note. -
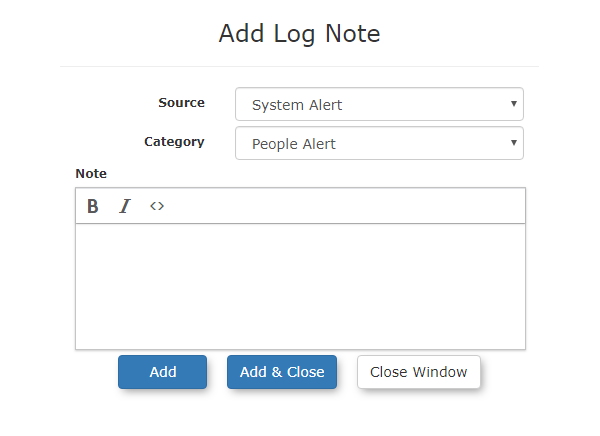
Enter the source, category, and additional details in the Add Log Note
screenscreen.where -
can include the source of the information, the category and any notes that need to be included. To save the log selectClick the Add button
at the bottom. Toto save thelognote,andorto also close the log, if it is completed, selectclick the Add & Close button to save the note and simultaneously close the entire dispatch log. -
Click the Assign link at the
farbottom.
right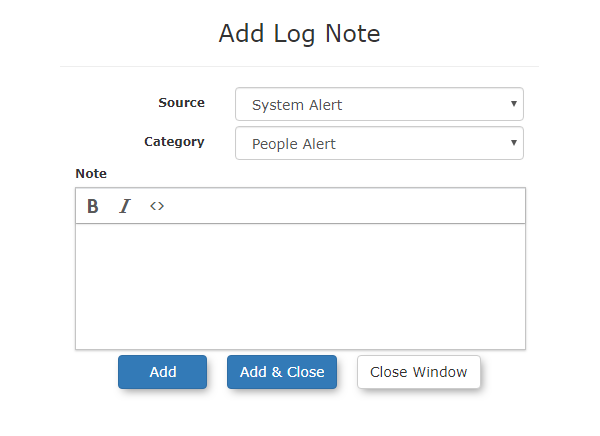
ofIfthedispatchers wantlog to assign an admin user to act on the log orif they wantto attach it to an incidentreport,report.select
When an assignment is made, the incident number will appear directly in the listing of Dispatch Log Records. ThisYou can click this link canat beany selectedtime to gainquickly accessaccess, toview, view/or edit the associated incident report.
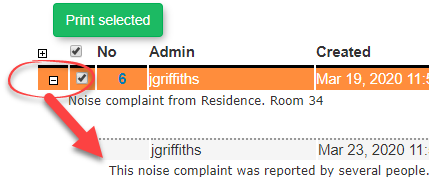
Viewing Additional Notes / Rolled-Up Alerts
-
We can view all of the available log records associated with the dispatch log InClick theView/Edit Dispatch Log Records, by selecting the -
Click the
specificlog.
link
for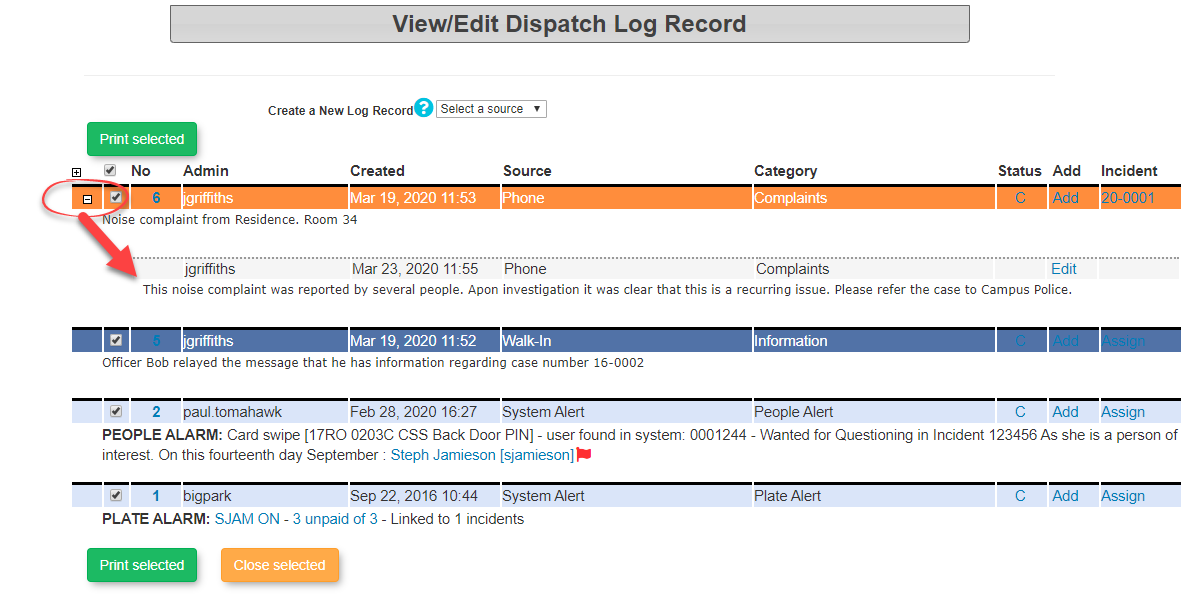
Dispatchersthecandispatch number if you need to addadditionalfurther information to the initialloglog.by
Printing and Closing Logs
-
Select the
linkappropriateforsource in the list of current dispatchnumber.logsToandclose a log once it has been dealt with, selectclick the"C"Print Selected button to generate a printed list of those specific logs. -
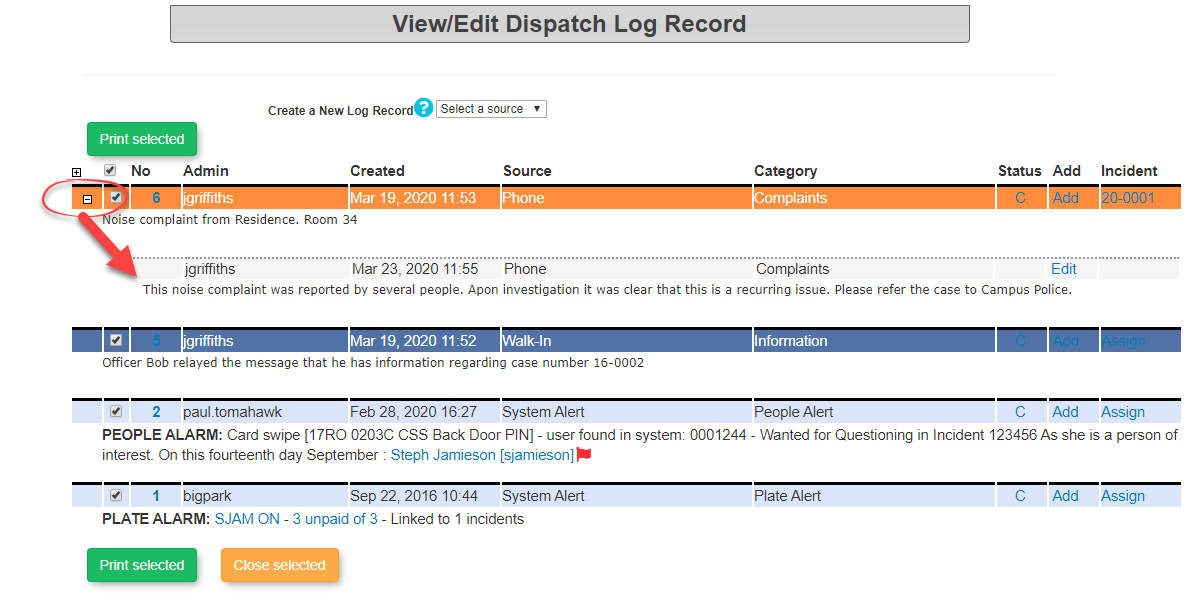
Click the C in the Status column of a specific log to individually change
theits status toclosed.closed once it has been resolved. -
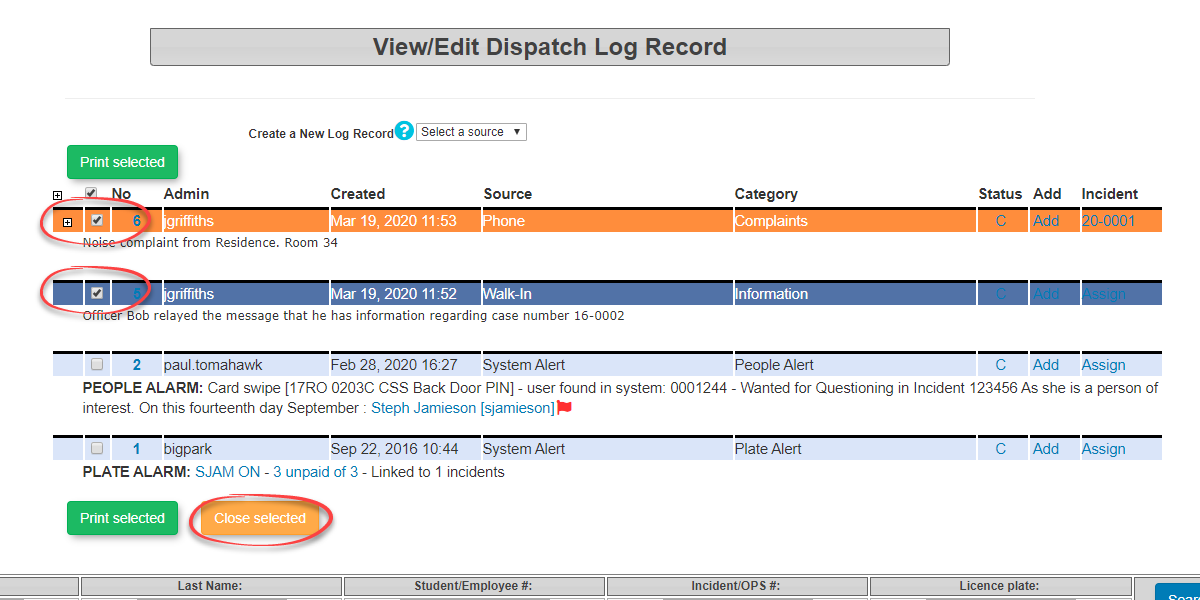
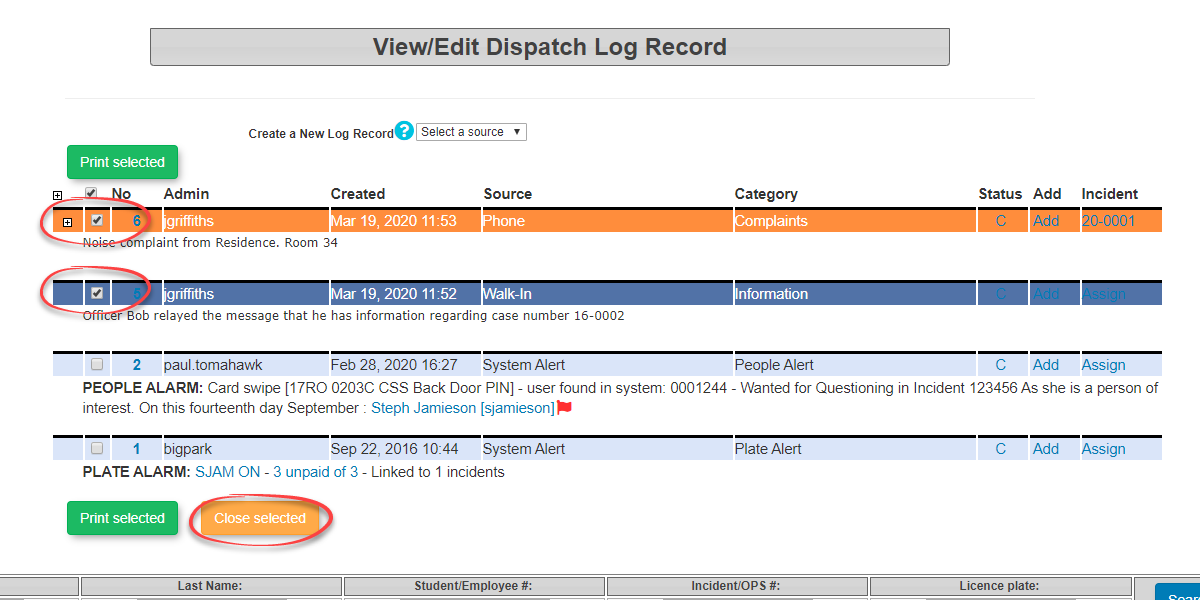
Enable the checkboxes next to multiple log records to prepare them for bulk closure.
-
Click the Close Selected button to instantly close all checked logs.
BulkBest ClosingPractices of& Dispatch LogsConsiderations
-
ItMaintainisanalsoorganizedpossibledashboard: Dispatchers should establish a routine to closemultiplelogsDispatchimmediatelyLogsonceintheybulk.areSelectresolved or formally assigned to an incident. This keeps the open logsyouviewwishuncluttered and focused on active issues. -
Utilize Bulk Actions: When dealing with numerous informational system alerts (such as standard LPR reads or resolved warnings), use the Close Selected bulk action to
closesavebytimeselectingand clear your queue efficiently. -
Check for Rolled-Up Data: Always click the
checkbox+associatedsymbolwithtothe log in question. Once you have selectedreview alltherelatedlogsystemrecordstriggersyoubeforewishclosingtoaclose,dispatchclickitem,onensuringClosenoSelected.
critical secondary alerts are missed within a rolled-up log.