Improve LPR Read Rates
WhatThe Improve LPR Read Rates guide provides administrators and enforcement personnel with instructions on how to physically and digitally optimize License Plate Recognition (LPR) cameras. Its primary purpose is to help increase the opticalaccuracy rangeand speed of plate reads through physical adjustments, exposure tuning, bounding box modifications, and system configurations. This article is intended for theOPS-COM reader?administrators and enforcement staff.
Setup and Configuration
Optimizing your LPR read rates involves a combination of physical camera adjustments, web interface configuration, and handheld settings.
Physical Camera Setup
-
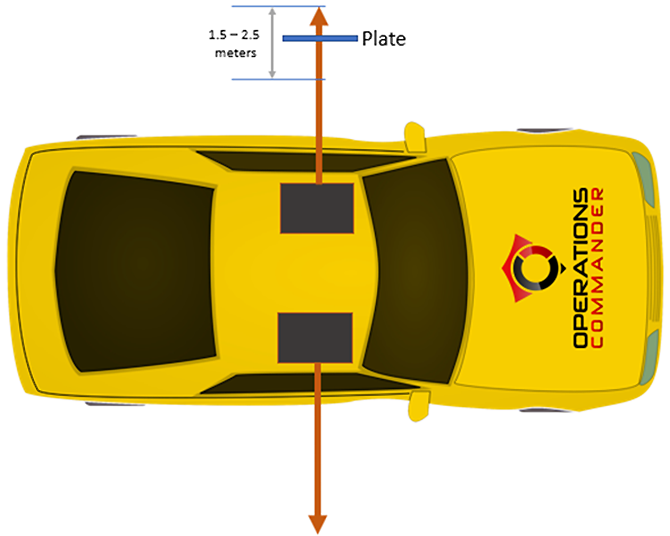
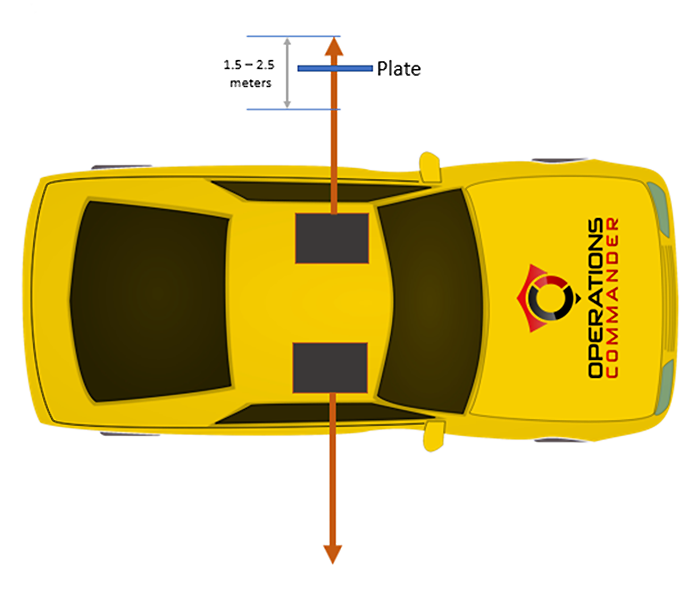
Optical Range: The sweet spot for plate reads is between 1.5 to 2.5 meters between the camera and the license plate.
Also
-
Camera Angle: Ensure the
lens is clean.Another issue may be camera angle. The optimumoptimum angle for the camera is straight on (parallel) to theplateplate.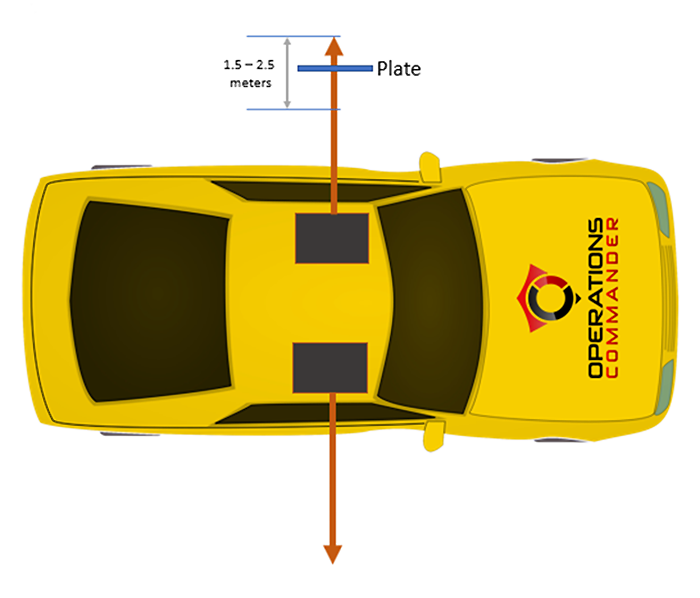
-
The PL8-RDR system supports fuzzy searching based on user supplied values.
makeIn the case of the LPR system "seeing"ABC123, it will also validate againstA8C123Maintenance:andAlwaysABC128checkortoA8C12B.Manual CorrectionsYou can improve plate reads by making corrections and verifying correct plates on the system.OPSCOM has an algorithm that includes the human updates as part of the read score. Therefore, if a plate is misread and corrected, it is very probable that the system will return the (human) updated version.Further, the system does fuzzy searching... this means it will look for a plate in the system that matches a pattern. For example, a plate of ABC123 may be read as A8C128. With fuzzy searching and based on time of day etc. the system will return ABC123 if that plate has a permit (but will also note that it was a "fuzzy" read of the plate).If you see a score of 100% in the LPR report that means that the system determined a human updated version was the best match since a score of 100% is theoretically impossible with LPR cameras.As an Example here's a tweak you can do for Ontario users oncesure the camera lens issetup..completely clean and free of debris.
Fuzzy Searching
Web Interface Configuration
Administrators can use the web interface to fine-tune how the camera processes images and characters.
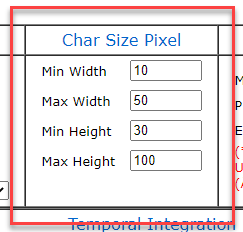
Adjusting Character Dimensions: You can tweak character dimensions to improve regional reads (for example, Ontario plates).
-
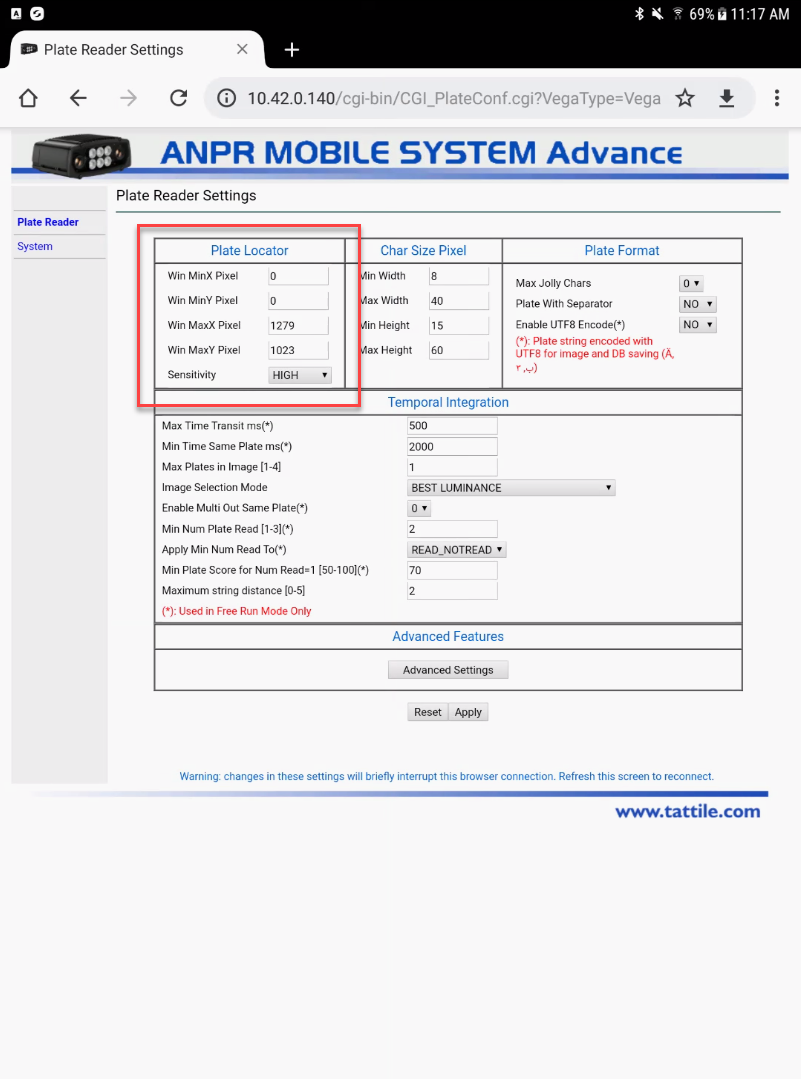
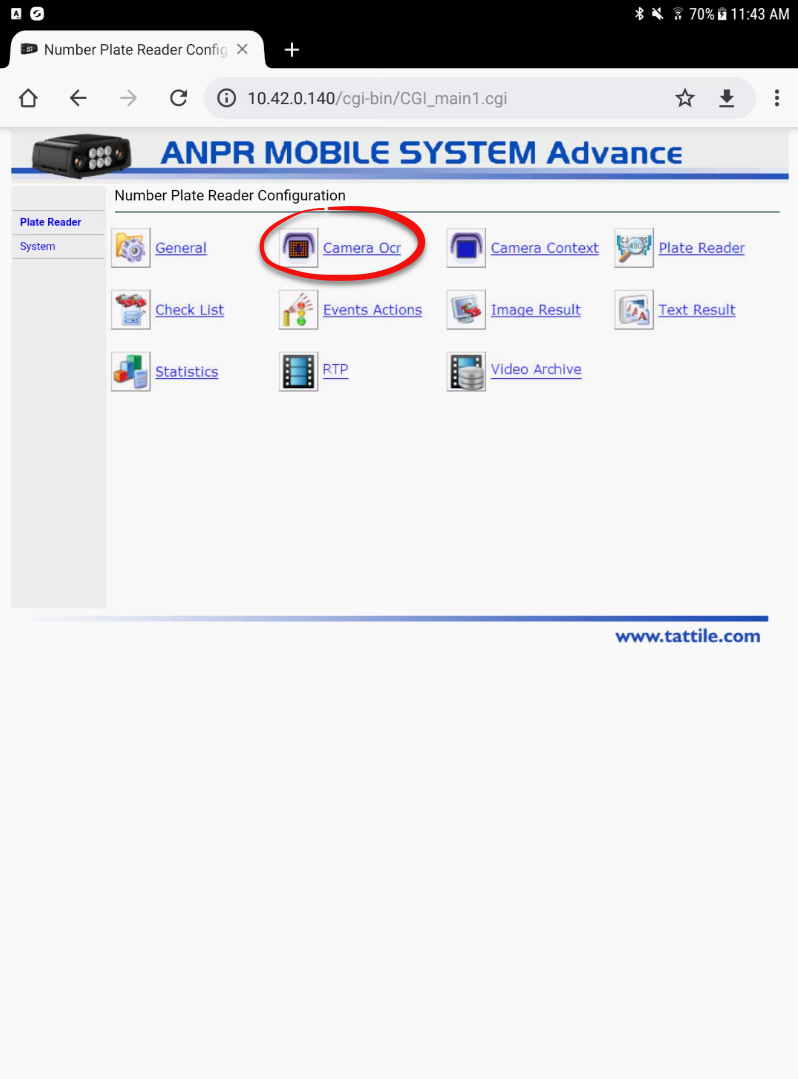
GoNavigateintoto the Web Interface Page and select Plate Reader then Camera OCRand set the following Characters dimensions:. -
Set CHAR SIZE Min
W:W10toMax W: 50 Min H:30 Max H: 10010.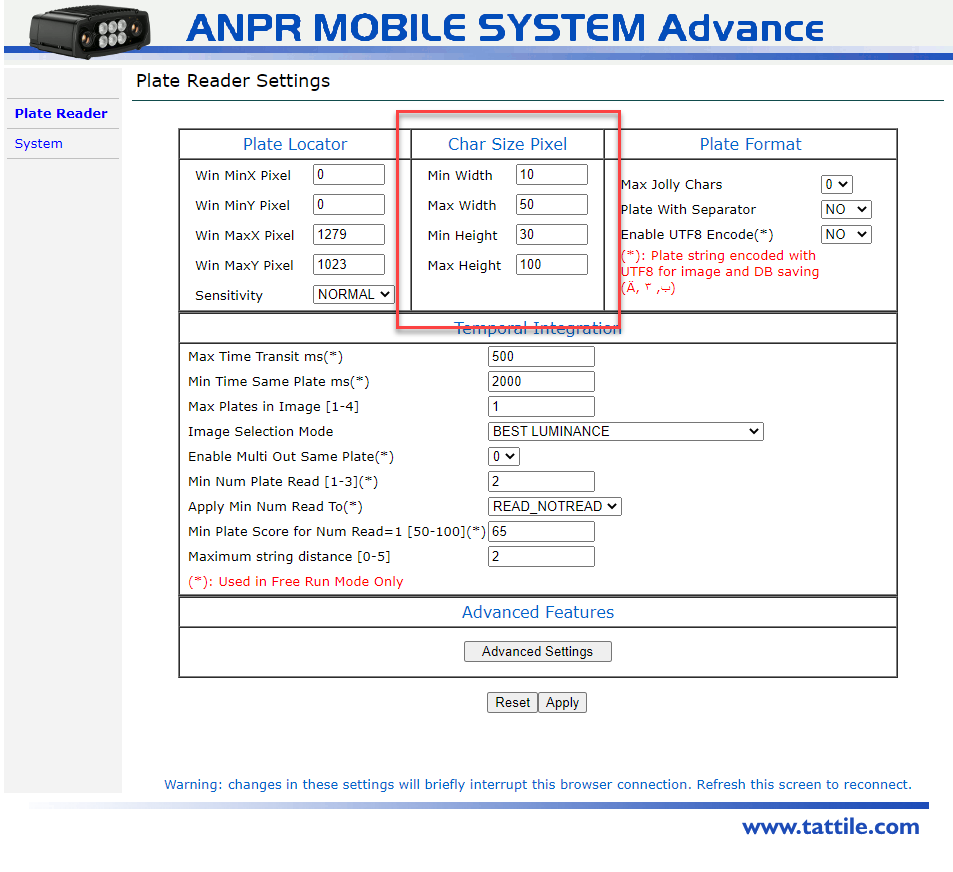
-
Set CHAR SIZE Max W to 50.
-
Set CHAR SIZE Min H to 30.
-
Set CHAR SIZE Max H to 100.
Improving Exposure
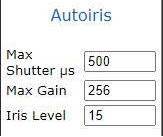
For dark plate reads:
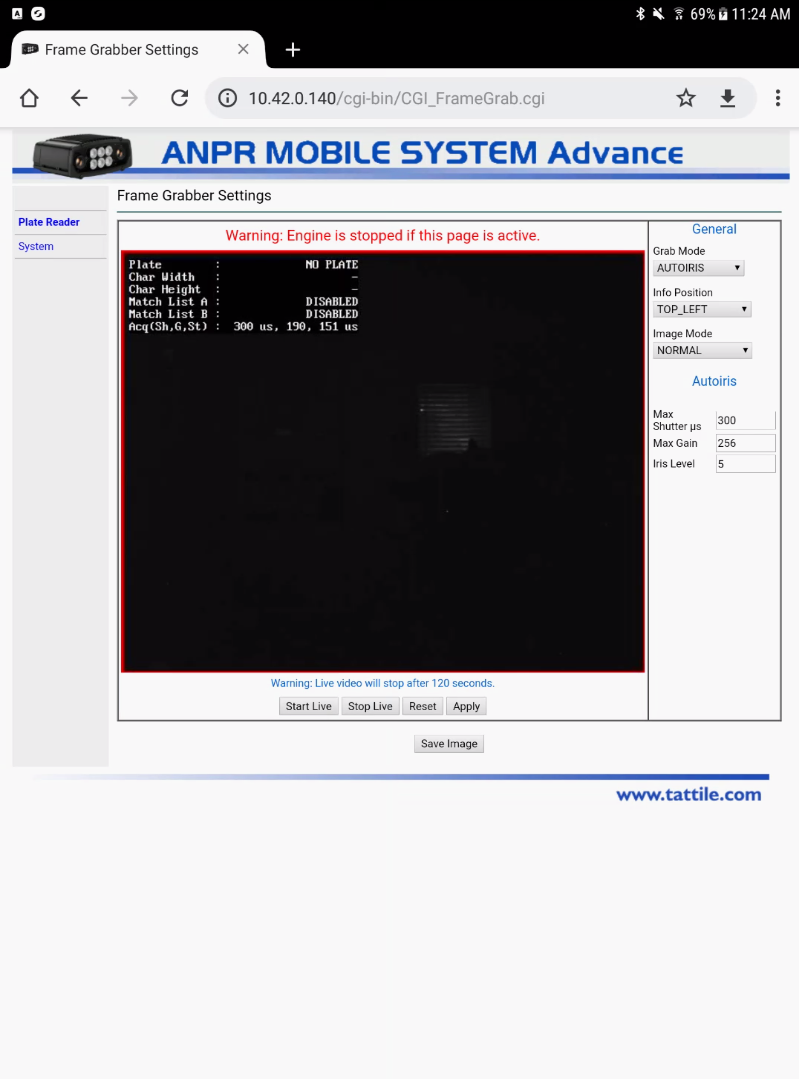
Improving Exposure for Dark Plates:
-
Set Max Shutter to
500
500. -
Set Max Gain to
256256.(If images are toodarkdark, this setting can beincreased.increased,Howeverbut it is not recommended togo overexceed 1000.) -
Set Iris Level to
15
15.
Adjusting the Bounding Box
The LPR camera has the ability to customize the area that is being analyzed during the plate read. This article explains how to adjust the read area (Bounding Box).
The bounding box refers torestricts the area that can be adjusted to narrow the view orspecific area that is analyzed by the LPR camera.camera,
Theunnecessary settingsbackground involved are located in the Plate Reader Settings.
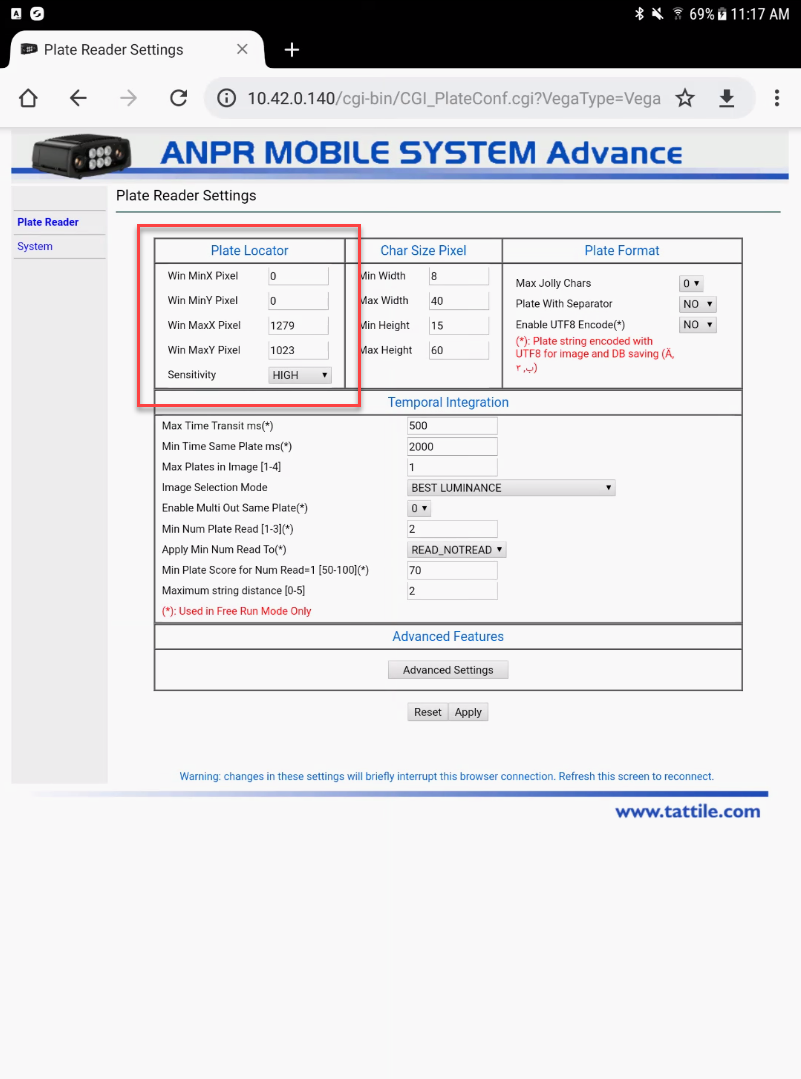
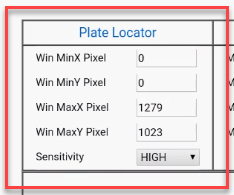
The default settings for full frame are as follows.information. Measurements for height are always considered the distancecalculated from the top of the screen.screen, Measurements forand width are based on distance from the left of the screenscreen.
-
Navigate to the Plate Reader Settings.
-
Edit the pixel values to narrow the read area. The default full-frame settings are:
-
Win MinX Pixel
-: 0 -
the left)Win MinY Pixel
-: 0 -
the top)Win MaxX Pixel
-: 1279 -
the left)Win MaxY Pixel
-: 1023(from
(From(from(From -
-
Increase the
Mintop)
values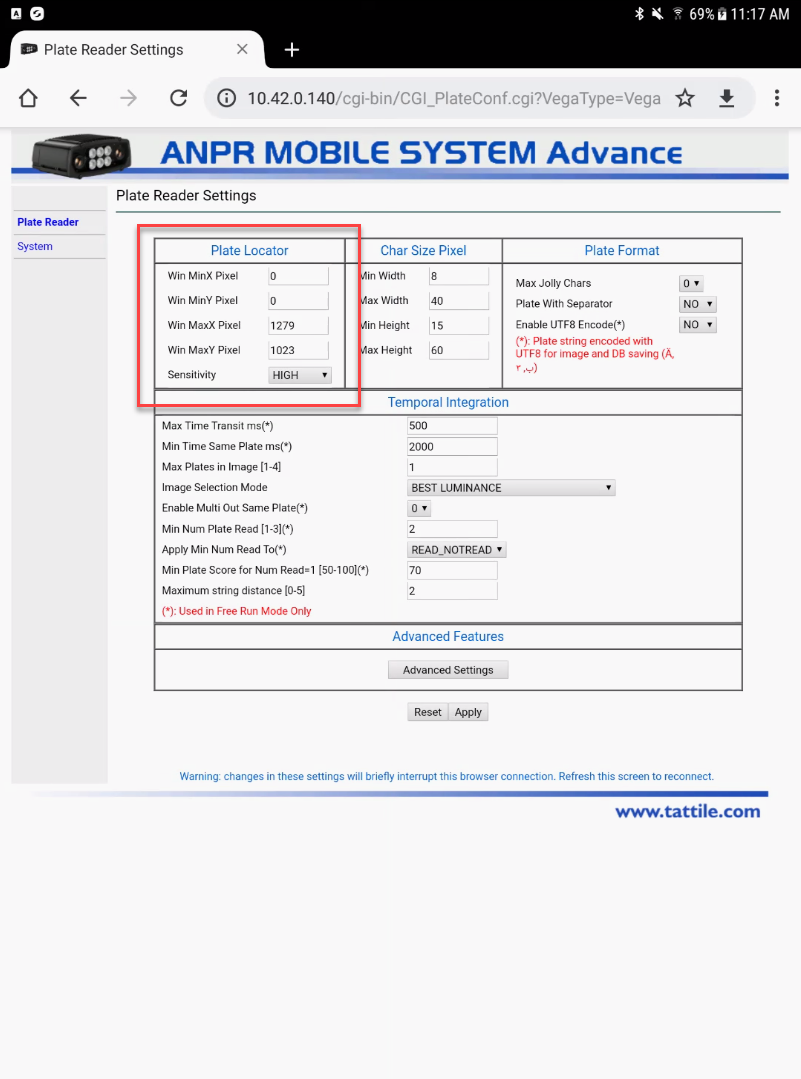
Toorviewdecrease thelocationMaxofvalues to shrink the bounding boxgohorizontallyinto(X) or vertically (Y). -
Click the
toCameraApplyOCRbuttontab.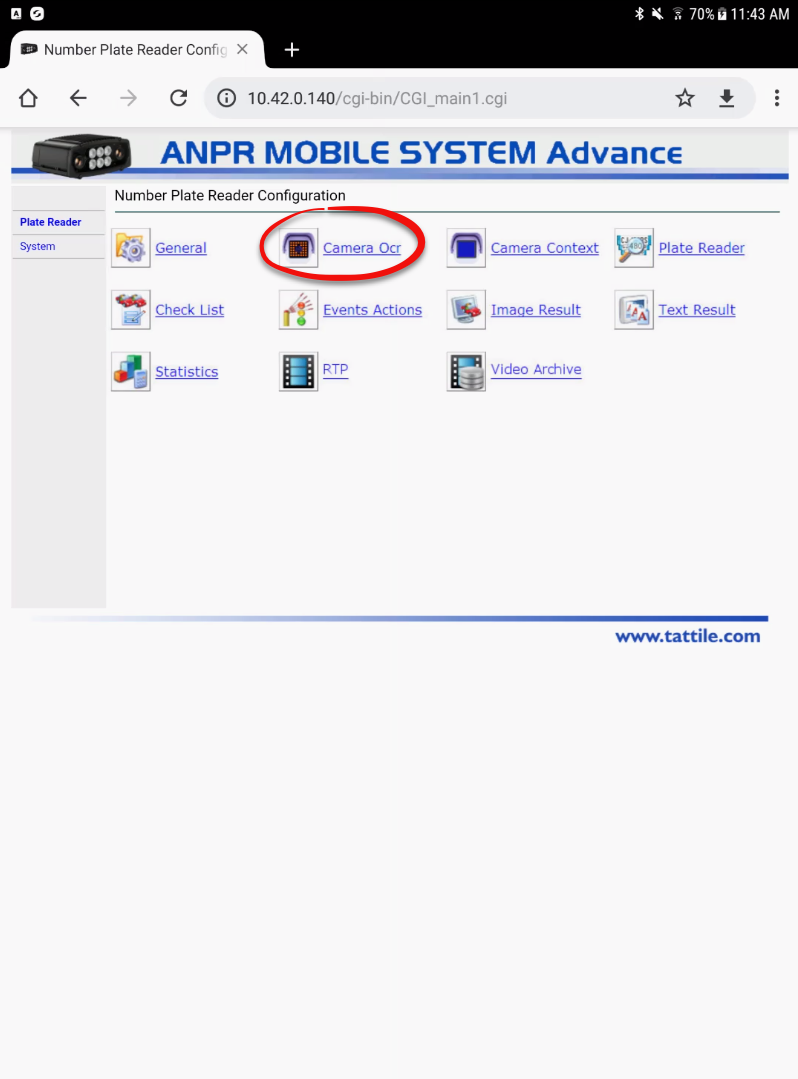
Here issave thefull frame view of the bounding box. See the red outlined box in the image below.
changes.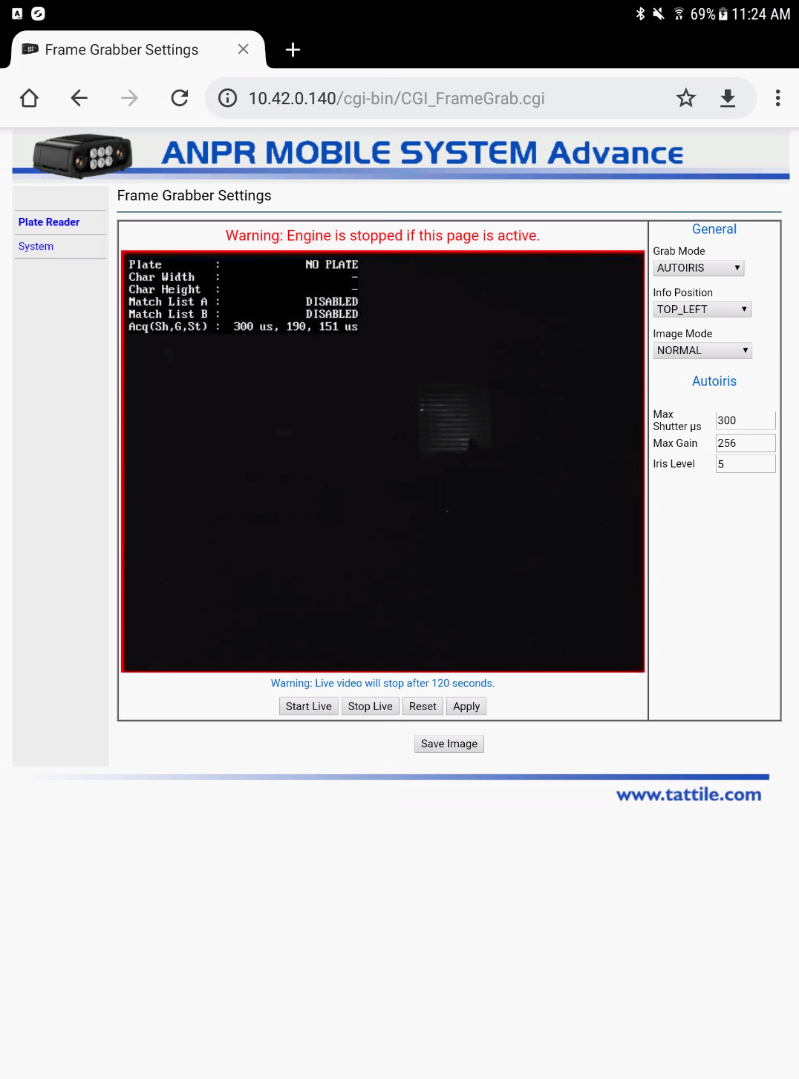
Adjusting Height
To adjust the box edit the number in the settings. In this case we will narrowOnce the bounding box in height to restrict the read area.Here are the settings:
Win MinX Pixel - 0 (from the left)Win MinY Pixel - 100 (from the top)Win MaxX Pixel - 1279 (from the left)Win MaxY Pixel - 700 (from the top)
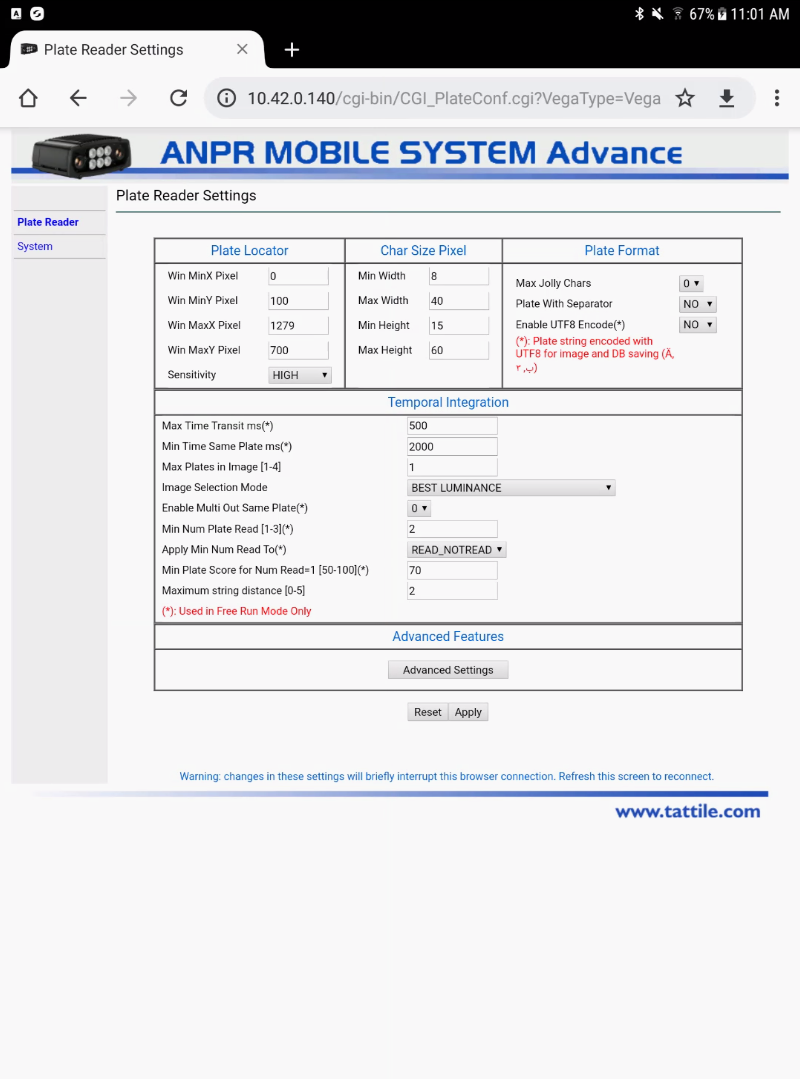
IMPORTANT
Once the settings are changed and you click onthe Apply,Apply button, the camera will reboot. This process will take a couple of minutes to complete before you can navigate away from the page.
Handheld Unit Configuration
TheFor resultingNOREAD Bounding Box will look like this:
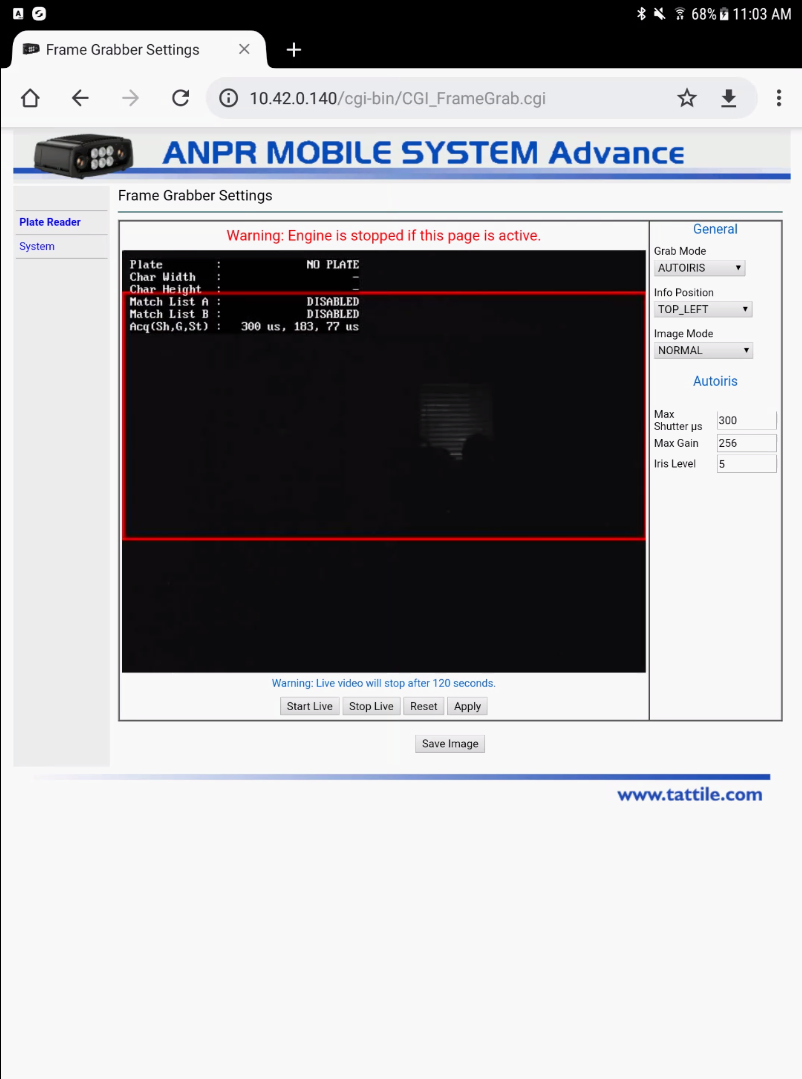
Let's now say we want to lower the box in the view. I would have to increase the values in both Y axis settings.
Here are the settings
Win MinX Pixel - 0 (from the left)Win MinY Pixel - 200 (From the top)Win MaxX Pixel - 1279 (from the left)Win MaxY Pixel - 800 (From the top)
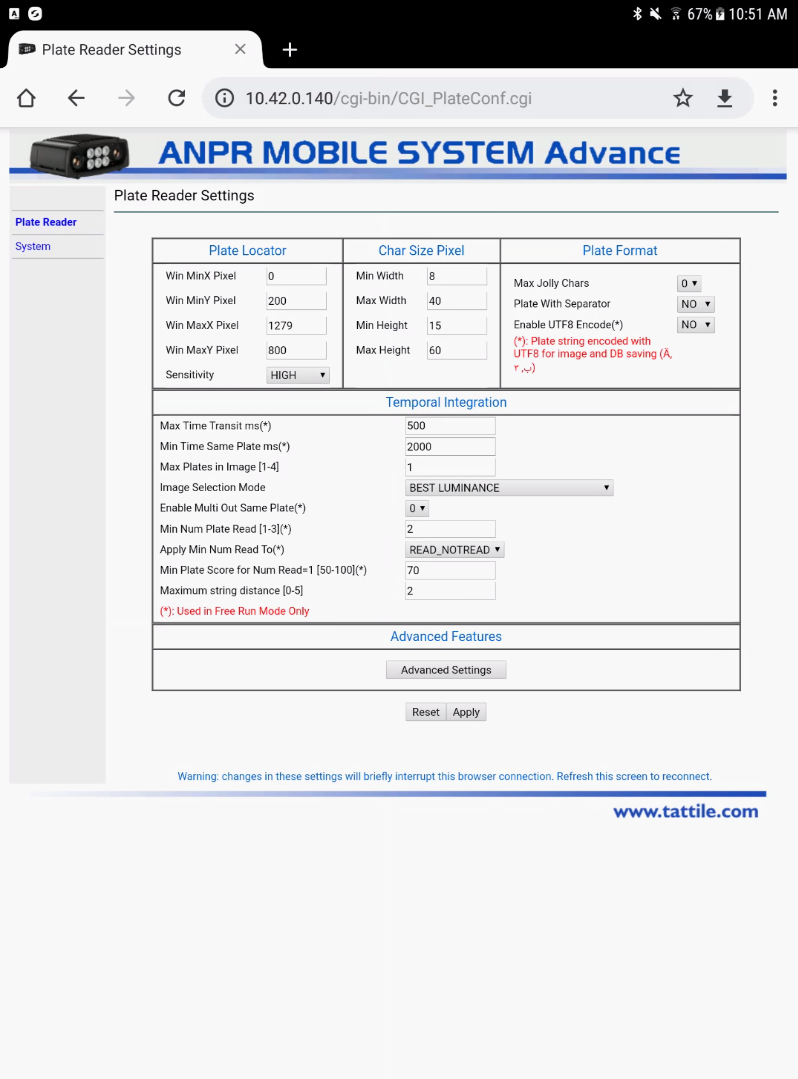
Here is the resulting bounding box:
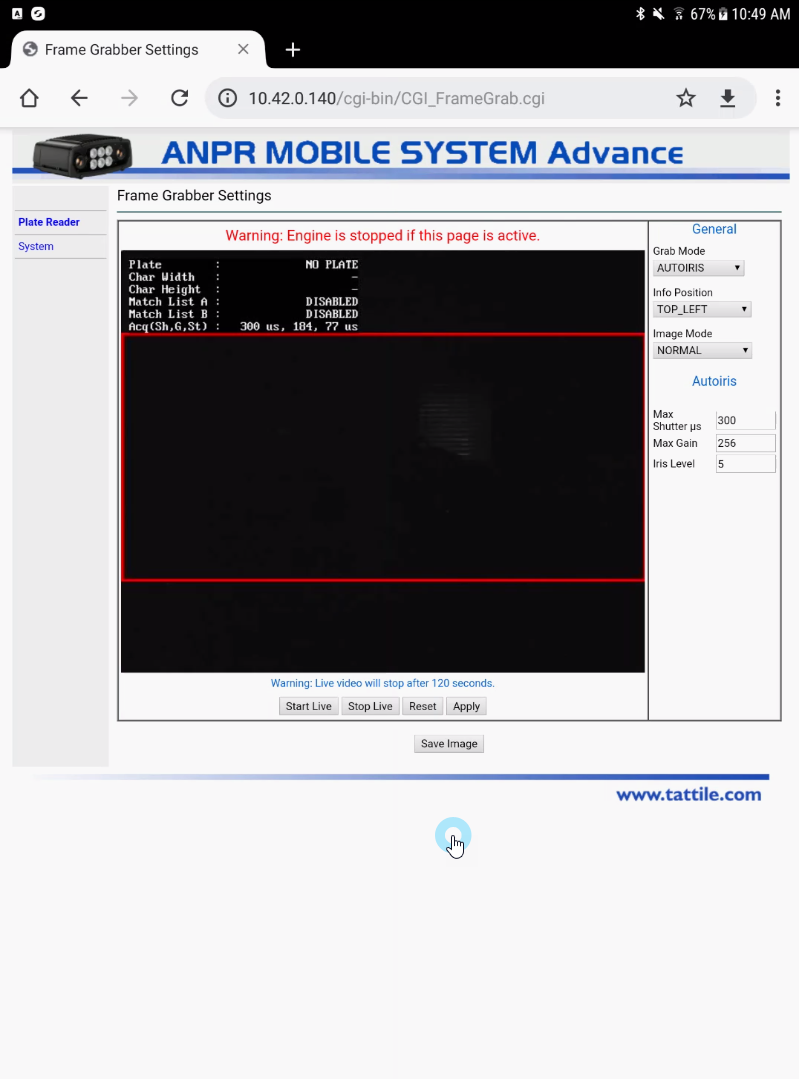
Adjusting Width
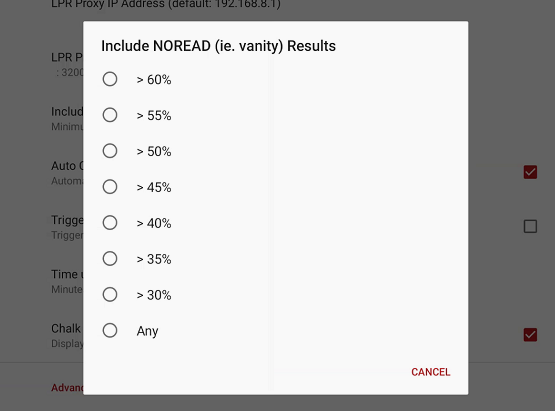
Additionallyresults, you can narrowadjust settings directly on the widthAndroid ofhandheld thedevice boundingto boxprocess ifvanity needplates be.or Inchallenging this case we will narrow the bounding box by 100 pixels on both sides.reads.
Here
-
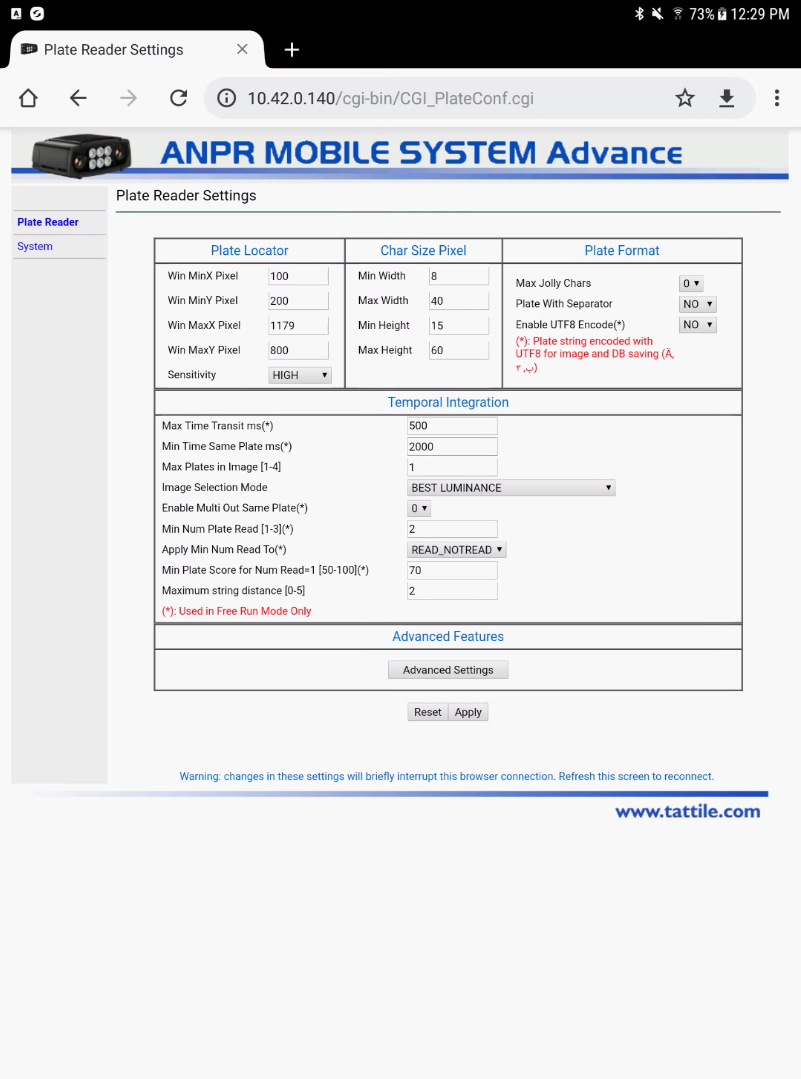
Win MinX Pixel -100(from the left)Win MinY Pixel - 200(From the top)Win MaxX Pixel -1179(from the left)Win MaxY Pixel - 800(From the top)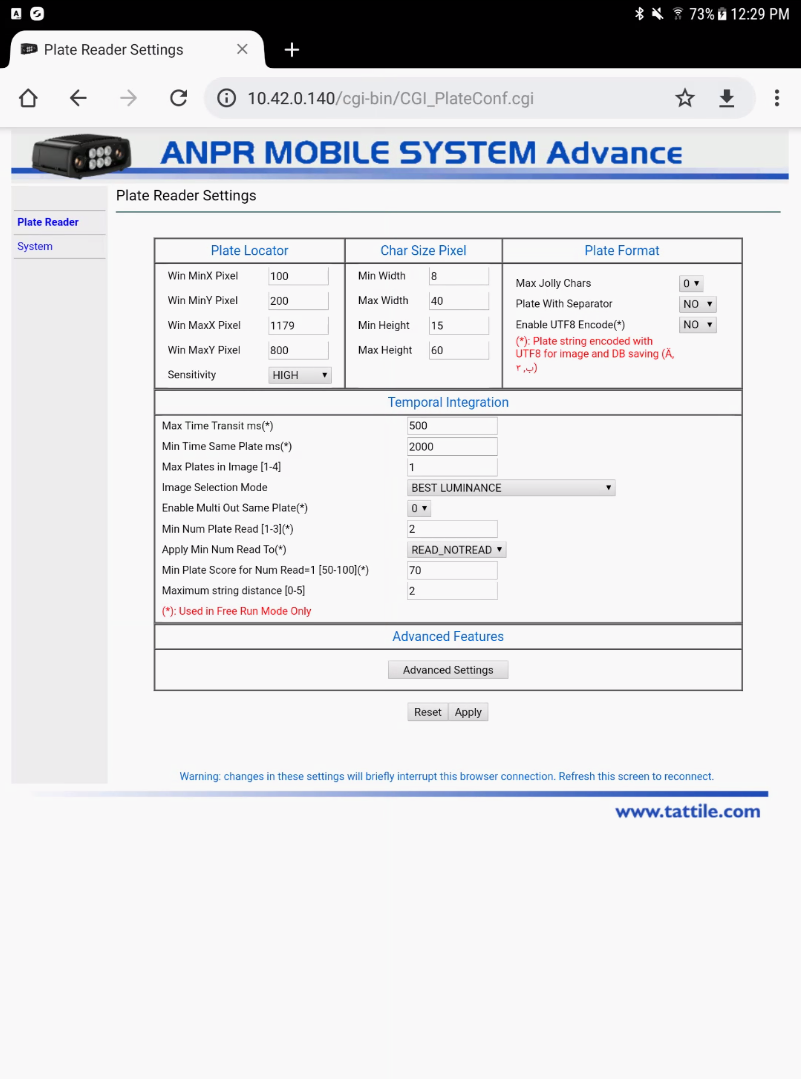
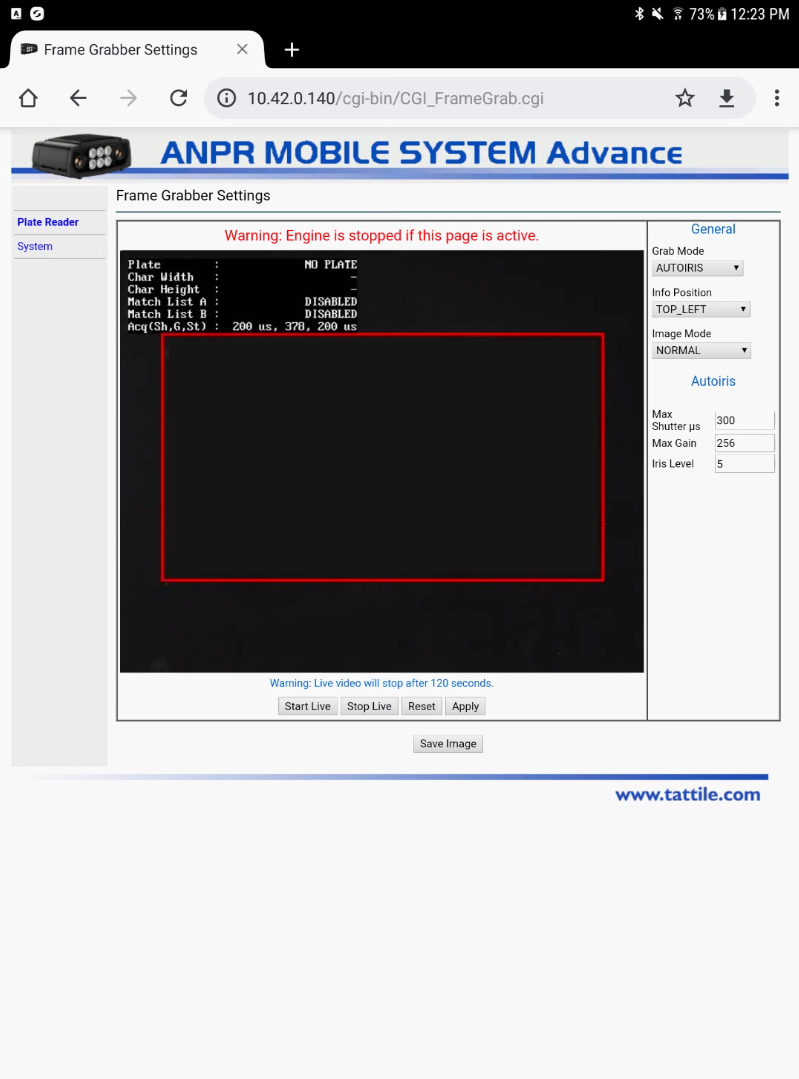
Here is the resulting bounding box.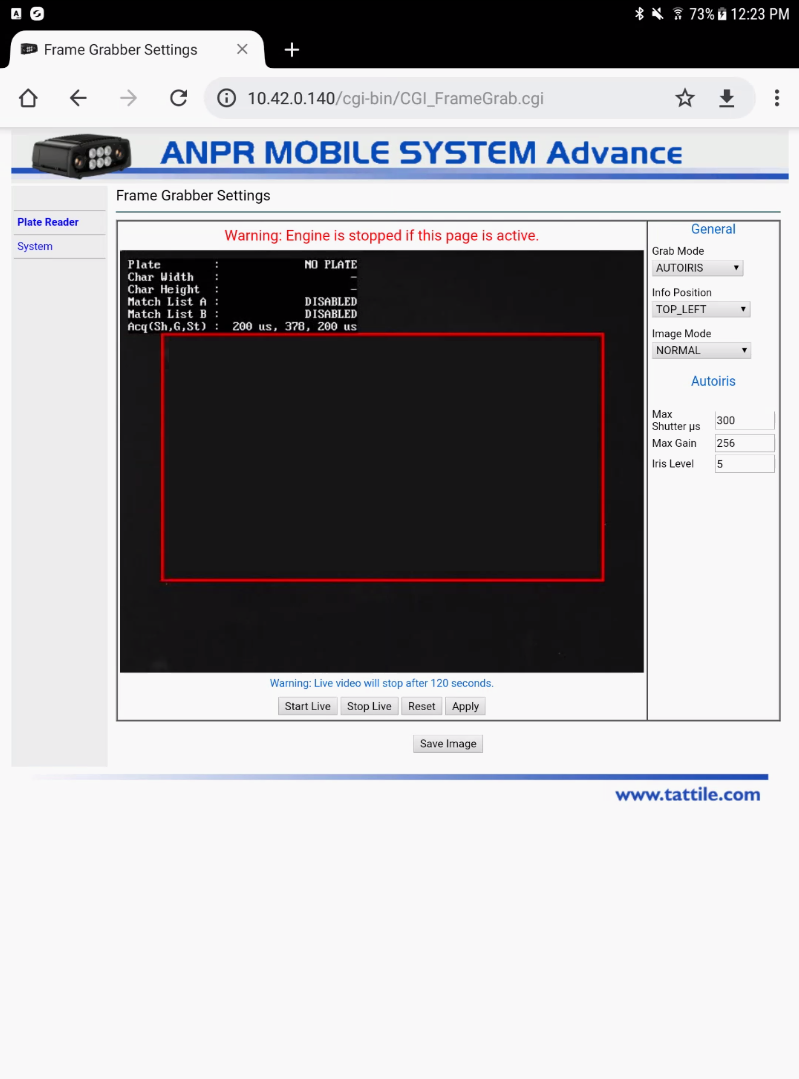
By selective use of these settings you can customize the area that is processed by the LPR read. As a result LPR reads could be faster and more accurate since the camera is reading a smaller more focused area and ignores anything outside of the bounding box.On the HandheldFor NOREADs you can check the setting inTap System Settings.to -
if that can be reduced.It may mean more noise, but it may also help with determining what is going on (ie. reading but not seeing it as aTap
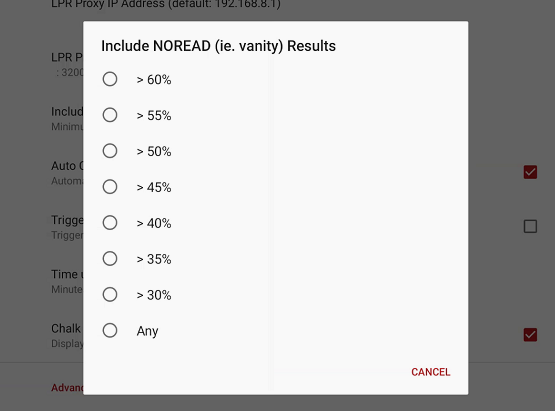
READresult)To adjust this setting go into system settings and tap onInclude NOREAD (ie. vanity) Results
.
-
Set the percentage to 50% to start.
We -
tweakTweak
itthisoncepercentagewelaterseebased on how the systemreacts.reacts in the field.

Using this Feature
The LPR system utilizes advanced algorithms and human corrections to continually improve its read accuracy during daily operations.
Fuzzy Searching
The PL8-RDR system inherently supports fuzzy searching based on user-supplied values. If the LPR system "sees" ABC123, it will automatically validate against similar visual patterns such as A8C123, ABC128, or A8C12B based on time of day and active permits.
Manual Corrections
You can actively improve plate reads by making manual corrections and verifying correct plates on the system. The system uses an algorithm that includes your human updates as part of its read score. Therefore, if a plate is consistently misread and corrected by an administrator or guard, it is highly probable that the system will return the human-updated version in the future.
If you see a score of 100% in the LPR report, that indicates the system determined a human-updated version was the best match. A raw algorithmic read score of 100% is theoretically impossible with standard LPR cameras.
Best Practices and Considerations
-
-
Balance NOREAD noise: While increasing the NOREAD percentage on the handheld can help identify vanity plates, it may also introduce more system noise. Monitor the results and find a balance that captures valid plates without overwhelming the user with false reads.
-
Avoid excessive gain: When adjusting exposure, never increase the Max Gain setting over 1000. Excessive gain will introduce heavy digital noise, actively degrading the camera's ability to perform OCR (Optical Character Recognition).