Permit Invoicing
InvoiceThe PreparationPermit Invoicing feature allows administrators to generate, manage, and distribute billing statements for permit purchases to companies and individual users. Its primary purpose is to streamline financial operations by automating invoice creation and email delivery based on active sales windows. This article is intended for OPS-COM administrators responsible for financial processing and corporate account management.
Setup and Configuration
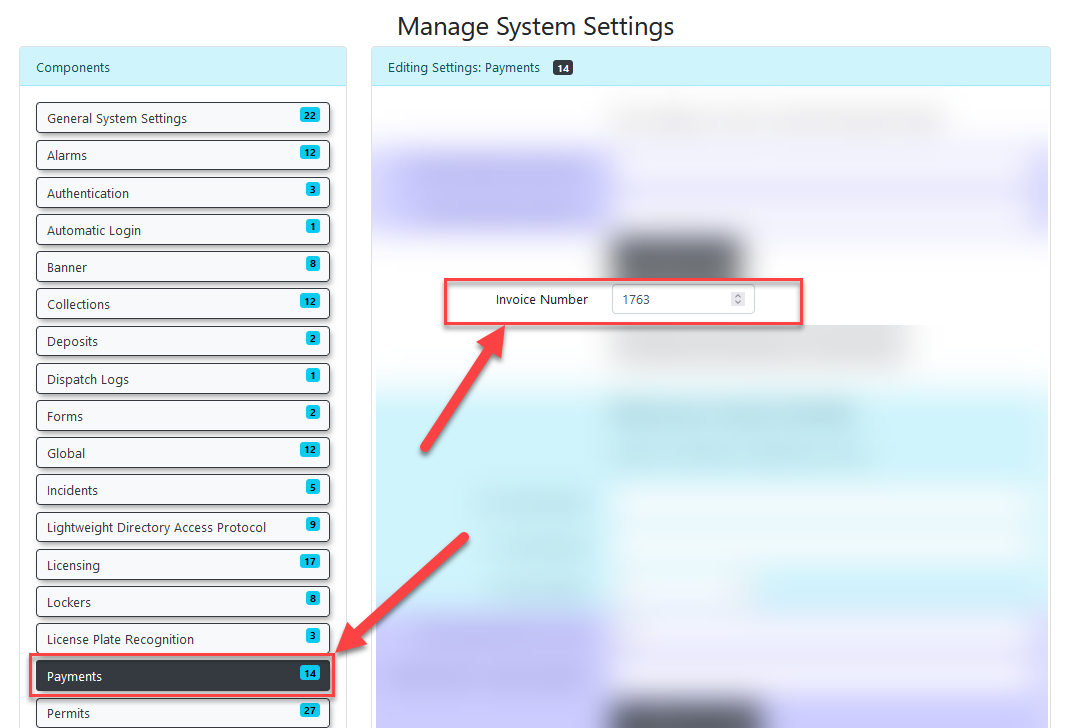
Before invoicesgenerating caninvoices, be prepared, thereadministrators must first be an invoice number set.
Locateconfigure the invoicesystem's number settings on the settings page.
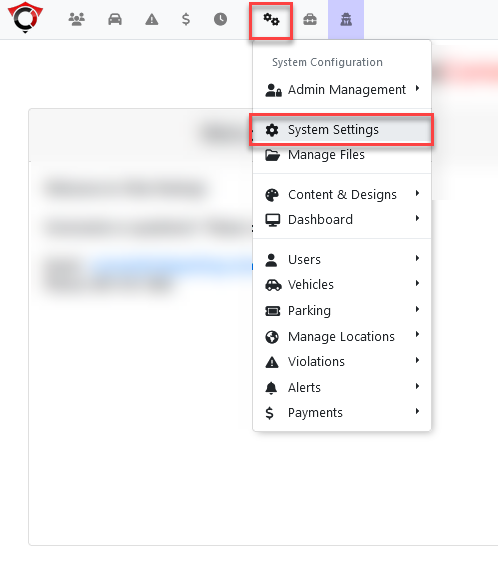
The settings page can be found under:
System Config>System Settings
Thebaseline invoice settings canand beensure foundcompanies underand users are properly flagged to receive billing communications.
Configuring Invoice Settings
-
Hover over System Config and click System Settings.
-
Locate and open the Payments menu option.
-
TheSet your desired starting invoicenumber can be set here.
number.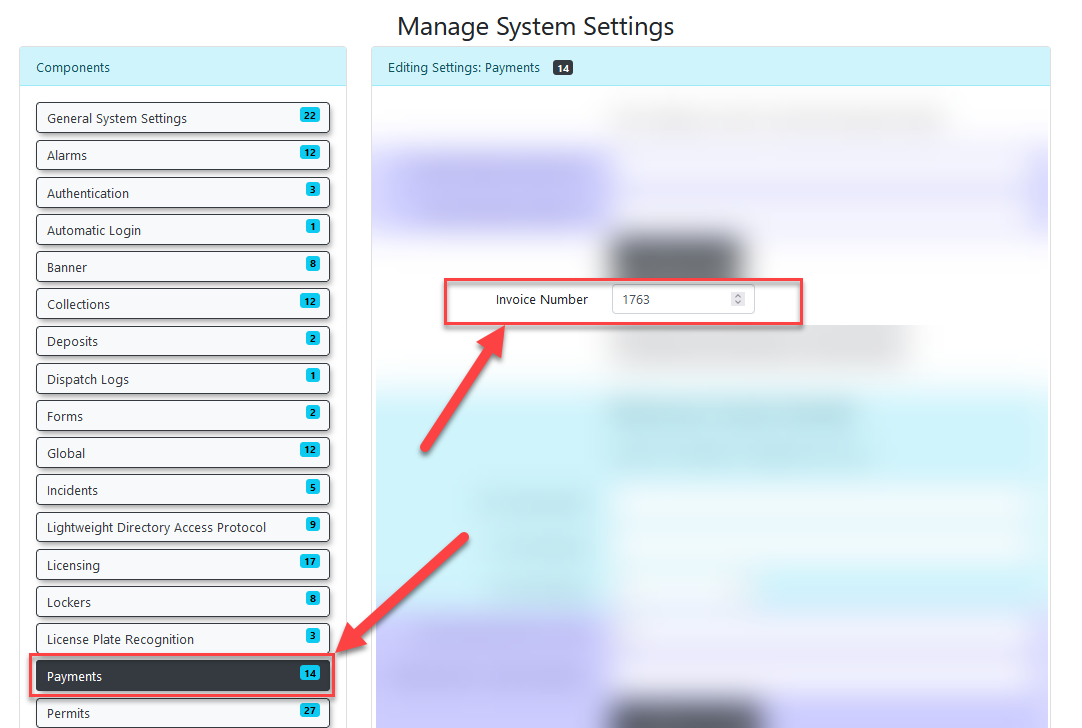
-
TheVerify that your permit invoice templatemustisalsofullybeconfiguredsetup fromon the system templates page.Decide
Setting Company Invoice Contacts
Different
-
First,Hovernavigateoverto the company edit screen. This can be found by going to the company search page, found under the menu items:- User Management
->and click Companies.
- User Management
-
From this page, enterEnter the necessary search criteriaandtobring uplocate thecompanytargetthat invoices will be set up for.company. -
TheClickeditthe Edit buttoncan be foundnext to the company information.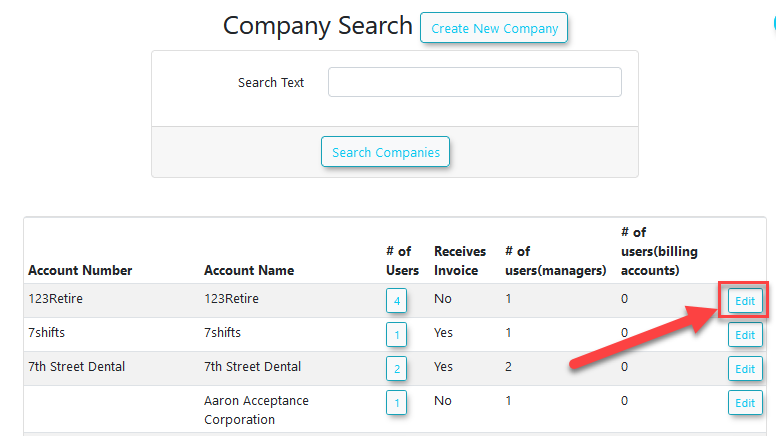
-
Clicking on this will bring upEnter thecompany edit page.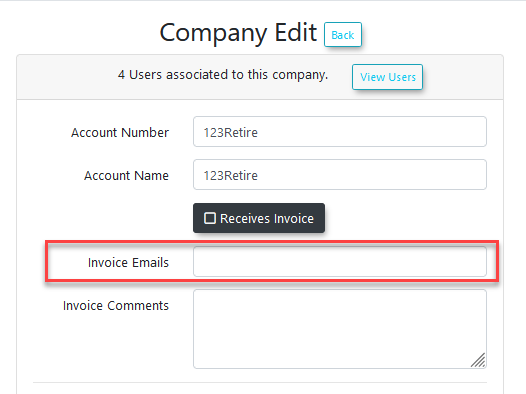
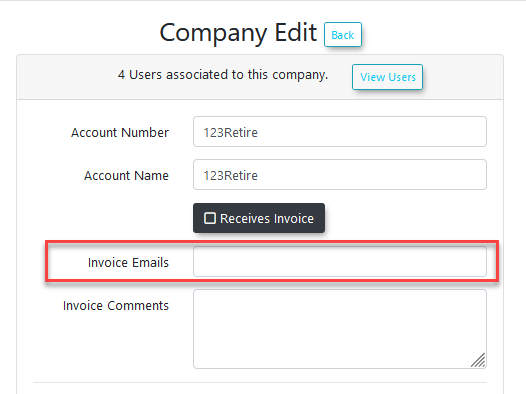
The relevant field here is invoice emails.
InvoiceTo ensure invoices are received by the correct recipients, populate the 'Invoice Emails' field on the company edit screen with therecipient email addressesofinto therecipients.
field. You can add multiple recipients by separating the addressesTheseEmailscanwithbeaseparated by colonscolon (commasa comma (

UserConfiguring ConfigurationUsers for Invoices
AUsers user canmust be setdesignated ascorrectly within their profiles to receive invoices, whether they are part of a company fromor acting as an individual.
-
For Company Members: Open the user's
profileprofile.Afterandconfiguringdesignatea userthem asparttheof a company, additional configuration options will appear in their profile.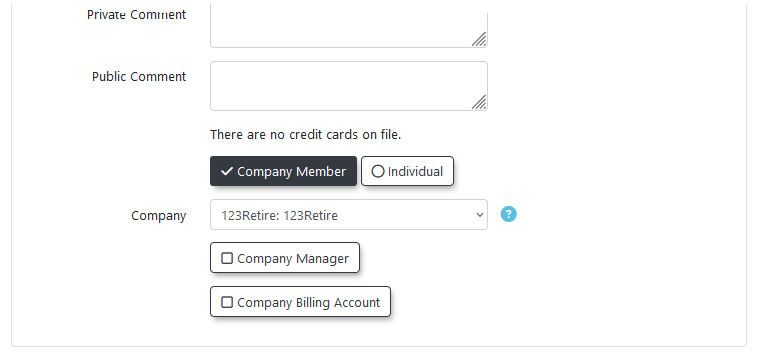
For Company Members, an admin must designate a member to act asCompany BillingManager.Manager. Thiswillspecificbedesignation is strictly required to activate invoicing for that company. -
For Individual Users: Open the
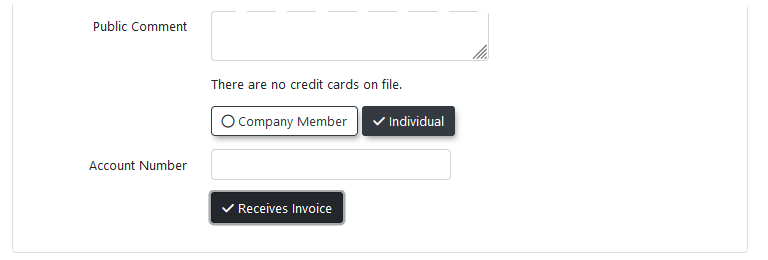
companyuser'smemberprofile and enable both the Individual checkbox and the Receives Invoice checkbox.
Using this Feature
Once the system and users are configured, administrators can generate and send invoices in batches based on active permit sales windows.
Creating and Sending Invoices
-
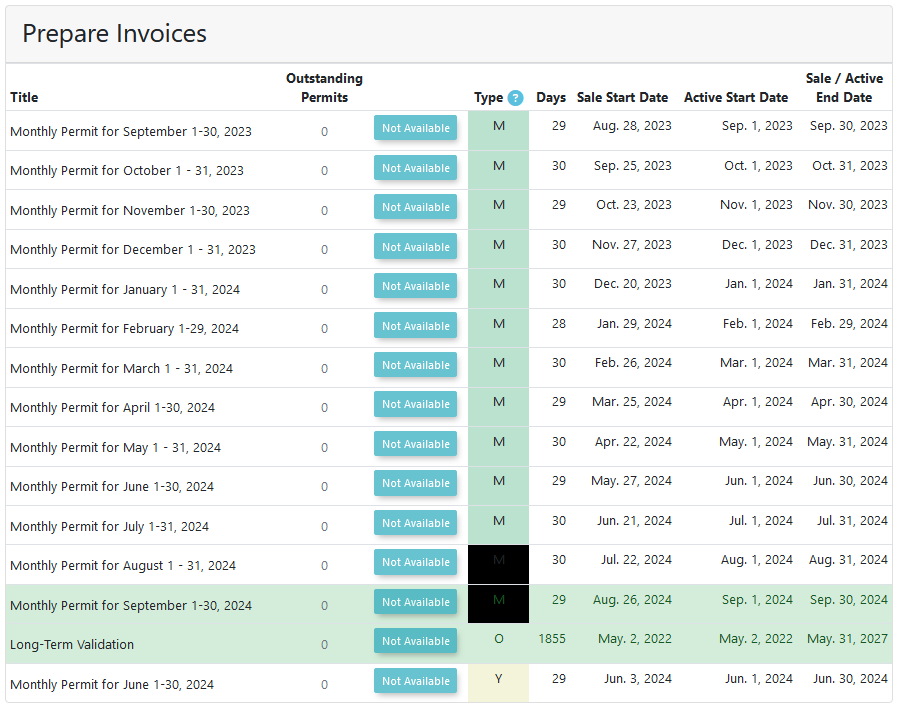
Hover over Permits and click Prepare Invoices.
-
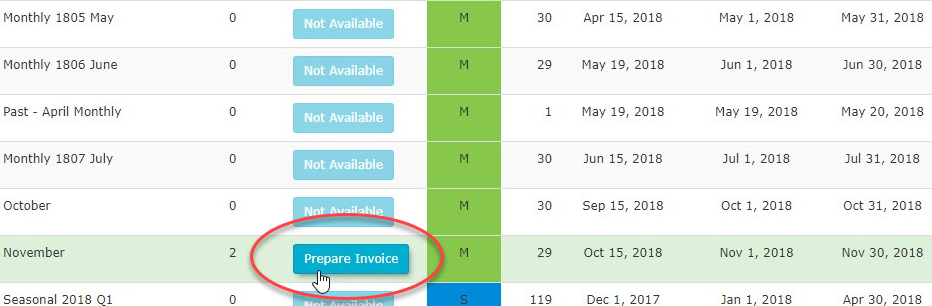
Click prepare invoices next to the specific sales window that
receiveshas outstanding permits. -
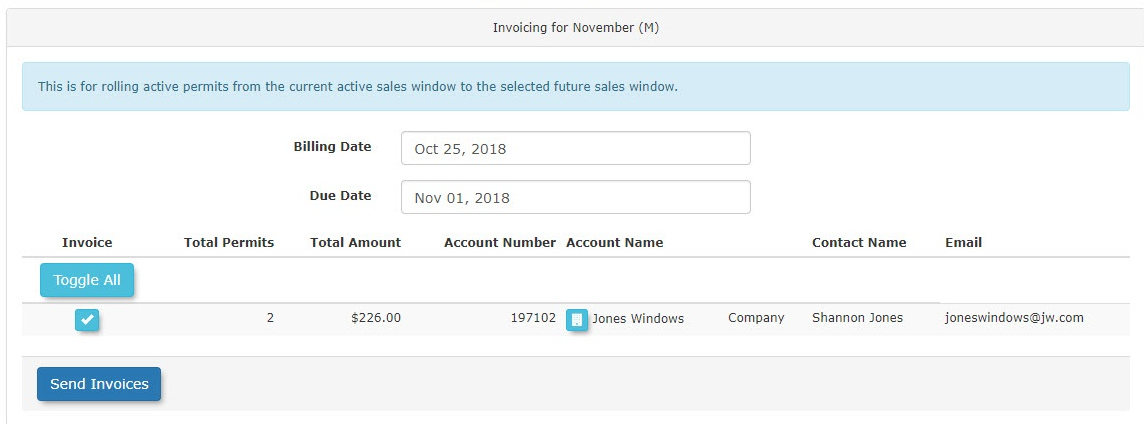
Review the populated list of invoices. All invoices are selected by default; toggle off any specific invoices you wish to exclude from the batch.
-
Note:Set the Billing Date and Due Date for the invoices being processed. -
Click Send Invoices to schedule the emails for delivery.
-
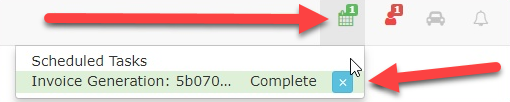
Click the calendar icon in the top navigation bar to monitor the status of the invoicing task.
-
Click the blue X button to clear the task once it displays as complete.
Key Information Displayed
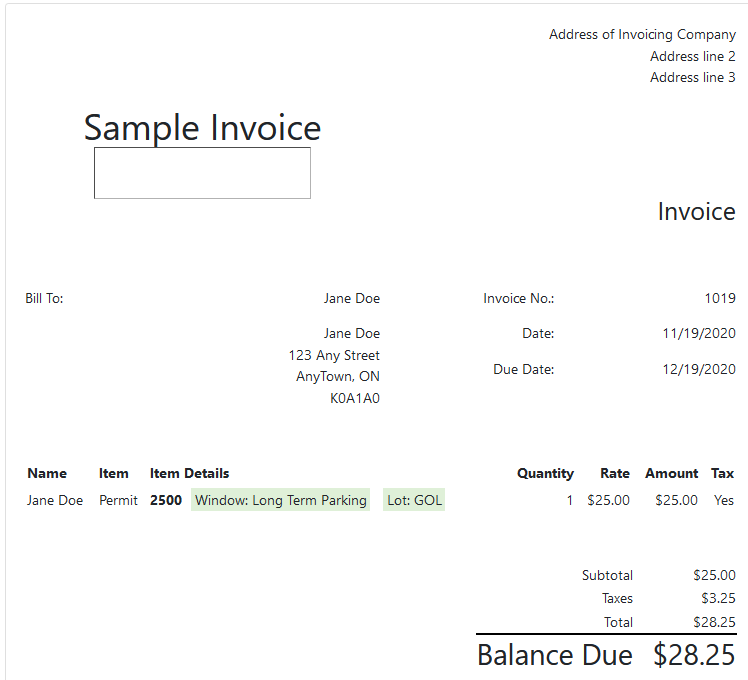
When the invoice is emailed to the selected companies or individuals, it will automatically include:
-
A detailed list of the users associated with the transaction.
-
The specific permit numbers being purchased.
-
The Billing date, which reflects the exact date the invoice was sent.
-
The Due date, which reflects the deadline for the expected payment.
Best Practices and Considerations
-
Limit Billing
ManagerManagers:does not need to be a Company Manager, though they are often assigned both roles.Whiletherean organization canbehave multiple Company Managers, there should only be one designated Company BillingManager.Manager to ensure billing communications are centralized and not duplicated. -
DesignatingDetermine Rollover Rules: Organizations should establish aBillingclearManagerbusinessisrulerequiredregarding whether unpaid permits are allowed toactivaterollinvoicing.Invoicing Individuals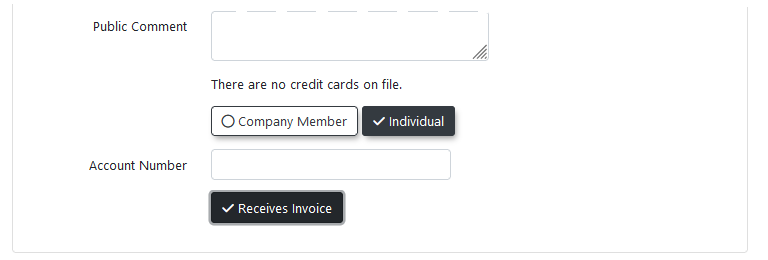
For individual users who are not part of a company but need to receive invoices, edit their user profile and check both the 'Individual' and 'Receives Invoice' checkboxes.Creating Permit InvoicesTo start creating a permit invoice, first navigateover to thepagenextunderperiodthebeforemenu:configuring invoice templates and generating bills.Permits -> Prepare Invoices
ThepreparePleaseinvoicesnotepagethatwill be displayed.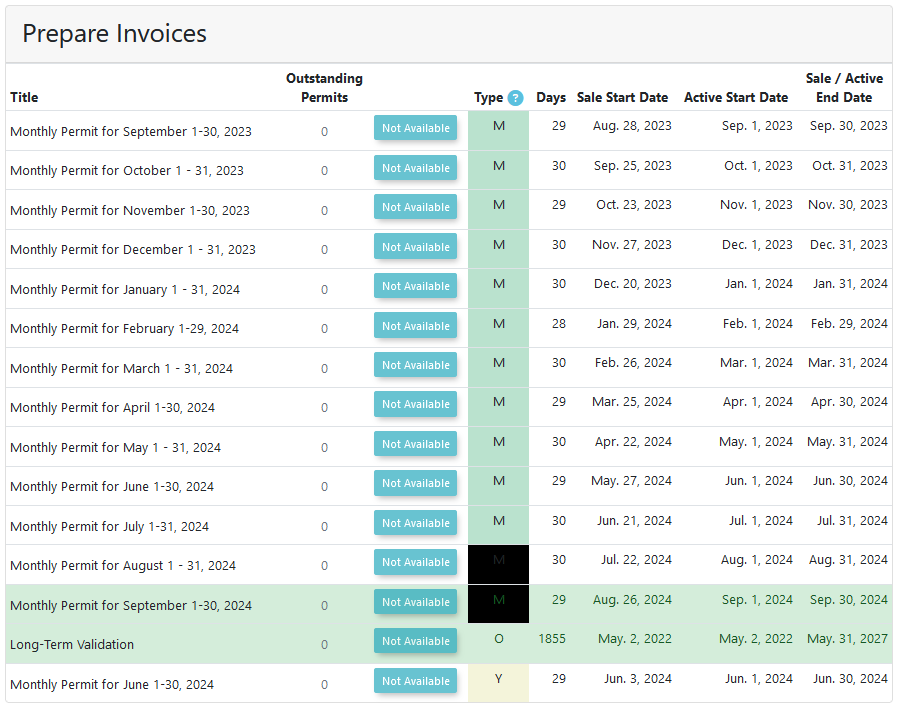
In sale windows where there are outstanding permits, a button will appear for prepare invoices.Click on prepare invoices to start the invoicing process.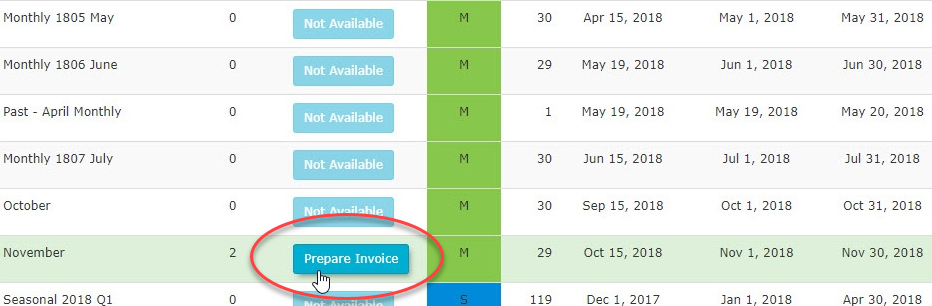
Note - Currently,currently, only permitsforassigned to user typesthatotherarethannot Student'Student' orStaff'Staff' will be shown as available forinvoicing.invoicingSetting Invoice Billing and Due DatesA list of invoices will be displayed forin thesale window. All invoices will be selected by default, but specific invoices can be excluded by toggling them off.As part of the process, the the Billing Date and Due Date for the invoices can be set.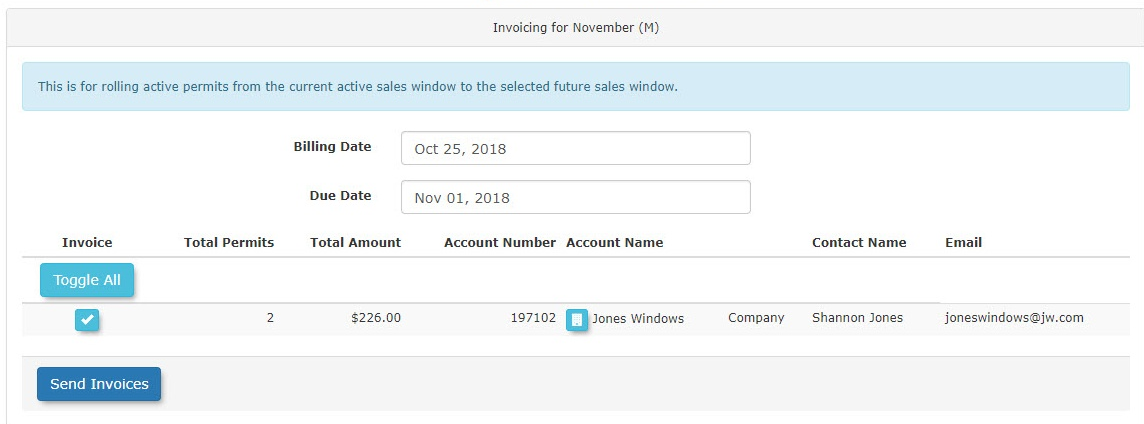
ClickSend Invoicesto schedule the invoices for sending.The following message will appear:
The invoicing task will appear under the calendar icon.When clicked, the status of the task will be displayed; in this case, it shows as complete.The task can be cleared by clicking the blue X button.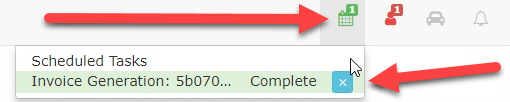
EmailingAt this stage, the invoices will be emailed to the companies selected.The invoice will contain a list of users as well as the permit numbers being purchased.By default, the email will be formatted as follows: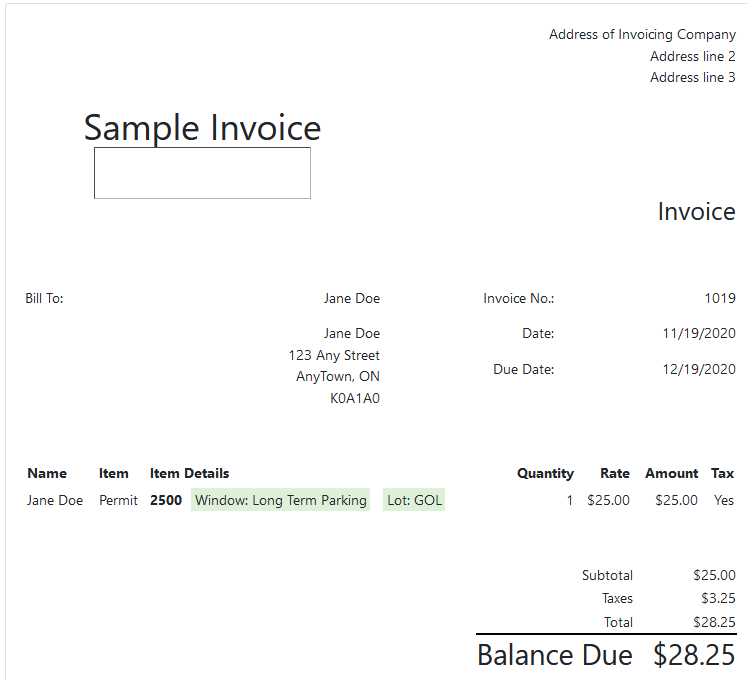
Note the dates:The billing date is the date the invoice was sent.The due date is the date the invoice is expected to be paid by.
system.