
Permit Sales Window Management
Creating a new Sales Window
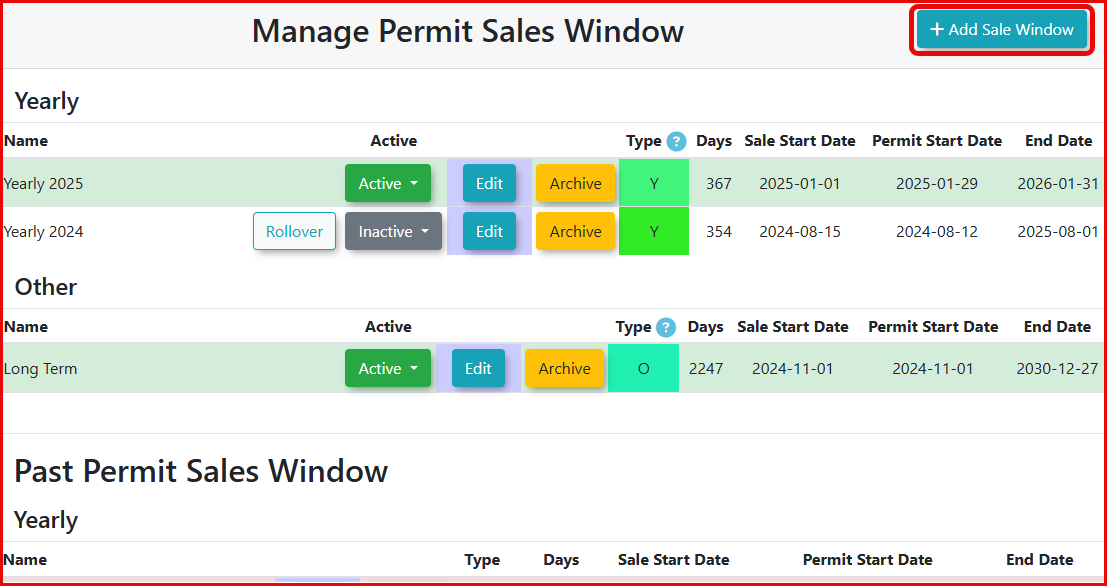
To create a new Sales Window, choose Sales Window from the Parking Management or Permits menus. When presented with the Manage Permit Sales Window screen click +Add Sale Window.
Be sure that you have chosen the Permit Sales Window and not the Locker Sales Window option.
The Manage Permit Sales Window appears. Enter the information for the new sales window.
In this example, we are creating a yearly permit sales window with the following information:
- Sale Start Date of December 29th, 2025 (When the permits will be available to purchase)
- Permit Start Date of January 1st, 2026 (What date the permit becomes valid)
- End date of December 31st, 2026 (What date the permit expires)
| Sale Start Date | Permit Start Date | End Date |
|---|---|---|
| The day that the permits are on sale and users can begin to purchase permits in the lots that use this sales window. | The day the permits become valid (Useable, Scannable, Swipe able, LPR/Handheld Reads, etc.). This allows you to sell your permits in the Sale Start Date field but not allow them to be valid until a certain date. | The official end date that permits can be sold until, or can be active for, in this sales window. Remember Active differs from Sale. |
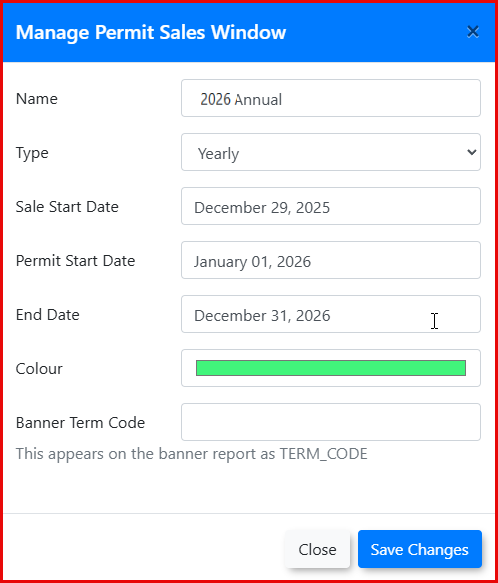
Click Save Changes to save your information. It will now appear in the list of possible Sales Windows.
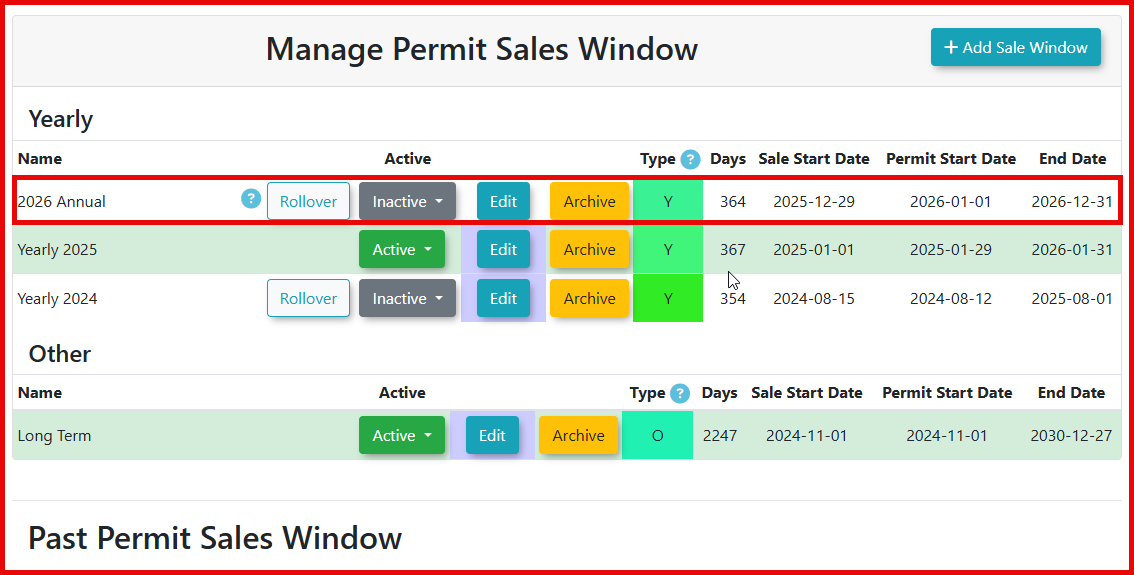
In the sales window example above: If this sales window was made Active, permits could be purchased any time between Dec. 29, 2025 and Dec. 31, 2026. These permits would be valid from January1, 2026 to December 31, 2026.
Activating the Sales Window
Once the sales window has been configured it needs to be made active. To do so, choose the correct sales window from the Manage Permit Sales Window (as shown in screenshot above), click on the dropdown under the Active column header, and choose Active. Note that other yearly sales windows automatically switch to Inactive.