Setting Up A Lot To Be Visible and Available To The End User
IMPORTANTQuick NOTE:Steps:Show
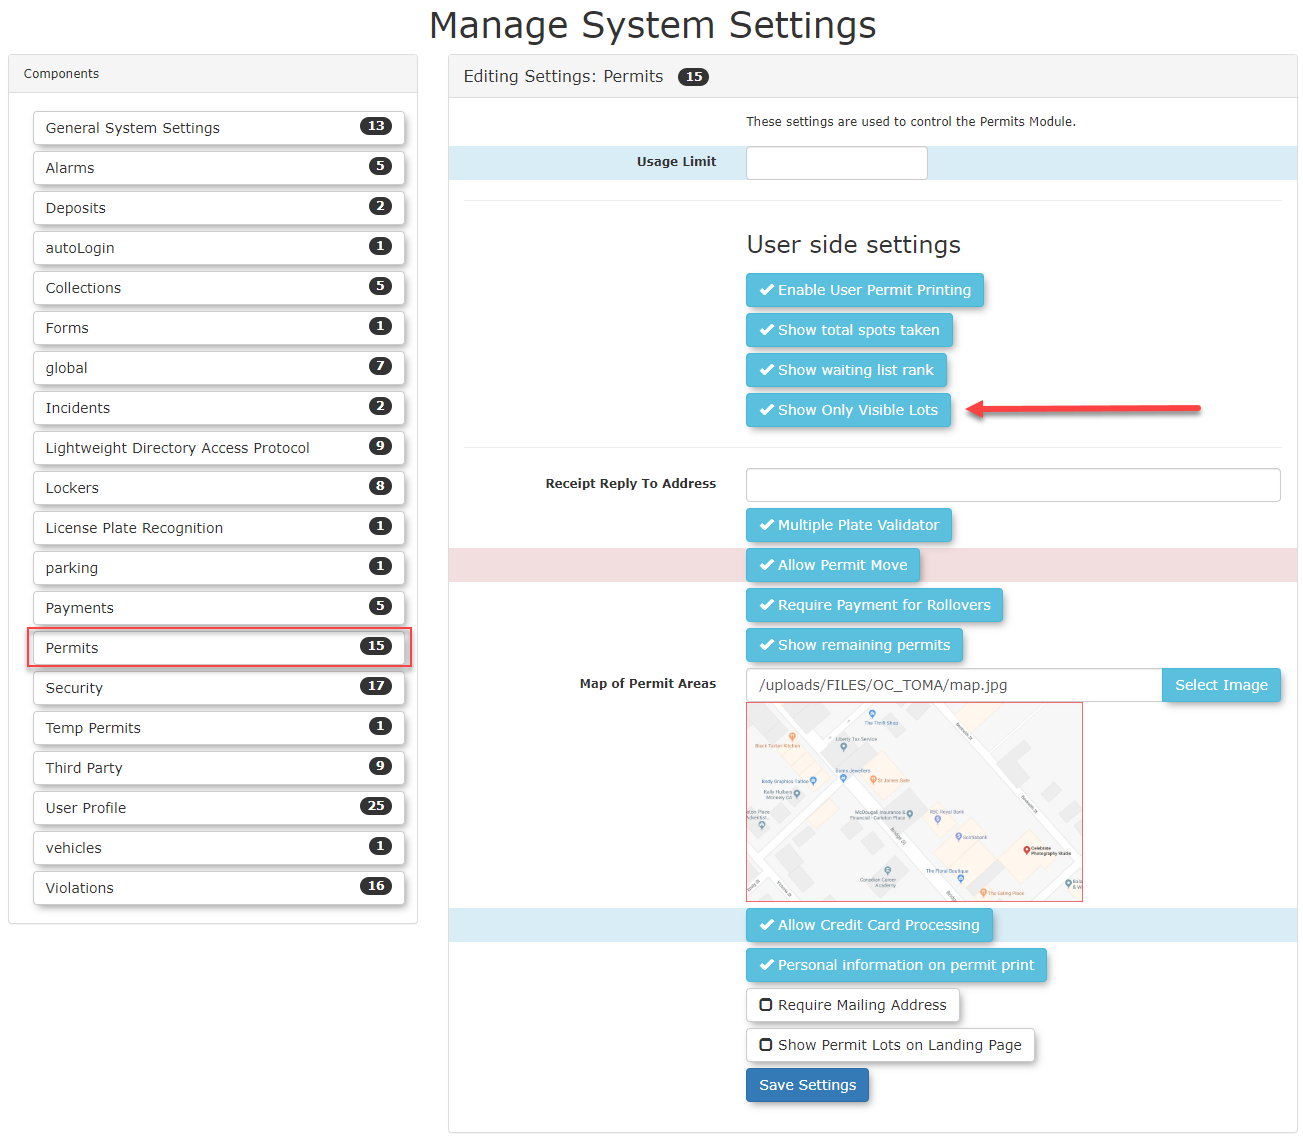
OnlyVisibleover LotsSystem canConfiguration beand toggledclick on orSystem off.SettingsWith, the checkbox left unchecked (or in the off position) all lotsensure that areThis setlot is visible to Visiblesite onusers.
the Lot Administration page will show, as well as lots that are not set to be visible but have an active waiting list.
With the box checked (or in the on position) only lots that are set as Visible on the Lot Administration page will show and non-visible lots will not show even if they have an active waiting list.
The setting can be found in Manage System Settings in the permits tab. See below.
When do we use this?
This instruction outlines the six factors that come into play when creating a lot for permit sales that will determine if
There are 6 factors that affect lot visibility.
Lot creationas avisible lotOnly.Lot mustnot be a "Temporary Only Lot"You mustAllocate permitsGo tothe lotYou must create aPermit Allocationfor the lots you want to be visible:You mustactivatethe Permit AllocationUser typemust matchlot user type
Factor 1 - Create a lot and select it to be visible
Once the allocation is set up we can now create our lot. There are 2 of the 6 factors involved in lot creation. Factor 1 - Simply the creation of the lot itself as a visible lot (checkbox)Factor 2 - Make sure the lot is NOT set to Temporary only
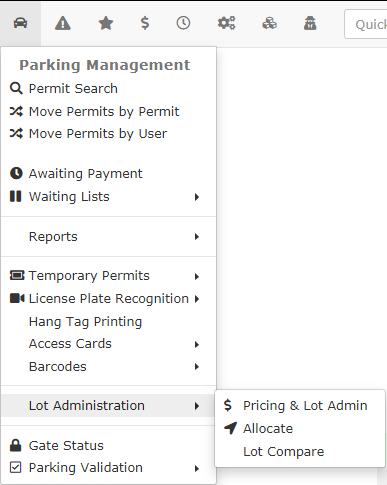
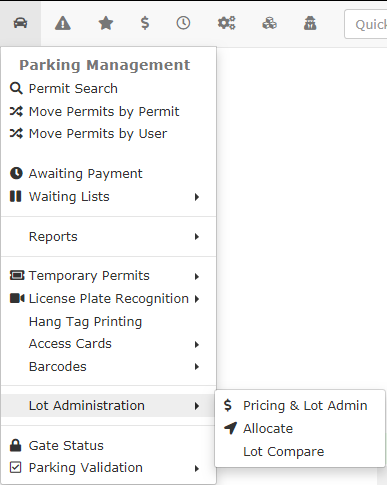
From the Parking Management Menu hover over Lot Administration > Allocate, assign permit numbers (e.g., 520–619), and save.
Quick Step List
-
Create the Lot as Visible:
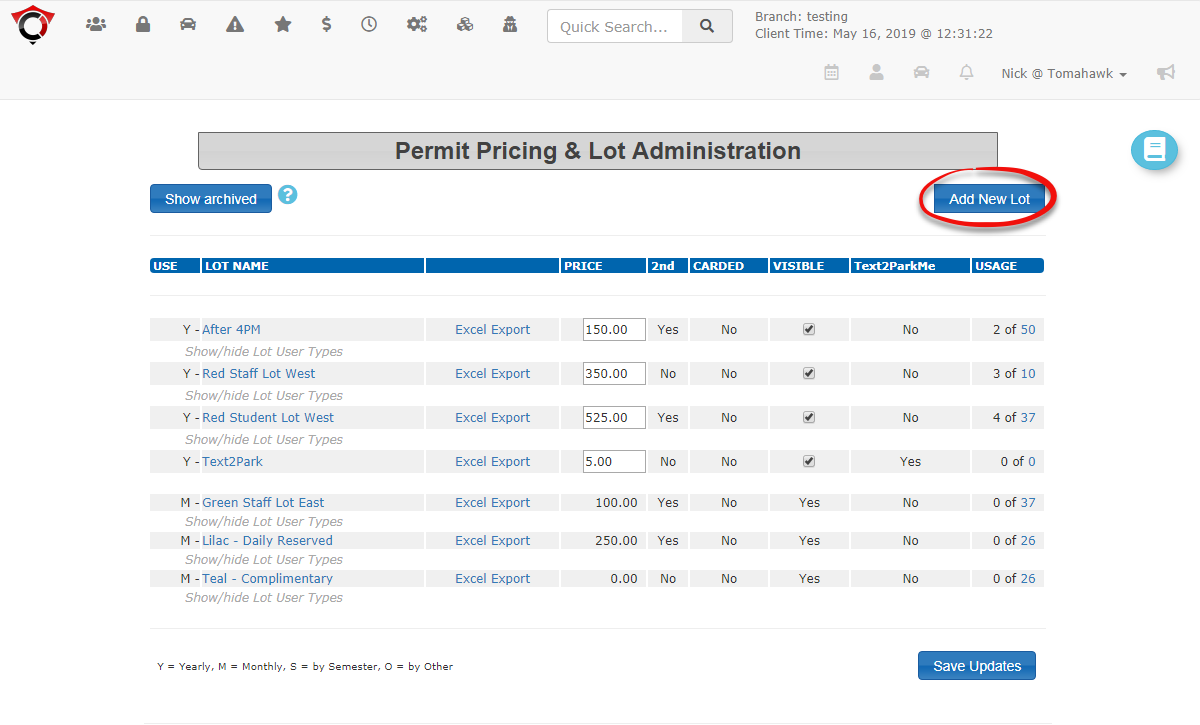
- Go to Lot Administration > Pricing & Lot Admin
from the resulting drop down menu.ThePermit Pricing & Lot Administrationwindow will open.To create a new lot click on> Add New Lotin the upper right of the screen.In this scenario we will be setting up a lot with the following data:Setting up a Lot as Visible:- .
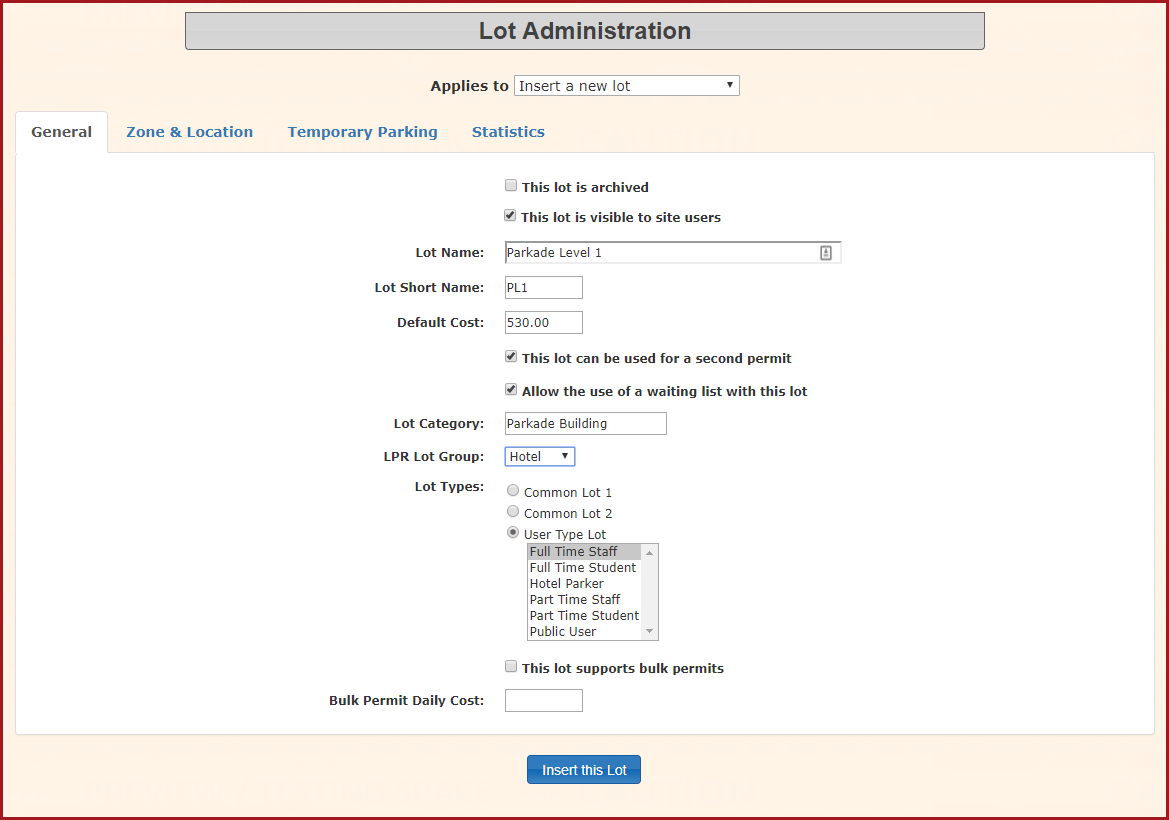
- Check
the box beside "This lot is visible to site users" to ensure the lot will be visible on the user side.. LotFillName:outParkadedetailsLeveland1Lot Short Name: PL1Default Cost: 530.00Check to select This lot can be used for a second permit(This allows end users to have more than one permit in the lot however if space is limited Administrators can limit this to a single permit)Checkto select Allow the use of a waiting list with this lotSet the Lot category to Parkade BuildingLPR Lot Group: Hotel (Note. This is for LPR functionality)
Click onclick Insert this Lot. - Go to Lot Administration > Pricing & Lot Admin
-
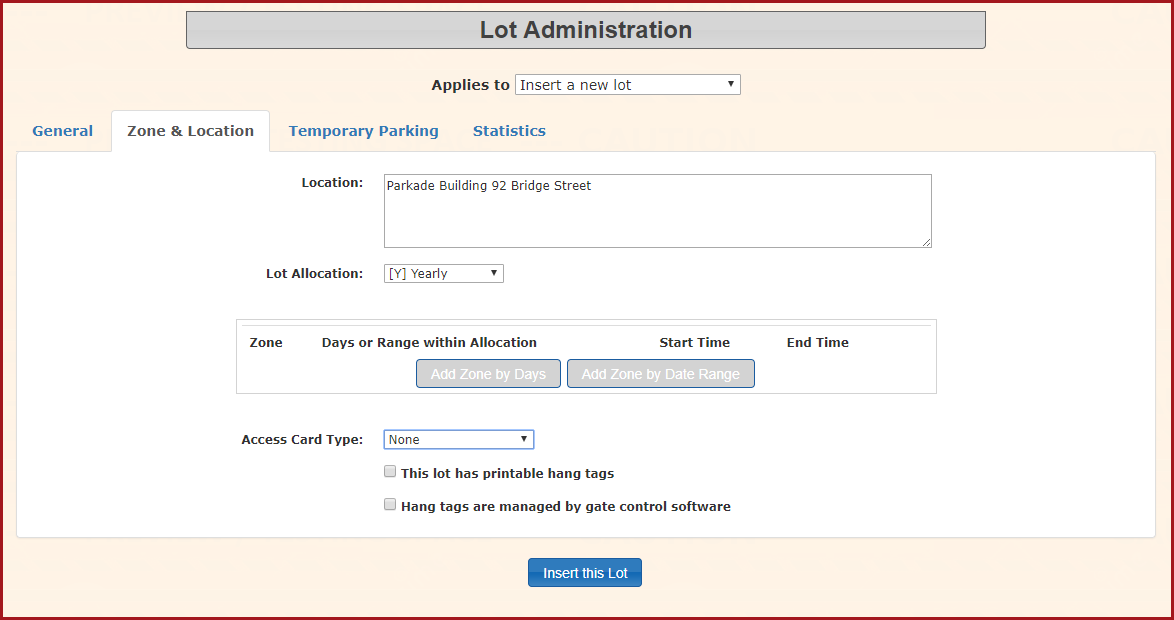
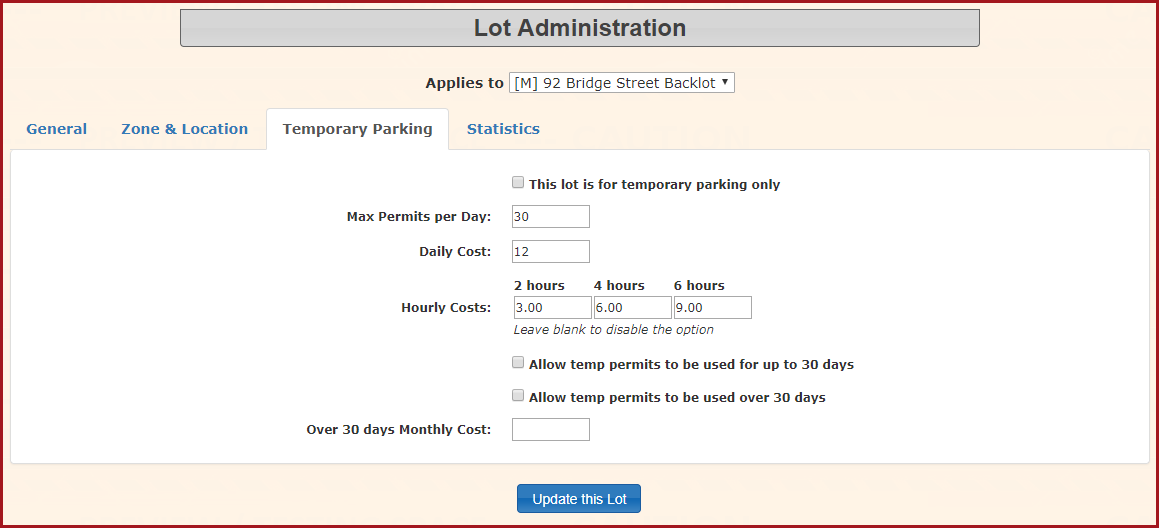
InEnsure theLocation tab, enter a description in the Location field. This information will be visible on the user side when selecting lots.Ensure thatLotAllocationissetNotto yearlyso it will be in sync with the Allocation you set up earlier.Temporary Parking TabTemporary-Only- You can designate a number of spaces as Temporary Parking.In this example we will set up Temp Parking with the following data::MaxEnsurepermitstheper Day: 30Daily Cost: 12.00 (Thislot isthenotmaximummarkedfeeasforTemporaryparking anything over 6 hours.)Hourly costs: 2 Hours - 3.00, 4 Hours - 6.00, 6 Hours - 9.00Only.
-
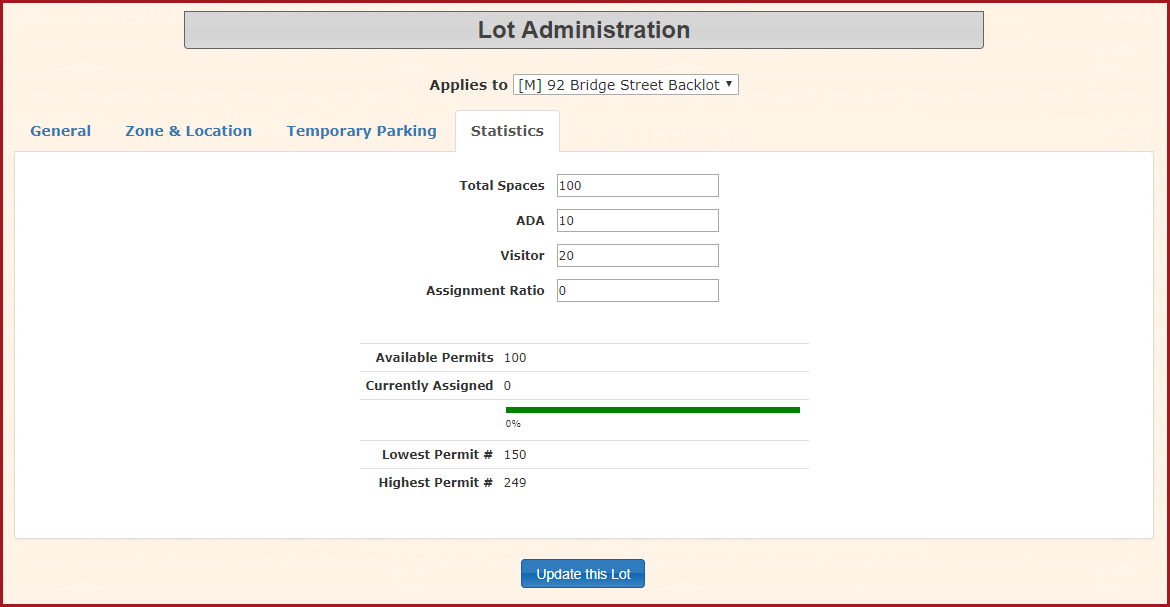
StatisticsAllocateTabPermits- This tab allows the admin to set certain parameters to the lot.:Total Spaces: 100ADA: 10 (These are special needs spots, Handicap, Expectant Mothers, etc.)Visitor: 20
ClickUpdate this LotGo tosave this configuration.Factor 3 - Allocate Permits to the lotWe will now need to set up Permits for this lot. To access the permit setup. Hover overLot Administrationto display the submenu and select> Allocate. - Set a permit
numbersrange1(e.g.,through 10 in one lot520-619) andthenclickthe next lot starts at 11 to 20 for example. -
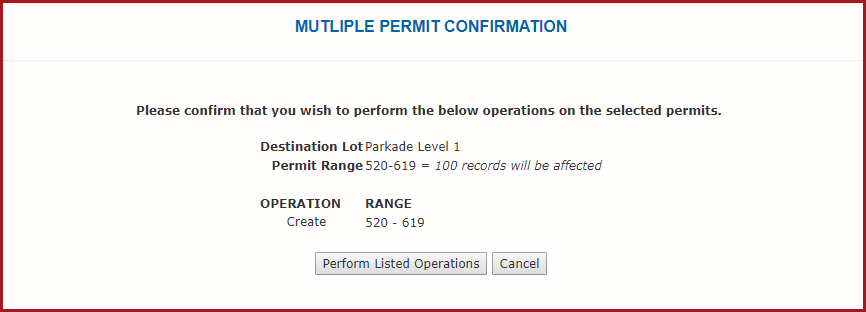
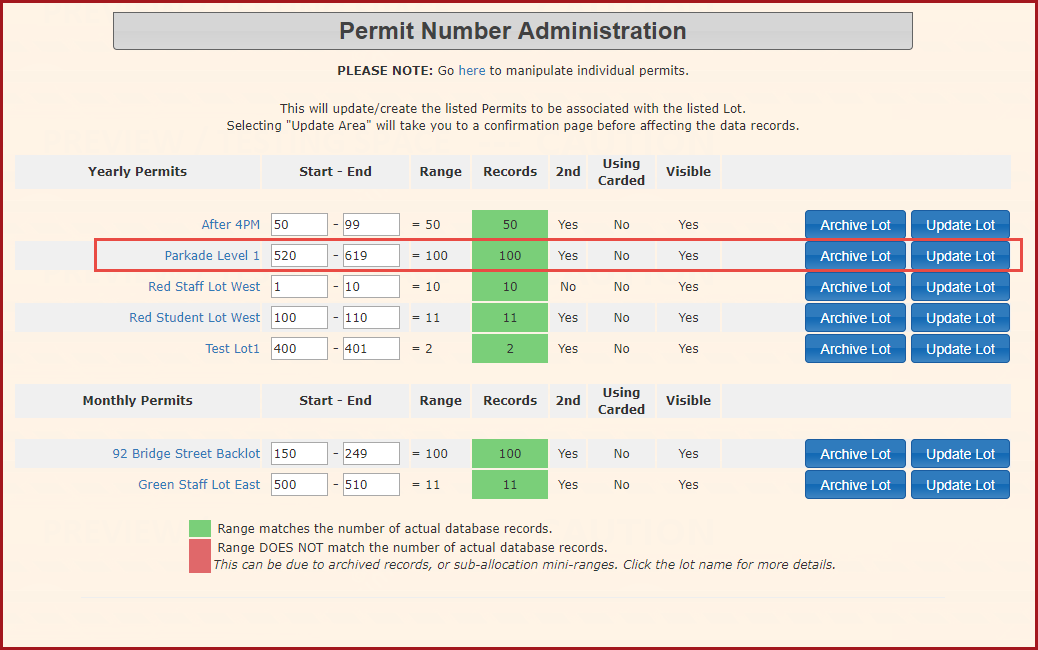
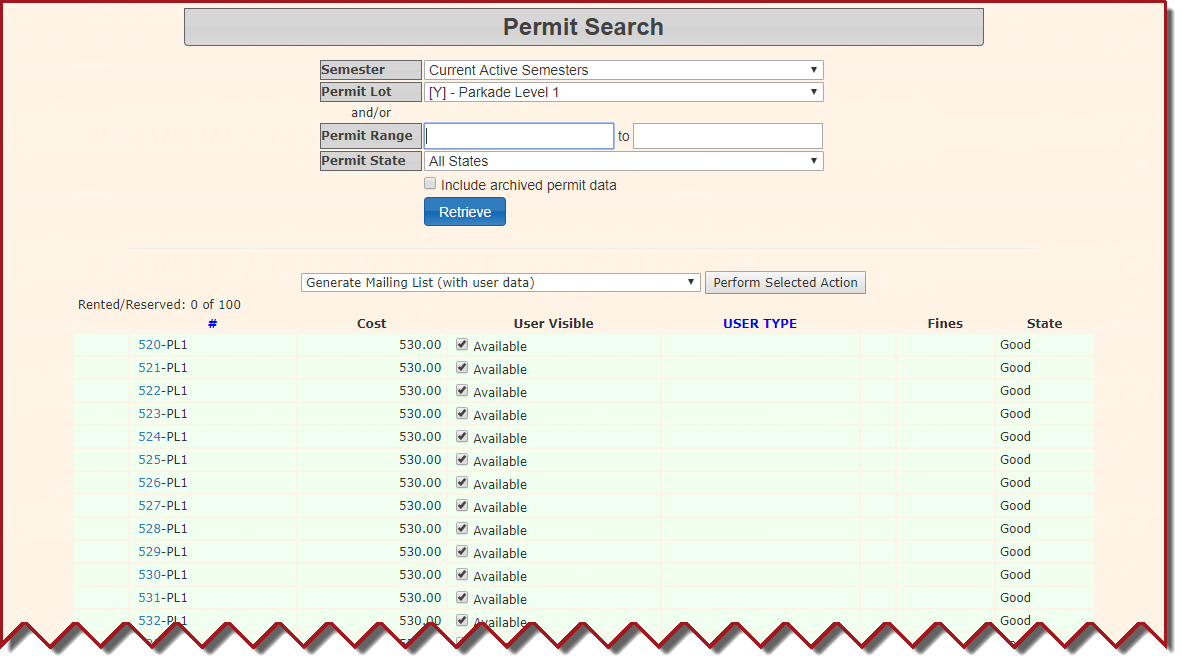
ASetpop up will appear confirming your action.Upon return to theUp PermitNumber Administration page note that the lot now has permit numbers listed.To view the actual permits click on theLot name(Parkade Level 1)This will display a list of permits as shown below.Factor 4 -Sales Window:(originallyknown as Permit Allocation)The first step is - Go to
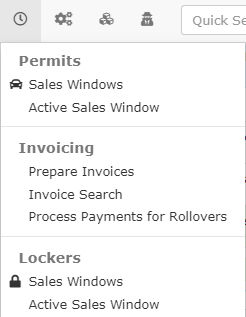
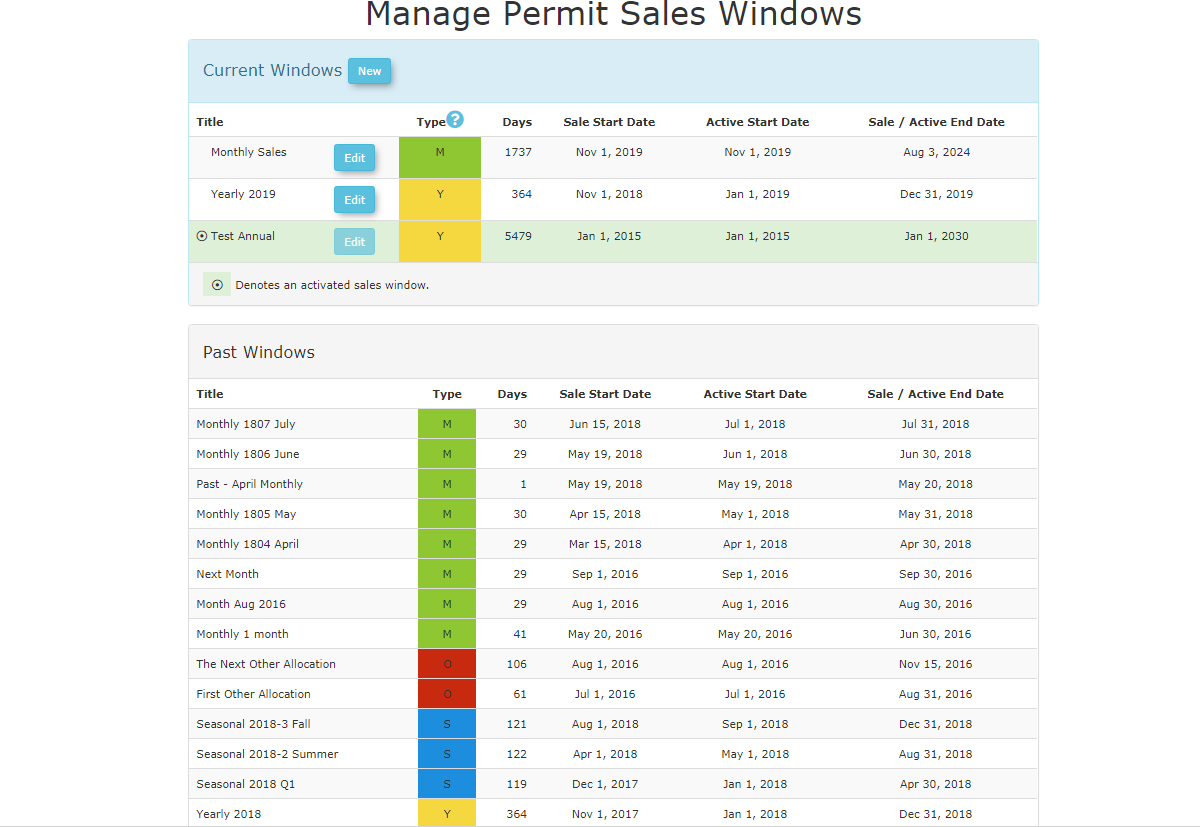
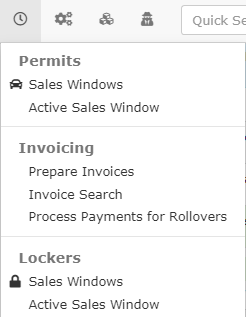
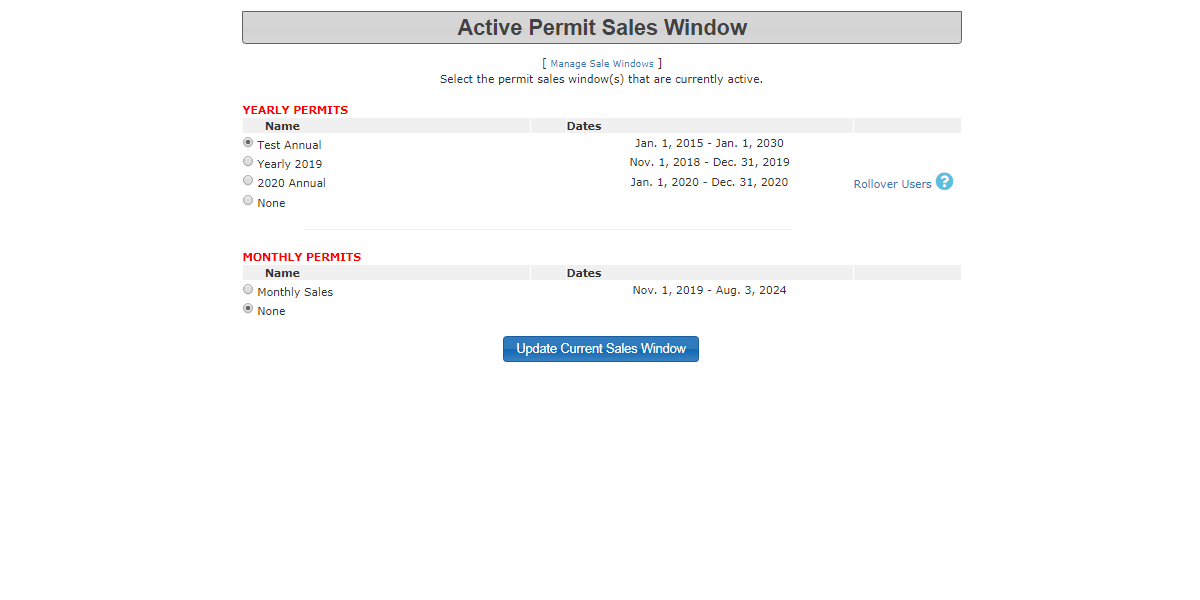
SetAllocationsup Sales Windows. To access> Sales Windowshover overAllocations(The clock icon) and selectSales Windowsfrom the drop down menu.ThePermit Allocation Screenwill open.
.From the Select Allocation drop down select> Insert New Allocation - Set the
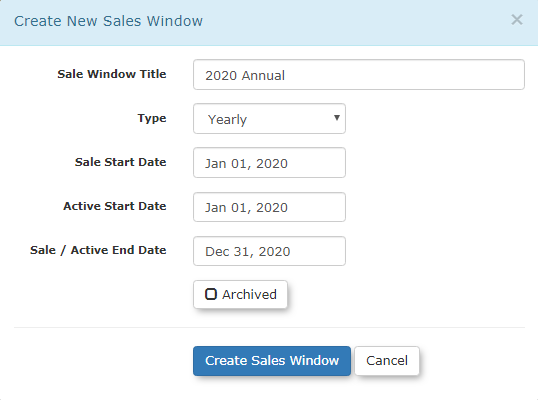
"New"button above the current windows- Allocation
Title:Title,2020Type,Annualand Allocation Type: YearlySale Start: Jan 1, 2020Start Date: Jan 1, 2020- Start/End
Date;Dates,Decthen31,click2020Insert New.
- Allocation
-
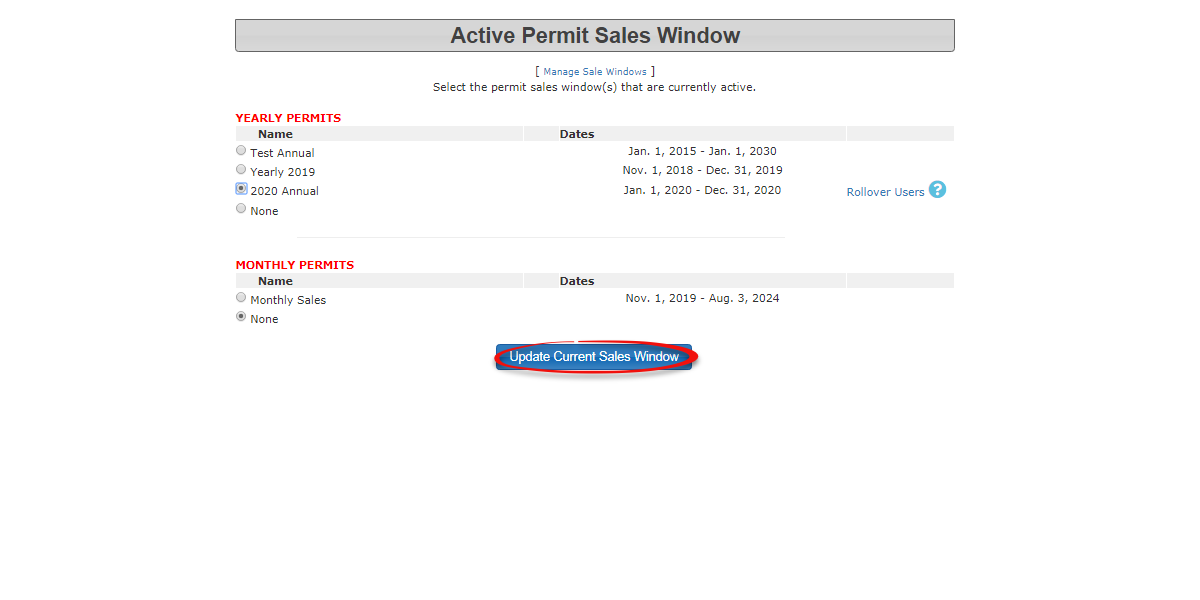
Click onInsert Newto submit the allocation. Your resulting screen should go back to the main Sales Window page showing that Window that you have just created.Factor 5 -Activate the Permit Allocation: -
How To Test That The Lot Is Visible On The User Side.Factor 6 -Match User TypeMust Matchto Lot:UserTypeKeeping - Log in
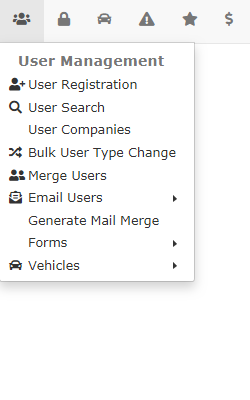
mind this lot is set upasa Full Time Staff lot you will need to log in to the system as a full time staff member to test visibility.Simply put if the user type you are testing does not match the lot user type we set above, the lot will not be visible on the user side.Hover over theUser Managementmenu icon and selectUser searchfrom the drop down menu.Each standard build ofOPS-COMhasa test userby(e.g., John Doe). - Set the
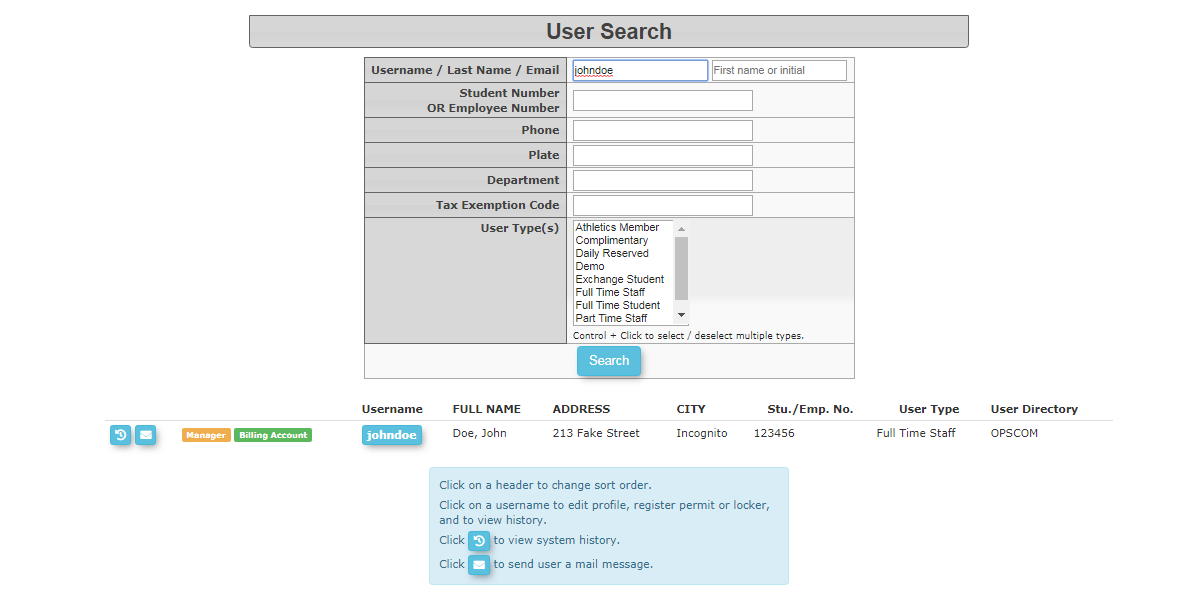
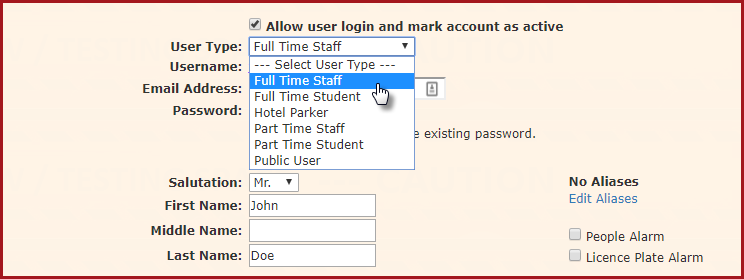
nameUserJohn Doe. We will use this user to test visibility.In the search engine, search for the username:johndoe.TypeTo access johndoe's user profile click on his username.Ensure that johndoe's user type is setto Full Time Staff. - Test lot
asvisibilityaFull Time Stafflot.SelectFull Time Stafffromon the usertype drop downSelect Human Resources as the department type (any department type will do)Click onSubmit Registration Informationfor ProcessingOn the confirmation screen click on Information CorrectOn the next screen click onReturn to Profileside.
Once
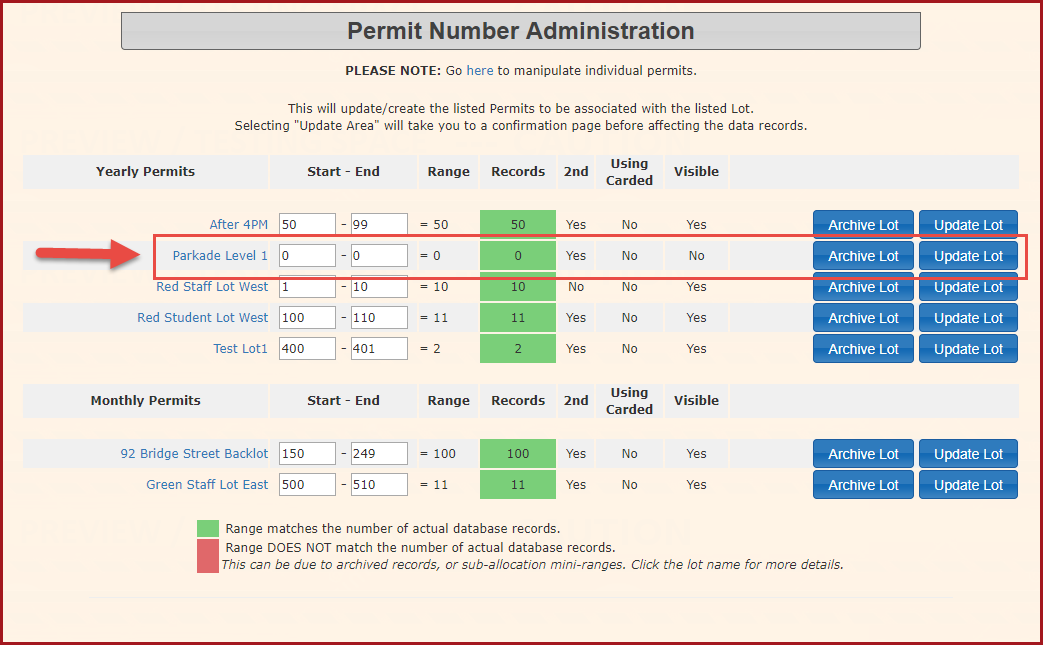
As you can see at this point in the process the lot has been created but there are no permits associated with the lot.
As a best practice, notice there are gaps between permit numbers in as much as we don't have any lots that permit numbers end and start in sequence.That is to say we don't have
Important Note:
Note: It is always a good idea to leave a gap in case the lot changes over time. For example if a series of parking spots were redrawn to allow narrower spots for motorcycle parking, the number of spots in a lot would increase. Having the gap allows the administrator to add permits to an existing lot.
In our example we will be allocating 100 permits to the lot numbered 520 through 619. Once you have updated the start and end range for this lot Click Update Lot.
to
submit
your changes.
In this example we will create an allocation for a yearly lot using the following data. To do that, click
Click the URL to be automatically logged into the system as johndoe
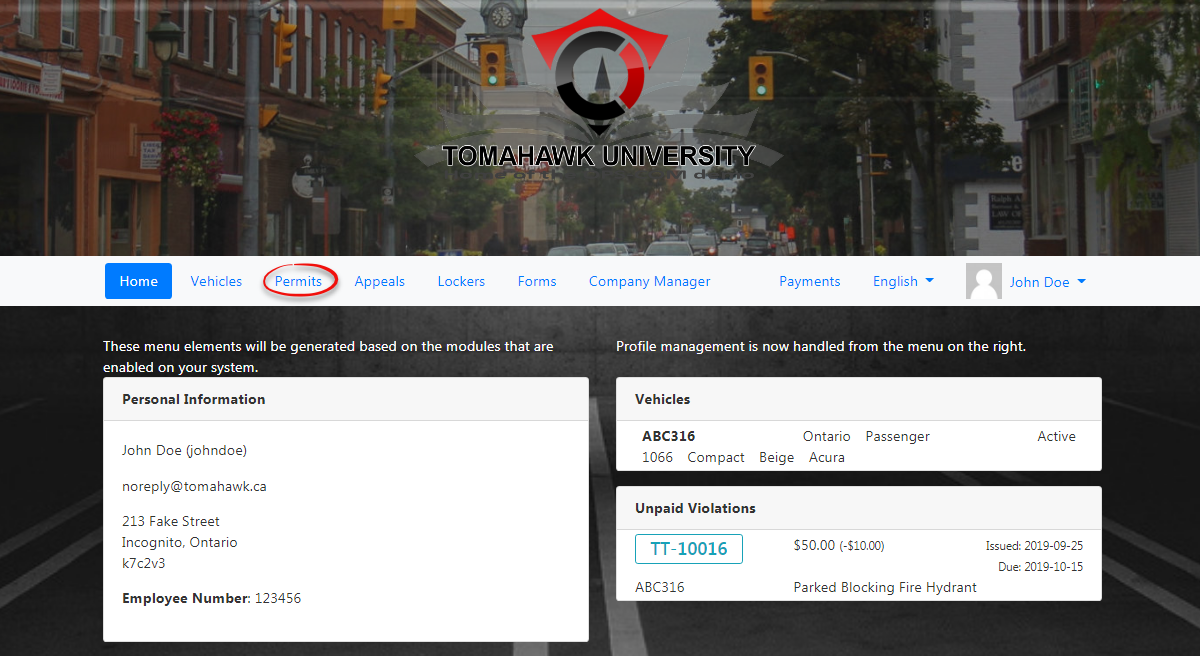
Once you are in the users profile, Click on Permits.
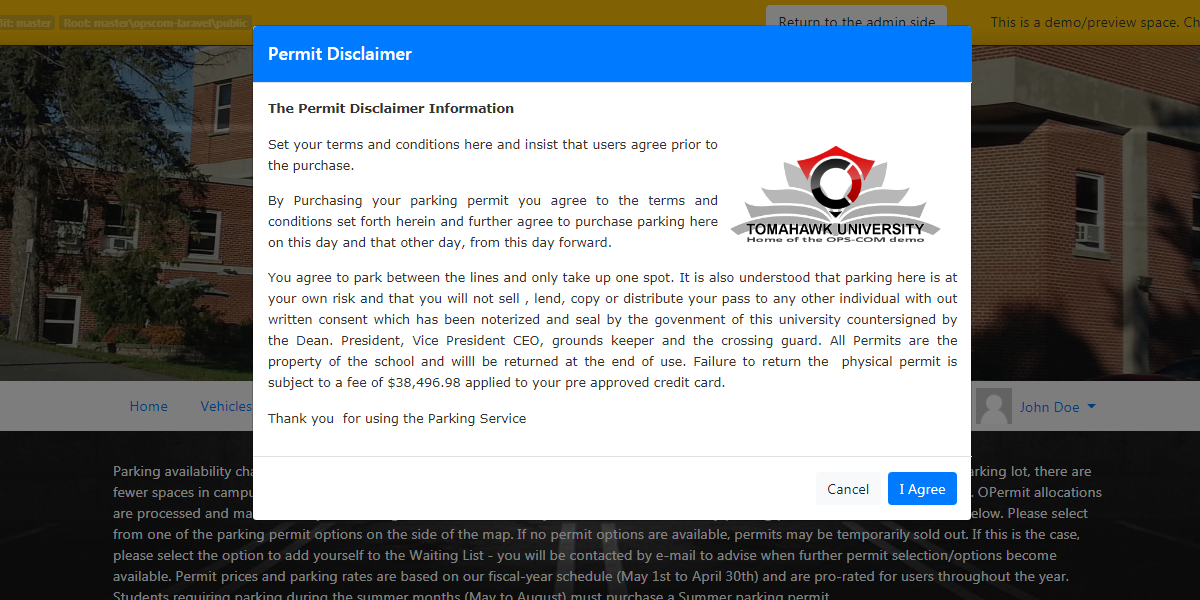
Click I Agree on the Disclaimer page.
Click on Standard Parking to advance to the lot selection screen.
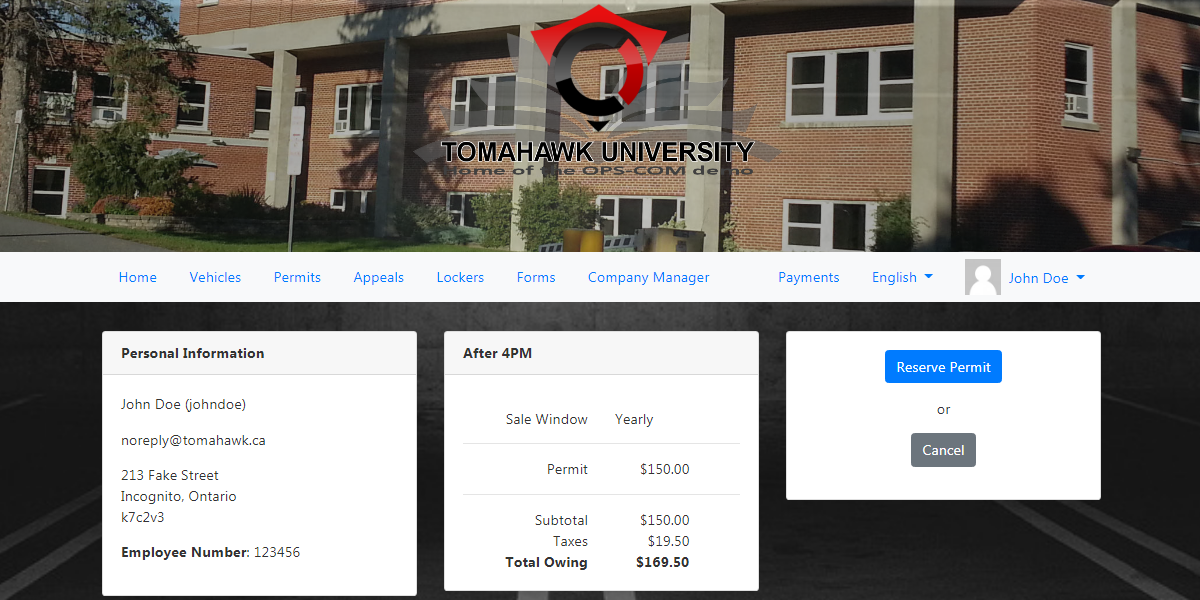
On the Standard Permit Registration Page notice the lot is available to be reserved.

