Plate Capture Using Handheld
Bounding Box is a Guide
For best results especially on non-standard license plates we found if you try to capture the plate too tightly to the size of the box in the viewfinder it has trouble distinguishing between the actual plate number and the other text on the plate.
In the sample below it actually captured the digits on the upper left of the plate.
In this case, an attempt to match the edges of the plate with the bounding region confused the image processor.
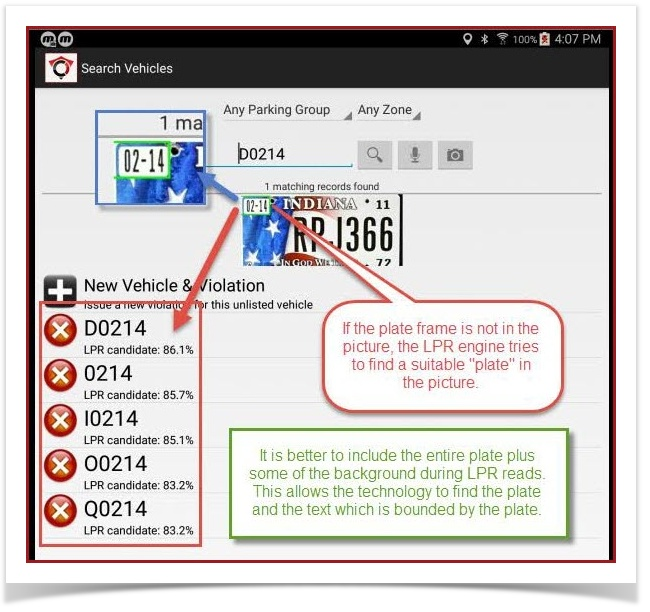
If the plate frame is not in the picture, the LPR engine tries to find a suitable "plate" in the picture.
It is better to include the entire plate plus some of the background during LPR reads. This allows the technology to find the plate and the text which is bounded by the plate.
Step Back and Try Again
We were able to accurately capture the plate by backing up.
In fact we exaggerated the distance pulling back by quite a bit and still got an accurate reading.
Second listed entry is the plate... captured without a problem.
So the lesson here is not to be afraid to back off quite a bit and it may yield better results.
It is quite amazing how small we can make the plate in the viewfinder and still get a read.
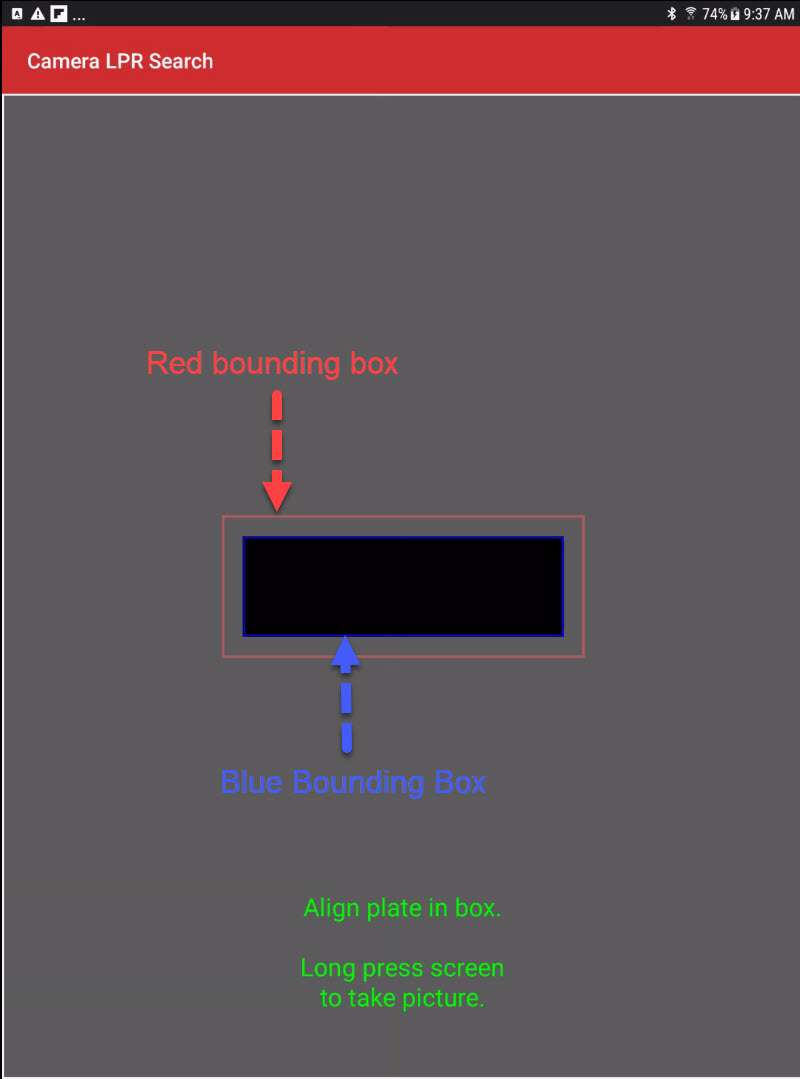
Using the guide boxes
Different devices may have different properties when it comes to the built in cameras. The viewfinder in OPS-COM is designed to help determine if minor adjustments need to be made in order to properly line up a plate to be read into the system.
There are two outlined boxes to help align the plate. The Red box indicates the maximum area you wish to view the plate in. If the plate extends outside of the red area it will not be read. It is advisable to keep the plate inside the blue box to ensure it does get read properly. As discussed above the plate can actually be captured at a very small size in the viewfinder.
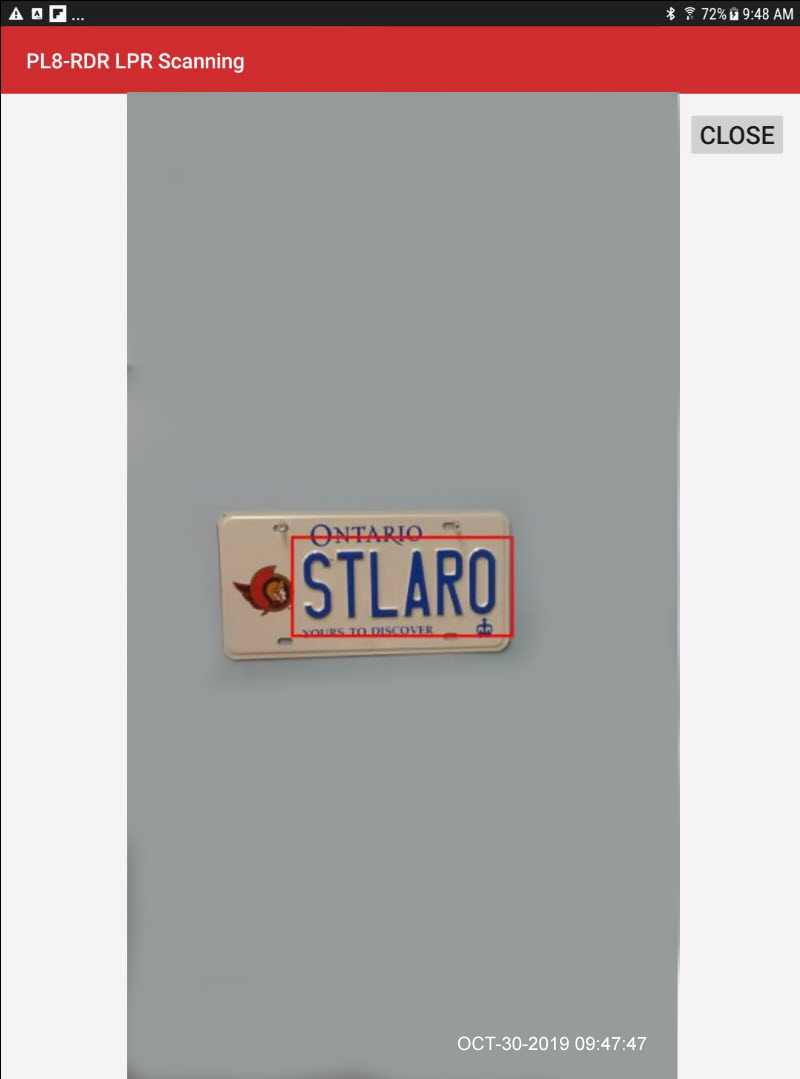
Here is an example of a plate read. This is a perfect example of focusing the view on the plate number, excluding the Logo on this vanity plate.

Once the plate is captured the screen goes back to the Plate read screen.

The image of the plate can be tapped to see a full context image. The red bounding box represents where the blue bounding box was on plate capture.
You can see the relationship between the viewfinder screen and the actual image captured. With some devices the plate looks centered but the actual shot comes out off center. This context image will allow you to see any offset so you can adjust the centering when capturing a plate. Note the contextual image is date stamped as well.