
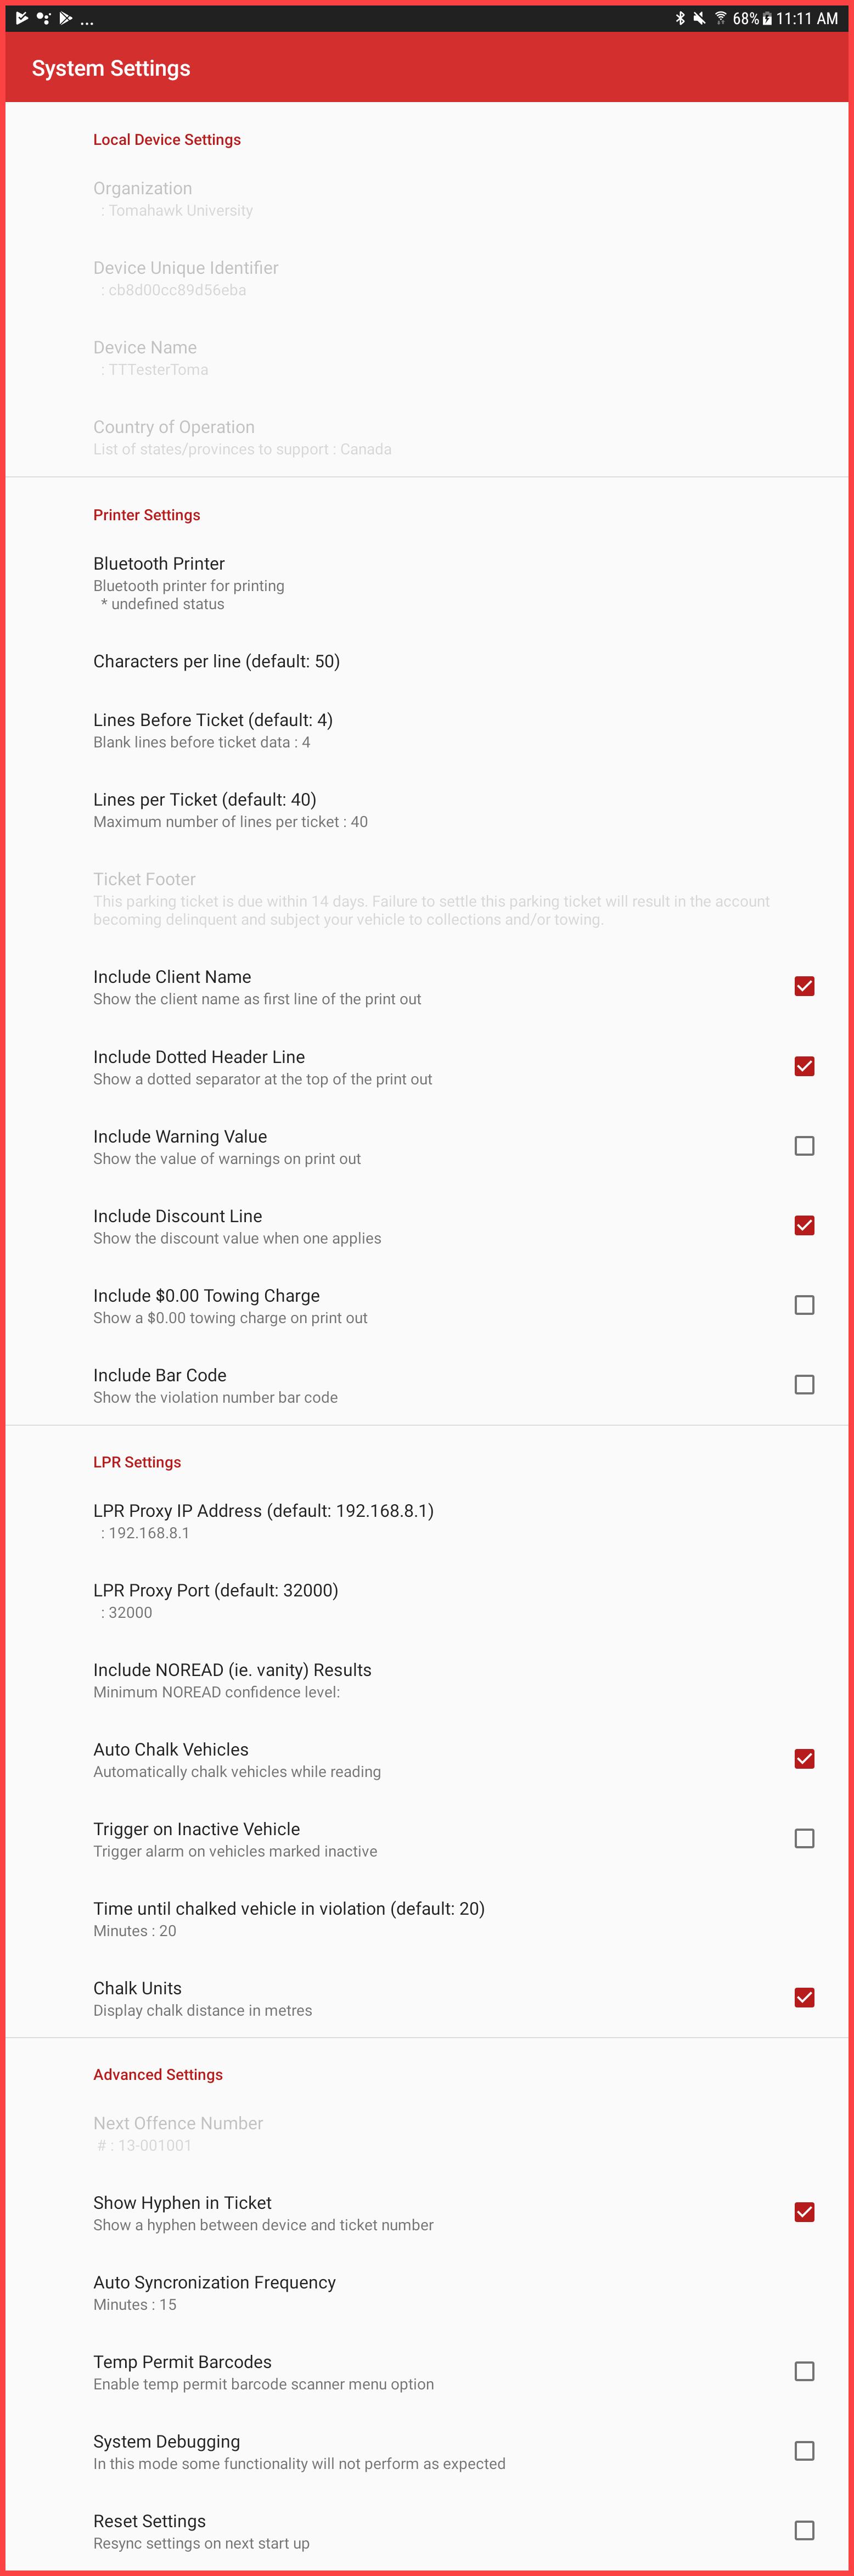
System Settings
Local Device Settings
The first section of the System Settings screen contains device information under the Local Device Settings. All of these items are set on the admin side.
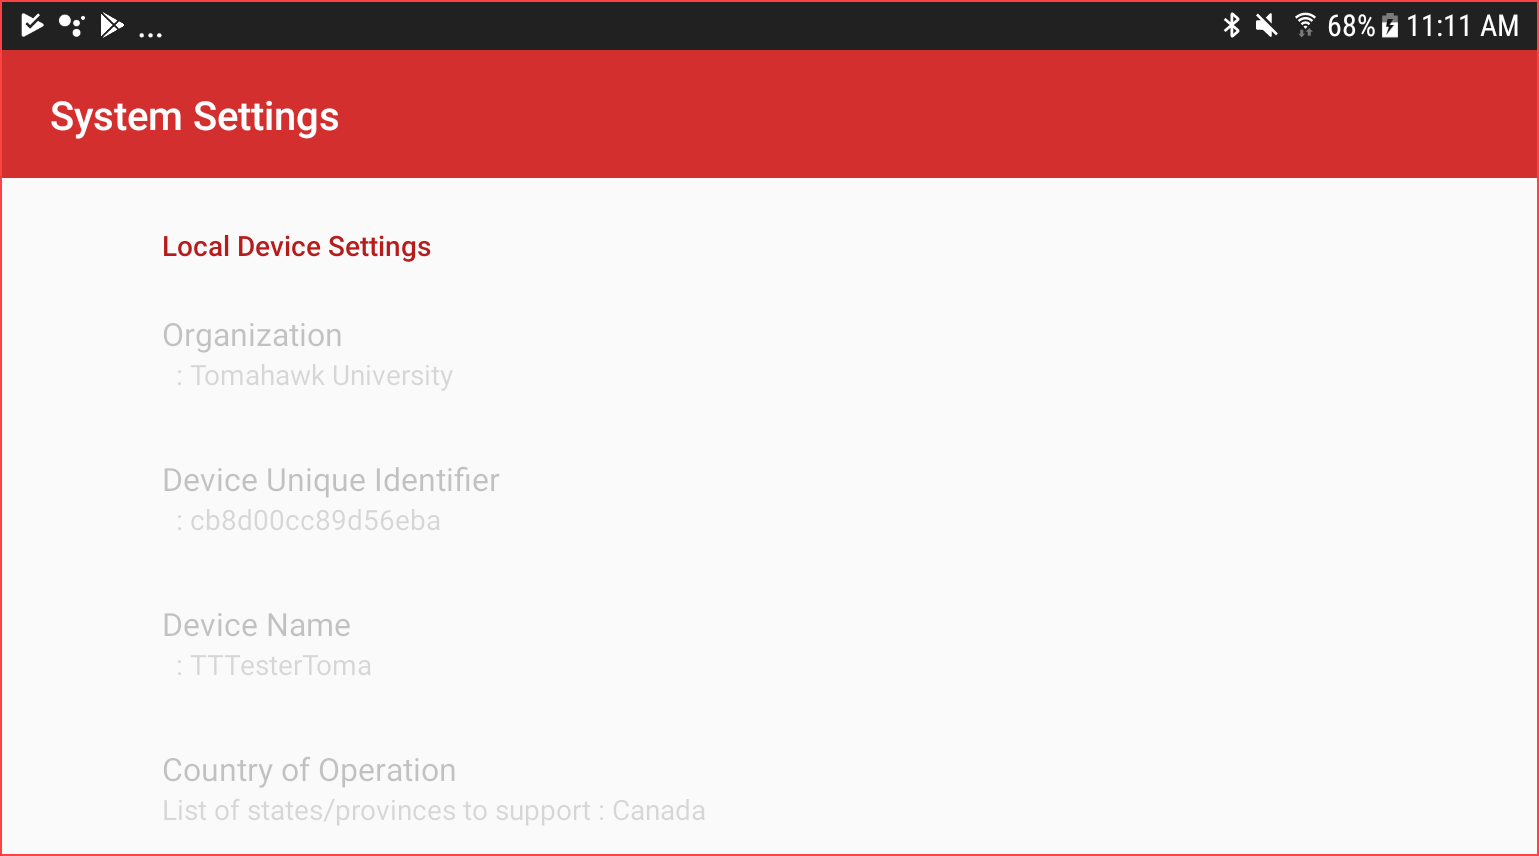
Printer Settings
The next section is directed at Printer Settings: This section sets what printer is used and offers several options as to what prints on the ticket.
Tap on each item to edit it's settings.
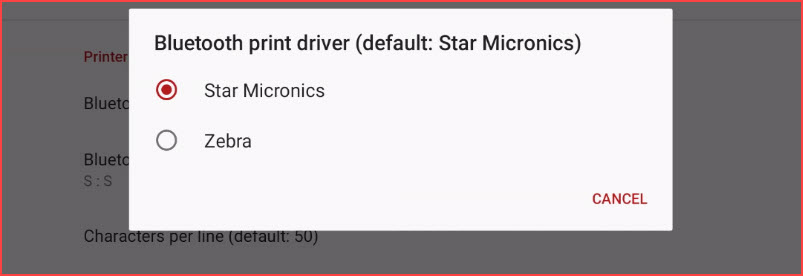
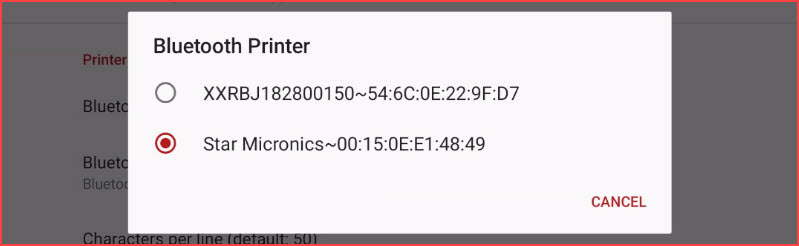
Bluetooth print driver (default: Star Micronics): Select the printer model you plan to use. (This must match what is selected in the Bluetooth Printer setting.)
Bluetooth Printer: Select the printer model you plan to use. (This must match what is selected in the Bluetooth printer driver setting.)
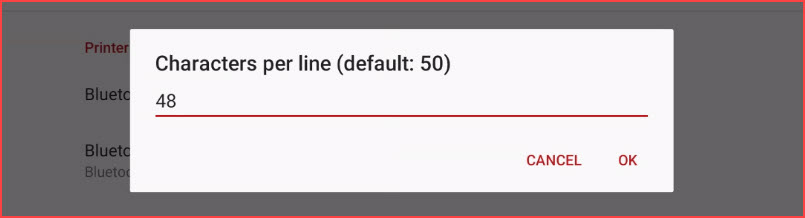
Characters per line: Indicates the number of characters across the width of a printed ticket.
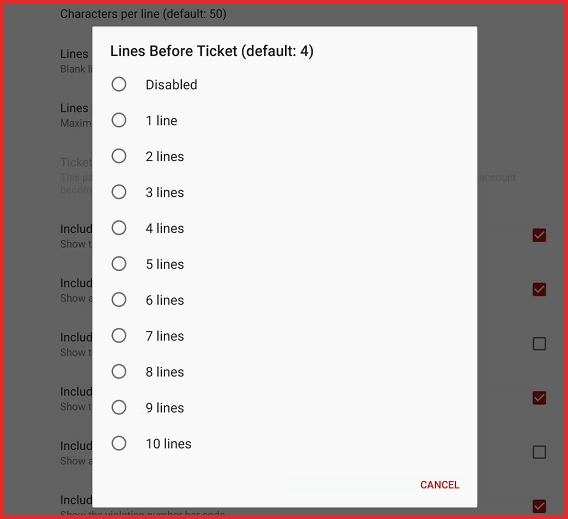
Lines Before Ticket: Indicates the number of blank lines before the first line of text is printed on the ticket.
There is already a buffer zone where the company logo is printed which allows further adjustment to this buffer zone.
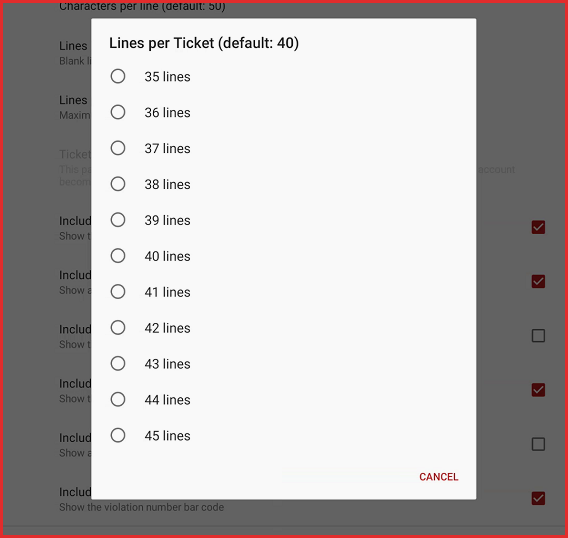
Lines per Ticket: Sets the maximum number of printed lines on the ticket.
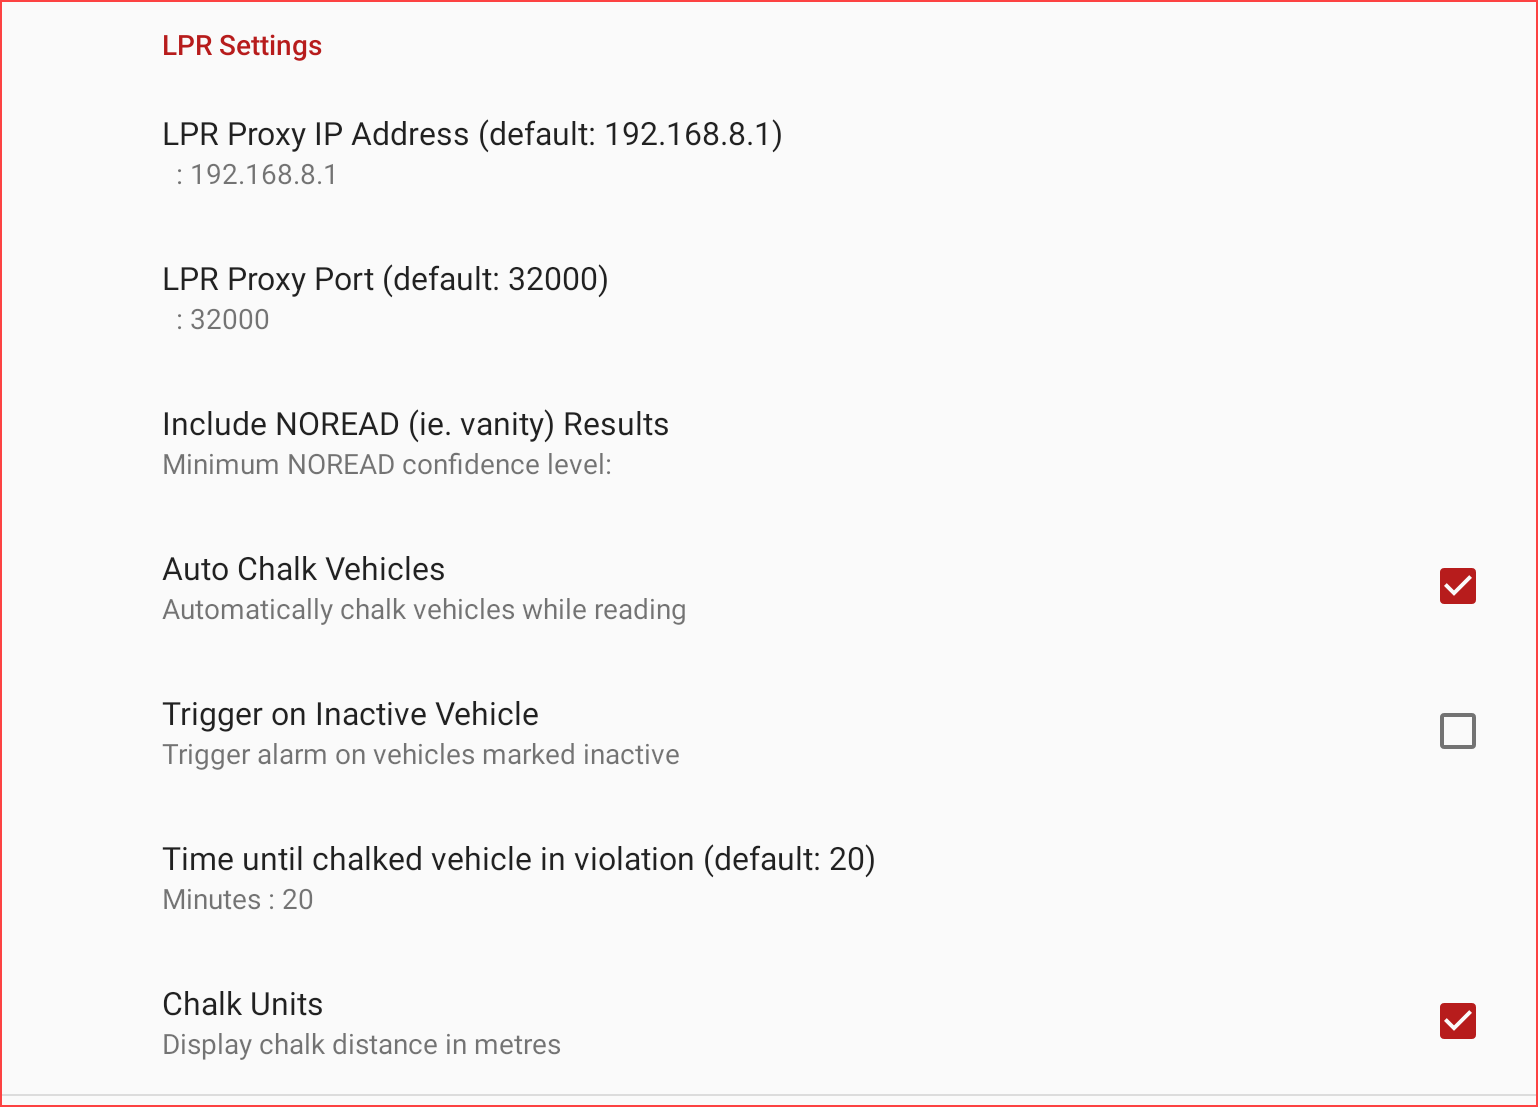
LPR Settings
LPR Settings are used to set up a camera, enable chalking, and other chalking information related to the LPR device connected.
Important Note
To be able to use LPR on a handheld unit you must first toggle the functionality on in System Settings on the Admin Portal.
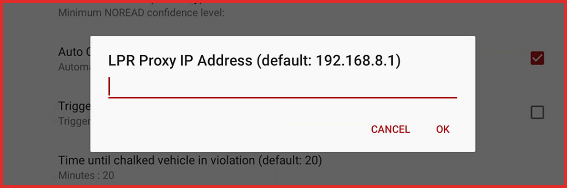
LPR Proxy IP Address: Enter the LPR Proxy IP Address (The default IP is 192.18.8.1 which is used to connect to a PL8RDR)
LPR Proxy Port: Enter the port number for the LPR Proxy Port (The default proxy port is 32000)

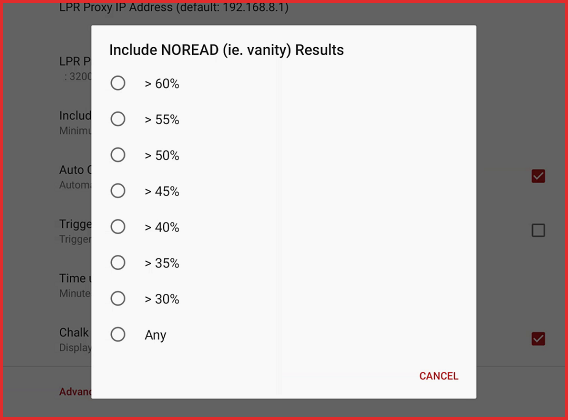
Include NOREAD Results: Set the level of NOREADS that you wish to include.
For example setting the level greater than 50% would only include reads with a 50% or greater read score.
Auto Chalk Vehicles: Toggles auto chalking of vehicles while reading plates.
Trigger on Inactive Vehicle: Toggle whether or not you are sent an alarm when you scan a vehicle marked as inactive.
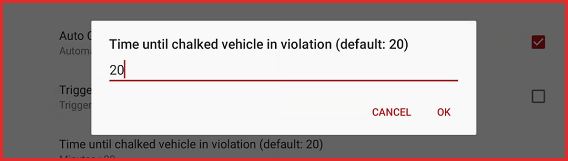
Time until chalked vehicle in violation: This feature allows you to set the amount of time in which it takes for a vehicle that is parked illegally to be flagged as a violation.
Chalk Units: Toggles whether or not you display the virtual chalking information in meters.
Advanced Settings
Advanced settings are used to adjust ticket formatting, offence details and add barcodes.
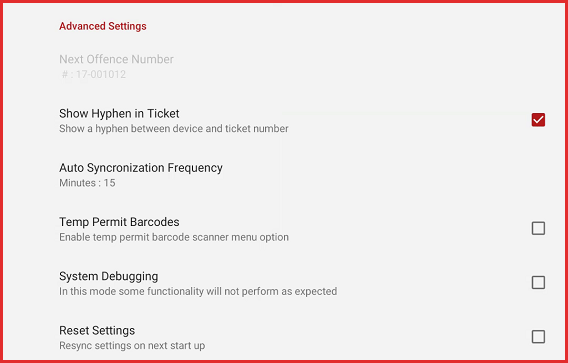
Next Offence Number: This number is set on the admin side. It would be set to the next ticket number you wish to apply to the next offence written. (Next ticket number)
Show Hyphen in Ticket: Toggles the option of whether or not there is a hyphen between the device ID and ticket number.
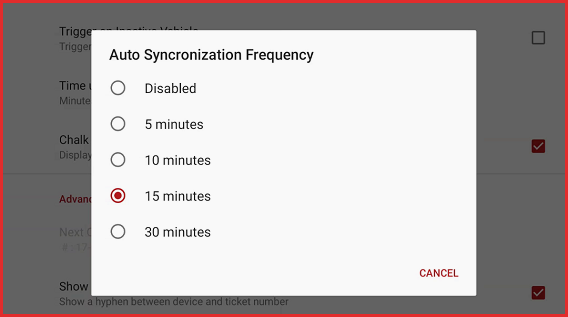
Auto Synchronization Frequency: This sub-menu allows you to change the amount of time between each auto synchronization of data from the handheld and the database.
Temp Permit Barcodes: Toggles on or off the Temporary Parking Barcode Scanning Function.
System Debugging: Toggle on to put the device into debug mode for testing.
Reset Settings: Re-syncs the settings with information on the Operations Commander in order for you to return to default settings.