Accepting a Student Account Payment from the Admin Portal
Accepting a
The Student Account Payment feature allows administrators to process transactions by billing a user's internal institutional account directly from the administrative portal. Its primary purpose is to seamlessly facilitate purchases, such as permits or lockers, for students who pay their parking fees through their central student tuition or university finance accounts. This article is intended for OPS-COM administrators.
Setup and Configuration
ToBefore Beginyou letscan selectaccept a student account payment, ensure this specific payment type has been created and enabled within your global payment settings.
For detailed instructions on configuring new payment methods, please refer to the Managing Payment Types page.
Using this Feature
Administrators can guide an unpaid item through the checkout process using a student's central account in just a few steps. The following example demonstrates this process using a permit purchase.
-
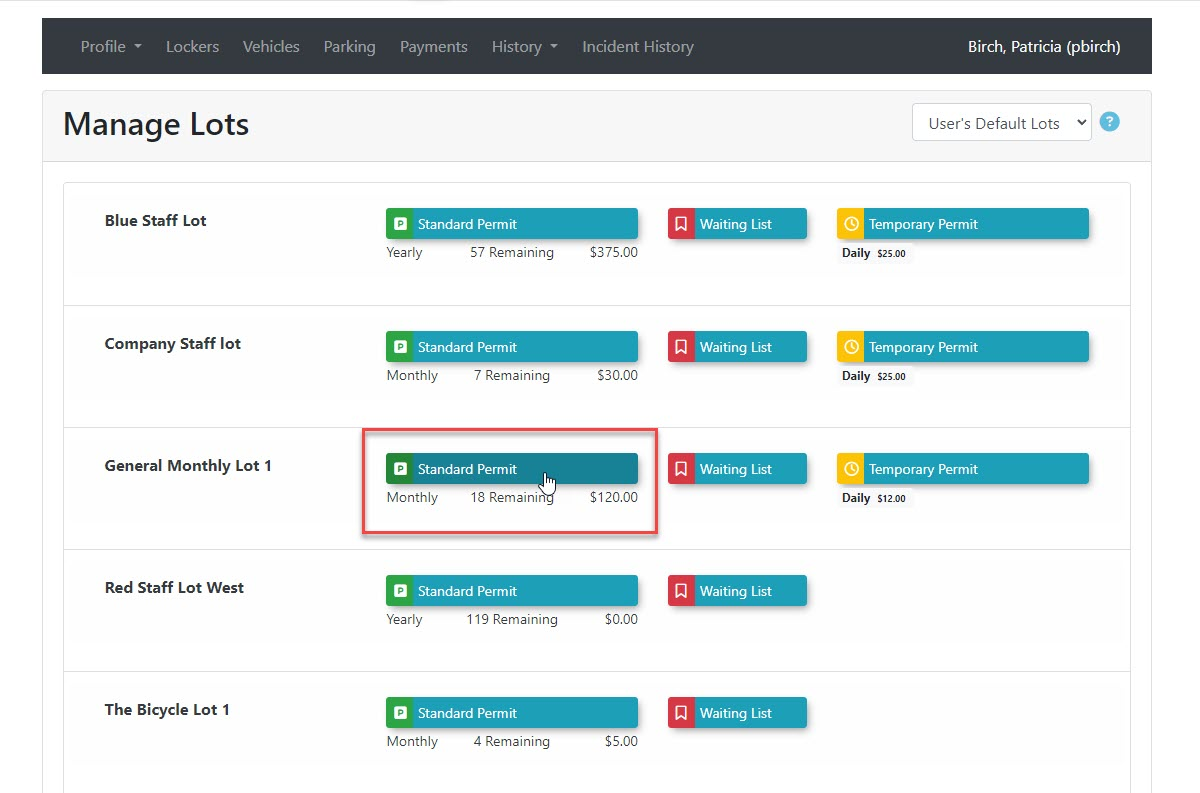
Navigate to
assignmentpurchase. In this casetheadminspecificisuser'sassigning a permit to a studentprofile andtakinginitiatepaymenttheviapurchaseStudentorAccount.
process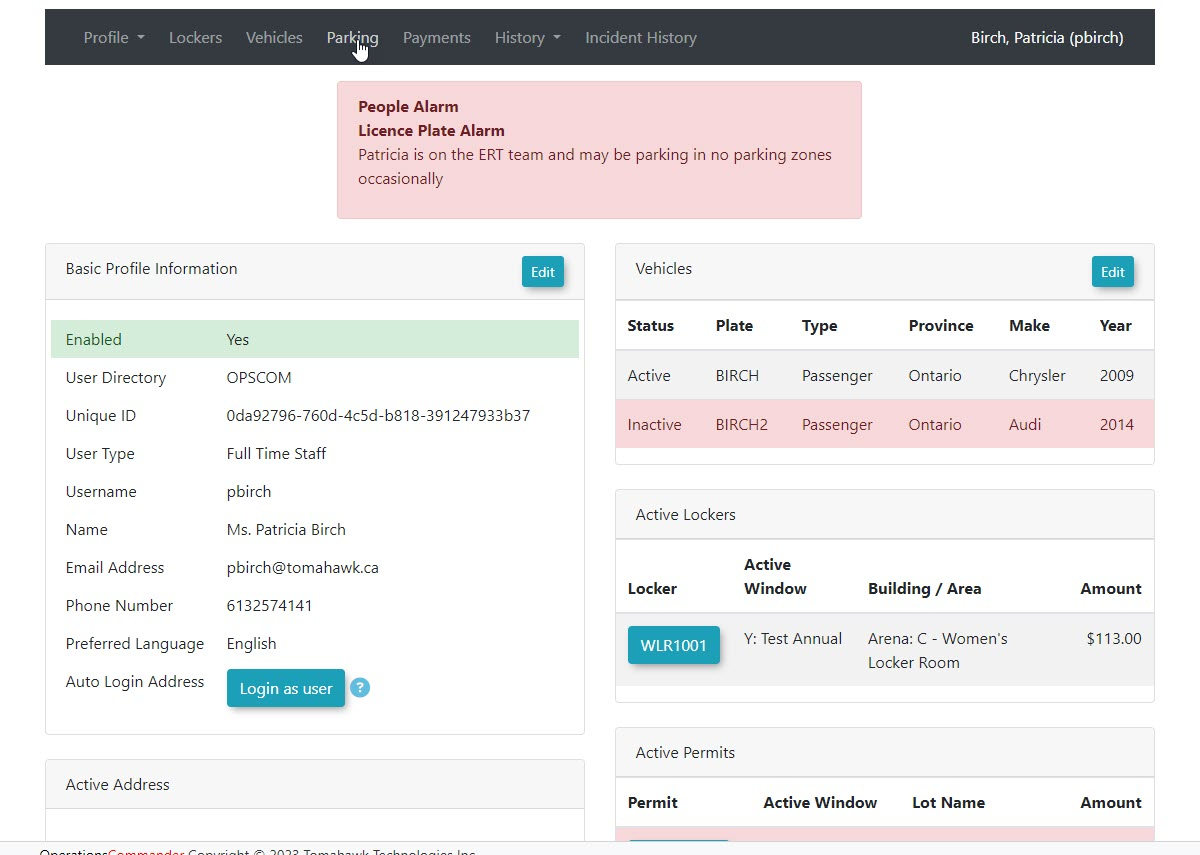
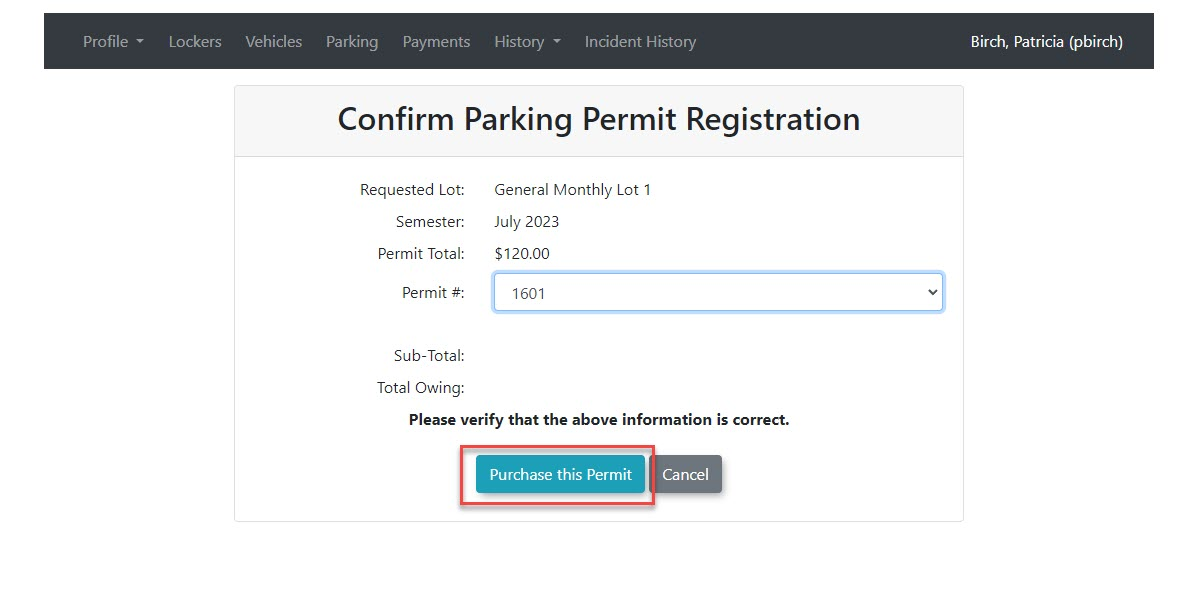
In(e.g.,this example we are purchasingselecting a permit in the General MonthlyLot for Patricia Birch.Lot).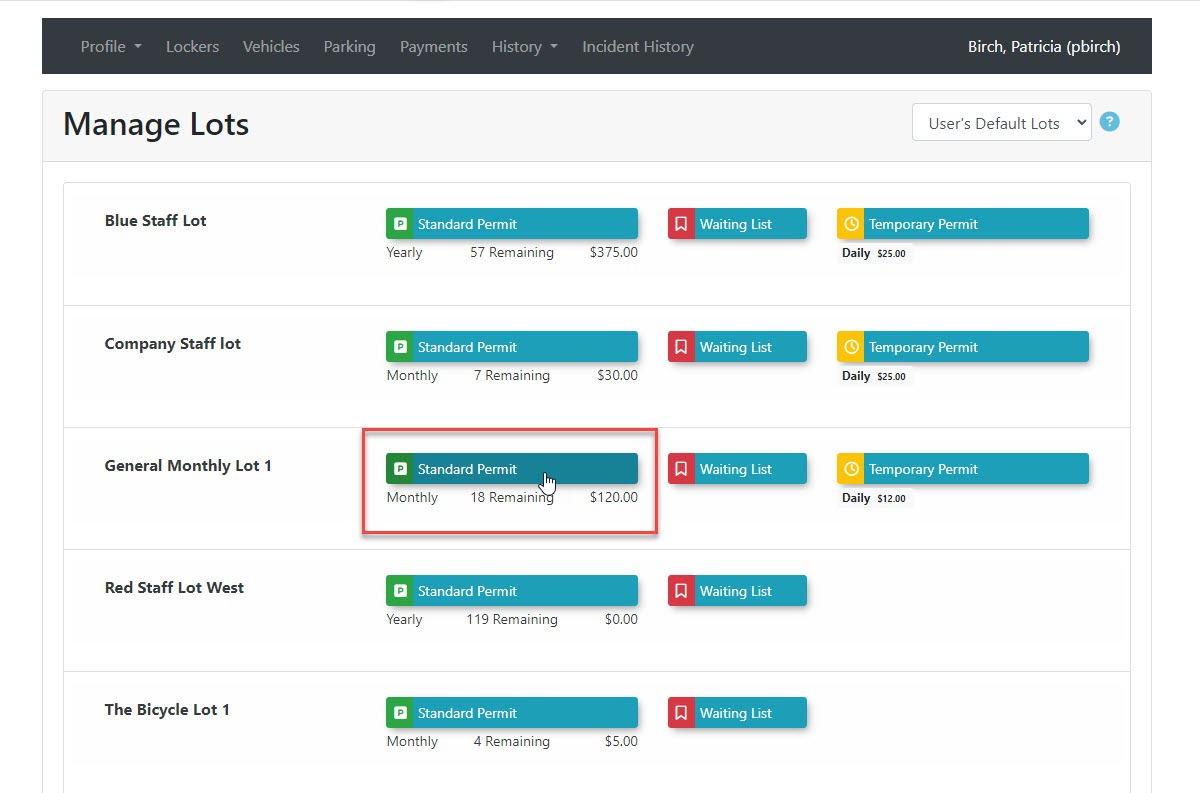
-
OnceChoose thelot has been selected, the admin can then choose aspecific permit to assign to the user. -
Click
onthe Purchase this Permit button to continue.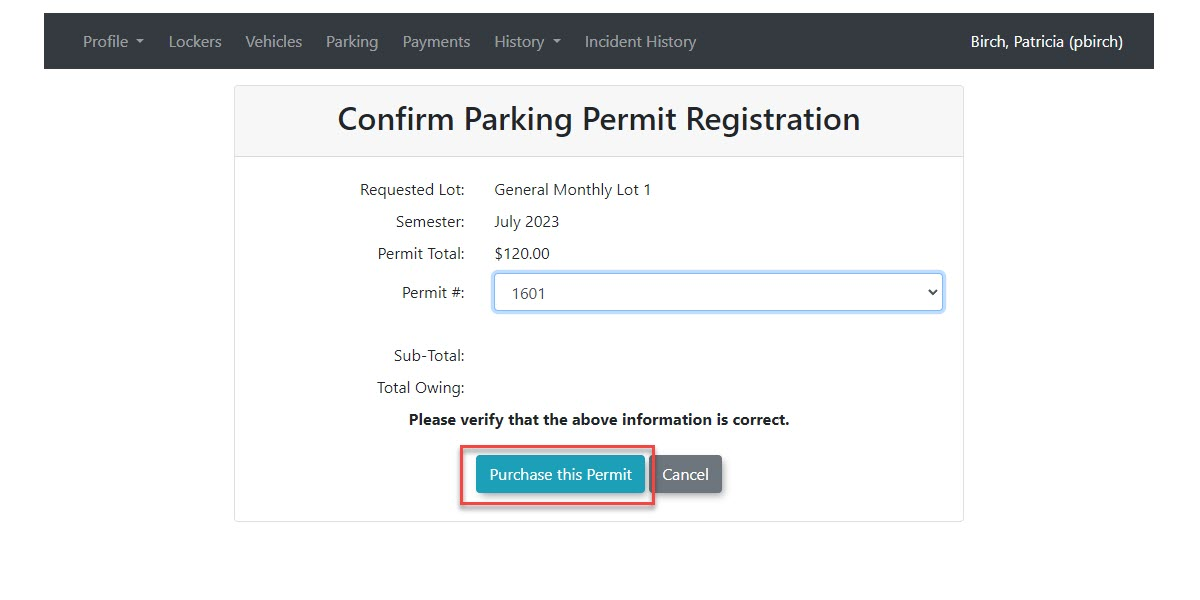
-
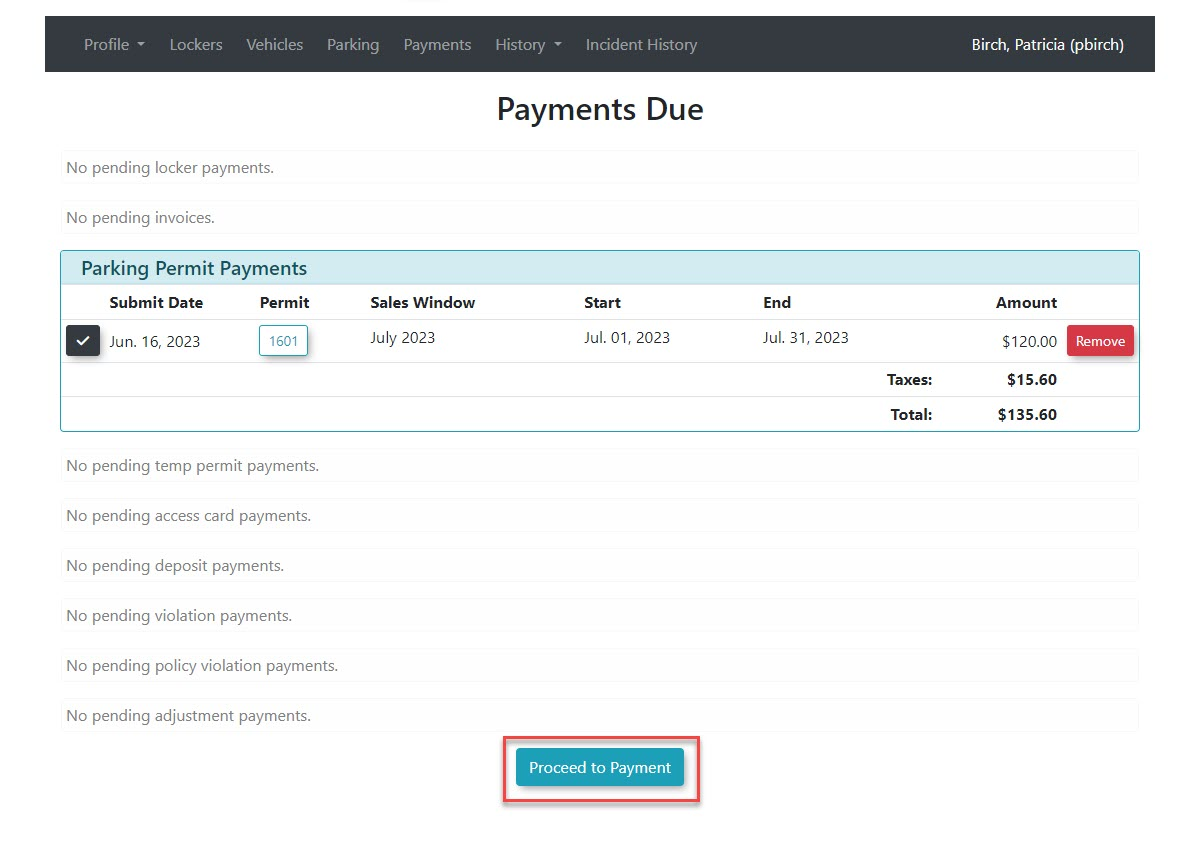
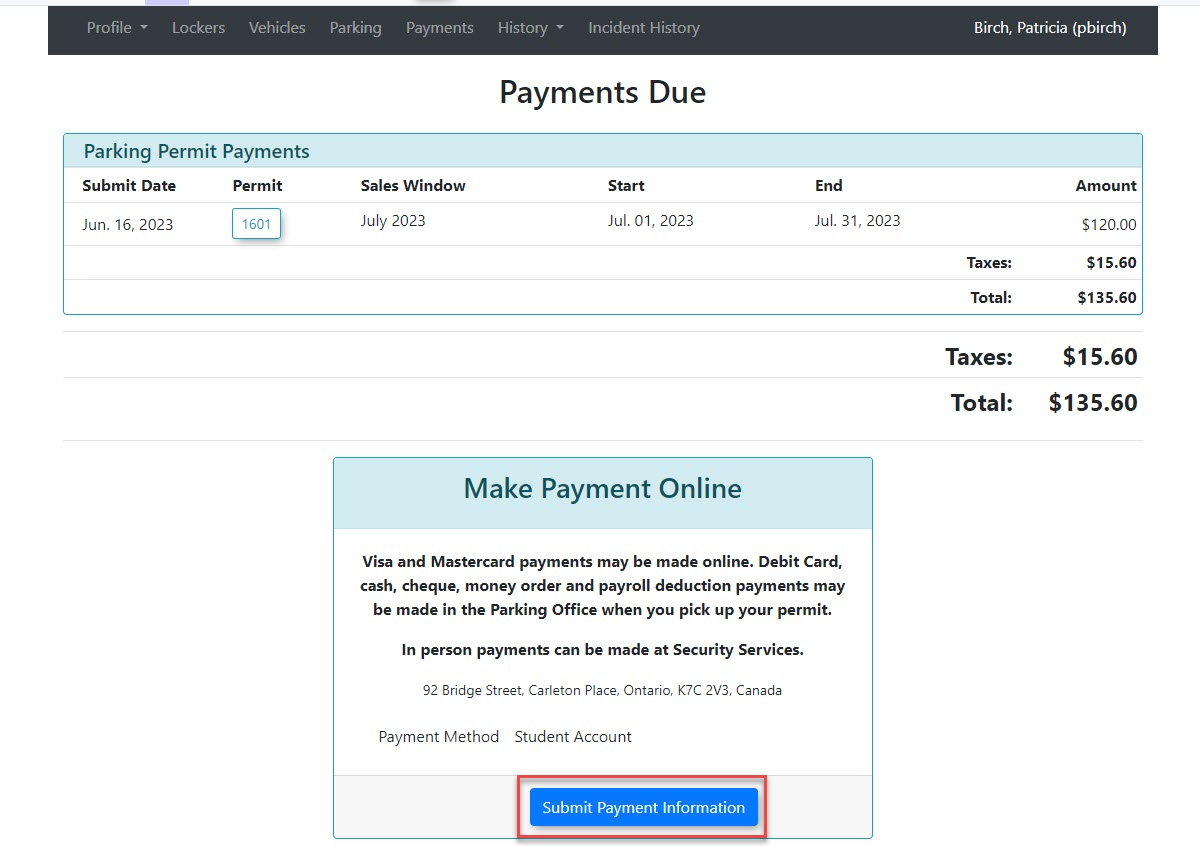
The payment due page will appear.Clickonthe Proceed to Paymenttobuttoncontinue.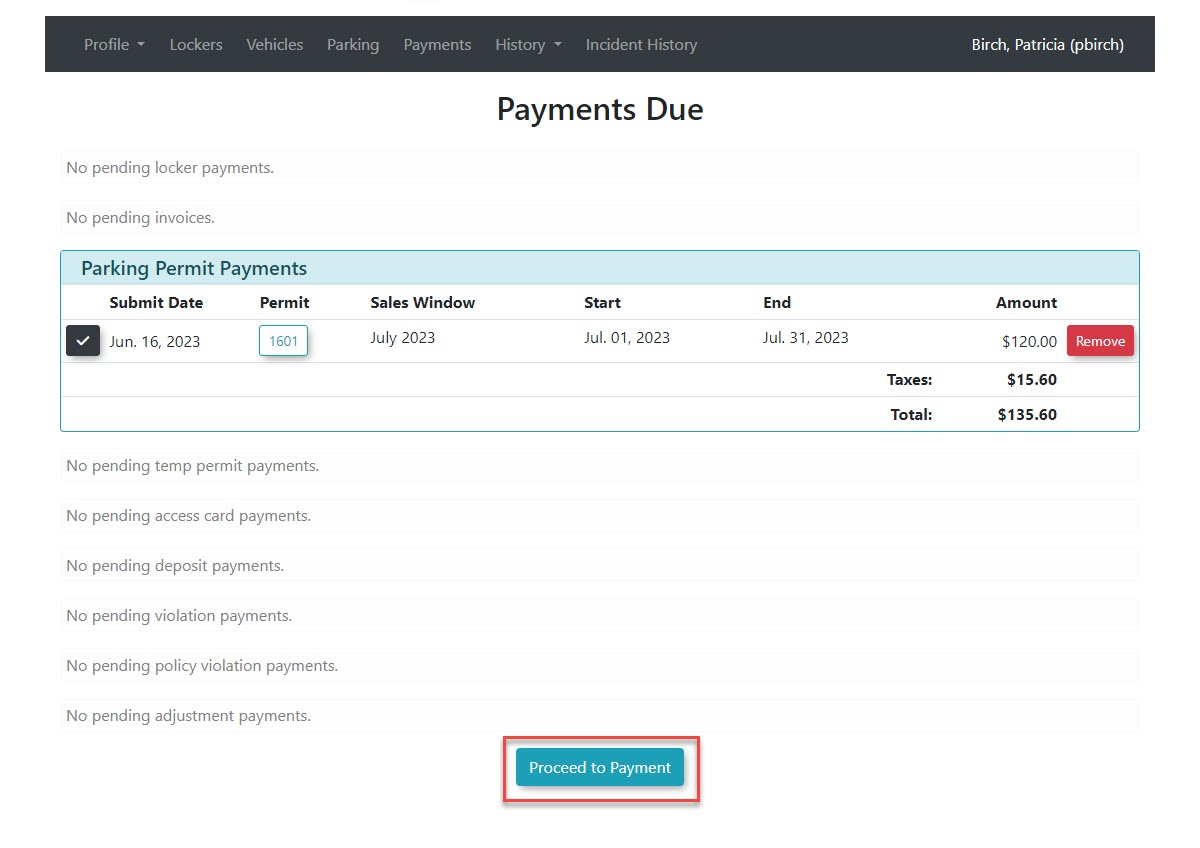
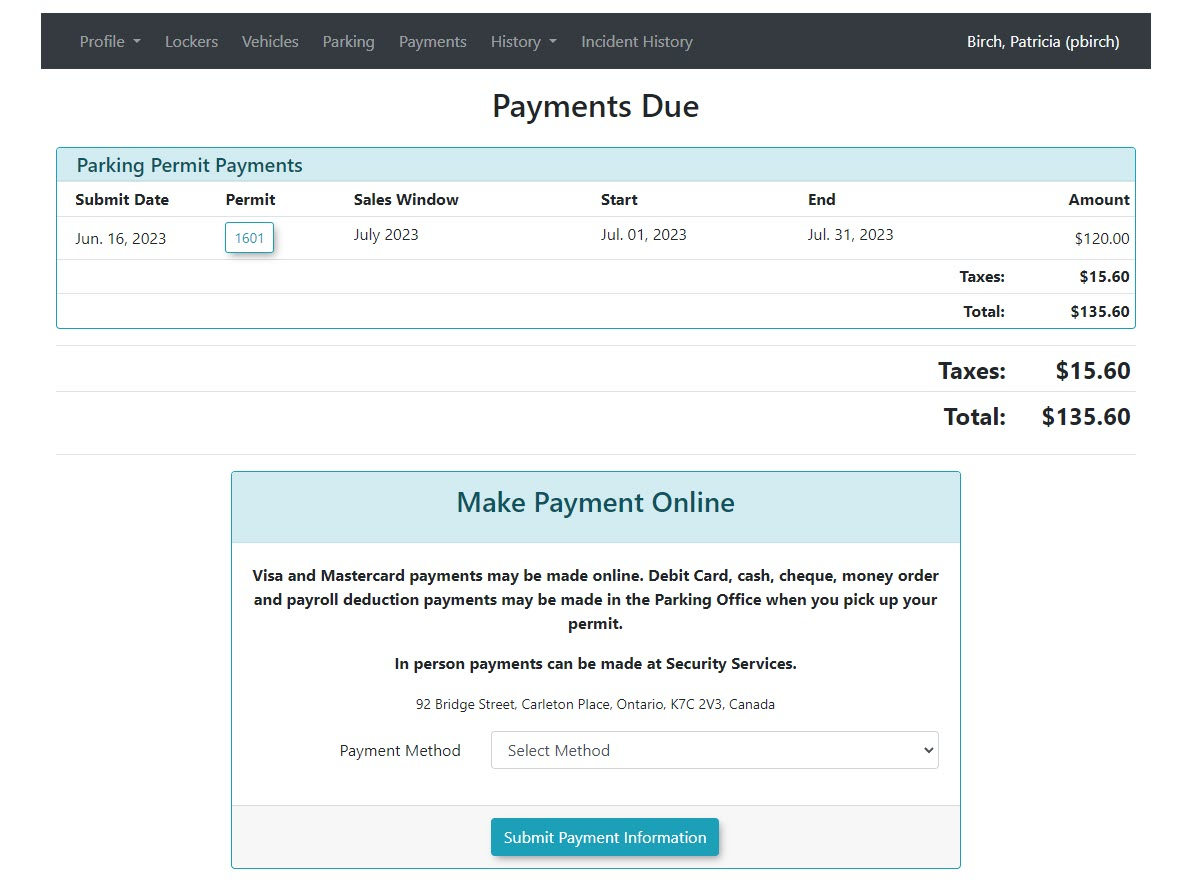
The screen will refresh andon theadminsubsequentwillpaymentbeduepresented with thePayment Selectionsection of the process.page.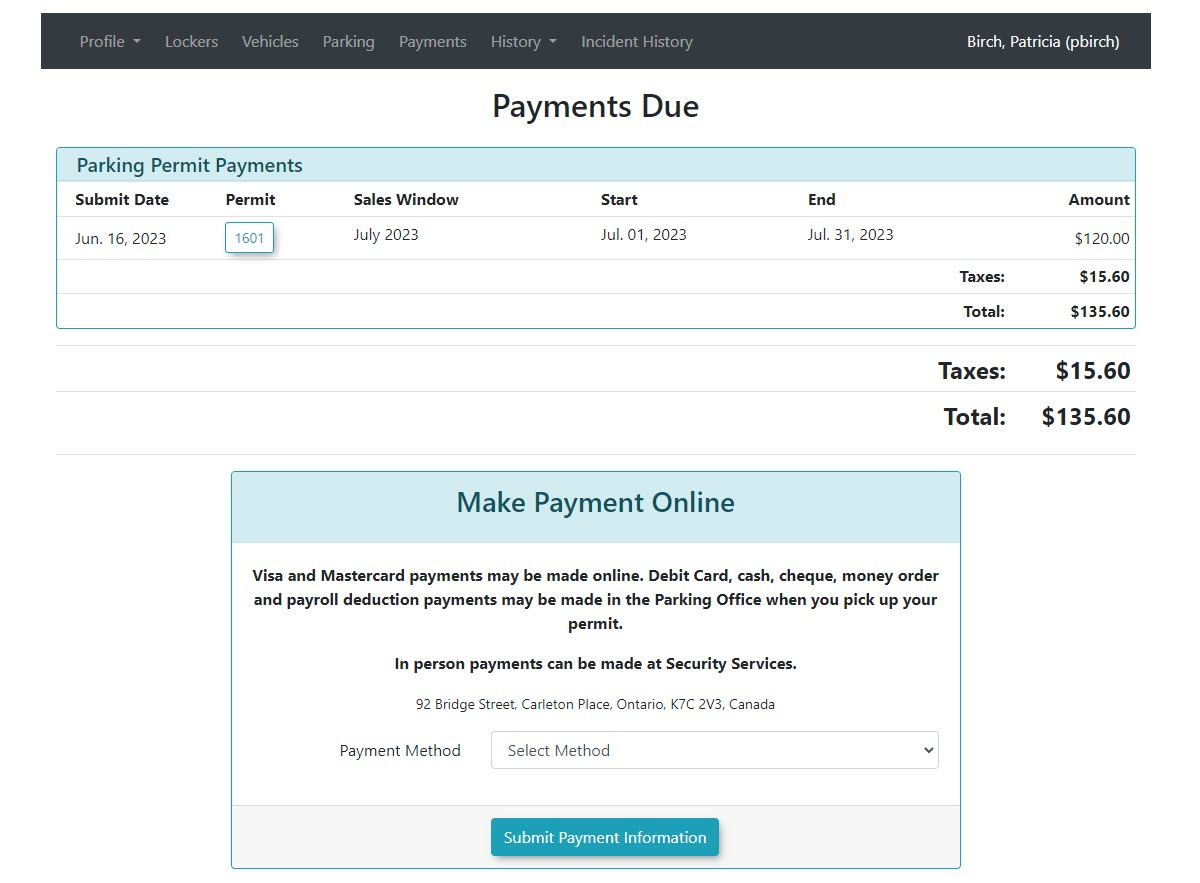
-
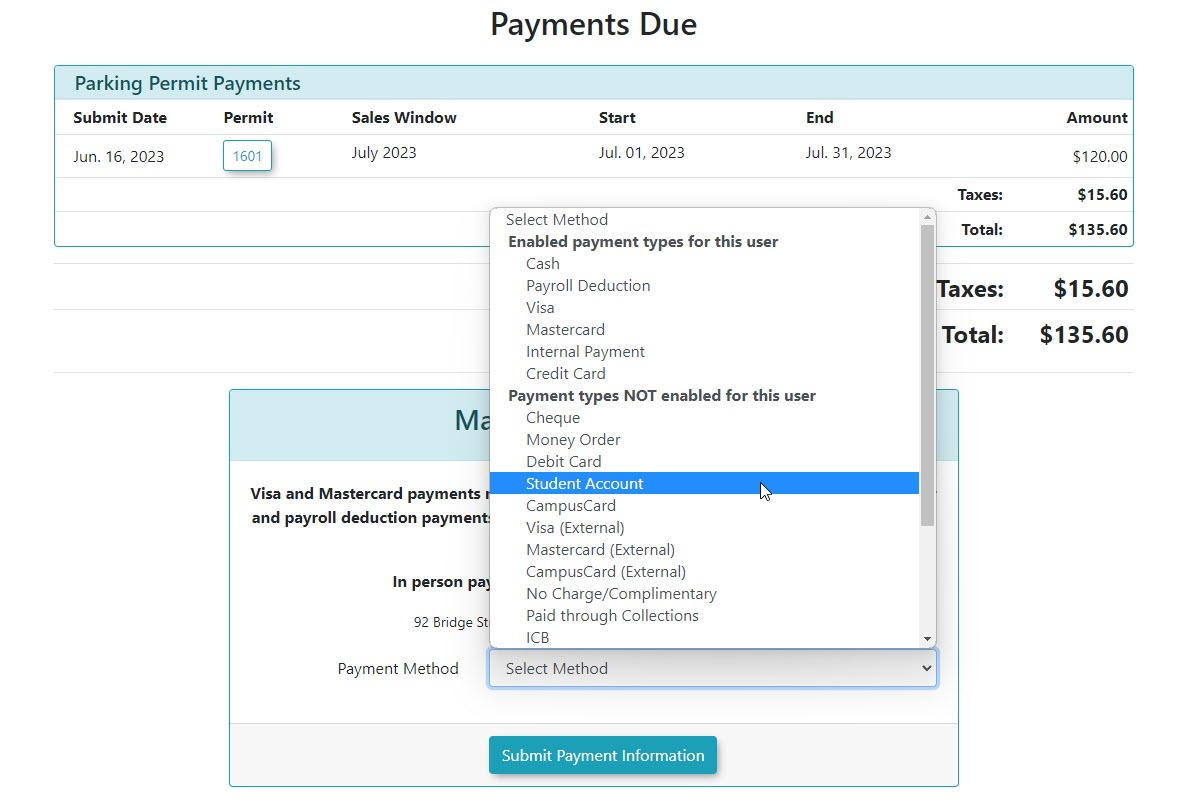
In this case we have selected aSelect Student Accountpayment.from the payment method options on the payment selection screen. -
Click the Submit Payment
to continue.button.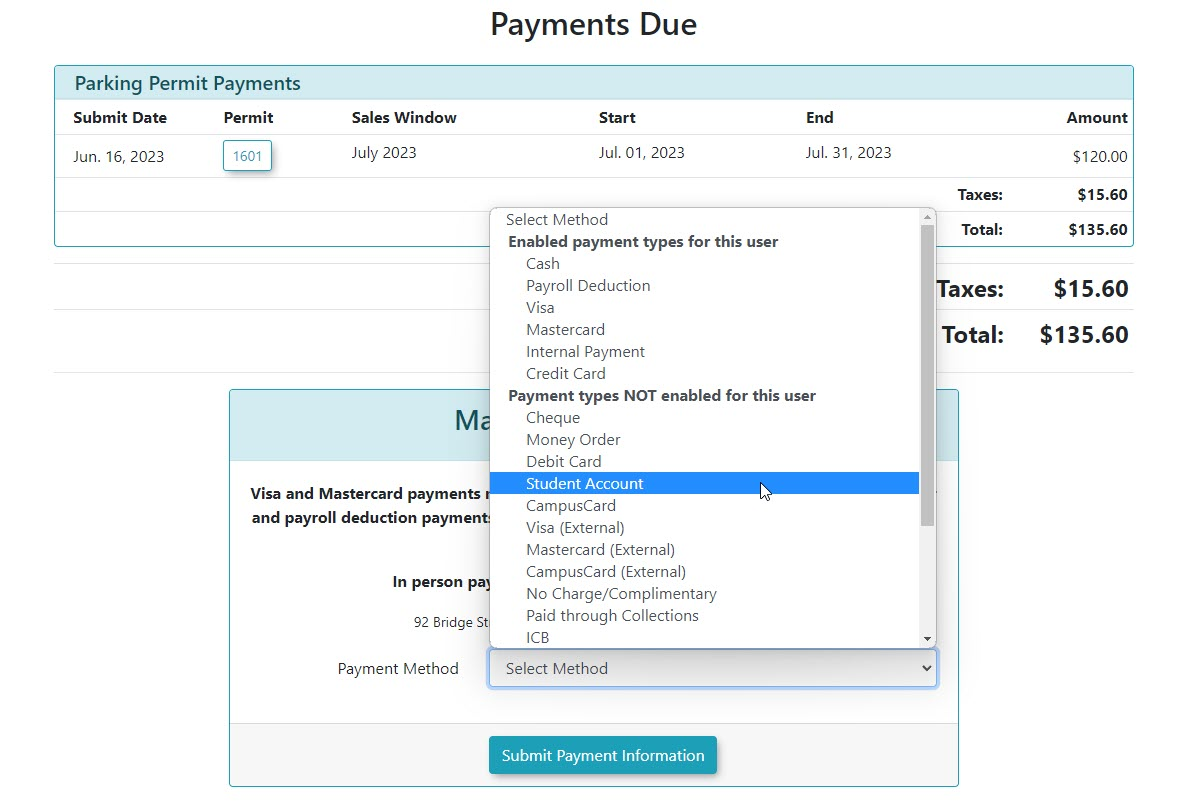
-
The screen will refresh andReview theadmin will beoptions presentedwithon thePayment Selection section of the process. In this case we have selected a cash payment. ClickSubmit Paymentto continue.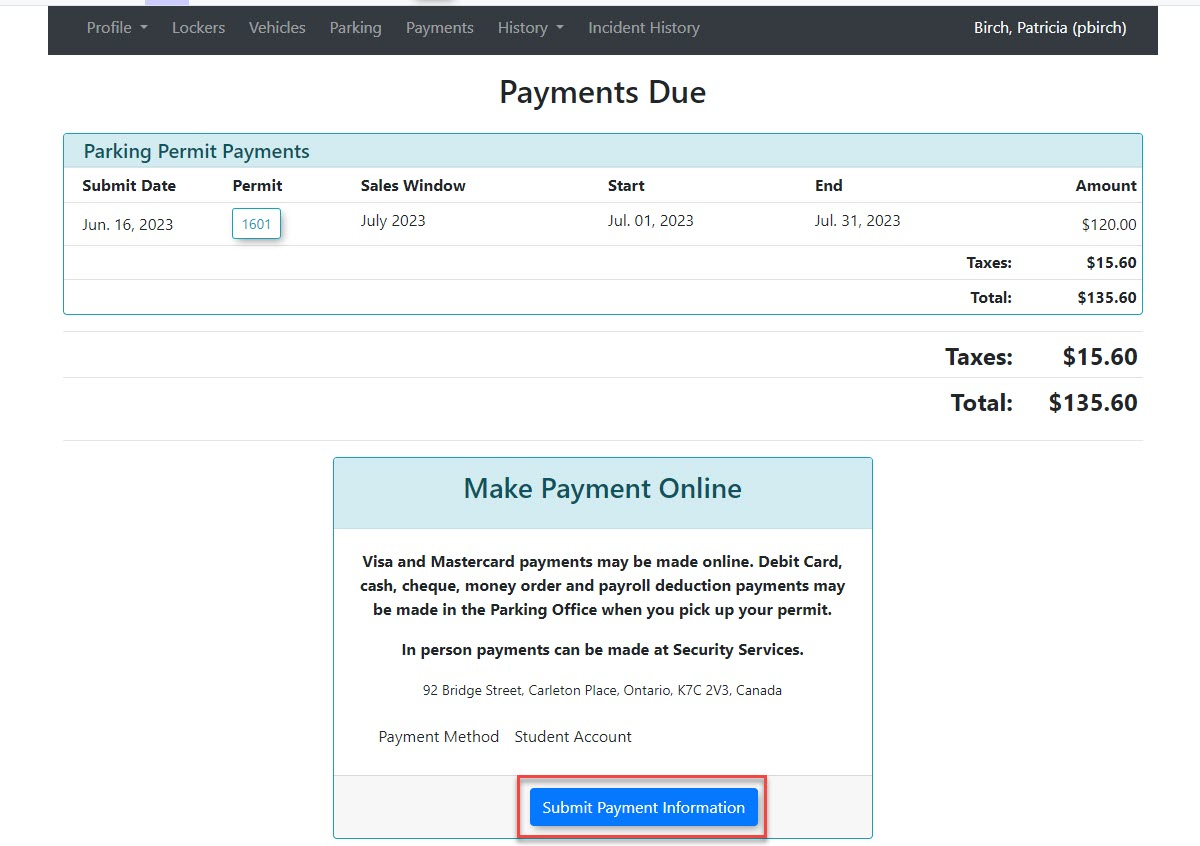
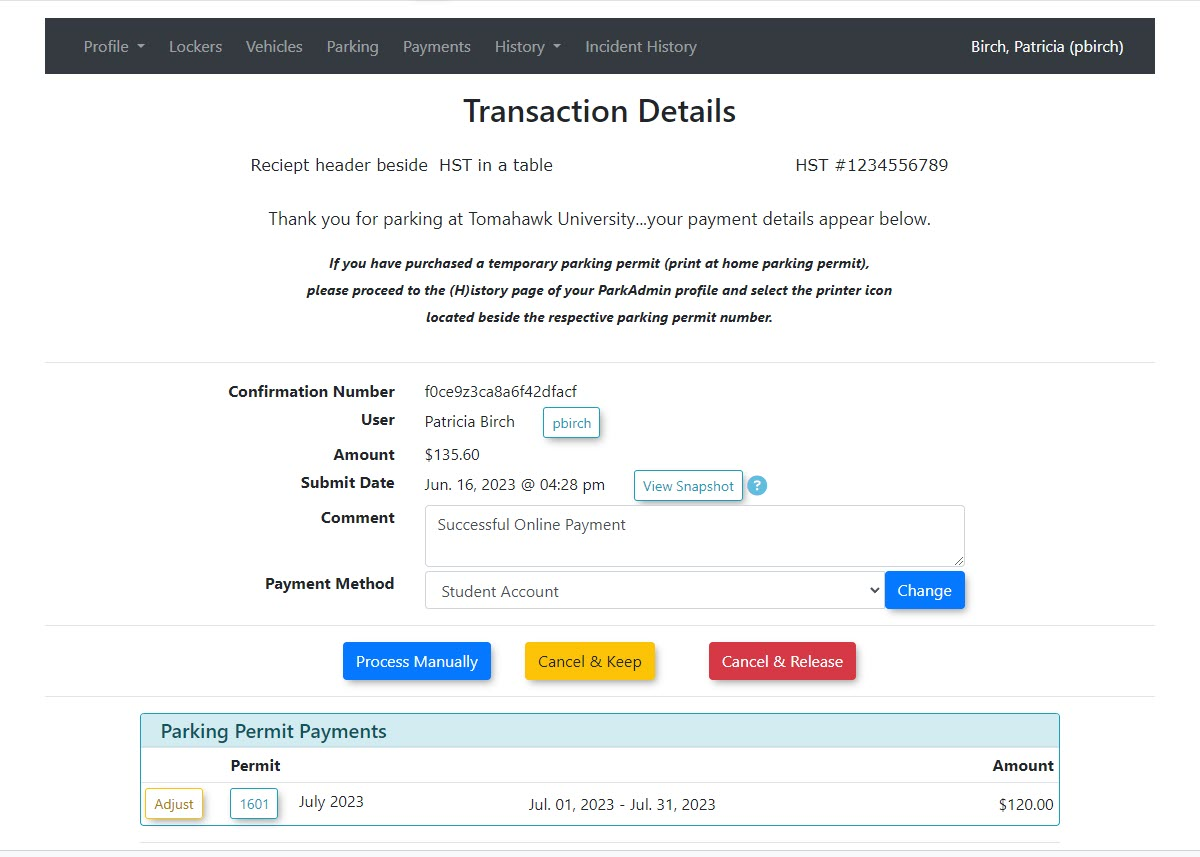
TheTransaction Detailsscreen will appear. There are three choices available.screen:-
Process
ManuallyManually:whichThis option will complete thetransactiontransaction. -
Cancel and
KeepKeep:whichThis option will terminate the transaction but return the permit or locker to an awaiting payment status on the user's profile. -
Cancel and
ReleaseRelease:whichThis option willalsoterminate the transaction and release the permit or locker back into the pool of availablelockersinventory.to rent.
-
-
INClickourtheexample we will selectProcess Manually button tocompletefinalize the transaction.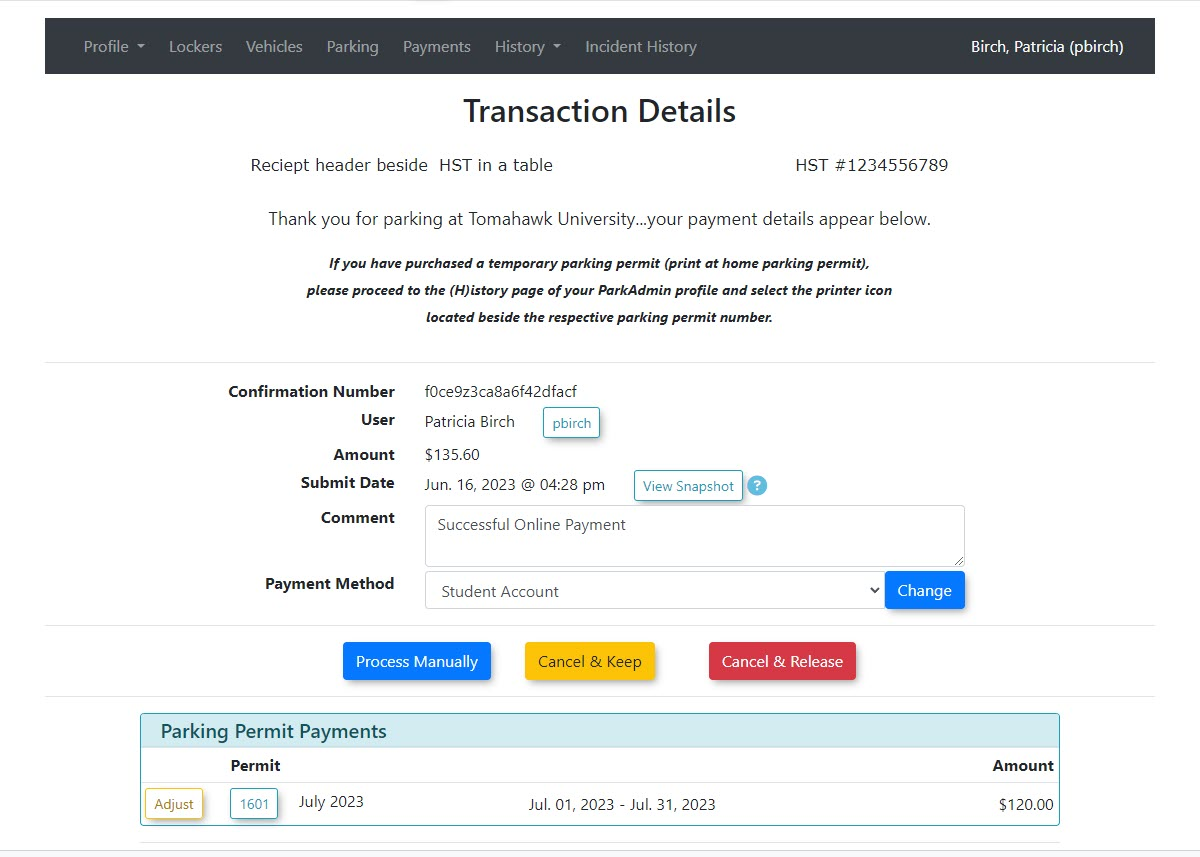
Visual Cues and Status Indicators
-
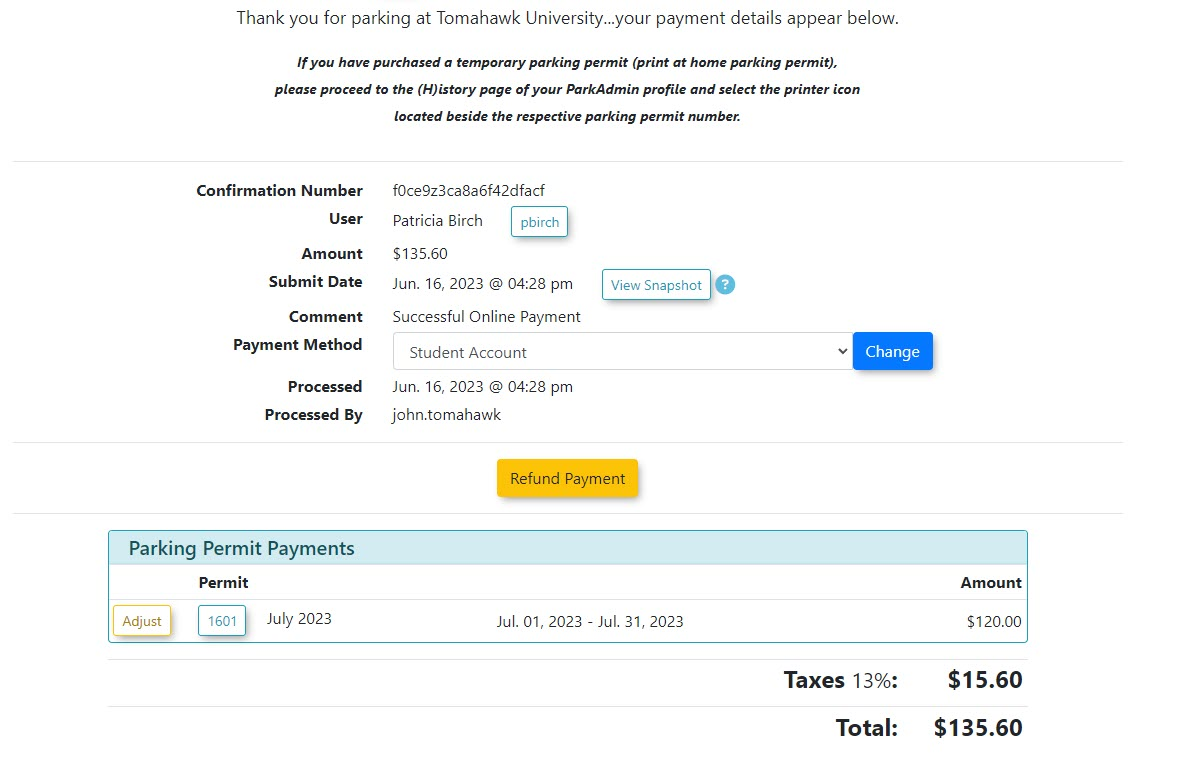
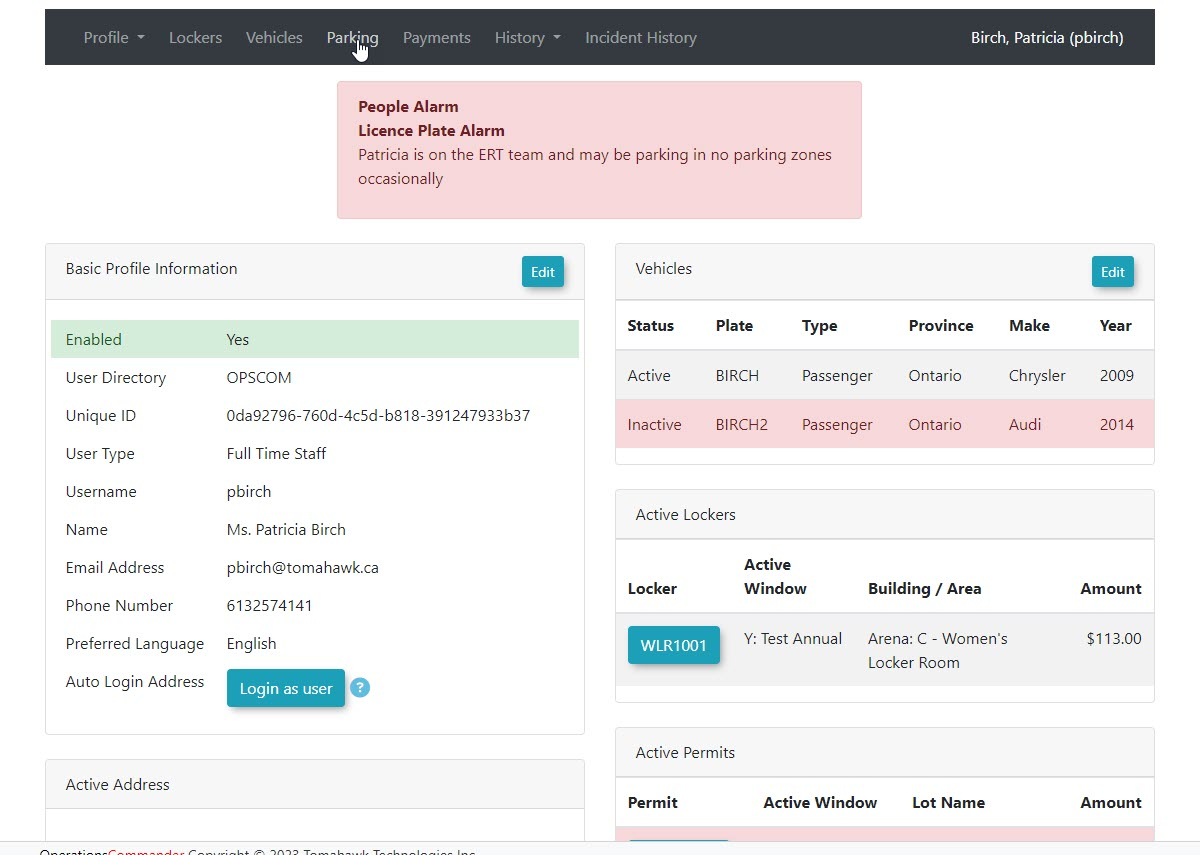
TheReceipt Generation: Once the paymentwillisbesuccessfullyprocessed andprocessed, theTransaction Detailsfinal screen will display a detailed receipt. Because the payment methodisselected was Student Account, the item will be permanently marked and tracked in the system history as being paidbyvia a student account.A
Best Practices and Considerations
Reconciling Funds: To ensure your institution's finances remain balanced, run a Daily Payments Itemized report canfiltered be run of daily payments filteredspecifically by the Student Account.Account payment type. This report canshould be provided to theyour financial department on a regular schedule to allow financethem to manually retrieve the appropriate funds from the central student account.accounts.
-