Authorize.Net
Setup and Configuration
Before configuring the payment type in OPS-COM, ensure your Authorize.Net merchant account is fully established and properly configured for online transactions.
Verifying Merchant Profile Settings
Your account must be properly configured for e-commerce transactions to process payments from the portal.
-
Log in to your Authorize.Net portal.
-
Click Account and then select Merchant Profile.
-
Verify that the Product Type is set to Card Not Present (CNP) and the Market Type is set to eCommerce under the Business Information heading.
Generating API Credentials
To connect the systems, you must provide three unique pieces of identification to the Tomahawk Technologies (OPS-COM) support team.
-
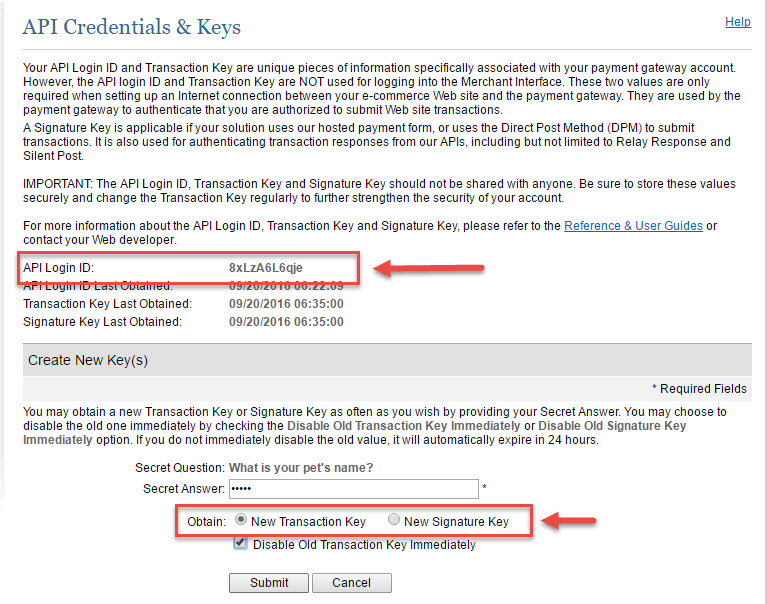
Click Account and navigate to the API credentials area.
-
Locate your API Login ID (this was defined during your initial account creation).
-
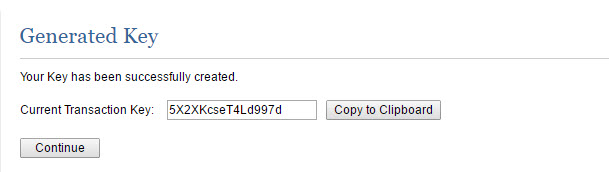
Select the option to generate a new transaction key and click Submit to reveal your Transaction Key.
-
Select the option to generate a new signature key and click Submit to reveal your Signature Key.
-
Copy these three specific values and supply them to your OPS-COM representative to complete the backend system integration.
Using this Feature
Administrators manage the appearance and security behavior of the hosted checkout page directly from the Authorize.Net portal. Because OPS-COM handles the transaction handoff automatically, administrators do not manually process these specific web payments on a daily basis.
Customizing the Payment Form
-
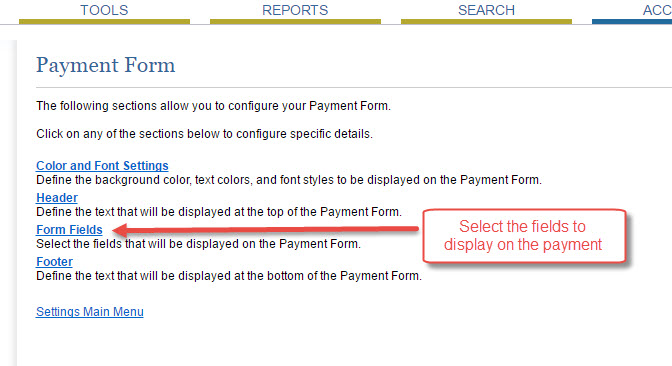
Click Account and select Payment Form.
-
Adjust the form styling to present a consistent look and feel for your end users.
-
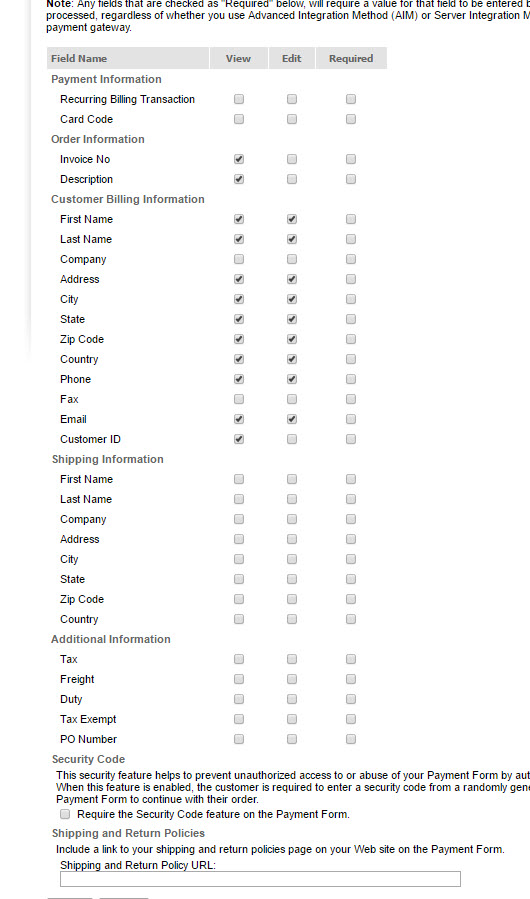
Disable the shipping address fields to remove checkout confusion, as shipping is not required for parking transactions.
Configuring Address Verification Service
If you are utilizing Address Verification Service (AVS) for enhanced fraud protection, you must configure the hosted form to enforce these rules.
Keep Billing Details Visible: Even though OPS-COM automatically connects the final payment to the logged-in user, it is highly recommended to keep the billing details visible and editable on the payment form. Users frequently use credit cards belonging to someone else (such as a spouse, parent, or corporate account), and the billing information must match the cardholder, not necessarily the OPS-COM user profile.
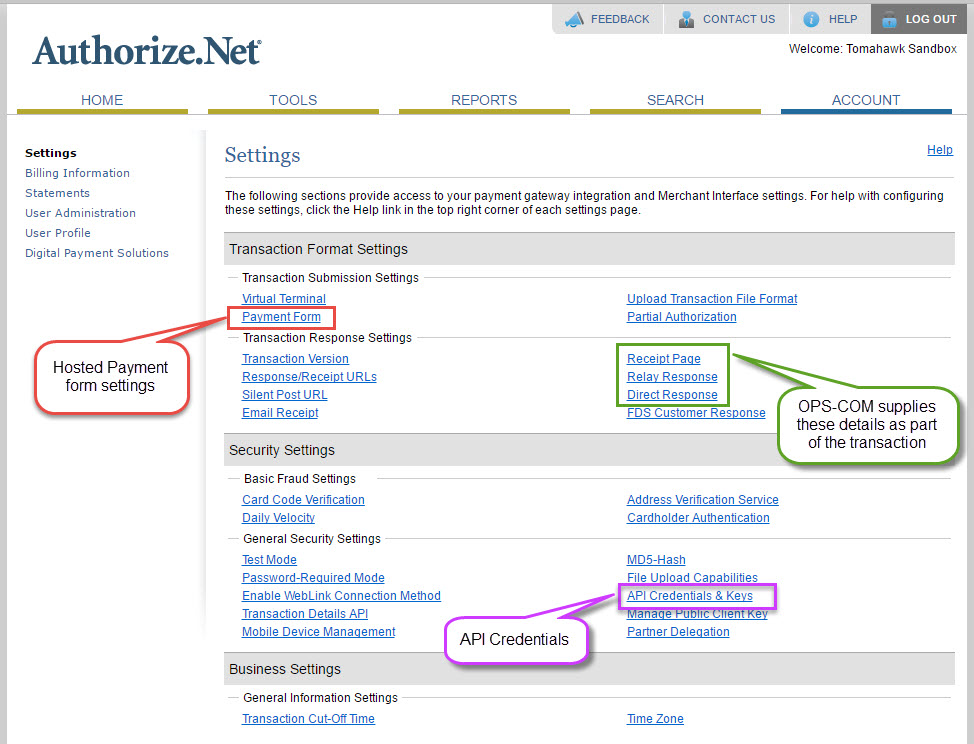
Development:Receipt and Response Pages: You do not need to manually configure the receipt page or response details within Authorize.Net. As part of the secure payment protocol, OPS-COM automatically supplies this routing information and handles the final receipt generation on the user portal.
Best Practices and Considerations
-
Environment Separation: Always use the Sandbox portal (
[https://sandbox.authorize.net/This space is primarily](https://sandbox.authorize.net/)) fordevelopmentinitialagainstintegrationtheandAuthorize.NettestingAPI.toThe sandbox area ensuresensure no transactions are accidentally pushed through a"real"real payment processor.Production:Only use the Production portal ([https://account.authorize.net/](https://account.authorize.net/)) for live, active transactions. -
TheSimulateproductionFailurespaceStates:isWhen configuring your system in theportalSandboxtoenvironment,accessreviewtransactionsthe official Authorize.Net developer testing guide. Use their designated test card numbers andlivespecificaccountpennysettings.Production (or Testing) SetupThere are several places where setup is required. The hosted payments page will need to be updated to present a consistent look for the end user. This can be done under the "Payment Form" option under the "Account" area as noted below.As well, it should be noted that the receipt page and response details do not need to be completed. As part of the payment protocol OPSCOM supplies this information to Authorize.Net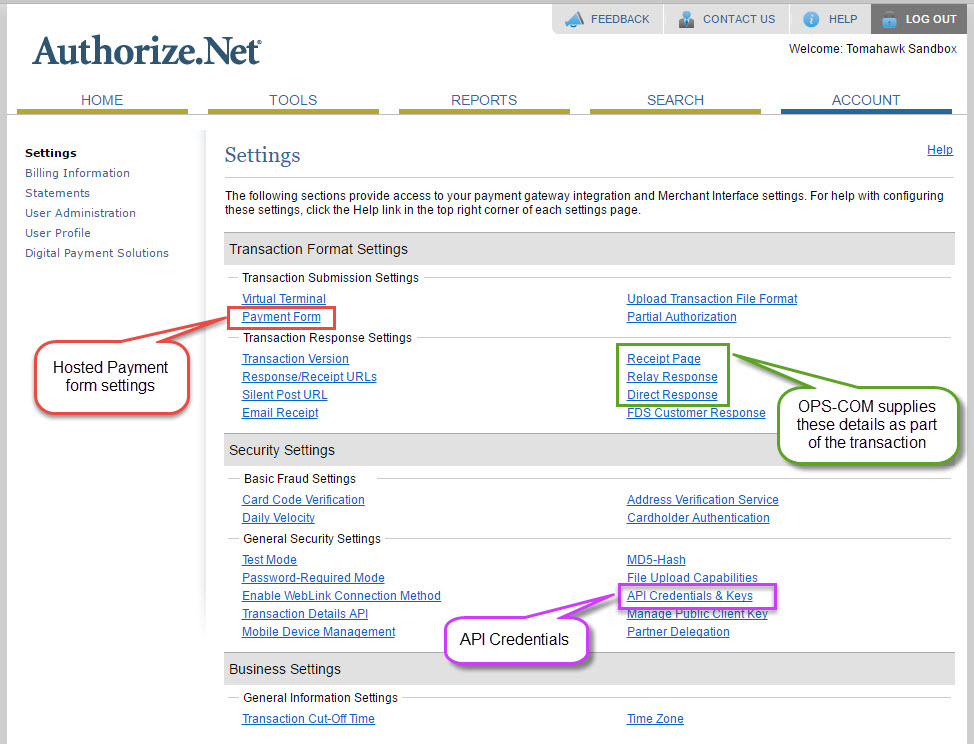
Please be aware your Authorize.net merchant account needs to have the following settings:Product Type:Card Not Present (CNP)Market Type:eCommerceThese settings are usually setup by your Authorize.net contact on the initial account creation. If you want to confirm the correct settings go to Account > Merchant Profile. Under the Business Information heading it will show your product and market type.API CredentialsAPI credentials are required for communication between OPSCOM and Authorize.Net. You will need 3 pieces of unique identification, one of which (API Login ID) is defined at the time of the account creation.OPSCOM will need the following ID'sAPI Login IDTransaction KeySignature Key
Where to obtain these values is noted below.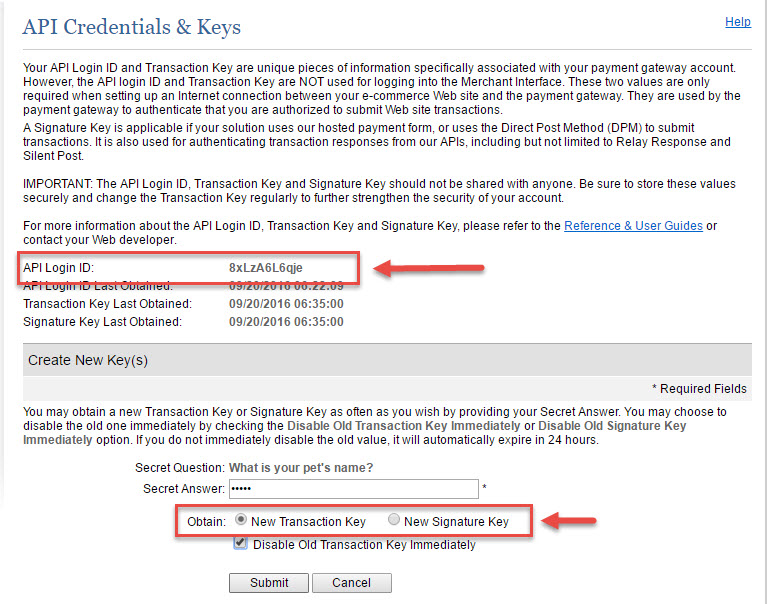
In the above screen shot we have chosen to generate a new Transaction Key. Upon selecting Submit, the new transaction key is presented.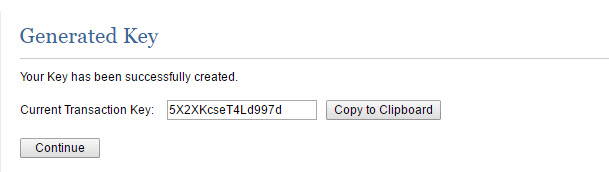
NOTEThe generatedTransaction KeyandSignature Keytogether with theAPI Login IDneed to be supplied to Tomahawk Technologies Inc. to complete the OPSCOM setup.Payment FormYou can style the payment form and add additional details to the hosted payment input page. As well, fields such as shipping address can be hidden on the payment form to remove any confusion for the end user.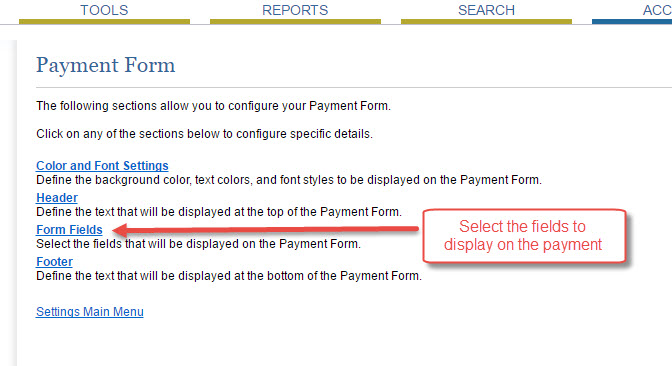
Suggested payment form options:NotePersonal details can also be removed from the form since OPSCOM will automatically connect the payment to a user. Since users will often use credit cards that are not their own (spouse, parents, corporate) adding the additional fields is suggested.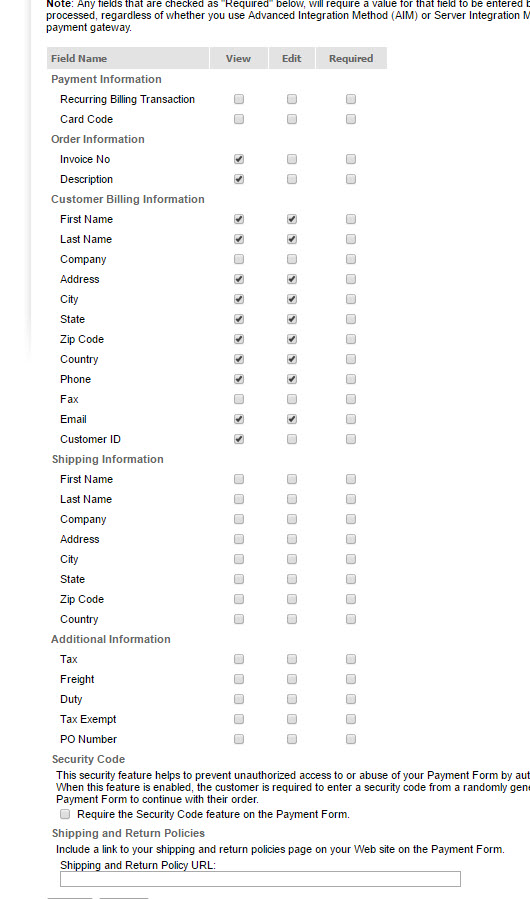
AVS (Address Verification Service)If AVS is enabled please make sure to set the following address fields required:Seehttps://support.authorize.net/knowledgebase/Knowledgearticle/?code=000001490for additional information on AVSSite TestingTestingThis page includes waysamounts to generate failurestates:stateshttp://developer.authorize.net/hello_world/testing_guide/(like declined cards or AVS mismatches) to ensure OPS-COM handles the checkout errors gracefully before going live.