Bambora Checkout
The Bambora Checkout Hosted Payment configuration allows administrators to process secure online transactions through a fully integrated Bambora (Wordline) merchant account. Its primary purpose is to enable reliable payment processing and tokenized profiles directly within the OPS-COM checkout flow by utilizing secure authorization headers. This article is intended for OPS-COM administrators.
Setup and Configuration
To properly configure your Bambora/WordlineBambora payment type in OPSCOMOPS-COM, you will require two separate "Authorizationencoded Headers".authorization Theseheaders: headersthe will be referenced below as:
Payment Authorization HeaderProfile Authorization HeaderThe process to generateand the twoProfile differentAuthorization encodedHeader. headers is similar in that bothBoth require your Bambora Merchant ID +(MID) and a specific API access passcode,passcode to generate.
Generating the Payment Authorization Header
-
Log in to your Bambora account.
-
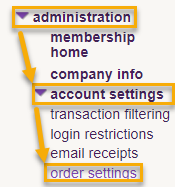
Select Administration, click Account Settings, and
boththenareselectencodedOrderatSettings from thesameleftlink,navigationhowevermenu. -
Scroll down to the API access passcode
is different for each and shown on different pages in Bambora (order settings vs payment profile configuration).section.Bambora -
Order Settings: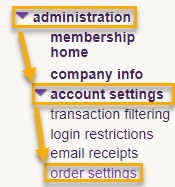
Login to your Bambora account, then onClick the
left navigation selectAdministration→Account Settings→Order Settings.API access passcode (PaymentAuthorization Header):On the Order settings page scroll down to "API access passcode". If there is nothing in the API access passcode field click the "Generate New Code"button.buttonAfterifgeneratingtheyourfieldAPIisaccessempty.passcode -
sureClick
tothescrollUpdatedownbuttontoat the bottom of the pageand click "Update"to save your changes.Merchant -
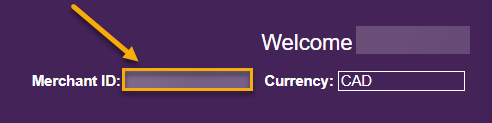
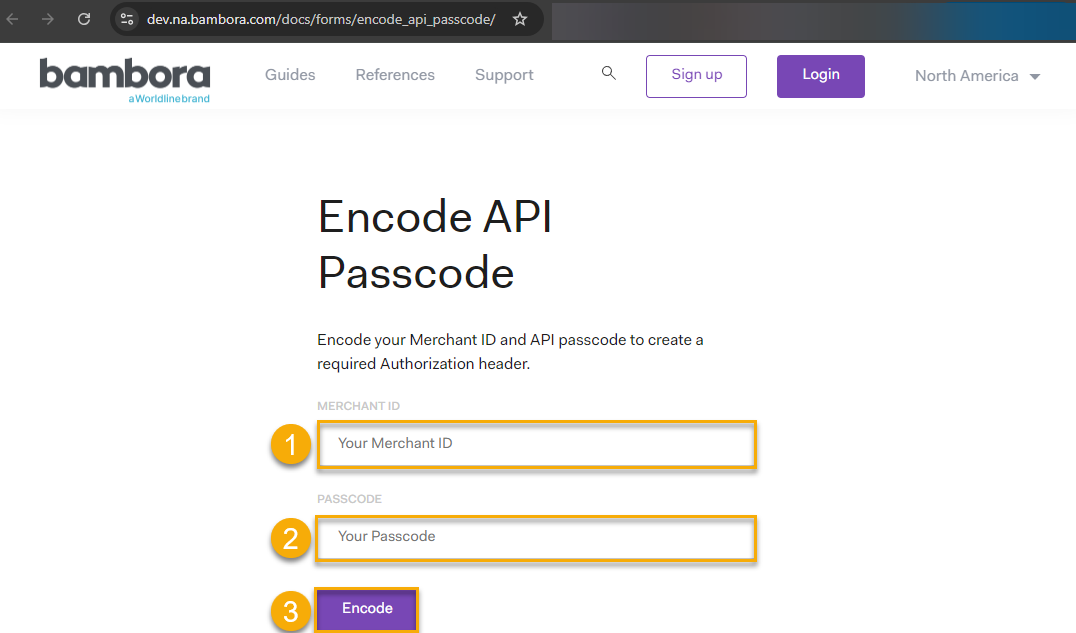
Now that you know yourAPI access passcodeLocate andMerchant IDgo here.Copy and pastecopy your Merchant ID(1) and API access passcode (2) into the appropriate fields, then click "Encode"(3).Copy/record thePaymentAuthorization Headershown. This will be needed later when you setup the Bambora Checkout payment type in OPSCOM. It will be referenced further down this page as thePaymentAuthorization Header. You should temporarily paste this into a program such as Notepad for easy access later since you will need it later during the OPSCOM configuration.You will want to make sure to copy only the following section returned (excluding quotation marks):"Passcode ______"For example, select/copy as shown in the highlighted example below, starting at the P on Passcode. We want to exclude/not copy "Authorization:"
-
Navigate
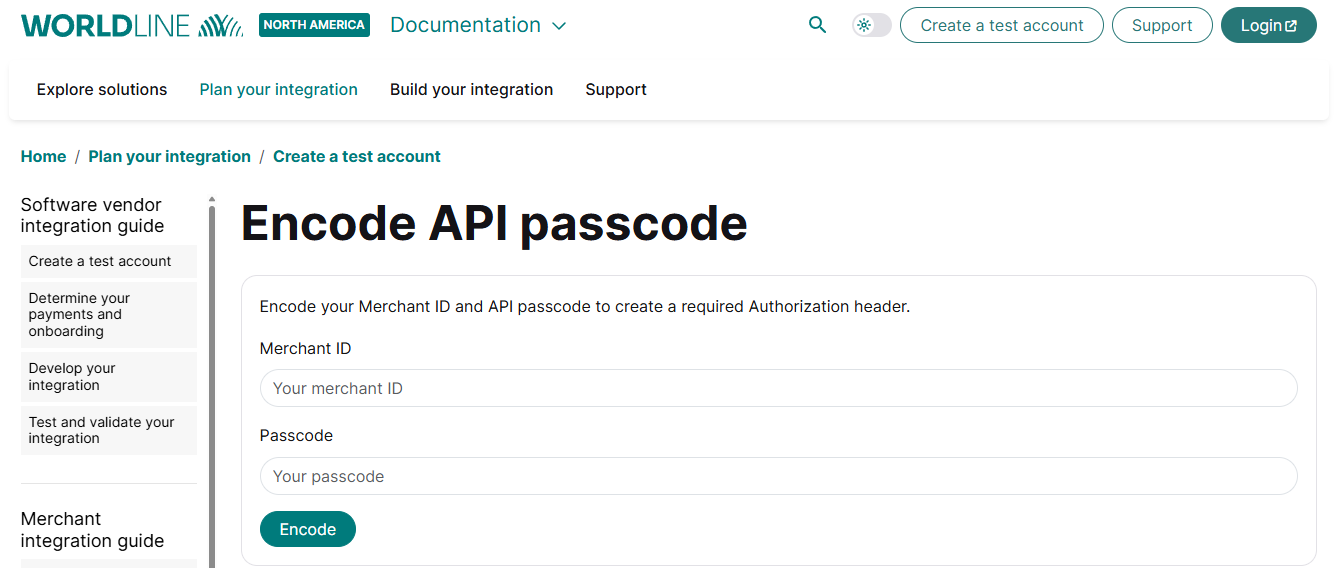
to Encodethe Bambora encoding tool URL provided by your implementation specialist.Paste your Merchant ID and the new API access passcode into the appropriate fields.
Click the Encode button.
Copy the generated Payment Authorization Header. Ensure you only copy the string starting with the word Passcode (e.g., Passcode MzAw...). Do not copy the Authorization: prefix or the quotation marks.
Generating the Profile Authorization Header
):
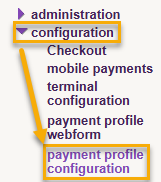
NowSelectthatConfigurationyouandknowclickyourPayment Profile Configuration from the left navigation menu in Bambora.Ensure the API access passcode
andoptionMerchantisIDselectedgo here.. Copy and paste your Merchant ID (1) and API access passcode (2) intounder theappropriateSecurityfields,Settingsthen click "Encode"(3).section.Copy/recordClick theAuthorizationGeneratePasscodeNewreturned.CodeThisbuttonwill be needed later when you setupif theBamborafieldCheckoutispaymentempty.typeinOPSCOM. It will be referenced further down this page asClick the
"ProfileAuthorization Header". You should temporarily paste this into a program such as Notepad for easy access later since you will need it later during the OPSCOM configuration.You will want to make sure to copy only the following section returned (excluding quotation marks):"Passcode ______"For example, select/copy as shown in the highlighted example below, starting at the P on Passcode. We want to exclude/not copy "Authorization:"
-
Navigate back to the Bambora encoding tool.
-
Paste your Merchant ID and this
page. -
Click the Encode button.
-
Copy the generated Profile Authorization Header, again ensuring you only copy the string starting with the word Passcode.
-
Hover over System Configuration and click Payments then Setup Payment Types.
-
Click the Add Type button.
-
Select Bambora -
Settings:Checkout -
-
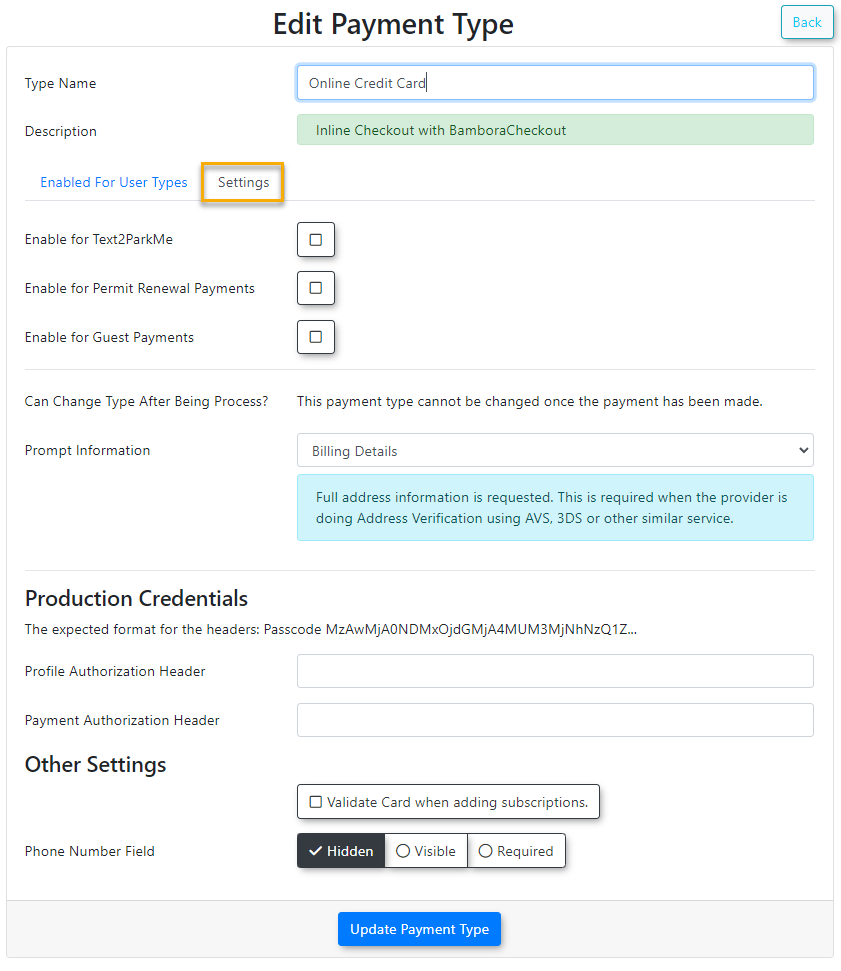
Enter a clear, descriptive name into the Type Name field (e.g., Online Credit Card Payment).
-
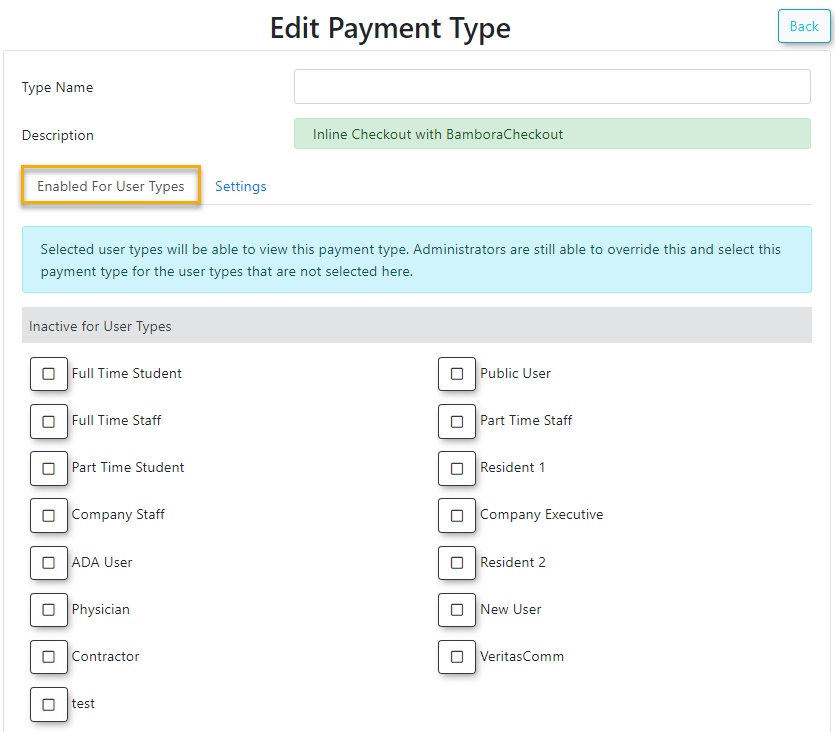
Select the specific user groups who should have access to this method from the Enabled for User Types list.
-
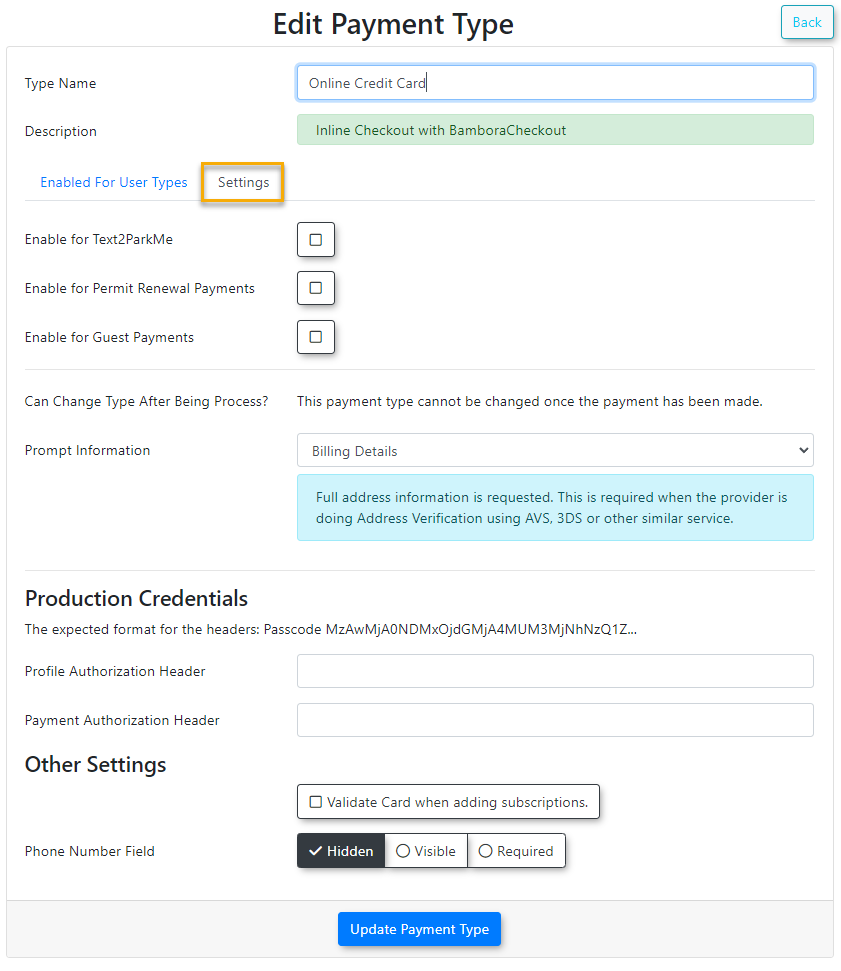
Enable or disable the checkboxes for Enable for Text2ParkMe
: if,you aren't using this module leave the button unchecked.Enable
forfor Permit Renewal Payments: if,youandaren'tEnableusingforthisGuestfeaturePaymentsleavebased on your operational needs. -
Select Billing Details from the
button unchecked.Enable forGuest Payments: if you aren't using this feature leave the button unchecked.Prompt Information
:Thisdrop-downdependsmenuonifwhetheryouor not you'reare enforcing AVS(Address Verification Service)in your Bamboraaccount.account,Thisoris set in Bambora underselectAdministrationEmail Address→Account Settings→Order Settings → Transaction Reversal Options Conditions.If using AVS you will require the Prompt for to have "Billing Details" selected, which will prompt users to supply their billing address information during checkout so AVS can pass. Otherwiseif AVSisn'tis not required. -
Paste your copied headers into the Profile Authorization Header and Payment Authorization Header fields under the Production Credentials section.
-
Enable the Validate Card when adding subscriptions checkbox if you want the card validated immediately by the payment provider when it is first added as a subscription method in a user's profile.
-
Leave the Phone Number Field set to hidden unless specifically required
inby your fraud detection settings. -
Click the Update Payment Type button at the bottom of the page to save your configuration.
-
AVS Configuration: If using
AVSAVS, Bambora recommends enabling only the“AVS Postal/Zip CodeMismatch”Mismatch option.as theThe Street Mismatch option is extremely sensitive and may result in a highdeclineraterate.of declined payments due to minor formatting typos. -
User-FriendlyNaming:
The text you enter into theProfileTypeAuthorizationNameHeader:fieldCopyis exactly what your users will see when selecting a payment method during checkout. Choose a generic andpasterecognizable name, such as "Credit Card", to avoid confusion during theProfilecheckout process.Authorization Headerinto this field as detailed in the steps above.
 |
Encode API Passcode (Payment Authorization Header):
 | |
| |
 |
|
| |
| |
|
|

OPSCOM Configuration:
| |
 |
|
| |
 |
| specific
access
| from |
| list.
|
AVS and Prompt Settings Match: You must align your OPS-COM prompt information with your Bambora Using this FeatureBecause this is a backend payment gateway configuration, administrators do not manually interact with this feature on a daily basis. Once fully configured, the Bambora Checkout integration automatically handles electronic routing and card tokenization when users
Best Practices and Considerations
|
| |