
Payment Data Export via Banner SFTP
The Payment Data Export via Banner SFTP feature automatically exports payment and violation data into a CSV file specifically formatted for integration with the Banner system. Its primary purpose is to ensure seamless financial data synchronization by appending the necessary detail codes and term codes to user transactions. This article is intended for OPS-COM administrators responsible for system configuration and financial integrations.
Setup and Configuration
There are several items that must be carefully configured across different system modules in order for the right information to display in the exported CVSCSV file.
Admin Side:
User Profile
Configuration
-
In the user profile,Configure a unique user ID in the User Profile.must be configured.This information will likely be populated
byautomatically via a user data import.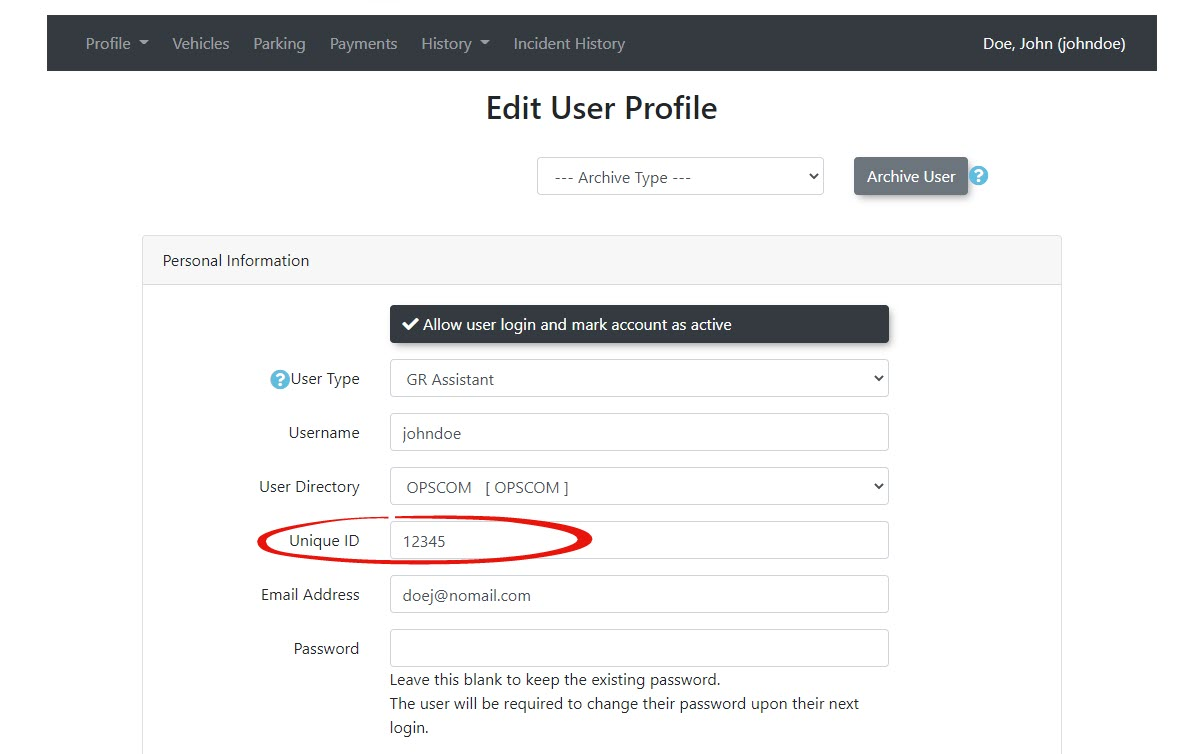
Lot Administration Configuration
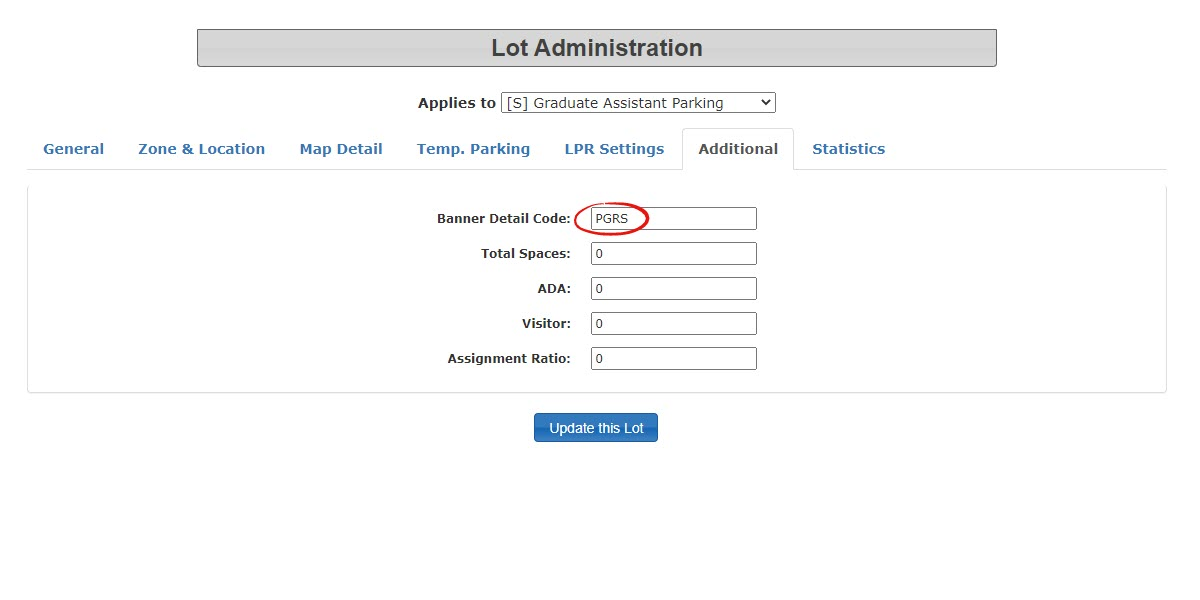
Each lot requires a unique banner detail code.
-
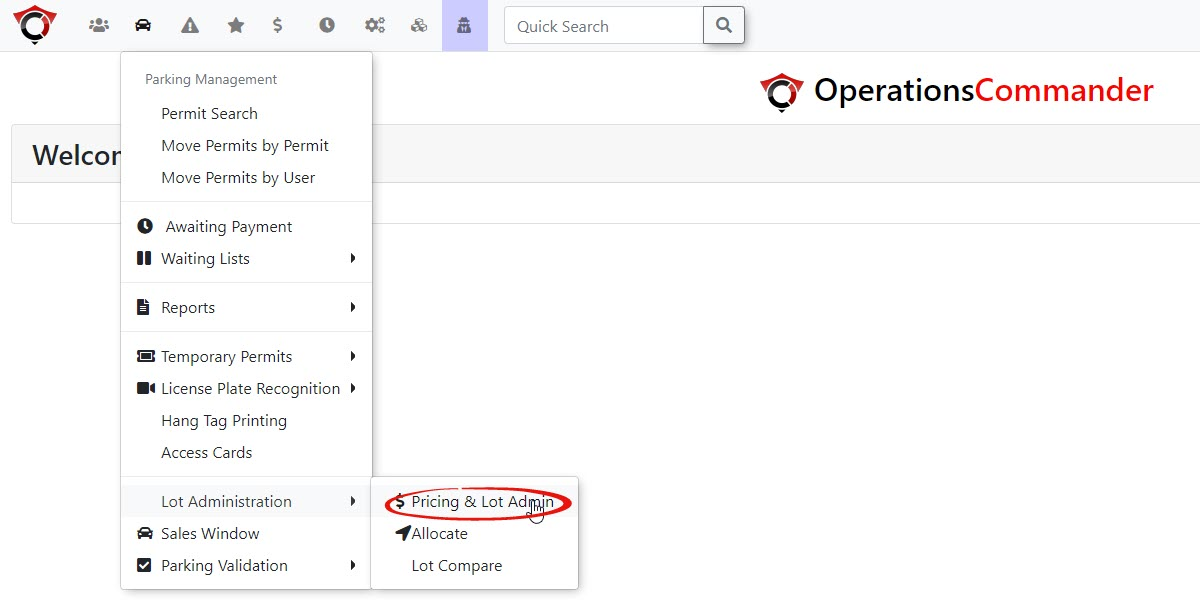
Hover over Lot Administration and click
onPricing & Lot Admin.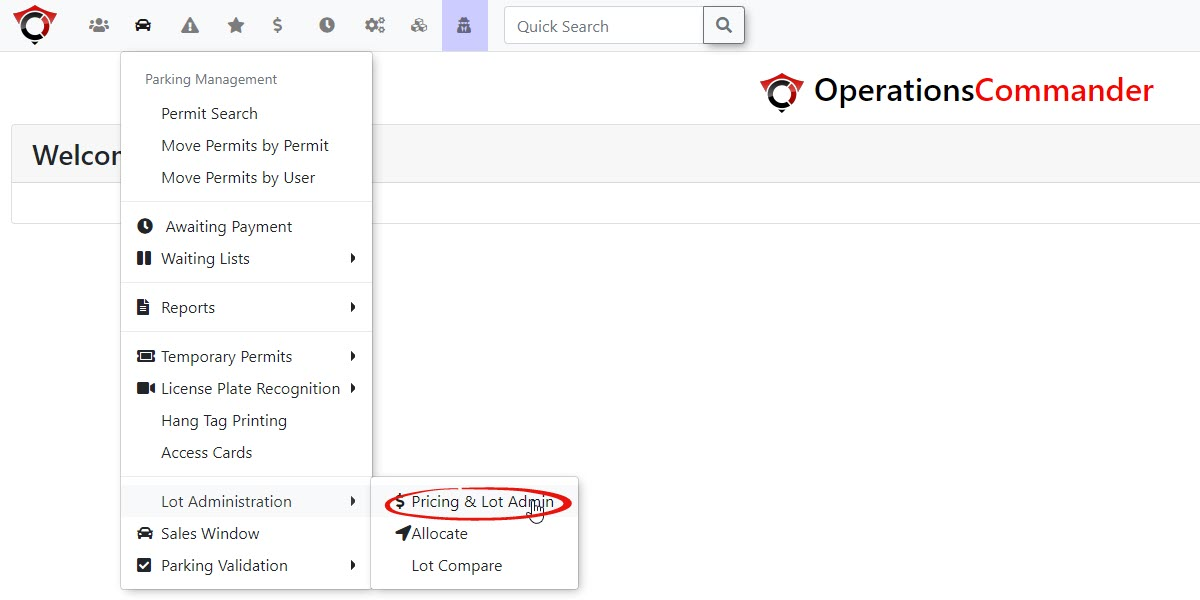
-
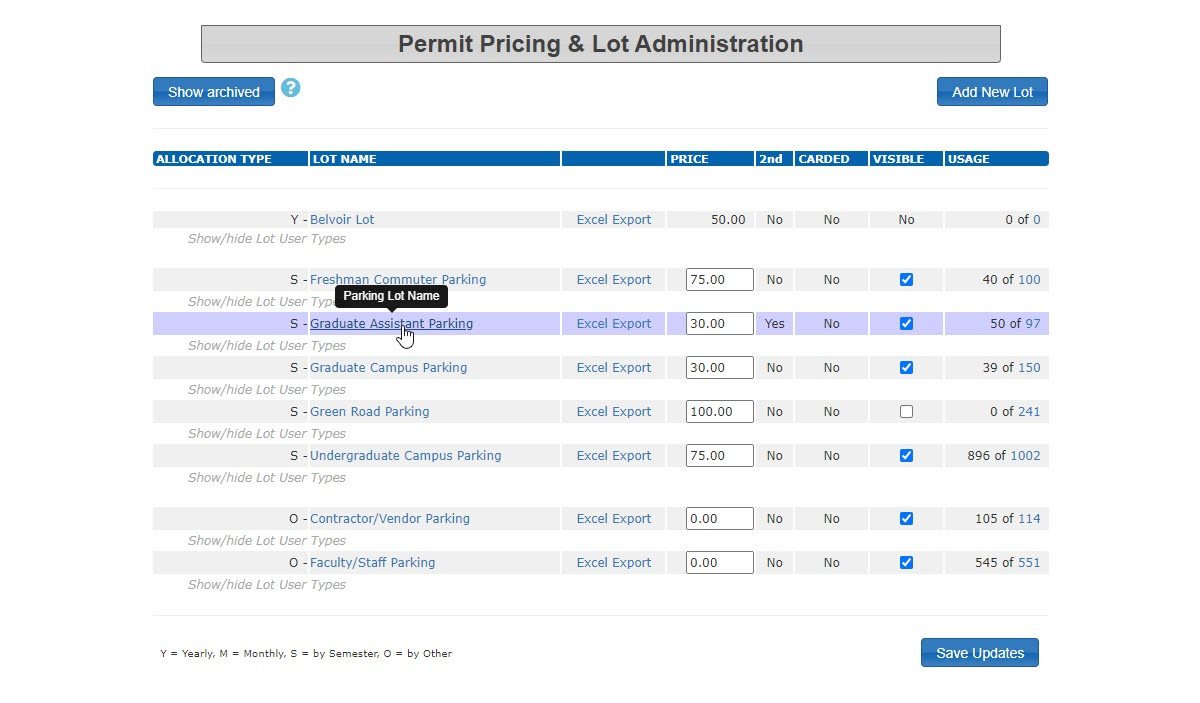
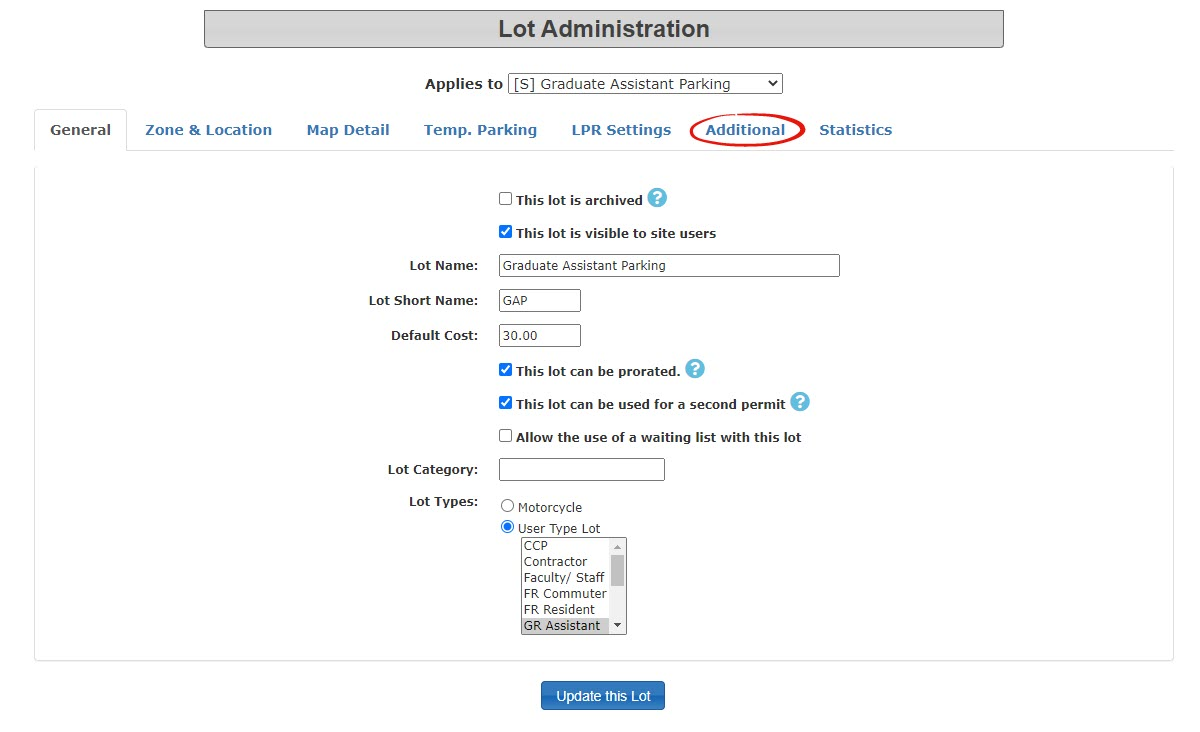
SelectClick thelotspecificyou wish to add the detail code to. Click on thelot name to access the configuration screens.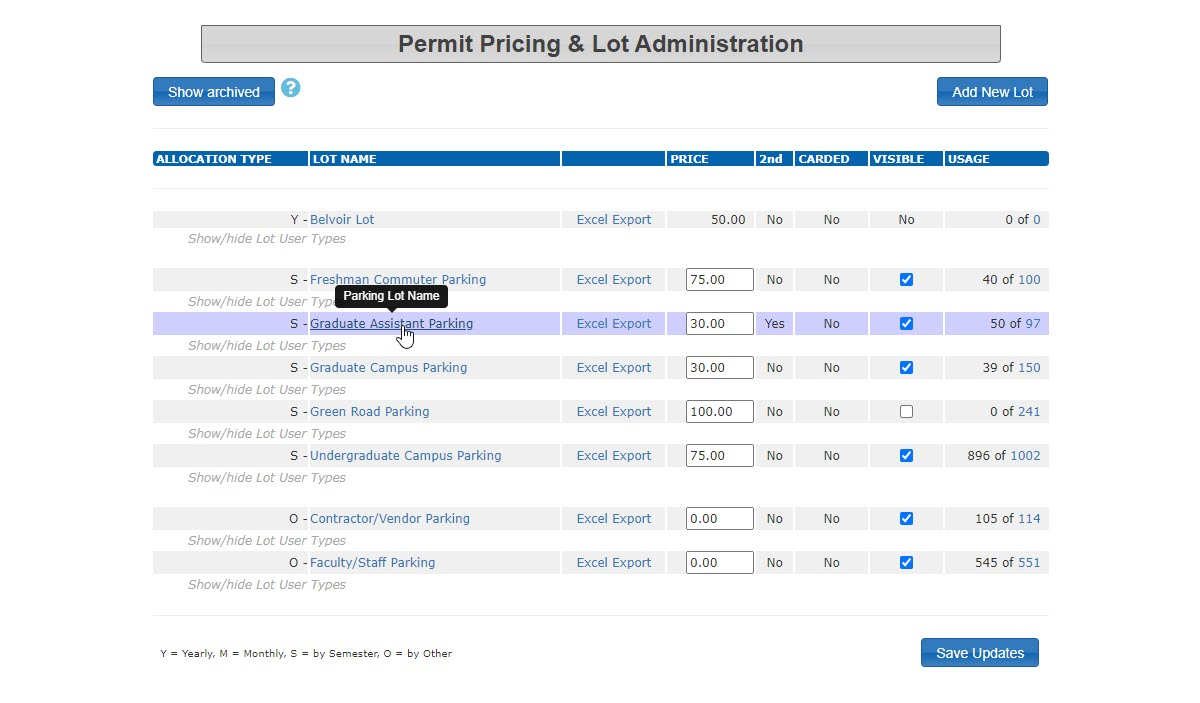
-
Once you are in the lot configuration tool, selectClick the Additional tab.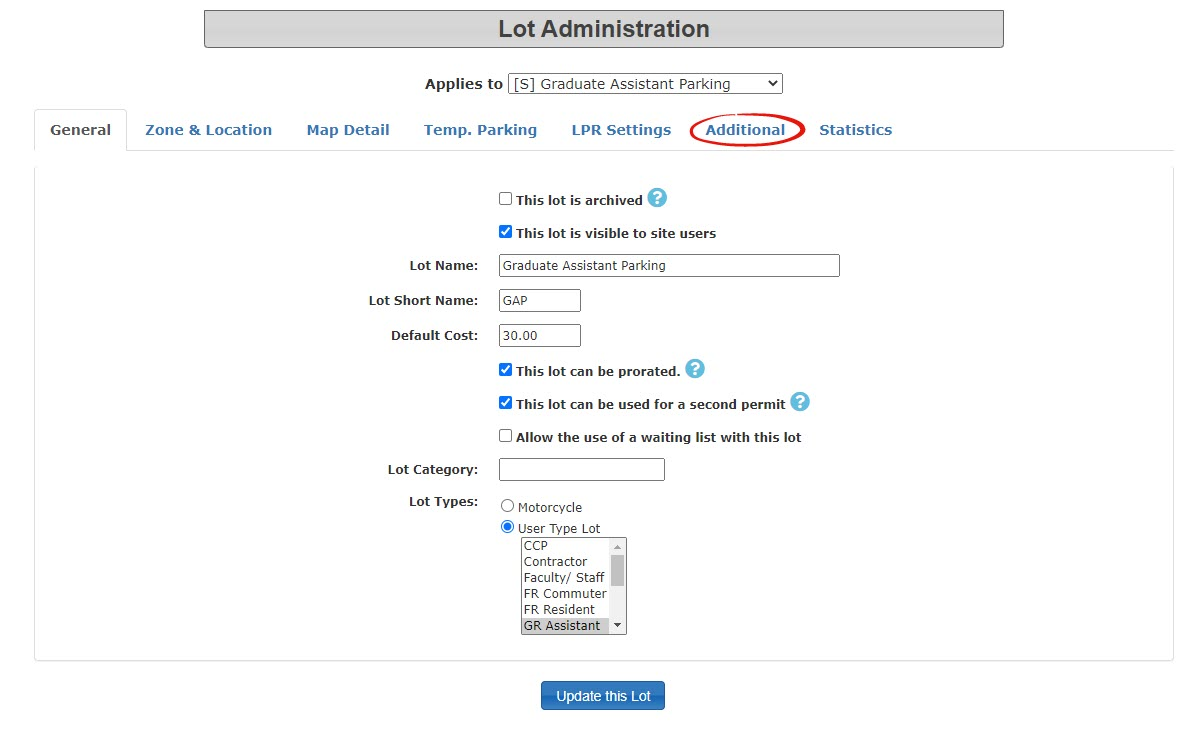
-
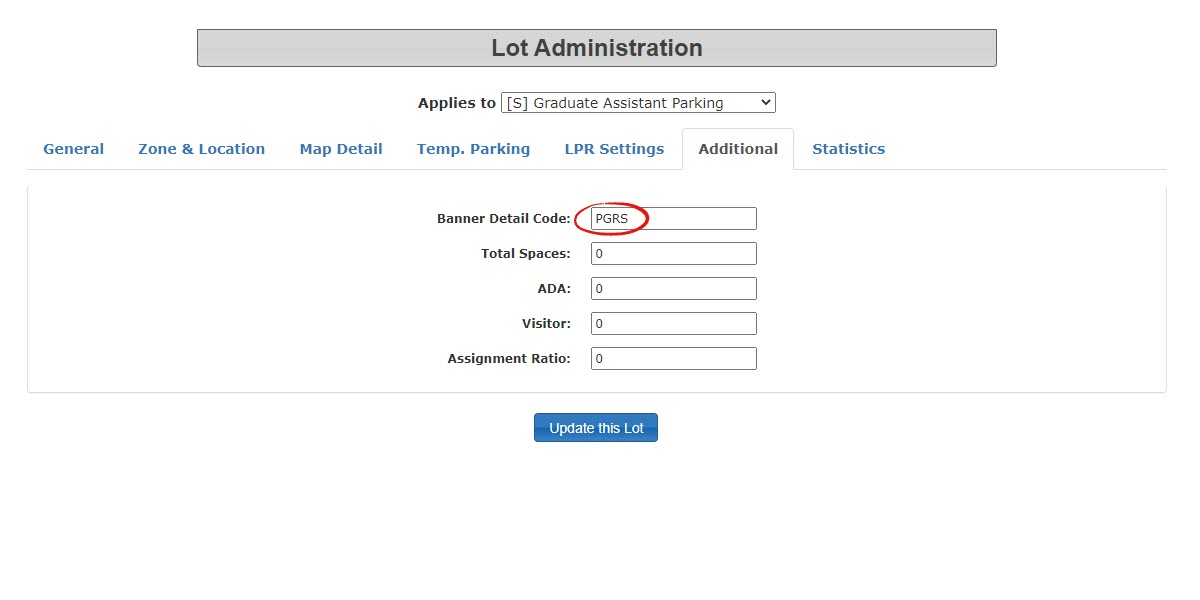
Enter the required code into the Lot Detail Code
.(These codes are established in the preliminary planning phase of the project)field. -
Ticket Categories Configuration
-
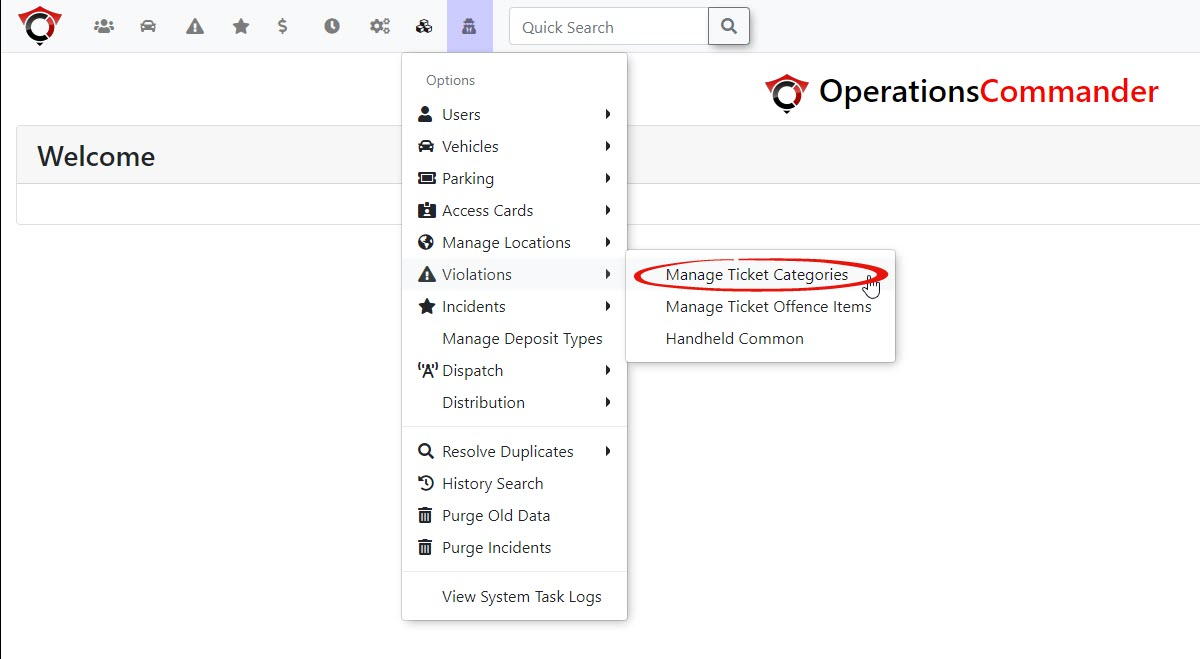
From theOptions Menu, hoverHover over Violations and select Ticket Categories (or Manage Ticket Categories).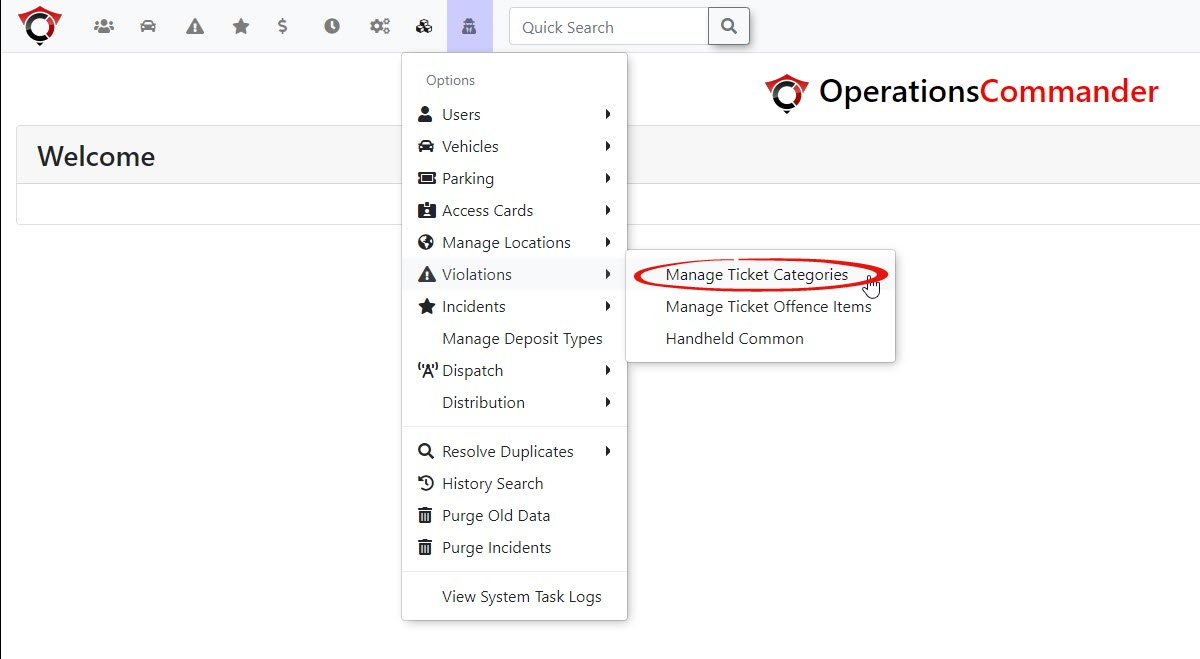
-
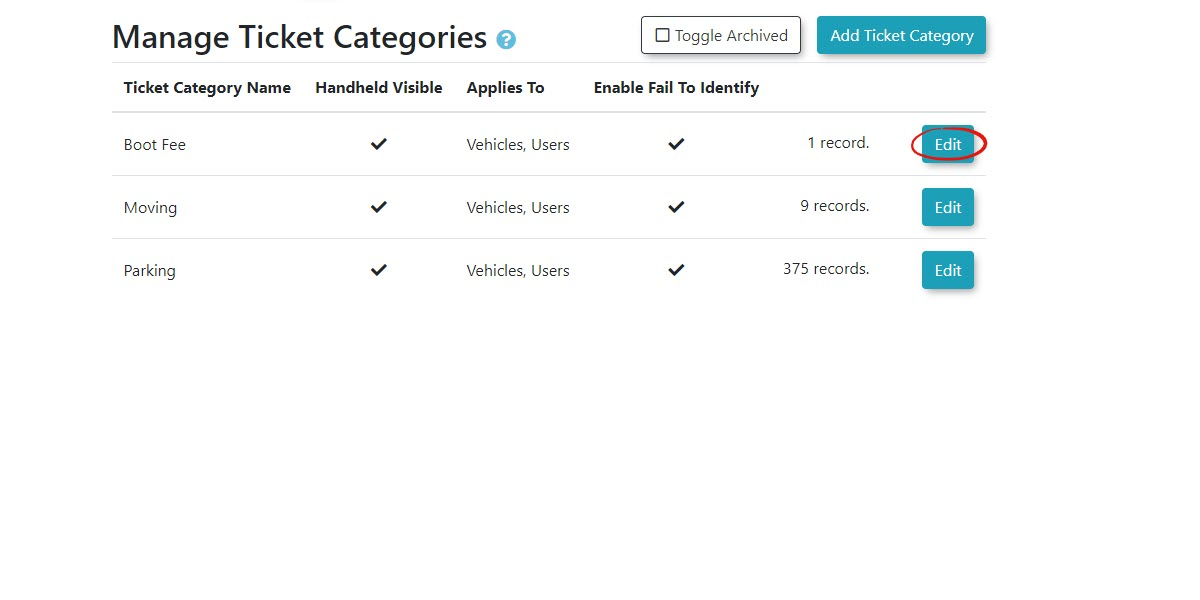
Click Edit
Editon theCategorycategory you wish to configure.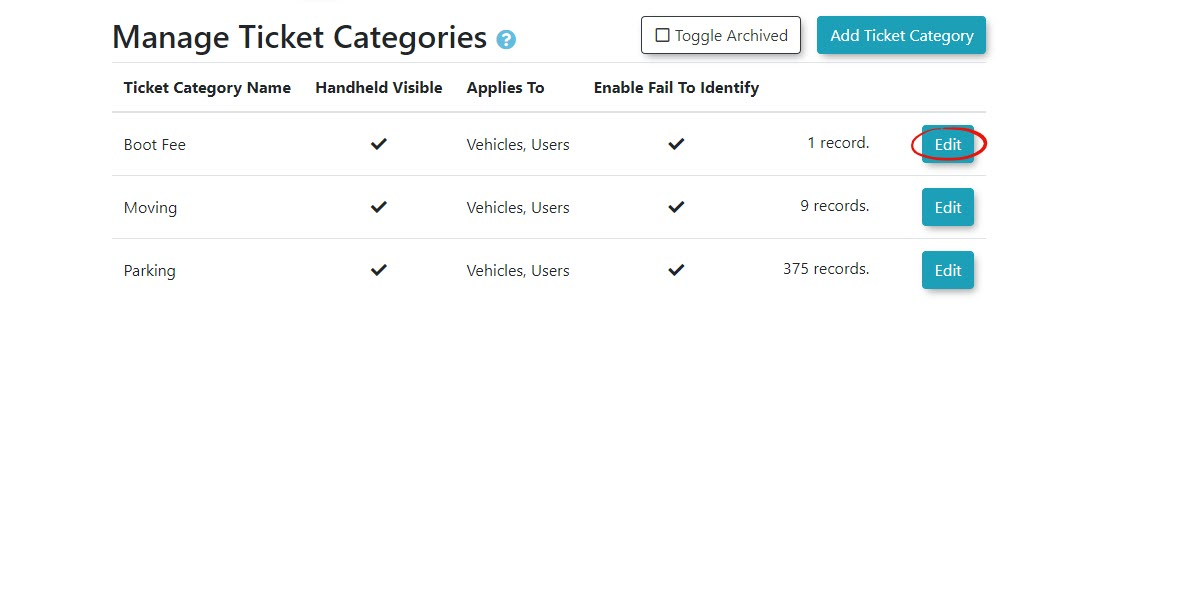
-
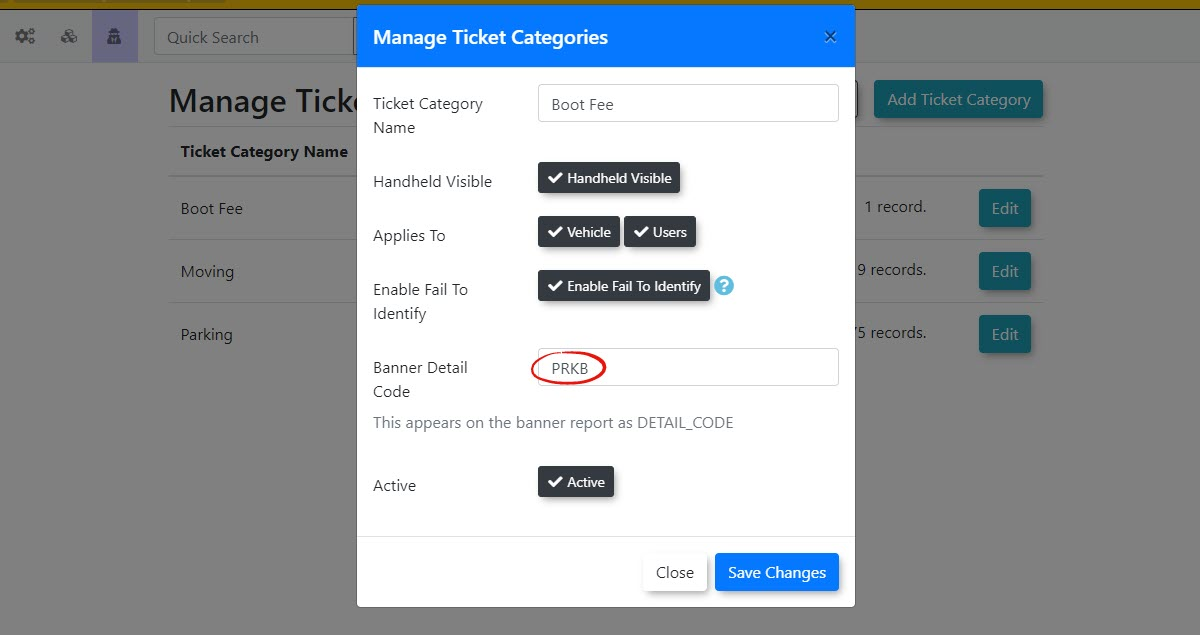
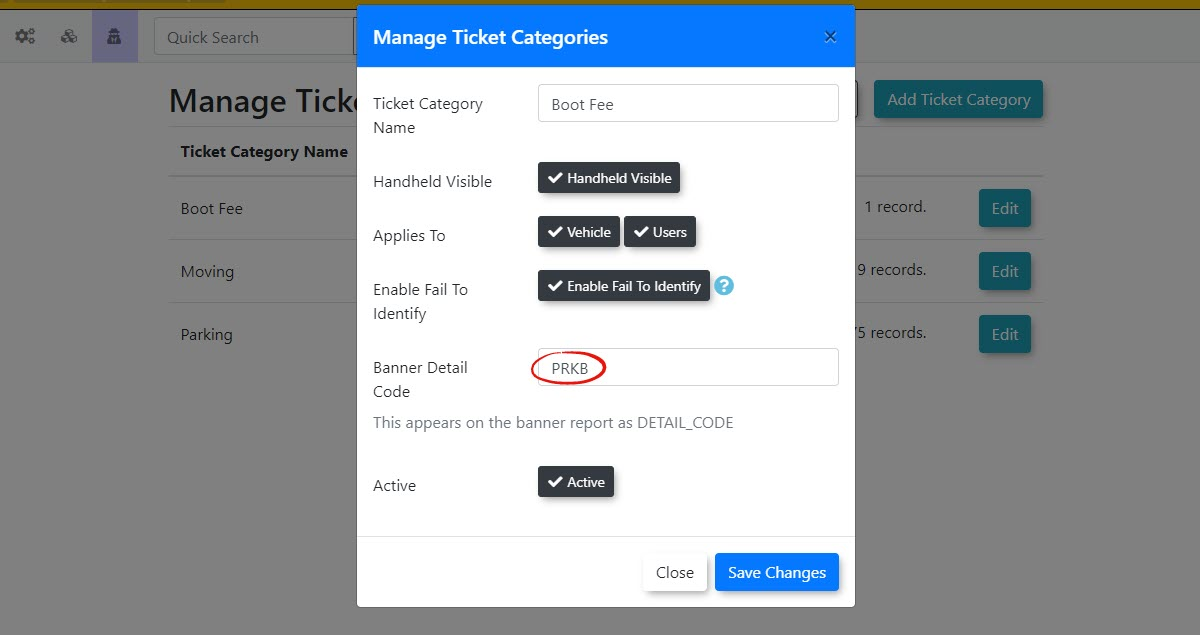
Enter the detail code for the ticket
categorycategory.In(e.g.,thisenteringcase, the Detail Code isPRKB for the Boot Feecategory.category). -
Sales Window Configuration
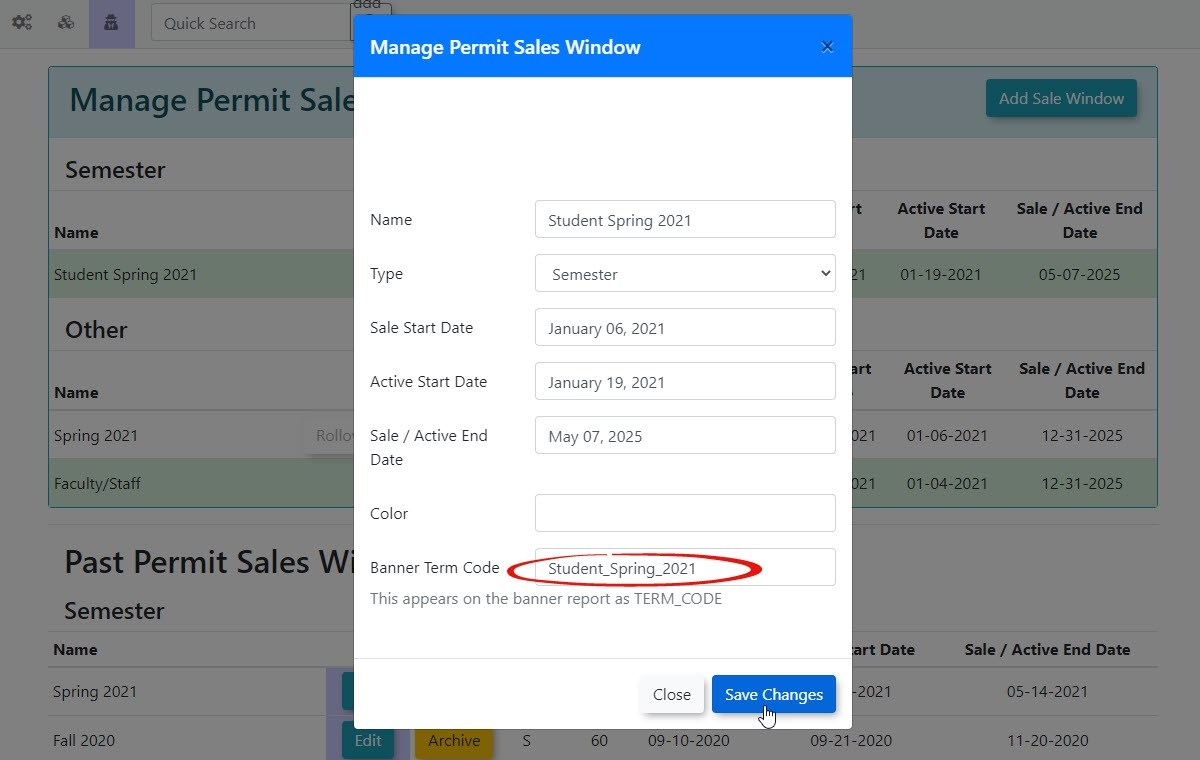
OnYou must enter a Term Code specifically used for permits on the sales window configuration page, we need to enter a Term Code used for Permits only.
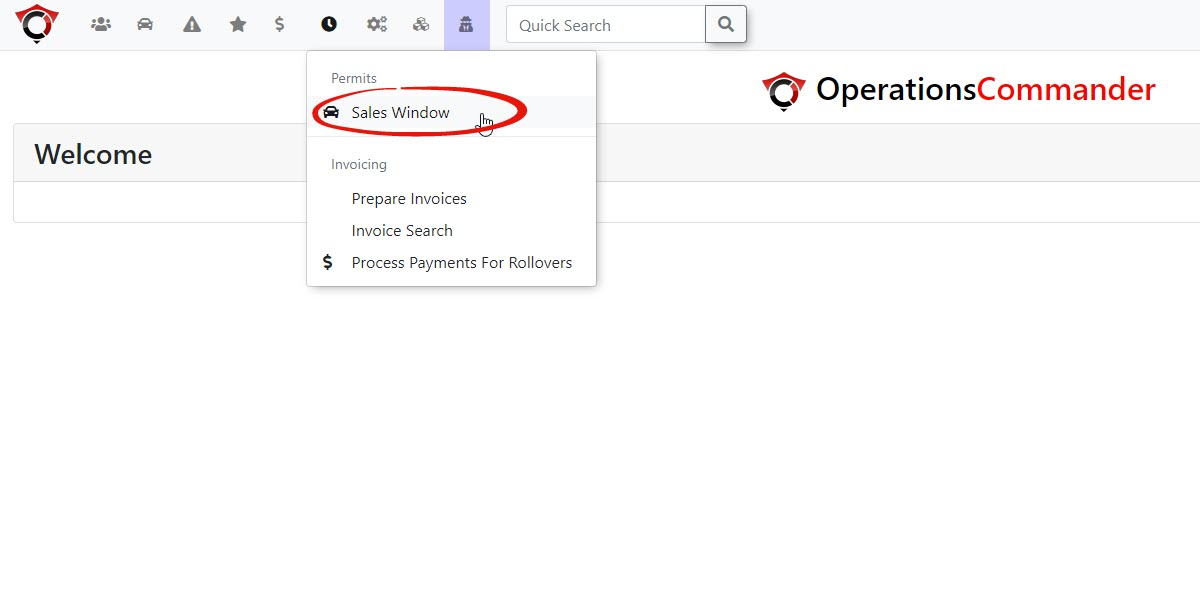
To dopage so goit to the Permits Menu and select Sales Windows
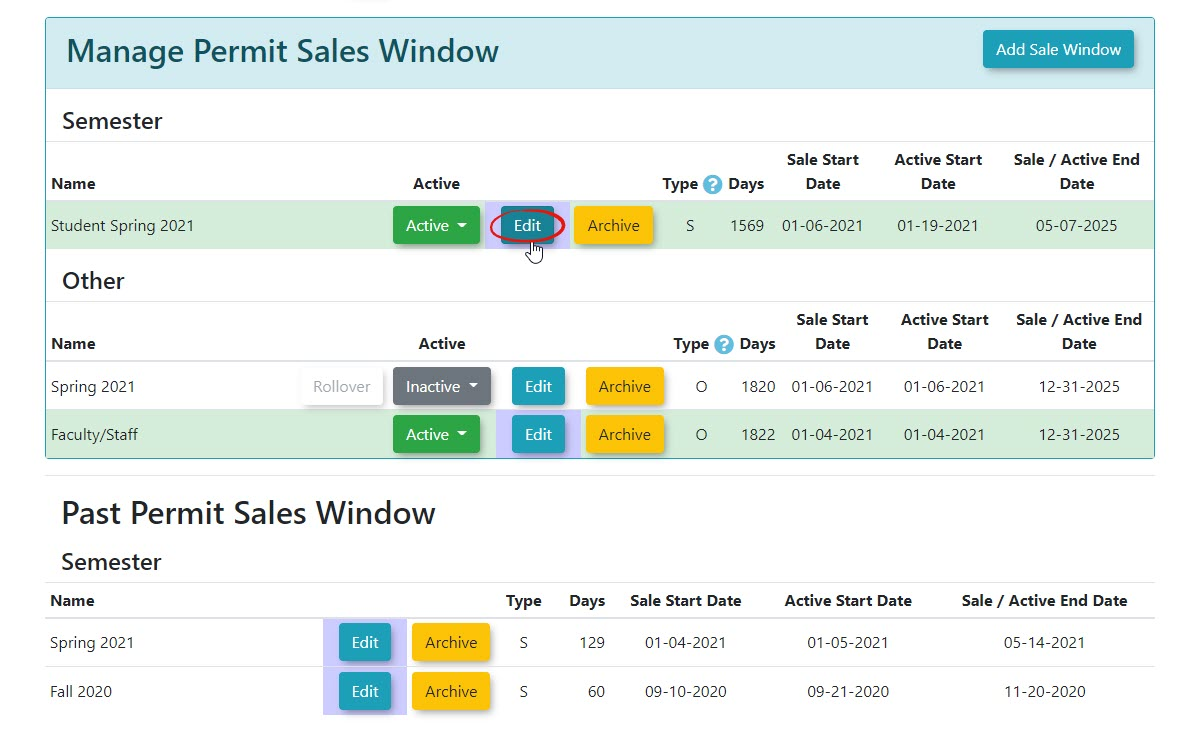
To access the configuration screen, click on EDIT.
Here you will enter the Term Code for the selected Sales Window that you want to appearappears on the permit purchases export.
-
Hover over Permits and select
-
Click Edit to access the configuration screen for the desired window. -
Enter the appropriate code in the Banner Term Code field.
-
Click the Save Changes button.
Activate Script to Run on a Schedule
-
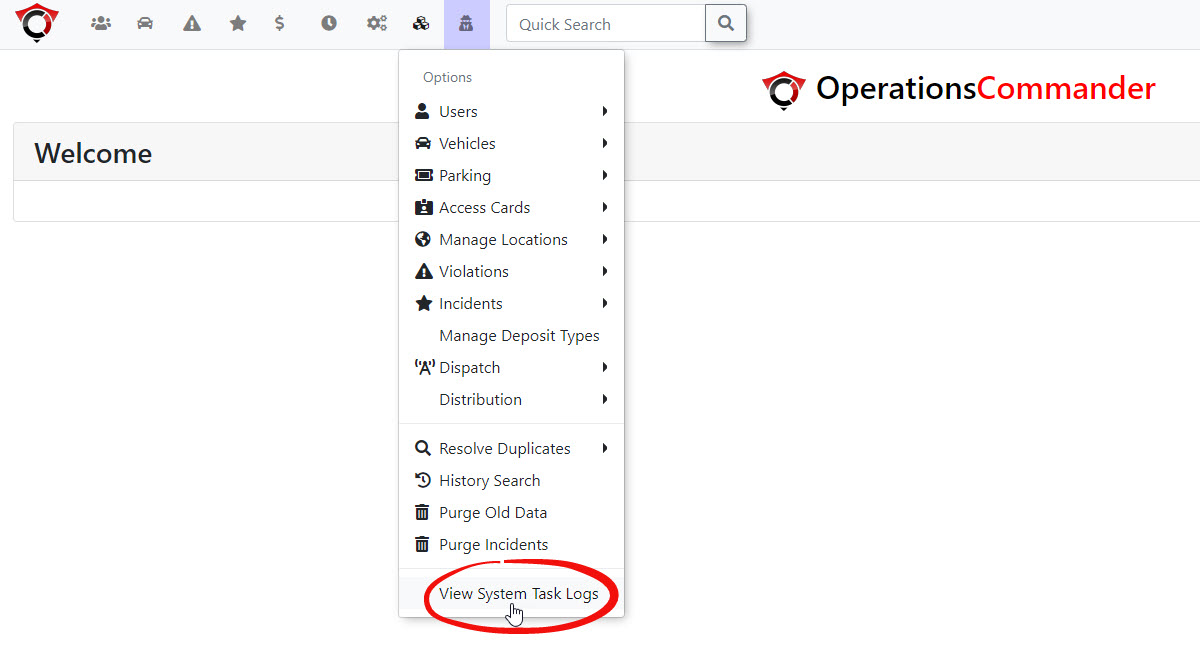
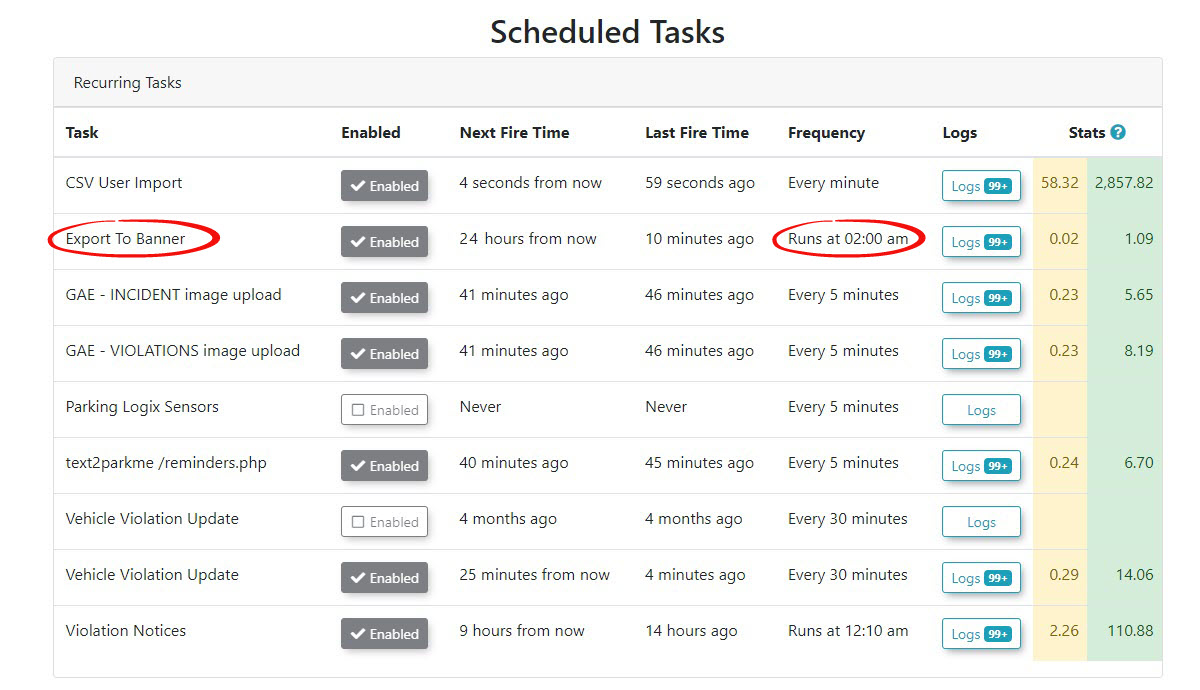
YouClickmustViewnowSystemensureTask Logs from theSystemmainTaskoptions menu. -
Ensure the associated system task is set to active and has an active schedule
setset.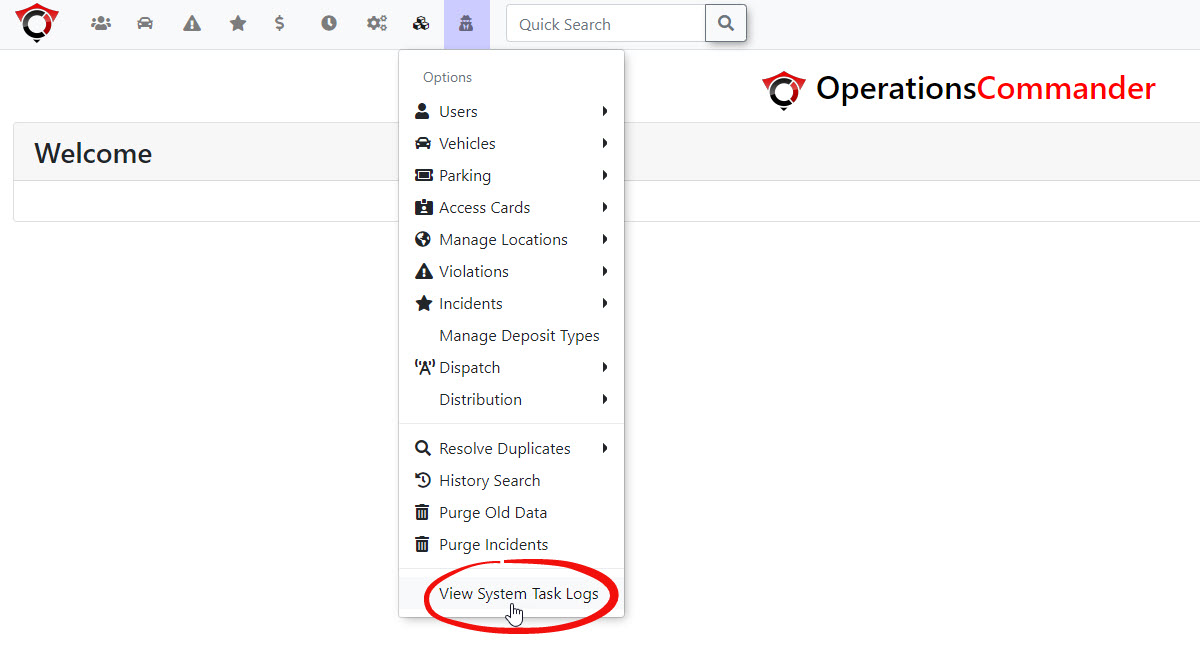
In this example, the Tasktask is set to run at 2:00 amNightlynightly).
Using Thethis User Portal
Feature
YouOnce areconfigured, nowthe setsystem toautomatically makehandles the data export based on your scheduled tasks. Administrators can verify the workflow by performing a paymenttest transaction on the user portal.
Performing a permit.Test Transaction
-
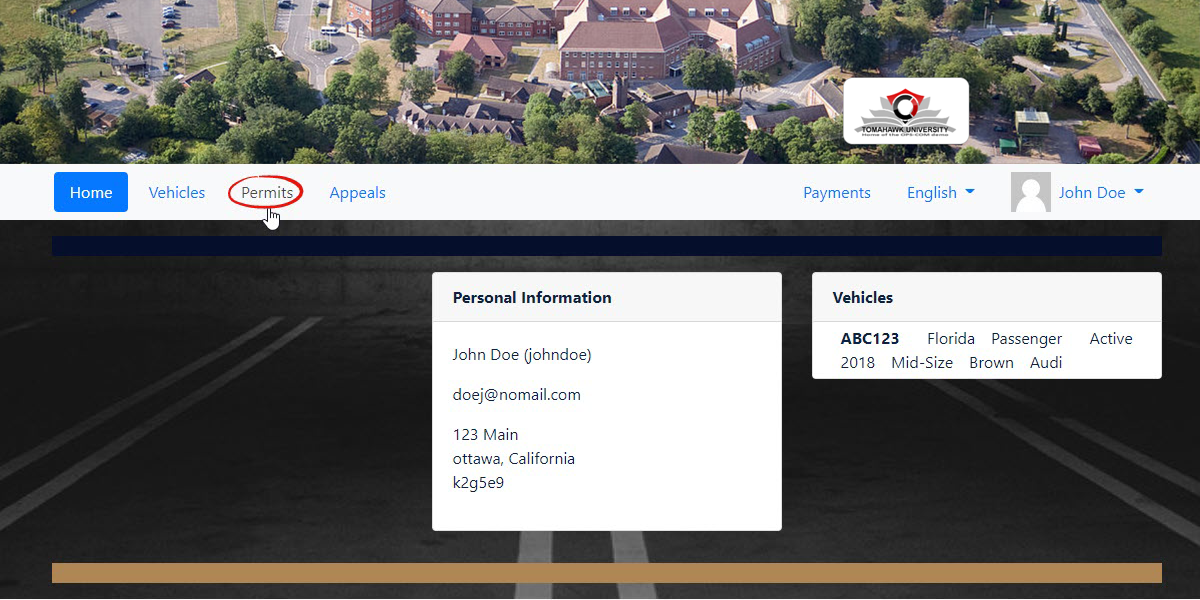
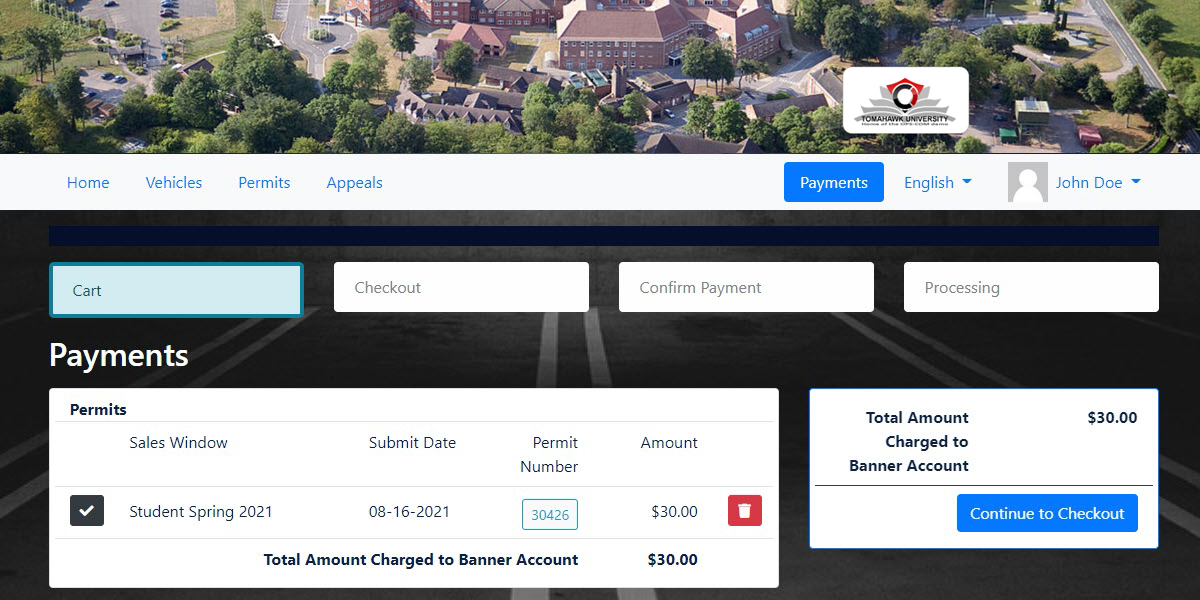
GoNavigate to the user portal and clickonthe Permits menu item.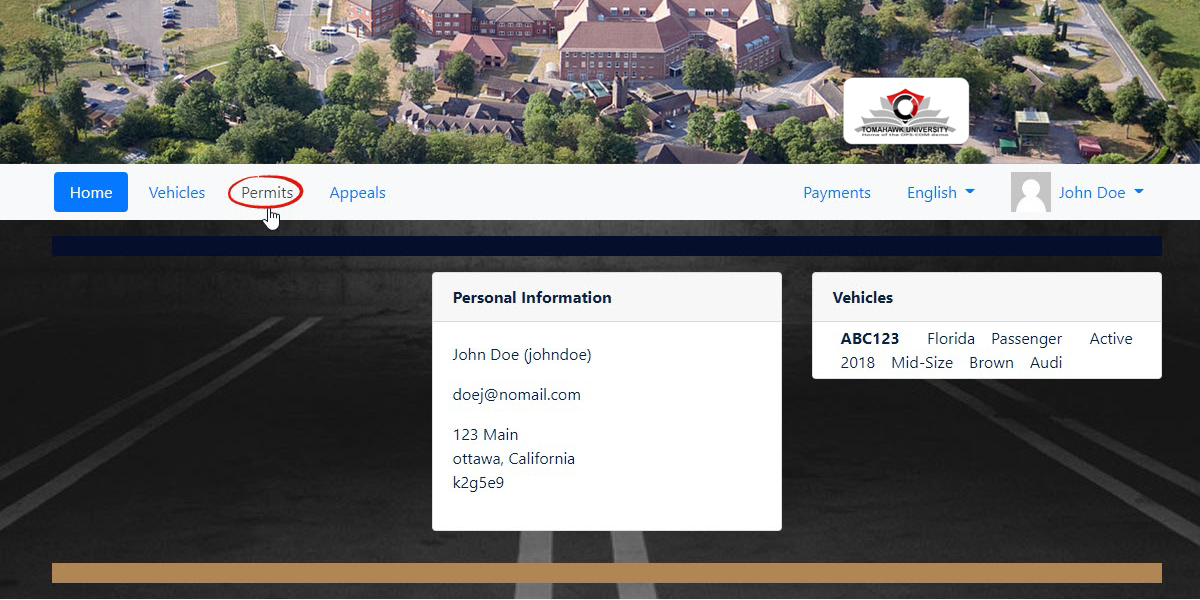
-
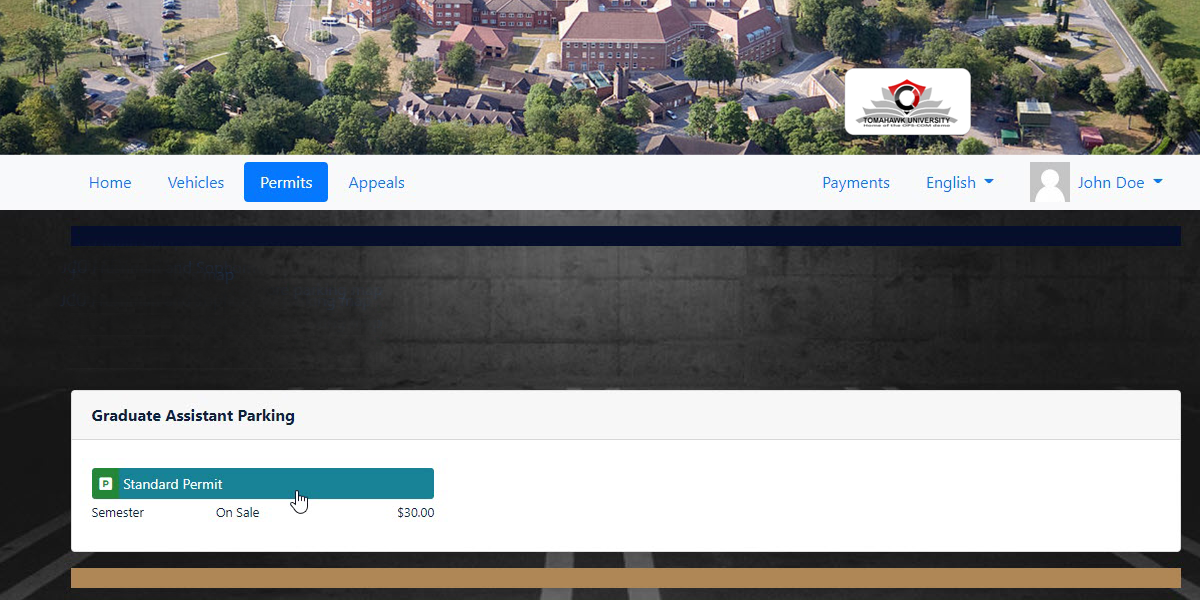
Select the
Lotlot you wish to purchase a permit in.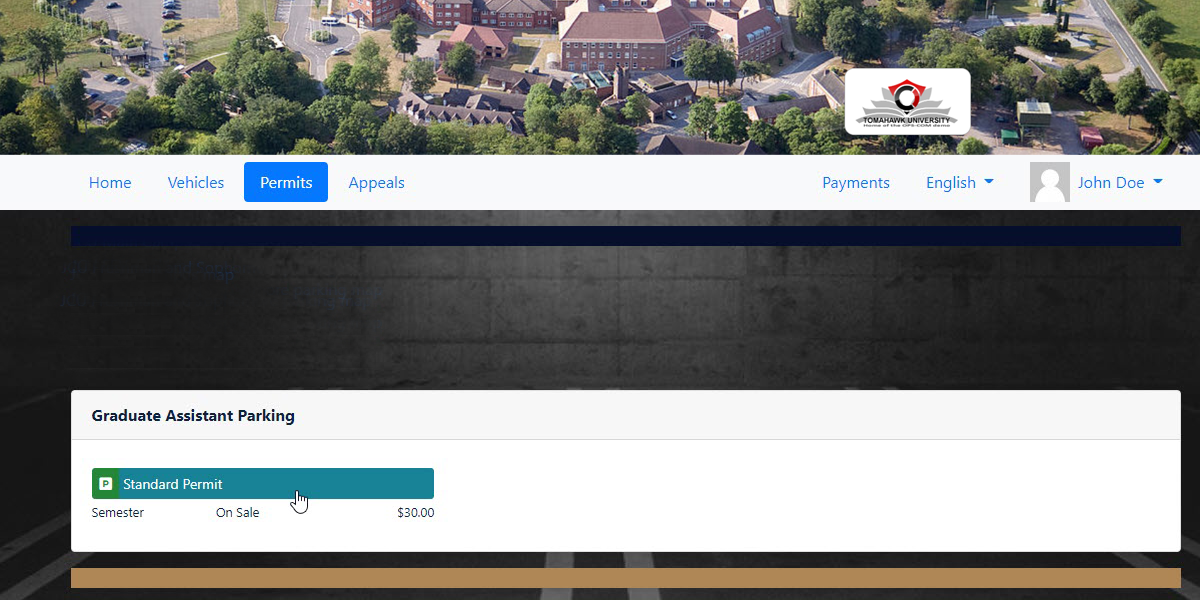
-
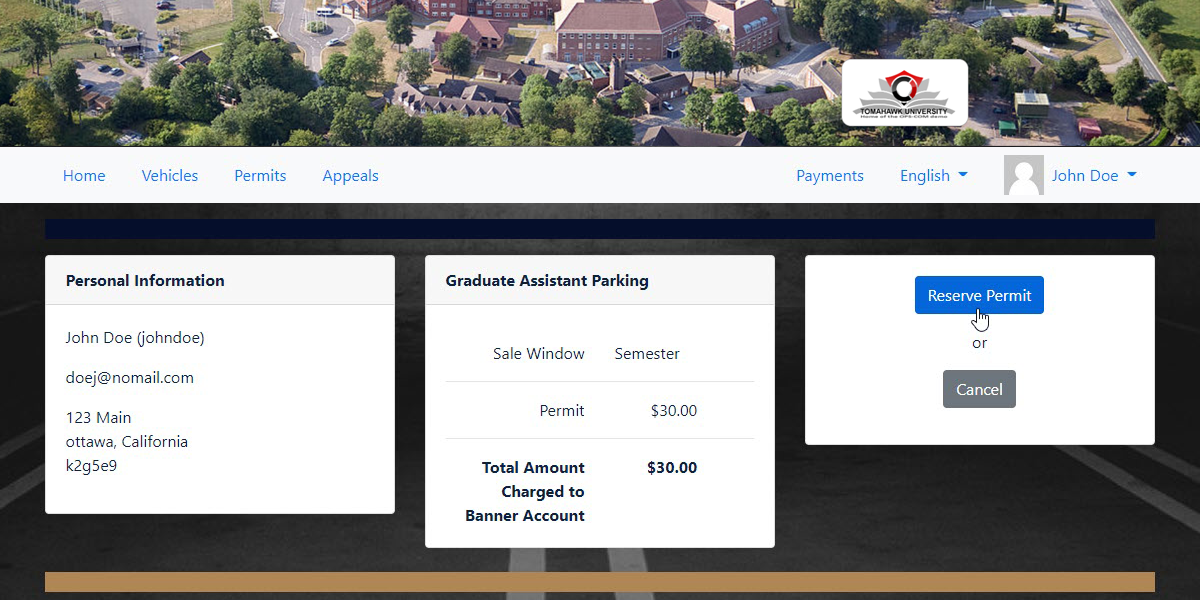
ClickClickthe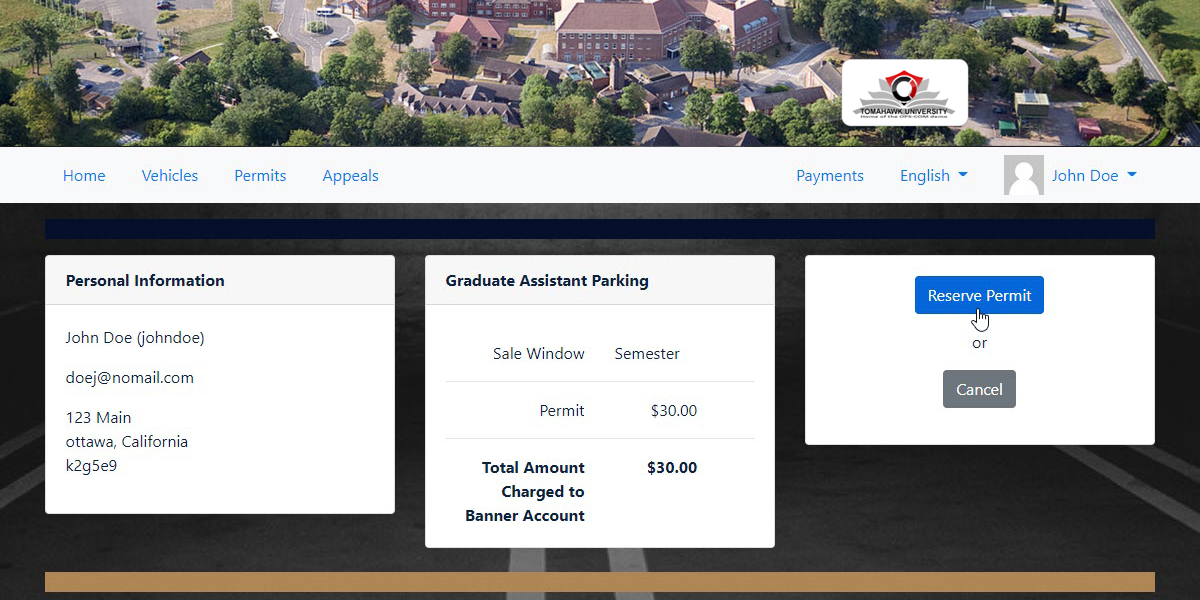
-
ClickContinue to Checkout to view your
Cart.cart.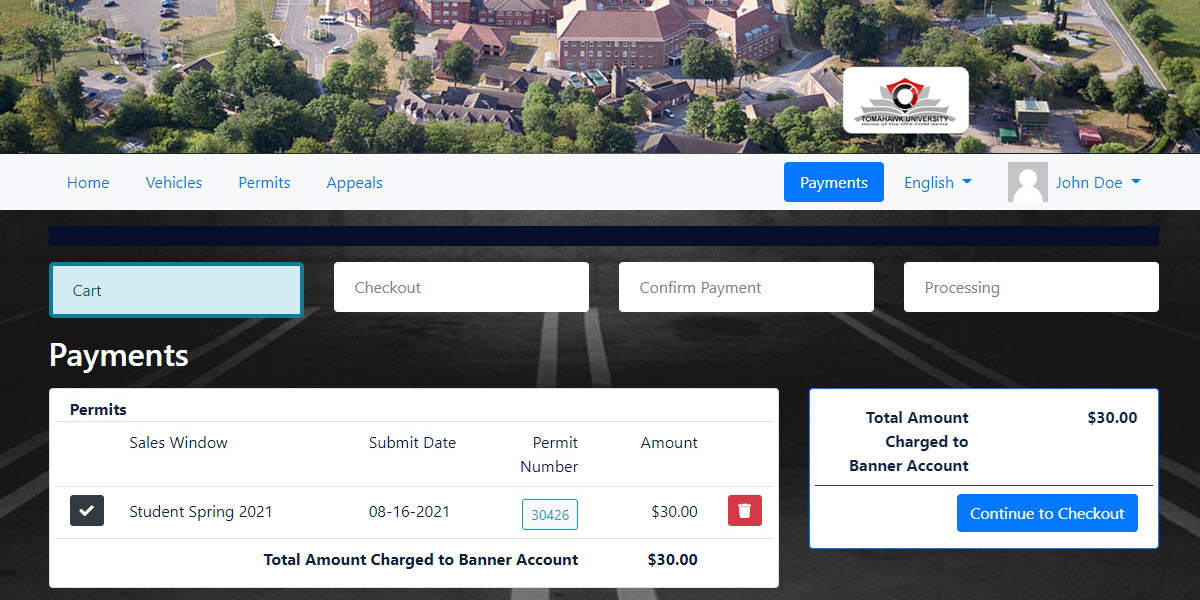
-
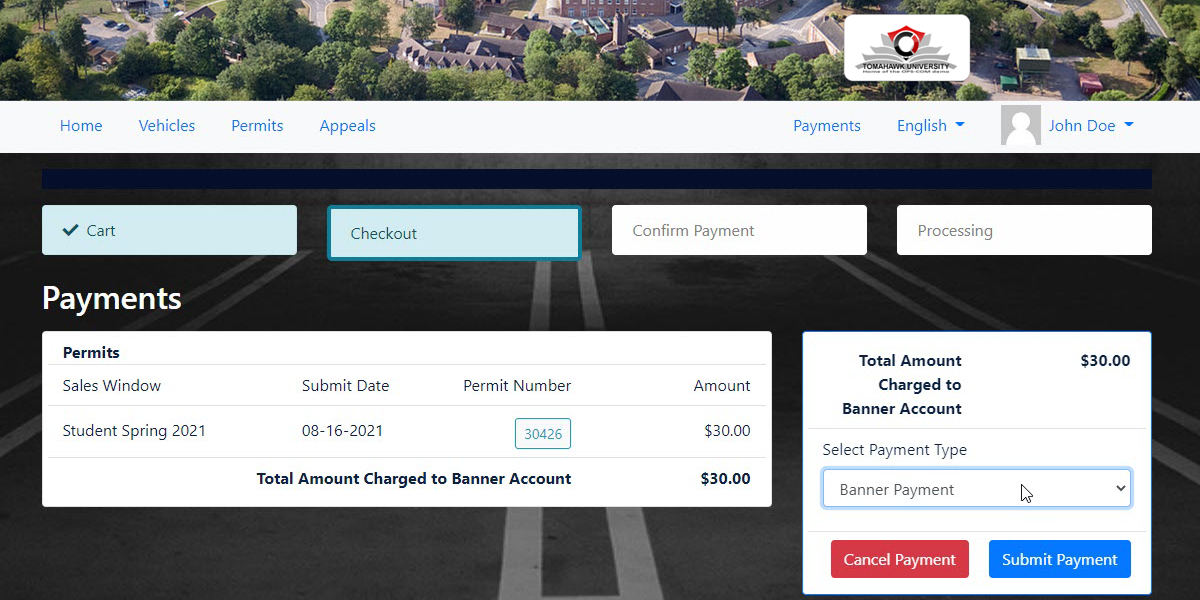
This can be configured so that Banner Payment is
yourthe only selectionavailable.available to the user.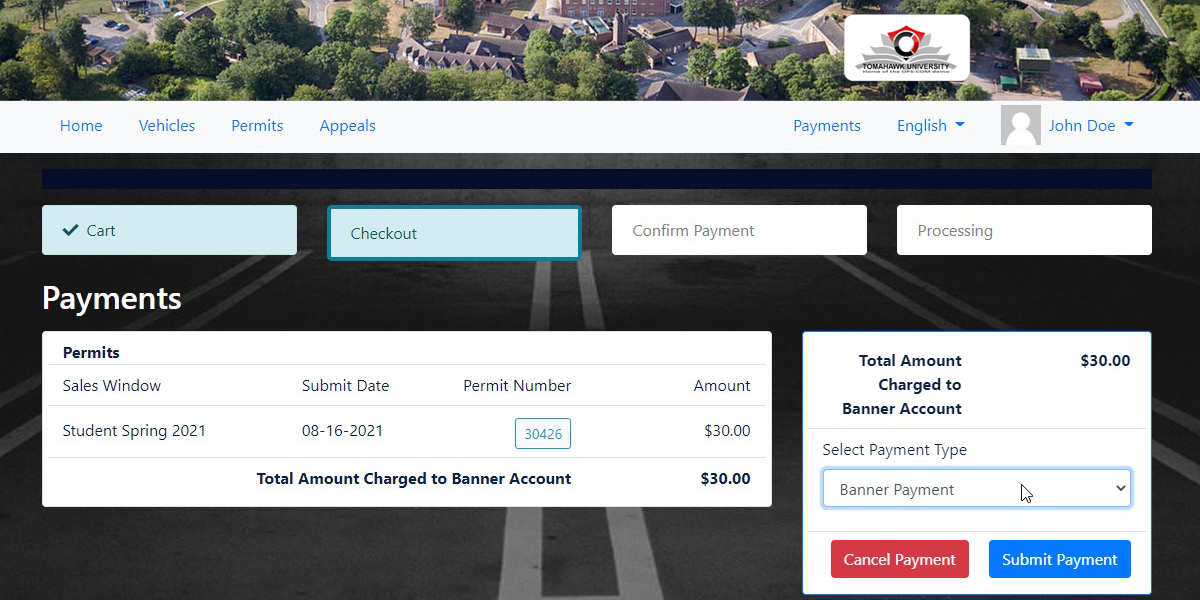
-
ClickClickthe SubmitPayment.Payment button. -
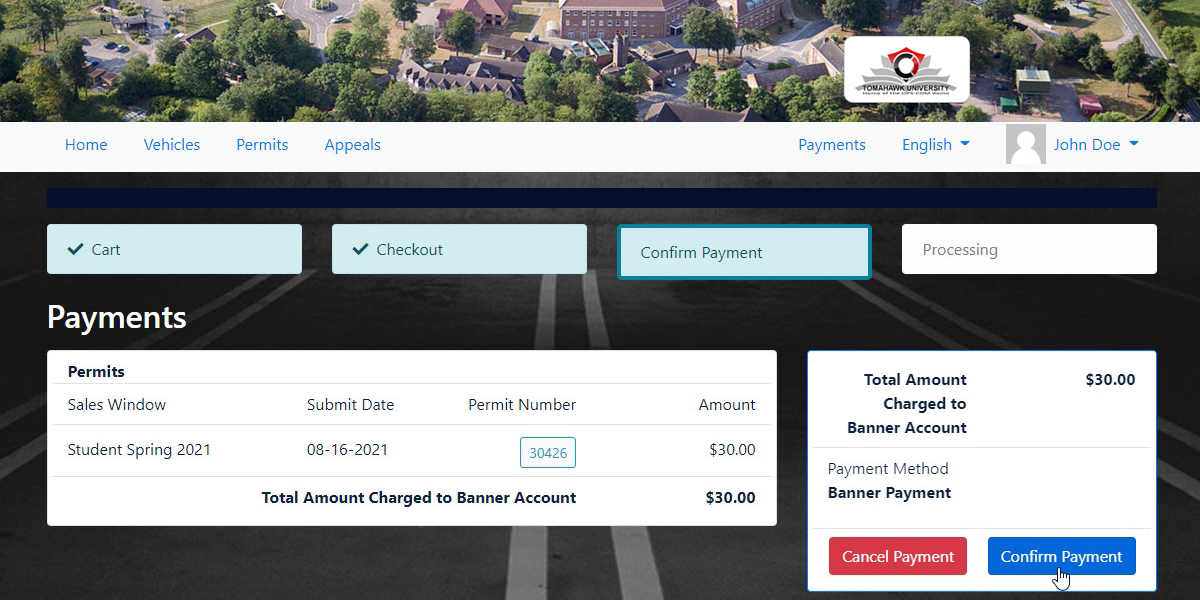
The screen will refresh to show theClick Confirm Paymentpage.ClickonConfirm Payment.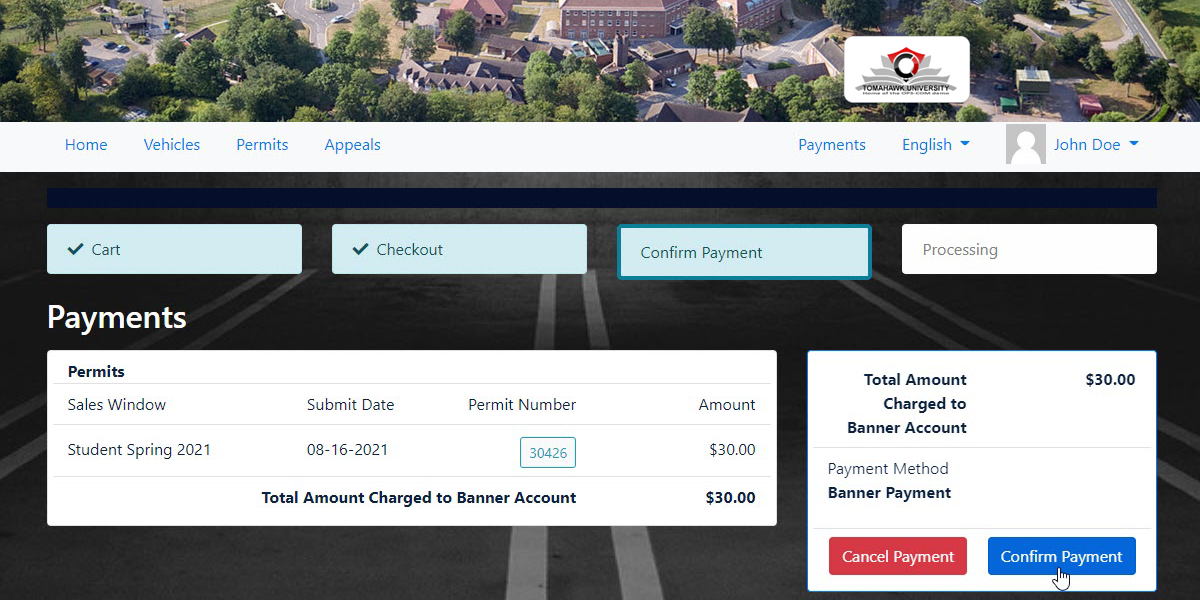
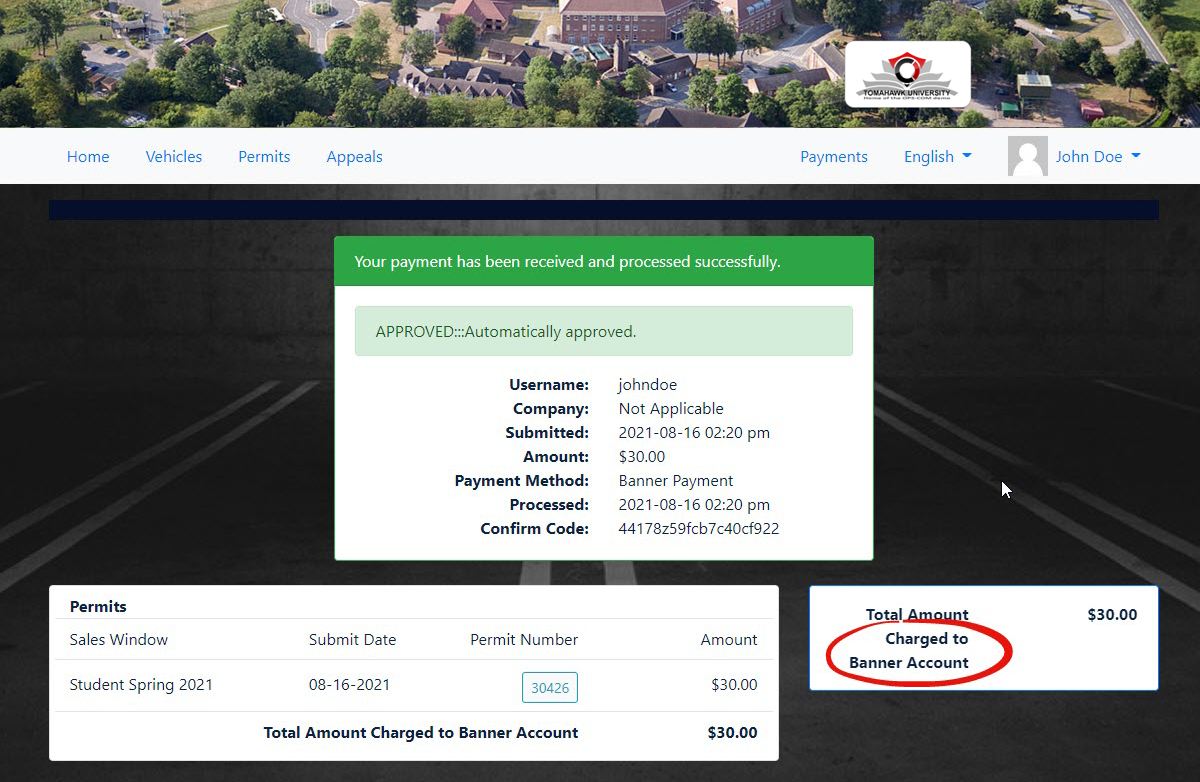
Oncethepaymentrefreshedisscreenprocessed,toyoufinalizewillthegettransactionanand generate the online receipt.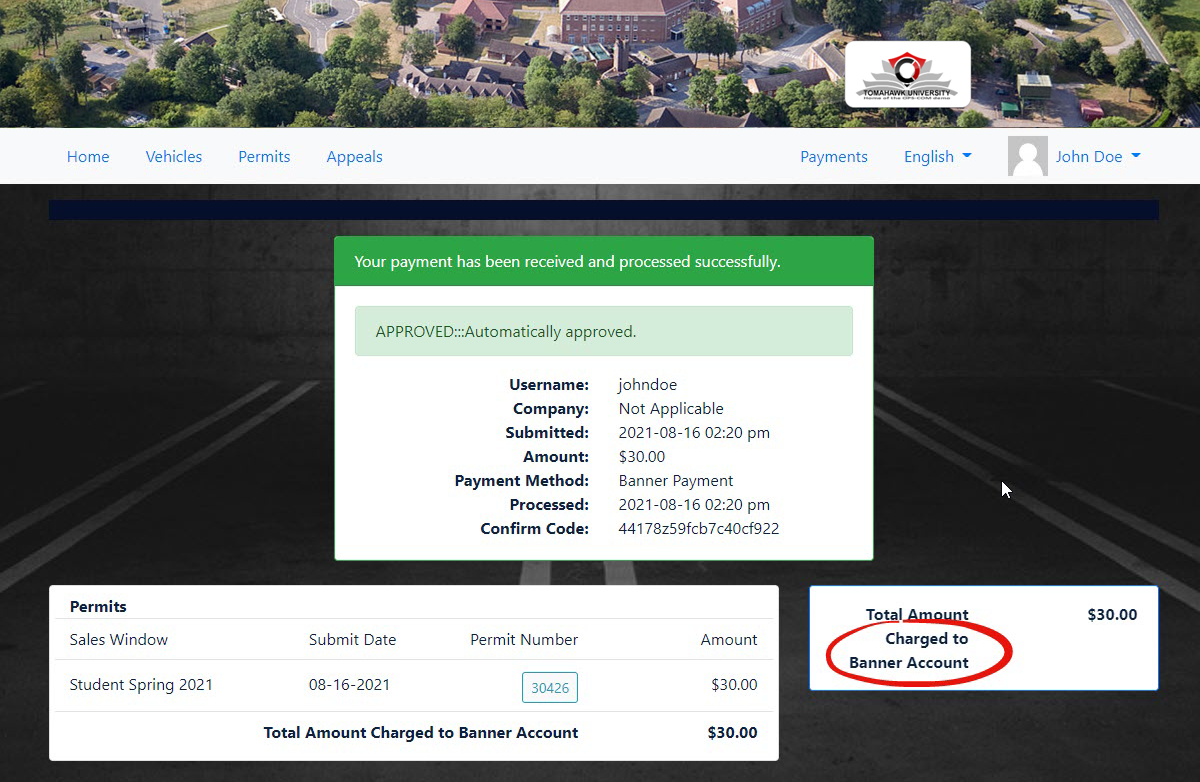
Best Practices and Considerations
-
The It actively gathers any violations or payments that can be sent toSome additional information on howUnderstand theBannerexportprocesstrigger:works:bannerBanner that haven't been exported yet.WhenOnceaanviolationitem has been exported by the system task, ithasisainternallyflag put on it that marks it has been exportedflagged toBanner.prevent duplicate exports. -
ItAnticipatewilluniqueexportfilethegeneration:violationsTheit found into a new file, andsystem does notaffect any previously output files, meaning it doesn'tcreate a cumulative file that gets more data added to it each day. Rather, it creates a completely new CSV file every single time itruns;runs.thisThis interval isn't necessarilydaily,daily; it runs at whateverintervalfrequency your organization has decided. -
Handle missed schedules carefully: If the
clientsystemhastaskdecided for it.This would mean if they missedmisses a scheduled day, therewouldwill be more than one new file in the output folder forthemyour team to process. Administrators must be prepared to process all pending files inBanner.Banner to ensure financial records are fully reconciled.