Permit Purchase by an Admin
Purchasing
The Admin Portal Permit Purchase process allows administrators to assign a Permitstandard parking permit and process the associated transaction on behalf of a user. Its primary purpose is to seamlessly facilitate in-person or administrative permit assignments while accurately logging the financial transaction in the system. This article is intended for OPS-COM administrators.
Setup and Configuration
There is no specific system configuration required to use this feature, provided your parking lots, permit inventory, and payment methods are already established. Processing a permit purchase is a standard administrative action available to users with the appropriate user management and payment processing permissions enabled on their account profile.
Using this Feature
Administrators can assign a permit and guide it through the checkout process in just a few steps.
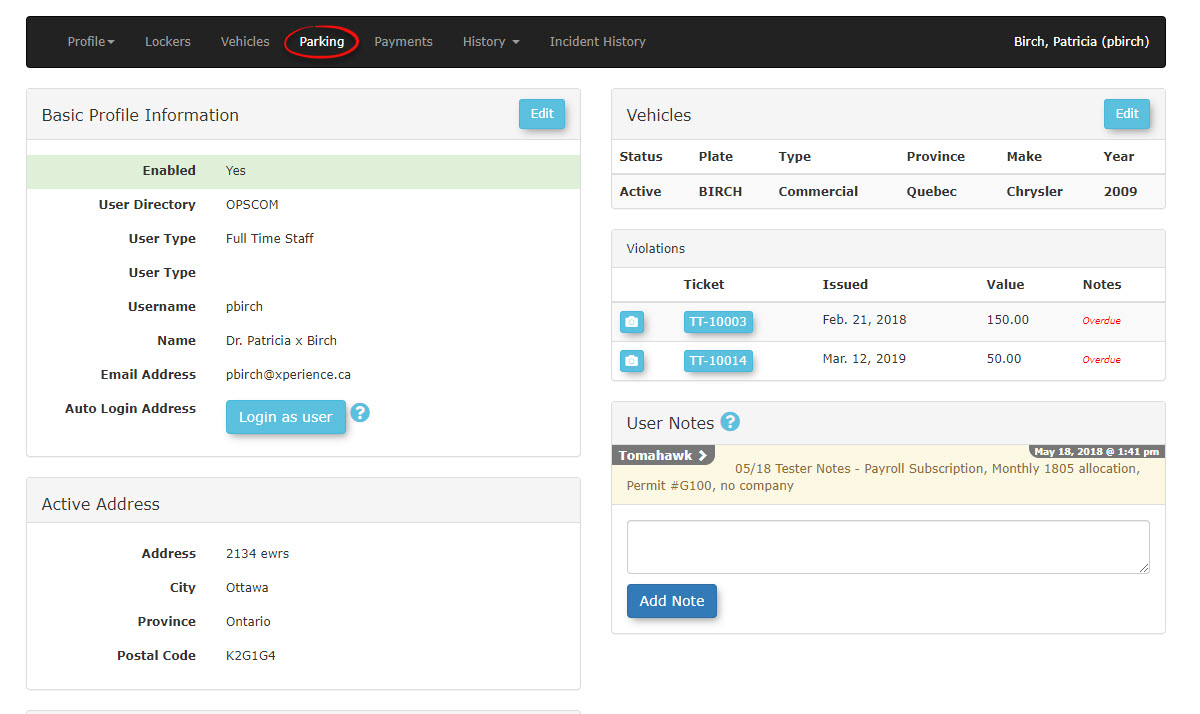
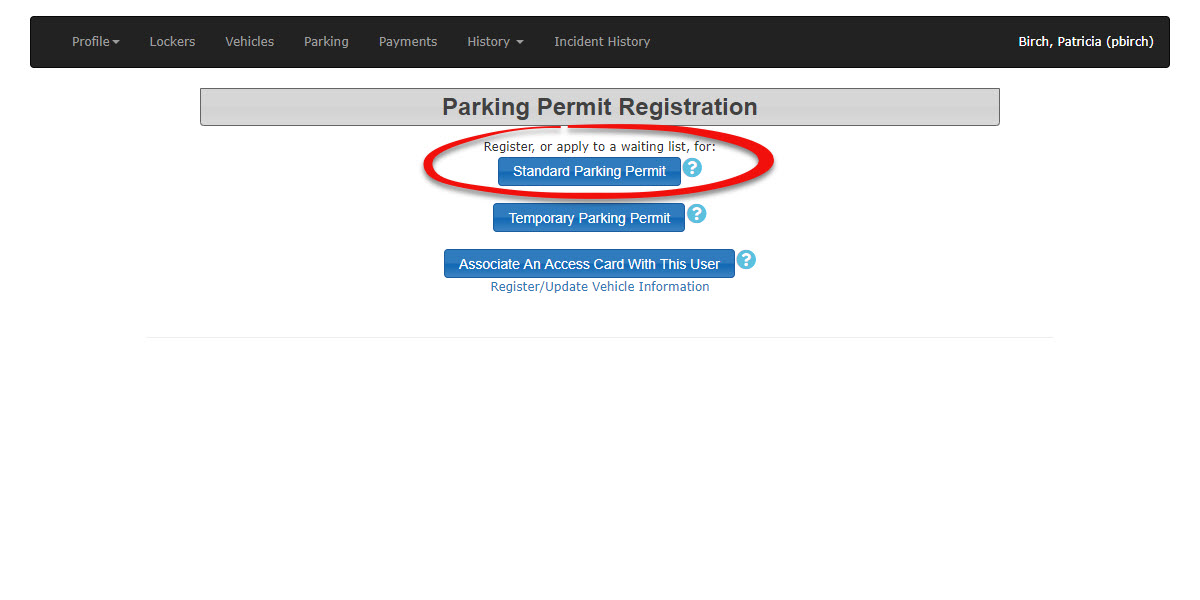
Tobegin goNavigate to
pbirch'the specific user'suserprofile and clickonthe Parking menu item.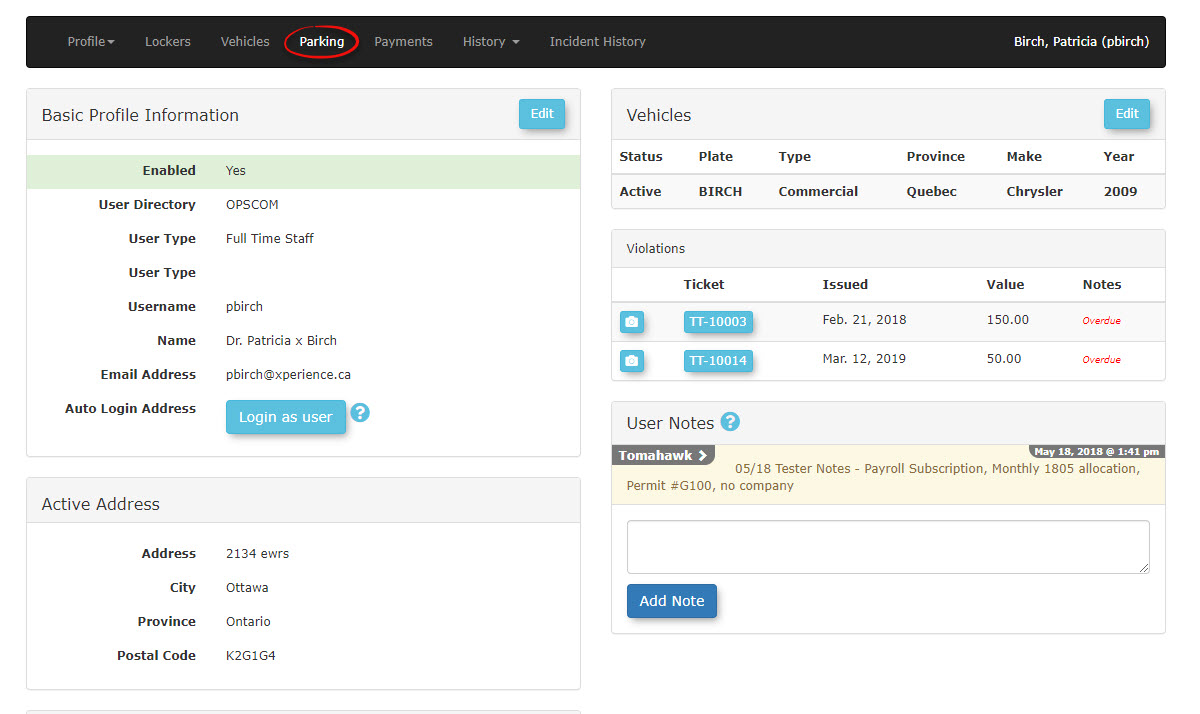
Thescreen will refresh withClick the
following option screen. You may purchase aStandard Permit,aoption.Temporary-
orAssociate an Access Card withSelect the
desired lot fromUserthisthescreen.drop-downIn our case we will select a Standard Parking Permit.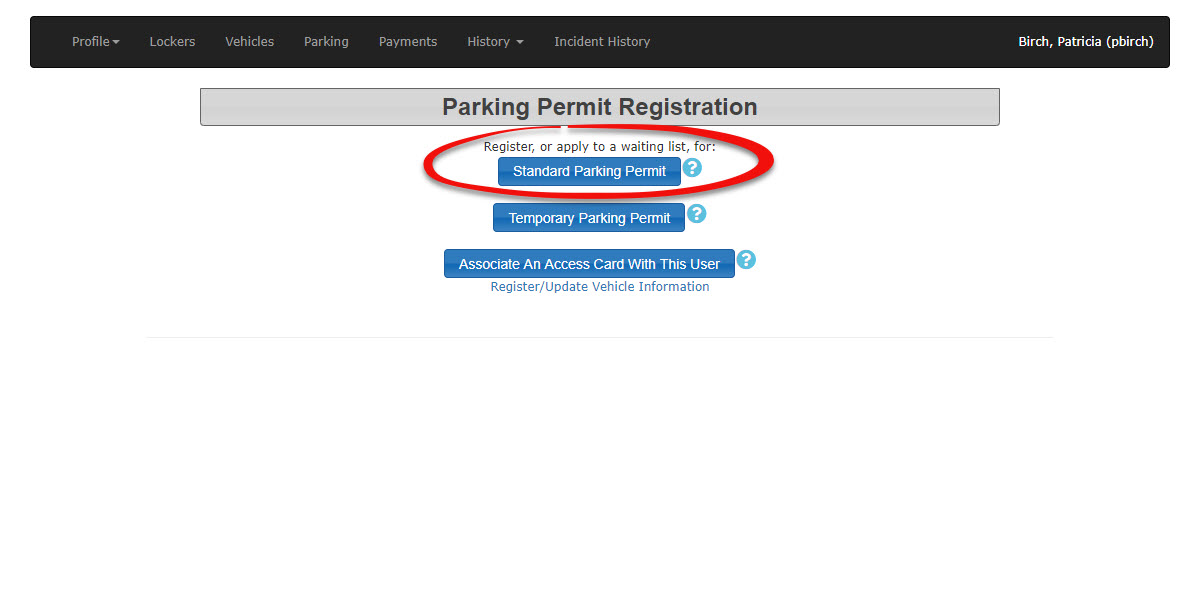
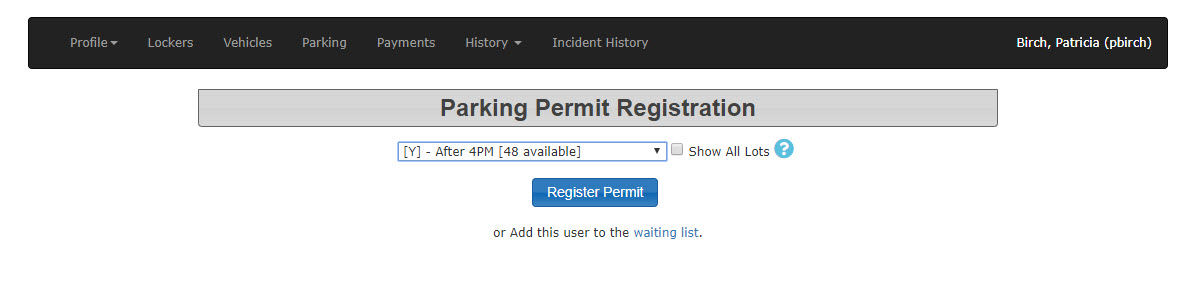
The screen will refresh with the lot selection tool.
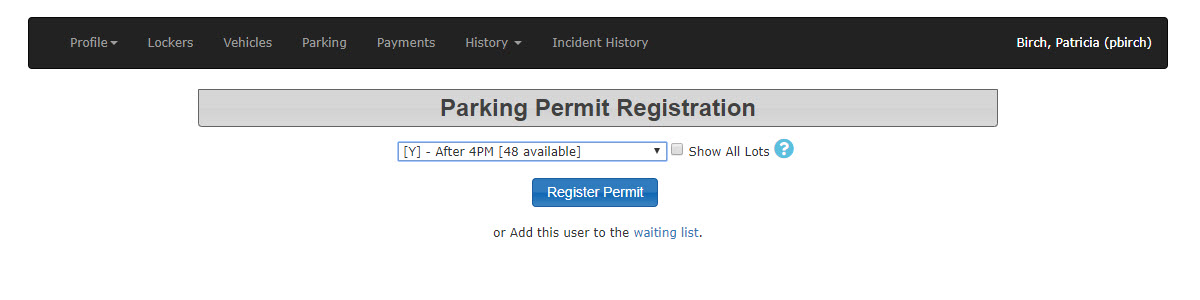
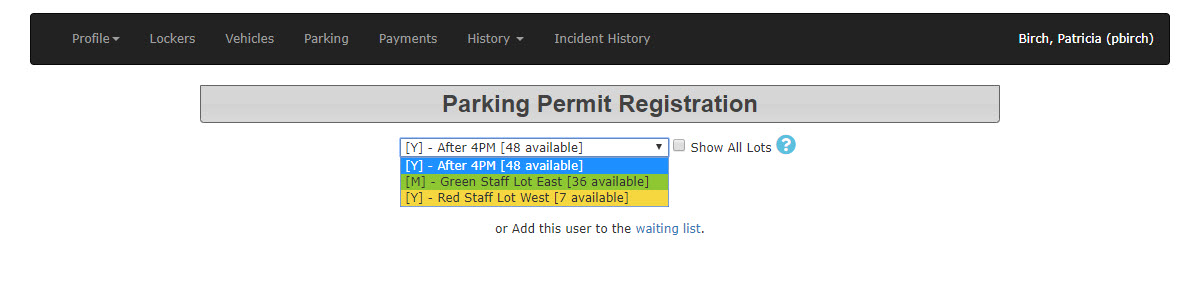
The drop down allows the admin to select various lots that are available for this user based on user type. In this scenario lots available to staff members can be selected.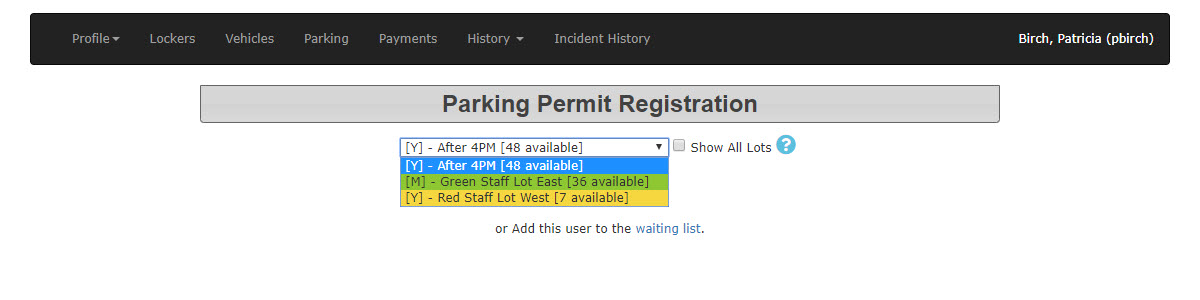
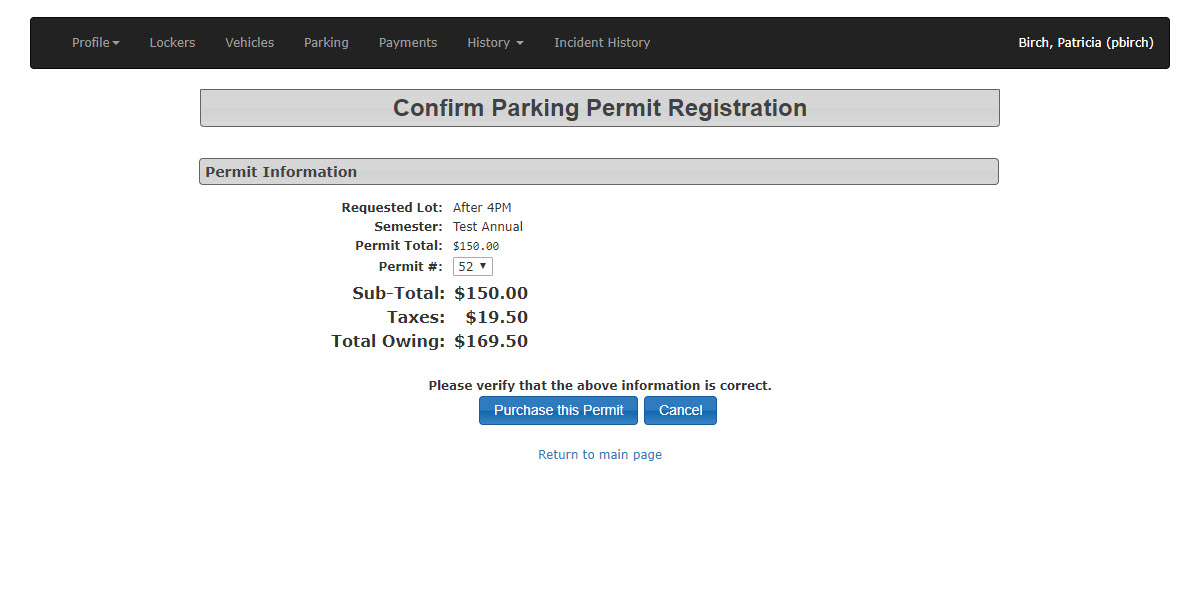
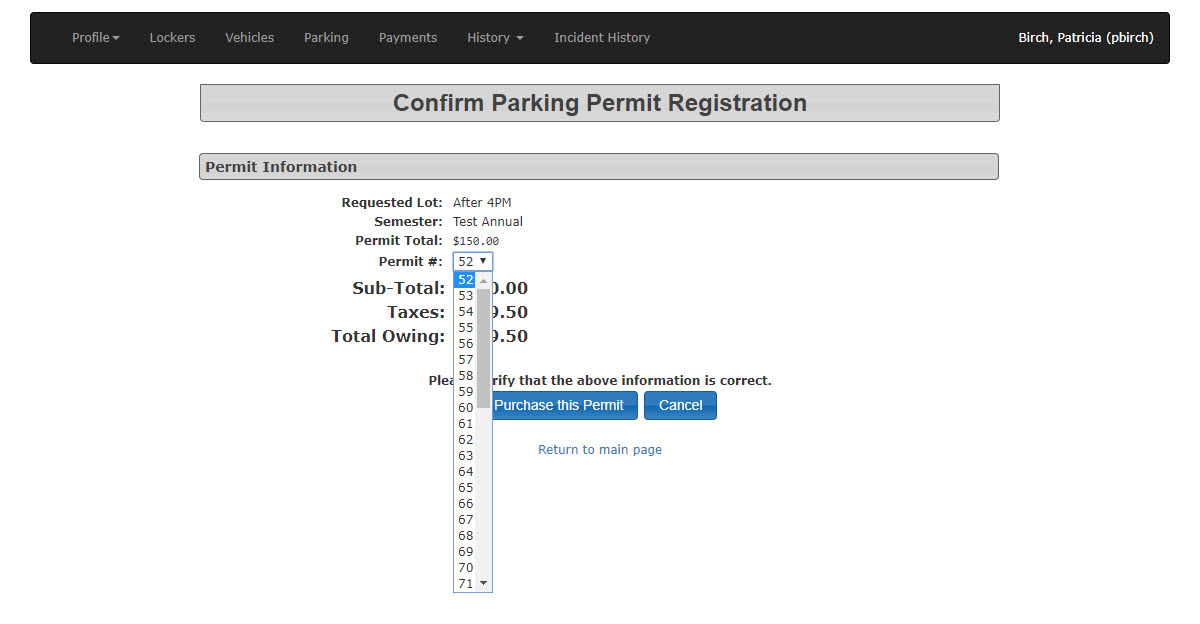
As suggested we will select theYearly After 4PM lot. Notice the number of available spaces in each lot is displayed here as well.The screen will refresh with a confirmation screen that displaysReview the purchasedetails.
details
on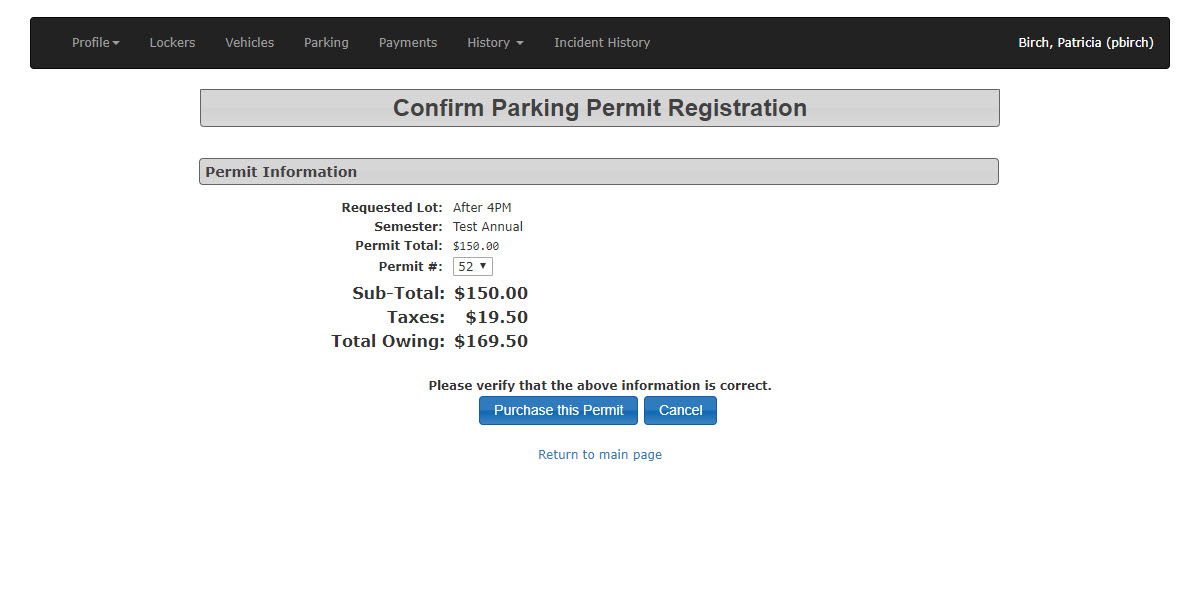
Thethe confirmation screen. By default, the system willbring upselect the next available permit insequencethebysequence.default,Tohowever if there were a requirement to haveassign a specificpermit issued to the user, the admin maypermit, expand the permit#numberdropdrop-downtomenuselectandamakespecificyourpermit.
selection.-
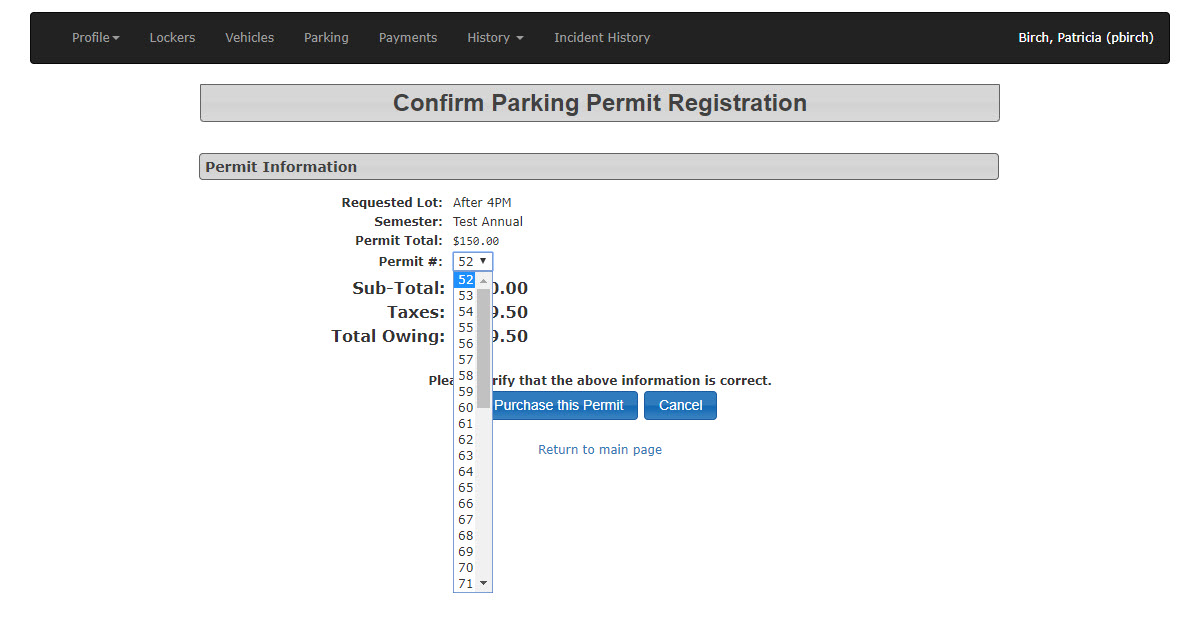
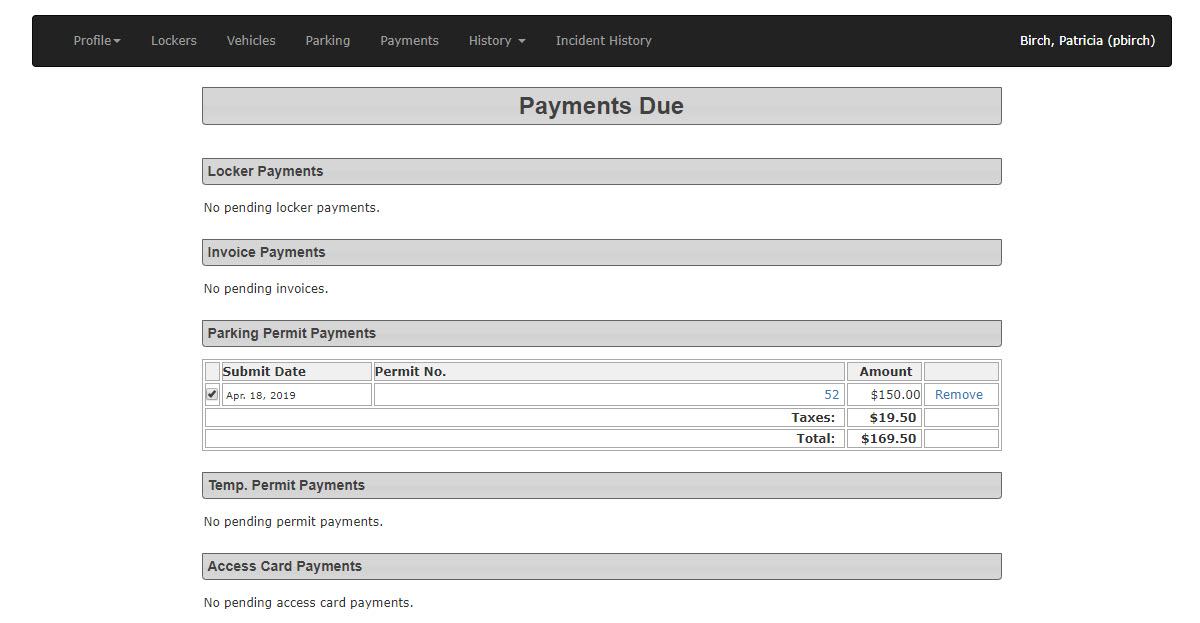
OnceClick thepermit is selected Click onPurchase this Permittobutton.proceed. TheReview the items on the Payments Due screen
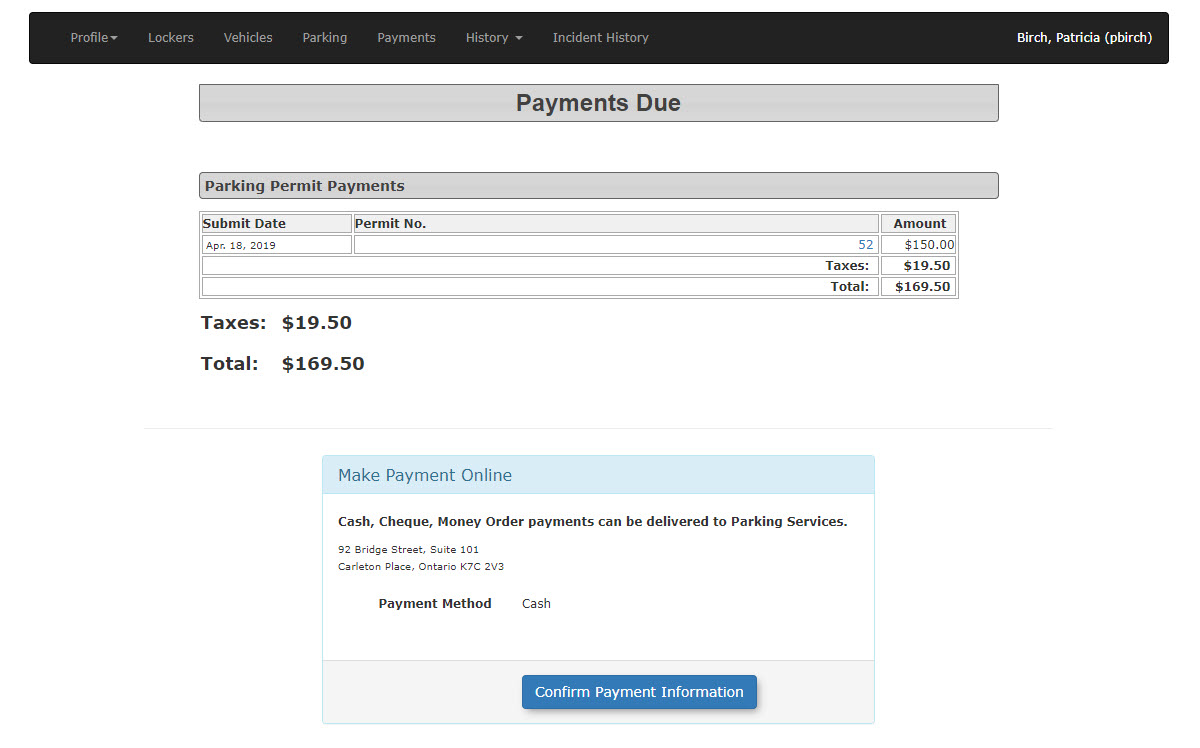
willandrefresh withclick thePayments Screenlisting the permit as well as any other payment that would be due at this time. ClickProceed to Paymentto continue.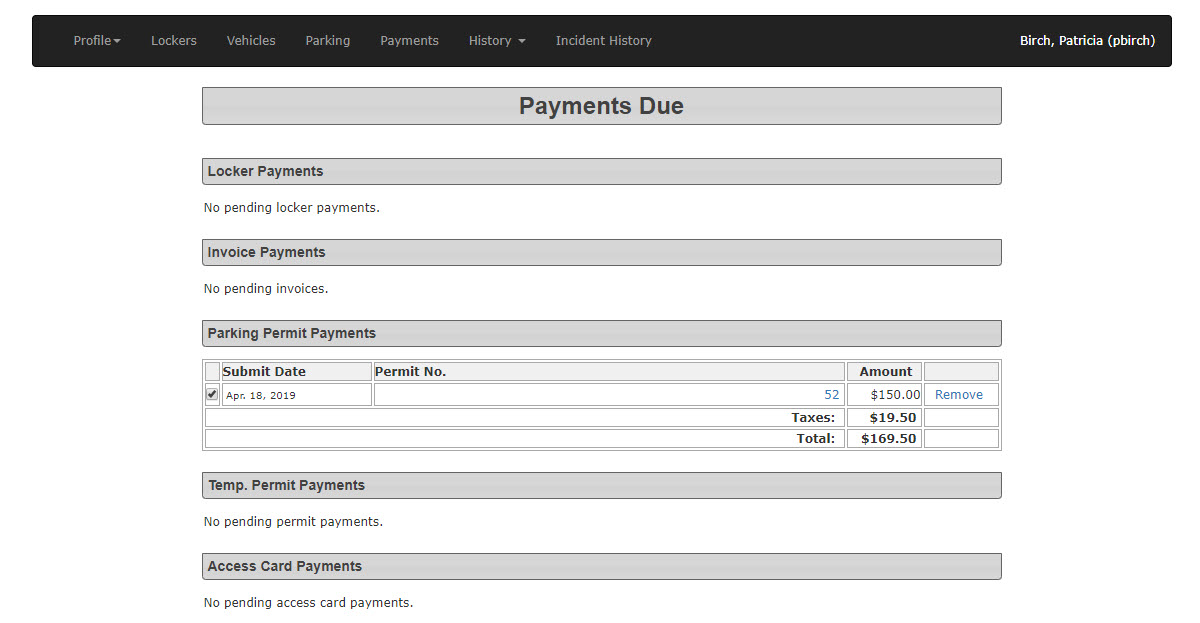
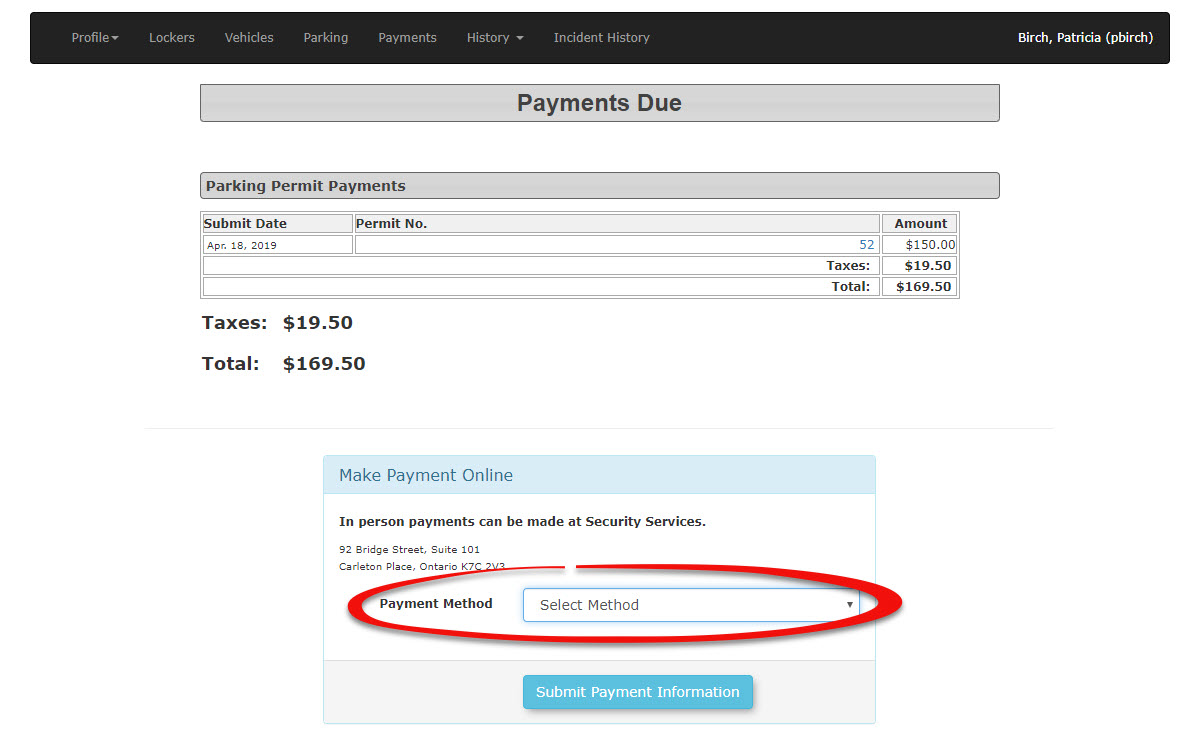
Thescreen will refresh withSelect the
PaymentdesiredTypepaymentselectionmethodtool.
(e.g.,
Cash)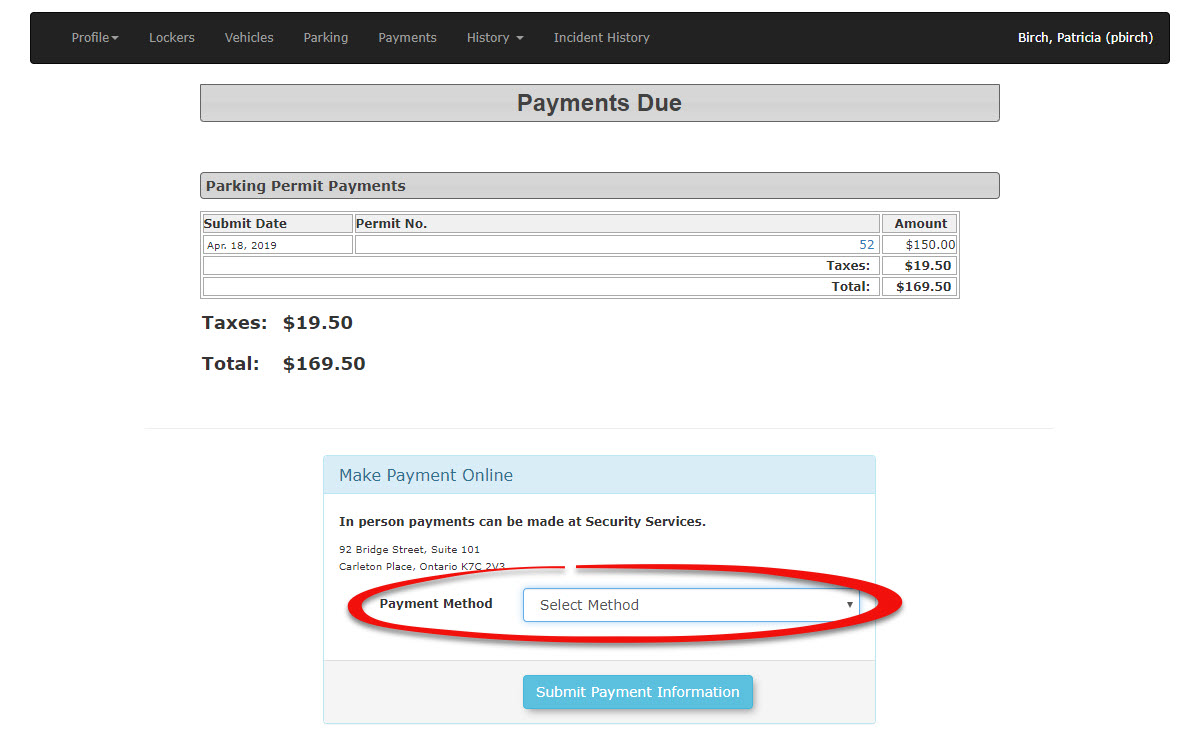
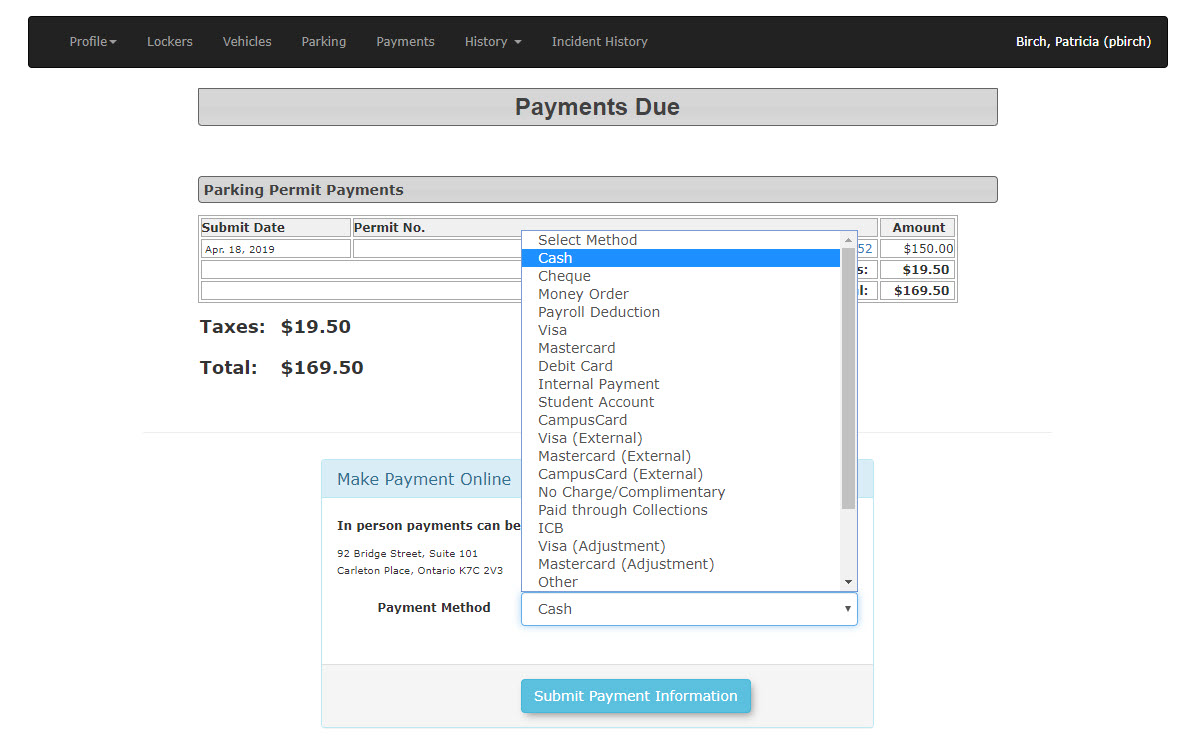
Thefromadmin may select whateverthe payment typethey wish to process this payment with from the dropdrop-down list.Inour-
we will selectcashasClick the
payment type. ClickSubmit Payment Typeto proceed.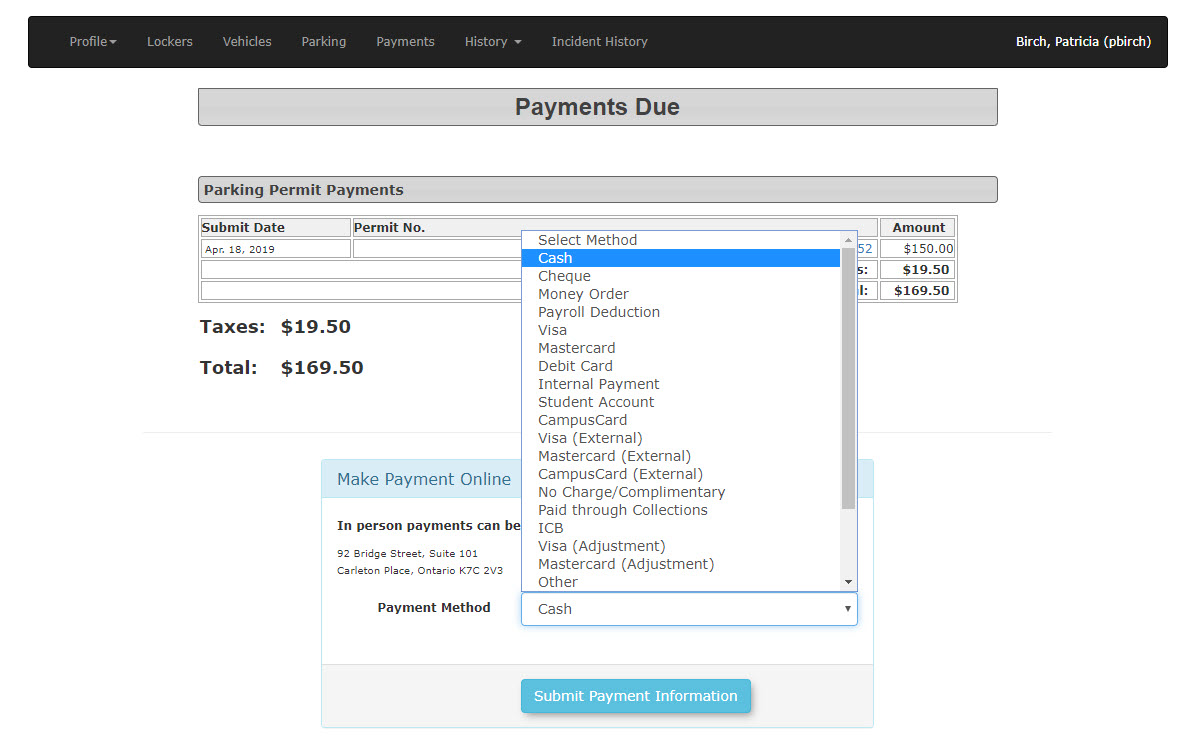
Thescreen will refresh with a confirmation screen showingClick the
payment details with totals. Click onproceed.
proceed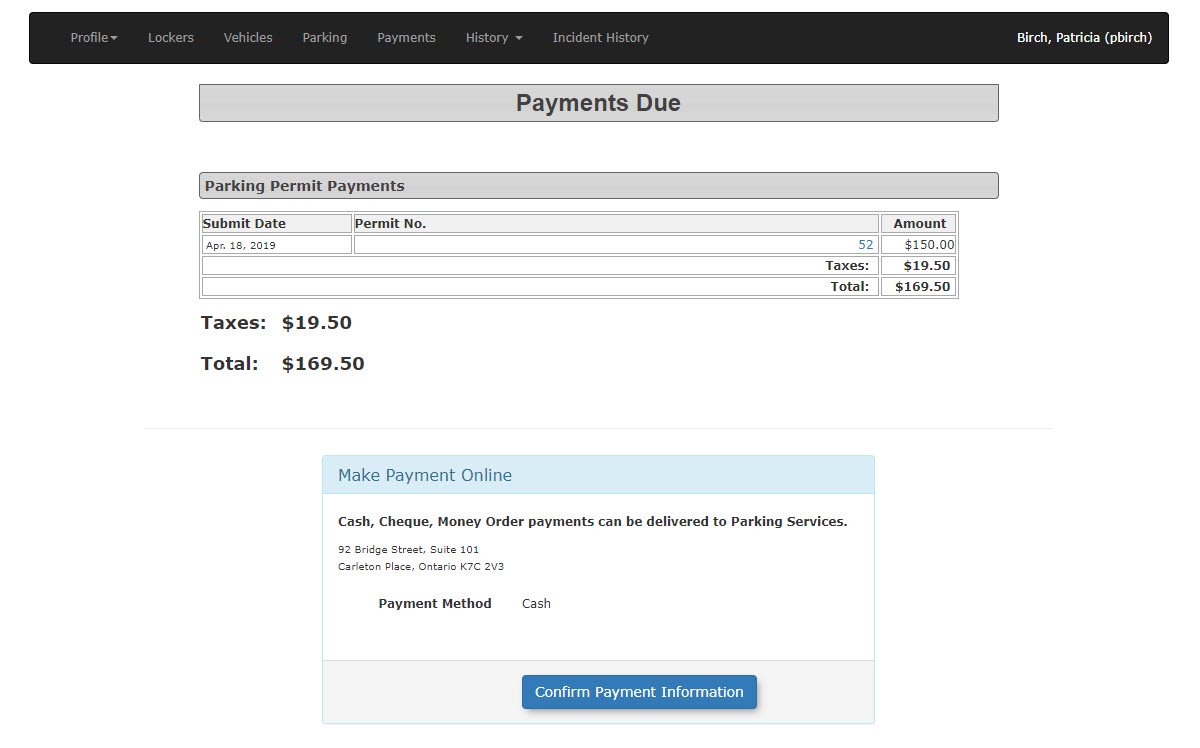
ThescreenReview the options available on the Transaction Details screen:
-
Process Manually: This option will
refreshcompletewiththe purchase and finalize the transaction. -
Cancel & Keep: This option will terminate the checkout process but keep the permit reserved in an awaiting payment status on the user's profile for future processing.
-
-
Click the
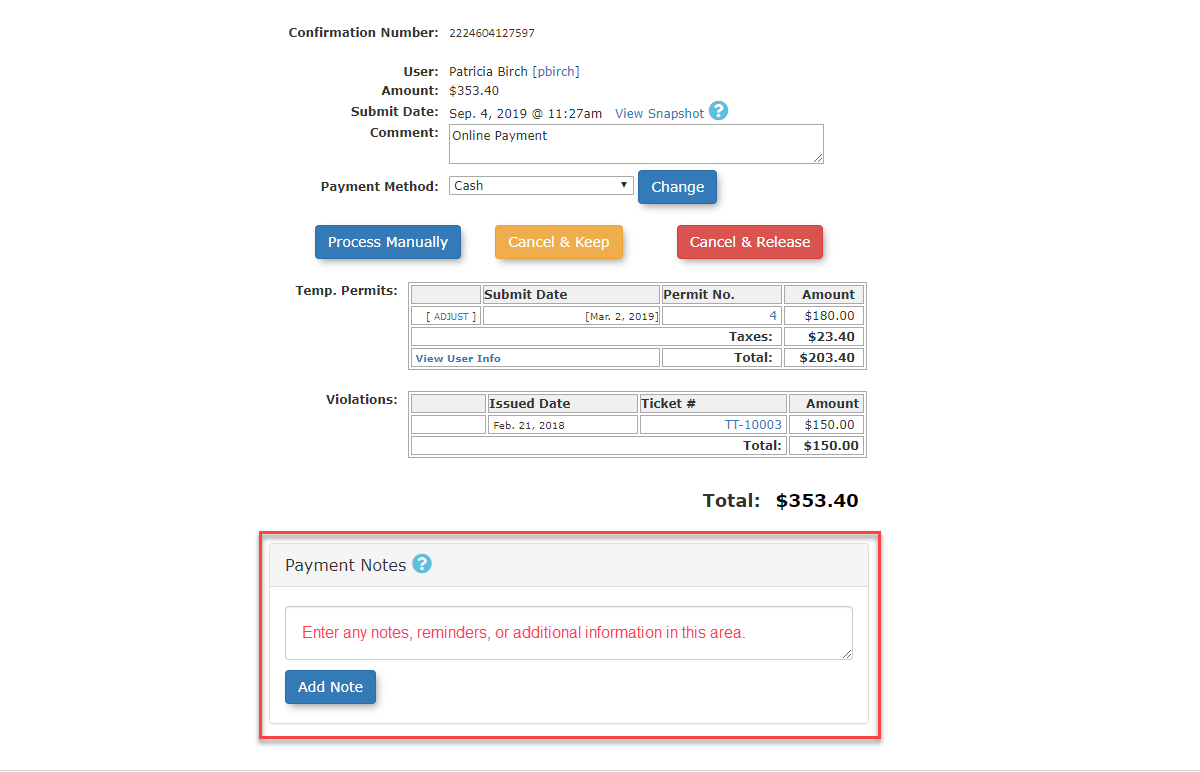
TransactionProcessDetailsManuallyscreen.buttonTheretoarecompleteseveralthesectionspurchase.on
Key thatInformation displayDisplayed
-
aboutLot
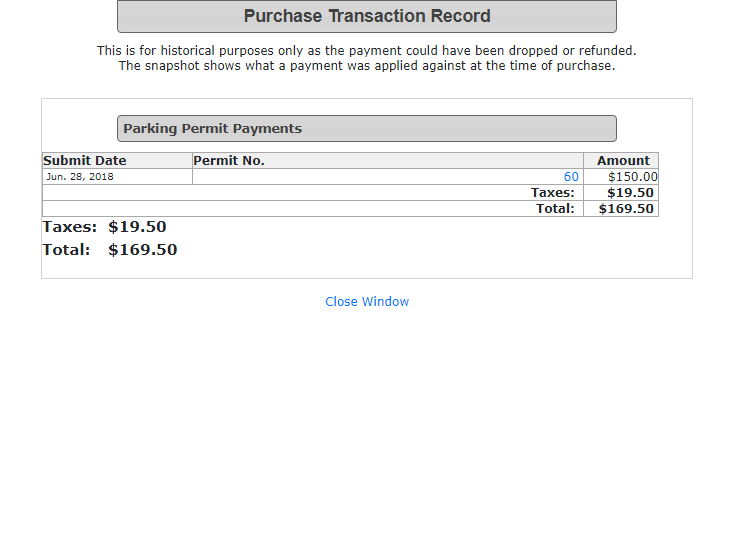
your transaction.1- TheConfirmation NumberAvailability:forWhenthis transaction.2- TheSubmit Datealong withselecting aView Snapshotlink which allows you to see the payment information for this purchase, however, it does not allow you to drill into the details of each transactionlot from thesnapshotdrop-down(Inmenu, theexamplesystembelow,willPermitdisplayNo.the60).number of available spaces. It will only displaythelotstotalthatofareallavailableitems andto thevaluespecificofuser'seachdesignateditemuserindividually.type (e.g., Staff -
View Snapshot: Located next to the
purchaseCancelSubmit&DateKeepwhich will cancelon the transactionbutscreen,keepthisthelinktransactionallowsdetailsadministratorsandtoreserveviewtheapermitquicksosummarythat you can processof the paymentatinformationanotherandtime.ClicktotalonvaluesProcesswithoutManuallydrillingto completeinto thepurchase.
specific item details.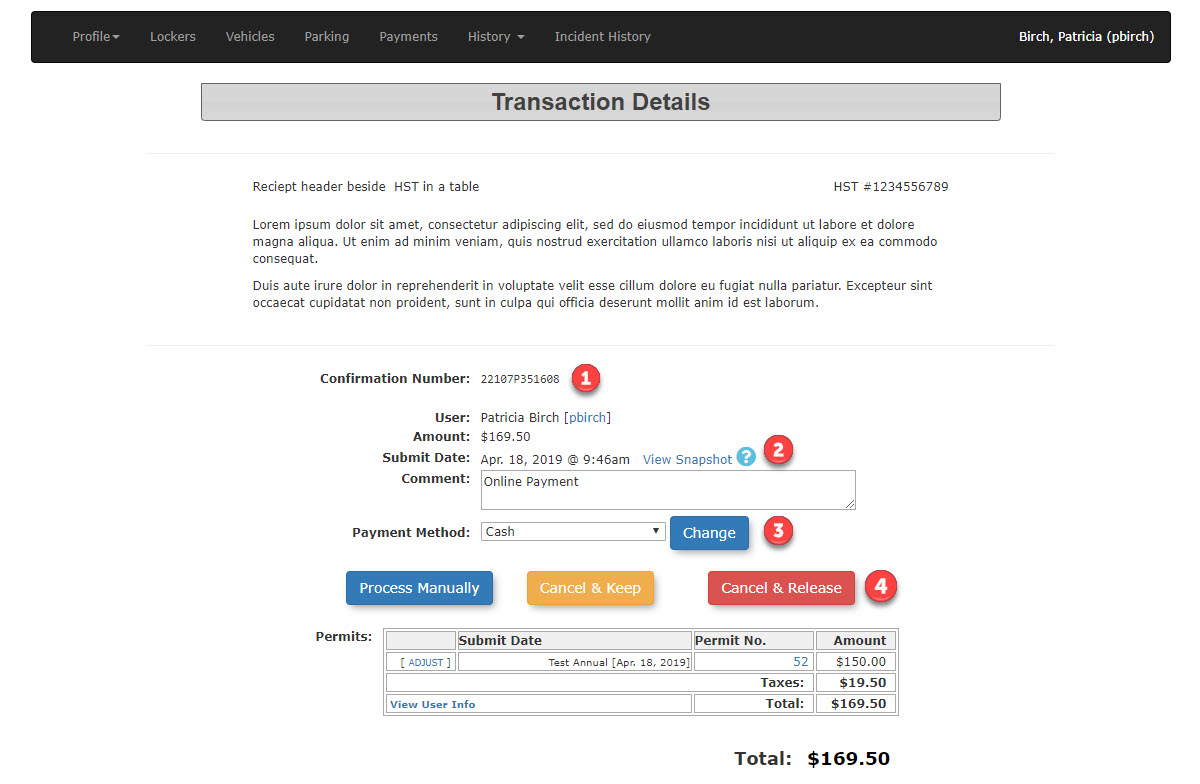
-
Confirmation- Number:
TheAscreenuniquewillalphanumericrefreshidentifierwithgenerated for the transaction, visible on the finalTransaction Detail screen. This informationreceipt screencanandbeaccessibleaccessed in the future fromvia the user's historyinfororderfuturetoreference.view
3- The Payment Method which can actually be changed at this point if needed. 4- Three options are available:Process Manually whichlots will completeonly show for staff users).
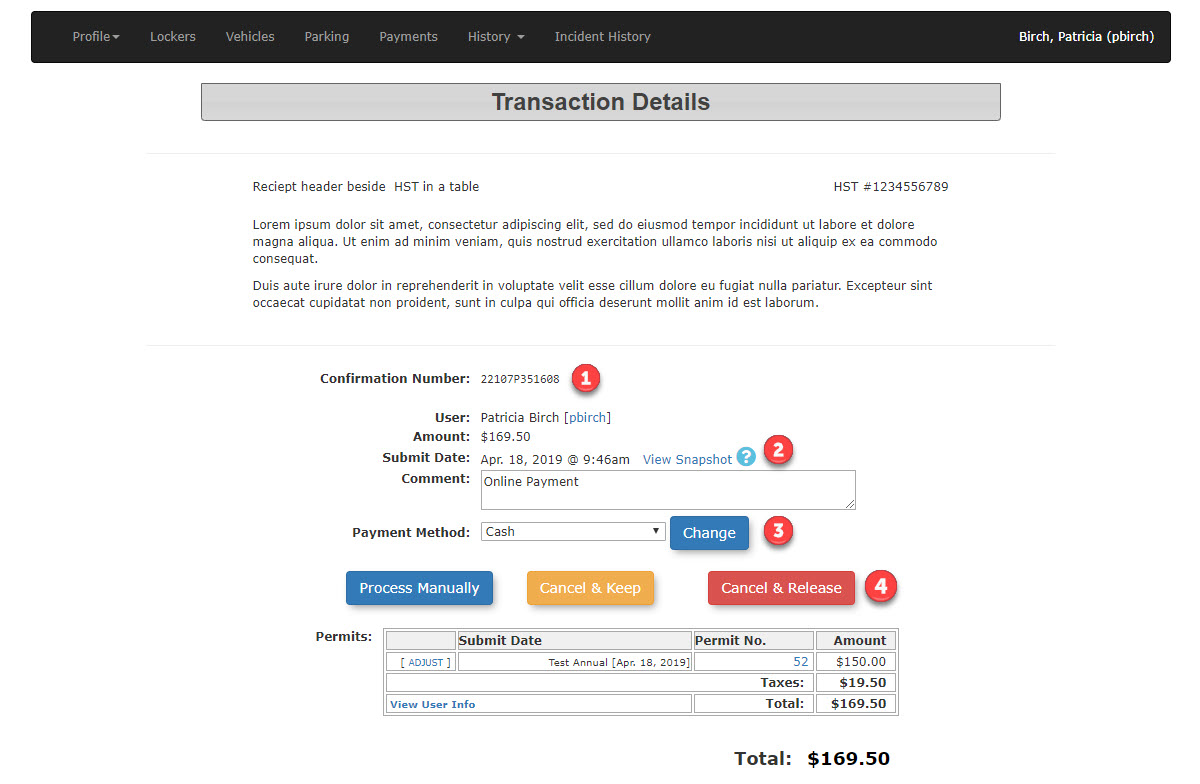
Available adminAction has& Button
-
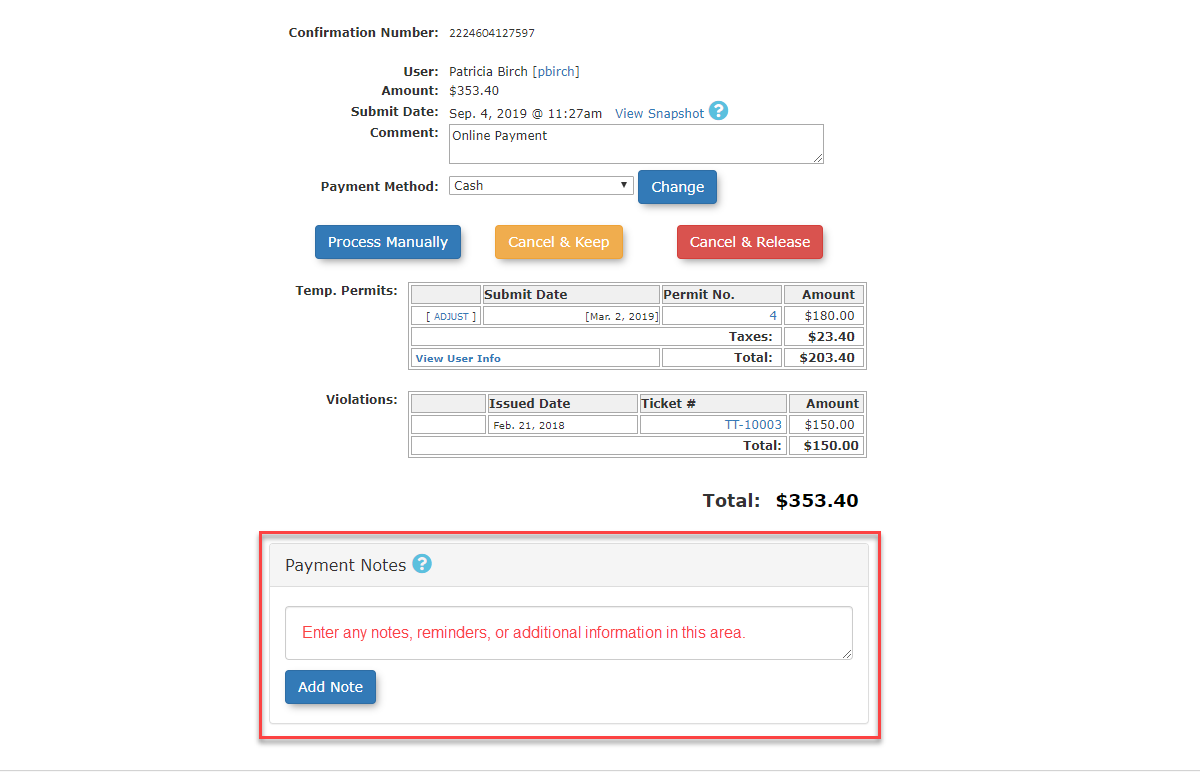
Payment Notes: A dedicated text area on the
optionfinalfrom thistransaction screentothatperformallowsa refund if needed.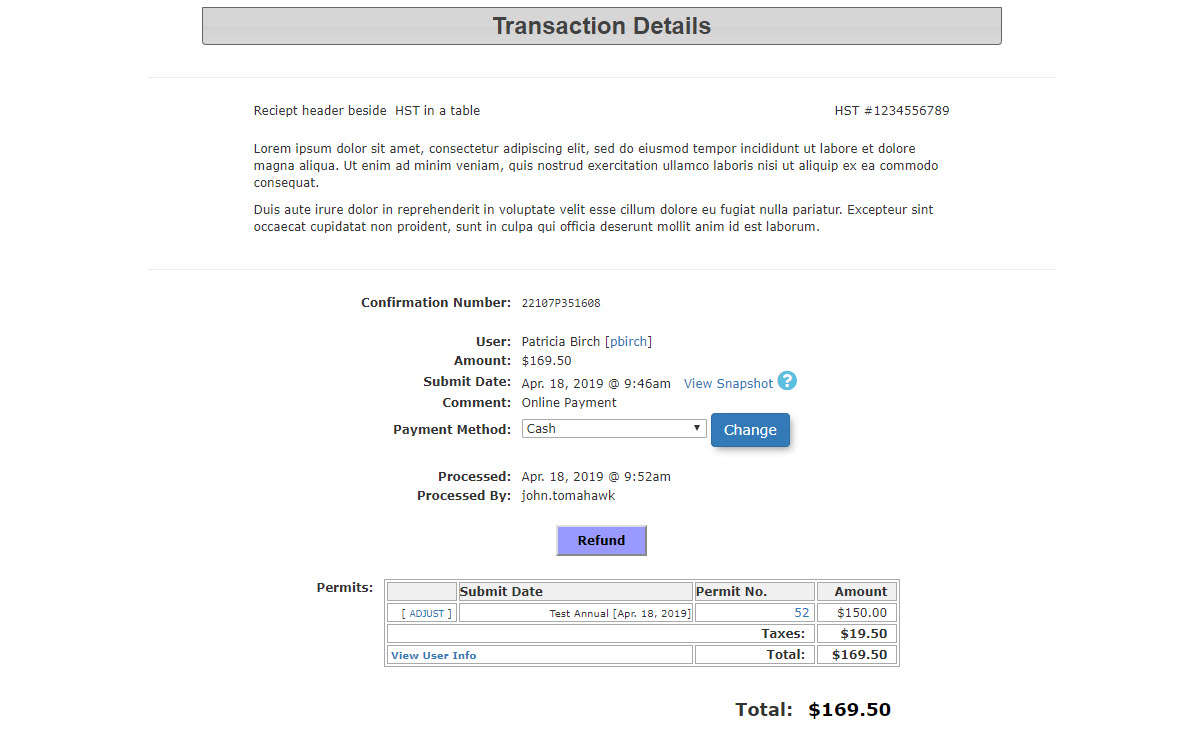
-
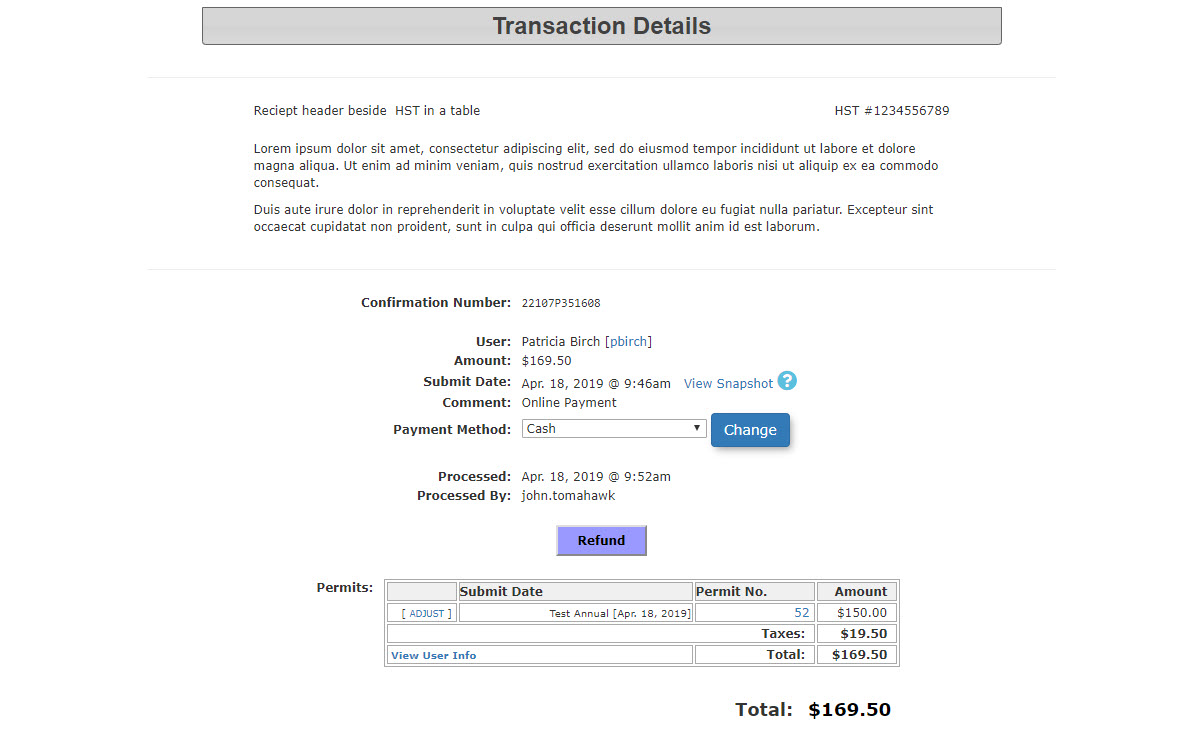
Payment Method Adjustment: Before finalizing the transaction, administrators have the ability to change the selected payment method directly from the Transaction Details screen if the user changes their mind.
Payment Notes
Payment Notes allow Adminsadministrators to annotate refundsthe andpurchase, otherrefunds, or payment anomalies. These notes are completely private and notare never visible to the endend-user.
Best Practices and Considerations
Managing Incomplete Transactions: If a user needs to finalize their payment at a later time, use the Cancel & Keep button. This safely holds the assigned permit under their profile without forcing you to restart the entire assignment process when they return to pay.
-
Detailed Auditing: Always add clear payment notes if you alter the standard payment process, process an external offline payment, or apply a refund. This creates a reliable audit trail for your finance department.
-
Verify Permit Selection: Always double-check the assigned permit number before clicking the final process button, especially if your organization requires specific users to park in designated, numbered stalls.