Skip to main content
Adding Permits to a Lot
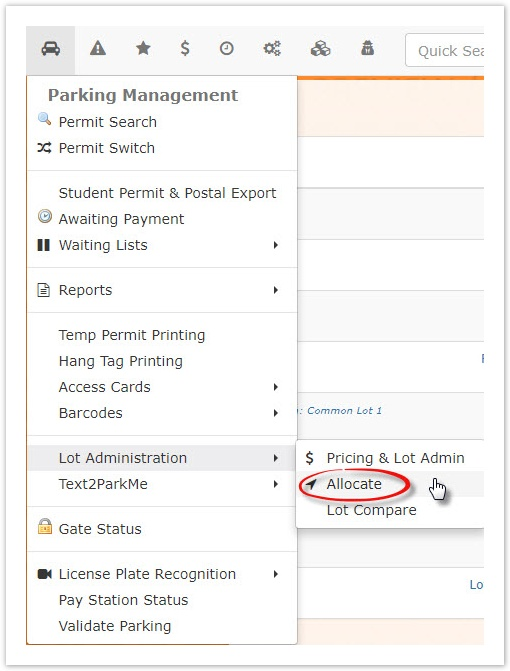
Go to Parking Management main menu and hover over Lot Administration to view the drop down menu.
Click on Allocate
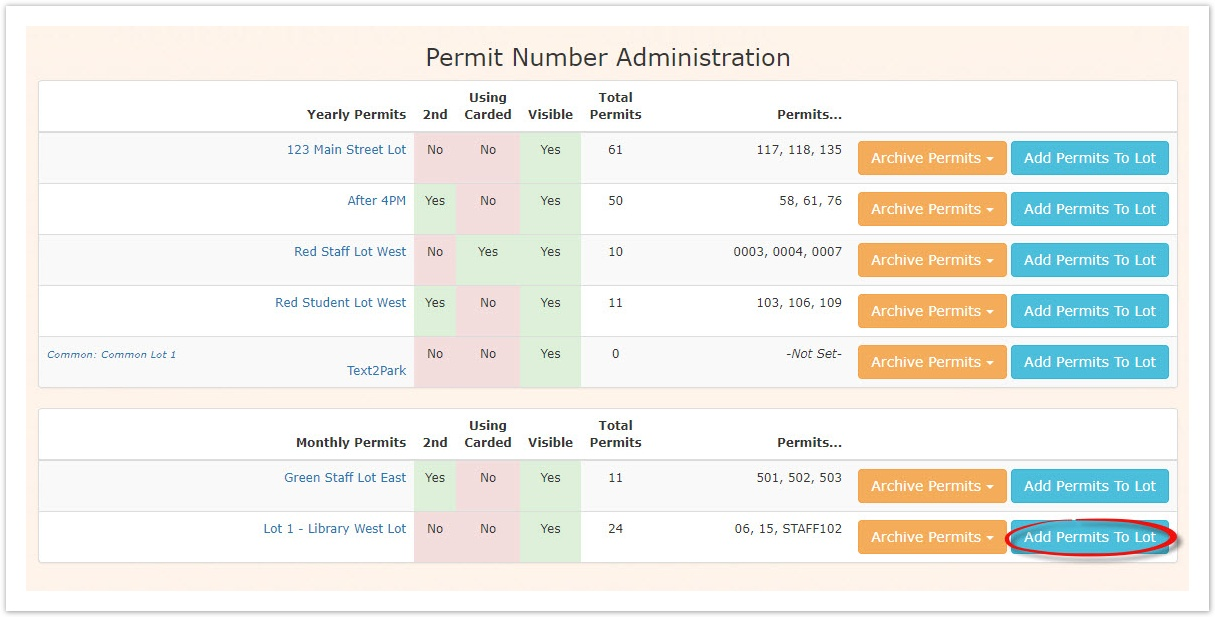
Locate the lot you wish to manage. In this case we are using Lot 1 - Library West Lot
Click on Add Permits to Lot
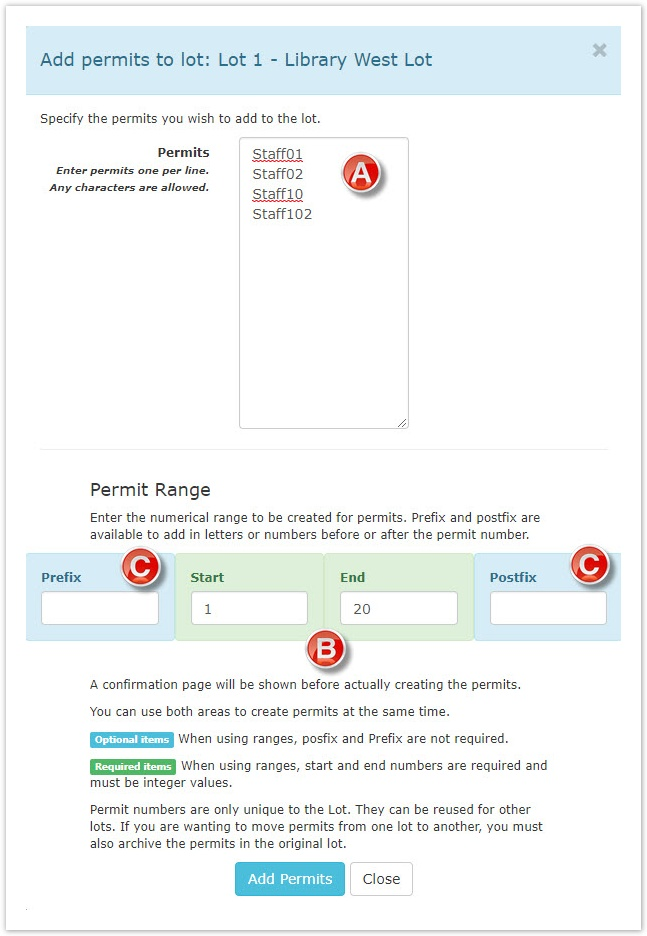
The Add permits to lot utility opens.
In this field the Administrator can add permits with alphanumerical values as one string.
For example Staff01, Staff02 etc can be entered here.
In these two fields the Administrator can add a range of permit numbers (1 to 20. 50 to 200 etc)
The Administrator also has the ability to add a prefix or postfix to the permit number
Click Add Permits
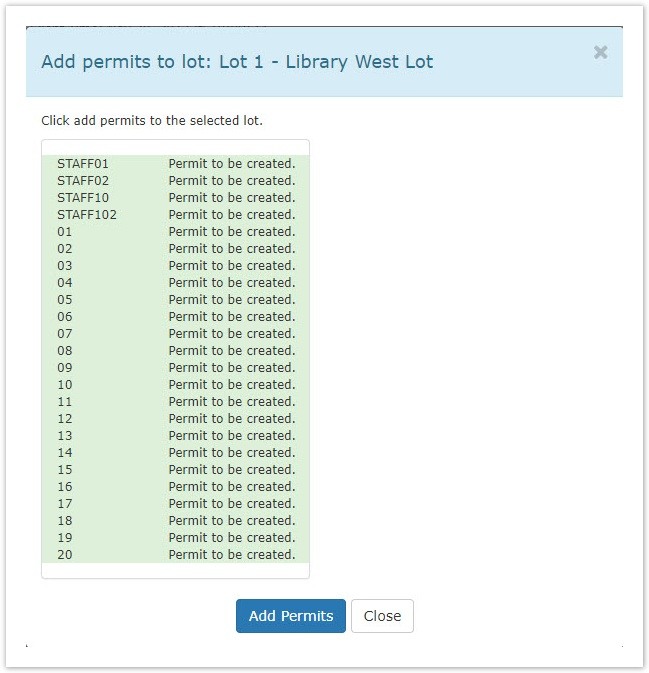
The following confirmation screen will appear: Click Add Permits again.
A pop-up message will appear, confirming the changes you have made.

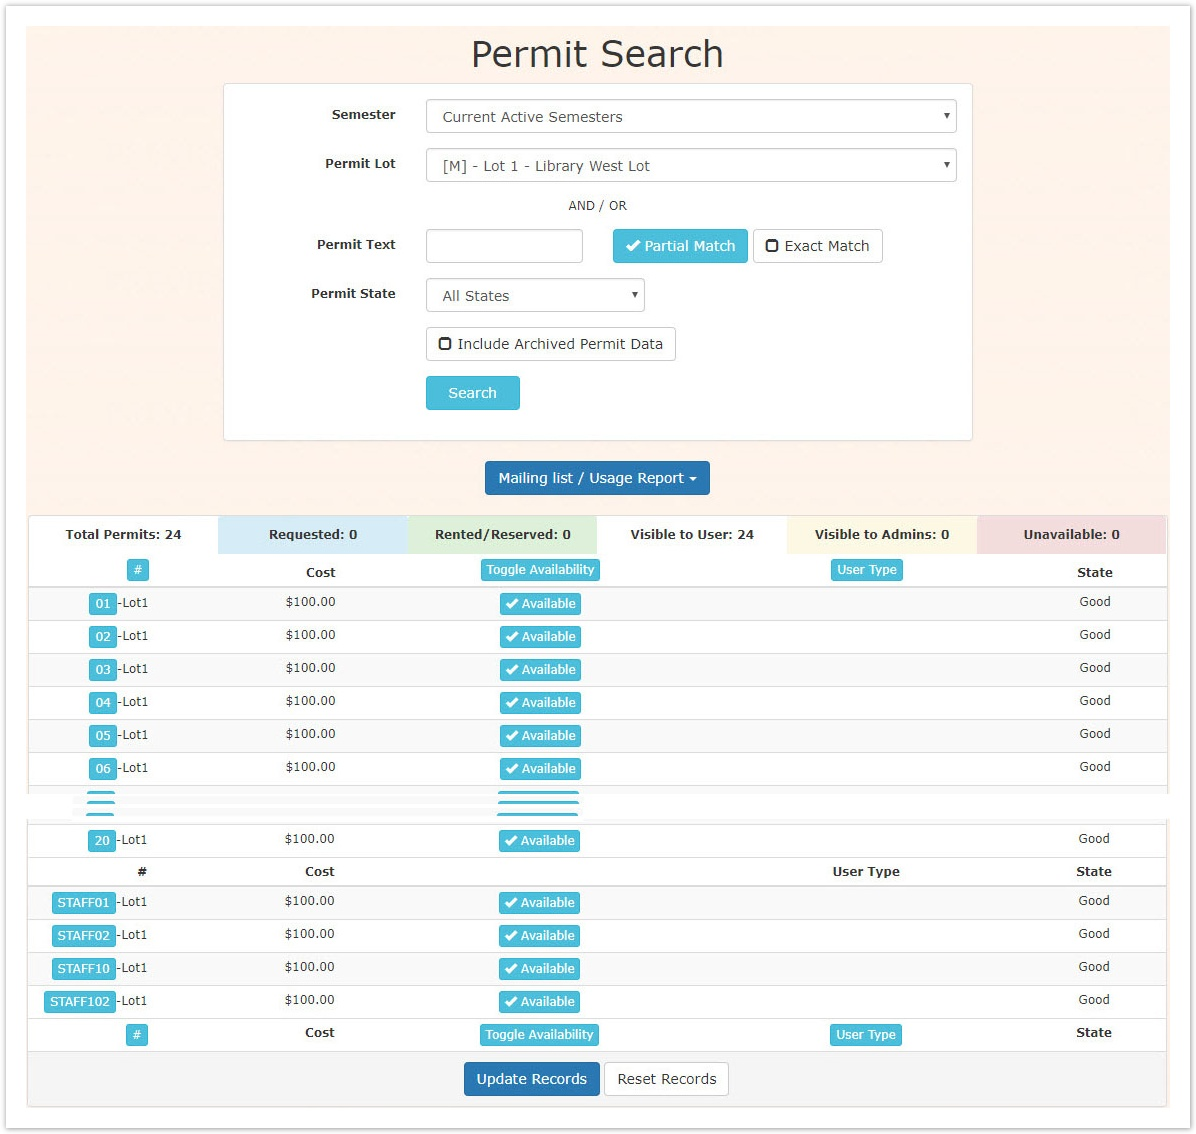
Once the permits are added, your lot should look like the following in the Permit Search utility:
Note: The image has been edited to shorten the list. On the actual system you will see a full list of permits.
