
Basic Waitlist Report
When a user joins a waitlist, Admins can access a report to see the waitlists by lot, link to the user's profile or email users individually or in bulk.
Setup & Configuration
Waitlists must be configured on the lots before users can join them. You can find the instructions for enabling this on thethis Pricing & Lot Admin page under the Standard Permits section.page.
- Click Permits, hover over Waiting Lists followed by Waitlist Report.
- The Waitlist Report screen displays. Administrators can view/edit details about a user waiting to purchase a permit in a specific lot.
-
This screen allows the admin to quickly see:
- The user's Rank on the waiting list
- The date they were added to the waiting list
- The user's name
- Their user type
- Their city
- Phone Number
- Comments
- The lot they are waiting for a permit in
If the record is highlighted in blue, the user does not currently have a permit assigned to them.
If the record is highlighted in yellow, the user does currently have a permit assigned but has not yet purchased it.
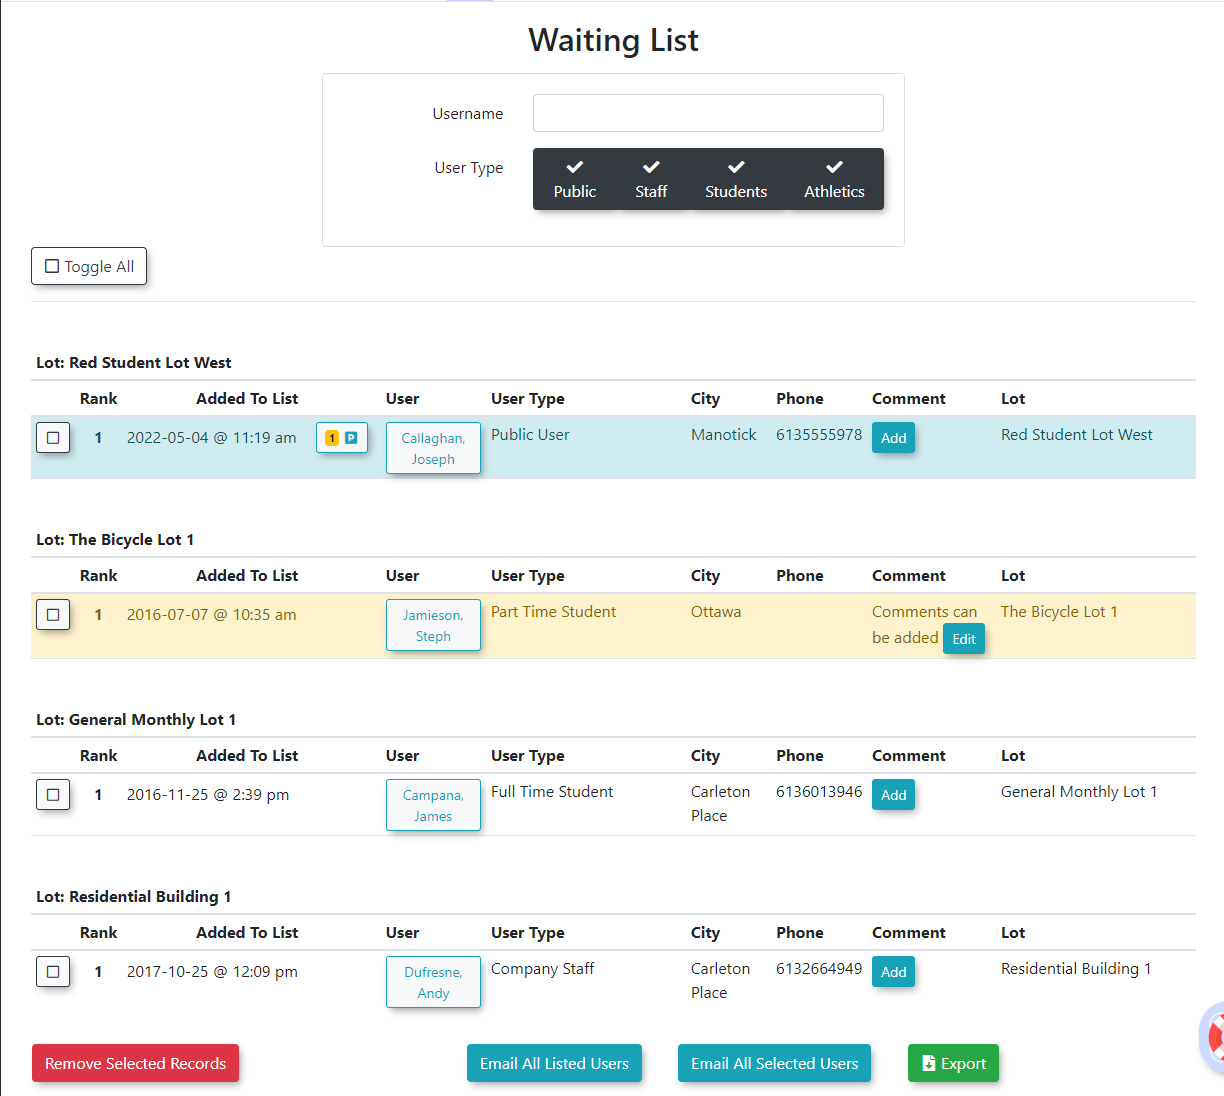
- The User Profile icon, allows administrators to view/edit the user's profile. This is also the link that administrators would use if they wanted to sell a permit to the user that is on the waiting list (Click the User Profile icon and click the Parking Tab).
- The Add link allows administrators to add comments to the waitlist record. If a comment already exist, an edit link will appear allowing administrators to update the comments on file.
- The 'Toggle Selections' button allows administrators to select all records. Enable the check box to the left of the record to make individual record selections.
- The 'Remove Selected From Waiting List' button allows administrators to remove records from the wait list. Organizations should develop a business rule for when to remove a user from the waiting list, after a user has been emailed or after a permit has been purchased.
- The 'Email All Listed Users' button allows administrators to send a single email message to all users listed in the table.
- The 'Email Selected Users' button allows administrators to email only those users that they have selected.
- The 'Export to Excel' button exports the table as an Excel spreadsheet.