Bambora Checkout
Bambora Configuration:
Order Settings Configuration:
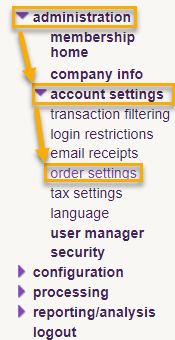 |
Login to your Bambora account, then on the left navigation select Administration → Account Settings → Order Settings. |
API access passcode:
On the Order settings page scroll down to "API access passcode". If there is nothing in the API access passcode field click the "Generate New Code" button. After generating your API access passcode make sure to scroll down to the bottom of the page and click "Update" to save your changes.
Merchant ID (MID):
 |
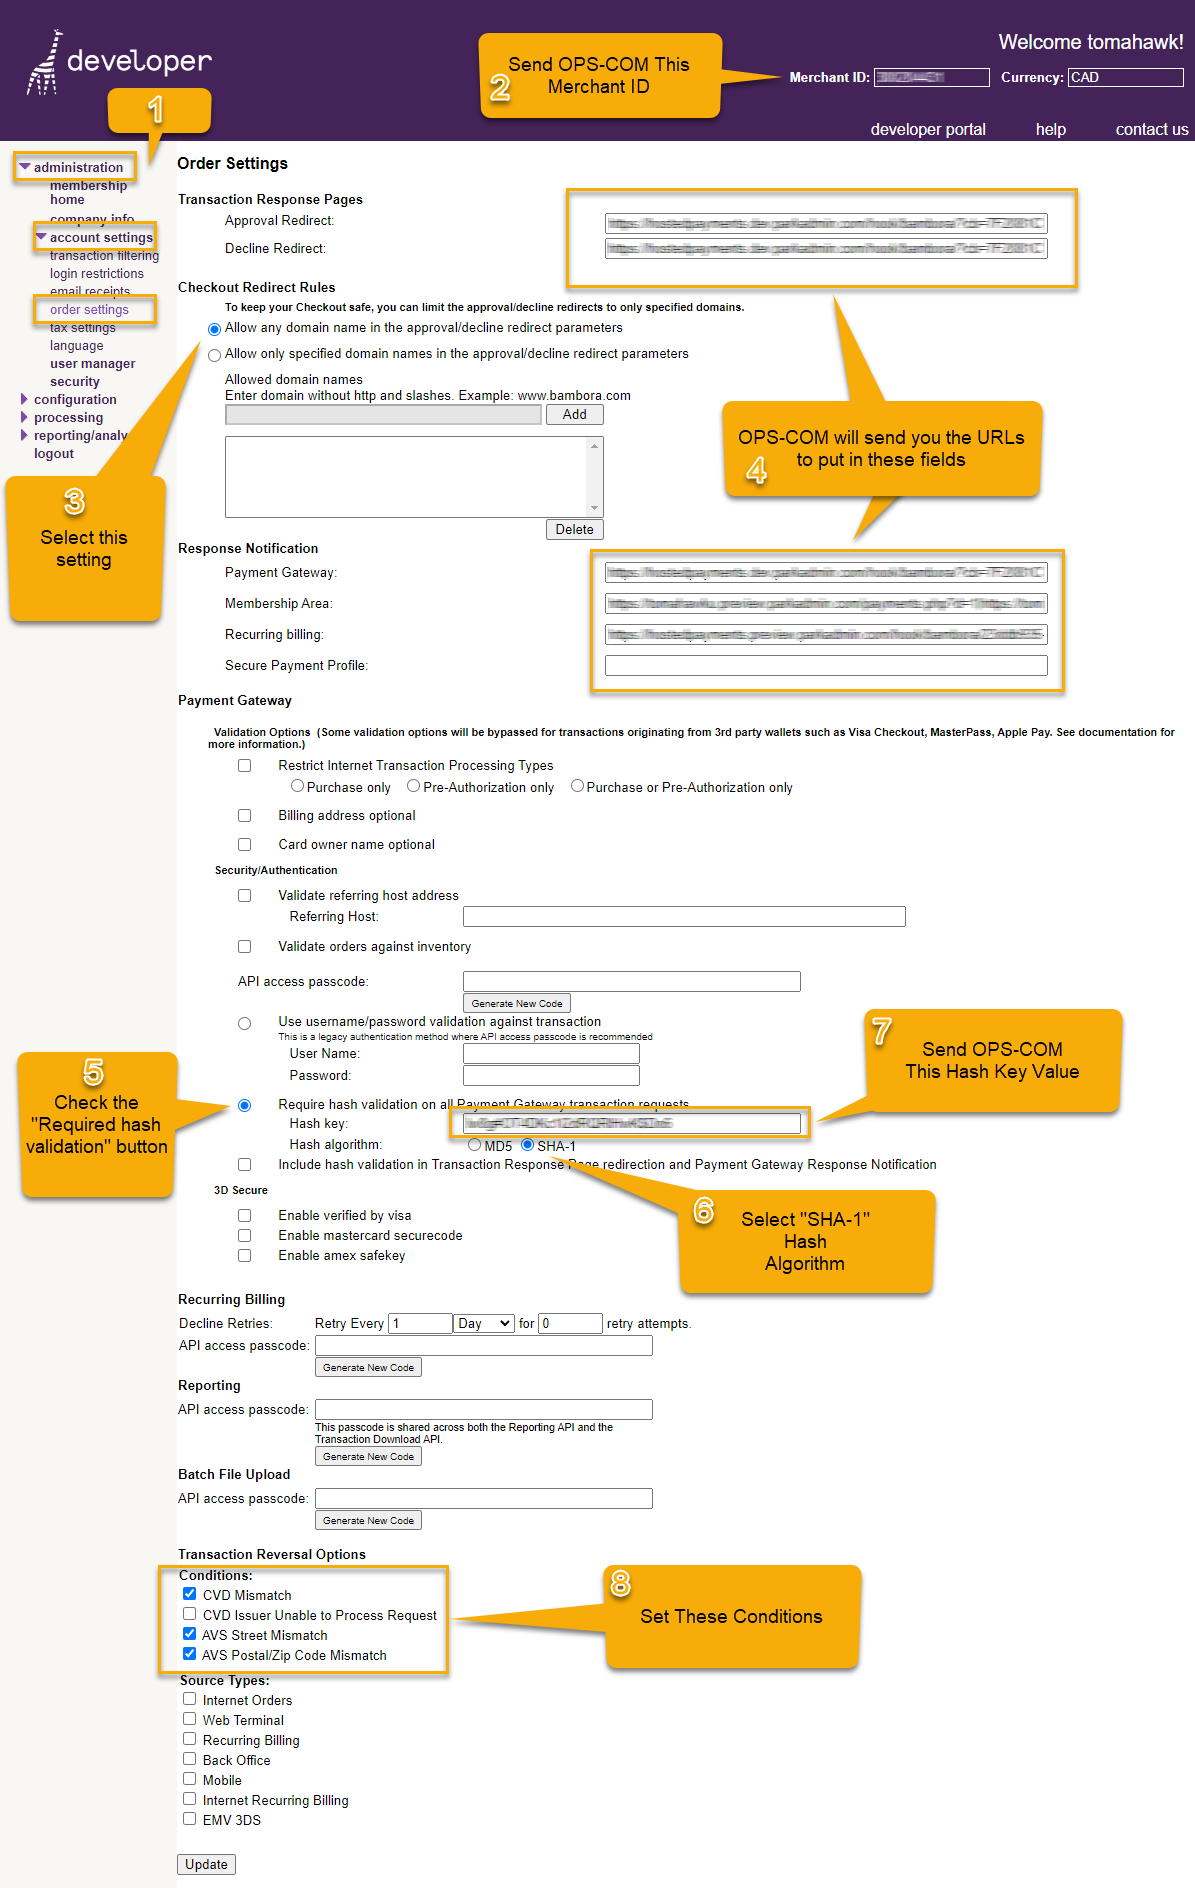
Your Merchant ID can be found in the top right of your Bambora account:
account. |
Encode API Passcode:
|
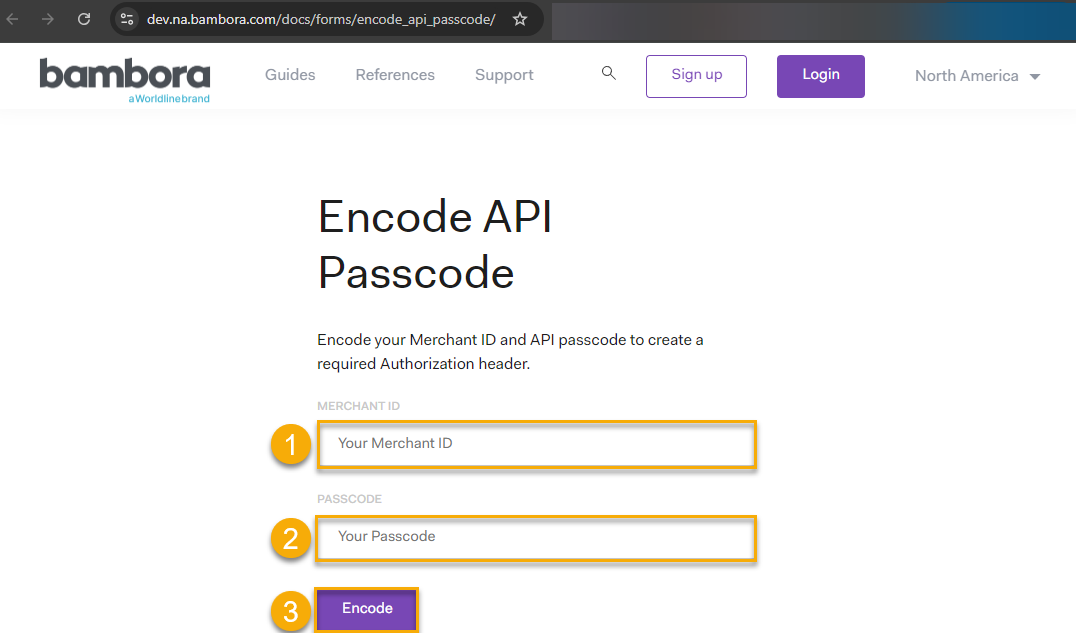
Now that you know your API access passcode and Merchant ID go here. Copy and paste your Merchant ID (1) and API access passcode (2) into the appropriate fields, then click "Encode"(3):. |

Please use the following screenshot for reference to the [Steps] listed below.
*Important*Configuration:
These
Create updatesnew shouldPayment only be made to a Bambora gateway that is NOT currentlyType in production/liveOPS-COM:
use.
If
you
have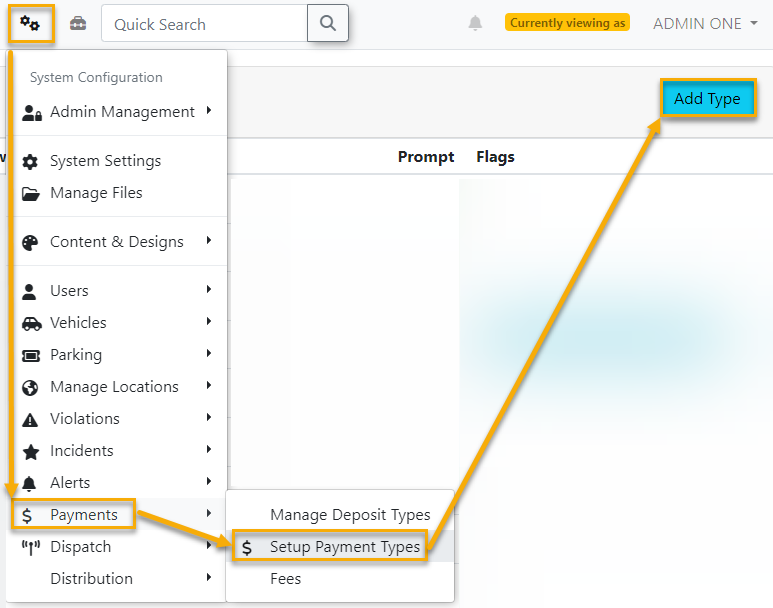 |
a current Bambora gateway that is being used by another system for payments, you may need to contact Bambora to have them setup another new gateway/merchant account for use with OperationsCommander (OPS-COM) hosted payments.
The requirements for a Bambora gateway to work with OperationsCommander (OPS-COM) are as follows:
[Step 1] - Login to your BamboraOPS-COM system with an administrator account andthat navigatehas permission to edit payment types.
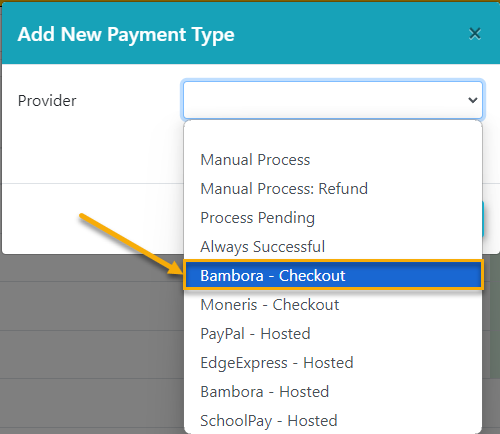
In the orderOPS-COM settingsmenu pageselect System Configuration → Payments → Setup Payment Types → Add Type.
|
|
|
Select "Bambora - Checkout" from the Provider list.
|
|
|
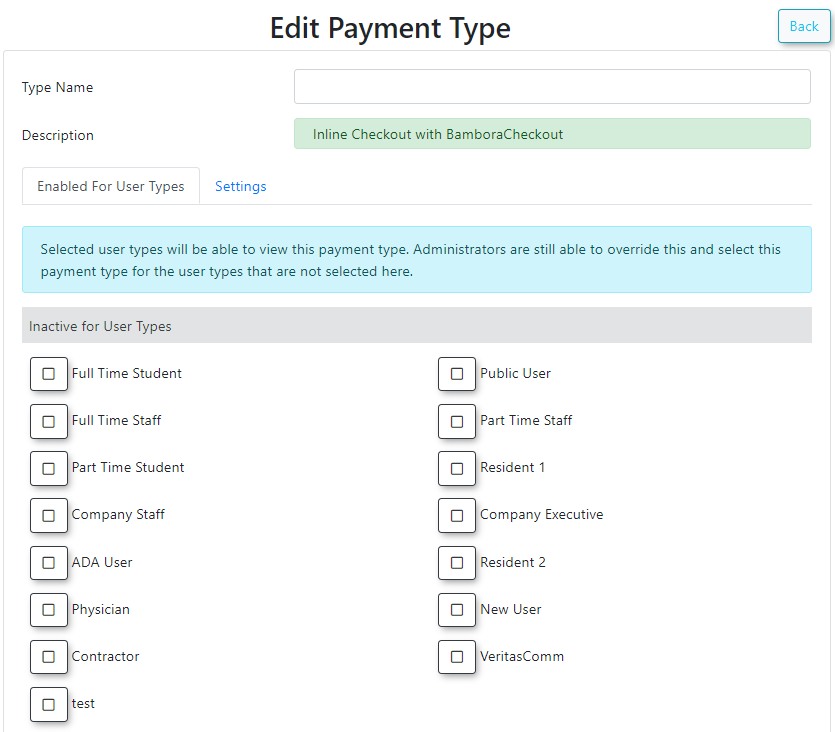
Type Name: The Type Name can be whatever you want it to be, though please note this will also be the name displayed to users during payment checkout when they are prompted to select a payment method.
You can reference the specific hosted payment provider or something more generic such as "Online Credit Card Payment", "Online payment", "Credit Card", etc. Really it's up to you and what you think makes most sense to your site users when making a payment.
[StepEnabled 2]for -User MerchantTypes: ID:Select Pleasethe sendUser usTypes you wish this value.new Payment Type to be visible to so they can select it during payment checkout. You can change these user types at any time.
[Step 3]
-Once Select:done Allowmake anysure domainto name inclick the approval/decline"Update redirectPayment parametersType" button at the bottom of this page.
[Step 4] - Approval Redirect: We will supply you with the URL to paste here.
[Step 5] - Require Hash Validation on all Payment Gateway Transaction Requests: Select this button.
[Step
|
6]
-
Hash Algorithm: Select SHA-1.
[Step 7] - Hash Key: Send us this hash tag value.
[Step 8] - Select: CVD Mismatch, AVS Street Mismatch and AVS Postal/Zip Code Mismatch conditions


