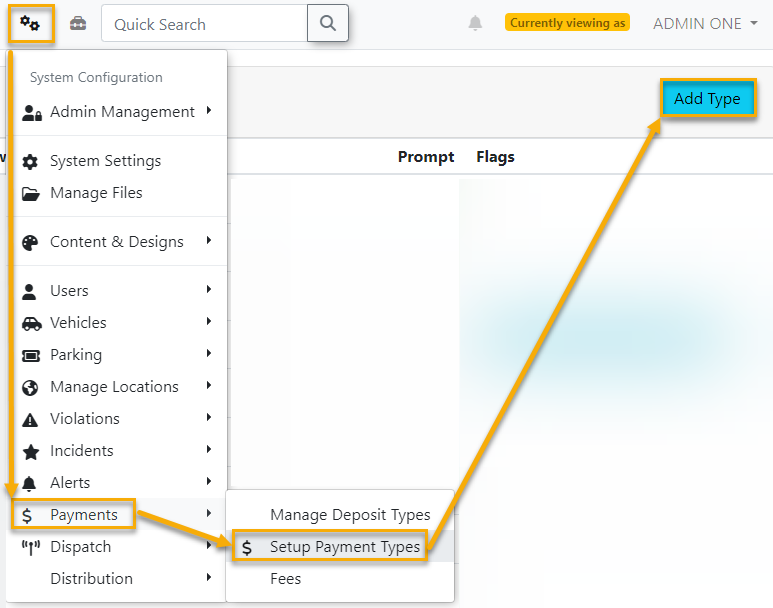
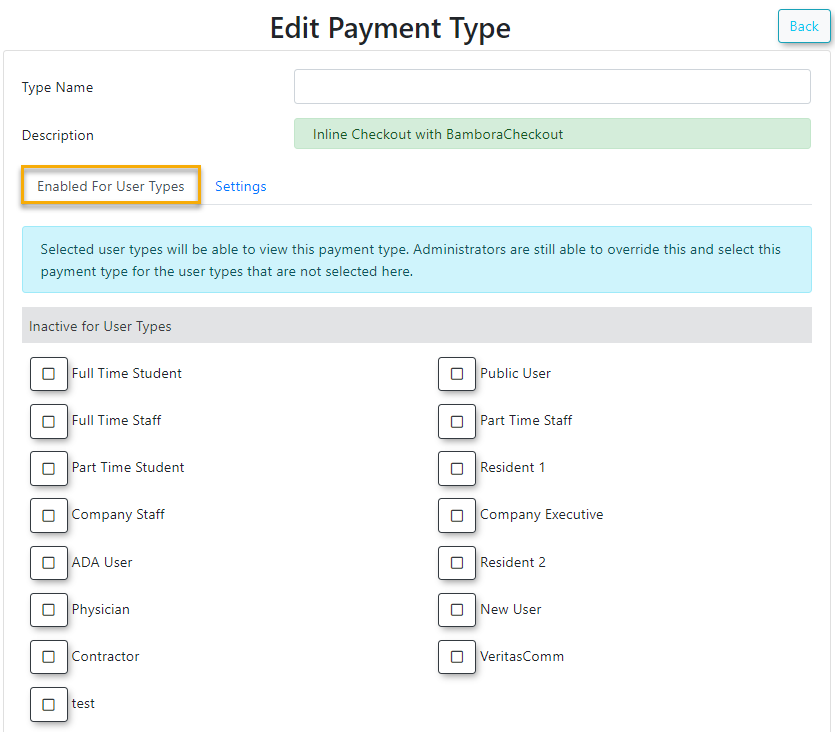
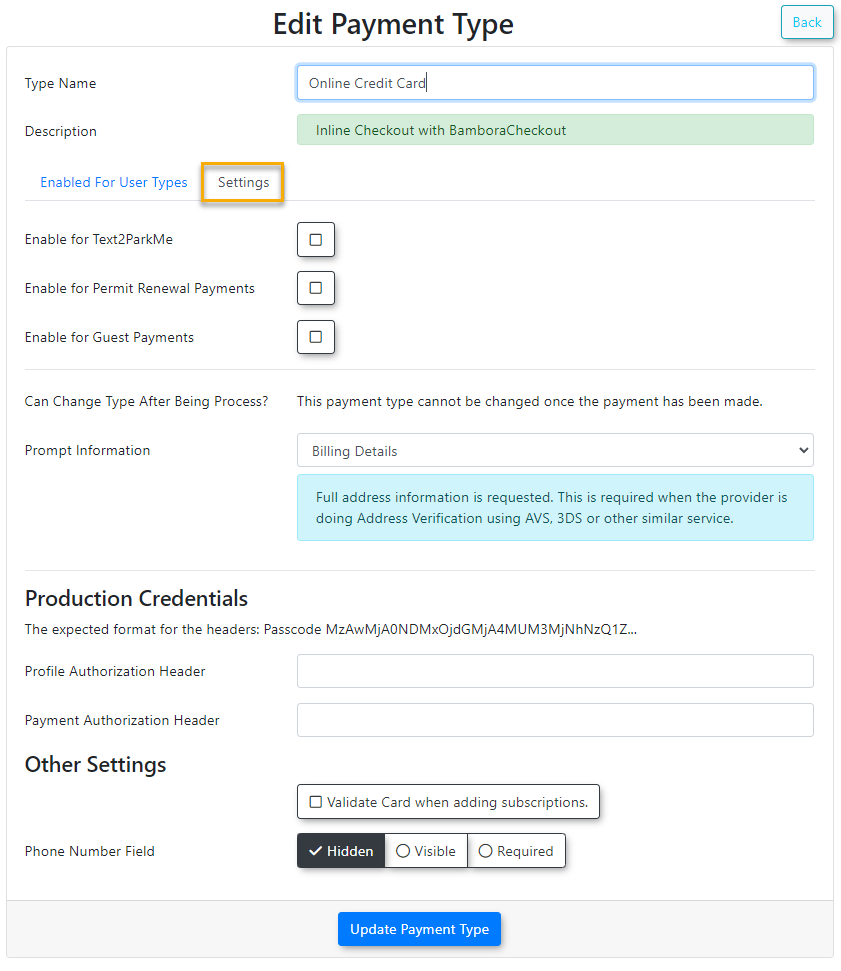
Bambora Checkout
Bambora Configuration:
Order Settings:
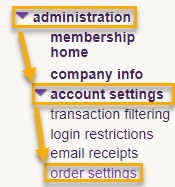 |
Login to your Bambora account, then on the left navigation select Administration → Account Settings → Order Settings. |
API access passcode:passcode (Payment Authorization Header):
On the Order settings page scroll down to "API access passcode". If there is nothing in the API access passcode field click the "Generate New Code" button. After generating your API access passcode make sure to scroll down to the bottom of the page and click "Update" to save your changes.
Merchant ID (MID):
 |
Your Merchant ID can be found in the top right of your Bambora account. |
Encode API Passcode:Passcode (Payment Authorization Header):
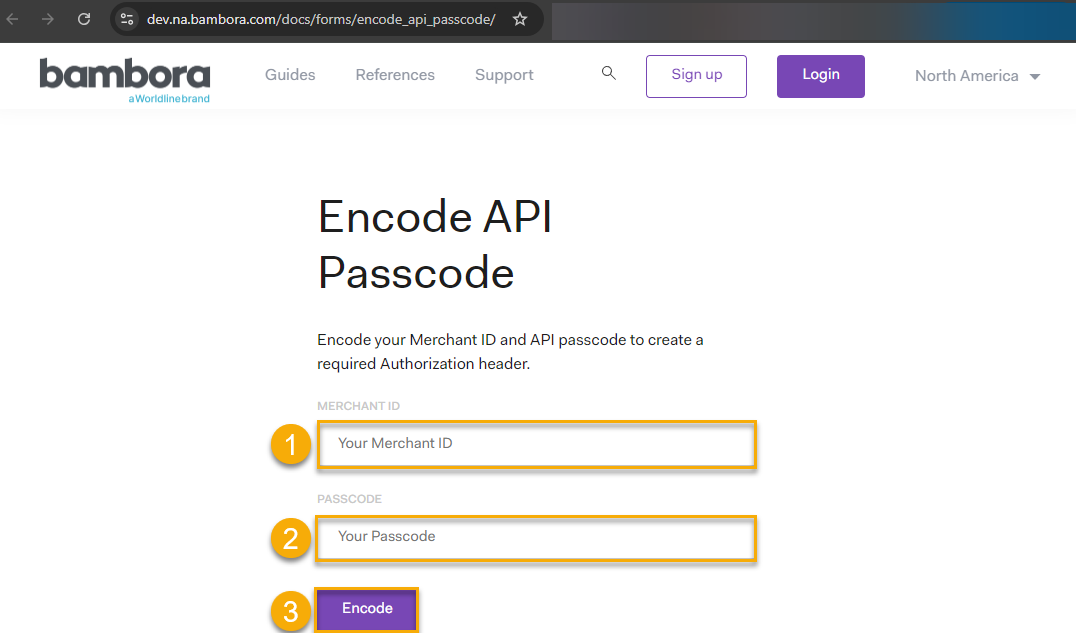 |
Now that you know your API access passcode and Merchant ID go here. Copy and paste your Merchant ID (1) and API access passcode (2) into the appropriate fields, then click "Encode"(3).
Copy/record the Authorization Passcode returned. This will be needed later when you setup the Bambora Checkout payment type in OPS-COM. It will be referenced further down this page as the "
You will want to make sure to copy only the following section returned (excluding quotation marks): |
|
Payment Profile Configuration:Similar to the above process for encoding your Payment authorization header, we will be going through a similar process for encoding your Profile authorization header. |
||
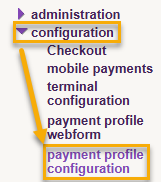 |
Login to your Bambora account, then on the left navigation select Configuration → Payment Profile Configuration. |
|
API access passcode (Profile Authorization Header):Under Security Settings make sure "API access passcode:" is selected. If there is nothing in the API access passcode field click the "Generate New Code" button. After generating your API access passcode make sure to scroll down to the bottom of the page and click "Update" to save your changes. |
||
Merchant ID (MID): |
||
 |
|
|
Encode |
||
 |
Now that you know your API access passcode and Merchant ID go here. Copy and paste your Merchant ID (1) and API access passcode (2) into the appropriate fields, then click "Encode"(3).
Copy/record the Authorization Passcode returned. This will be needed later when you setup the Bambora Checkout payment type in OPS-COM. It will be referenced further down this page as the "Profile Authorization Header". You should temporarily paste this into a program such as Notepad for easy access later since you will need it later during the OPS-COM configuration.
You will want to make sure to copy only the following section returned (excluding quotation marks): |
|


