
Parking Logix - Parking Sensor Integration
Enable Parking Logix Integration
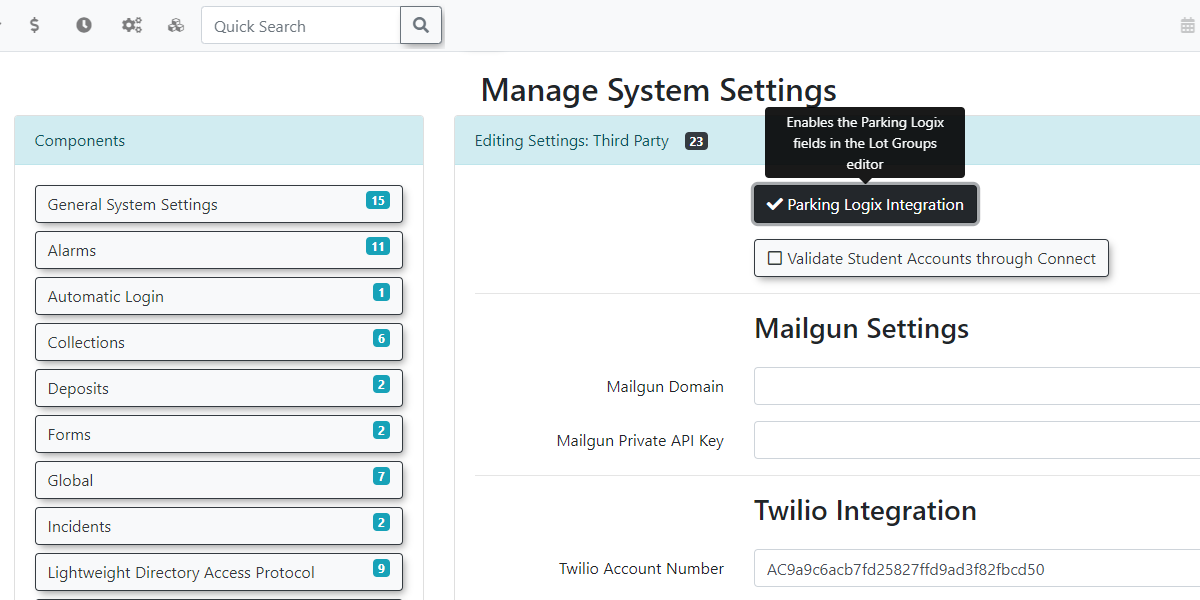
Before you can use the Parking Logix integration on your system you will need to navigate to your Third Party settings under System Settings.
From there you should see the option to enable Parking Logix Integration.
Adding the Lot Group
Next, add a new lot group to your system making sure you include the API code. It is possible but unlikely that there will be multiple API keys if lot access is split over several keys.
Create a specific group for each lot you will be collecting data from.
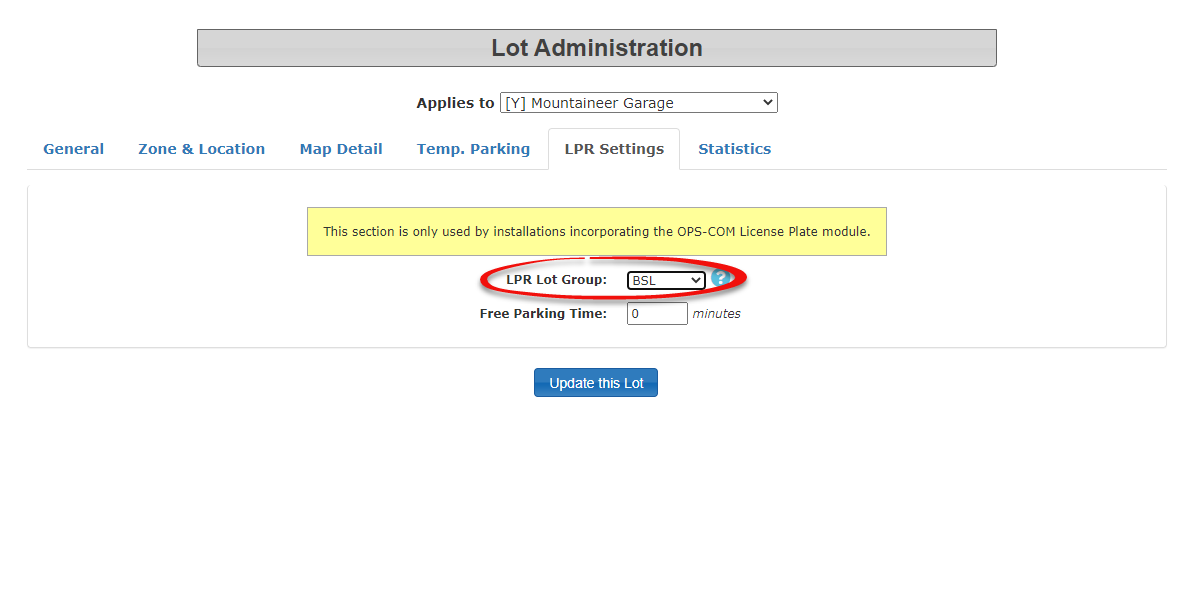
It's important to note that you will also need to enter the Parking Logix specific name for the lot and it must match exactly.
For example, in the image below, the Parking Logix name is Mountaineer Garage.

Once the Lot Group has been configured you would need to assign it to the lot on the LPR Settings Tab of the Lot Administration tool.
Enable the System Task
A system task must be enabled for the Parking Logix sensors to communicate with our system.
This must be enabled by OPS-COM integration staff and you can contact us through support to set this up. Please email support@ops-com.com for assistance.
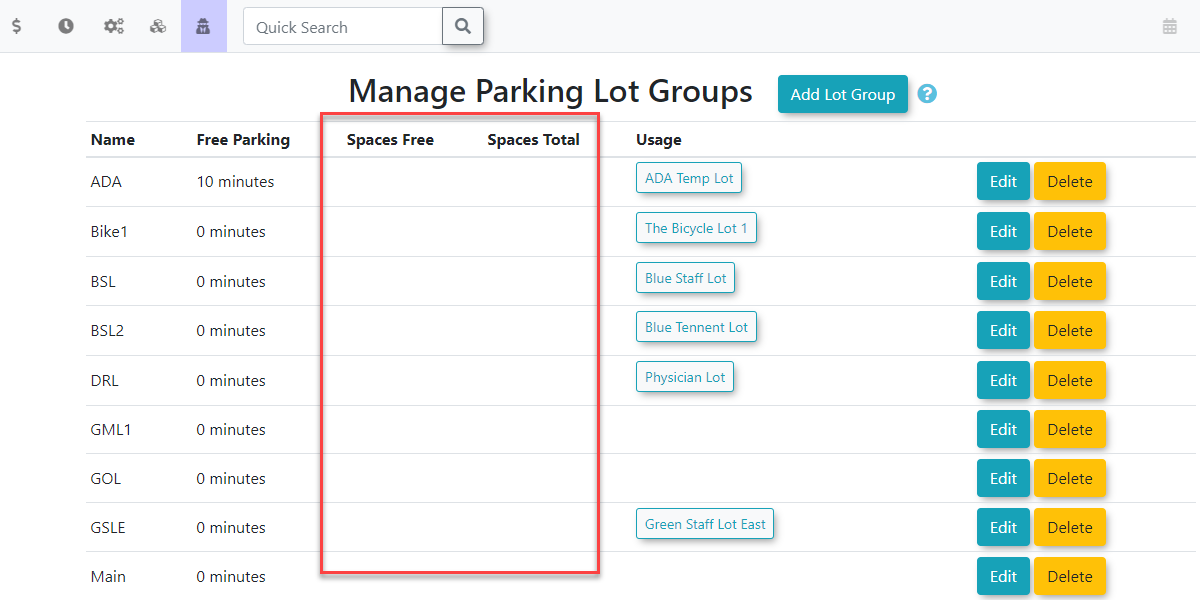
Once the system task has been run you should see updated on the lot counts under Manage Parking Lot Groups
Displaying the Map on the User Side
Finally, enter the short code on the user side to any of your pages using System Messaging.
For more information on how system messaging works please see: https://wiki.ops-com.com/x/M4QCAw followed by Editing Pages.
The short code is [parking_logix] and you can pass addition parameters such as: only, show, filter, or name. This will restrict the list to show only specific lots.
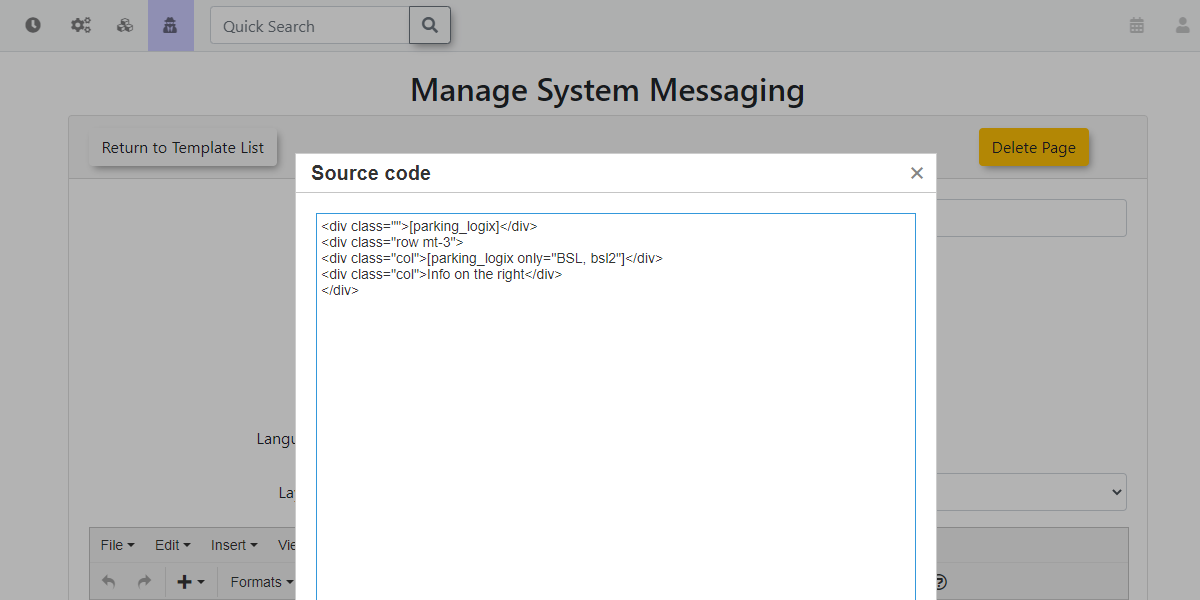
By design, it will only show lots that have a group assigned to it that have an API key stored in it.
