
Payment for a locker from the Admin Portal
The Locker Payment feature allows administrators to assign a locker and process the associated payment on behalf of a user directly from the administrative portal. Its primary purpose is to seamlessly facilitate locker rentals and handle in-person transactions, ensuring accurate inventory and financial tracking. This article is intended for OPS-COM administrators.
PayingSetup and Configuration
There is no specific system configuration required to use this feature, provided your locker inventory and payment methods are already established. Processing a locker payment is a standard administrative action available to users with the appropriate user management and payment processing permissions enabled on their account profile.
Using this Feature
Administrators can navigate the assignment and checkout process for a locker.locker in just a few steps from a user's profile.
To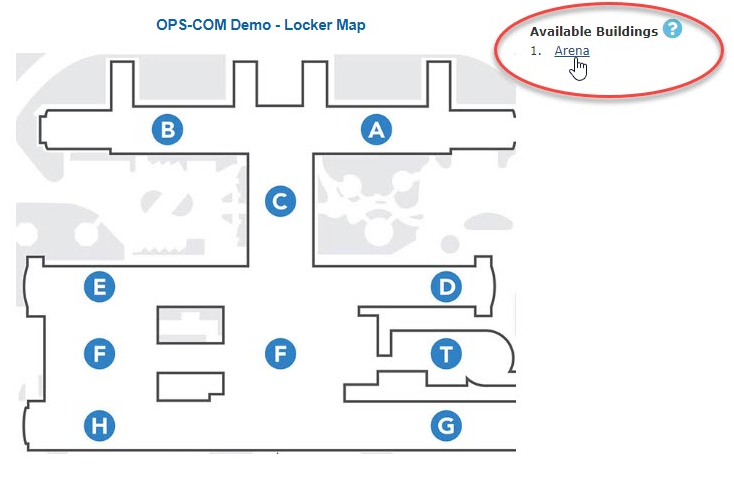
-
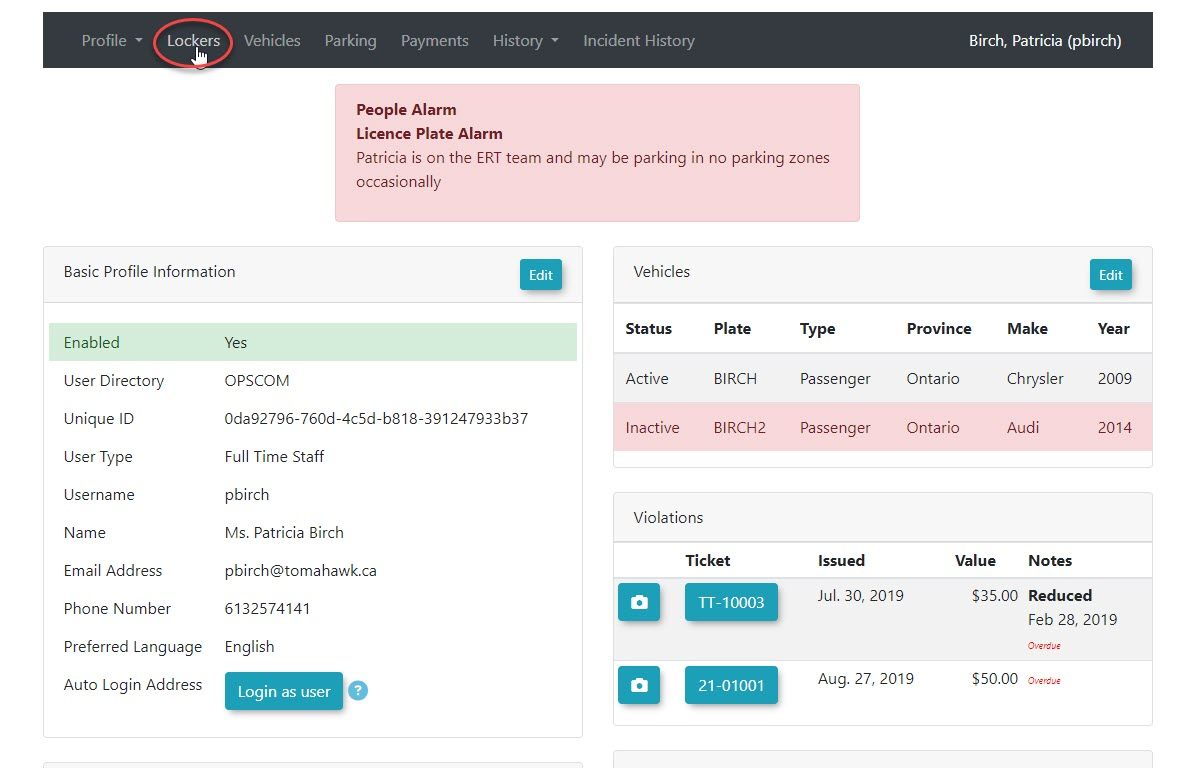
onNavigate to the
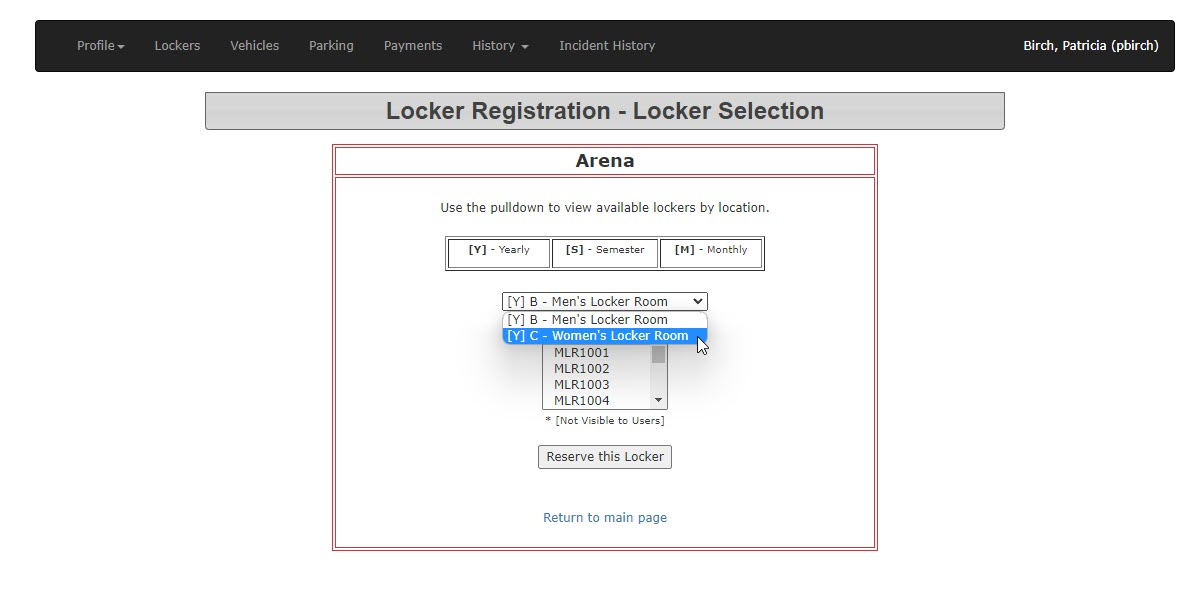
Lockersmenu item in thespecific user's profile on the admin portal.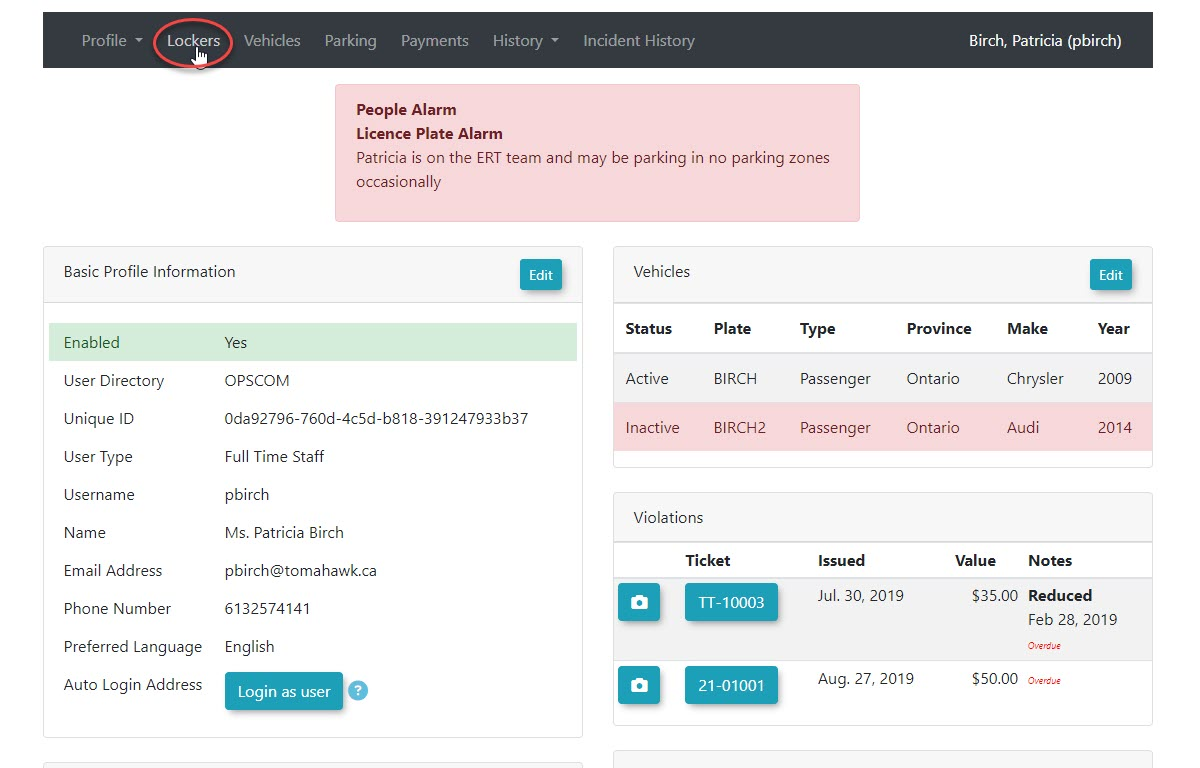
-
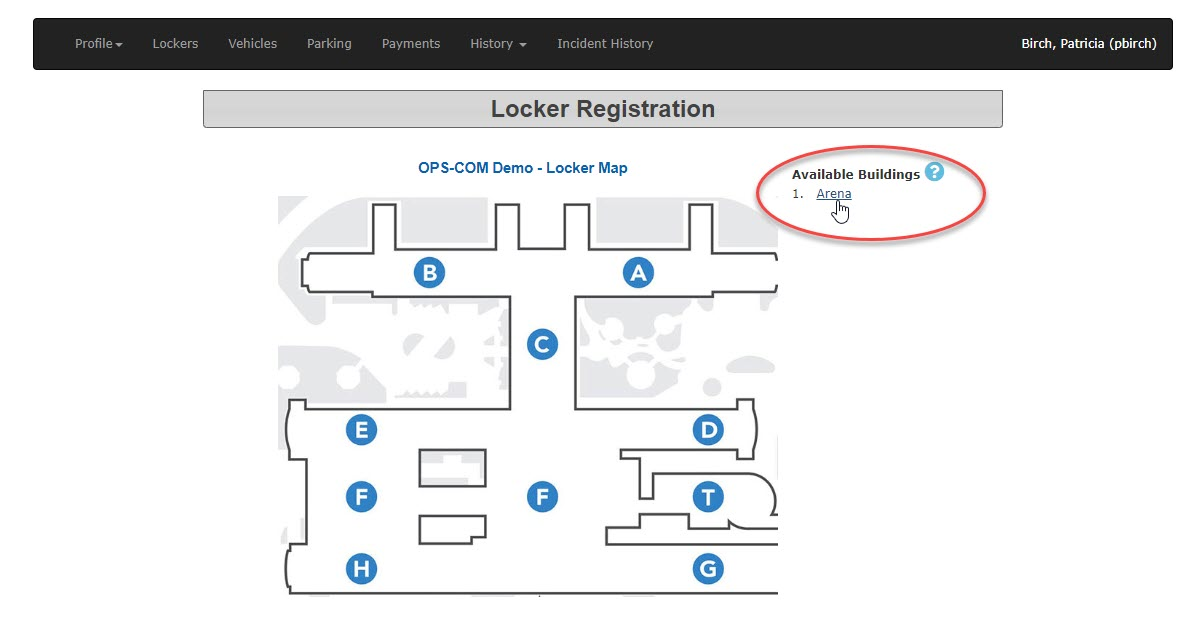
TheClick the Lockers menu item to open the locker registrationpagepage.appears -
aSelect the desired building from the list of
buildingslocations withlockersavailableavailable.lockers.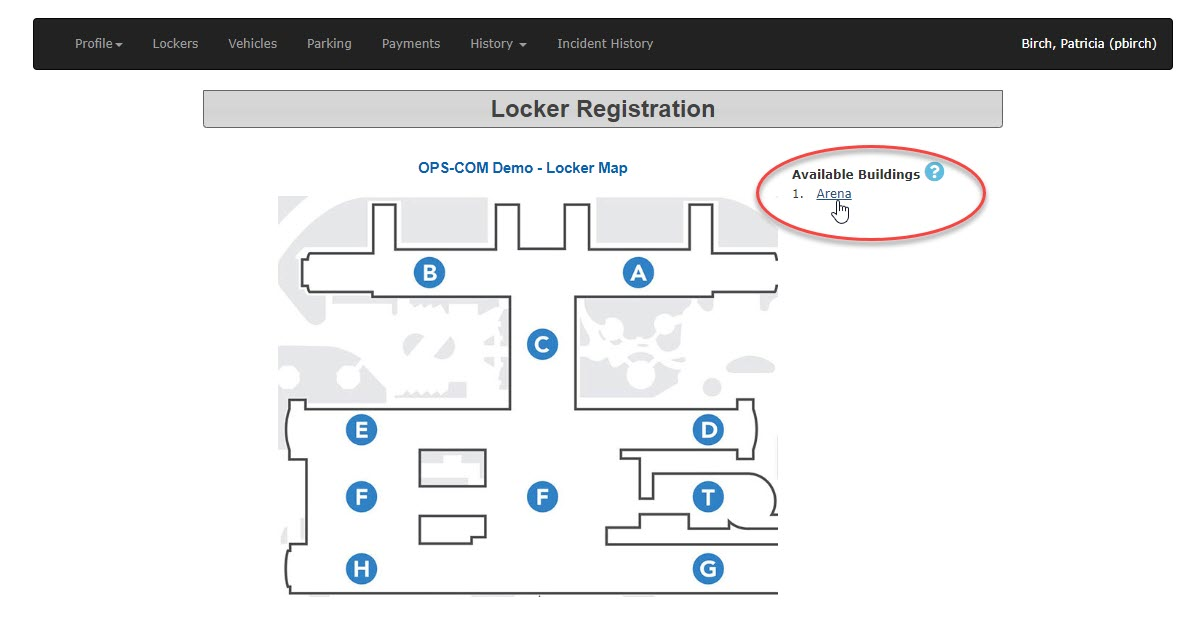
-
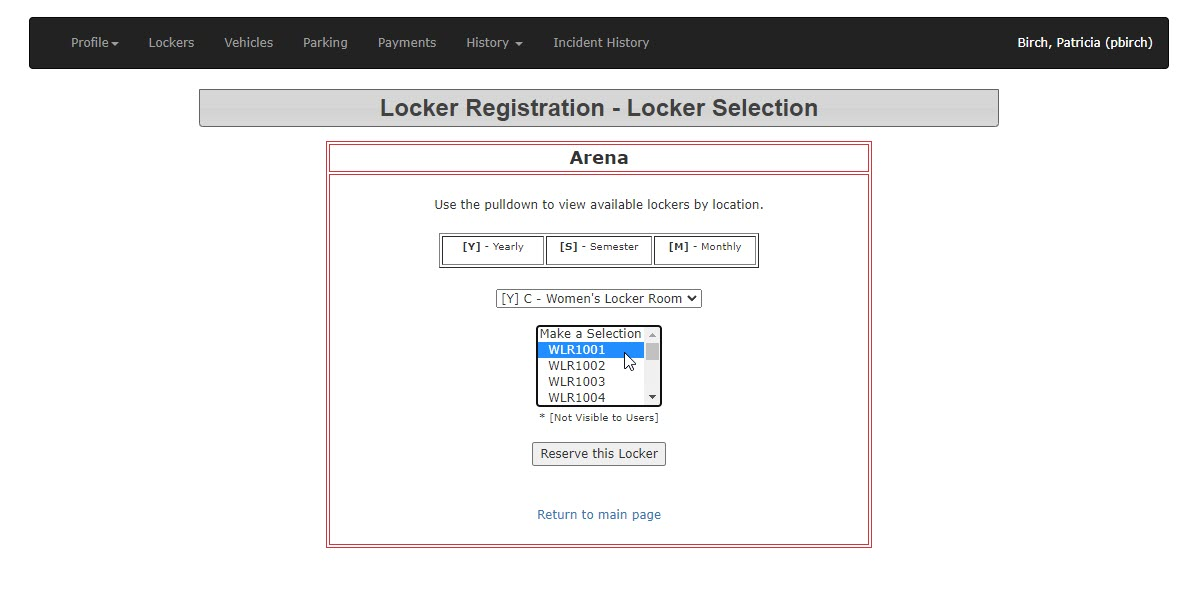
The locker selection page will open allowingChoose theadmin to chose thespecific locker area within the buildingchosen.(e.g.,In this case we are looking for a locker in the women'Women's lockerroom.room).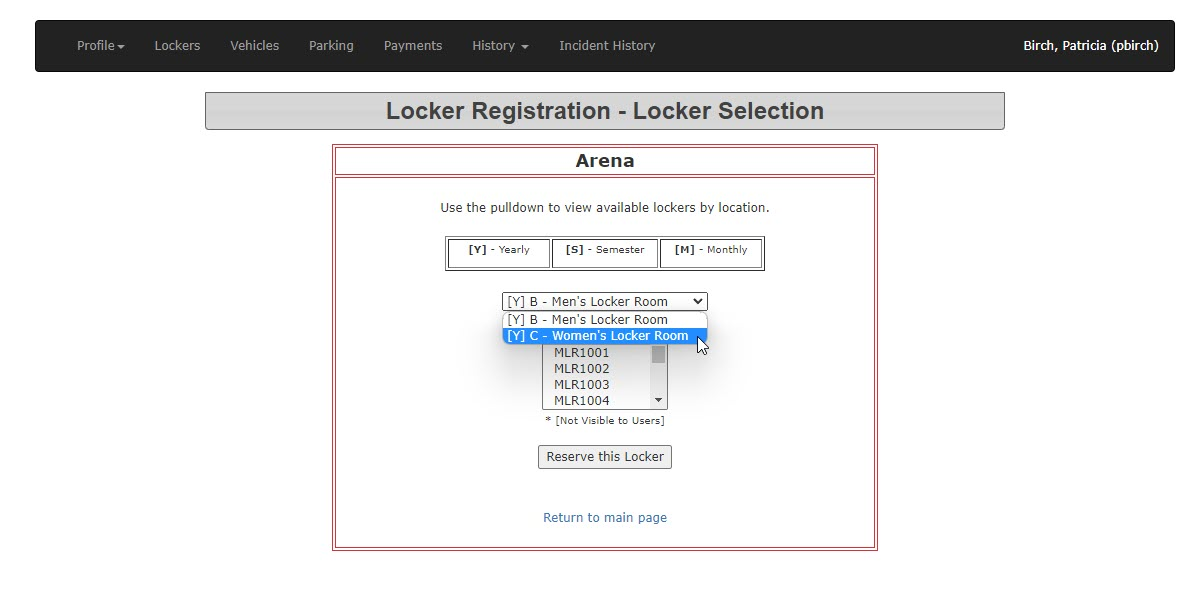
-
The admin may then selectSelect the specific locker numbertheyyou wish to assign to the user. -
Click
onthe Reserve Locker button to continue.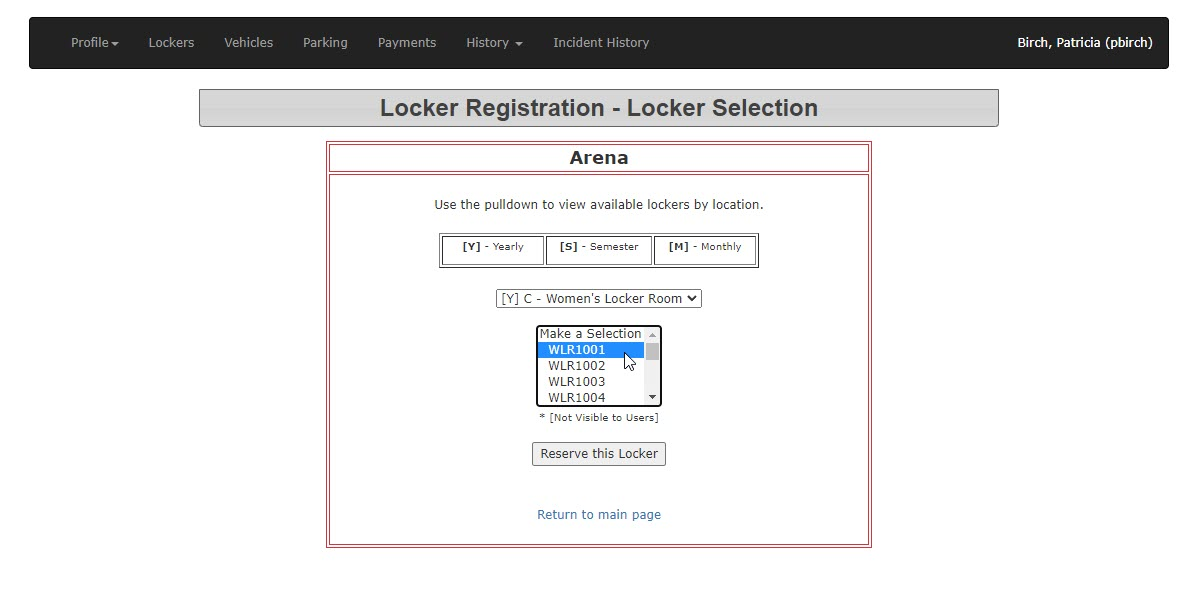
-
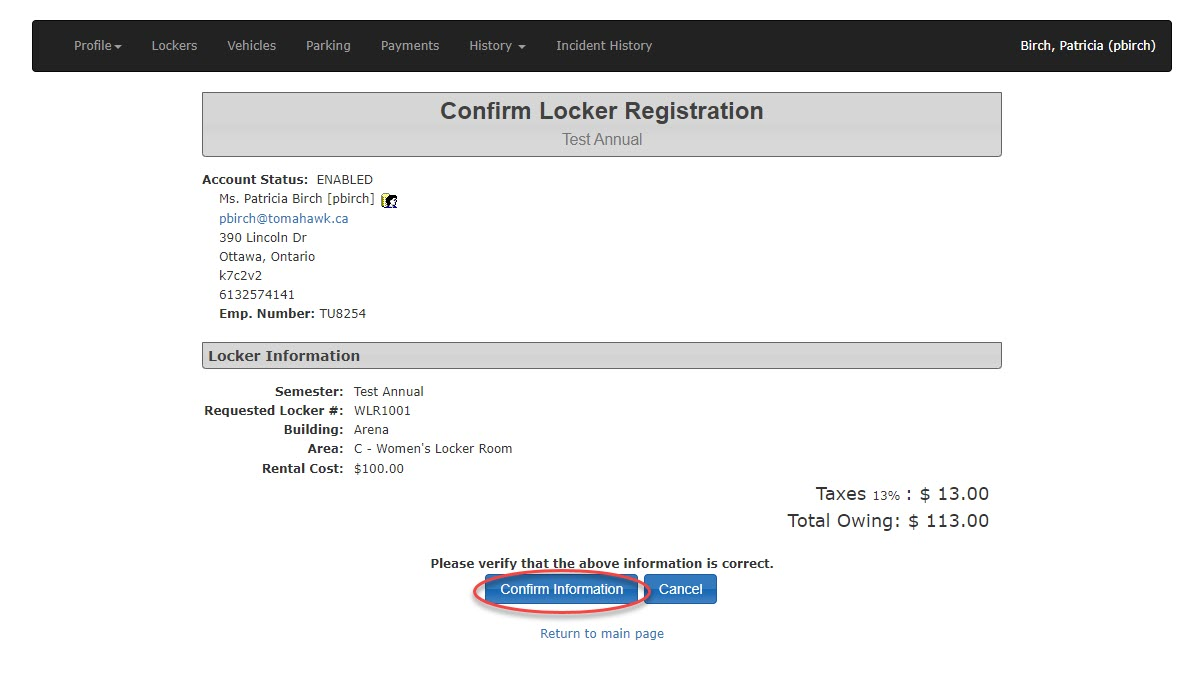
TheVerify the assignment information on the confirmLockerlockerRegistrationregistration pagewillandopen whereclick theadmin can verify the information about the locker being assigned. Click onConfirm Infoto continue.button.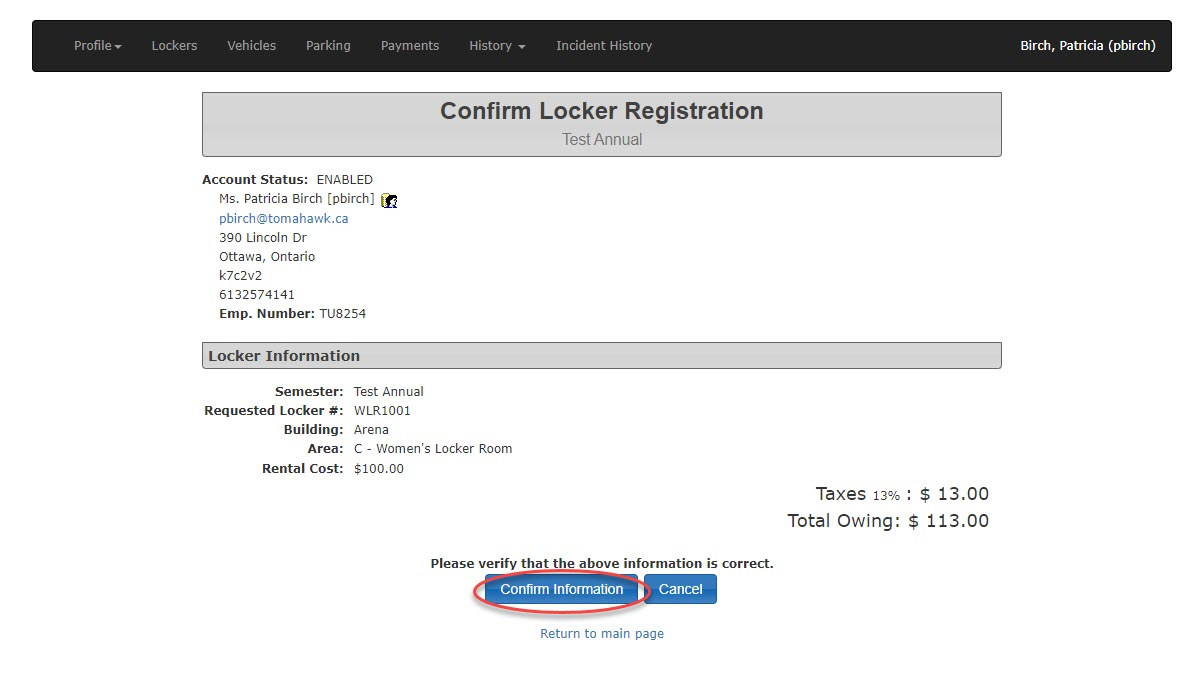
-
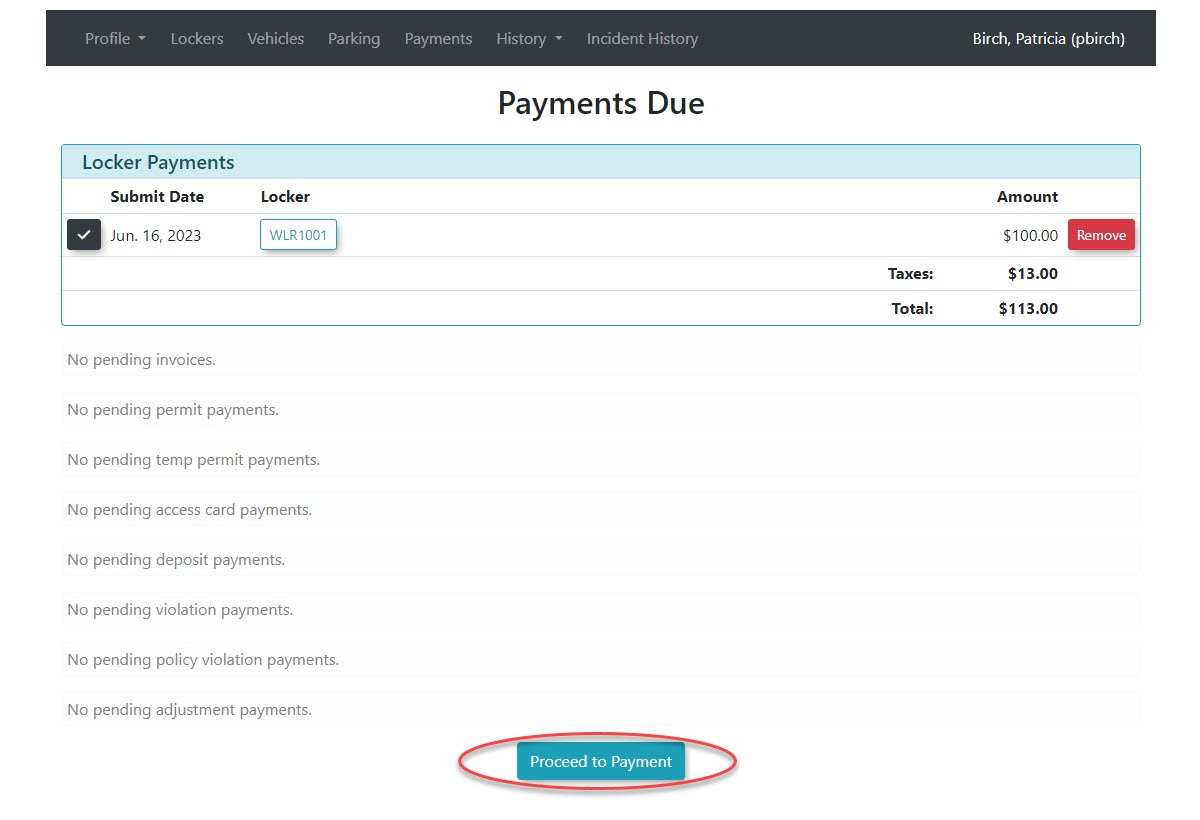
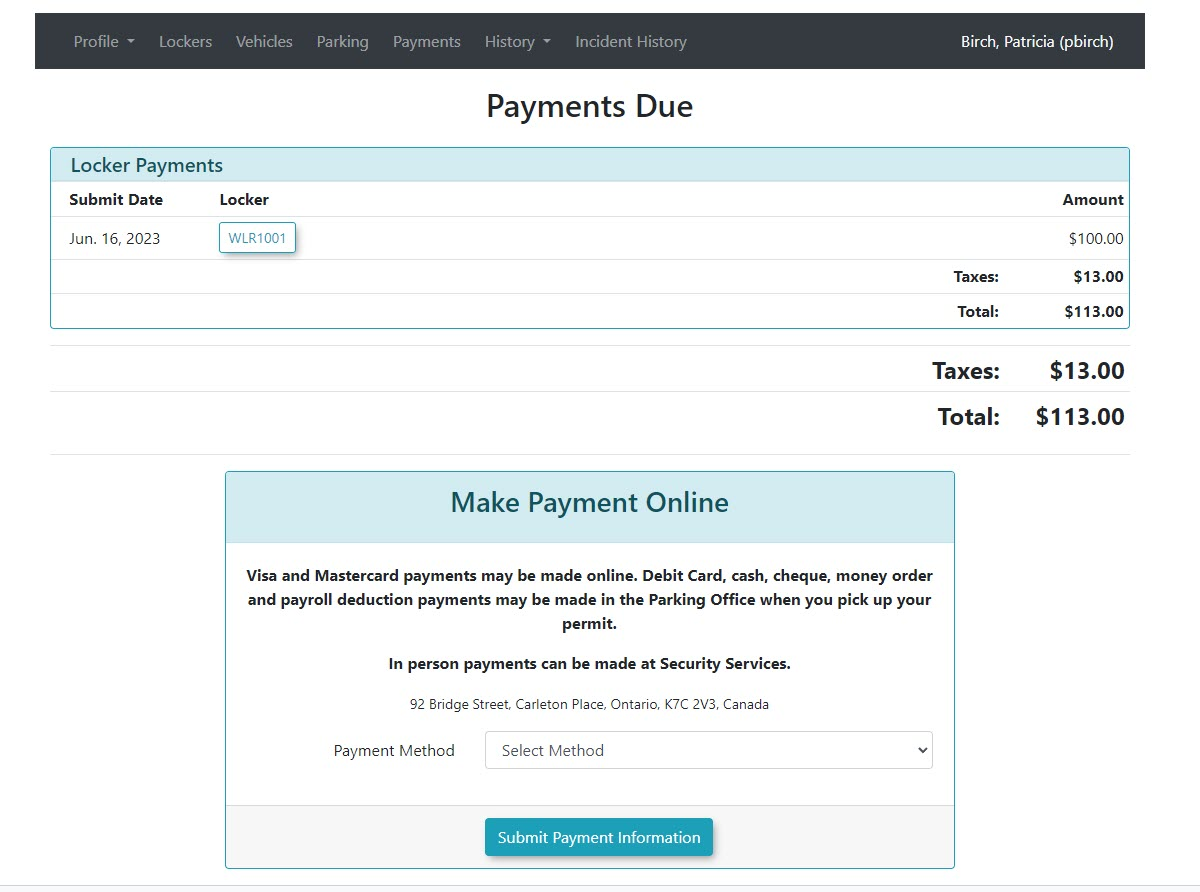
The payment due page will appear.Clickonthe Proceed to Paymenttobuttoncontinue.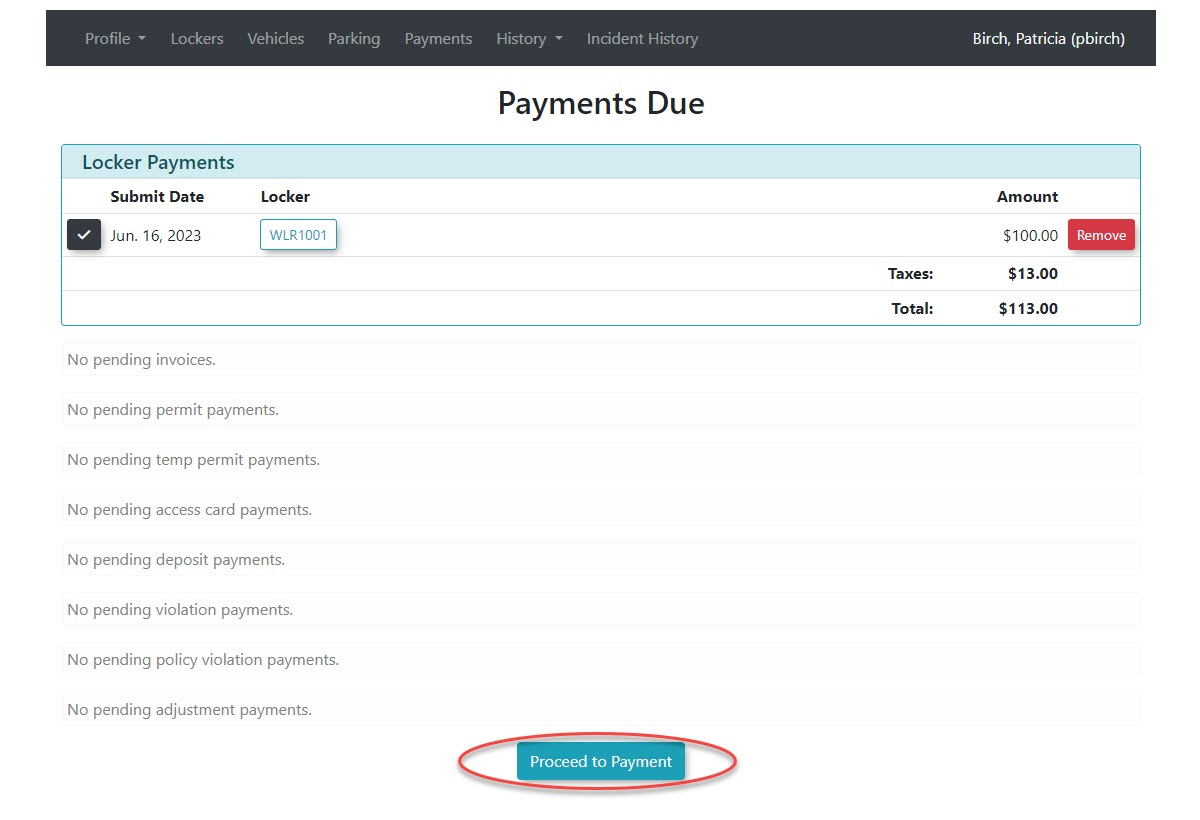
The screen will refresh andon theadminpaymentwillduebepage.presented -
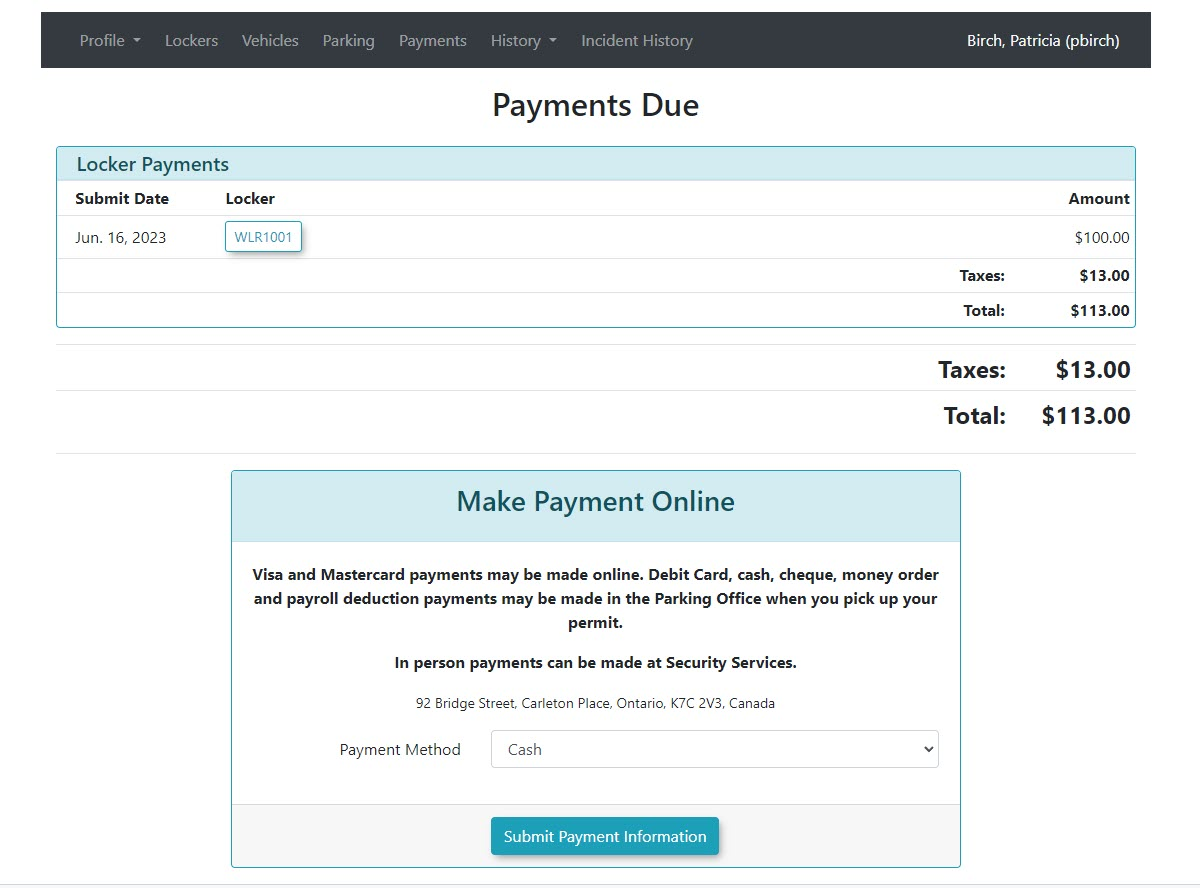
Select the
PaymentdesiredSelectionpaymentsectionmethodof(e.g., Cash) from theprocess.payment selection section.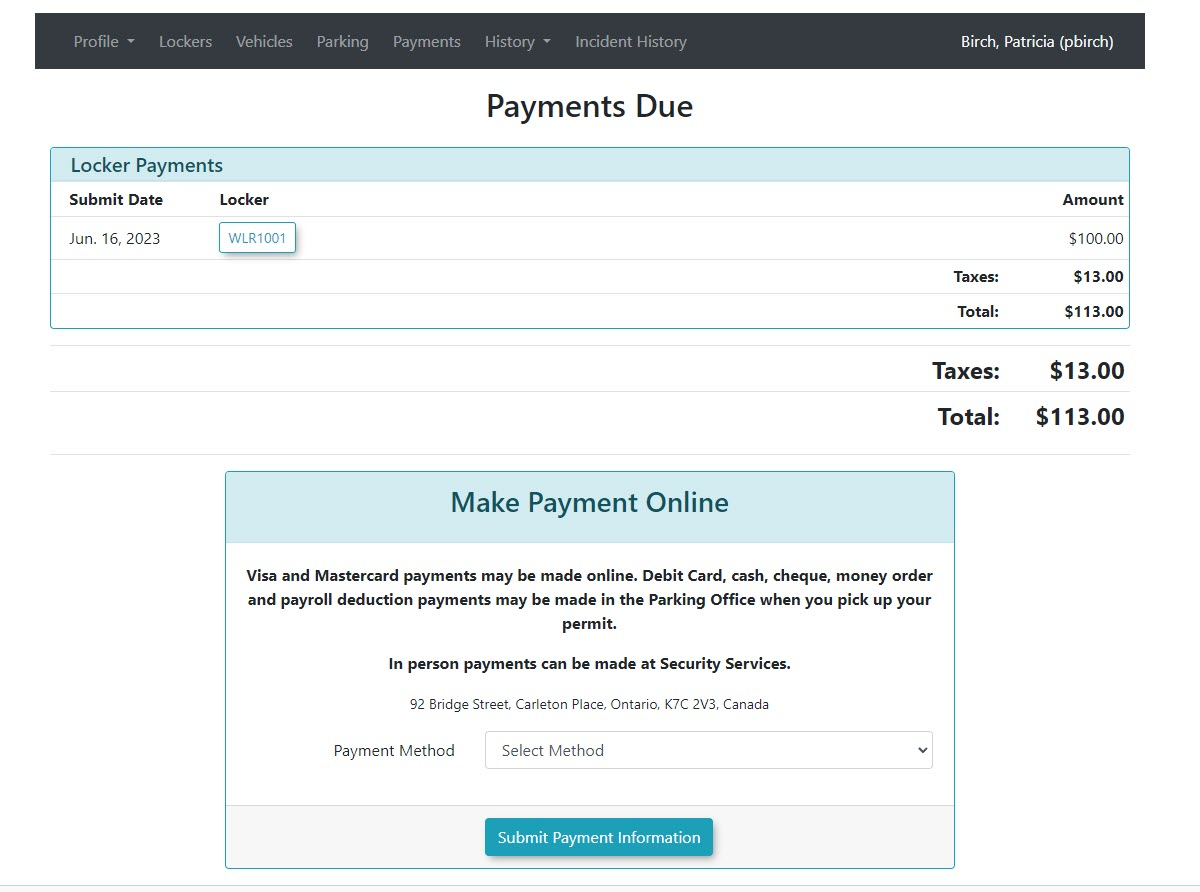
-
InClickthis case we have selected aCashpayment. Clickthe Submit Paymentto continue.button.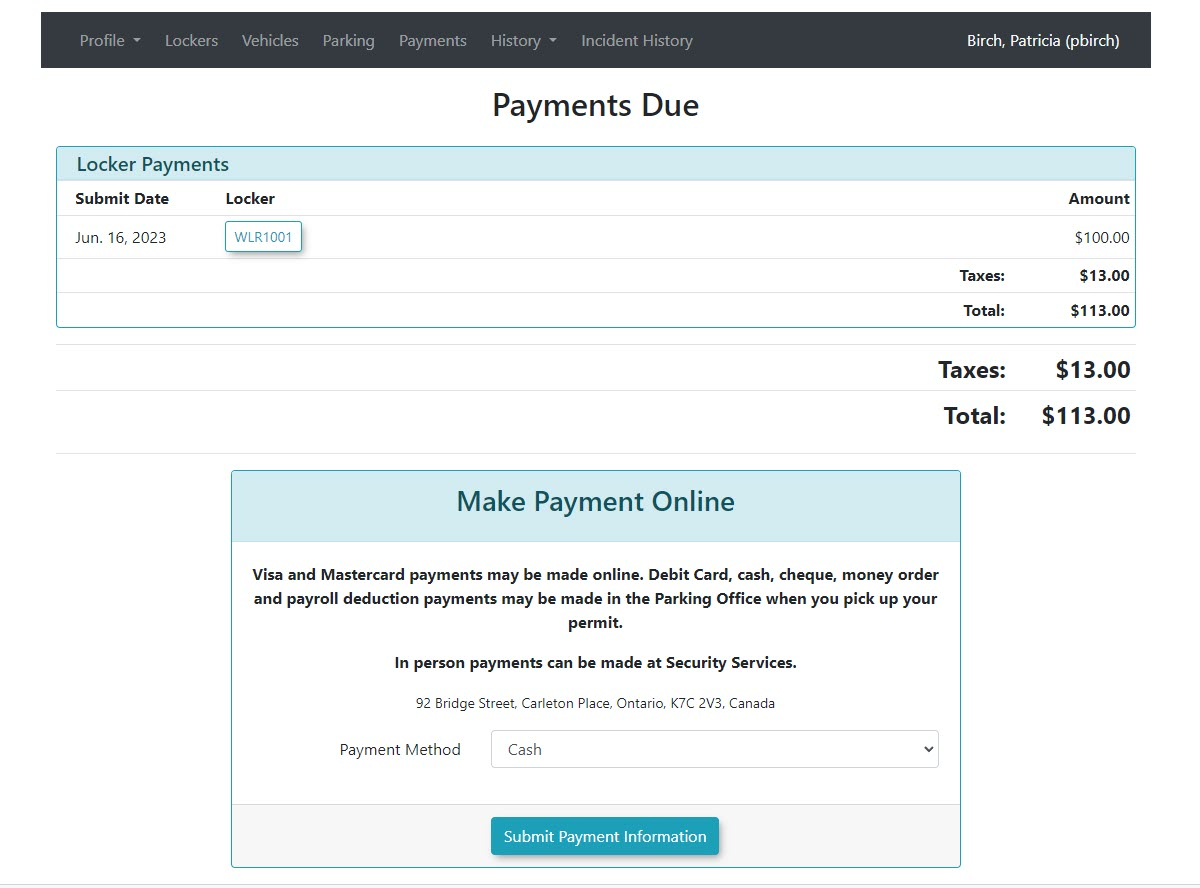
-
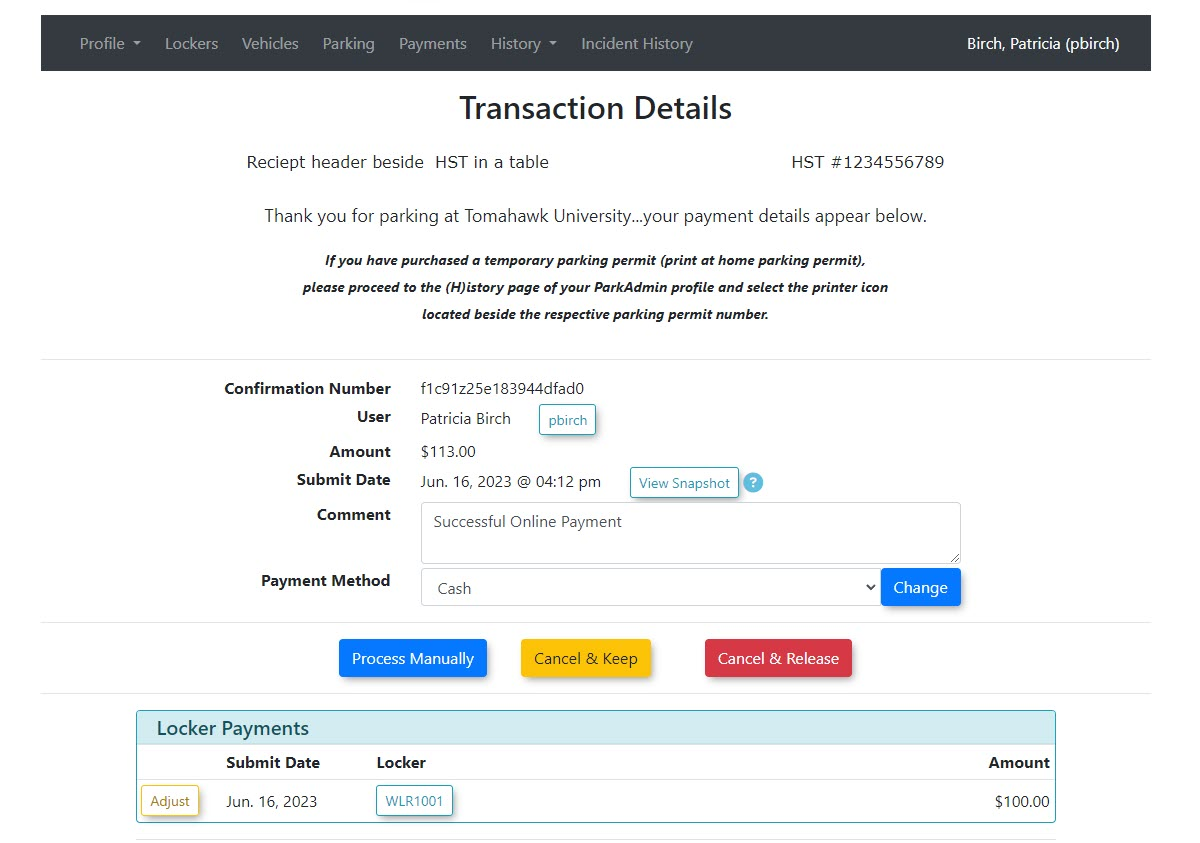
TheReviewtransactionthe options presented on the Transaction Detailsscreen will appear. There are three choices available.screen:-
Process
ManuallyManually:whichThis option will complete the transaction and finalize the rental. -
Cancel and
KeepKeep:whichThis option will terminate the transaction but return the locker to an awaiting payment status on the user's profile. -
Cancel and
ReleaseRelease:whichThis option willalsoterminate the transaction and immediately release the locker back into the pool of availablelockersinventory.to rent.
-
-
INClickourtheexample we will selectProcess Manually button tocompletefinalize the transaction.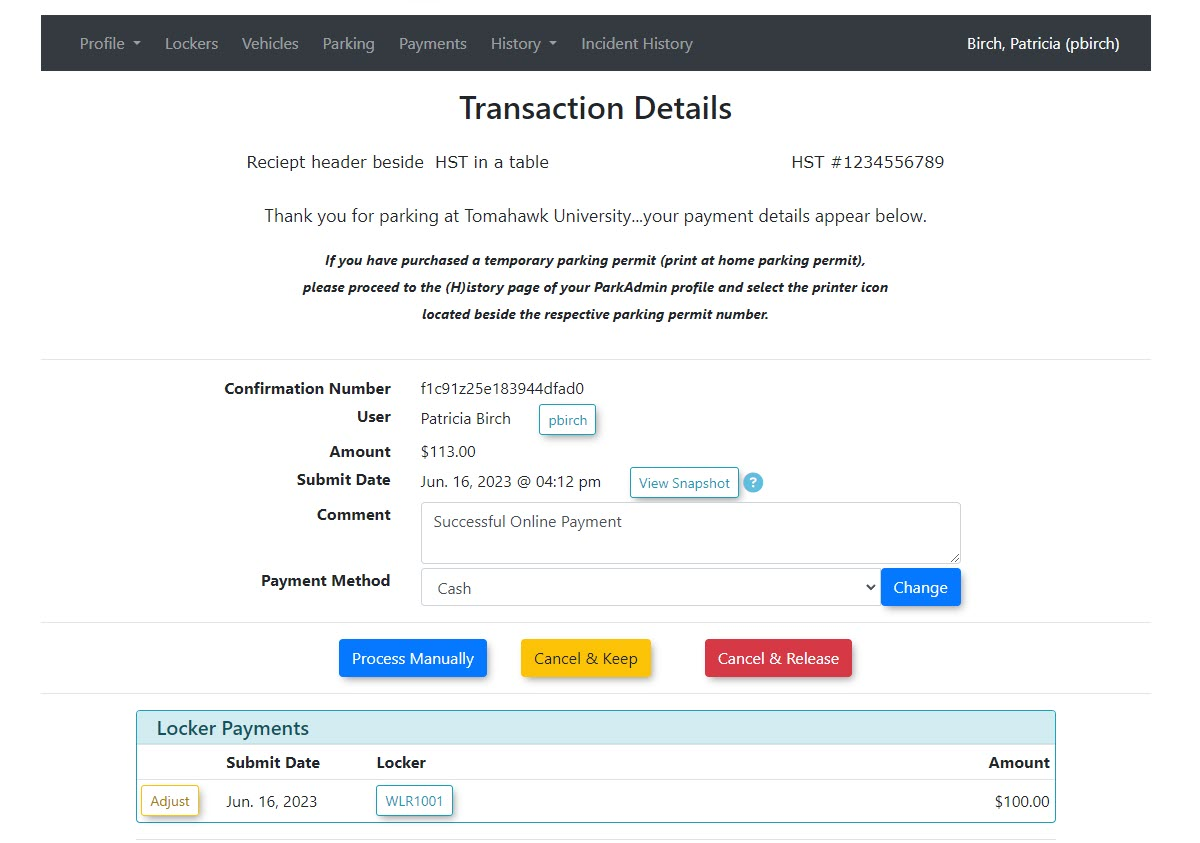
Visual Cues and Status Indicators
-
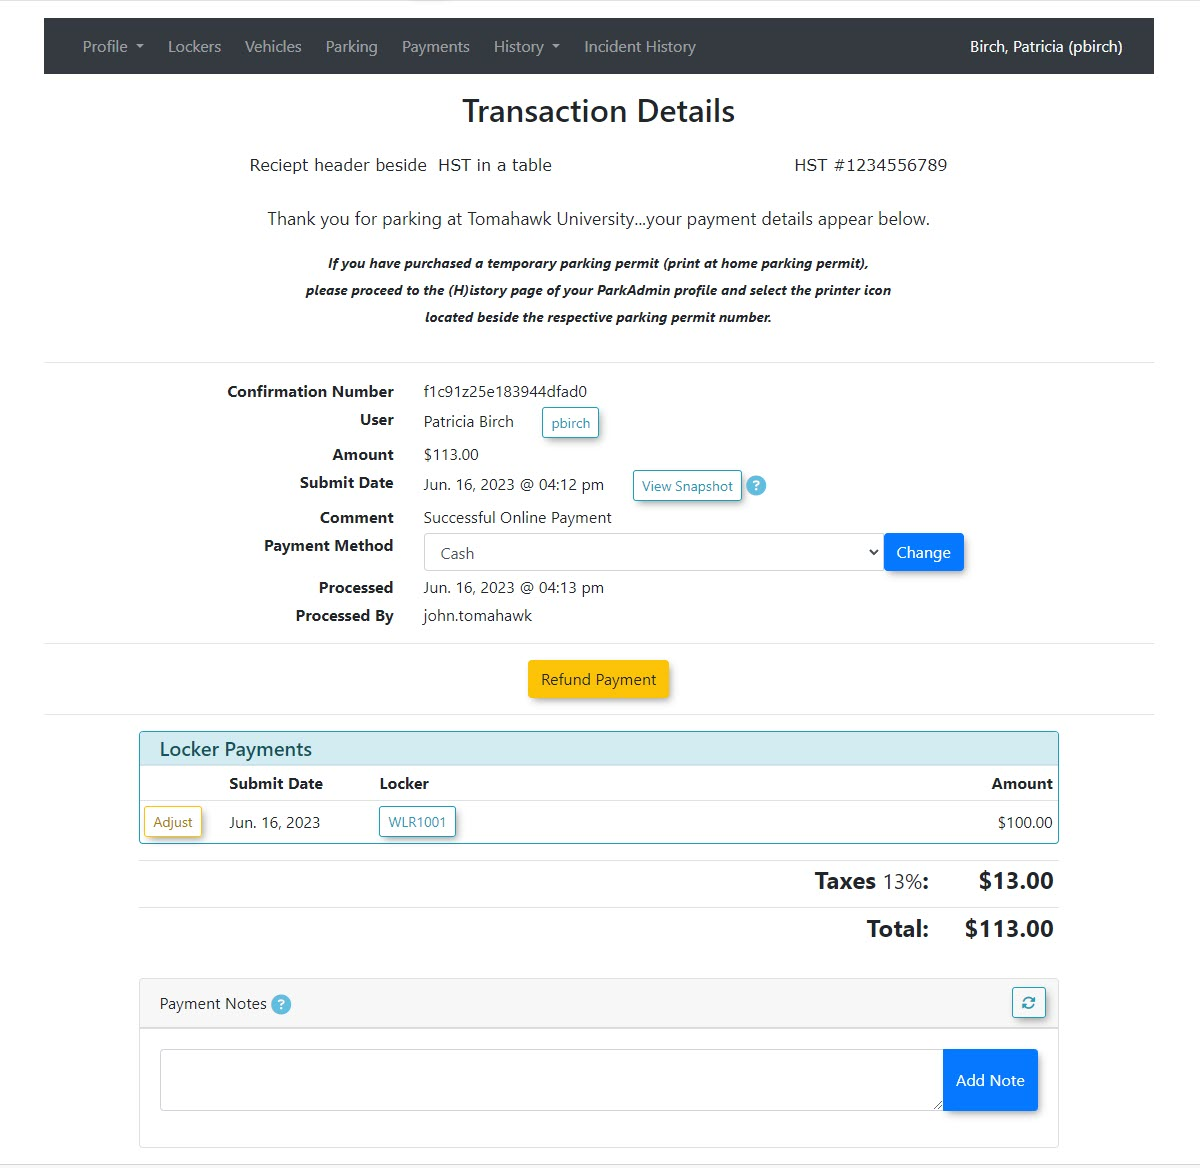
TheReceipt Generation: Once the paymentwillisbesuccessfully processedandmanually, the final Transaction Details screen will refresh to display areceipt.detailed receipt, confirming the locker assignment and the logged payment.
Best Practices and Considerations
-
Verify the User Profile: Always verify you are processing the transaction on the correct user profile before clicking the final process button to prevent assigning inventory or logging manual payments to the wrong account.
-
Releasing Inventory: If a user changes their mind at the final checkout step and no longer wants the locker, ensure you click the Cancel and Release button so that the locker immediately becomes available for other users to rent.