Bambora Checkout
To properly configure your Bambora/Wordline payment type in OPS-COM you will require two separate "Authorization Headers". These headers will be referenced below as:
Payment Authorization Header
Profile Authorization Header
The process to generate the two different encoded headers is similar in that both require your Bambora Merchant ID + API access passcode, and both are encoded at the same link, however the API access passcode is different for each and shown on different pages in Bambora (order settings vs payment profile configuration).
Bambora Configuration:
Order Settings:
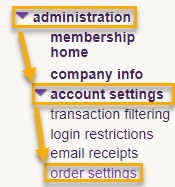 |
Login to your Bambora account, then on the left navigation select Administration → Account Settings → Order Settings. |
API access passcode (Payment Authorization Header):
On the Order settings page scroll down to "API access passcode". If there is nothing in the API access passcode field click the "Generate New Code" button. After generating your API access passcode make sure to scroll down to the bottom of the page and click "Update" to save your changes.
Merchant ID (MID):
 |
Your Merchant ID can be found in the top right of your Bambora account. |
Encode API Passcode (Payment Authorization Header):
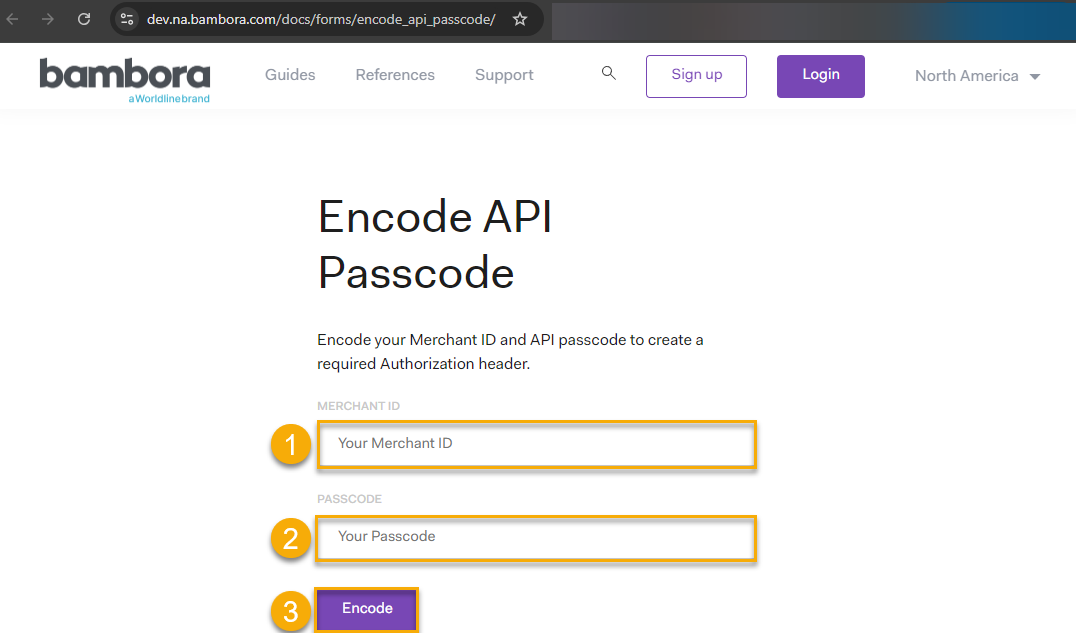 |
Now that you know your API access passcode and Merchant ID go here. Copy and paste your Merchant ID (1) and API access passcode (2) into the appropriate fields, then click "Encode"(3).Copy/record the Authorization Passcode returned. This will be needed later when you setup the Bambora Checkout payment type in OPS-COM. It will be referenced further down this page as the "Payment Authorization Header". You should temporarily paste this into a program such as Notepad for easy access later since you will need it later during the OPS-COM configuration.
You will want to make sure to copy only the following section returned (excluding quotation marks): |
Similar to the above process for encoding your Payment Authorization Header, we will be going through a similar process for encoding your Profile Authorization Header. Payment Profile Configuration: |
|
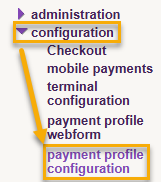 |
Login to your Bambora account, then on the left navigation select Configuration → Payment Profile Configuration. |
API access passcode (Profile Authorization Header):Under Security Settings make sure "API access passcode:" is selected. If there is nothing in the API access passcode field click the "Generate New Code" button. After generating your API access passcode make sure to scroll down to the bottom of the page and click "Update" to save your changes. |
|
Merchant ID (MID): |
|
 |
Your Merchant ID can be found in the top right of your Bambora account. |
Encode API Passcode (Profile Authorization Header): |
|
 |
Now that you know your API access passcode and Merchant ID go here. Copy and paste your Merchant ID (1) and API access passcode (2) into the appropriate fields, then click "Encode"(3).
Copy/record the Authorization Passcode returned. This will be needed later when you setup the Bambora Checkout payment type in OPS-COM. It will be referenced further down this page as the "Profile Authorization Header". You should temporarily paste this into a program such as Notepad for easy access later since you will need it later during the OPS-COM configuration.
You will want to make sure to copy only the following section returned (excluding quotation marks): |
OPS-COM Configuration:
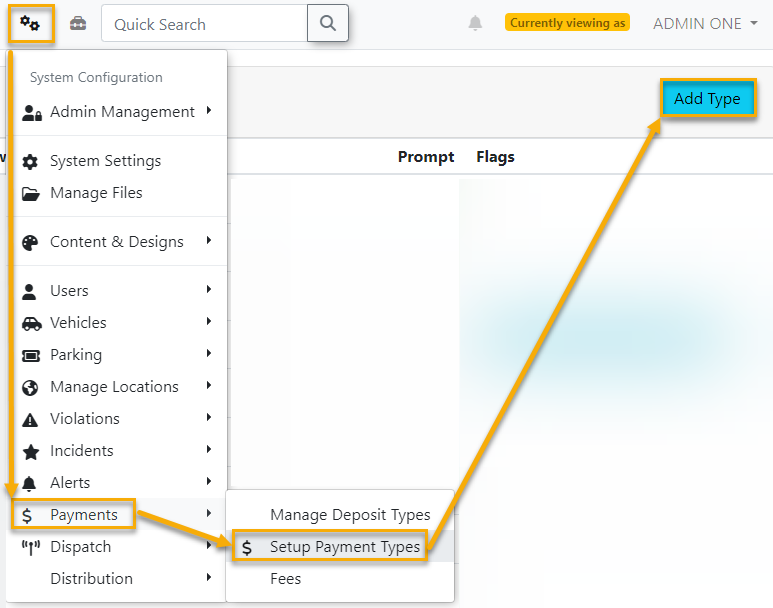
Create new Payment Type in OPS-COM: |
|
 |
Login to your OPS-COM system with an administrator account that has permission to edit payment types.
In the OPS-COM menu select System Configuration → Payments → Setup Payment Types → Add Type.
Select "Bambora - Checkout" from the Provider list, then click "Next Step". |
Edit Payment Type - Enabled for User Types: |
|
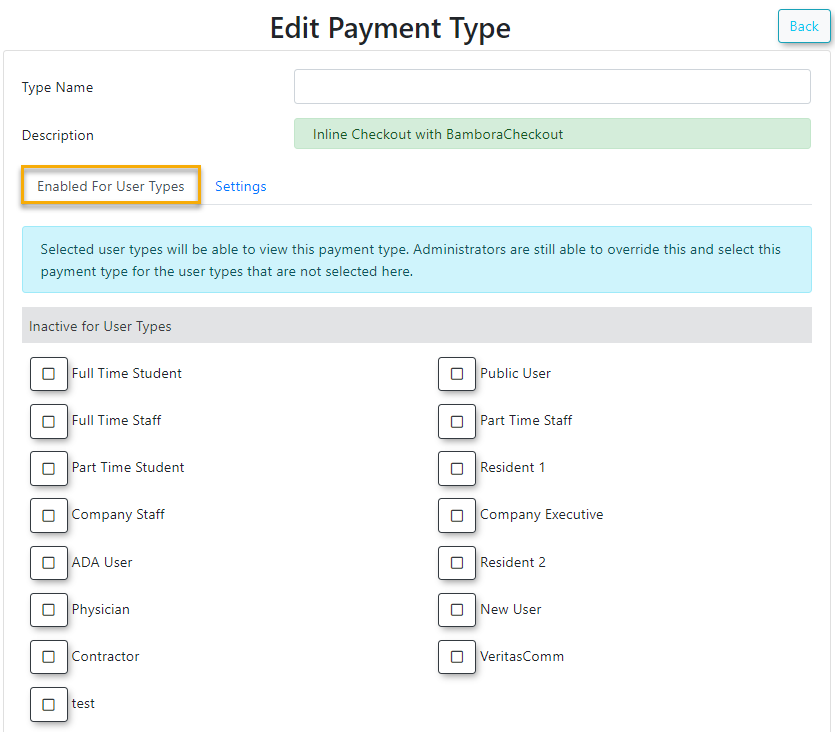 |
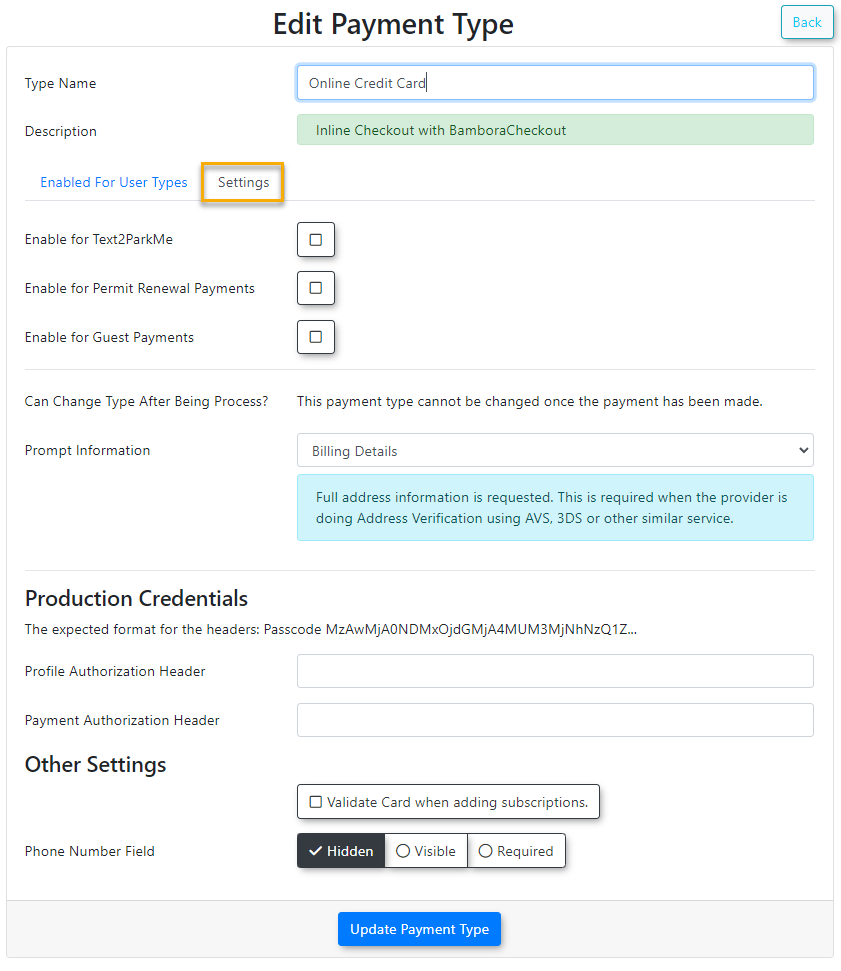
Type Name: The Type Name can be whatever you want it to be, though please note this will also be the name displayed to users during payment checkout when they are prompted to select a payment method.
You can reference the specific hosted payment provider or something more generic such as "Online Credit Card Payment", "Online payment", "Credit Card", etc. Really it's up to you and what you think makes most sense to your site users when making a payment.
Enabled for User Types: Select the User Types you wish this new Payment Type to be visible to so they can select it during payment checkout. You can change these user types at any time. Once done make sure to click the "Update Payment Type" button at the bottom of this page. |
Edit Payment Type - Settings: |
|
|
Enable for Text2ParkMe: if you aren't using this module leave the button unchecked. Enable for Permit Renewal Payments: if you aren't using this feature leave the button unchecked. Enable for Guest Payments: if you aren't using this feature leave the button unchecked.
Prompt Information: This depends on whether or not you're enforcing AVS (Address Verification Service) in your Bambora account. This is set in Bambora under Administration → Account Settings → Order Settings → Transaction Reversal Options Conditions. If using AVS you will require the Prompt for to have "Billing Details" selected, which will prompt users to supply their billing address information during checkout so AVS can pass. Otherwise if AVS isn't required in your Bambora account you can select Email Address in which case no address information will be required from users making payments.
If using AVS Bambora recommends enabling only the “AVS Postal/Zip Code Mismatch” option as the Street Mismatch is extremely sensitive and may result in a high decline rate.
Production Credentials:
Profile Authorization Header: Copy and paste the Profile Authorization Header into this field as detailed in the steps above.
Example:
Payment Authorization Header: Copy and paste the Payment Authorization Header into this field as detailed in the steps above.
Example:
Other Settings:Validate Card when adding subscriptions: Optional setting related to when/if users add a subscription method in OPS-COM for this payment type and whether or not the card is validated by the payment provider when first added as a subscription method. If left unchecked the card will only be validated when/if used for a payment.
Phone Number Field: Usually hidden, but some payment providers may require a phone number for payments depending on your fraud detection settings. Recommend leaving hidden unless otherwise stated by your payment provider or if you check a setting in Bambora to require a phone number.
|
|
|
|
|


