
Authorize.net Payment Provider Setup
Setup and Configuration
OPSCOM Payment Type Creation
First, we need to create a new payment type for this integration.
-
Log in to the OPSCOM Admin Portal.
-
Hover over System Admin and click Payment Gateway Setup to create a new payment type.
-
Click the Script Type drop-down menu and choose JS: Authorize.JS.
-
Enter a descriptive name in the Payment Type Name field, such as Credit Card or Online Payment.
-
Disable access for all User Types to this payment method while setup is in progress.
Do not grant access to any user types until credential entry and webhook configuration are fully verified.
Authorize net API Credentials Generation
The next steps will detail how to link your OPSCOM installation to your payment provider account, with Authorize.net.
-
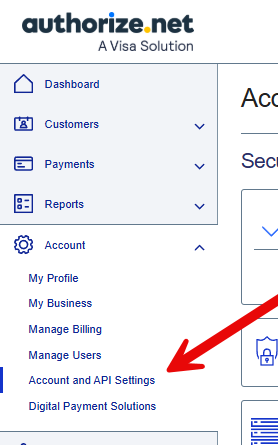
Click Account on the side bar and click Account and API Settings.
-
Click API Credentials and Keys.
-
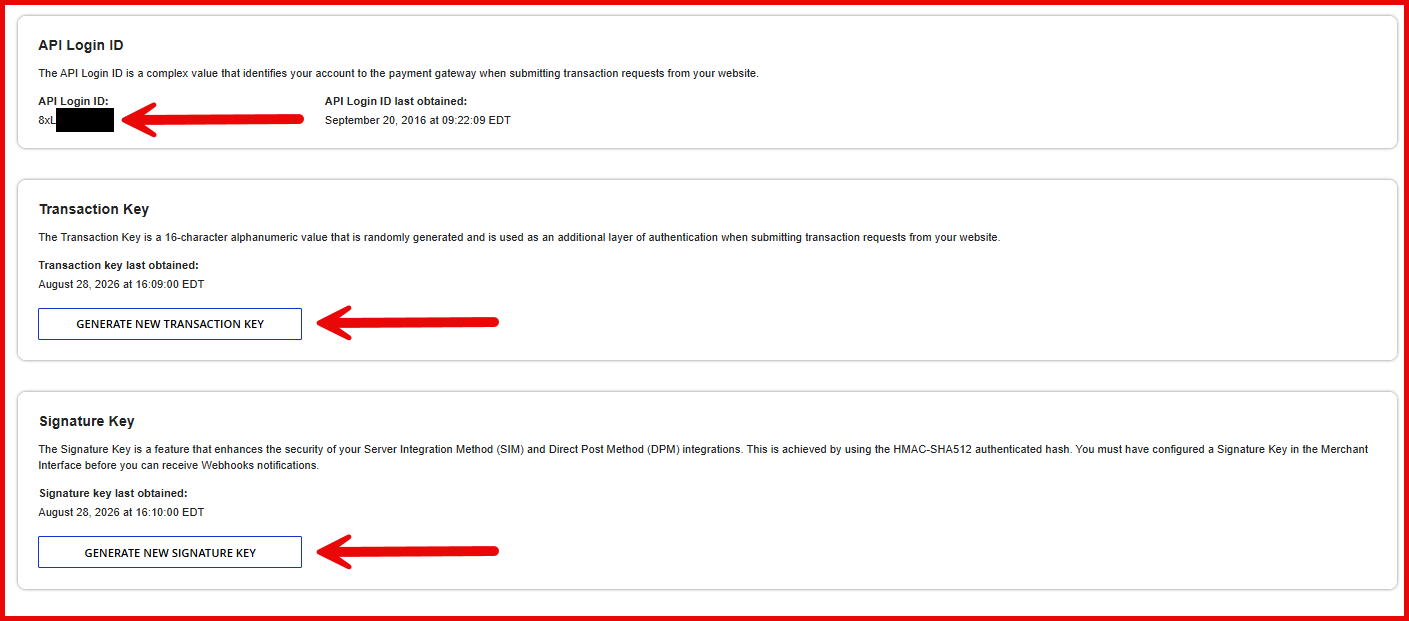
Copy the API Login ID displayed near the top of the page.
-
Select the Generate New Transaction Key option, enter an identifier name, answer the security question (if applicable), and click the Submit button.
-
Copy the generated key immediately and store it in a secure password manager.
-
In the same way, select the Generate New Signature Key option, click the Submit button, and copy the generated key.
Finishing OPSCOM Payment Type Configuration
-
Return to the payment type settings page in OPSCOM.
-
Enter the API Login ID, Transaction Key, and Signature Key into the corresponding credential fields.
-
Enter these credentials into both the Production Credentials and Testing Credentials fields to enable testing on the preview environment.
-
Configure billing address requirement, or display preferences and enable or toggle the Bank Account payment option based on organizational requirements. (allows direct bank transfers)
-
Click the Update Payment Type button to save progress.
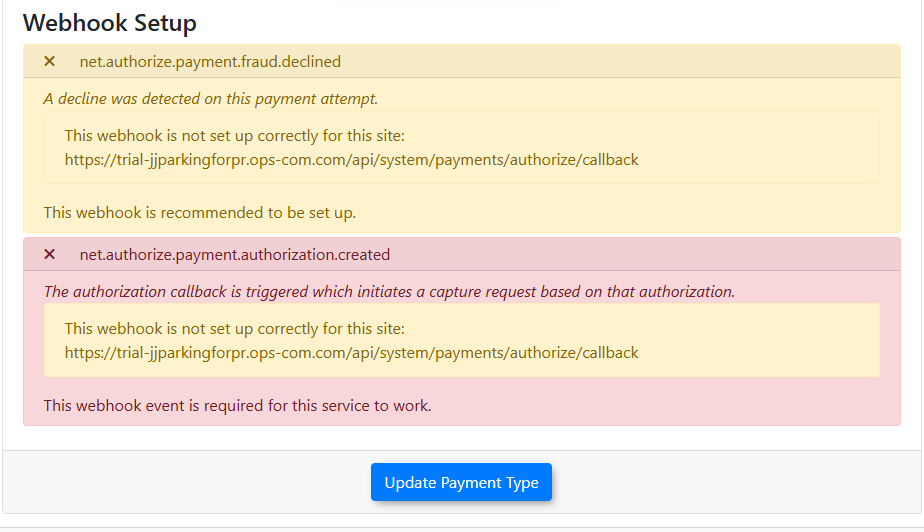
Now you should see this warning, and in the next step, we will fix it by setting up a webhook configuration on Authorize.net.
Webhook Notification Setup
-
Log into the Authorize.net Merchant Interface, click Account, and click Account and API Settings.
-
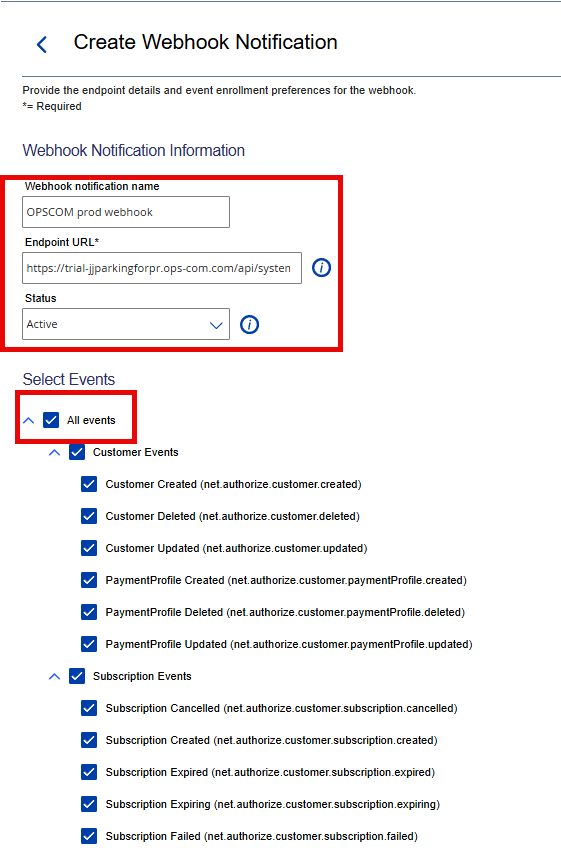
Scroll down to Webhooks and click the Create Webhook Notification button.
-
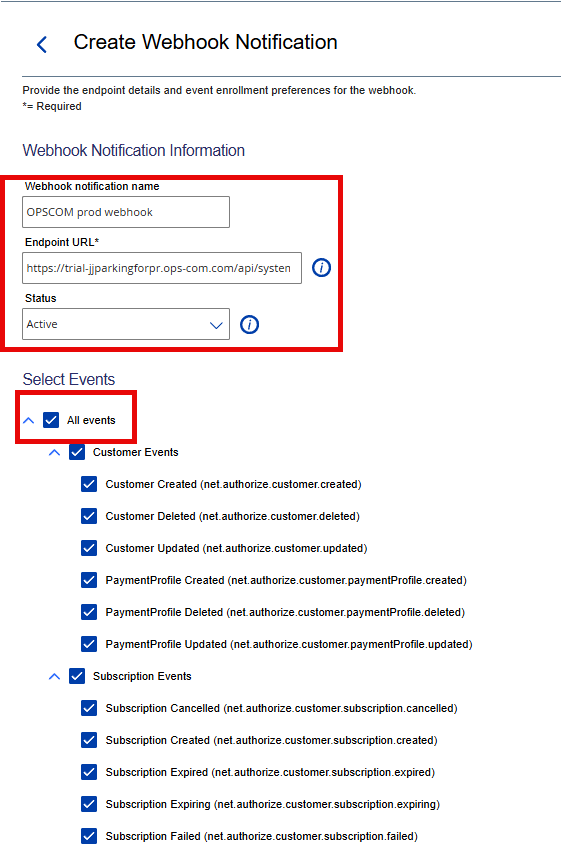
Enter OPSCOM in the Name field.
-
Enter
https://{your-domain}[.ops-com.com/api/system/payments/authorize/callback]in the Endpoint URL field, replacing{your-domain}with the active domain name.
For example: [https://citypark.ops-com.com/api/system/payments/authorize/callback] -
Click the Status drop-down menu and choose Active.
-
Select the All Events option under Event Selection.
-
Click the Save button.


Using this Feature
-
Return to the payment type configuration page in OPSCOM.
-
Refresh the browser page.
-
Confirm that a green success indicator appears for both the Production and Preview environments.
- Test on the preview environment, until you are satisfied.
( https://{CLIENT-ID}.preview-admin.ops-com.com/admin/ ) -
Re-enable access for the appropriate User Types on the payment type settings page to grant user access to the payment method.
Best Practices and Considerations
-
Disable user access during setup to prevent users from attempting payments while credentials or webhooks are being configured.
-
Verify Signature Key configuration to ensure OPSCOM can validate that incoming webhook notifications originate directly from Authorize.net.
-
Maintain separate test and production credentials by connecting an Authorize.net Sandbox account to the preview environment (
{client}.preview.ops-com.com) and a live account to the production environment. -
Ensure PCI DSS SAQ A compliance by using Authorize.JS to tokenize cardholder data directly in the customer browser, keeping raw card numbers off OPSCOM servers.
-
Establish a credential rotation schedule and update OPSCOM immediately whenever a Transaction Key or Signature Key is regenerated to avoid service disruptions or failed webhook signature checks.