The OPSCOM Admin Portal
The Admin Portal is where all the OPSCOM admins will log in and carry out their daily duties serving their end users.
OperationsCommander works hard to maintain an up to date product wiki! If you have any questions or if you feel something is missing, post about it in the community.
___________________________________________________________________________________________
- Landing Page and Dashboards
- Using the OPSCOM-ARC System Dashboard & Widgets
- Edit the Admin Landing Page Messages
- Point in Time Dashboard Control
- Geo Location Dashboard Widget
- Graph Dashboard Widget
- Filterable Graph Dashboard Widget
- List Dashboard Widget
- WYSIWYG Dashboard Widget
- Incident Association Dashboard Widget
- OPSCOM FAQs, Tips & Tricks
- Quick Search Tool Functionality
- Disable Browser Auto-Fill and Auto-Complete
- Rebranding the OPSCOM User Portal with Custom Colors
- Why Are My Violation/Warning Notification Emails Not Going Out?
- Unsubscribe Option for Email Notifications-Opt-Out
- OPSCOM Reports
- User Management
- Registering a New User
- User Search
- User Profile Overview
- Archiving or Disabling a User
- User - History Tab
- User - Parking Tab
- User - Payments Tab
- Payment Management (Subscriptions)
- Using Tax Exemption
- User - Vehicles Tab
- Edit Primary Driver
- Unlink a Vehicle from User Profile
- Understanding & Controlling Active Vehicles
- User - Incident History
- Bulk Email Users
- Generate Mail Merge
- Review Emails Sent to Users
- Retrieving Uploaded Files
- Registering a Locker for a User
- User Company Editor
- Bulk User Type Change
- Merge User
- Athletics Module
- Forms Module
- Vehicle Management
- Search by Plate
- Merge Vehicles
- DNTT - Do Not Ticket or Tow
- Active Vehicle Report
- Tracking Electrical Vehicles
- OperationsCommander & Locker Management
- 🚀 The Evolution of OPSCOM: Introducing Project Eevee & Project Butterfly
- Locker Search
- Locker Switch
- Awaiting Payment (Lockers)
- Midnight List - Lockers
- Non Returning Users Report
- Locker Sales Windows
- Allocate Lockers
- Locker Troubleshooting
- Permit Management - ParkAdmin
- Permit Search
- Permit Switch
- Awaiting Payment - Permits
- Using the Basic Waitlist Report
- Managed Waitlist
- Single Allocate
- Permit Allocations
- Permit Sales Window Management
- Using Permit Proration
- Permit Waitlist Feature Overview
- Selling Permits Using Tablet Kiosks with OPSCOM
- Setting Permit State for a Lost or Stolen Permit
- Altering the Price of Unpaid Standard Permits
- Releasing a Permit
- Archiving and Restoring Permits
- OC Prime - New Temp Permit Functionality
- Apply Temp Permit to User Vehicles
- Temporary Permit Printing
- Real-Time Parking Map
- QR Code Guest Temporary Permitting
- QR Code User Experience
- Rollover: Auto Selection and Automatically Processing Payments
- Feature Overview - Rollover/Renew Permits
- Enabling Permit Rollovers without Previous Payment
- Preventing Permit Rollover after Cancellation
- Text2ParkMe - Usage
- Text2ParkMe - Active Permits
- Setup Lots to Use Text2ParkMe
- Planning Lot Groups and Lot Zones
- Pricing and Lot Admin
- Lot Passwords
- Lot Visibility Options
- Adding Permits to a Lot (Allocation)
- Setting Up A Lot To Be Visible and Available To The End User
- Public-Facing Lot Pages
- Setting Up for Event Parking
- Pay Station Status
- Refundable Parking Deposits
- Access Cards - Search
- Clearing Items Awaiting Payment
- Parking Logix - Parking Sensor Integration
- Viewing and Editing LPR Events
- Improve LPR Read Rates
- LPR Audit Log
- The Validator - a Parking Validation Utility
- Branding the Validator Tool
- Managing Validator Records
- Validator Admin Groups
- Validate Parking Report
- Hang Tag Printing
- Printing Permit from Home Setup
- Zebra Sticker Printers
- Extend Your Parking
- Violations/Citations and Appeals - OPSCOM ViolationAdmin
- Violations From Static Cameras / Mailout Violations
- Spoiling a Violation
- Cancelling a Violation
- Hiding Zero Dollar Violations
- Search Repeat Offenders Report
- Restricting Payment of Violations in Court Requested Conviction (CRC) Status
- Printing the Certificate of Parking Infraction
- MTO Annual Report
- Collections - Flag as Sent to Collections
- Municipal Violations and Collections
- Managing Violation/Citation Appeals
- Edit a Violation
- Paying a Violation
- Search for a Violation
- Configure Violations to a Person
- Creating a Violation on the Admin Portal
- Security PIN on Violations - How is it used
- Ticket Warnings Explained
- Notice Letter Templates
- Notice Letter Report
- Auto Email Notifications for Warnings
- Appeal Evidence Uploads Overview
- OperationsCommander Payments and Transaction Flow
- Payroll Deduction Settings
- Setting up Quick Pay/Guest Payments
- Payment Reconciliation: Submitted / Processed
- Accepting a Student Account Payment from the Admin Portal
- Payment for a locker from the Admin Portal
- Admin Portal Permit Purchase with Credit Card
- Daily Payments - Itemized
- Admin Portal Cash, Cheque or Debit Payment
- Paying for a Violation from the Admin Portal
- Payment Data Export via SFTP
- Search Payments
- Banner Report
- Flex Payments
- Payroll Deduction Workflow
- Admin Portal Violation Payments with Credit Card
- Failed Payments Report
- Mark Items as Paid
- Payment Adjustments
- Electronic Fund Transfer Configurations
- Paying a Violation Anonymously on the Administrator Interface
- Permit Purchase by an Admin
- Transact Campus/CashNet Hosted Payment Setup
- TouchNet (uPay) Hosted Payments
- SchoolPay
- PayPal
- OpenEdge Hosted Payments
- Moneris Checkout
- Moneris Hosted Paypage
- Chase E-xact Hosted Payments
- Bambora Checkout
- Authorize.Net
- Hosted Payments
- Technical Schematic - Step #1
- Automatic Violation Notice
- Collections Module
- What does a refund look like in the system?
- Cancel Transaction
- Adjustments
- Adjusting a violation to zero dollars
- Types of Reimbursement
- Payment Processing Models
- Payments and Transaction Flow
- OPSCOM Company Manager and Invoicing - FinanceAdmin
- Re-Sending an Invoice
- Cancelling an Invoice
- Invoice Search
- Permit Invoicing
- Sending Invoices in Advance of Payment
- Company Setup and Invoices
- OperationsCommander Vehicle and People Alarms
- Generic Alarms
- People Alarms
- Plate and Vehicle Alarms
- The Differences Between Alerts, Plate, Vehicle Alarms and DNTT
- IncidentAdmin
- Active Dispatch Logs (BETA)
- Viewing an Incident
- Filling out the Incident Form (WIP)
- Incident Checklist
- My Incident Tasks
- View Cameras
- Related Occurrences
- Dispatch Logs
- Incident Distribution Feature
- View Open Incidents
- Incident Summary Report by Sub-Location
- Incidents Summary Report by Category
- Incidents Summary Report
- Recent Incidents Summary Report (Last 30 Days)
- Incident Reports
- Editing Incidents
- Incident Entry
- Search Incidents
- Configuring Incidents
- IncidentAdmin Workflow
- Hazing Transparency Report
- Fire Safety Report
- Setting Up for Clery Act Reporting
- Security with OperationsCommander
Landing Page and Dashboards
When you sign in to OperationsCommander initially, you are presented with a landing page. You can navigate back to that page anytime by clicking the OPSCOM logo. You can also find your Dashboards and system Setup information on this page.
OperationsCommander works hard to maintain an up to date product wiki! If you have any questions or if you feel something is missing, post about it in the community.
Using the OPSCOM-ARC System Dashboard & Widgets
The System Dashboard is a fully customizable, widget-based analytics interface built directly into the administrative portal. Its primary purpose is to allow administrators to visualize organizational data, track key operational metrics, and create personalized reporting views using a drag-and-drop grid. This article is intended for OPSCOM administrators responsible for monitoring system analytics and managing operational data.
Setup and Configuration
This feature is a core administrative tool used to display graphical and tabular representations of your operational data.
Admin Side: Administrators must have the appropriate system role permissions enabled to view, edit, or set default dashboards. Access to specific data within the widgets is automatically restricted based on the administrator's existing system permissions.
Using this Feature
Administrators can use the following instructions to create custom dashboards, manage layouts, and configure individual data widgets.
There are two distinct dashboard types. The General Dashboard is the main operations dashboard accessible by clicking the OPSCOM logo, surfacing organization-wide data. The Admin Dashboard is shown when viewing a specific admin's profile page and automatically filters data to that specific user.
Creating a Dashboard
-
Click the + Create Dashboard button on the Dashboard homepage.
-
Enter a descriptive title in the Name field.
-
Select Private (only you can see it) or Visible (any admin with browse permissions can view it) from the visibility options.
-
Click the Create button to immediately open the new workspace.
Editing a Dashboard Layout
-
Toggle the Edit Mode switch located in the toolbar.
-
Drag widgets by their header to reposition them on the grid.
-
Drag the bottom-right corner of any widget to resize it.
-
Click the Save Layout button in the toolbar to persist the grid positions.
Adding and Configuring Widgets
-
Toggle the Edit Mode switch in the toolbar.
-
Click the + Add Widget button to open the widget gallery.
-
Click a specific widget card to add it to your grid.
-
Click the Settings icon on the new widget header to open the configuration modal.
-
Select the appropriate metrics from the Data Source drop-down menu.
-
Configure the specific Display Settings and Filter Settings for your required view.
-
Click the Save button to apply the configuration and fetch the data.
Available Widget Types
| Widget Type | Description |
| Graph | Displays data as an interactive chart. Supports Bar, Stacked Bar, Line, Pie, and Doughnut styles. |
| Filterable Graph | Identical to the Graph widget but includes an inline filter drop-down displayed directly on the widget header for real-time data slicing. |
| List | Displays data as a sortable, paginated data table. Ideal for raw record-level views (e.g., individual violations or LPR reads). |
| Map | Displays geocoded records as pins on an interactive map. Supports pin clustering, color-coding by age, and drawing patrol paths. |
| WYSIWYG | A free-form rich-text content panel used for notes, announcements, or instructions embedded directly in the dashboard. |
| Admin Info | A read-only profile summary card displaying the name, role, and contact details of the admin currently being viewed. |
| Incident Association | Displays incident association data relevant to the specific dashboard context. |
Available Data Sources
| Data Source | Compatible Widgets | Common Display and Filter Settings |
| Violation Stats | Graph, Filterable Graph, List, Map | Filter by payment status, payable only, geocoded only, or active writers. Group by time, plate, location, writer, or category. |
| Permit Stats | Graph, List | Filter by active only status, permit type, specific lots, or lot zones. Group by permit type, lot, or user type. Measure by count or revenue. |
| LPR Stats | Graph, Filterable Graph, List, Map |
Filter by permit type or camera classification (Entry, Exit, Monitor, Patrol). Group by camera, device type, or entry/exit type. |
| Permit Activity (Beta) | Graph |
Tracks login, reservation, and payment traffic over short time windows. Filter by Time Period (Last 4/8 Hours, Last Day) and Bucket Size (5 to 60 mins). Supports Auto Refresh. |
Dashboard Permissions Reference
| Permission | Operational Effect |
| dashboard_browse | Allows the administrator to view dashboards marked as Visible. |
| dashboard_edit_any | Allows the administrator to edit any dashboard regardless of ownership. |
| dashboard_set_org_default | Allows the administrator to promote a specific dashboard to the organization-wide default. |
Best Practices and Considerations
-
Utilize the Filterable Graph for LPR Camera data: Set the Filter Dimension to Camera to get a per-camera drop-down directly on the widget. This allows you to quickly filter views without needing to open the backend widget settings.
-
Star your most-used dashboard: Mark your primary dashboard as your personal default. Clicking the star icon ensures it loads automatically as your landing page when you navigate to the portal.
-
Use effective graph combinations: Use the Group by Entity setting combined with a Stacked Bar chart. This is the most readable combination for comparing multiple cameras, lots, or writers side by side.
-
Create annual progress charts: Combine the Year to Date time period with the Group by Month setting. This creates a clean, automated year-progress chart that resets automatically each January.
-
Optimize Map widgets: Configure Geo widgets with the Last 4 to 8 Hours time range and enable the Cluster Pins setting. This prevents map clutter and improves performance for busy patrol routes.
-
Combine List and Graph widgets: Place a List widget alongside a Graph widget on the same dashboard using the exact same data source and filter settings. This provides administrators with both a high-level visual chart and a raw-record drill-down on a single screen.
- Monitor High-Volume Sales: Add a Permit Activity graph widget during major permit launches to monitor system load. Look for large gaps between Logins and Unique Users to spot repeat retry attempts, or high Reservations relative to Paid counts to spot potential payment gateway bottlenecks.
- Perform Historical Audits with Point in Time: Use the Point in Time anchor in the top dashboard toolbar to freeze dashboard metrics during past high-traffic incidents or specific reporting windows without disrupting live data for other team members.
Edit the Admin Landing Page Messages
The Admin Dashboard landing page message feature allows organizations to display important, up-to-date information directly to their staff upon logging into the system. Its primary purpose is to centralize internal communications such as system updates, upcoming deadlines, or schedule changes. This article is intended for OPS-COM administrators responsible for managing internal announcements and system content.
Setup and Configuration
This feature requires specific role permissions to access the content and design configuration menus.
Admin Side: Administrators must have the Manage System Messages permission enabled on their user role.
-
Hover over System Configuration, click Admin Management, then Manage Roles.
-
Click the Permissions button next to the role you want to modify.
-
Click the System Content tab.
-
Enable the Manage System Messages checkbox.
-
Click the Save Permissions button.
Using this Feature
Administrators can use the following instructions to seamlessly access and modify the content displayed on the main admin dashboard.
Editing the Message Content
-
Hover over System Configuration, click Content & Designs, then Pages and Content Blocks.
-
Click the Messages tab.
-
Click the Edit button next to the Admin Dashboard item.
-
Enter your desired content using the standard WYSIWYG editor.
-
Click the Save Messaging button to immediately publish your changes to the dashboard.
The WYSIWYG editor displays by default for quick text entry. If you prefer to construct your message using HTML, click the Tools drop-down menu and choose Source Code.
Best Practices and Considerations
Point in Time Dashboard Control
The Point in Time control allows administrators to freeze an entire dashboard view to display historical data as it existed at a specific past moment. It helps teams investigate past incidents, evaluate high-volume permit launches, and generate historical reports without altering live operational data. This article is intended for OPSCOM administrators.
Setup and Configuration
Point in Time is a built-in feature available on all customizable dashboards. Access is tied to standard dashboard viewing permissions (dashboard_browse). No additional system setup or backend configuration is required.
Using Point in Time
Administrators can use this tool to quickly toggle between live system data and anchored historical snapshots.
Freezing a Dashboard to a Past Moment
-
Open the dashboard you'd like a historical view of.
-
In the top toolbar (next to the dashboard title), click the Point in Time icon (⟲).
-
In the Point in Time modal, click the Select Date and Time field to pick your target date and time.
-
Click Save.
The dashboard will reload every widget against that specific moment. The ⟲ icon will turn amber to indicate an anchored state, and hovering over it displays Viewing as of: <date and time>.
Geo Location Dashboard Widget
The Geo Location Widget provides an interactive Google Map view on the dashboard to plot geocoded operational data. Its primary purpose is to help administrators visually monitor real-time spatial trends—such as active violation locations and License Plate Recognition (LPR) reads—across parking facilities. This article is intended for OPSCOM administrators.
Setup and Configuration
The Geo Location widget is built directly into the dashboard framework.
-
Admin Side: Administrators must have system role permissions enabled to edit dashboards (dashboard_edit_any or ownership of the target dashboard).
-
Data Sources: The map supports visual plotting for two underlying data sources:
-
Violation Stats: Displays spatial distribution of issued parking tickets.
-
LPR Stats: Plots License Plate Recognition camera reads and scan locations.
-
Using this Feature
Administrators can use the following instructions to add and configure a Geo Location widget on any customizable dashboard workspace.
Adding the Geo Location Widget
-
Open your target dashboard and toggle the Edit Mode switch in the top toolbar to On.
-
Click the + Add Widget button to open the widget selection gallery.
-
Select Geo Location Widget from the available widget options.
Configuring Map Data and Filters
-
Locate the newly placed Geo Location Widget tile on your grid and click the gear icon (Settings) in its header bar.
-
Enter a custom title in the Widget Name field.
-
Select a Data Source from the drop-down menu (Violation Stats or LPR Stats).
-
Select the Display Settings tab to configure map visualization parameters (such as cluster displays or default time ranges).
-
Select the Filter Settings tab to refine the underlying data:
-
Permit Type: Filter displayed map points by specific permit classifications or leave set to All.
-
Camera Type: Specify entry, exit, monitor, or patrol camera types (available when LPR Stats is selected).
-
Bounding Coordinates: Enter numerical thresholds into Min Latitude, Max Latitude, Min Longitude, and Max Longitude to restrict the rendered map area to a specific geographic bounding box.
-
-
Click Save to apply the configuration and render the map data.
Available Controls and Display Modes
Map Layer Controls (On Map)
-
Map View: Standard graphical street map mode provided by Google Maps, ideal for identifying lot boundaries and street layouts.
-
Satellite View: High-resolution aerial satellite imagery, useful for pinpointing precise vehicle or enforcement locations within open lots.
-
Point Clustering: Groups dense clusters of nearby location points into summarized numerical circles (e.g., orange numeric markers) to keep the map readable and optimize performance.
Widget Header Toolbar
-
Refresh (circular arrow icon): Manually updates the widget data to query and load the latest geocoded records.
-
Download Raw CSV (green tray/arrow icon): Exports the raw underlying location data and coordinates currently plotted on the map into a downloadable .csv spreadsheet file.
-
Settings (gear icon): Opens the configuration modal to edit the widget title, data source, display settings, and filters.
-
Duplicate (double box icon): Creates an exact clone of the widget tile with matching settings on your active dashboard grid.
-
Delete (trash can icon): Removes the widget tile from the active dashboard.
Best Practices and Considerations
-
Restrict Bounding Box Coordinates: For large organizations or multi-campus deployments, set Latitude and Longitude minimums and maximums under Filter Settings to lock a specific map widget to a single sub-campus or facility.
-
Optimal Time Ranges: Configure map data to load relative windows (such as Last 4 to 8 Hours) in Display Settings. This avoids cluttering the map with stale historical data and maintains high rendering speed for enforcement monitoring.
-
Combine with List Widgets: Place a Geo Location map widget adjacent to a List Widget configured with the exact same data source (Violation Stats or LPR Stats). This setup gives staff simultaneous access to spatial pin visualizers alongside tabular record drill-downs.
Graph Dashboard Widget
The Graph Widget presents system data in a dynamic visual chart format powered by Chart.js. Its primary purpose is to help administrators analyze operational trends—such as ticket issuance volume, active permit distribution, LPR scan activity, and dispatch logs—over time or across specific operational categories. This article is intended for OPSCOM administrators.
Setup and Configuration
The Graph widget is built directly into the dashboard framework.
-
Admin Side: Administrators must have system role permissions enabled to edit dashboards (dashboard_edit_any or ownership of the target dashboard).
-
Data Sources: Supports aggregated data from Violation Stats, Permit Stats (Beta), LPR Stats, Active Permits (Beta), Permit Activity (Beta), Dispatch Stats (Beta), and Incident Stats (Beta).
Using this Feature
Administrators can use the following instructions to add and configure a Graph widget on any customizable dashboard workspace.
Adding and Configuring the Graph Widget
-
Open your target dashboard, toggle Edit Mode to On, and click + Add Widget.
-
Select Graph Widget from the gallery.
-
Click the gear icon (Settings) in the widget header to open configuration settings.
-
Select your Widget Name, Data Source, and preferred Chart Type (Bar, Stacked Bar, Line, Pie, or Doughnut).
Display and Filter Options
Display Settings Tab
Display options adjust automatically based on your selected Data Source:
-
Standard Stats (Violation, Permit, Dispatch, Incident, LPR): Customize your date range (Time Period), time intervals (Time Grouping), data grouping (Group By attributes like lot, camera, or permit type), metric (Count vs. Revenue), and sort order.
-
Active Permits (Beta): Configure Group By and Stack By attributes (Lot, Lot Zone, or Permit Type) to structure stacked visual comparisons.
-
Permit Activity (Beta): Define your relative Time Period, choose interval granularity via Bucket Size, and set the Auto Refresh rate.
Filter Settings Tab
Filters adapt dynamically based on your selected Data Source:
-
Violation Stats: Refine by Payment Status (Unpaid, Overdue, Paid, Collections) or toggle options to isolate Payable Only (excludes warnings/spoiled tickets), Geo Coordinates Only, or Active Writer tickets.
-
Permit Stats (Beta): Toggle Active permits only, or filter by specific Permit Type, Lots, Lot Group, or Lot Zone.
-
Dispatch Stats (Beta): Toggle Parent Logs Only to exclude sub-logs, or filter by Log Status.
Click Save to apply your configuration and render the graph.
Available Controls and Display Modes
Widget Header Toolbar
-
Refresh (circular arrow icon): Updates the graph to fetch and display the latest backend data.
-
Download Raw CSV (green tray/arrow icon): Exports the raw tabular data points into a
.csvfile. -
Settings (gear icon): Opens the configuration modal to modify data sources, rules, and filters.
-
Duplicate (double box icon): Clones the widget tile with matching settings onto your active dashboard.
Best Practices and Considerations
-
Chart Type Selection: Use Bar or Stacked Bar charts for discrete categories/lots, Line charts for time trends, and Pie/Doughnut charts for relative percentage distributions across small datasets.
-
Point in Time Compatibility: When a global Point in Time anchor is active on the dashboard, relative time windows evaluate backward from that timestamp, and auto-refresh pauses automatically.
-
Combine with List Widgets: Place a Graph widget side-by-side with a List Widget configured with the exact same data source and filters to provide a high-level visual chart alongside a granular record drill-down on a single screen.
Filterable Graph Dashboard Widget
The Filterable Graph Widget displays operational data in a dynamic visual chart format while embedding an interactive runtime filter directly in the widget header. Its primary purpose is to allow administrators to slice and filter chart data live on the dashboard without entering edit mode. This article is intended for OPSCOM administrators.
Setup and Configuration
The Filterable Graph widget is built directly into the dashboard framework.
-
Admin Side: Administrators must have system role permissions enabled to edit dashboards (dashboard_edit_any or ownership of the target dashboard).
-
Supported Data Sources:
-
LPR Stats: License Plate Recognition scan metrics and camera activity.
-
Dispatch Stats (Beta): Entry counts, log statuses, and call types.
-
Incident Stats (Beta): Reported incident classifications and task metrics.
-
Using this Feature
Administrators can use the following instructions to add and configure a Filterable Graph widget on any customizable dashboard workspace.
Adding and Configuring the Widget
-
Open your target dashboard, toggle Edit Mode to On, and click + Add Widget.
-
Select Filterable Graph Widget from the gallery.
-
Click the gear icon (Settings) in the widget header to open Filtered Graph Settings.
-
Select your Widget Name, Data Source, and preferred Chart Type.
Setting Up the Runtime Filter
Display Settings Tab
-
Filter Dimension: Select the specific dataset attribute you want to expose as a live header drop-down.
-
Standard Display Controls: Configure date range (Time Period), time aggregation (Time Grouping), data categorization (Group By), sort order, and Auto Refresh.
Filter Settings Tab
Filters adapt dynamically based on your selected Data Source:
-
LPR Stats: Filter default views by Permit Type or Camera Type.
-
Dispatch Stats (Beta): Toggle Parent Logs Only to exclude sub-logs, or filter by Log Status.
-
Incident Stats (Beta): Filter entries by Status or category.
Click Save to apply your configuration and render the graph.
Runtime Filtering & Header Controls
-
Dynamic Header Filter: An interactive drop-down menu rendered directly in the tile header, allowing viewers to slice chart data live without changing backend settings.
-
Refresh (circular arrow icon): Updates the chart to fetch and display the latest backend data.
-
Download Raw CSV (green tray/arrow icon): Exports the underlying tabular data points into a downloadable .csv file.
-
Settings (gear icon): Opens configuration settings to modify data sources, rules, or default filters.
-
Duplicate (double box icon): Clones the widget tile onto your active dashboard.
-
Delete (trash can icon): Removes the widget tile from the dashboard.
Best Practices and Considerations
-
Command Center Use: Use Filterable Graphs on operational or management dashboards where staff need to filter data quickly (such as switching between different LPR camera locations or dispatch log statuses) without opening widget settings.
-
Combine with List Widgets: Place alongside a List Widget configured with matching data sources to give administrators simultaneous access to interactive visual charts and granular record lists.
List Dashboard Widget
The List Widget displays backend operational data in a clean, sortable table and list format. Its primary purpose is to provide administrators with a detailed, record-level drill-down—such as active permit inventories, raw violation logs, LPR read records, and dispatch calls—directly on the dashboard workspace. This article is intended for OPSCOM administrators.
Setup and Configuration
The List widget is built directly into the dashboard framework.
-
Admin Side: Administrators must have system role permissions enabled to edit dashboards (dashboard_edit_any or ownership of the target dashboard).
-
Data Sources: Supports tabular data rendering from Violation Stats, Permit Stats (Beta), LPR Stats, Active Permits (Beta), Dispatch Stats (Beta), and Incident Stats (Beta).
Using this Feature
Administrators can use the following instructions to add and configure a List widget on any customizable dashboard workspace.
Adding and Configuring the Widget
-
Open your target dashboard, toggle Edit Mode to On, and click + Add Widget.
-
Select List Widget from the gallery.
-
Click the gear icon (Settings) in the widget header bar to open List Settings.
-
Enter a custom Widget Name and select your target Data Source.
Display and Filter Options
Display Settings Tab
Display controls adapt based on your chosen Data Source:
-
Standard Stats (Violation, Permit, LPR, Dispatch, Incident): Configure date ranges (Time Period), interval grouping (Time Grouping), data categorization (Group By), visible table fields (Columns), sort direction (Sort Order), and Auto Refresh rates.
-
Active Permits (Beta): Select specific table fields under Columns, set the sort direction (Sort Order), and configure Auto Refresh.
Filter Settings Tab
Filters adapt dynamically based on your selected Data Source:
-
Violation Stats: Refine by Payment Status or toggle options to isolate Payable Only (excludes warnings/spoiled tickets), Geo Coordinates Only, or Active Writer tickets.
-
Permit Stats (Beta): Toggle Active permits only, or filter by specific Permit Type, Lots, Lot Group, or Lot Zone.
-
LPR Stats: Refine list entries by Permit Type or Camera Type.
-
Active Permits (Beta): Filter live permit inventories by Permit Type, Lots, or Lot Zone.
-
Dispatch Stats (Beta): Toggle Parent Logs Only to exclude sub-logs, or filter entries by Log Status.
-
Incident Stats (Beta): Filter list entries by Status or Category.
Click Save to apply your configuration and render the list table.
Available Controls and Interactive Features
Table Features & Drill-Downs
-
Clickable Record Links: Category values and locations render as interactive link buttons (e.g., location tags ending with
>) allowing staff to drill directly down into underlying records. -
Sortable Column Headers: Click any column header arrow to dynamically re-sort table rows in ascending or descending order.
-
Page Navigation: Use the previous and next arrow buttons and page numbers at the bottom of the widget to flip through long lists of data.
Widget Header Toolbar
-
Refresh: Updates the table to fetch and display the latest backend data.
-
Download CSV: Exports the formatted list layout.
-
Download Raw CSV: Exports the raw underlying tabular data into a downloadable .csv file.
-
Settings: Opens the configuration modal to modify data sources, visible columns, and filters.
-
Duplicate: Clones the list widget tile with matching settings onto your active dashboard.
-
Delete: Removes the list tile from the dashboard.
Best Practices and Considerations
-
Combine with Visual Widgets: Place a List widget adjacent to a Graph Widget or Geo Location Widget configured with the exact same data source and filter settings. This setup gives staff an instant visual overview alongside raw-record drill-downs on a single dashboard screen.
-
Column Selection: Select only essential fields under Columns to ensure the table remains clean and readable without requiring excessive horizontal scrolling.
WYSIWYG Dashboard Widget
The WYSIWYG Widget displays custom, formatted text and media content on the dashboard workspace. Its primary purpose is to allow administrators to publish custom announcements, staff schedules, links, or operational instructions using a rich-text editor. This article is intended for OPSCOM administrators.
Setup and Configuration
The WYSIWYG widget is built directly into the dashboard framework.
-
Admin Side: Administrators must have system role permissions enabled to edit dashboards (dashboard_edit_any or ownership of the target dashboard).
-
Content Source: Pulls saved rich-text records created in the central WYSIWYG Content repository.
Using this Feature
Administrators can use the following instructions to add and configure a WYSIWYG widget on any customizable dashboard workspace.
Adding and Configuring the Widget
-
Open your target dashboard, toggle Edit Mode to On, and click + Add Widget.
-
Select WYSIWYG Widget from the gallery.
-
Locate the newly placed tile on your grid and click the gear icon (Settings) in its header bar to open WYSIWYG Settings.
-
Enter a custom title in the Widget Name field.
-
Select a pre-configured content record from the WYSIWYG Record drop-down menu (e.g., Admin Dashboard, Contact Us).
-
Click Save to render the custom text block on your dashboard grid.
Managing WYSIWYG Content Records
To create or edit the content available in the WYSIWYG Record drop-down menu:
Available Controls and Header Toolbar
-
Refresh: Updates the widget tile to load the latest saved content changes from the central record.
-
Settings: Opens the WYSIWYG Settings modal to rename the widget tile or switch to a different linked record.
-
Duplicate: Clones the widget tile with matching settings onto your active dashboard.
-
Delete: Removes the widget tile from the dashboard layout.
Best Practices and Considerations
-
Central Content Management: Updating a single WYSIWYG record under System Configuration > Dashboard > WYSIWYG Content automatically updates every widget tile referencing that record across all dashboards simultaneously.
-
Operational Announcements: Use WYSIWYG tiles at the top of shared admin dashboards for important alerts, policy updates, shift schedules, or emergency contact directories.
Incident Association Dashboard Widget
The Incident Association Widget displays real-time incident and task tallies assigned to or associated with the logged-in user. Its primary purpose is to give administrators an immediate operational summary of their active workload, assigned tasks, group responsibilities, and associated incident reports directly on their dashboard. This article is intended for OPSCOM administrators.
Setup and Configuration
The Incident Association widget is built directly into the dashboard framework.
-
Admin Side: Administrators must have system role permissions enabled to edit dashboards (dashboard_edit_any or ownership of the target dashboard).
-
Data Source: Automatically queries the logged-in administrator's account profile to pull active incident management records, individual task assignments, and group task queues.
Using this Feature
Administrators can use the following instructions to add and view the Incident Association widget on any customizable dashboard workspace.
Adding the Widget
-
Open your target dashboard, toggle Edit Mode to On, and click + Add Widget.
-
Select Incident Association Widget from the gallery.
-
The tile automatically renders summary metrics and active records tied to your administrator profile.
Summary Metrics & Record Table
Header Metrics Summary
The top bar of the tile displays three real-time counters:
-
Incidents: Total count of active incidents linked to the logged-in administrator (e.g., created by or assigned to the admin).
-
My Tasks: Total count of individual tasks directly assigned to the logged-in user across all active incidents.
-
Group Tasks: Total count of unassigned or shared tasks assigned to the administrator's user group or department queue.
Incident Detail Table
When active records exist, the widget populates a structured data table featuring:
-
Incident Number: Clickable blue button tag containing the unique incident number for quick navigation to the full incident report.
-
Report Date: Timestamp indicating when the incident was logged.
-
Relation: Visual badges identifying the administrator's connection to the incident.
-
Task Counters: Numerical count columns breaking down specific My Tasks and Group Tasks remaining for each listed incident row.
-
Empty State: Displays a "No records found" inbox icon when the administrator has no active incident associations or pending tasks.
Available Controls and Header Toolbar
-
Refresh: Manually queries the system to fetch and display the latest incident counts and task assignments.
-
Settings: Opens configuration settings to rename the widget tile.
-
Duplicate: Clones the widget tile onto your active dashboard grid.
-
Delete: Removes the widget tile from the dashboard layout.
Best Practices and Considerations
-
Personalized Dashboard Experience: Because data in this widget dynamically resolves to the currently logged-in user, adding it to a shared or default organizational dashboard provides every administrator with their own personalized workload view automatically.
-
Daily Task Workflow: Encourage dispatchers and security personnel to keep this widget on their primary landing dashboard so they can monitor new task assignments in real time throughout their shift.
OPSCOM FAQs, Tips & Tricks
OperationsCommander works hard to maintain an up to date product wiki! If you have any questions or if you feel something is missing, post about it in the community.
Quick Search Tool Functionality
The Quick Search tool is a centralized search utility that allows administrators to rapidly locate specific records across the platform directly from the main menu. Its primary purpose is to retrieve relevant data associated with users, vehicles, incidents, and financial transactions, significantly streamlining daily workflows. This article is intended for OPS-COM administrators.
Setup and Configuration
This feature is a core administrative tool built directly into the main interface.
Admin Side: The Quick Search tool is enabled by default for all administrative accounts. No specific setup, permissions, or configuration is required to use this utility.
Using this Feature
Administrators can use the following instructions to quickly locate system records from any page within the admin portal.
-
Click the Search text field located in the main menu.
-
Enter a minimum of 3 characters to initiate the search query.
-
Click the desired record from the generated list of results to navigate directly to its specific details.
Searchable Data Types
The Quick Search tool scans across multiple modules to return results matching the following information:
-
License plate (including the license plate of any vehicle involved in an incident)
-
VIN number
-
Username
-
Last name
-
Email address
-
Student number
-
Employee number
-
Ticket number
-
Incident number
-
Payment Confirmation code
Best Practices and Considerations
-
Adhere to the character minimum: Ensure that you have entered at least three characters to initiate the search. The system will not execute a query or generate results for entries containing fewer than three characters.
-
Leverage advanced search tools: Consider using the advanced search features within specific modules if you are unable to locate a specific record. Navigating directly to modules such as Permit Management or IncidentAdmin provides much more granular filtering options for complex or highly specific queries.
If your search does not yield the expected results immediately, double-check your spelling and verify that you have met the three-character minimum requirement before navigating to the advanced module searches.
Disable Browser Auto-Fill and Auto-Complete
This article provides instructions on how to disable browser auto-fill and auto-complete features on your local workstation. Its primary purpose is to prevent browsers from automatically populating administrative form fields with incorrect data, ensuring strict data integrity when managing user profiles and sensitive information. This guide is intended for OPSCOM administrators who are experiencing data entry interference caused by their local web browsers.
Setup and Configuration
Because this configuration takes place outside of the OPSCOM environment, the setup involves modifying your local software settings.
Admin Side: Administrators must configure their local web browser settings to prevent auto-fill behaviors from overriding manual data entry within the administrative portal.
User Side: End-users may also choose to disable these settings on their personal devices for privacy reasons, though it is not strictly required for basic interaction with the public parking portal.
Some browser plug-ins, such as third-party password managers, may also act as auto-fill utilities and cause similar data override issues. If disabling the browser's native auto-fill does not resolve your data entry issue, review your installed plug-ins and disable or configure them to explicitly exclude the OPSCOM domain.
Using this Feature
Administrators can use the following steps corresponding to their specific web browser to disable the native auto-fill features.
Google Chrome
-
Open Chrome.
-
Click the More icon (three vertical dots) at the top right and select Settings.
-
Scroll to the bottom of the page and click Show advanced settings.
-
Disable the Enable Autofill to fill out web forms in a single click checkbox located under the Passwords and forms section.
Microsoft Edge
-
Open Edge and click the More icon (three dots) at the top right.
-
Click Settings and scroll down to Advanced Settings.
-
Locate the Save Form Entries option and toggle the setting to off.
Mozilla Firefox
-
Open Firefox.
-
Type about:config directly into the address bar and press Enter.
-
Click the I'll be careful, I promise button to proceed.
-
Search for dom.forms.requestAutocomplete and double-click the entry to set its value to False.
Apple Safari
-
Open Safari and click Preferences.
-
Click AutoFill.
-
Deselect all checkboxes corresponding to the categories of information you do not want Safari to automatically fill.
-
Click the Edit button next to a specific category if you need to edit or delete existing saved information.
Internet Explorer
Best Practices and Considerations
-
Test after configuration: Always save your changes and refresh the system to confirm that the auto-fill issue is resolved. Logging completely out of OPSCOM and logging back in ensures your new browser settings take effect across all portal forms.
-
Maintain security awareness: If you are using a shared workstation, be aware that disabling auto-fill is a critical step in maintaining data privacy. Preventing your browser from saving this data safeguards against unauthorized access to saved credentials and protected user information.
Rebranding the OPSCOM User Portal with Custom Colors
The custom colors feature allows administrators to modify the primary and secondary colors of the User Side interface. Its primary purpose is to align the visual appearance of the public-facing parking portal with your organization's official branding. This article is intended for OPS-COM administrators responsible for managing system designs and user experience.
Setup and Configuration
This feature modifies the core cascading style sheets (CSS) of the user portal and requires access to the system templates.
Admin Side: Administrators must have the appropriate system role permissions enabled to access the content and design configuration menus.
Using this Feature
Administrators can use the following instructions to apply custom styling to the portal using standard color names or precise hex codes.
Editing the Portal Styles
-
Hover over System Settings, click Content & Designs, then Templates & Design.
-
Click the Toggle Templates button.
-
Click the Edit button under the Styles section.
-
Add the following code snippet to the very top of the editor, directly under the
<style>tag::root{ --ion-color-primary: purple; --ion-color-secondary: orange; } -
Replace
purpleandorangewith your desired standard color names (e.g.,blue,green,red).
Best Practices and Considerations
-
Utilize precise branding: For more precise branding control, use hexadecimal color codes instead of standard color names. Hex codes ensure your portal matches your organization's exact marketing and brand guidelines.
-
Identify the correct hex codes: Use a browser extension such as ColorZilla or an online color picker tool to find the exact hex code for your organization's specific colors.
-
Format the snippet correctly: In the code snippet, replace the standard color name with your six-character hex code. Ensure you include the hashtag (#) before the code.
When using hex codes, your CSS snippet should be formatted exactly like the example below:
:root{
--ion-color-primary: #6F42C1;
--ion-color-secondary: #FFA500;
}Why Are My Violation/Warning Notification Emails Not Going Out?
The automated notification system triggers emails to responsible parties when a violation or warning is issued. This troubleshooting guide helps administrators identify and resolve configuration issues preventing these automated emails from successfully sending. This article is intended for OPS-COM administrators responsible for managing system communications and enforcement.
Setup and Configuration
Ensuring that notification emails function correctly requires verifying several core settings across both user profiles and system configurations.
Admin Side: Administrators must ensure that system tasks, email templates, and violation parameters are actively enabled and configured correctly to allow automated processing.
User Side: End-users must have a valid email address attached to their account and be designated as the primary driver of the vehicle to receive automated email notifications.
Verifying System Configurations
To ensure emails are processed successfully, verify the following configurations within your environment:
-
Confirm that the user is marked as the Primary Driver and has a valid email address associated with their account. The system automatically sends emails to the primary driver; users without an email address are instead flagged for the Letter Report.
-
Hover over System Configuration and click Content & Designs then Email Templates to ensure that the templates for violation notices are properly configured and enabled.
-
Hover over Tools and click View System Task Logs to verify that the New Violation Notices system task is enabled and running correctly (either on a set schedule or via manual trigger).
-
Hover over System Configuration and click System Settings then Violations to ensure that the Send Notices For Warnings checkbox is enabled, assuming your organization sends warnings.
-
Hover over System Configuration and click System Settings then Violations to verify the Days until due configuration. Additionally, check the Collections settings to ensure Include All Unpaid Violations is set according to your organizational requirements.
Troubleshooting and Inspection
Administrators can use the following instructions to investigate further if the system configurations are correct but emails are still not sending.
-
Hover over Violations and click Letter Report.
-
Inspect the generated report to identify users who lack valid email addresses or who have unsent notices.
-
Manually review these entries to determine if they meet the criteria for automated notification.
The system only triggers initial emails for New Violations (those issued on the current day). Existing or older violations may not trigger an automated notification email after the initial issuance date has passed.
Best Practices and Considerations
-
Maintain accurate user data: Regularly audit user profiles to ensure primary driver contact information is up to date. Confirming valid email addresses prevents ongoing communication gaps.
-
Monitor your task logs: Periodically review the System Task Logs. This confirms that automated notification processes are executing as expected without errors.
-
Maintain consistency in reporting: Use the Letter Report as a standard tool for identifying users who fall outside of the automated email criteria. This ensures these individuals still receive necessary physical notices.
Unsubscribe Option for Email Notifications-Opt-Out
The Email Notification Opt Out feature allows users to easily unsubscribe from non-essential email communications. Its primary purpose is to improve the overall user experience, ensure compliance with strict data privacy regulations, and significantly reduce the volume of manual unsubscribe requests. This article is intended for OPS-COM administrators responsible for managing system communications and user settings.
Setup and Configuration
This feature requires administrators to enable a global setting and assign appropriate categories to their email templates.
Admin Side: A master setting controls whether users are able to access email preferences. This setting is deployed as off by default. Once enabled, administrators can assign pre-defined categories to the email templates on their system. The pre-defined email categories cannot be altered and include:
-
Important (Essential)
-
Promotional Emails (Non-essential)
-
Newsletter (Non-essential)
-
Product Updates (Non-essential)
User Side: When the feature is enabled, end-users can manage their email preferences through an Email Preferences page within their account settings. Users can access this page by navigating directly to their account settings on the public portal or by clicking the Unsubscribe link located in the body or footer of any non-essential email they receive.
Using this Feature
Administrators and users will interact with the categorization and opt-out functionalities through the following workflows.
Assigning Email Categories
Administrators must assign a specific email category when setting up system communications. Category selection options are available on both the standard compose email page and the email template page for automated system messages.
-
Select the desired classification from the category drop-down menu when composing a new email or editing an existing template.
-
Review the system warning prompt. If a non-essential category is selected, a message will clearly display to the admin indicating that the user has the ability to opt out of receiving it.
-
Save your template or dispatch the email. Emails marked with a category flagged as essential are always sent, while emails marked with a category a user has explicitly unsubscribed from will automatically be withheld from that specific user.
Managing User Email Preferences
Users will interact with the following elements on the Email Preferences page to control their inbox:
-
Checkboxes: Users can select or deselect the checkboxes next to each email category to manage their active subscriptions.
-
Popover icon (?): Clicking this icon next to a specific checkbox will display a detailed description of that category.
-
Select/Deselect All: Users can click this action to quickly manage all checkboxes at once.
-
Essential Categories: Users can view a static list of essential email categories that cannot be unsubscribed from at the very bottom of the page.
-
Save Changes: Users must click the Save Changes button to apply their updates. A confirmation message will immediately display to verify the action.
Best Practices and Considerations
-
Develop a clear business rule: Organizations should develop a firm business rule defining what is considered an essential versus a non-essential email. Essential emails are critical communications that all users must receive, such as major operational announcements, emergency road closures, or advisories for lot closures due to heavy snow.
-
Use non-essential categories appropriately: Classify promotional or optional content strictly as non-essential. Non-essential emails are those that a user can safely decide they do not need, such as event notices for an upcoming open house or a sale at the campus store.
-
Understand the impact of disabling the feature: If the unsubscribe functionality is turned off globally after users have already unsubscribed, their personalized subscription settings will be ignored. Users will immediately begin receiving all system emails again, which can result in spam complaints or user confusion.
OPSCOM Reports
OperationsCommander works hard to maintain an up to date product wiki! If you have any questions or if you feel something is missing, post about it in the community.
Reports Overview
The Reports module provides administrators with a centralized location to access, generate, and analyze data across various operational areas. Its primary purpose is to assist management in tracking sales, monitoring parking activity, auditing violations, managing incidents, and overseeing financial transactions. This article is intended for OPS-COM administrators responsible for data analysis and operational reporting.
Setup and Configuration
The Reports module is a core administrative tool and does not require extensive initial configuration to function.
Admin Side: Administrators must have the appropriate system role permissions enabled to view and generate specific reports. Access to financial, violation, or incident data is restricted based on these assigned roles.
Using this Feature
Administrators can use the following instructions to navigate the module and access specific data sets.
-
Hover over the main menu and click Reports.
-
Select the specific report you wish to view from the categorized lists (Parking, Violations, Incidents, or Payments).
-
Configure your required date ranges or filters on the specific report page to generate the data.
| Parking Reports | Purpose |
| Detailed Permit Sales Report by Lot | Provides a granular view of permit transactions by parking area for sales volume analysis. |
| Permit Sales by Lot by Month | Displays lots, payment types, sales amounts, and the total number of permits sold per month. |
| Permit Sales Report | Offers a breakdown of sales based on a selected allocation type and time period. |
| Active Permit Report | Shows a detailed list of permit holders for a selected allocation type and time period. |
| Company Permit Report | Searches for permits associated with users within a specific company. |
| Temp Permit Sales Report | Provides a breakdown of temporary permit purchases within a selected time period. |
| Athletic Permit Sales | Displays purchase details for user types identified as Athletics or lots with athletic user types. |
| Active Parker Listing | Lists all users who purchased a permit within the selected time period. |
| Lot Value Report | Summarizes lot utilization and the total financial value of permits sold in each lot. |
| Active Deposit Report | Lists active deposits grouped by lot. |
| Users With Multiple Permits | Identifies users who currently hold more than one active permit. |
| User Vehicle Report | Lists vehicles on the site, associated user details, and active permits. |
| Midnight List | Details permits that will be released at midnight if no payment promise was confirmed. |
| Violation Reports | Purpose |
| Violations by Location/Officer Report | Summarizes violations issued by an officer, including status updates (appealed, upheld, paid, etc.). |
| Paid Violations Summary by Type Report | Displays the number of violations issued by type and total financial amounts. |
| Violations by Officer Report | Details violations by officer, filterable by date, ticket writer, spoil type, and ticket type. |
| Summary Report by Officer | A high-level summary of violations per officer, including issuance, appeal, and payment status. |
| List Overdue Report | Tracks unpaid violations past their due date; automatically updates once payment is received. |
| Violations by Pay Type by Month Report | Searches for violations issued, grouped by month and payment type. |
| Towed Vehicles Report | Audits vehicle removals, including towing charges, status, and vehicle identifiers. |
| Incident Reports | Purpose |
| Recent Incidents Summary Report | Lists all incidents recorded within the last 30 days. |
| Search Repeat Offenders Report | Identifies users with multiple violations based on specific filters like date or ticket type. |
| Weekly Stat Report | Lists incident volume filtered by category and sub-category. |
| Incidents Summary Report | Provides a comprehensive summary of incidents within a specified time frame. |
| Incidents Summary Report by Category | Summarizes incidents grouped by specified categories over a time frame. |
| Incident Summary Report by Sub-Location | Summarizes incidents filtered by specific locations. |
| Hazing Transparency Report | For CLERY act compliance, is used to track hazing incidents at universities, in the incidents module. |
| Fire Safety Report | For CLERY act compliance, is used to track organization fires, injuries, and property damage during a fire, in the incidents module. |
| Payments Reports | Purpose |
| Daily Payments | Displays all submitted or processed payments within a specific time frame. |
| Unprocessed Payments | Tracks "promises to pay" that have been submitted but not yet marked as received. |
| Payroll Deduction Report | Reports on payroll deduction payments grouped by day. |
| Tax Exemption Report | Exports an Excel file of individuals with tax exemption codes. |
| Failed Payments | Highlights failed automatic credit card payments. |
| Billing Account Setup Report | Lists users missing subscription settings or companies without a billing account. |
Click the More... button within the Payments Reports section to access additional preset reports, including detailed lists for Cheque Refunds, Unprocessed Adjustments, and Daily Processed/Submitted payment logs.
Best Practices and Considerations
-
Export data for offline analysis: Use the export functionality to download data to Excel. Many reports, such as the Unprocessed Payments report, offer this feature to help you maintain external audit logs or manipulate data outside of the system.
-
Monitor automated release lists: Ensure that users provide valid payment methods during the permit reservation process. The Midnight List is an automated utility that flags permits to be released if no payment promise was confirmed; monitoring this ensures data and revenue integrity.
-
Utilize specific filters: Utilize the available date and type filters when querying large data sets. Applying targeted filters to high-volume lists, such as the Violations by Officer Report, minimizes system load times and allows you to focus strictly on the specific data sets you need.
User Management
OperationsCommander works hard to maintain an up to date product wiki! If you have any questions or if you feel something is missing, post about it in the community.
Registering a New User
The User Registration feature allows administrators to manually create new user accounts, granting individuals direct access to the public-facing user portal. Its primary purpose is to enable users to utilize core features such as purchasing parking permits, renting lockers, and managing violations, while ensuring a comprehensive administrative record is maintained for your operations. This article is intended for OPS-COM administrators responsible for managing user profiles and system access.
Setup and Configuration
This feature requires specific role permissions to allow administrators to manually generate and manage user accounts.
Admin Side: Administrators who are setting up users as part of their daily role must have the specific viewing and editing permissions enabled on their administrative profile.
-
Hover over System Configuration, click Admin Management, then Manage Roles.
-
Click the Permissions button next to the administrative role you want to modify.
-
Click the User Management tab.
-
Enable the Edit Users checkbox and the View Users checkbox.
-
Click the Save Permissions button.
User Side: End-users do not participate in manual administrative registration, but they will receive full access to the user portal once their profile is officially activated by the administrator.
Using this Feature
The manual user registration process involves two main stages: entering the initial basic information and then completing the full user profile.
Basic User Information
-
Hover over User Management and click User Registration.
-
Select the appropriate User Type for the new user from the drop-down menu.
-
Enter a Username and the required basic user information (such as first name, last name, and email address).
-
Click the Submit Registration button to proceed to the next stage of the profile setup.
Completing and Activating the User Profile
-
Enable the Allow user login and mark account as active checkbox on the Edit User Profile page.
-
Complete all remaining profile information, ensuring all mandatory fields are filled out.
-
Click the Submit Profile Information button.
-
Review the Confirm Registration Information screen to carefully verify that all displayed information is correct.
-
Click the Information Correct button to finalize the account creation, or click the Back button if edits are needed.
Enabling the Allow user login and mark account as active setting activates the user's ability to self-manage their account via the user portal. It will automatically prompt them to change their password upon their first successful login.
Fields marked with a red exclamation mark (!) after a failed submission are mandatory fields that must be completed to save the profile.
Refer to the following related wiki articles for detailed instructions on configuring specific profile fields: Locker User Types, Using Tax Exemption, User Company Editor, and Manage User Departments.
Best Practices and Considerations
-
Understand mandatory field management: Administrators with appropriate permissions can adjust which fields are mandatory for user profiles via the System Settings menu. Review these settings to ensure all necessary data is collected during registration without creating administrative bottlenecks.
-
Inform users of the password prompt: Inform new users that they will be prompted to change their password upon their first login.
-
Select user types carefully: Accurately select the User Type during registration. This selection directly impacts the user's access to specific lots, available payment types, and profile field visibility on the portal.
-
Execute post-registration actions: Remember that the system allows immediate actions like adding a vehicle or purchasing a permit after registration. Guide the user or perform these actions on their behalf as per your specific organizational workflow.
-
Verify email configurations: If your system is configured to require email verification for new accounts, ensure the user knows to check their email for the verification link. Even if you manually registered them, they may need to verify their address before they can fully log in.
User Search
The User Search feature provides administrators with a powerful tool to quickly locate and access specific user accounts within the system. Its primary purpose is to enable efficient viewing and editing of user information, supporting various administrative tasks such as profile updates, violation management, and permit assignment. This article is intended for OPS-COM administrators.
Setup and Configuration
This feature is a core administrative tool and does not require extensive initial configuration to function.
Admin Side: Administrators must have the appropriate system role permissions enabled to view and search for user profiles within the administrative portal.
Using this Feature
Administrators can use the following instructions to input various criteria, refine search results, and quickly navigate to specific user records.
Accessing User Search
-
Hover over User Management and click User Search.
Entering Search Criteria
-
Click the Toggle More Options button to see all available search fields.
-
Refine your search results by selecting one of the following radio button options:
-
Any Users: Displays both enabled and disabled user accounts.
-
Enabled Only: Displays only active user accounts.
-
Disabled Only: Displays only disabled user accounts.
-
-
Enter your parameters into the relevant fields and click the Search button.
-
Review the search results that appear in the table below the criteria box.
There is a strict limit to how many records will return at once. If you see the message "The search has returned more records than allowed and has been truncated. Please refine your search.", you will need to narrow down your search criteria.
Available Actions from Search Results
From the search results table, you can perform various actions by interacting with the column headers or associated icons:
-
Click any column header to sort the results alphabetically or numerically.
-
Click the user's Username to access the comprehensive User Profile Overview page.
-
Click the Envelope icon to start drafting an email to that specific user.
-
Click the Clock icon to shortcut directly to the user's incident and action history.
Although no dedicated export button is available on this screen, you can highlight and copy the search results directly into Excel or Google Sheets for external review.
Best Practices and Considerations
-
Combine search criteria: Combine multiple search criteria, such as first name and last name, or username and User Type, for more precise results. This strategy is especially critical in systems with a massive volume of users to avoid hitting the record return limit.
-
Utilize expanded options: Don't hesitate to use the expanded search options when you need to find users based on less common data points. Clicking the toggle button reveals highly specific fields that can narrow down broad searches.
-
Include disabled accounts when necessary: Remember to select the Any Users or Disabled Only radio buttons if you are looking for accounts that may have been deactivated. By default, you may be filtering out historical records if you only search for active users.
-
Maintain data integrity: Accurate and up-to-date user information in the system will yield more reliable search results. Regularly auditing and cleaning up user profiles ensures your searches remain fast and effective.
-
Establish a workflow baseline: Use the User Search as your primary tool for quickly navigating to a user's comprehensive profile for any administrative task. Starting your workflows here ensures you have the correct user context before issuing violations or selling permits.
User Profile Overview
The User Profile Overview page serves as a central dashboard for a user's comprehensive system information and current activity. Its primary purpose is to provide administrators with a quick reference view, enabling efficient access and management of user details, associated vehicles, violations, permits, and historical data. This article is intended for OPSCOM administrators responsible for managing user accounts and troubleshooting issues.
Setup and Configuration
This feature is a core administrative dashboard and does not require extensive initial configuration to function.
Admin Side: Administrators must have the appropriate system role permissions enabled to view and edit user profiles within the administrative portal.
Using this Feature
Administrators can use the following instructions to navigate to a user's profile and utilize the available management sections.
Accessing a User Profile
-
Utilize the Quick Search field in the main menu, or hover over User Management and click User Search to locate a specific account.
-
Click the specific username from your search results to open the User Profile Overview page.
Editing a User's Basic Profile
-
Click the Edit button located within the Basic Profile Information section.
-
Modify the necessary account details within the Personal Information, Student Information, or Staff/Faculty Information categories.
-
Click the Submit Profile Information button to save your changes.
The fields displayed within the profile categories can be individually set to Hidden, Visible, or Required as defined in your System Settings for User Profiles.
Logging in as a User
Administrators can view the system exactly as the end-user sees it.
-
Click the Login as user button.
-
Review the new browser window that opens, which will automatically log you into the OPSCOM end-user portal as the selected user.
You may encounter an error if the Auto Login setting is not configured correctly in your system settings. If this occurs, contact OPSCOM Support for assistance.
Adding or Editing Vehicles
-
Click the Edit button within the Vehicles section.
-
Click the necessary buttons to add new vehicles, edit existing vehicles, or apply a Do Not Ticket Tag (DNTT) to a specific vehicle on the resulting Vehicle Information screen.
Viewing Additional Information
The landing page provides immediate, direct access to a wealth of additional user-specific data through various dashboard sections:
-
Active Alerts: Any active alerts or warnings associated with the user's profile will be prominently displayed at the top of the page.
-
Waitlist Position: If the user is on any waitlists, the requested lots and their current ranks will be listed.
-
Violations: View detailed violation information by clicking the specific ticket number link. If available, view photos related to a violation by clicking the Camera icon next to the ticket number.
-
Permits: Access detailed permit information by clicking the specific permit number link in the Active Permits section.
-
Deposits and Notes: View any active deposits on the user account, read private user notes, and add new administrative notes directly from the dashboard.
Best Practices and Considerations
-
Utilize centralized management: Utilize the User Profile Overview as your primary hub for managing all aspects of a user's interaction with the system. Starting your workflows here ensures you have the complete context of the user's account before making changes.
-
Streamline efficient troubleshooting: Navigate to the user's profile landing page when they report an issue for a quick overview of their status. Reviewing their active permits, recent violations, and active alerts can greatly aid in rapid troubleshooting.
-
Test the user experience: Leverage the Login as user feature to test new configurations. This is invaluable for verifying specific user access or replicating user-reported issues directly from their perspective.
-
Review comprehensive history: Leverage the integrated views of alarms, violations, and permit details to understand a user's complete history. This comprehensive data is critical for informing decisions related to appeals, permit renewals, or strict enforcement actions.
Archiving or Disabling a User
Archiving or disabling a user account allows administrators to deactivate access to the user portal while preserving all historical data associated with the profile. Its primary purpose is to ensure data integrity for past transactions and maintain strict security when a user leaves the organization or changes roles. This article is intended for OPS-COM administrators responsible for managing user access and system security.
Setup and Configuration
Disabling a user account (simply preventing login) requires no specialized setup. However, performing a categorized archive requires administrators to configure specific archive categories in advance.
Admin Side: To utilize the structured archiving feature, administrators must first create dedicated archive classifications (e.g., "Former Student," "Terminated Staff," or "Account Closed").
If you have not yet created these categories, they will not appear in the drop-down menu during the archiving process. Instructions for creating these categories can be found on the User Types wiki page.
Using this Feature
Administrators can use the following instructions to either temporarily disable a user's login access or perform a formalized, categorized archive.
Accessing the User Profile
Before performing either action, you must locate the target user.
-
Locate the user you wish to modify using the main menu search functionalities.
-
Click the Username from the search results to open their User Profile Landing Page.
-
Confirm that the name displayed at the top right-hand corner matches the user whose account you intend to modify.
Disabling a User Account (Preventing Login)
This method revokes a user's ability to log in to their account while keeping their profile and data fully intact for administrative reference.
-
Click the Edit button located on the Basic Profile Information bar.
-
Disable the Allow user to login and mark account as active checkbox on the resulting Edit User Profile screen.
-
Click the Submit Registration Information for Processing button at the bottom of the page.
-
Click the Information Correct button on the Confirm Registration Information screen to submit the change.
Archiving a User Account (Categorized Disablement)
Archiving provides a structured way to disable a user account by assigning it to a specific category, which is highly useful for historical reporting or internal tracking.
-
Click the Edit button located on the Basic Profile Information bar.
-
Click the Archive Type drop-down menu and choose the appropriate status for the User Types.
-
Click the Archive User button.
-
Confirm the prompt to finalize the archiving process.
Best Practices and Considerations
-
Preserve data integrity: Always disable or archive an account instead of attempting to delete a user. User accounts have associated historical data such as permits, violations, payments, and login history. Direct deletion compromises this data integrity and breaks historical reporting.
-
Enforce security protocols: Disable accounts promptly when a user's access is no longer required. Removing access immediately upon a user's departure is a critical security measure to prevent unauthorized system entry.
-
Utilize archive types effectively: Categorize exactly why an account was disabled by using specific archive user types. Tagging a profile as "Account Closed" versus "Temporary Suspension" provides valuable context for future internal auditing.
-
Understand reversibility: Remember that disabling an account is completely reversible. You can easily reactivate a returning user's account by navigating to their profile and re-enabling the login checkbox.
-
Maintain permission awareness: Be aware that a disabled or archived user account retains its assigned roles and permissions for reporting purposes. While the user can no longer act on these permissions, historical reports will accurately reflect the access they held while active.
User - History Tab
The History tab provides OPSCOM administrators with a comprehensive log of a user's financial transactions, permit activity, and system-recorded events. This feature serves as a central hub for auditing accounts, performing necessary adjustments, and providing effective user support.
Setup & Configuration
The History tab is a core component of the User Profile Overview and requires no additional setup or configuration to function.
Using this Feature
The History tab allows you to view and interact with a user's historical data. The Recent History view displays the 100 most recent records, including entries for Locker, Parking, Enforcement Adjustment, Address, and Mail Records.
Accessing the User History Tab
-
Hover over User Management and click User Search.
-
Search for the user using their name, username, email, or account number.
-
Click the user's username to open their Profile Page.
-
Hover over the History tab.
-
Click Recent History to view the activity log.
Available Actions & Buttons
The History tab includes several functional elements to assist in account management:
-
Adjust: Click this link next to a processed transaction to modify it. After making your changes, click the Add Adjustment button to save.
-
Item Number: Click the link in the Item Number column (e.g., permit number, violation ticket number, or appeals record number) to view or edit the specific item's details. Remember to click Update/Save Changes after modifying item details.
-
send email: Click this button next to the Current Renter label to compose and send an email directly to the user associated with that record.
-
Make Payment or Processed: Click this button next to a transaction to view its detailed payment processing information.
Best Practices & Considerations
-
Document all adjustments: When using the Adjust feature, always provide a clear and detailed reason for the modification. This is essential for maintaining a transparent and accurate audit trail.
-
Review item details before acting: Before emailing a user or modifying an item, always click the Item Number to review the full details. This ensures you have the necessary context to take appropriate action.
Periodically reviewing the History tab is a recommended best practice for verifying that adjustments and permit changes are accurately reflected in the user's account.
User - Parking Tab
The User Profile Parking Tab allows administrators to manually purchase both standard and temporary parking permits on behalf of a specific user. Its primary purpose is to serve as a centralized hub for managing a user's parking permissions, overriding lot allocations when necessary, and facilitating direct administrative sales. This article is intended for OPS-COM administrators responsible for permit allocation and user profile management.
Setup and Configuration
Before permits can be assigned to users, your overarching lot parameters must be established in the system.
Admin Side: Before permits can be sold from a user's profile, all parking lots, permit types (e.g., yearly, monthly, temporary), and associated costs must be configured in the system. Instructions for configuring these foundational settings can be found on the Pricing & Lot Admin page.
User Side: Users can also purchase standard and temporary permits for themselves directly through the public-facing user portal, provided the lot is visible to their assigned user type and there is available inventory.
Using this Feature
Administrators can use the following instructions to navigate to a user's parking profile and manually process a permit purchase.
Navigating to the Parking Tab
-
Hover over User Management and click User Search.
-
Enter the search criteria (such as name, username, email, or account number) to find the desired user.
-
Click the user's Username from the search results to open their profile page.
-
Click the Parking tab to navigate to the Manage Lots screen for that user.
Purchasing a Standard Permit
-
Locate the desired parking lot on the Manage Lots screen.
-
Click the Standard Permit button associated with that specific lot.
-
Review the details on the Confirm Parking Permit Registration screen, including the location, permit type, and cost. You may have the option to manually edit the permit number and permit cost on this screen.
-
Click the Purchase this Permit button to proceed to the payment process and finalize the registration.
If you attempt to purchase a standard permit for a lot that has no available inventory, the system will prevent the transaction. You can instead click the Waitlist link next to the lot to immediately add the user to the queue.
Purchasing a Temporary Permit
-
Click the Temporary Parking Permit button on the Manage Lots screen.
-
Click the Select a lot drop-down menu and choose the appropriate lot on the Temp. Parking Permit Registration screen.
-
Enter the start and end dates for the permit.
-
Choose the temporary permit type (e.g., all day or hourly).
-
Select the vehicle the permit will be assigned to.
-
Confirm the generated Permit Number.
-
Enable the DNTT (Do Not Ticket or Tow) checkbox if this temporary permit should prevent violation issuance.
-
Click the Confirm this Permit button.
-
Review all the details one final time on the Confirm Parking Permit Registration screen.
-
Click the Purchase this Permit button and proceed with the payment process.
Best Practices and Considerations
-
Utilize Do Not Ticket or Tow for special circumstances: The DNTT checkbox on temporary permits is a powerful tool to prevent accidental enforcement. It is typically used for special circumstances, such as for guest speakers, VIPs, or short-term contractors, where you want to ensure their vehicle is absolutely not ticketed for the duration of their temporary permit.
-
Verify inventory rules: Organizations should develop a business rule for when to utilize the waitlist versus overriding a sold-out lot. While the system prevents standard purchases on full lots, administrators should clearly understand when it is appropriate to add a user to the waitlist queue to maintain fair allocation policies.
User - Payments Tab
The Payments tab allows administrators to process user payments for various outstanding items such as lockers, parking permits, and violations. Its primary purpose is to facilitate phone-in payments, in-person transactions, and to assist users who are unable to complete the payment process themselves. This article is intended for administrative staff with payment processing permissions.
Setup and Configuration
This feature requires no special configuration to be used directly on the user profile, provided your foundational financial settings are established.
Admin Side: Administrators must ensure that the organization's payment gateway and item pricing have already been configured globally. For more details on these initial setups, please refer to the Payment Gateway Configuration and Pricing & Lot Admin articles.
User Side: Users can also process their own payments directly through the public-facing portal for most standard items and violations, provided they have an active account.
Using this Feature
Administrators can use the following instructions to navigate to a user's account and manually process an outstanding payment.
-
Hover over User Management and click User Search.
-
Enter the search criteria to find the specific user and click their Username from the search results to open their profile page.
-
Click the Payments tab to view a list of outstanding items, such as violations or permits.
-
Enable the checkbox next to each item you wish to include in the current payment.
-
Click on any item name highlighted in blue to view more detailed information. If you make any changes in the detail view, you must click the Update button to save them.
-
Click the Proceed to Payment button once all necessary items are selected.
-
Review the transaction summary on the Payments Due screen, click the Payment Type drop-down menu, and choose the correct payment method.
-
Click the Submit Payment Information button.
-
Verify that all payment details are correct on the final confirmation screen and click the Confirm Payment Information button.
-
Review the Transaction Details screen. You may click Adjust to modify the payment total (e.g., applying a discount) or click Cancel Transaction to abort the payment process.
-
Click the Process Manually button to complete the transaction.
For credit card transactions utilizing an integrated payment gateway, the final step may occur automatically without needing to click the manual processing button. Once the payment is accepted, a transaction confirmation number will be displayed.
While selecting items in step 4, you have the option to click the Remove button next to an item. The remove action is permanent and cannot be undone. Use this with extreme caution, as the item will be completely removed from the user's account, not just excluded from the current transaction.
Best Practices and Considerations
-
Double-check before confirming: Always verify the selected items and payment amount with the user before confirming the payment information. Reversing a finalized transaction is a much more involved administrative process.
-
Understand manual versus automatic processing: Be aware of how your system is configured. If a payment gateway is active, credit card transactions are typically processed in real-time. Manual processing is specifically used for logging cash, cheque, or other offline payment methods.
-
Use the cancel button to abort: If there is any uncertainty or an error is discovered before final processing, use the Cancel Transaction button. This safely exits the workflow, leaving the items on the user's account as outstanding without causing any financial impact.
Payment Management (Subscriptions)
The Payment Management Subscriptions feature allows administrators to designate a default payment method for permits that roll over from month to month. Its primary purpose is to streamline recurring billing by automatically applying designated payment types, such as payroll deductions, Electronic Funds Transfer (EFT), or credit cards, to permit renewals. This article is intended for OPS-COM administrators managing recurring parking permits and user billing.
Setup and Configuration
Before managing subscriptions, ensure the system is configured to handle the necessary payment processing.
Admin Side: Administrators must enable specific system settings to allow the processing of recurring credit card transactions for permit rollovers.
-
Hover over System Settings and click Permits.
-
Enable the Allow Credit Card Processing checkbox to ensure the system can process credit card transactions for permit rollovers.
User Side: In order for subscriptions to function, the user must provide valid information pertaining to the payment method they wish to use for their subscription service via the user portal, or provide it to an administrator to enter manually.
Using this Feature
Administrators can manage subscription payment methods directly through a user's profile to facilitate automated permit renewals.
-
Utilize the Quick Search field or hover over User Management and click User Search to locate the target user.
-
Click the specific username from your search results to access their profile.
-
Click the Profile drop-down menu and choose Manage Payment Methods.
-
Click the Add New Payment Method button located under the Payment Subscription Options section.
-
Enter the required payment details based on the user's preferred method.
-
For credit cards, provide the necessary card information and click the Add Payment Method button to register it in the system.
-
For EFT, enter a label into the Label field (e.g., Savings) along with the user's banking information, then click the Add Bank Information button.
-
Locate the Permit Rollover Subscription section on the left side of the screen.
-
Click the payment drop-down menu and choose the newly added payment method from the list.
-
Click the Save button.
Upon saving, a confirmation message will immediately appear on the screen indicating that the permit rollover subscription has been successfully updated.
Best Practices and Considerations
-
Verify prior payment history: For a specific credit card to be used for recurring permit payments, the user must have purchased their previous permit using the exact same payment type. The system requires this historical transaction record to successfully link the payment method to the subscription.
-
Understand EFT limitations: Remember that EFT can only be used for subscription services. Electronic Funds Transfer cannot be used to pay for individual citations or other one-off items within the system.
-
Encourage user responsibility: Administrators should actively encourage users to maintain updated payment information within their online profiles. Keeping billing details current ensures uninterrupted permit rollovers. While administrators can manually add payment details on the backend, users can easily manage multiple payment methods through their own user portal (keeping in mind that only one method may be set as primary).
Using Tax Exemption
The Tax Exemption feature allows administrators to apply specific exemption codes to user profiles, automatically waiving applicable taxes during the purchase of items such as permits, violations, and lockers. Its primary purpose is to ensure accurate billing for tax-exempt individuals or organizations and to simplify compliance with specific financial regulations. This article is intended for OPS-COM administrators responsible for managing user profiles and accounting settings.
Setup and Configuration
This feature does not require global system configuration but must be manually applied to eligible user profiles.
Admin Side: Administrators must locate the user profile and manually input the approved tax exemption code provided by the user or organization.
User Side: Users do not configure this setting themselves. Once a valid code is applied to their profile by an administrator, the system automatically waives taxes during their checkout process on the user portal.
Using this Feature
Administrators can use the following instructions to apply tax exemption codes to a profile, verify their presence, and generate auditing reports.
Adding or Updating a Tax Exemption Code
-
Locate the user you wish to modify using the administrative search tools.
-
Click the Username from the search results to access their User Profile Overview.
-
Click the Edit button on the Basic Profile Information bar, or click the Profile drop-down menu and choose Edit Profile Information.
-
Locate the Tax Exemption Code field on the Edit User Profile screen.
-
Enter or update the alphanumeric tax exemption code in this field.
-
Click the Submit Profile Information button.
-
Click the Information Correct button on the confirmation screen to save the changes to the user's profile.
Verifying the Tax Exemption Code
The active tax exemption code is displayed directly in the Profile Overview window on the user's User Profile Landing Page for easy reference. This allows administrators to quickly verify its presence without having to enter edit mode.
When a user with a valid tax exemption code on their profile proceeds to purchase items, applicable taxes will not appear as a line item on the payment or confirmation page. The system automatically waives these taxes at checkout.
Generating the Tax Exemption Report
Administrators can generate a report to view all users with active tax exemption codes.
-
Hover over the main menu, click Payments, and choose Tax Exemption Report.
-
Review the generated list, which includes the user's First Name, Last Name, and Tax Exemption Code.
-
Use the available export or print functions to extract the report records for external auditing.
Best Practices and Considerations
-
Ensure data accuracy: Ensure that tax exemption codes are accurately entered and validated against official documentation. Verifying the exact code maintains financial compliance and prevents incorrect billing.
-
Establish internal verification protocols: Establish clear internal procedures for verifying a user's eligibility for tax exemption before entering a code on their profile.
-
Audit records frequently: Regularly run and review the Tax Exemption Report for auditing purposes. Routine checks ensure that all tax-exempt transactions happening on your platform are correctly accounted for and supported by your organization.
-
Communicate policies clearly: Clearly communicate your organization's tax exemption policies to eligible users. Ensure they understand how to submit their proof of exemption to administrators so it can be added to their profile before they attempt to make a purchase.
User - Vehicles Tab
The User Vehicles tab allows administrators to add, edit, and remove vehicles associated with a specific user profile. Its primary purpose is to provide a centralized interface for managing the complete lifecycle of a user's vehicles, including toggling active statuses and managing Do Not Ticket or Tow (DNTT) notations. This article is intended for OPS-COM administrators responsible for managing user profiles and vehicle records.
Setup and Configuration
Administrators can control the visibility of the Vehicle Identification Number (VIN) field during the vehicle creation and editing process.
Admin Side: In order for the VIN number field to be available to administrators, the master setting must be enabled.
-
Hover over System Settings and click Vehicle.
-
Enable the Enable VIN checkbox to make the field available in the administrative portal.
-
Enable the Show VIN Field on User Side checkbox if you wish to make this field visible to users on the public portal.
User Side: End-users can also add, edit, and manage their own active vehicles via the public-facing user portal, provided your organizational settings allow it.
Using this Feature
Administrators can use the following instructions to navigate to a user's vehicle list and perform standard lifecycle management tasks.
Navigating to the Vehicle Information Page
-
Hover over User Management and click User Search.
-
Use the search fields to find the desired user and click their Username from the search results to open their profile.
-
Click the Vehicles tab to access the Vehicle Information page, which lists all vehicles currently associated with that user.
Adding a New Vehicle
-
Click the Add New Vehicle button located on the Vehicle Information page.
-
Fill in all required vehicle details on the Add New Vehicle Information screen.
-
Click the Add New Vehicle button at the bottom of the form to save the record.
Editing a Vehicle
-
Click the hyperlinked Plate of the vehicle you wish to edit from the vehicle list.
-
Modify the necessary details in the Vehicle Information window that appears.
-
Click the Update Vehicle button to save your changes.
Activating or Deactivating a Vehicle
-
Locate the Status column for the desired vehicle in the list.
-
Click the Active or Inactive link to immediately toggle the vehicle's current status.
Removing a Vehicle from a User Profile
-
Click the X icon in the row of the vehicle you want to remove.
-
Confirm the action in the subsequent prompt to finalize the removal.
See the Unlink a Vehicle from User Profile article for the specific system requirements and business rules necessary to successfully remove a vehicle from a user's profile.
Managing Do Not Ticket or Tow (DNTT) Status
-
Click the Record DNTT Link next to a specific vehicle in the list.
-
Add, edit, or remove a Do Not Ticket or Tow notation. This status prevents violation issuance under specific, pre-defined conditions (e.g., in a certain lot or during a specific time).
Best Practices and Considerations
-
Check for existing license plates: If you add a new vehicle but the details do not save correctly, it is likely because that license plate already exists in the system. The plate may be associated with another user or currently archived. The vehicle must be properly associated with the current user before all details can be successfully edited.
-
Understand vehicle removal mechanics: Removing a vehicle only disassociates it from the current user's profile; it does not delete the vehicle record from the system. If the vehicle is associated with only one user, it will be safely archived. If it is associated with multiple users, it will remain active on the other user profiles.
-
Clear balances before removal: Always ensure any outstanding balances or violations tied to a vehicle are cleared before removing it. This is especially critical if the vehicle is only associated with one user, as you want to prevent leaving orphaned debts in the system.
Edit Primary Driver
The Edit Primary Driver feature allows administrators to manually set or change the main user responsible for a specific vehicle. Its primary purpose is to ensure that official communications, such as violation notices, are routed correctly when a vehicle is associated with multiple user profiles. This article is intended for OPS-COM administrators responsible for managing vehicle records and user profiles.
Setup and Configuration
This feature is a standard administrative function and does not require extensive initial configuration to function.
Admin Side: There is no specific global setup required to enable this feature. However, the option to change the primary driver is only available when a single vehicle is associated with two or more user profiles. If a vehicle is only linked to one user, that user is automatically designated as the primary driver by default, and the selection field will not be visible on the backend.
User Side: Users cannot manually change the primary driver designation for a shared vehicle via the public-facing user portal. This action must be performed by an administrator.
Using this Feature
Administrators can use the following instructions to manage the primary driver designation from the vehicle editing screen within any associated user's profile.
-
Hover over User Management and click User Search.
-
Locate any user currently associated with the vehicle and click their Username from the search results to open their Profile Page.
-
Click the Vehicles tab.
-
Click the hyperlinked license Plate of the desired vehicle in the list to open the Edit Vehicle screen.
-
Click the Primary Driver drop-down menu and choose the name of the user you want to designate as the new primary contact.
-
Click the Update Vehicle button to apply the change.
The Primary Driver drop-down menu will solely contain the names of users who are already actively associated with the vehicle.
Best Practices and Considerations
-
Understand automatic assignments: Be aware that a nightly system process automatically attempts to assign a primary driver to any new vehicle. Additionally, if a violation appeal is submitted for a vehicle that currently lacks a designated primary driver, the system will automatically assign the role to the user who submitted the appeal. This ensures there is always a designated contact for ongoing communications.
-
Correct legacy records easily: If you encounter an older vehicle record with multiple users designated as the primary driver, simply select the correct one and save the profile. When you save the change, the system will automatically clean up the data and remove the incorrect legacy designations from the other associated users.
Unlink a Vehicle from User Profile
The Unlink a Vehicle feature allows for the removal of the association between a specific vehicle and a user's profile. Its primary purpose is to maintain accurate system records when a user no longer owns a vehicle or to correct a vehicle that was mistakenly linked to the wrong account. This article is intended for OPS-COM administrators responsible for managing system settings and supporting user profile management.
Setup and Configuration
Administrators must configure specific system settings to grant users the permission to manage and remove their own vehicle associations.
Admin Side: Administrators must enable the overarching system setting to allow end-users to delete vehicles from their profiles.
-
Hover over System Configuration and click System Settings then Vehicles.
-
Enable the Allow users to delete vehicles checkbox.
-
Enable the setting to allow the removal of vehicles with warnings, if this matches your organizational business rules.
User Side: Once enabled by the administrator, users can self-manage their vehicle associations directly from the public-facing user portal.
In order for a user to successfully remove a vehicle from their profile, the vehicle must meet strict system criteria. The vehicle must not have any directly associated active standard or temporary permits, incidents, alerts, or valid violations. There is no minimum amount of dormant time required before removal. These system restrictions do not apply to administrators removing vehicles from a user profile on the backend.
Using this Feature
Administrators can use the following instructions to guide users through the process of unlinking a vehicle via the public user portal.
-
Log in to the user portal.
-
Click the Vehicles tab located in the main navigation menu.
-
Locate the specific vehicle plate you wish to remove from the list.
-
Click the Remove button (represented by a trash can icon) to completely unlink the vehicle from the profile.
If the user has been involved in incidents, or if the vehicle has outstanding fines and fees associated with it, the system will actively prevent them from removing the vehicle.
Best Practices and Considerations
-
Understand vehicle removal mechanics: Removing a vehicle only disassociates it from the current user's profile; it does not delete the vehicle record from the system itself. If the vehicle is associated with only one user, its core record will simply be archived. If it is associated with multiple users, it will be removed from the current profile while remaining fully active on the other associated user profiles.
-
Clear outstanding balances first: Before removing a vehicle that is only associated with a single user, it is critical to ensure all outstanding violations or fees tied to that vehicle have been resolved. This prevents orphaned debts and maintains accurate financial reporting for your organization.
Understanding & Controlling Active Vehicles
Active vehicles in OPSCOM are license plates registered and marked as eligible to be assigned to parking permits. Its primary purpose is to help administrators understand how vehicle status functions, how it interacts with permit renewals, and how to manage potential discrepancies between active vehicle counts and active permit counts. This article is intended for OPSCOM administrators responsible for managing permit allocations and user accounts.
Setup and Configuration
The primary control mechanism for preventing excessive vehicle registrations is governed by user type configurations.
Admin Side: Administrators must ensure that user type settings are correctly configured to limit the maximum number of vehicles a user can register. Detailed setup instructions can be found in the Limiting Active Vehicles article.
User Side: End-users can self-manage their active vehicle list through the public-facing user portal, provided their assigned user type grants them the necessary permissions and limits.
Using this Feature
Administrators can use the following concepts and instructions to monitor user accounts, ensuring vehicle counts remain consistent with permit requirements.
Understanding Active Vehicle Status
An active vehicle is defined as any license plate the system recognizes as ready to be assigned to a parking permit.
-
Ready Status: This status indicates the vehicle is registered and eligible; it does not confirm that the vehicle is currently assigned to a valid, active permit.
-
Sticky Status: Vehicle status is considered "sticky," meaning it persists from year to year. During permit rollovers, the system does not automatically deactivate vehicles even if a user's permit count decreases. This behavior can lead to a mismatch where a user has more active vehicles than active permits.
The maximum number of vehicles a user can have marked as active is strictly determined by their assigned User Types.
Managing Vehicle and Permit Mismatches
Administrators must regularly monitor accounts to catch discrepancies between vehicles and active permits.
-
Hover over the main menu and click Reports.
-
Click the Active Vehicle Report.
-
Review the generated report to identify all customers who have a higher number of active vehicles than active permits.
-
Contact the affected users to request they deactivate any excess vehicles, or manually deactivate the extra vehicles through the User - Vehicles Tab if organizational policy allows.
| Feature | Active Vehicle Count | Active Permit Count |
| Definition | Number of license plates marked as Ready. | Number of valid permits purchased for the current period. |
| Rollover Status | Sticky (Carries over year to year). | Reset (Only current permits count). |
Best Practices and Considerations
-
Conduct proactive auditing: Regularly run the Active Vehicle Report to identify and resolve discrepancies. This is especially critical following permit renewal or annual rollover periods when users may drop permits but forget to deactivate old vehicles.
-
Establish strict permit rules: Organizations requiring one permit per active vehicle should establish a firm business rule for managing these discrepancies during the annual rollover process.
-
Communicate with users: If a user has more active vehicles than permits, reach out to the user to have them clean up their account. Maintaining an accurate, pruned vehicle list ensures that your enforcement and permit allocation data remains precise.
User - Incident History
The User Incident History page provides a comprehensive list of all disturbance incidents associated with a specific user profile. Its primary purpose is to allow administrators to quickly review a person's history on the premises to understand behavioral patterns and retrieve details about past events. This article is intended for OPS-COM administrators responsible for security, dispatch, and incident management.
Setup and Configuration
This feature displays data logged through the Dispatch Logs and Incident Reporting modules. No special configuration is required to access the page itself, but incidents must be correctly created and explicitly associated with the user during the initial logging process for them to populate here.
Admin Side: Administrators must have the appropriate system role permissions enabled to view user profiles and access incident reports.
User Side: End-users do not have access to view internal incident history logs, notes, or dispatcher reports via the public-facing user portal.
Incidents can automatically be distributed to various departments, internal or external parties, or even local police. Detailed instructions for configuring this functionality can be found on the Incident Distribution page.
Using this Feature
Administrators can use the following instructions to navigate to a user's incident history and interact with the available records.
Accessing the History
-
Access the target user's profile using the administrative search tools.
-
Click the Incident History tab to view the list of associated incidents.
Key Information Displayed
The page lists all disturbance incidents the selected user has been involved in. Each entry in the list displays the following key information:
-
Incident ID Number
-
Date and Time of the incident
-
Description (A brief summary or classification of the incident type)
Available Actions and Buttons
Administrators can perform the following actions directly from the history list:
-
Details: Click the Details button next to any incident to navigate to the full report for that specific event, providing all logged information and officer narratives.
-
Add Note: Click the Add Note button to add a general, internal note to the user's main profile. This is useful for summarizing patterns or adding follow-up information related to their overall history.
-
Edit/View Images: Click the Edit/View Images button to securely manage the profile pictures or identification photos associated with this user.
The accuracy of this page depends entirely on correct data entry during the reporting phase. Ensure that all new incidents are accurately logged and associated with the correct users to maintain a complete and reliable history. Whenever possible, attempt to get suspects to identify themselves with a government-issued ID to ensure the correct profile is tagged.
Best Practices and Considerations
-
Review the history before interacting: Review the User Incident History before interacting with a user regarding a new complaint or disturbance. Checking this page first provides the full context of past events, flags potential safety concerns, and informs your approach to the situation.
-
Summarize recurring issues strategically: Use the Add Note feature on this page to summarize recurring issues or document actions taken based on a user's pattern of behavior. For example, you might add a note stating, "Spoke with user on 2025-07-18 about repeated noise complaints." Keep in mind that notes specific to a single event should be added directly within that incident's details page instead.
-
Identify repeat offenders: Leverage the information on this page to identify repeat issues and make informed administrative decisions. This historical data is critical for supporting escalated actions, such as formally restricting property access or revoking parking privileges.
Bulk Email Users
The Bulk Email Users tool allows administrators to compose and send mass email communications to targeted groups. Its primary purpose is to efficiently broadcast important operational announcements based on specific criteria such as user type, permit status, or assigned parking lot. This article is intended for OPS-COM administrators responsible for managing user communications.
Setup and Configuration
This tool is a core administrative feature and does not require specialized setup to activate.
Admin Side: This tool is available by default. However, the effectiveness of the recipient filtering depends entirely on having accurate and up-to-date user data in the system, including correct user types, lot assignments, and profile statuses.
User Side: End-users do not interact with the configuration of this tool; they simply receive the dispatched mass emails in their personal inboxes.
Using this Feature
Administrators can use the following instructions to define a targeted recipient list, compose a message, and dispatch a mass email.
Defining the Recipient List
-
Hover over User Management and click Email Users.
-
Select either a User Type Group, User Type, or Locker User Type on the Email Users page to begin defining your audience.
-
Refine your recipient list by selecting options from the Filter by, Select by Lot, or Select by Locker Area menus.
-
Click the Prepare Email button to generate the final recipient list based on your chosen criteria and reveal the email composition tools.
To select multiple options within a single filter box (e.g., to email users in three different lots simultaneously), hold the Ctrl key (or Cmd on a Mac) and click each desired option. To deselect an option, hold the same key and click it again.
Composing and Sending the Email
After preparing the email, a new composition section will appear on the page.
-
Click the View Recipient List button to review the exact list of users who will receive the email, or click the Export Recipient List button to download a CSV file for external review.
-
Enter your message details into the Subject and Message fields.
-
Click the Choose File button and select the desired attachment if you wish to include a document or image.
-
Click the Send Email button when your message is finalized.
-
Click Yes on the prompt to confirm the action and queue the email for delivery.
Sending a mass email is an irreversible action. Always proofread your subject line and message content carefully for accuracy and clarity before clicking the Send Email button.
Best Practices and Considerations
-
Always verify the recipient list: Always use the View Recipient List button to check your final list of recipients before sending. This is a critical step to ensure your communication reaches the correct audience and prevents you from accidentally spamming unrelated users.
-
Anticipate delivery queues: Be aware that emails are queued for delivery and may not be sent instantaneously, especially for very large recipient lists. The system automatically sends them in batches to ensure reliable delivery and avoid server timeouts.
-
Reserve for operational announcements: Use this tool strictly for important operational announcements, such as lot closures, policy changes, or permit renewal deadlines. Avoid overusing the mass email function for non-essential matters to prevent email fatigue among your user base.
-
Verify historical delivery: You can view emails sent successfully to a specific user by navigating to their profile and checking their sent mail history. Detailed instructions for this verification process can be found in the Review Emails Sent to Users article.
Generate Mail Merge
The Generate Mail Merge tool allows administrators to export user mailing addresses from the system into a downloadable file format. Its primary purpose is to seamlessly provide data for Microsoft Word's Mail Merge feature, enabling the mass production of physical letters and communications. This article is intended for OPSCOM administrators responsible for managing user communications and mass mailings.
Setup and Configuration
This tool is a standard administrative feature and does not require any specific system configuration to function.
Admin Side: Administrators do not need to configure any system settings. However, they must have access to Microsoft Word (or a compatible word processor) on their local workstation to utilize the exported data.
Using this Feature
Administrators can use the following instructions to generate and download the necessary CSV file for their physical mail merge.
Generating the CSV File for Export
-
Hover over User Management and click Generate Mail Merge.
-
Wait for the system to generate the mailing list based on your total user records.
-
Click the CSV button to export and download the file to your local computer.
In databases with an exceptionally large volume of user records, this export tool may not function as expected or could time out. If you encounter issues exporting the full list, please contact OPSCOM Support for assistance.
Composing and Initiating the Mail Merge
-
Open Microsoft Word on your local computer after successfully downloading the CSV file.
-
Import the downloaded CSV file into your document using the software's native mail merge tools.
Depending on your specific version of Microsoft Word, the exact steps for importing a data source may differ. Please refer to the official Microsoft Mail Merge documentation for detailed, software-specific instructions on completing the merge.
Best Practices and Considerations
-
Understand export limitations: Be aware that this tool currently exports all user records from your database. Granular filtering options (such as exporting only specific user types or active accounts) are not currently available within the tool itself. You must filter the data manually in Excel or Word after the export is complete.
-
Audit data before sending: Always review the exported CSV file for accuracy and missing data before proceeding with the physical print run. This simple check prevents wasted materials and ensures your communications reach valid mailing addresses.
Review Emails Sent to Users
The Sent Mail History feature provides a comprehensive log of all automated and mass communications dispatched to a specific user. Its primary purpose is to allow administrators to verify that critical messages, such as violation notices, invoices, and payment receipts, have been successfully delivered by the system. This article is intended for OPSCOM administrators responsible for user communications and troubleshooting.
Setup and Configuration
This feature is a core logging function and does not require any specific configuration to activate.
Admin Side: This feature is enabled by default. The system automatically logs communications generated by system tasks and user actions without any necessary administrative setup.
User Side: Users receive these emails in their personal inboxes but do not have a dedicated interface within the public portal to view their historical sent mail log.
Using this Feature
Administrators can use the following instructions to access a user's profile and view their specific communication history.
Accessing a Users Email History
-
Access the target user's profile using the administrative search tools.
-
Click the History tab.
-
Click History and choose Sent Mail.
Key Information Displayed
The Sent Mail page displays a list of all system-generated communications sent to the user, including the following key details and available actions:
-
Subject: Displays the exact subject line of the email. Click the specific link in the Subject column to open a pop-up window displaying the exact body content of the email that was sent to the user.
-
Date: Displays the exact date and time the email was successfully dispatched.
The following types of internal and automatic messages are commonly logged in the Sent Mail history:
-
New and Overdue Violation Notices: Emails dispatched via the Send New Violation Notices and Overdue Violation Notices automated system tasks. The viewable link displays the notice letter exactly as it was generated.
-
Receipts: Automated email receipts dispatched when a user completes a payment. The history log displays the actual email content, which may have a slightly different layout than the standard receipt view within the administrative portal.
-
Invoices: Emails containing system-generated invoices that were generated and dispatched to the user.
Best Practices and Considerations
-
Verify before troubleshooting: Always check the Sent Mail history first when a user reports not receiving an email. Confirming that the system successfully dispatched the message is the critical first step before investigating potential spam filters, blocked addresses, or typos in the user's profile.
-
Prevent duplicate communications: Use this tool to verify past communications before manually resending notices or contacting users. Checking the history helps prevent sending duplicate messages and causing potential user confusion.
This history log strictly tracks emails sent directly through OPSCOM's automated systems. It does not log manual correspondence sent from personal or external email clients (e.g., Outlook, Gmail).
Retrieving Uploaded Files
The Retrieving Uploaded Files feature allows administrators to locate, view, and delete documents or images submitted by end-users. Its primary purpose is to help administrators easily manage user-submitted documentation directly from the administrative portal while maintaining strict data governance. This article is intended for OPS-COM administrators responsible for reviewing user profiles and managing file submissions.
Setup and Configuration
File management is a standard feature that requires specific system role permissions to access and utilize.
Admin Side: Administrators must have the View User Uploads and Delete User Uploads permissions enabled on their role to view or remove files. Administrators cannot upload files on behalf of a user directly from this administrative interface.
User Side: Only end-users can upload files to their own profiles through the public-facing portal.
Using this Feature
Administrators can use the following instructions to locate, view, and remove files from a specific user's account. All file management tasks begin directly from the user's profile page.
Viewing Uploaded Files
Deleting an Uploaded File
-
Click the View All button in the Uploaded Files section of the user's profile to access the full list of files.
-
Locate the specific file you wish to remove on the Uploaded Files page.
-
Click the Delete button associated with that file to remove it from the system.
File deletion is completely permanent. Once a file is deleted from the system, it cannot be recovered. Always verify you are deleting the correct file before confirming the action.
Best Practices and Considerations
-
Uploading files for a user: Use the Login as user feature and follow the user-side workflow if you must upload a file on behalf of a user. Administrators cannot directly upload files to a user's profile from the backend interface. Detailed instructions can be found in the OPSCOM-Go! - Uploading Files article.
-
Verify administrative permissions: Ensure you have the appropriate permissions to perform these actions. If you cannot view or delete user files, verify that your administrative role has the required file management permissions actively enabled.
-
Audit files carefully: Always verify you are deleting the correct file before confirming the action. Accidental deletion may require the user to resubmit important documentation, causing delays in permit approvals or appeals.
Registering a Locker for a User
The Locker Registration feature allows administrators to rent and assign lockers to users directly from their administrative profile. Its primary purpose is to facilitate the centralized assignment of locker inventory, ensuring accurate tracking of available spaces and collected fees. This article is intended for OPSCOM administrators responsible for managing locker inventory and user assignments.
Setup and Configuration
Before a locker can be assigned to a user, the physical locker parameters must be established within the system.
Admin Side: Administrators must ensure the locker inventory is fully configured in OPSCOM prior to attempting registration. This prerequisite includes setting up the overarching Buildings, specific locker room locations (such as the Men's Locker Room), individual locker numbers, and any associated rental fees.
User Side: Users do not need to configure anything to be assigned a locker by an administrator. Alternatively, users can choose to self-manage their locker purchases by logging into the public user portal, provided there is available inventory.
Using this Feature
Administrators can use the following instructions to navigate to a user's profile, select an available locker, and process the rental reservation.
-
Hover over User Management and click User Search to locate the target user.
-
Click the user's Username from the search results to navigate to their Profile.
-
Click the Lockers button to open the locker registration interface for that specific user.
-
Select the appropriate building from the list located under the Available Buildings heading.
-
Click the location drop-down menu on the Locker Registration - Locker Selection page and choose the specific locker room.
-
Select the desired locker number from the generated list of available lockers.
-
Click the Reserve This Locker button to proceed with the selection.
-
Review the Confirm Locker Reservation screen to carefully verify the summarized locker details.
-
Click the Confirm Information button.
-
Click the Proceed to Payment button on the Payments Due screen and complete the financial transaction as required.
Best Practices and Considerations
-
Finalize reservations with payment: Remember that a locker reservation is not considered final until payment has been successfully processed. If you navigate away from the Payments Due screen without completing the transaction, the locker may automatically be released back into the available inventory.
-
Verify the assigned user: Always double-check that the correct user's name is displayed in the top-right corner of the Locker Registration screen before selecting a locker. This simple verification step ensures you are assigning the inventory and any subsequent charges to the correct individual's profile.
User Company Editor
The User Companies feature allows administrators to group individual users under a single corporate account. Its primary purpose is to streamline permit management, billing, and reporting for your business-to-business clients. This article is intended for OPS-COM administrators responsible for managing corporate accounts and user billing.
Setup and Configuration
Before you can link users to a business, you must establish the foundational company profile.
Admin Side: Administrators must create the company profile and establish key details (such as the invoice email and account number) before attempting to link individual users.
User Side: End-users cannot create companies themselves; however, users designated as a Company Manager can self-manage their employees' profiles via the public portal once the administrator grants them access.
Creating a New Company
-
Hover over User Management and click User Companies.
-
Click the Create New Company button to open the Company Create window.
-
Fill in the company's information in the provided fields, including the Account Number, Company Name, Address, Contact Name, and Invoice Emails.
-
Click the Add New Company button.
It is highly recommended to establish the complete company profile first before you begin associating users with it. This ensures all foundational details are correctly in place from the start.
Using this Feature
Administrators can use the following instructions to search for existing companies, assign users to a corporate account, configure manager roles, and archive defunct companies.
Searching for a Company and Viewing Users
-
Hover over User Management and click User Companies to access the Company Search page.
-
Search for a specific company by entering its name or account number into the search field.
-
Click the hyperlinked number in the Users column to redirect to the User Search page. This action displays a filtered list of all users assigned to that specific company and clearly indicates which users currently hold the manager or billing roles.
Adding Users to a Company and Assigning Roles
-
Locate the specific user profile you wish to modify using the administrative search tools.
-
Enter the company's name into the Company field on their profile and select it from the drop-down list.
-
Enable the Company Manager checkbox to allow the user to access and view the profiles of other people within the same company.
-
Enable the Company Billing Account checkbox to designate the user as the primary contact responsible for the company's payment method. This allows them to pay for permits and violations for all users they manage.
-
Click the Submit button to save the changes to the user's profile.
Archiving a Company
-
Locate the company you wish to archive on the Company Search page.
-
Click the Edit button.
-
Click the Archive button located in the top-right corner of the Company Edit screen.
A company cannot be archived if it currently has any users associated with it. You must first navigate to each associated user's profile and remove them from the company before the system will allow you to archive the record.
Best Practices and Considerations
-
Understand billing account limits: There can only be one Company Billing Account contact per company. If you attempt to assign this role to a second user, the system will actively prevent the change and display a message indicating who the current billing contact is. You must remove the role from the first user before assigning it to a new one.
-
Leverage the manager role: The Company Manager role is a powerful tool for business-to-business clients. It empowers a primary corporate contact to self-manage their employees' profiles, greatly reducing the administrative burden on your own team. Be sure to clearly communicate this capability and its benefits to your corporate contacts.
Bulk User Type Change
The Bulk User Type Change tool allows administrators to move all users from one designated user type to another in a single operation. Its primary purpose is to efficiently manage large-scale user role updates, such as transitioning students to an alumni status at the end of an academic year. This article is intended for OPS-COM administrators responsible for managing system user roles and permissions.
Setup and Configuration
This feature is a standard administrative tool and does not require extensive initial configuration to function.
Admin Side: Administrators must ensure that both the original user type (the classification you are moving users out of) and the destination user type (the classification you are moving users into) are already created in the system. Instructions for creating and managing these roles can be found on the User Types wiki page.
Using this Feature
Administrators can use the following instructions to select an existing user type and securely migrate all of its members to a new classification.
-
Hover over User Management and click Bulk Type Change.
-
Review the list of existing user types on the screen. A number badge next to each name clearly indicates the current count of users assigned to that type.
-
Locate the specific user type you wish to move users out of.
-
Click the drop-down menu next to that user type and select the new user type you want to move the users into.
-
Click the Save Changes button.
-
Click the Confirm Changes button on the final confirmation prompt to execute the migration.
-
Wait for the system to process the update and automatically refresh the page. Verify the change by reviewing the updated user counts for the affected user types.
This action is permanent and cannot be undone. It will immediately move all users from the original type to the new one. Always double-check your selections before clicking the final Confirm Changes button.
Best Practices and Considerations
-
Verify permissions beforehand: Changing a user's type directly impacts their system permissions and access. This includes their eligibility for specific permits, lots, and waitlists. Before performing a bulk change, comprehensively review the destination user type to ensure it has all the correct permissions and business rules configured.
-
Utilize for seasonal transitions: Use this tool for major seasonal or annual organizational transitions. It is highly effective for updating student statuses at the end of a semester, or systematically moving all members of a deprecated access group to a newly created, active one.
-
Allow time for high-volume processing: Do not navigate away from the page after confirming the changes. For user types containing a very large number of users (e.g., thousands of accounts), the background process may take a few moments to complete. Wait patiently for the process to finish and the page to reload completely to ensure data integrity.
Merge User
The Merge Users tool allows administrators to combine two separate user profiles into a single, primary account. Its primary purpose is to maintain a clean database by resolving duplicate profiles resulting from user error, name changes, or other data discrepancies. This article is intended for OPS-COM administrators responsible for managing user accounts and system data integrity.
Setup and Configuration
Before a user profile can be selected in the merge tool, it must meet specific criteria. If you cannot find a user when searching in the merge tool, first navigate to that user's profile to verify these settings.
Admin Side: Administrators must ensure the target user profiles meet the following conditions:
-
Ensure the user account is actively enabled.
-
Ensure the user has a specific User Type assigned to their profile.
User Side: End-users do not have the ability to merge accounts. This is strictly an administrative function.
Using this Feature
The merge process involves selecting a source profile (FROM User) to merge into a destination profile (TO User).
The Merge Process
-
Hover over User Management and click Merge Users.
-
Review the two search sections displayed on the page. The profile on the left is the source account that will be merged and then archived (FROM User). The profile on the right is the destination account that will remain active (TO User).
-
Enter search criteria (such as name, email address, student number, or employee number) in both sections to locate the two user profiles.
-
Select the correct user profile from the search results in each section.
-
Click the Merge button to proceed.
-
Review the confirmation screen showing which user will be merged into the other.
-
Click the Merge button again to finalize the action.
Data is only transferred from the FROM User if a corresponding record does not already exist on the TO User. The merge tool does not overwrite or duplicate existing records on the destination profile.
Transferred Data and Profile Status
When the merge is successfully completed, the following actions occur:
-
The FROM User (left column) profile is permanently archived and is no longer accessible.
-
The TO User (right column) profile remains active and inherits the following data: Vehicles, Violations, Permits, Lockers, and Items Awaiting Payment.
-
A record of the merge is logged in the Completed History section on the profile of the TO User.
The merge process is irreversible and results in the permanent archival of the FROM User profile. Always double-check that you have selected the correct source and destination accounts before finalizing the merge.
Best Practices and Considerations
-
Designate the profile with the most accurate core information as the TO User. While transactional data is automatically transferred during the process, the primary profile details (such as name and contact information) of the TO User are what the final, merged profile will permanently retain.
-
Use this tool to proactively resolve common data integrity issues. This tool is highly effective for consolidating records when a user accidentally creates a second profile, changes their legal name and creates a new account, or when an admin-created profile needs to be officially consolidated with a user-created one.
Athletics Module
The Athletics Module is a stand-alone interface designed specifically for registering athletic facility members, managing their vehicles, and issuing parking permits. Its primary purpose is to streamline the administration of athletic users in a dedicated portal separate from standard campus or municipal parking operations. This article is intended for OPSCOM administrators responsible for athletic parking management.
Setup and Configuration
The Athletics Module operates independently of the standard administrative portal and cannot be accessed through the typical OPSCOM navigation menus. No specialized system setup is required, but administrators must know the specific URL to log in.
To access the module, navigate to your standard administrative URL, but replace /admin with /athletics: https://[client_ID][.parkadmin.com/athletics](https://.parkadmin.com/athletics)
Using this Feature
Administrators can use this module to perform the entire lifecycle of an athletics parking profile, from initial registration to permit printing.
Registering an Athletics Member and Vehicle
-
Click Athletics User Registration on the main module page to open the quick registration form.
-
Enter the new user's information into the provided fields.
-
Click the Submit Registration Information for Processing button.
-
Review the confirmation screen and click the Information Correct button to proceed.
-
Click the Associate a vehicle with this user link when prompted.
-
Fill in the required vehicle details on the form.
-
Click the Add New Vehicle button to save the vehicle to the user's profile.
Purchasing a Permit
-
Review the updated user information screen, which will now display the assigned vehicle.
-
Select the desired permit (e.g., Company Staff Lot) from the available options.
-
Click the Purchase this Permit button to complete the transaction and generate a confirmation message on the screen.
Athletics User Search
-
Click Athletics User Search from the main module page to locate existing members.
-
Enter your desired search criteria into the provided fields.
-
Click the Search button to generate a list of matching users.
Available Actions & Buttons (User Search):
-
H Icon: Click the gold H icon to view the specific user's historical profile data.
-
Envelope Icon: Click this icon to open an email draft addressed directly to the user.
-
Username: Click the user's hyperlinked name to open their complete, detailed profile information.
The search function within this module is restricted by design. Only individuals who have been explicitly assigned the "Athletics" user type within the system will appear in these search results.
List Current Athletics Users
-
Click List Current Athletic Users to view an active directory of all members assigned the Athletics user type.
-
Click a specific username to view a detailed breakdown of their profile and associated vehicles.
-
Click a specific permit number to trigger a pop-up window displaying detailed permit information.
-
Click a specific vehicle plate number to view additional registered details about that vehicle.
Permit Printing
-
Click Print Permits from the main module page or directly from a user's detailed profile screen.
-
Select the appropriate Permit Lot from the drop-down menu.
-
Select the specific Permit Text (permit number) from the drop-down menu.
-
Click the Print Selected Hang Tag button to generate a printable version of the permit.
Best Practices and Considerations
-
Log out securely: Administrators must always click the Log Out button when finished working in the Athletics Module. Because this interface operates on a distinct URL outside the main admin portal, explicitly closing your session ensures unauthorized users cannot access member data.
-
Verify data before issuing: Always ensure the correct vehicle is actively associated with the user's profile before clicking the purchase button. Issuing an athletics permit to an incomplete profile can result in incorrect compliance enforcement or unwarranted citations in the physical lots.
Forms Module
OperationsCommander works hard to maintain an up to date product wiki! If you have any questions or if you feel something is missing, post about it in the community.
Forms Admin
The Forms module allows organizations to create and manage digital forms for special requests and communications with users. Its primary purpose is to streamline data collection and digitize specialized workflows directly within the system. This article is intended for OPSCOM administrators responsible for setting up, configuring, and managing these digital forms.
Setup and Configuration
Administrators must ensure they have the appropriate role permissions assigned before attempting to create or modify forms.
Admin Side: Administrators require specific permissions to access the form builder tools.
-
Hover over System Configuration, click Admin Management, and click Manage Roles.
-
Select the relevant administrator role and click the Permissions button.
-
Navigate to the Users tab and enable the Edit Forms and View Forms checkboxes.
-
Click the Save button to apply the changes.
The Forms module has been refactored with new functionality, and new forms are currently only operational on the OPSCOM app. Any existing forms created in the old format are not compatible and must be recreated using the new form builder.
Using this Feature
Administrators can use the following instructions to access the module and utilize the available form management tools.
-
Hover over User Management, hover over Forms, and click List Forms to view the complete list of existing forms.
Available Actions and Buttons
Once on the list page, administrators can interact with forms using the following actions:
-
+Add Form: Click the +Add Form button to open the new form builder, allowing you to design and configure your form from scratch.
-
Edit: Click the Edit icon (represented by a pencil icon) next to a form in the list to open the builder and make changes to the layout or questions.
-
Entries: Click the Entries button to view a comprehensive list of all users who have filled out the specific form, along with their submitted information.
-
Copy: Click the Copy button to immediately duplicate a form. The copied version will be added to the bottom of the list.
-
Archive: Click the Archive button to retire a form so it can no longer be used by end-users. All past entries and submitted information will remain saved for historical reference.
-
Export: Click the Export button to download the form data to your device through your browser's download manager in a .xls format (Microsoft Excel Spreadsheet).
Best Practices and Considerations
-
Recreate legacy forms promptly: Remember that existing legacy form data is not compatible with the new format. You must actively recreate any old forms using the new form builder for them to function correctly on the OPSCOM app.
-
Audit permissions regularly: Regularly review and ensure that the appropriate administrator roles have the necessary permissions. Confirming that the Edit Forms and View Forms checkboxes are properly assigned prevents unauthorized modifications to your active forms.
-
Prioritize user-friendly design: Consider the end-user experience on the OPSCOM app when creating new forms. Keep forms concise and clearly structured with logical questions to ensure ease of use for individuals submitting data from mobile devices.
Viewing Form Entries
The Viewing Form Entries feature allows administrators to view, search, and manage user submissions for custom digital forms. Its primary purpose is to provide the tools necessary to review submitted data, edit information, and communicate directly with the submitter. This article is intended for OPSCOM administrators responsible for managing form data and processing user requests.
Setup and Configuration
Before you can search for and manage form entries, the foundational forms must be established in the system.
Admin Side: This functionality requires that a digital form has already been created and submitted by users. The specific search options available on the Form Entries page are strictly dependent on which fields were marked as "searchable" during the form's initial setup. Instructions for configuring these field settings can be found in the Creating New Forms article.
User Side: End-users submit form entries via the public-facing platform or OPSCOM app, but they cannot view the administrative entry management backend.
Using this Feature
Administrators can use the following instructions to search for specific form submissions and manage them individually from the entry view page.
Searching for Form Entries
-
Hover over User Management, hover over Forms, and click List Forms.
-
Locate the desired form in the list and click the entries button.
-
Enter a date range using the Start date and Up to and including fields on the Form Entry Search page.
-
Select which searchable columns will be displayed in the results list using the Show in results multi-select box.
-
Click the toggle more options button to filter by specific answers. This reveals text boxes for each searchable field where you can enter a targeted search query.
-
Click the search button to generate the list of entries.
-
Click an individual entry from the results list to view its full details.
Working with an Individual Entry
The Entry View page displays the submitter’s information and all of their submitted answers. Administrators can perform the following actions from this page:
-
Viewing and Editing Data: Administrators can manually edit any of the user's submitted answers or add values to administrative fields. Click the save button at the bottom of the page to apply any changes.
-
Replying to the User: Click the prepare email button at the top of the page. You will be redirected to the email composition screen with the user's email address and the form's name pre-filled as the subject line.
-
Deleting an Entry: Entries can be permanently removed by clicking the delete option directly from this page.
Visual Cues: Fields marked as Admin-Only are clearly indicated by a blue border. Hovering your mouse over this border will display a helpful administrative tooltip.
Best Practices and Considerations
-
Maximize search functionality: Use the toggle more options feature for powerful, targeted searches. For example, you can easily find all submissions where a user answered 'Yes' to a specific question by entering 'Yes' into that specific field's search box.
-
Leverage administrative fields: Remember that Admin-Only Fields are never visible to the end-user. Use these hidden fields to safely add internal notes, track status updates, or log other administrative data related to the submission without exposing it to the submitter.
-
Edit with caution: Editing a user's form entry permanently changes the data stored in the database. Always ensure modifications are necessary and accurate before saving changes to a user's original submission, as the original unedited entry will be overwritten.
Form Field Types
The Form Field Types reference provides a detailed overview of the various field types available when building a custom digital form. Its primary purpose is to help administrators understand the function and configuration options for each individual field, enabling them to create effective and user-friendly forms. This article is intended for OPS-COM administrators responsible for designing and deploying digital forms.
Setup and Configuration
This feature involves utilizing the available building blocks within the form creation tool.
Admin Side: No special system configuration is required to use these form fields. For a complete guide on building a form from scratch, please refer to the Creating a New Form article.
Using this Feature
Administrators can utilize the following field types when designing their custom forms. Each field type includes specific configuration options.
Checkbox Group
Used to allow a user to select one or more options from a list.
-
Enable Other: Allows the user to input a custom value not present in the options list.
-
Options: The list of choices for the user. Options can be pre-selected for the user by enabling the checkbox next to the desired item.
Date Field
Used to get a date from the user, who will be presented with a calendar date picker.
-
Type: The type of date field.
-
Min / Max: The minimum and maximum allowed dates that can be selected.
-
Step: The date increment steps.
Header
Used to display a header or subheader on the form. This is a display-only field.
-
Label: The header text that will be displayed.
-
Type: The header size (e.g., H1, H2).
Number
Used to accept numerical digits only.
-
Type: The type of number field.
-
Min / Max: The minimum and maximum allowed numerical values.
-
Step: The amount the value increments or decrements when using the arrow controls.
Paragraph
Used to display a block of text on the form, such as for instructions. This is a display-only field.
-
Content: The paragraph text to be displayed.
Radio Group
Used to allow a user to select only one option from a list.
-
Options: The list of choices for the user. One option can be pre-selected by enabling the corresponding radio button.
Select Menu
Presents a drop-down list of options. This is ideal for questions with many choices to save screen space.
-
Allow Multiple Selections: Enable this to allow the user to select more than one option (making it function like a Checkbox Group).
-
Options: The list of choices for the user.
Text Field
Used to allow a user to input a single line of text.
-
Type: Specifies the kind of input required (e.g., Text Field, Password, Email, Tel).
-
Max Length: The maximum number of characters allowed.
Text Area
Similar to a Text Field, but provides a larger, multi-line area for text input.
-
Max Length: The maximum number of characters allowed.
-
Rows: The initial height of the text area in rows/lines.
Keep your end-users in mind when designing forms. Leveraging field limitations (like Max Length or Min / Max dates) proactively prevents data entry errors and saves administrative time later during the review process.
Best Practices and Considerations
-
Choose the right selection tool for the job. Use a Radio Group for single-choice questions with few options. Use a Checkbox Group for multiple-choice questions. Use a Select Menu when you have many options to present in order to save valuable screen space.
-
Ensure data integrity by selecting the appropriate type. When using a Text Field, always select the appropriate Type (e.g., Email, Tel). This helps validate the input and provides a much better user experience by triggering a specialized keyboard on mobile devices.
-
Structure your form clearly. Use Header and Paragraph fields to structure your form. Breaking up long forms with clear headings and instructional paragraphs improves readability and submission accuracy.
Forms
The Forms module allows administrators to create, manage, and deploy custom digital forms for end-users. Its primary purpose is to seamlessly collect specific information for organizational processes such as applications, appeals, or feedback. This article is intended for OPS-COM administrators responsible for building and managing digital forms.
Setup and Configuration
The primary setup step involves creating and configuring a new form using the three-tab interface.
Admin Side: Administrators build the forms using the administrative interface.
This is a refactored module. Existing form data from older versions of the system is not compatible, and old forms must be recreated using this new tool. To view the different options available for form building, please refer to the Form Field Types article.
User Side: Users do not configure forms but will interact with and submit the published forms based on the availability schedule defined by the administrator.
Using this Feature
Administrators can use the following instructions to navigate the form builder and manage their existing digital forms.
Creating a New Form
-
Hover over User Management, hover over Forms, and click List Forms.
-
Click the Add Form button on the Forms List page.
-
Enter a Title and Description for your form on the Form Basics tab.
-
Enable the Visible checkbox to make it accessible to users.
-
Set a Show At and Hide At date and time to schedule the form's exact availability.
-
Navigate to the Post Form Actions tab to configure what happens after a user submits the form.
-
Select Mail to specific email to automatically send a notification email to an administrator upon submission.
-
Define the Completion Text message that will be displayed to the user after they successfully submit the form.
-
Navigate to the Questions tab.
-
Drag and drop the desired field types from the right-hand panel into the questions area on the left.
-
Click the edit icon on each field to configure its specific options, such as its Label, Help Text, and whether it is a required field.
Managing Forms in the List
Administrators can perform several actions on existing forms directly from the Forms List page:
-
Edit Form: Click the pen icon to modify an existing form's settings and questions.
-
View Entries: Click the entries button to view all user submissions for that form. For more details on this process, see the Viewing Form Entries article.
-
Copy: Click the Copy button to create an exact duplicate of the form structure without its previous entries.
-
Archive: Click the Archive button to remove the form and all its entries from active view.
-
Export: Click the Export button to download the form and all its entry data to a local Excel file.
Understanding Question Options
When editing an individual question field, the following options are available to refine data collection:
-
Required: Enable the Required checkbox to make the question mandatory for the user to answer before the system accepts the submission.
-
Searchable: Enable the Searchable checkbox to allow the answers for this field to be queried directly on the Form Entries page.
-
Admin Only: Enable the Admin Only checkbox to hide the question from end-users entirely. It is only visible to administrators when viewing or editing an entry.
Best Practices and Considerations
-
Avoid editing a live form: Avoid editing a form after it has collected user entries. Making changes to the form structure can cause existing entry data to misalign or display incorrectly.
-
Duplicate to update safely: The Copy feature is the safest way to update a live form. Create a copy, make your necessary changes to the new version, and then archive the old form once you are ready for users to switch to the updated version.
-
Ensure continuous availability: If you want the form to always be available, make sure to set the Show At as the current date and leave the Hide At date blank. Providing an end date will automatically restrict access once that time passes.
Vehicle Management
OperationsCommander works hard to maintain an up to date product wiki! If you have any questions or if you feel something is missing, post about it in the community.
Search by Plate
The Search by Plate feature is a powerful tool for locating vehicles within the system. Its primary purpose is to allow administrators to quickly identify a vehicle's owner, review its permit and violation history, and perform related actions directly from a single centralized interface. This article is intended for OPS-COM administrators and enforcement personnel.
Setup and Configuration
This feature is a standard part of the vehicle management module and does not require any special configuration to function.
Admin Side: Administrators do not need to configure any system settings. The search results are automatically drawn from existing user, vehicle, permit, and violation data already present within the system.
Using this Feature
Administrators and enforcement personnel can use the following instructions to perform targeted vehicle searches and interact with the resulting data.
Performing a Vehicle Search
-
Hover over User Management, hover over Vehicles, and click Search by Plate.
-
Enter your criteria into one or more of the standard search fields:
-
Plate: Enter the full or partial license plate number.
-
Make: Enter the manufacturer of the vehicle (e.g., Honda, Ford).
-
Type: Enter the body style of the vehicle (e.g., Sedan, SUV).
-
Colour: Enter the primary color of the vehicle.
-
-
Enable the Fuzzy Search checkbox if you are using a partial plate number to broaden the results.
-
Enable the Electric Vehicle checkbox to filter results specifically for electric vehicles.
-
Select a Date Range to filter for LPR events or pay station permits within a specific timeframe. Leave this field completely blank to search the vehicle's entire historical record.
-
Click the Search button to execute the query.
Interpreting Search Results and Available Actions
The search results will dynamically appear in a list below the search form. Each row provides specific information and quick-access icons for a vehicle record.
-
History Icon: Click to view the vehicle's complete history, including LPR scans and past permit associations.
-
User Profile Icon: Click to navigate directly to the owner's user profile page.
-
Vehicle Details Icon: Click to view detailed information about the vehicle itself, such as the specific make, model, and year.
-
Username: Click the linked username of the vehicle's registered owner to navigate directly to their profile.
-
Email Icon: Click to open a new email composition window addressed to the vehicle owner.
-
Violations Count: Click the displayed number indicating how many violations are associated with this vehicle to view the specific list of violations.
-
Incidents Count: Click the displayed number indicating how many incidents are associated with this vehicle to view the specific list of incidents.
-
Add Violation Icon: Click to immediately open the violation issuance screen for this specific vehicle.
-
Pay Station Status: Review this column to view information about temporary permits purchased from a pay station for this license plate.
Be extremely cautious when using the Add Violation Icon. Always ensure you have identified the correct vehicle and associated user from the results list before issuing a new ticket to prevent enforcement errors.
A single license plate may appear in multiple rows if it is registered to different users (e.g., family members sharing a car) or has a separate pay station history not formally linked to a registered user account. Review all results carefully to ensure you are acting on the correct record.
Best Practices and Considerations
-
Utilize fuzzy search for partial plates: Use Fuzzy Search if you are unsure of the full plate number or its exact sequence. Enabling this option will perform a broader search and significantly improve your chances of finding the target vehicle.
-
Filter strategically by date: Use the Date Range filter primarily when investigating recent LPR sightings or temporary pay station activity. For a comprehensive overview of a vehicle's permits and violations, ensure the date range fields are left completely blank.
Merge Vehicles
The Merge Vehicles feature allows administrators to combine two existing vehicle records into a single, unified record. Its primary purpose is to correct duplicate entries, accurately associate vehicles with their correct user profiles, and consolidate all historical data, such as violations, into one primary vehicle record. This article is intended for OPS-COM administrators responsible for maintaining data accuracy and comprehensive vehicle histories.
Setup and Configuration
This feature is a standard administrative tool and does not require specific system configuration to function.
Admin Side: Administrators must have the appropriate system role permissions assigned to manage vehicle records and user profiles.
Using this Feature
Administrators can use the following instructions to search for existing vehicle records and consolidate them.
-
Hover over User Management, hover over Vehicles, and click Merge Vehicles to open the interface.
-
Enter the vehicle plate or VIN of one or both vehicles you intend to merge into the search fields.
-
Click the Search button.
-
Select the secondary vehicle (or vehicles) from the results on the left side. These are the records whose information and history you want to transfer.
-
Select the primary vehicle from the results on the right side. This is the single vehicle record that will permanently remain after the merge.
-
Click the Merge button.
-
Confirm the merge action in the subsequent prompt.
-
Wait for the confirmation screen to appear, indicating the successful completion of the process.
This process associates the secondary vehicle's data to the primary record, bringing along all historical information, including outstanding violations. If the primary vehicle is associated with a user, this process will correctly link all the consolidated violation history to that user's profile.
Best Practices and Considerations
-
Identify the primary vehicle carefully: Clearly determine which vehicle record should be the primary one that remains in the system. This is usually the record with the most accurate, complete, or longest-standing information.
-
Review details before merging: Carefully review the details of both the secondary and primary vehicles before initiating the merge. Look closely at details like the make, model, color, and ownership history to ensure they are indeed duplicates and that the merge is intended.
-
Leverage search flexibility: Use the flexibility to search by either plate or VIN to accurately identify the correct vehicles for merging.
Merging vehicles is a permanent and irreversible action. Once two vehicles are merged, the secondary vehicle records are effectively absorbed into the primary, and the action cannot be undone. Always verify your selections before proceeding to prevent data loss or incorrect associations.
DNTT - Do Not Ticket or Tow
The Do Not Ticket or Tow (DNTT) feature allows administrators to apply a temporary condition on a vehicle to prevent ticketing or towing. Its primary purpose is to grant temporary parking exceptions for specific time frames, such as for VIPs, special events, or service vehicles. This article is intended for OPSCOM administrators responsible for managing parking exceptions and enforcement operations.
Setup and Configuration
The DNTT feature is a standard administrative tool and is enabled by default, requiring no overarching system configuration.
Admin Side: While the core feature is available by default, an administrator's assigned user role must specifically have the Manage Vehicle permission enabled to successfully access and run the Vehicle DNTT Report.
User Side: End-users cannot apply, edit, or view DNTT flags for their own vehicles via the public-facing portal. This is strictly an administrative enforcement tool.
Using this Feature
Administrators can use the following instructions to apply the flag from a user's profile, manage existing exceptions, and review usage through reports and handheld devices.
Applying a DNTT Flag to a Vehicle
-
Hover over User Management and click User Search.
-
Click the Vehicles tab once you have opened the target user's profile page.
-
Locate the specific vehicle in the list and click the Add DNTT button.
-
Set the exact start and end date and time for the parking exception using the From Date / To Date fields.
-
Specify a particular lot or area where the exception is valid using the Location field. If left blank, the system will assume the DNTT applies to all locations globally.
-
Enter a clear and concise reason for the DNTT in the Note field.
-
Click the Save Changes button.
The Note field is mandatory and serves as the most critical piece of information for your field officers. Always write a clear, concise note explaining exactly why the DNTT was issued (e.g., "Guest of Dean for event in building A until 4 PM"). This note will be directly visible to enforcement officers using the OPSCOM App.
Editing or Deleting an Active DNTT
-
Click the Vehicles tab on the user's profile.
-
Click the Edit DNTT button next to the vehicle possessing the active flag.
-
Click Modify to update the active details, or click Delete to remove the DNTT exception entirely.
Viewing DNTT Status on Handheld Units
Enforcement officers can easily see active DNTT flags in the field to prevent accidental violation issuance.
-
Tap Search Vehicles on the OPSCOM App.
-
Enter the license plate to perform a database search.
-
Tap the vehicle record in the results list to view the full details, including the expiry time and the administrator's explanatory note. Any vehicle with an active DNTT will be clearly indicated in the initial results list.
Using the Vehicle DNTT Report
This report provides a searchable historical log of all DNTT flags issued by administrators.
-
Hover over User Management, hover over Vehicles, and click Vehicle DNTT Report.
-
Enter a Date Range to find DNTTs that were active during that specific period.
-
Filter by Number of Instances to find vehicles with a history of multiple DNTT records.
-
Click the Search button.
Best Practices and Considerations
-
Specify exact timeframes: Set the DNTT time frame to be as specific as possible. Avoid creating open-ended or excessively long exceptions. Limiting the timeframe maintains the integrity of your parking enforcement program and prevents abuse.
-
Restrict by location: Use the optional Location field to add clarity if a parking exception is only valid in a specific lot or area. This explicitly limits the scope of the exception and helps prevent confusion for both the vehicle owner and the enforcement officer.
-
Audit exception usage: Regularly use the Vehicle DNTT Report to audit active and past exceptions. Consistent auditing helps ensure the feature is being used correctly by your administrative staff and provides a clear history of all granted exceptions for accountability purposes.
Related Video
Active Vehicle Report
The Active Vehicle Report is an investigative tool designed to identify users who have more active vehicles registered on their profile than they have valid permits. Its primary purpose is to help administrators detect potential permit abuse, outdated vehicle lists, or other data discrepancies that could affect parking enforcement and lot management. This article is intended for OPS-COM administrators.
Setup and Configuration
This report is a standard administrative feature and does not require any specific configuration.
Admin Side: No specific setup is required to run the report. It automatically analyzes existing user, vehicle, and permit data to provide a focused list of users whose vehicle counts may require review. The allowable limit for extra vehicles is determined by your overarching user type settings.
Using this Feature
Administrators can use the following instructions to access the report and interpret the generated data.
-
Hover over User Management, hover over Vehicles, and click Active Vehicles Report.
-
Wait for the report to run automatically when the page loads.
Key Information Displayed
The report is specifically designed to display a list of all users who have at least one more active vehicle than they do valid permits. For each user meeting the criteria, the report will display:
-
Username: The name of the user.
-
Email: The user's listed email address.
-
Active Vehicles: A count of active vehicles currently listed on their profile.
-
Valid Permits: A count of valid permits they currently hold.
-
Allowed Extra Vehicles: The amount of extra vehicles specifically allowed for that user, which is determined by their user type settings (the default is 1, meaning one additional vehicle is allowed).
To calculate the exact amount of unauthorized extra vehicles, add the number of active permits to the number of allowed extra vehicles. Subtract that total from the number of Active Vehicles. This final number indicates how many vehicles the user is over their allowed limit.
This report is strictly an investigative tool, not a definitive list of violators. A discrepancy can easily occur for legitimate reasons, such as a user forgetting to remove an old vehicle after selling it, or temporarily adding a rental car to their profile.
Best Practices and Considerations
-
Develop a standard procedure: Develop a standard procedure for addressing users on this report. A best practice is to contact the user directly and ask them to review and update the vehicle list on their profile. Instruct them to remove any vehicles they no longer own or use for parking on the premises.
-
Review periodically: Review this report periodically to ensure user data is clean and accurate ahead of peak periods. Running this report at the beginning of each semester or right before a major permit sales cycle prevents clutter and ensures your enforcement data is highly accurate.
Tracking Electrical Vehicles
The Tracking Electrical Vehicles feature allows both administrators and users to officially designate specific vehicles as electric within the system. Its primary purpose is to provide the data necessary for managing access to dedicated charging stations, reporting on sustainability metrics, and applying EV-specific parking policies. This article is intended for OPSCOM administrators responsible for vehicle management and parking policy enforcement.
Setup and Configuration
The EV flag feature is universally enabled by default and does not require any special system configuration to activate. The functionality is immediately available on all vehicle information pages.
Admin Side: Administrators have the ability to manually apply or remove the EV designation for any user's vehicle directly from the administrative portal.
User Side: End-users can self-manage their profiles and flag their own vehicles as electric through the public-facing online portal.
Using this Feature
Administrators can use the following instructions to manually flag a vehicle as electric and generate specialized reports based on these designations.
Flagging a Vehicle as an EV
-
Hover over User Management and click User Search.
-
Enter your search criteria to locate and select the specific user whose vehicle you wish to manage.
-
Click the Vehicles tab located on the user's profile.
-
Click the license plate link for the specific vehicle you wish to edit.
-
Enable the Electric Vehicle checkbox within the vehicle information pop-up window.
-
Click the Save Changes button.
Identifying and Reporting on EVs
Administrators can identify electric vehicles in the system using two primary methods:
-
User Profile Indicator: When viewing the Vehicles tab of a user profile, EVs are clearly identified by a blue thunderbolt icon next to the license plate. Hovering over this icon displays a helpful tooltip confirming it is an electric vehicle.
-
Vehicle Report: Administrators can quickly get a comprehensive list of all EVs in the system using the Search by Plate tool.
-
Hover over User Management, hover over Vehicles, and click Search by Plate.
-
Enable the Electric Vehicle checkbox in the search filters.
-
Click the Search button. The resulting list will include an EV column to help you easily identify all flagged vehicles.
-
User Portal Experience
Users can follow a similar, streamlined process to designate their own vehicles as electric:
-
Log into the OPSCOM user portal.
-
Navigate to the page listing the active vehicles associated with the account.
-
Click the Edit button for the desired vehicle.
-
Enable the Electric Vehicle checkbox in the vehicle details window and save the changes.
Much like the administrative view, end-users can visually identify their own EVs by the blue thunderbolt icon displayed directly next to the vehicle's license plate in their vehicle list.
Best Practices and Considerations
-
Manage dedicated charging stations: Use the EV flag to manage access to dedicated charging station areas. You can strategically create specific lots or permit types that are strictly only available to users with a flagged EV on their profile.
-
Track sustainability metrics: Regularly run the Search by Plate report with the Electric Vehicle filter enabled. This allows you to accurately track the number of EVs in your parking system over time and formally measure the adoption of green transportation.
-
Enforce green policies: If your organization has EV-specific parking policies (such as 'EVs Only' parking stalls), the EV flag provides the critical data needed to enforce these rules. Enforcement officers can easily verify EV status through standard vehicle lookups on their handheld devices.
-
Encourage user self-management: Encourage users to accurately update their vehicle information, including the EV flag, during permit registration or annual renewals. Pushing this responsibility to the user ensures your data remains accurate without requiring manual administrative updates for every single vehicle.
OperationsCommander & Locker Management
OperationsCommander works hard to maintain an up to date product wiki! If you have any questions or if you feel something is missing, post about it in the community.
🚀 The Evolution of OPSCOM: Introducing Project Eevee & Project Butterfly
The OPSCOM platform is currently undergoing a strategic transformation to modernize workflows and increase system flexibility. Its primary purpose is to optimize permit and lot management through new hierarchical structures and automation, significantly reducing the administrative effort required to manage complex pricing tiers. This article is intended for OPSCOM administrators interested in the upcoming architectural improvements to the system.
Setup and Configuration
As this initiative represents a fundamental architectural shift currently in active development, there are no immediate setup steps required within your live environment.
Admin Side: Administrators do not need to configure any active settings. However, familiarizing your management team with the upcoming container hierarchies and automated logic will prepare your organization for a smooth operational transition.
User Side: End-users do not need to perform any setup. They will seamlessly benefit from the enhanced workflows and interfaces as the updates are iteratively deployed to the public portal.
Understanding the Platform Enhancements
The OPSCOM development team has identified three primary areas for platform enhancement to support increasingly complex organizational needs.
Strategic Improvement Areas
-
Dynamic Sales Windows: Moving beyond the current four-allocation-type limit to confidently support an unlimited number of overlapping and staggered sales windows.
-
Unified Lot Management: Transitioning away from fragmented "Virtual Lots" to a single, intuitive hierarchical view that automatically manages multiple price points and user types.
-
Automated Rollovers: Replacing manual renewal processes with an automated, subscription-style logic to streamline term-to-term permit rollovers.
Project Eevee The Proof of Concept
To ensure the new platform architecture is completely stable, the development team is utilizing the Lockers module as the initial proof-of-concept model, internally known as Project Eevee.
Project Eevee introduces a new organizational "Container" hierarchy. This structural change allows administrators to define a price once and have it apply intelligently across the entire inventory based on user type and specific timeframes.
The Container Hierarchy: The new organizational structure allows inventory to be nested intuitively, flowing from Region → Campus → Building → Floor → Unit.
Future Development Project Butterfly
Once Project Eevee is fully proven and optimized within the locker environment, the development team will initiate Project Butterfly. This phase represents a total reimagining of the existing parking permitting system, seamlessly integrating the efficiencies, automation, and hierarchical controls developed during the Project Eevee phase into your entire parking inventory.
Best Practices and Considerations
-
Engage in active participation: Administrators are highly encouraged to share insights and feedback to help shape the final functionality. As new features like the Grid Editor and the enhanced User Portal are selectively released, your feedback is invaluable to the development cycle.
-
Monitor official updates: Keep a close watch on the OPSCOM Community to provide input on proposed changes and accurately track the progress of the transition. Active community engagement ensures your organization's specific operational needs are considered during development.
Locker Search
The Locker Search tool allows administrators to find, view, and manage lockers within the system. Its primary purpose is to filter for specific lockers, review renter information, manage public visibility, and access detailed rental histories. This guide is intended for OPS-COM administrators responsible for locker inventory and rentals.
Setup and Configuration
This feature is a standard administrative tool and requires no special system configuration.
Admin Side: Administrators do not need to configure any overarching settings, as the search tool draws directly from existing locker inventory data.
User Side: End-users do not have access to this administrative search tool. They can only view and manage their own assigned lockers via the public-facing user portal.
Using this Feature
Administrators can use the following instructions to filter their locker inventory and perform both individual and bulk actions on the results.
Performing a Locker Search
-
Hover over Locker Management and click Search.
-
Enter your criteria into one or more fields (e.g., Locker Area, Locker Status, Renter Name, Locker Number) on the Locker Search page.
-
Click the Retrieve button to run the search.
The search results will dynamically appear in a list below the search form. Each row represents a single locker record.
Available Actions and Buttons
The following actions can be performed directly on the search results page.
Page-Level Actions:
These actions apply to the entire list of lockers returned by your search.
-
Generate Mailing List: Click to download an Excel report containing the mailing details for all users currently renting a locker within the search results.
-
Mark All Available: Click to enable the User Visible checkbox for all lockers in the current results list, making them available for public rental.
-
Mark All Not Available: Click to disable the User Visible checkbox for all lockers in the current results list, hiding them from public view.
-
Update Records: Click to actively save all changes after using the Mark All buttons or manually changing individual User Visible checkboxes.
Row-Level Actions:
These actions apply only to a single locker in the list.
-
Locker # Link: Click the number in the Locker # column to open the Current Locker Information pop-up. Here you can edit the locker's condition, add internal comments, and view current renter details. Click the Update button within the pop-up to save any changes.
-
History Icon (H): Click the gold H icon to view a detailed history of the specific locker, including all past renters and associated transactions.
-
User Visible: Enable or disable the User Visible checkbox for an individual locker to change its public visibility.
Always click the Update Records button after making changes to the User Visible column. Whether you use the bulk Mark All buttons or change individual checkboxes, your changes will not be saved to the database until you click the Update Records button.
The Locker History is a valuable audit tool. Use it to resolve disputes about previous rentals or to track the maintenance history of a specific locker over its lifecycle.
Best Practices and Considerations
-
Filter results carefully before bulk updating: Use the Mark All Available and Mark All Not Available buttons with care. Because these actions apply to all lockers returned in your current search results, ensure your search criteria are specific enough to avoid accidentally changing the status of unintended lockers.
-
Streamline communication: Use the Generate Mailing List feature at the end of a rental term. This allows you to easily export the contact information needed for sending out mass renewal reminders or locker clean-out notices.
Locker Switch
The Locker Switch tool allows administrators to reassign a user to a different locker or swap locker assignments between two users. Its primary purpose is to provide a clear workflow for managing locker changes due to user requests, maintenance needs, or other administrative requirements. This article is intended for OPS-COM administrators responsible for managing locker inventory and assignments.
Setup and Configuration
This tool is a standard feature within the locker management module and does not require any specific configuration to activate.
Admin Side: The tool strictly relies on existing locker and user rental information already being present in the system. No additional setup or configuration is needed before using the switch tool.
User Side: End-users do not have access to the locker switch functionality on the public portal. They must request any locker changes or swaps directly through an administrator.
Using this Feature
The Locker Switch tool allows for two distinct actions: moving a single user to a new locker (Switch) or exchanging lockers between two users (Swap). Administrators can perform a switch or swap by following these steps:
-
Hover over Locker Management and click Locker Switch.
-
Select the Locker Area and Locker Number for the locker being changed in the Old Locker section.
-
Verify that the correct user's name is displayed before proceeding.
-
Select the Locker Area and Locker Number for the destination locker in the New Locker section.
-
Click the Switch Old to New button to move the user from the old locker to a new, vacant locker.
-
Click the Swap Old with New button instead if you need to exchange locker assignments between the user of the old locker and the user of the new locker.
-
Enter any relevant notes in the Reason for Action text box on the Locker Switch Confirmation page.
-
Click the Switch User Lockers button to finalize the change and view the final Locker Information Updated confirmation page.
Carefully choose between the Switch and Swap functions based on occupancy. Selecting the Swap action when the new locker is vacant may result in a system error. Conversely, selecting the Switch action when the new locker is already occupied by another user will completely unassign that original user from their locker.
Best Practices and Considerations
-
Always verify the user's name before proceeding: Always verify the user's name after selecting the Old Locker Number. This crucial step ensures you are modifying the correct user's assignment and prevents frustrating administrative errors that are difficult to untangle.
-
Add a brief comment for historical tracking: Add a brief comment in the Reason for Action box whenever performing a switch or swap. Consistently using this note feature helps other administrators determine exactly why changes to the locker were made for future reference, dispute resolution, and auditing purposes.
Awaiting Payment (Lockers)
The Lockers Awaiting Payment report is an administrative tool used to manage and communicate with users who have pending locker payments. Its primary purpose is to provide administrators with a centralized view of unpaid locker reservations and offer quick actions for sending payment reminders. This article is intended for OPS-COM administrators.
Setup and Configuration
This report is a standard feature within the locker management module and does not require any specific configuration.
Admin Side: Administrators do not need to configure any settings. The report automatically pulls from existing unpaid locker reservation data.
User Side: End-users do not have access to this administrative report, but they will receive the email notifications dispatched from it to their registered email addresses.
Using this Feature
Administrators can use the following instructions to generate the report, filter results, and communicate with users who have pending payments.
Generating the Report
-
Hover over Locker Management and click Awaiting Payment.
-
Use the drop-down menus on the Lockers Awaiting Payment page to filter by Locker Area and select a Sort Type (e.g., by building area, by user).
-
Click the Search button to generate the list.
Available Actions and Buttons
The report provides several actions for managing the listed users and their respective lockers:
-
Email Listed Users: Click this button to send a single, mass email to all users currently displayed in the search results.
-
Envelope Icon: Click the envelope icon located in a user's row to compose and send an email to that individual user only.
-
Username: Click the user's name to navigate directly to their main user profile page.
-
Locker Number: Click the locker number to open a pop-up window displaying the locker's details. From here, you can update fields like Condition and add internal Comments. Click the Update Locker button to save any changes.
-
Building Area: Click the link in the Building Area column to view or edit details about that specific location. Click the Update this Area button to save any structural changes.
Best Practices and Considerations
-
Proactively manage reservations: Use the Email Listed Users button to send out periodic payment reminders. This proactive communication helps significantly reduce the number of abandoned reservations and ensures timely revenue collection.
Establish a regular cadence (such as weekly or bi-weekly) for reviewing this report and dispatching reminders. If a user fails to pay after multiple reminders, you can confidently clear their reservation to make the locker available for other users.
Midnight List - Lockers
The Midnight List is a system-generated report displaying lockers with pending transactions that are scheduled to be automatically cleared out of the system at midnight. Its primary purpose is to help administrators review and manage unpaid locker reservations before they expire and the lockers return to the available public inventory. This article is intended for OPS-COM administrators responsible for managing locker assignments and billing.
Setup and Configuration
This feature is a standard automated administrative process and does not require any specific manual configuration to activate.
Admin Side: Administrators do not need to configure any settings for this list to generate. The system automatically populates the list based on unpaid locker reservations that have reached their designated expiration timeframe.
User Side: End-users do not have access to this administrative list. They will simply see their reservation expire and the locker disappear from their profile if it is cleared.
Using this Feature
Administrators can use this list to review impending locker expirations and take action on unpaid reservations before the automated midnight clearing process occurs.
Managing the Midnight List
Because this list acts as a queue for automated system actions, administrators must proactively manage the items awaiting payment if they wish to prevent a locker from being cleared.
Best Practices and Considerations
-
Review the list daily: Make it a daily administrative habit to review the Midnight List before the close of business. This proactive check ensures that no legitimate locker reservations are accidentally cleared overnight due to delayed manual payment processing or miscommunication.
-
Establish a final notice protocol: Develop a standard business rule for users appearing on this list. For example, utilize the system's email tools to send one final payment reminder to users on the Midnight List, clearly stating that their reservation will be permanently canceled if payment is not resolved by the end of the day.
Non Returning Users Report
The Non Returning Users Report is an administrative tool designed to identify students who rented lockers in a previous semester but did not secure a rental for the current term. Its primary purpose is to help administrators investigate potential unauthorized locker usage or track student attrition between semesters. This article is intended for OPS-COM administrators responsible for locker management and enforcement.
Setup and Configuration
This report is a standard feature within the locker management module and does not require any special configuration to function.
Admin Side: Administrators do not need to configure any overarching settings. The system automatically pulls data directly from existing locker rental records and established sales windows.
Using this Feature
Administrators can use the following instructions to generate the report and effectively compare past locker rentals against current active terms.
Generating the Report
-
Hover over Lockers Management and click Non-Returning Users Report.
-
Click the Yearly drop-down menu under the Old Semesters section and choose the appropriate Old Sales Window.
-
Click the Yearly drop-down menu under the Current Semesters section and choose the appropriate Current Sales Window.
-
Click the Search button to generate and view the report. The results will automatically appear in a table.
-
Click the Export button to download and save the generated data as a spreadsheet file for external review.
Best Practices and Considerations
Locker Sales Windows
The Locker Sales Windows tool allows administrators to create and manage the specific timeframes during which users can purchase lockers. Its primary purpose is to control the public availability of locker inventory for distinct rental periods, such as by semester or academic year. This article is intended for OPSCOM administrators responsible for managing locker operations.
Setup and Configuration
The core setup for this feature involves creating the primary sales windows that define your rental periods.
Admin Side: Administrators must build and configure the active sales periods in the backend before any lockers can be sold.
-
Hover over Locker Management and click Sales Window.
-
Click the Add Sale Window button on the Manage Locker Sales Window page.
-
Fill in the required information in the pop-up window that appears.
-
Click the Save Changes button. The new sales window will be created with an "Inactive" status by default.
User Side: End-users do not configure sales windows. They simply log in and select from the active windows presented to them during the locker purchasing process on the user portal.
Using this Feature
Once sales windows are successfully created, administrators can manage their visibility and operational status using the provided interface tools.
Available Actions and Buttons
Administrators can perform the following actions to manage their locker sales periods:
-
Active: Click the Active button next to a sales window to toggle its status. An active window allows users to purchase associated lockers. You can have up to four active sales windows at one time, strictly limited to one for each category: Yearly (Y), Monthly (M), Semester (S), and Other (O).
-
Edit: Click the Edit button to modify the configuration details of an existing sales window.
-
Archive: Click the Archive button to move a completed or expired window out of the main view. The window will be moved to the Past Locker Sales Window section.
-
Restore: Click the Restore button next to an item in the archive section to bring an archived window back to the active list.
Best Practices and Considerations
-
Plan your sales windows in advance: Plan your sales windows well in advance of each rental period (e.g., before the start of a new semester). Create the windows ahead of time and leave them inactive; only activate them when you are completely ready for public sales to begin.
-
Exercise extreme caution when deactivating: Deactivating a sales window that has active locker rentals will immediately cause all users to lose their lockers within that window. While the lockers can technically be restored by reactivating the window, this action heavily disrupts user data and should be performed with extreme caution.
Deactivating a populated sales window instantly removes locker assignments. Always verify the window is completely empty or truly expired before disabling its active status.
Allocate Lockers
The Allocate Lockers tool allows administrators to set up and manage locker inventory by creating a hierarchical structure of buildings and areas. Its primary purpose is to streamline the bulk addition of lockers and efficiently manage their status and public visibility. This article is intended for OPS-COM administrators responsible for locker management and facility setup.
Setup and Configuration
Setting up your locker inventory is a hierarchical process that involves creating parent buildings, defining specific areas within those buildings, and finally adding individual lockers to those areas.
Admin Side: Administrators must completely configure the building and area hierarchy before any locker numbers can be successfully added to the system.
User Side: End-users do not have access to the locker allocation configuration. They interact only with the published inventory when renting a locker via the public-facing user portal.
Using this Feature
Administrators can use the following instructions to build out their locker hierarchy and populate their inventory.
Accessing the Locker Allocation Page
-
Hover over Lockers Management and click Allocate.
Create a Building
-
Click the Add Building button on the Manage Locker Numbers page.
-
Enter the building name and location in the Building Name and Location fields.
-
Click the Save Changes button.
Create a Building Area
-
Click the Add Area button within the newly created building's section.
-
Enter the necessary details in the Area Name and Description fields.
-
Select the appropriate Locker User Types that are permitted to rent lockers in this specific area.
-
Choose a Sales Window type (such as Yearly, Monthly, Semester, or Other) from the options.
-
Click the Save Changes button.
Add Lockers to an Area
-
Click the + symbol next to the specific area where you want to add lockers.
-
Enter individual locker numbers, with each number on a new line, in the Specific Lockers field, or enter a start and end number for a sequential range in the Locker Range fields. You can also apply an optional Prefix or Postfix.
-
Enable the Visible checkbox if you want the lockers to be immediately available for users to see and rent.
-
Click the Add Lockers button.
Managing Existing Lockers
Once your locker inventory is created, you can interact with it using the following actions:
-
Viewing Lockers: Click the Magnifying Glass Icon next to the area name on the Manage Locker Numbers page to view the comprehensive list of all lockers within that specific area.
-
Archiving Lockers: Click the Trash Bin Icon next to the relevant area to remove lockers from the active inventory. You will be presented with two options: Archive All Lockers (archives every locker in the area) or Archive Selected Lockers (allows you to choose specific lockers from a list to archive).
-
Restoring Lockers: Click the + symbol for the area, enter the numbers of the specific lockers you wish to restore, select Restored from the locker status drop-down menu, and confirm the action to bring them back to your active inventory.
Best Practices and Considerations
-
Combine entry methods: You can use both the Specific Locker and Locker Range methods simultaneously to add non-sequential and sequential lockers in a single operation. This is highly efficient for populating complex locker layouts and saves significant administrative time.
Archive with caution: Archiving lockers completely removes them from the active inventory. While they can technically be restored later, this action should be used very carefully. If the lockers have current or past rental history associated with them, archiving them may disrupt your historical reporting and user data.
Locker Troubleshooting
The Locker Troubleshooting guide outlines a basic test to verify if locker availability is configured correctly when utilizing Locker UserTypes. Its primary purpose is to help administrators quickly identify and resolve configuration issues that prevent specific user groups from viewing or renting lockers. This article is intended for OPS-COM administrators responsible for locker management and system configuration.
Setup and Configuration
This troubleshooting process relies on verifying existing system configurations rather than setting up a new feature.
Admin Side: Administrators must verify that specific Locker UserTypes have been correctly created and assigned to both the user profiles and the designated locker areas.
User Side: End-users must be assigned the correct Locker UserType by the system or an administrator to successfully view restricted locker inventory on the public portal.
Using this Feature
Administrators can use the following step-by-step basic test to troubleshoot and verify locker availability.
Performing the Basic Availability Test
-
Hover over User Management and click User Search to locate a user who is reporting issues, or select a designated internal test account.
-
Verify that the correct Locker UserType is actively assigned to the user's profile settings.
-
Hover over Lockers Management and click Allocate.
-
Locate the specific building area where the missing lockers reside.
-
Verify that the exact same Locker UserType assigned to the user is actively selected in that area's permission settings.
-
Log into the user portal as the test user to confirm that the lockers in that specific area are now visible and available for rental.
If the assigned user types match perfectly but the lockers are still not visible on the user portal, verify that the individual lockers are marked as Visible in the allocation inventory and that an active Sales Window is currently open for that specific area.
Best Practices and Considerations
-
Test with dedicated accounts: Always use a dedicated test account to verify your Locker UserType configurations before opening a new sales window to the public. Proactive testing prevents a surge of support tickets from users unable to access their expected locker inventory.
-
Audit permissions regularly: Regularly audit your building areas to ensure that only the intended Locker UserTypes are selected. Selecting incorrect or overly broad user types can either inadvertently hide lockers from authorized users or mistakenly expose restricted lockers to the general public.
Permit Management - ParkAdmin
OperationsCommander works hard to maintain an up to date product wiki! If you have any questions or if you feel something is missing, post about it in the community.
Permit Search
The Permit Search tool is a central hub for finding, managing, and reporting on all parking permits. Its primary purpose is to provide administrators with detailed search capabilities and a suite of actions for managing permit visibility, user assignments, and communications. This article is intended for OPS-COM administrators.
Setup and Configuration
This tool is a standard administrative feature and utilizes existing permit and user data within the system. It does not require any specific initial configuration.
Admin Side: Administrators do not need to configure any settings. The search page automatically populates based on your active permit inventory and user assignments.
Using this Feature
Administrators can use the following instructions to find specific groups of permits and perform a variety of bulk and individual management actions.
Performing a Permit Search
-
Hover over Parking Management and click Permit Search.
-
Enter your search criteria into the designated fields.
-
Click the Toggle More Options button to expand additional filters.
-
Check the Archived Permit Data or Include Only Active Permits checkboxes under the expanded options to refine your search further.
-
Click the Retrieve button to generate your results.
Visual Cues and Status Indicators
At the top of the search results, a legend provides a quick overview of the permits found based on their status:
-
Total: The total number of permits found by your specific search criteria.
-
Requested: A user is associated with the permit, but no payment has been initiated.
-
Rented/Reserved: A payment is associated with the permit, but it may not be fully processed yet.
-
Visible To User: The permit is available for purchase and has no user associated with it.
-
Visible to Admins: The permit is explicitly hidden from users and has no user associated with it.
-
Unavailable: The permit's state is not set to Good, Valid, or Usable.
Available Actions and Buttons
Administrators can perform actions on both a bulk and individual level directly from the search results page.
Bulk Actions:
-
Select a report or action from the drop-down menu at the top of the results (e.g., Generate Mailing List, Generate User Usage Report, Send Email to Permit Users, Generate Status Report, Generate Permits for Printing).
-
Click the Perform Selected Action button to proceed and apply the action to all permits in the current list.
Individual Actions:
-
Permit Number: Click the link in this column to open the Parking Permit Information screen, where you can manage the Permit State and view associated user and payment details.
-
Clock Icon (History): Click this icon to view the permit's complete transaction and user rental history.
-
Reserved/Rented: Click the user's name in this column to view their details, with links to navigate to their profile or send an email.
-
Toggle Availability: Enable or disable the checkbox in this column to control if a permit is visible to users for purchase. Use the Mark all Available or Mark all Not Available buttons for bulk changes, then click the Update Records button to save.
-
Release: Click this link to disassociate the permit from its current user, making it available for resale.
-
Switch: Click this link to initiate a Permit Switch and change the permit number associated with the current user.
Best Practices and Considerations
-
Process refunds separately: Releasing a permit does not automatically refund the user. This action only disassociates the permit from the user. If a financial refund is required, you must also perform a separate financial adjustment on the user's profile.
-
Understand the difference between permit statuses: Requested means a user has selected an item but has not yet chosen a payment method. Reserved means there is an associated unprocessed payment (such as a promise to pay via cheque). Rented means the payment is fully processed and finalized.
-
Customize your workspace: Use the Toggle More Options button to pin frequently used search filters to your default view. This simple step saves time and customizes the search page to better fit your daily administrative workflow.
Permit Switch
This administrative tool allows OPSCOM administrators to manage parking assignments by swapping permit locations or transferring permit ownership between users. This feature is essential for processing permit transfers and updating parking assignments efficiently.
Setup and Configuration
This feature is a standard administrative tool and requires no specific setup or configuration. Its functionality is based on existing user and permit data already present within your OPSCOM environment.
Using this Feature
The Permit Switch tool provides two primary functions for managing permit assignments: swapping permits and moving permits between users.
Swapping Permits
Use this process to exchange permit assignments between two users or to move one user to a different, vacant permit.
-
Select the Lot Name and Permit number for the first permit under Current Permit.
-
Select the Lot Name and Permit number for the second permit under New Permit.
Note: Permits already assigned to other users will be highlighted and will display the name of the current owner.
-
Review the price difference displayed in the permit summary box.
-
Next to Calculate, select either the Full Price or Prorated Price radio button. Neither option is selected by default; you must select one to proceed.
-
Enter a mandatory Reason for Action.
-
Click the Switch Permits button to finalize the swap.
Best Practices and Considerations
-
Invoice Responsibility: Moving a permit from one user to another does not transfer any associated invoices. The original user remains responsible for any outstanding payments on their account.
-
Automatic Price Calculation: When swapping permits with different values, the system automatically calculates the price difference, both at Full Price and Prorated Price rates. This difference is applied as a charge or credit to the user's account upon confirmation.
-
Audit Trail: Always enter a clear and concise Reason for Action when performing a switch. This creates an important audit trail that can be reviewed in the permit's history, documenting why the administrative change was made.
Awaiting Payment - Permits
The Awaiting Payment Permits report is an administrative tool used to manage and communicate with users who have pending permit payments. Its primary purpose is to provide administrators with a centralized view of unpaid permit reservations and offer efficient tools for sending payment reminders and processing payments. This article is intended for OPS-COM administrators.
Setup and Configuration
This report is a standard feature of the permit management module and does not require any specific configuration.
Admin Side: Administrators do not need to configure any settings. The report automatically aggregates and displays data based on user permit reservations and their current payment status.
User Side: End-users do not have access to this administrative report, but they will receive the email notifications and payment reminders dispatched from it to their registered email addresses.
Using this Feature
Administrators can use the following instructions to generate the report, filter results, and communicate with users who have outstanding permit payments.
Generating the Report
-
Hover over Permit Management and click Awaiting Payment.
-
Wait for the Permits Awaiting Payment screen to load, displaying all users with pending payments.
-
Click the drop-down menu at the top of the page and select a specific lot to filter the list.
Available Actions and Buttons
The report provides several actions for managing the listed users and their pending payments:
-
Email Listed: Click this button to send a single, bulk email to all users currently displayed in the list. A pop-up will allow you to quickly compose a message and add attachments.
-
Export and Print: Click the Excel, CSV, PDF, Copy, or Print buttons to easily export or print the current report data for offline review.
-
Envelope Icon: Click this icon located in a user's row to compose and send an email to that individual user only.
-
Profile Icon: Click this icon to navigate directly to the user's profile page.
-
Permit Number: Click the link in this column to explicitly view or edit the permit's details and manually process any associated payments.
Best Practices and Considerations
-
Target specific transaction types: Remember that this report specifically targets users who have a promise to pay on file (such as a pending cheque or payroll deduction) but whose payment has not yet been processed. It is a critical tool for managing non-credit card transactions.
-
Send bulk reminders: Use the Email Listed button to send bulk payment reminders to all users on the report. This is a highly efficient way to prompt users to complete their purchases and finalize their reservations.
-
Establish a routine: Run this report weekly and send an email reminder for users to remit payment.
Establish a regular cadence (such as weekly or bi-weekly) for reviewing this report and dispatching reminders. Consistent communication helps reduce the number of abandoned reservations and ensures timely revenue collection.
Using the Basic Waitlist Report
The Basic Waitlist Report provides administrators with a centralized view of all users currently on waitlists, organized by parking lot. Its primary purpose is to help manage demand, facilitate user communication, and streamline the process of offering permits to waitlisted individuals. This article is intended for OPS-COM administrators.
Setup and Configuration
Before users can join a waitlist or their data appears in this report, waitlist functionality must be properly configured within your system.
Admin Side:
-
Instructions for enabling waitlists for specific lots can be found on the Pricing & Lot Admin page, under the Standard Permits section. Waitlists can be set up for individual lots or configured as grouped waitlists that cover multiple locations.
-
Configure the Only Allow Waitlist after lot is Full setting to determine whether users will see the option to join a waitlist even before all permits for a designated lot are sold out, or only once the lot reaches full capacity.
User Side: You can configure the option to allow users to see their rank on the waitlist.
-
Hover over System Configuration and click System Settings.
-
Navigate to the Permits tab and enable the Show Waitlist Rank checkbox.
-
Refer to the User Experience page for more details on the front-end view.
Using this Feature
Administrators can use the following instructions to access the report and interact with waitlisted user data.
-
Hover over Permits, hover over Waitlists, and click Waitlist Report.
-
View or edit details about a user waiting to purchase a permit in a specific lot directly on the Waitlist Report screen.
Key Information Displayed
This screen allows the admin to quickly see:
-
The user's Rank on the waitlist
-
The date added
-
The user's name
-
Their user type
-
Their city
-
The user's Phone Number
-
Any entered Comments
-
The lot they are waiting for a permit in
Visual Cues & Status Indicators: Blue Highlight: The user does not currently have a permit assigned to them. Yellow Highlight: The user does currently have a permit assigned but has not yet purchased it.
Available Actions & Buttons
-
The User Profile icon allows administrators to view and edit the user's profile. This is also the primary link administrators would use to sell a permit to the waitlisted user (click the User Profile icon and navigate to the Parking tab within their profile).
-
The Toggle Selections button allows administrators to select all records displayed in the report simultaneously. You can also make individual record selections by enabling the checkbox to the left of each record.
-
The Export to Excel button exports the entire table as an Excel spreadsheet for further analysis or record-keeping.
Best Practices and Considerations
-
Establish clear business rules: Organizations should establish clear business rules for when to remove a user from the waitlist, such as after a user has been emailed an offer, or after a permit has been successfully purchased and processed.
-
Proactively manage waitlists: Regularly review the Waitlist Report to identify users who are next in line and to manage available permits efficiently.
-
Streamline communication: Use the report to facilitate communication with waitlisted users, either individually or in bulk by using the export function for email lists.
-
Manage user expectations: If the Show Waitlist Rank setting is enabled, ensure users understand what their rank means and how it might change.
Managed Waitlist
The Managed Waitlist system automates the process of assigning available permits to waitlisted users. Its primary purpose is to reserve available permits, notify designated administrators, and allow them to manually assign the permit to a user within a specific timeframe before it is released back to the waitlist. This article is intended for OPS-COM administrators responsible for managing parking inventory and waitlists.
Setup and Configuration
Before utilizing the managed waitlist, administrators must enable the core system settings and configure waitlists for individual lots.
Admin Side:
-
Hover over System Configuration and click System Settings.
-
Click the Permits tab.
-
Enable the Enable Managed Waitlist checkbox.
-
Enter admin emails into the Waitlist Email Managers field. Multiple email addresses can be separated by commas. These email addresses will be notified when a permit becomes available for waitlisted users.
-
Enter the amount of time that is being given to users to purchase permits in the Waitlist Reservation Duration box. This value is measured in days.
Enabling the Managed Waitlist setting makes the core waitlist system active, but you must still explicitly enable waitlists on individual lots for them to be used.
Enabling Waitlists on Individual Lots:
Instructions for enabling waitlists for specific lots can be found on the Pricing & Lot Admin page, under the Standard Permits section. Waitlists can be set up for individual lots or configured as grouped waitlists that cover multiple locations. Configure the Only Allow Waitlist after lot is Full setting to determine whether users will see the option to join a waitlist even before all permits for a designated lot are sold out, or only once the lot reaches full capacity.
Waitlist Email Templates:
There is a standard email template you can configure for communicating with your users. To learn more about working with email templates, refer to the Waitlist Email Templates article.
User Side:
Administrators can configure the option to allow users to see their rank on the waitlist via the public portal.
-
Hover over System Configuration and click System Settings.
-
Navigate to the Permits tab and enable the Show Waitlist Rank checkbox.
To see exactly how this appears to the end-user, refer to the User Experience page.
The Managed Waitlist emails sent to users automatically include both the exact purchase deadline date and time to prevent users from losing their spot due to confusion.
Using this Feature
Administrators can use the following instructions to manage waitlist assignments, process extensions, and communicate with users.
Assigning a User a Permit from the Waitlist
When a permit becomes available in a lot with a waitlist, the admin will be notified via the email addresses set up in the Waitlist Email Managers field. The permit will be actively reserved for assignment to users on the waitlist.
-
Hover over Parking Management, hover over Waitlists, and click Waitlist.
-
Click the Assign button to associate the selected user to the permit you wish them to have on the Waitlist screen.
Releasing or Extending an Assigned Permit
If the amount of time you set in the Waitlist Reservation Duration passes and the user has not purchased a permit, the admin will be sent an automated email. The admin then has the option to release the permit so it can be assigned again, or to extend the user's time to pay.
-
Return to the Waitlist page and click the Permit icon beside the target username.
-
Click the Release Permit button to remove the association, or click the Extend button to add 10 more days directly from the Parking Permit Information page.
Available Actions and Buttons
Administrators can utilize the following buttons from the main Waitlist screen:
-
Remove Selected From Waitlist: Click this button to completely remove individual or multiple records from the waitlist.
-
Email All Listed Users: Click this button to send a single, bulk email message to all users currently displayed in the table.
-
Email Selected Users: Click this button to send an email only to those specific users you have individually selected.
-
Export to Excel: Click this button to export the entire waitlist table as an Excel spreadsheet for further analysis or external record-keeping.
Best Practices and Considerations
-
Establish clear communication: Customize the Waitlist Selected email template to clearly inform users about the permit offer, the purchase deadline, and next steps.
-
Create a defined process: Establish internal procedures for managing permit offers, extensions, and removals from the waitlist to ensure consistency and fairness.
-
Monitor admin inboxes: Ensure the email addresses defined in Waitlist Email Managers are actively monitored by the appropriate staff to facilitate prompt assignment and follow-up.
-
Set a realistic reservation duration: Set a realistic and fair reservation duration, balancing user convenience with the administrative need to quickly reassign permits if offers are not taken up.
-
Leverage reporting tools: Use the Waitlist Report and export features to analyze demand, identify trends, and accurately refine your permit allocation strategies.
Single Allocate
The Single Allocate tool allows administrators to add individual permits to a specific parking lot, rather than generating an entire block or range of numbers. Its primary purpose is to help efficiently manage one-off permit additions and make quick inventory adjustments. This guide is intended for OPSCOM administrators.
Setup and Configuration
There is no specific system setup or configuration required to use the Single Allocate feature. It is a standard administrative tool available to users with the appropriate lot and permit management permissions.
Using this Feature
Follow these steps to allocate a single permit number to an existing lot.
-
Hover over Parking Management and click Lot Administration then Allocate.
-
Locate the lot you wish to add a permit to on the Permit Number Allocation page.
-
Click the Add Permits To Lot button.
-
Enter the desired permit number into the appropriate field on the Add Permits screen.
-
Click the Add Permits button to finalize the allocation.
A pop-up message will appear on the screen confirming that your changes were successfully made.
Best Practices and Considerations
-
Bulk Additions: Use the standard range allocation feature if you need to add multiple sequential permits at once. The Single Allocate tool is best reserved for one-off additions, replacements, or custom permit numbers.
-
Verify Inventory: Always double-check your work by navigating to the Permit Search utility after adding a new permit. This ensures the permit was successfully generated and assigned to the correct lot before it is sold or assigned to a user.
Permit Allocations
The Permit Allocations module allows administrators to generate, assign, and manage permit numbers within specific parking lots. Its primary purpose is to help effectively control lot inventory, whether you are adding new permit blocks, issuing single permits, or archiving old records. This article serves as a directory for OPSCOM administrators to navigate the various allocation tools.
Setup and Configuration
There is no specific global configuration required to access the allocation tools. These features are standard administrative functions available to users with the appropriate lot management and permit allocation permissions enabled on their account profile.
Using this Feature
-
Adding Permits to a Lot: Learn how to generate and allocate large, sequential blocks or ranges of permit numbers to a specific lot's inventory.
-
Single Allocate: Discover how to quickly add individual, non-sequential, or custom permit numbers to a lot without generating a full range.
-
Archiving and Restoring Permits: Understand how to safely remove inactive permits from a lot's available inventory and how to seamlessly restore them if they are needed again.
To access the general allocation dashboard within the system:
-
Hover over Parking Management and click Lot Administration then Allocate.
-
Locate the specific lot you wish to manage to begin using the allocation tools.
Best Practices and Considerations
Inventory Audits: Regularly review your lot allocations before the start of a new sales window or academic semester. Archiving unused permits and accurately generating new ranges ensures that your users have a smooth purchasing experience and prevents accidental over-selling.
-
Permission Control: Restrict allocation permissions to lead administrators or lot managers. Preventing unauthorized staff from accidentally generating or deleting permit records ensures your reporting and revenue projections remain accurate.
Permit Sales Window Management
Permit Sales Windows define the specific timeframes during which parking permits can be purchased and when they are valid. Its primary purpose is to help administrators create, configure, and activate sales windows so permits align accurately with organizational academic terms or operational periods. This article is intended for OPS-COM administrators.
Setup and Configuration
Administrators use the Manage Permit Sales Window page to create, configure, and define the dates for sales windows.
Admin Side:
-
Hover over Parking Management and click Sales Windows.
-
Click the +Add Sale Window button.
-
Enter a descriptive name for your sales window in the Name field.
-
Choose your allocation timeframe from the Allocation Type drop-down menu:
-
Monthly: Used for permits valid on a month-to-month basis.
-
Yearly: Used for full-year or annual permit cycles.
-
Semester: Tailored for academic terms (e.g., Fall, Winter, Spring/Summer).
-
Other / Alternate A / Alternate B: Options for unique or non-standard timeframes that do not fit standard categories.
-
-
Enter your Sale Start Date, Permit Start Date, and End Date.
-
Choose a color for your sales window.
-
Click the Save Changes button. The newly created sales window will now appear in the list on the Manage Permit Sales Window page.
Defining Key Dates
When creating a new sales window, you must accurately define the following key dates to dictate availability:
-
Sale Start Date: The first day that permits associated with this sales window will be available for purchase by users.
-
Permit Start Date: The first day the purchased permit becomes officially valid and usable (e.g., scannable, recognized by LPR). This allows for pre-selling permits before their validity period begins.
-
End Date: The official last day permits can be sold within this sales window, and also the date on which the permits expire and become invalid.
Example Scenario: If a sales window is configured with a Sale Start Date of December 29, 2025, a Permit Start Date of January 1, 2026, and an End Date of December 31, 2026, permits can be purchased anytime between December 29, 2025, and December 31, 2026. However, these permits will strictly be valid for parking from January 1, 2026, to December 31, 2026.
User Side: End-users do not configure sales windows. They simply purchase permits during the active windows configured by administrators.
Using this Feature
Once a sales window has been successfully configured, it needs to be made active for permits to be publicly sold.
Activating the Sales Window
-
Locate the sales window you wish to activate on the Manage Permit Sales Window screen.
-
Click the drop-down menu in the Active column for that specific sales window.
-
Choose Active.
If you manually activate a yearly sales window, other existing yearly sales windows will automatically switch to Inactive to prevent system conflicts.
Best Practices and Considerations
-
Prevent overlapping dates: Carefully manage sales window dates to avoid unintended overlaps that could confuse users or create accounting and enforcement issues.
-
Plan ahead: Create sales windows well in advance of the sale start date to allow ample time for configuration, testing, and marketing of new permits to your user base.
-
Manage expired windows: Regularly review the End Date of your sales windows. Past sales windows will be relocated under Past Permit Sales Window and cannot be reactivated; a completely new sales window must be created if similar dates are needed in the future.
-
Use clear naming conventions: Use clear and descriptive names for your sales windows (e.g., "Fall 2025-2026 Annual Permit Sales," "Spring Semester 2026") so they are easily identifiable in reporting and management screens.
Using Permit Proration
The permit proration feature allows administrators to sell a parking permit that is valid for a shortened portion of an active sales window, automatically adjusting the overall cost accordingly. Its primary purpose is to accommodate users who need to begin parking partway through a standard term, such as a student arriving mid-semester or a new employee starting mid-month. This article is intended for OPS-COM administrators responsible for permit sales and lot configuration.
Setup and Configuration
Before an administrator can prorate a permit during checkout, the specific lot must be configured to allow proration.
-
Hover over Parking Management and click Lot Administration then Pricing & Lot Admin.
-
Click the specific Lot Name to open the lot settings.
-
Click the Standard Permits tab.
-
Enable the Proration checkbox to allow price adjustments for this lot.
-
Click the Update Lot button to save your changes.
Using this Feature
Once the lot is configured, administrators can prorate a permit directly from a user's profile during the assignment process.
-
Hover over User Management and click User Search.
-
Locate the desired user and click their username to open their profile.
-
Click the Parking tab to begin purchasing a permit.
-
Click the Standard Parking Permit button for the configured lot. The full price of the permit will be displayed initially.
-
Select the desired permit number and choose the adjusted start date for the permit.
-
Verify that the system automatically adjusts the price. A prorated label will appear next to the new cost.
-
Click the Purchase this Permit button to finalize the transaction.
Visual Cues and Status Indicators
-
Prorated Label: Once the start date is modified, a prorated text label will appear to visually confirm that the original price has been recalculated. The newly adjusted cost will reflect accurately in both the Admin and User portals.
Best Practices and Considerations
Admin Permissions: In addition to configuring the lot, ensure that the administrative user attempting this process has the necessary Proration permission enabled on their specific administrative role profile. If they do not, they will be unable to execute the proration.
-
Verify Start Dates: Always double-check the selected start date before finalizing the purchase. The system relies entirely on this user-defined date to accurately calculate the remaining prorated cost for the sales window.
Permit Waitlist Feature Overview
The Permit Waitlist feature allows OPSCOM administrators to efficiently manage users waiting to purchase a permit in a specific lot or lot category. Its primary purpose is to save administrative time and ensure a fair, organized allocation process when parking inventory is limited.
Setup and Configuration
Configuration steps vary depending on which waitlist management method your organization chooses to utilize. Detailed setup instructions for each method can be found on their respective wiki pages:
-
Instructions for the manual reporting method can be found on the Using the Basic Waitlist Report page.
-
Instructions for the automated assignment system can be found on the Managed Waitlist page.
Using this Feature
The OPSCOM Waitlist can be leveraged in two distinct ways depending on your organization's workflow needs.
Basic Waitlist Report
When a user joins a waitlist, administrators can utilize this report to manually track and communicate with waiting users.
-
Available Actions: Access the report to view waitlists sorted by lot, click directly into a user's profile, and email users individually or in bulk to coordinate permit sales.
Managed Waitlist Functionality
If enabled, this advanced functionality streamlines and automates parts of the permit assignment process for waitlisted users.
-
Key Information Displayed: Administrators receive direct notifications when a permit becomes available. The system automatically reserves the open permit for the waitlist pool.
-
Available Actions: Administrators can choose which waitlisted user to assign the reserved permit to, seamlessly adding the item directly to that user's cart. You can then trigger an email to the user giving them a specific time limit to pay for the permit before it expires and becomes available for the next person in line.
Best Practices and Considerations
-
Determine Your Waitlist Method: Use the basic report if you require complete manual control over user communication and allocation, or enable the managed functionality to enforce strict payment deadlines and automate reservations, significantly reducing administrative overhead.
Selling Permits Using Tablet Kiosks with OPSCOM
The tablet kiosk feature allows organizations to configure a tablet as a dedicated self-service kiosk for selling temporary guest permits. Its primary purpose is to provide a streamlined way for visitors to purchase parking without staff assistance or the need for a personal user account. This article is intended for OPS-COM administrators responsible for facility setup and temporary permit management.
Setup and Configuration
Setting up a kiosk involves three main parts: obtaining the unique booking link for the desired parking lot, enabling Kiosk Compatible Mode within the system, and configuring the physical tablet device to lock it to the booking page.
Part One: Obtain the Guest Permit Link
Each lot configured for temporary permits has a unique URL for guest bookings. You will need this link to set up the kiosk.
-
Hover over Parking Management, hover over Lot Administration, and click Pricing & Lot Admin.
-
Click the name of the lot you want to feature on the kiosk.
-
Click the Temporary Permits tab.
-
Locate the QR code section and copy the guest permit booking link displayed directly below the code to use in the tablet configuration step.
The lot must be properly configured to sell temporary permits. Detailed instructions can be found on the Pricing & Lot Admin page. You must set prices in the temporary permit section of the lot editor. If left blank, they will be disabled, and users will not be able to pick it as an option (e.g., setting permits available for free for 2 hours, $5 for 3 hours, $8 for 12 hours, and $10 for 24 hours/1 day).
Part Two: Enable Kiosk Compatible Mode in OPSCOM
This system-wide setting optimizes the guest permit workflow for a kiosk environment.
-
Hover over System Configuration and click System Settings.
-
Click the General System Settings tab.
-
Enable the Enable Kiosk Compatible Mode toggle.
-
Click the Save Settings button.
Enabling this mode makes the following changes only to guest booking pages: After a successful transaction, the user is returned to the initial booking page instead of a receipt page, making it ready for the next user. The main navigation menu, header, and footer are hidden to prevent users from navigating away or attempting to log in on a public device.
Enabling Kiosk Compatible Mode affects all guest permit transactions, not just those from a kiosk. Users purchasing a guest permit via a QR code on their personal device will also be redirected to the start page after payment. We recommend enabling this setting only if you intend to use physical kiosks.
Part Three: Configure the Tablet Device (Android)
To function as a kiosk, the tablet must be locked to the guest permit URL using third-party apps and built-in operating system features. The following steps provide one example of how to achieve this on an Android device.
Step A: Install and Configure a Kiosk Browser App
-
Open the Google Play Store on your Android tablet and install a kiosk browser application (e.g., Fully Kiosk Browser & Lockdown).
-
Tap the app to open it and configure its initial settings.
-
Paste the guest permit link from Part One into the Start URL field.
-
Enable Fullscreen Mode.
-
Disable the Show Action Bar and Show Address Bar options.
Explore the app's advanced settings, such as navigating to Web Auto Reload and configuring Auto Reload on Idle. Setting this to 30 or 60 seconds will automatically reset the page for the next user after a period of inactivity.
Step B: Pin the Kiosk App
Pinning the app prevents users from closing it and accessing other tablet functions. You can do this in the device settings.
-
Ensure the tablet has a security PIN or password enabled in the device's Settings app, typically under the Lock screen settings.
-
Navigate to Settings, tap Security and privacy, and tap More security settings.
-
Enable the Pin app option.
-
Open the kiosk browser app you just configured.
-
Tap the recent apps button (on most devices, this is an icon with three vertical bars at the bottom of the screen).
-
Tap the icon appearing above the kiosk app's window and select Pin this app.
The device is now securely locked into the kiosk browser, and the device's PIN will be required to exit the app.
Using this Feature
Once fully configured, the tablet functions strictly as a locked-down, single-purpose device for guest purchases.
End-User Workflow
-
Approach the tablet, which will already display the permit booking page for the designated lot.
-
Enter plate information and complete the payment process. The user cannot navigate to other apps, web pages, or system settings during this flow.
-
View the confirmation message upon successful payment.
-
Wait for the page to automatically reset to the start of the booking process for the next user in line.
Best Practices and Considerations
-
Physically secure the device: Use a commercial-grade tablet enclosure or stand to protect the device from theft and damage in a public environment.
-
Adapt to device variations: The specific menu names and steps for configuring a tablet can differ based on the device manufacturer, OS version, or the specific kiosk app used. The instructions provided should be treated as a general guide.
-
Test the entire user flow: Before deploying the kiosk publicly, perform several test transactions. This ensures the process is smooth, payment is successful, and the page resets correctly for the next user.
Setting Permit State for a Lost or Stolen Permit
This article describes the process for managing a lost or stolen permit. Its primary purpose is to guide administrators through switching a user to a replacement permit and changing the original permit's status to remove it from active circulation. This guide is intended for OPS-COM administrators.
Setup and Configuration
This process utilizes standard administrative search and permit management tools, requiring no specific system configuration to function.
Admin Side: Administrators do not need to configure any special settings to use this feature. The standard permit states are built into the system by default.
User Side: End-users cannot mark their own permits as lost or stolen; they must report the issue directly to an administrator to securely process the replacement and update the permit state.
Setting a permit's state to Lost or Stolen immediately removes it from active circulation. It will no longer be available for purchase or assignment from the Admin Portal, purchase from the User Portal, or selection within the permit switching tool.
Using this Feature
This process is divided into two distinct parts: first, switching the user to a new permit, and second, deactivating the old one.
You must switch the user to a new permit before setting the old permit's state to Lost or Stolen. Failing to do so will prematurely remove the old permit from circulation, making it completely unavailable for the switch process.
Switching the User to a New Permit
-
Use the Quick Search bar to find the permit number that has been reported lost (e.g., PW21).
-
Click the Switch button from the search results.
-
Click the drop-down menu on the right side of the permit switch screen to select a new, available replacement permit for the user (e.g., PW19). The user's current permit will correctly appear on the left.
-
Click the Switch Permits button to complete the change. A pop-up notice will confirm the switch is complete.
Setting the Old Permit State to Lost or Stolen
-
Use the Quick Search bar again to find the original permit number (e.g., PW21).
-
Click the permit number link from the search results to open the permit details page.
-
Click the Permit States drop-down menu and select Lost or Stolen.
-
Wait for the system to confirm the update. The old permit is now officially out of circulation and will no longer appear in available permit lists.
Best Practices and Considerations
-
Temporarily hide high-demand inventory: During busy sales periods, consider temporarily hiding the new permit you plan to switch the user into. This safely prevents another user from accidentally purchasing it from the public portal during the brief moment the switch is being manually processed by the administrator.
-
Reverse states if found: The Lost or Stolen state is entirely reversible. If a missing permit is eventually found and returned, you can easily navigate back to its details page and change its state back to an active, usable status.
Altering the Price of Unpaid Standard Permits
This article describes the process for editing the cost of an unpaid standard permit for a specific user. Its primary purpose is to allow administrators to make one-time price adjustments for a single transaction without affecting the permit's default price for other users. This guide is intended for OPS-COM administrators.
Setup and Configuration
For an administrator to use this feature, their user role must have the specific price editing permission enabled.
Admin Side:
-
Hover over System Configuration and click Admin Management then Manage Roles.
-
Select the administrator role you wish to modify.
-
Locate the permissions list for that specific role.
-
Enable the Edit Unpaid Permit Cost checkbox.
-
Save the changes to the role.
User Side: End-users do not have access to alter permit pricing. They will simply see the final, adjusted price reflected in their cart once an administrator completes the process.
Using this Feature
Once the permission is enabled, the price of an unpaid permit can be changed from two different locations in the Admin Portal.
Editing During Permit Reservation
-
Click the edit cost button that appears next to the permit price while booking a permit for a user.
-
Enter the new price and a clear comment explaining the reason for the change in the fields that appear.
-
Proceed with booking the permit as normal to see the adjusted price reflected in the user's cart.
Editing from the Permit Information Page
All changes made to a permit's price are logged for auditing purposes. You can view these changes in the user's profile under the Recent History and Standard Permit History sections. Any comments entered during the price change will also be directly visible in the notes on the Permit Info Page.
Best Practices and Considerations
-
This feature only affects unpaid permits. Once a payment has been processed, the price cannot be changed using this tool. Any required adjustments for paid permits must be handled through a separate financial adjustment.
-
Always enter a clear and specific comment when changing a permit price. This provides an essential audit trail for other administrators and is critical for quickly resolving any future billing questions or disputes.
Releasing a Permit
The permit release feature allows administrators to remove an active permit assignment from a user profile and return it to the available system inventory. Its primary purpose is to help effectively manage permit cancellations, user account closures, or lot reassignments. This article is intended for OPS-COM administrators.
Setup and Configuration
There is no specific configuration required to release a permit. This function is a standard administrative tool available to users with the appropriate permit management permissions enabled on their account.
Using this Feature
If you already know the specific permit number, you can bypass the initial steps by using the Permit Search tool to locate the permit directly. If you do not know the permit number, follow the steps below starting from the user's profile.
- Navigate to the user profile for whom you wish to release a permit. Click the specific permit number located on the user dashboard.

- Click the permit number again from within the permit detail screen. This will direct you to the permit search screen where the release action can be performed.
- Enter a descriptive note in the comment field to track the reason the permit is being released.
- Click the Release This Permit button.
- Click OK in the pop-up window to confirm the release of the permit.
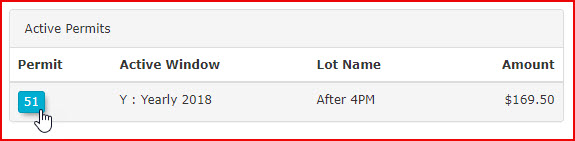
A confirmation message will appear on the screen to verify the action was successful. Now, when you search for this permit, it will appear as available in the system.
Best Practices and Considerations
-
Audit Trails: Always leave a comment when releasing a permit. Recording the reason for the release creates an important audit trail that can be referenced later if there are questions regarding the user's account history or billing.
-
Immediate Availability: Once a permit is successfully released, it is immediately placed back into the available inventory pool. If the lot is heavily utilized or has a waitlist, be aware that this space can now be claimed by or allocated to another user.
Archiving and Restoring Permits
The Archiving and Restoring Permits feature allows administrators to remove permits from a given lot's active inventory without permanently deleting them from the system. Its primary purpose is to help efficiently manage lot allocation by safely archiving unused or seasonal permits and easily restoring them when they are needed again. This article is intended for OPSCOM administrators.
Setup and Configuration
There is no specific system setup or configuration required to use this feature. Archiving and restoring permits is a standard administrative tool available to users with the appropriate lot and permit management permissions.
Using this Feature
Administrators can use the allocation tool to seamlessly archive existing permits or restore previously archived ones.
Archiving Permits
-
Hover over Parking Management and click Lot Administration then Allocate.
-
Locate the specific lot you wish to manage.
-
Click the Archive Permits drop-down menu and choose Selected Permits to remove a specific portion, or choose All Permits to remove the entire lot's inventory.
-
Select the specific permits you wish to archive if you chose the selected option.
-
Click the Remove button to initiate the archiving process.
-
Click the Remove button again on the confirmation screen to complete the action.
Restoring Permits
-
Hover over Parking Management and click Lot Administration then Allocate.
-
Locate the specific lot and click the Add Permits To Lot button.
-
Enter individual permit numbers directly into the Permits text box, or generate a range by entering the prefix, postfix, and the starting and ending sequence numbers (e.g., 01 to 10).
-
Click the Add Permits button to begin the restoration process.
-
Click the Add Permits button on the confirmation popup to finalize the restoration.
Best Practices and Considerations
Restoration Messaging: When restoring a previously archived permit, the confirmation popup will explicitly indicate that the permits are "restored" rather than "created." This verifies that the system has successfully pulled the existing permit data from the archive.
-
Verify Inventory Changes: Always refresh the list of permits after completing an archive or restore action to visually confirm that the targeted permits (e.g., TL2-01 through TL2-05) have been successfully removed from or added back to the lot.
-
Bulk Archiving Caution: Exercise caution when choosing the All Permits option, as this will immediately queue every permit within that lot for removal. Ensure no active user permits are inadvertently caught in a bulk archive sweep.
OC Prime - New Temp Permit Functionality
The Temporary Permit Rate Templates feature allows administrators to control pricing, eligibility, and special conditions for temporary parking permits on a per-lot basis. Its primary purpose is to define how temporary permit pricing is calculated using assignable templates with customizable hourly rates and priority layers. This article is intended for OPS-COM administrators.
Why We Built This
Every setting below exists to solve a specific problem we heard from customers. Keep these in mind as you read — they're the "why" behind the "how":
-
Duration-First Selection — parkers pick their date and time first, and the system automatically applies the cheapest available rate. No more manually choosing between permit types.
-
Early Bird Sale Windows — reward parkers who buy ahead of a deadline with a lower rate that disappears once the window closes.
-
The Rate Stacker — bill accurately for stays that span more than one rate type (e.g., a few hourly hours followed by an evening flat rate), instead of forcing the whole stay onto a single rate.
-
The Overnight Bridge — keep overnight stays valid instead of having permits expire at midnight regardless of when the lot actually reopens.
-
Speed and scale for admins — Reusable Pricing Templates and the Visual Block Painter cut down the time it takes to price many lots individually.
-
Event and exception pricing — Layered Priority lets admins override standard pricing for a one-off event without rebuilding the whole template.
-
Hidden or restricted pricing — promo codes and password-protected templates support scenarios like volunteer rates or private group rates without exposing them to the general public.
Setup and Configuration
Enable This Feature
To enable the new booking flow feature you must turn the feature on from the Rate Template Tab in Lot admin.
This is where you build the "shape" of your pricing — painting different scenarios (peak hours, overnight, weekends) directly onto a calendar instead of configuring rules in the abstract.
Creating a Rate Template
Unpainted Time Slots: Any hourly section left unpainted is treated as not bookable. Users cannot book a permit or park in the lot during that time.
Fixed Rate Blocks and Early Bird Pricing
Use this when you want one flat price for a stretch of time, or want to reward early purchases with a rate that disappears after a cutoff — this is what powers Early Bird Sale Windows.
-
Hold Ctrl on your keyboard and click multiple time slots.
-
Choose the Merge option to create a fixed-rate block.
-
Configure a booking cutoff time using the Sale End field if you want the block to stop being bookable at that specific price after a certain time. Once the cutoff passes, the price reverts to whatever other layer applies for that time.
-
Scroll to the form at the bottom of the template page to edit all created blocks.
Assigning Templates to a Lot
This is where you decide who can use a given template, and how many permits it can cover — useful for scenarios like staff-only rates or capacity-limited event pricing.
Using this Feature
Layers and Priority Calculation
Layers let you handle exceptions without rebuilding your whole pricing — e.g., a holiday rate that should always win, layered on top of your everyday template.
Each template can contain multiple layers, and each layer is assigned a priority on a per-day basis.
-
Same Priority Layers: If two layers share a priority and their time blocks overlap, both are considered during price calculation. The system automatically selects the cheapest price for the current hour block.
-
Higher Priority Layers: If a layer has a higher priority, its pricing always takes precedence over lower-priority layers, even if the lower priority is cheaper. A single hour block on a higher priority layer will be the only bookable slot for that day, though lower priority blocks on other days of the week will remain bookable.
-
Cross Template Calculation: If a user qualifies for multiple templates on the same lot, the system calculates the price under each eligible template and automatically selects the cheapest. Layers from different templates are never combined. Administrators can use the admin-only Price Calculator tool on the template page to simulate a given time slot and view the full price breakdown.
Proration Rules
This determines whether a parker is charged for exactly the time they used, or a flat fee no matter when they arrived — worth understanding so you can explain a charge if a parker asks about it.
-
Single Hourly Blocks: These blocks are prorated. If a user arrives or leaves mid-hour, they are only charged for the portion of the hour actually used.
-
Fixed Rate Blocks: These blocks are not prorated. Booking anywhere within the block requires paying the full block price, but grants the permit for the entire block duration.
Developer Note on Time Blocks: The sale_start, sale_end, and valid_until fields on time blocks are time-only reference values stored against a placeholder date. They must never be given a timezone cast. Doing so causes the weekly rate grid to silently stop rendering saved blocks. A code comment flags this at the cast site and must not be removed.
User Booking Flow
The goal on the parker side is getting from "I need to park" to "I'm parked" in as few taps as possible, while still surfacing special offers to those who qualify.
-
Select a start time for the temporary permit.
-
Choose a quick option for the end time or select Other to pick a specific date.
-
Check the Assign to all vehicles on profile checkbox if the lot allows bookings longer than 30 days and a duration of 31 or more days is selected.
-
Enter a promo code or template password to unlock additional hidden templates.
-
Review the price breakdown overview.
-
Proceed to checkout to have the permit added to the cart.
Promo Codes
Built for scenarios like volunteer parking, private group rates, or limited-time discounts — visible only to people who have the code.
Administrators can create a promo code tied to a specific lot and optionally restrict it to a specific template. Available configuration options include:
-
Discount Percentage
-
Valid Date Range
-
Usage Limit (total number of redemptions)
Promo code redemption rules: Each user can redeem a given promo code once per permit. If a user removes that permit from their cart before purchasing, the code becomes usable again for a new permit.
Concept Overview
| Concept | Behavior |
| Unpainted time slot | Not bookable |
| Same priority layers overlapping | Cheapest price wins |
| Higher priority layer | Always wins, even if pricier |
| Fixed rate block | No proration, full price for any partial use |
| Single hourly block | Prorated to actual time used |
| Multiple eligible templates | Cheapest template auto-selected; no cross-template layer mixing |
| Promo code | One use per user per permit; freed up if permit is removed from cart |
| Max permits limits | Template maximum is a sub-limit within the lot's overall maximum |
Best Practices and Considerations
-
Utilize higher priority layers for exceptions: Reserve higher priority layers for specific events like holidays, ensuring special pricing always overrides standard rates.
-
Understand template limits: The template maximum permits setting is a sub-limit within the lot's overall maximum. If multiple template assignments sum to more than the lot's overall limit, the system allows the intentional overlap but will display a warning message.
- Enforce booking windows: Enable the 30-day limit restriction on the lot-level setting to block users from selecting dates beyond a 29-day window.
Apply Temp Permit to User Vehicles
This article explains how to configure and issue a single temporary parking permit that applies to multiple vehicles on a user's profile. This feature streamlines the permitting process for administrators managing users who need temporary access for more than one registered vehicle. This guide is intended for OPSCOM administrators.
Setup and Configuration
Before issuing a temporary permit for multiple vehicles, you must configure the specific lot to allow this functionality.
Using this Feature
Once the lot is configured, administrators can issue the multi-vehicle temporary permit directly from the user's profile.
- Navigate to the desired user's profile and click the Parking tab.
- Click the Temporary Parking Permit button.
- Select the configured lot within the Temporary Parking Permit Registration window.
- Set the start date and end date.
- Click the Apply to all Vehicles button.
- Click the Confirm This Permit button to proceed to the confirmation window.
- Verify that all intended vehicles are listed, then click the Purchase this Permit button.
- Select the method of payment on the payment screen then click the Submit Payment Information button.
- Select Confirm Payment Information to proceed.
- Click the Process Manually button to finalize the transaction.
Upon completion, you will be taken to the Transaction Details screen, where you can view a final record of the purchase.
Best Practices and Considerations
Date Range Requirement: The selected date range between the start date and end date must be for a period longer than 30 days. If the duration is 30 days or less, the Apply to all Vehicles button will not activate.
-
Vehicle Verification: Always review the vehicle list on the confirmation screen before clicking Purchase this Permit to ensure the user has all necessary vehicles properly registered to their profile.
-
Lot Configuration: Remember that the multi-vehicle option is lot-specific. If you expect administrators to use this feature across different areas, ensure all relevant lots are updated under their respective Temporary Parking tabs.
Temporary Permit Printing
The Temporary Permit Printing feature allows administrators to search, retrieve, and batch-print temporary parking permits. Its primary purpose is to help efficiently generate physical hang tags or dash passes for users needing short-term parking access. This article is intended for OPS-COM administrators.
Setup and Configuration
There is no specific configuration required to use this feature, provided your administrative user role has the appropriate permit management permissions enabled.
Using this Feature
Administrators can use this tool to print multiple temporary permits at once through a system search, or print individual permits directly from a user's account.
- Hover over Parking Management and click Temporary Permits then Temp Permit Printing.
-
Click the Retrieve drop-down menu and choose the permit types you want to display.
-
Click the Permit Lot drop-down menu and choose the specific lot you are printing for.
-
Enter the Start Date and the Up to and Including date to define your search range.
-
Click the Retrieve button to generate the list of permits below the search criteria.
-
Enable the checkbox for each permit you wish to print from the generated list.
-
Click the print selected hang tags button to generate the physical permits.
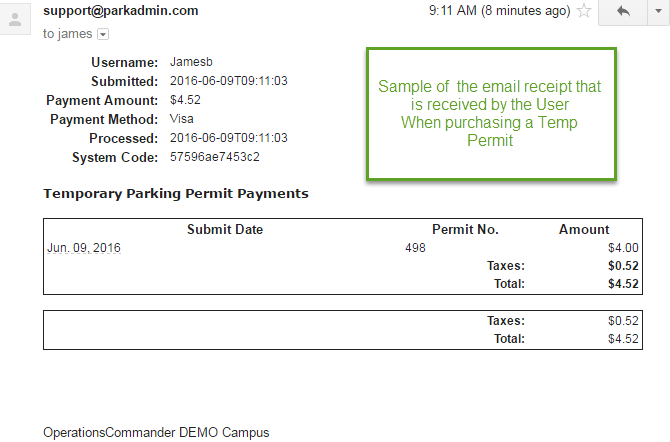
Printing from User History
If you only need to print a single permit, it is often faster to do so directly from the user's profile.
Best Practices and Considerations
-
Batch Processing: Utilize the date fields and lot filters when retrieving permits to quickly print daily or weekly batches of temporary permits for upcoming events or short-term visitors.
-
Individual Printing: Print directly from the user's history if you only need to issue a single replacement permit or handle a walk-in user, rather than running a system-wide search.
-
Printer Settings: Ensure your local printer is configured correctly to handle the specific cardstock or hang tag paper dimensions used by your organization before executing a large batch print.
Real-Time Parking Map
The Real-Time Parking Map feature provides a publicly accessible, interactive map displaying real-time lot availability. Its primary purpose is to allow users to easily find parking and purchase temporary permits directly from the interface, while simultaneously providing administrators with live lot statistics. This article is intended for OPSCOM administrators.
Setup and Configuration
Setting up the map requires creating a public-facing page and then configuring each lot that you want to display on that map.
To use this feature, you must first contact an OPSCOM support staff member and have them enable it on your production system.
Adding the Map to an OPSCOM Page
A Map page is provided by default at this link: [CLIENT NAME][.ops-com.com/u/#/realtimemodal](https://.ops-com.com/u/#/realtimemodal). If you would like to display the map on any other system messaging pages, such as the user login screen, follow these instructions:
-
Hover over System Configuration, click Content & Designs, then Pages and Content Blocks.
-
Create a new page or edit an existing one that will host the map.
-
Add the
[real-time-map]and[real-time-legend]shortcodes into the content area, ensuring each is on its own line.
Configure Individual Lots
For each lot you want to display on the map, you must configure its map marker and temporary permit settings.
-
Hover over Parking Management, hover over Lot Administration, and click Pricing and Lot Admin.
-
Select the lot you wish to edit and click the Zones and Location tab.
-
Set a map marker and enter a public-facing description in the Location field.
-
Click the Temporary Parking tab for the selected lot.
-
Set the Maximum number of Temp Permits, a 30-day usage setting, and the Daily Cost and Hourly costs.
-
Enable the Allow this lot to appear on the Real-Time Parking Map checkbox to finalize its visibility.
Configure Special Spots (Optional)
-
Hover over Lot Administration and click Manage Special Space Types.
-
Click the Add New button to create informational categories such as 'Electric Vehicle Charging' or 'Handicapped Accessible'.
-
Navigate back to the specific lot within the Pricing and Lot Admin module.
-
Click the General tab and enter the number of spaces available for each Special Space Type.
Using this Feature
Once configured, the map is immediately accessible to both the public for finding and purchasing parking, and to administrators for viewing live lot statistics.
Public User View
Administrator View
-
Hover over Parking Management and click Real-Time Map to open the internal view.
-
Click on the map markers to display detailed lot statistics. This includes Pay by Plate machine capacity (if applicable), all other spaces availability, and special spaces (such as handicap and pregnancy spaces).
Best Practices and Considerations
-
Verify temporary parking configurations: The Real-Time Map is specifically designed for temporary parking. A lot will not appear on the map unless all the required fields on the Temporary Parking tab are correctly filled out and the feature is enabled with the checkbox.
-
Write clear public descriptions: Write clear and helpful descriptions in the Location field under Zones and Locations. Because this text is highly visible to the public when they hover over a map marker, it should be used to provide useful context, like "Visitor Parking - North Campus".
QR Code Guest Temporary Permitting
The QR Code Guest Temporary Permitting feature allows administrators to configure specific parking lots so guests can self-register for temporary parking permits via a scanned QR code. Its primary purpose is to streamline the guest parking process for both free and paid scenarios, enabling visitors to quickly obtain a valid permit directly from their mobile device. This article is intended for OPS-COM administrators.
Setup and Configuration
Proper setup is required at both the system and lot level to enable QR code permitting functionality.
QR codes also work for users who are already logged into an account. They must have an active session on the same browser to use their stored account information to checkout, and they must hold the correct user type for that lot. Users who wish to pay for a temporary permit with saved cards must first log in to their account, navigate to their permits, and click Parking map to use the accelerated checkout process.
System-Wide Configuration
These initial steps enable the QR code functionality for your entire system.
-
Hover over System Configuration, click Users, and then click Types.
-
Confirm that a user type named Guest User exists. If it does not, you must add it.
-
Hover over System Configuration and click System Settings.
-
Navigate to the Temp Permits tab.
-
Enable the Enable QR Codes checkbox.
The Guest User type is absolutely essential for this feature to function. Without it, you will not be able to assign QR code capabilities to your lots.
Lot-Specific Configuration
Follow these steps for each individual lot where you want to offer guest temporary permitting via QR code.
-
Hover over Parking Management, hover over Lot Administration, and click Pricing and Lot Admin.
-
Select the desired lot to configure.
-
Select Guest User as the User Type for the lot on the General tab. Removing this user type will instantly disable the QR code feature for this specific lot.
-
Click the Temporary Parking tab.
-
Set the hourly or daily costs in the pricing section. Enter $0.00 for the applicable timeframes for free parking, or enter the correct amounts for the durations you wish to offer for paid parking.
-
Click the Update Lot button to save all changes.
Visibility Options: If you wish to use the lot for QR code functionality alone, excluding standard and temp permitting through the user portal, set the Visibility to User drop-down menu to Hidden but Accessible on the General tab. If you wish to use this lot for temporary permits exclusively, enable the This lot is for temporary parking only checkbox.
Daily Cost permits strictly expire at midnight on the day of purchase. To offer a true 24-hour permit, use the Hourly Cost setting and define a 24-hour duration instead.
Using this Feature
Once configured, you can brand the QR code and deploy it for public use.
Branding the QR Code
You can brand the QR code with your organization's logo. First, upload the logo to the system media bin. Then, select your uploaded image from the Logo field in the QR code configuration section on the Temporary Parking tab.
Accessing and Deploying the QR Code
-
Hover over Parking Management, hover over Lot Administration, and click Pricing and Lot Admin.
-
Select the configured lot and click the Temporary Parking tab.
-
Locate the QR code and its associated links in the QR code configuration section.
Available Actions
-
Print QR Code: Click this button to generate a printable page containing the QR code. This is ideal for quick deployment on physical signage.
-
Download QR Code: Click this button to download the QR code as an SVG file. This high-quality vector format is best for incorporating into professionally designed signs or digital materials.
-
Direct Link: Click this icon to copy the unique URL for the guest permit page. This link can be emailed, posted on a website, or sent via text message to provide direct access without requiring the user to scan a physical code.
Best Practices and Considerations
-
Always test the QR code: Always test the QR code with a mobile device after configuration to ensure it directs users to the correct permitting page before making it public.
-
Place signage strategically: For optimal visibility, place QR code signage at lot entrances and other strategic locations where drivers will easily see it upon arrival and safely scan it.
-
Verify payment processing: If you are offering paid temporary permits, ensure a payment processor is correctly configured and linked within your system.
-
Understand the user workflow: The end-user experience is a simple, mobile-friendly process where the guest scans the code, selects a parking duration from the options you configured, enters their license plate number, and completes the payment if required.
QR Code User Experience
The QR Code User Experience allows parkers to quickly purchase a temporary permit for a specific lot by scanning a physical QR code. Its primary purpose is to provide a streamlined checkout process for both guest parkers and registered users, facilitating rapid parking payments via mobile devices. This article is intended for OPS-COM administrators to understand the mobile end-user workflow.
Setup and Configuration
This feature primarily relies on the physical placement of generated QR codes and the user's mobile device.
Admin Side: Administrators must generate the lot-specific QR codes from the lot administration tools and post them visibly in the physical parking locations. No other specific system configuration is required for the checkout flow itself.
User Side: End-users simply need a mobile device with a camera capable of scanning QR codes. They can choose to check out as a guest or log into their user portal for an accelerated payment process.
Using this Feature
The workflow varies slightly depending on whether the parker is checking out as a guest or as a logged-in user.
Guest Checkout
-
Tap the QR code link or scan the physical code using a mobile device camera.
-
Tap the Accept button when prompted by the Guest Disclaimer.
-
Enter the vehicle information in the Vehicle Plate field.
-
Tap the Duration drop-down menu and select the length of stay.
-
Tap the Payment Method drop-down menu and choose the supported provider.
-
Tap the Make Payment button after entering credit card details on the secure payment page.
Registered User Checkout (Accelerated)
-
Tap the QR code link or scan the code while actively logged into the User Portal (this can be in a closed browser tab, as long as the session is still active).
-
Review the pre-populated vehicle and payment information retrieved from your stored account details.
-
Tap the Duration drop-down menu to choose your stay length.
-
Tap the Make Payment button to complete the transaction instantly using stored tokens from the payment processor.
Logged-in users experience a significantly faster checkout as the system automatically pulls stored vehicle plates and payment profiles, entirely removing the need for manual data entry in the field.
Key Information Displayed
Whether checking out as a guest or a registered user, the following key information is displayed:
-
Lot Selection: Since the QR code is lot-specific, the lot is automatically pre-selected and displayed at the top of the page.
-
Transaction Record: An on-screen confirmation appears immediately following a successful payment.
-
User Receipt: A receipt is automatically generated and sent to the user's registered email address (or the email address they were required to enter during checkout as a guest user).
Best Practices and Considerations
-
Encourage user registration: Encourage user registration to allow parkers to take advantage of the accelerated checkout. This reduces friction during the parking process and improves overall compliance.
-
Verify physical signage: Verify physical signage regularly to ensure QR codes are legible and linked to the correct, active lot in the system. Weather, fading, and vandalism can negatively impact scanability.
-
Establish guest refund policies: Organizations should establish a clear policy for managing guest refunds. Because these transactions are not tied to a permanent user profile in the same way as registered accounts, they may require different administrative handling.
Rollover: Auto Selection and Automatically Processing Payments
This article outlines how to automatically process payments for recurring permits (rollovers) using user credit cards stored on file. Its primary purpose is to help administrators streamline the permit renewal process by batch-processing payments for the upcoming term. This guide is intended for OPSCOM administrators.
Setup and Configuration
Before utilizing this feature, ensure the following system and user requirements are met:
-
Payment Gateway: Your system must utilize a payment gateway that allows you to charge client cards directly. This feature will not function if your system is configured for Hosted Payments only.
-
User Requirements: The user must have a valid credit card registered in the system, and that card must be explicitly designated as the Prime Credit Card.
Using this Feature
The Rollover Payment Processing tool allows you to select and process recurring permit payments in batches.
Processing Rollover Payments
-
Hover over Permits and click Process Payments for Rollovers.
-
Review the generated list on the rollover page.
-
Enable the checkbox for the payment types you wish to process.
-
Note: If an invoice or permit displays None Set, the user must manually log in and process the payment to secure the permit for the next sales window.
-
-
Click the Process Payments for Rollovers button to initiate the batch transactions.
Visual Cues and Status Indicators
-
Lock Pad Icon: Displayed on the right side of the screen. This indicates that a previous payment attempt was initiated but did not reach a finalized "Paid" or "Cancelled" state. This is most often due to a Declined - Retry later response from the payment processor.
Resolving a Locked Permit
If a permit is locked (displaying the lock pad icon), it cannot be processed through the standard rollover screen. Follow these steps to clear the lock and complete the transaction:
Best Practices and Considerations
Do not attempt to re-process a locked permit through the rollover screen. A locked permit indicates an incomplete transaction. The lock must be cleared via manual intervention through the user's cart to avoid processing errors.
Automatically Processing Invoices by a Company Manager: Invoices will only be picked up by the automated rollover processing if a user with a valid subscription is designated as the Billing Recipient on the company record. If this is missing, the rollover processing will skip the invoice.
-
Monthly Monitoring: Monitor rollover reports monthly to identify any lock pad icons, ensuring that all recurring permit payments have been successfully captured and no users slip through the cracks.
-
Investigate Declines: Investigate "Declined" messages immediately by contacting the user to verify their credit card information or by suggesting they contact their bank to authorize the transaction.
-
Allow for Processing Time: If a generic error occurs during processing, allow some time before trying again. Certain records may require a short period to clear the payment gateway's communication buffer before they can be successfully re-attempted.
-
Verify Transactions: Always confirm a successful payment within the user's transaction history before attempting any further administrative actions on the permit to maintain data integrity.
Feature Overview - Rollover/Renew Permits
The permit rollover and renewal feature allows administrators to transition active permits from an expiring sales window to a new one. Its primary purpose is to maintain continuous parking access for patrons while seamlessly automating the billing process for the extended validity period. This article is intended for OPS-COM administrators managing recurring permit billing.
Setup and Configuration
Before executing a permit rollover, you must configure a new sales window and ensure your system is properly set up to handle automatic payments and notifications.
-
Configure a new sales window with a start date equal to or greater than the end date of the previous sales window. Detailed instructions can be found on the Permit Sales Window Management page.
-
Navigate to System Settings then Permits and toggle the Show Permit Renewal Status to Users setting to control visibility on the user portal.
-
Review your payment gateway settings. To process automatic credit card renewals, your gateway must allow the direct charging of client cards (this will not work with hosted-only payments). Users must also have a valid card saved as their Prime Credit Card.
-
Navigate to the Email Templates page to customize the Payment Success and Payment Failure templates to ensure accurate communication is sent to users upon renewal.
Using this Feature
The rollover utility allows you to move users in bulk, manage individual exceptions, and process payments simultaneously.
Initiating a Rollover and Selecting Options
-
Hover over Permits and click Sales Window.
-
Click the Rollover button to open the Permit Renewal page.
-
Select the current expiring sales window in the From Sales Window drop-down menu.
-
Select the target sales window you are rolling permits into.
-
Select the specific user types you wish to process, or leave it as the default All User Types.
-
Click the Show Lots button to generate a list of eligible lots below the search form.
Managing Individual Permits
You can include or exclude specific permits from the rollover batch before processing.
1. Click the Holders or Renewing button next to a specific lot to view a list of its associated permits.
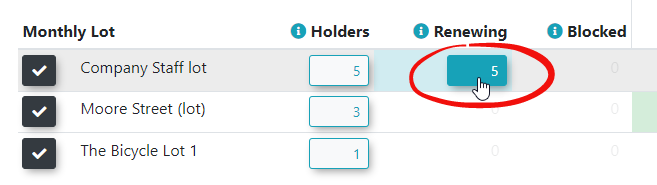
2. Toggle the renewable status for any individual permits (e.g., if a specific permit holder is not returning).
3. Click the Update Permits button to save your changes.
Here's the logic for permit rollover states:
| State | Current Permit Renewing (prevent rollover = 0) |
User exists in target Sale Window | Permit exists in target Sale Window | Notes |
|---|---|---|---|---|
| Renewing | True | False | False | Neither the user, nor the permit exists, but the current permit is set to be renewed. |
| Blocked | True | False | True | The permit exists in the target sale window, but the user doesn't. This means anywhere for any permit in the lot. If the user has multiple permits and some of them renewed, then they technically are not blocked. If the user has been given a different permit, they also are not blocked. |
| Renewed | True | True | N/A | The user is considered renewed when they exist in the target sale window. Just like the note for blocked, it's not intended to be good for users with multiple permits. |
| Not Renewing | False | False | N/A | The user was not found in the target sale window and their permit is also not renewing. This is the expected scenario. |
| Not Renewing, but Exists | False | True | N/A | The user WAS found and their permit is not renewing. This could use some investigation to make sure that the user is supposed to have that permit or not. |
Processing the Rollover
-
Verify the Process Payment option is toggled on for users with automatic payment subscriptions (e.g., Payroll Deduction, Prime Credit Card).
-
Uncheck the checkbox under Rollover for any user you wish to exclude entirely.
-
Click the Rollover Permits button to finalize the process.
Exporting Rollover Data
-
Click the Export Users button on the Permit Rollover page to download an Excel spreadsheet of all users associated with the selected lot for external reconciliation.
Best Practices and Considerations
Sales Window Dates: Ensure your new sales window is configured accurately. A rollover cannot be performed unless the new sales window has a start date that is equal to or greater than the end date of the previous sales window.
Task Processing Delays: The rollover action is executed by a background system task. Emails are not sent the instant you click the button; there is a brief delay between clicking Rollover Permits and the dispatch of user notifications.
-
Administrative Alerts: Ensure your administrator account has a valid email address attached to it. If a user’s permit is processed but they have an invalid or missing email address, the system will send a "Failure to Deliver" summary to the administrator who initiated the rollover.
-
Manual Payments: Users whose permits are rolled over but do not have an active payment subscription (like a saved credit card) will have the permit added to their cart as unpaid. They will need to log in and make a manual payment to secure their permit.
-
Audit Trails: A record of all success and failure emails sent during the rollover process is associated directly with each user’s account profile, allowing administrators to verify communication history if a patron claims they were not notified.
Related Video
Enabling Permit Rollovers without Previous Payment
This article outlines how to configure the system to allow permit rollovers without requiring a previous payment or a payment method on file. Its primary purpose is to provide administrators with the flexibility to process permit renewals for users who are billed through alternative methods, such as payroll deduction or student accounts. This guide is intended for OPSCOM administrators responsible for system configuration and permit management.
Setup and Configuration
Follow these steps to adjust your system settings and allow rollovers without payment.
- Hover over the System Config menu and click System Settings.
- Click Permits within the system settings menu.
- Disable the Require Payment for Rollovers checkbox.
- Click the Save Settings button to apply your changes.
The Require Payment for Rollovers setting is enabled by default to ensure automated payment collection during the renewal process.
Using this Feature
Once the configuration is updated, the requirement for a previous payment is removed from the rollover logic.
-
Proceed with the standard rollover process to allocate permits for the next period.
-
Verify that user permits successfully roll over regardless of their immediate payment status.
Best Practices and Considerations
-
Alternative Billing: Disabling the payment requirement is highly recommended if your organization relies on offline invoicing, internal departmental billing, or payroll deductions where immediate credit card processing is not required during the rollover action.
-
Account Monitoring: If you choose to allow rollovers without payment for standard users, ensure your team has a clear business rule and follow-up process for collecting permit fees post-rollover to avoid accumulating unpaid accounts.
-
Reverting the Setting: If you only need to process a specific batch of unpaid rollovers, remember to navigate back to System Settings and re-enable the Require Payment for Rollovers checkbox once your administrative task is complete.
Preventing Permit Rollover after Cancellation
This article outlines how to stop an active permit from automatically renewing during the rollover process. Its primary purpose is to allow administrators and end users to cancel future recurrences of a permit while maintaining the current active status until expiration. This guide is intended for OPSCOM administrators.
Setup and Configuration
There is no specific configuration required to use this feature. The ability to prevent permit rollovers is a standard function available to both administrators and end users within their respective portals.
Using this Feature
The process for preventing a permit from rolling over can be completed by an administrator on behalf of a user, or by the end user directly through their portal.
Administrator Side
2. Click the permit button associated with the active permit to reveal the Parking Permit Information window.
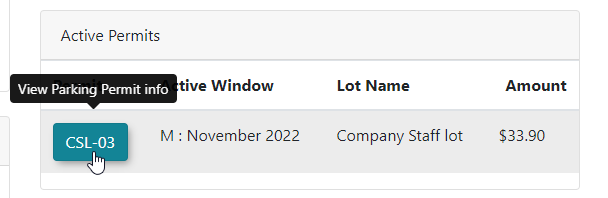
3. Click the Rollover State drop-down menu and choose Prevent Rollover.
4. Enter a comment to explain why the state is being changed. This field is mandatory.
5. Click the Update Permit button to apply the changes.
6. Review the confirmation message that appears, verifying the flag has been changed.
User Side
1. Locate the active permit on the User Dashboard.
2. Click the permit button to open the permit details.
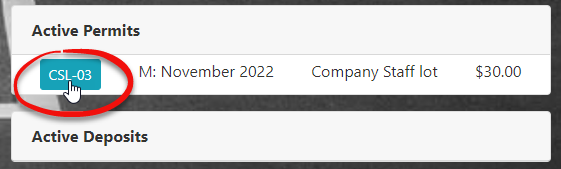
3. Click the drop-down menu in the Permit Information window and choose Not Renewing.
Feature Results
When administrators process permit rollovers for the upcoming season or month, permits that have had their state altered will be excluded from the main processing queue. Instead, these permits will appear in a separate list titled Permits that will not be rolled over.
Best Practices and Considerations
-
Mandatory Comments: Always provide a clear and detailed comment when changing the rollover state. Because this action is mandatory for administrators, using it to accurately document the reason for cancellation (e.g., user request, account closure) ensures a reliable audit trail.
-
Additional Notes: In addition to the mandatory comment on the permit state, it is best practice to add a general note to the user's profile detailing the cancellation for quick administrative reference.
-
Processing Awareness: When running batch rollovers, always review the Permits that will not be rolled over list to ensure no permits were flagged for cancellation by mistake.
Text2ParkMe - Usage
The Text2ParkMe Usage report allows administrators to search and generate detailed records of historical and current mobile parking transactions. Its primary purpose is to help audit parking lot utilization and track user specific permit activity over time. This article is intended for OPSCOM administrators.
Setup and Configuration
There is no specific configuration required to access this report, provided that the Text2ParkMe feature is active in your environment and your administrative user profile has the appropriate reporting permissions enabled.
Using this Feature
Administrators can use this reporting tool to filter and review Text2ParkMe parking data based on specific search criteria.
-
Hover over Parking Management and click Temporary Permits then Text2ParkMe followed by Current Usage.
-
Enter your desired search criteria into the User, Plate, Lot, and/or date range fields.
-
Click the Search button to generate the report.
Key Information Displayed
-
Usage Data: The generated report will appear directly below the search criteria fields, displaying all Text2ParkMe parking sessions that match your applied filters.
-
User Profiles: The Username field within the report results acts as an active link, allowing you to navigate directly to that specific user's profile for further investigation.
Best Practices and Considerations
-
Targeted Reporting: Utilize the start and end date fields to narrow down your search results. This is highly recommended for end-of-month financial reconciliation or when auditing usage for a specific event.
-
Investigating Discrepancies: If an anomaly is spotted in the usage report, use the active Username link to quickly verify the user's account standing, vehicle history, and overall profile data.
To generate a broad system-wide report, leave the User, Plate, and Lot fields blank and only apply a date range before clicking the Search button.
Text2ParkMe - Active Permits
The Text2ParkMe Active Permits report allows administrators to view a real-time list of all currently active and unexpired Text2ParkMe parking sessions. Its primary purpose is to help monitor mobile parking payments and easily audit current lot usage. This article is intended for OPSCOM administrators.
Setup and Configuration
There is no specific configuration required to access this report, provided that the Text2ParkMe feature is active in your environment and your administrative user role has the appropriate reporting permissions.
Using this Feature
This report automatically displays all Text2ParkMe permits that are currently active and have not yet expired as soon as the page is opened.
-
Hover over Parking Management and click Permit Management then Text2ParkMe - Active Permits.
-
Review the automatically generated list of active permits.
-
Enter your desired criteria into the User, Plate, or Lot Name search fields to narrow down the results.
-
Click the Filter Report button to update the listing based on your search criteria.
-
Click any Username link in the results to navigate directly to that specific user's profile.
Key Information Displayed
-
Active Permits: Only permits that are currently valid and unexpired are displayed on this page. Historical or expired Text2ParkMe sessions are excluded.
-
User Profiles: The Username field serves as an active link, allowing you to quickly jump to a user's profile for deeper investigation.
Best Practices and Considerations
-
Filtering for Enforcement: Routinely use the Plate and Lot Name filters when assisting field enforcement officers or verifying if a specific vehicle has a valid, active mobile parking session.
Because this report automatically populates active permits upon opening, you do not need to click search to see current activity. Simply accessing the page provides an immediate snapshot of current Text2ParkMe usage.
Setup Lots to Use Text2ParkMe
The Text2ParkMe feature allows users to pay for temporary parking, receive expiration reminders, and extend their parking time via SMS text messaging. Its primary purpose is to provide a convenient, mobile-friendly payment option for temporary parkers while increasing overall compliance. This article is intended for OPSCOM administrators responsible for managing parking lots and temporary permit configurations.
Setup and Configuration
Before you can configure individual lots to use Text2ParkMe, there are two mandatory system prerequisites that must be established with the assistance of the OperationsCommander team.
-
Gateway Provider: You must have a payment gateway provider set up and configured to accept Text2ParkMe payments. Work with your OPSCOM project manager to ensure this gateway is properly configured and tested within your system.
-
T2P Phone Number: You require a dedicated Text2ParkMe phone number that your users will text to obtain their temporary parking. The OPSCOM Support team will ensure this number is set up and tested for you.
Using this Feature
Once the system prerequisites are met, administrators must manually enable and configure the Text2ParkMe settings for each applicable lot.
-
Hover over Parking Management and click Lot Administration then Pricing & Lot Admin.
-
Click the specific Lot Name to open its settings.
-
Click the Temporary Permits tab.
-
Fill out all required fields located within the red box area.
-
Enter a clear display name in the Text Code field. This is the specific code that users will see and use when choosing this lot to park in.
-
Click the Update Lot button to save your changes.
Best Practices and Considerations
-
Text Code Clarity: Ensure the Text Code you assign to a lot is short, intuitive, and easy for users to type on a mobile device to minimize entry errors.
-
Visibility: Verify that your lot visibility settings allow temporary parkers to see and interact with the lot once Text2ParkMe is enabled.
Text Messaging Fees: Be aware that standard text messaging fees do apply to the end user based on their individual cellular phone plans. It is best practice to display a brief disclaimer regarding standard messaging rates on your physical lot signage.
Planning Lot Groups and Lot Zones
This article explains how to configure Lot Groups and Lot Zones to organize parking inventory within your system. Its primary purpose is to help administrators streamline enforcement operations and apply shared validation parameters across multiple locations. This guide is intended for OPSCOM administrators.
Setup and Configuration
Before applying zones to specific lots, you must first create the Lot Zone within your system settings.
Creating a Lot Zone
-
Hover over System Configuration and click Parking then Manage Lot Zones.
-
Click the Add Lot Zone button.
-
Enter a descriptive long name and short name into the respective fields to define the zone.
Using this Feature
Administrators can assign lots to specific groups and zones directly from the lot administration settings.
Applying a Lot Group to a Lot
-
Hover over Parking Management and click Lot Administration then Pricing & Lot Admin.
-
Click the specific Lot Name to open the lot settings.
-
Click the General tab.
-
Click the lot group drop-down menu and choose the group you wish to apply to your lot.
Applying a Lot Zone to a Lot
-
Hover over Parking Management and click Lot Administration then Pricing & Lot Admin.
-
Click the specific Lot Name to open the lot settings.
-
Click the Zone & Location tab.
-
Click the zone drop-down menu and choose the zone you wish to apply to the lot.
-
Set the valid dates by configuring the Days or Range with Sales Window parameters.
-
Set the valid times by entering the Start Time and End Time.
Best Practices and Considerations
Lot Groups vs. Lot Zones: A Lot Group allows you to group similar lots together to be seen as a single entity (enabling enforcement across multiple lots). A Lot Zone is a grouping mechanism allowing specific validation parameters (times and dates) to be applied to one or more lots.
-
Single Group Assignment: Remember that a lot may only belong to one Lot Group. While assigning a lot group is not mandatory, it is highly useful for organizing similar inventory.
-
Multiple Zone Assignments: You can assign the exact same zone to multiple distinct lots (e.g., applying a "RED Zone" configuration to both the Red Lot and the Green Lot).
-
Enforcement Flexibility: Patrol officers can select either a Lot Group or a Lot Zone during field enforcement, providing flexibility in how they monitor different parking areas.
-
Permit Alignment: Ensure any permits tied to the lot reflect the same zone settings to avoid compliance and validation issues for your users.
Pricing and Lot Admin
The Pricing and Lot Admin page is a central management tool for administrators to create new parking lots, define their characteristics, and configure pricing and permit settings. Its primary purpose is to allow comprehensive control over lot visibility, access, permit types, and advanced features, helping efficiently manage parking inventory. This article is intended for OPS-COM administrators.
Setup and Configuration
Creating and configuring parking lots is divided into several detailed tabs within the lot editor.
Before setting up new lots, consider your organization's permit types, pricing structures, and any specific access restrictions (e.g., faculty-only lots, temporary parking areas).
Accessing the Lot Editor
-
Hover over Parking Management, hover over Lot Administration, and click Pricing & Lot Admin.
-
Click the Add Lot button to create a new configuration, or click an existing Lot Name link to modify it.
General Tab
-
Enable the This lot is archived checkbox to safely archive the lot, making it unavailable for new sales while retaining historical data.
-
Select an option from the Visibility to Users drop-down menu (e.g., Visible, Not Visible, or Hidden but Accessible).
-
Enter the full, descriptive name for the lot in the Lot Name field.
-
Enter an abbreviated name in the Lot Short Name field.
-
Group similar lots together using the Lot Group feature to display them as a single entity.
-
Choose Common Lot to allow any user type to park, or choose User Type Lot to restrict access (hold the Ctrl key to select multiple allowed user types).
-
Enter a Lot Password to prevent users from booking a permit unless they have the required code.
-
Fill out the Special Parking Spaces section if your lot has dedicated spots like EV charging or ADA spaces.
-
Click the Update Lot button to save changes.
Zone & Location Tab
-
Enter a description of the lot's physical location in the Location Description field.
-
Upload an Image to be displayed next to the lot name.
-
Configure a Zone for this lot by selecting a zone and specifying days or a range within the sales window.
-
Move or click Create a Map Marker in the Map Detail section to pinpoint the location and automatically populate GPS coordinates.
-
Click the Update Lot button to save changes.
Standard Permits Section
-
Enter the base cost in the Default Cost field.
-
Choose Enabled, Use Default Setting, or Disabled for Prorated Sales.
-
Enable the This lot can be used for a second permit checkbox to allow users to purchase multiple permits for this lot.
-
Enable the Allow the use of Waitlist with this lot checkbox if you want the waitlist to be active.
-
Enable the Only Allow Waitlist after lot is full checkbox if you want a waitlist to activate only when permits are completely sold out.
-
Group multiple lots onto the same waitlist by entering a text value in the Waitlist Lot Category field.
-
Choose the applicable timeframe from the Lot Sales Window drop-down menu.
-
Enable the Hang Tag Settings if printing physical tags is required.
-
Click the Update Lot button to save changes.
If a user joins a waitlist that is part of a Waitlist Lot Category, they will automatically be added to all individual lot waitlists associated with that specific group and assigned the identical ranking. This ensures that if a permit becomes available in any one of those grouped lots, the user is eligible to purchase it.
Temporary Parking Tab
-
Enable the This lot is for temporary parking only checkbox if the lot is strictly exclusive to temporary parking.
-
Set the maximum number of daily temporary permits in the Max Permits per Day field.
-
Enable Allow temp permits up to 30 days or Allow temp permits to be used over 30 days under the Permit Duration settings. Disable these settings entirely if you do not wish to charge a daily fee.
-
Enable Allow all vehicles on profile to receive the permit to automatically apply the temporary permit to all vehicles on a user’s profile.
-
Enter the maximum fee for parking beyond 6 hours in the Daily Cost field.
-
Enter the hourly fee for parking in the Hourly Costs fields. If the lot has a flat rate, simply leave these fields blank.
-
Enter the monthly cost for parking permits that extend beyond 30 days in the Over 30 Days Monthly Cost field.
-
Enable the Allow this lot to appear on the Real-Time Parking Map checkbox to display the lot on the public map.
-
View, link to, download, print, or add a Logo Image to the QR Code directly from this section.
-
Click the Update Lot button to save changes.
Flex Permits Tab
-
Enable the Enable Flex Permits checkbox.
-
Click the Add New button to create a new time slot with a specified price and color code.
-
Click the Edit button to modify existing time slots, pricing, or colors individually. Alternatively, use the Time Slot Chart and the Select button to click and drag time slot information to apply to multiple times and dates simultaneously.
-
Click the Clear button to quickly remove all pricing configurations, click Fill to populate the chart with uniform pricing, or click Reload to revert to previously saved settings.
-
Click the Update Lot button to save changes.
Lot LPR Settings & Additional Settings Tabs
-
Set a grace period in the Free Parking Time field during which patrons can register their license plate with a pay-by-plate meter without incurring a charge.
-
Enter the applicable integration data into the Banner Detail Code field (used strictly for the Banner system).
-
Click the Update Lot button to save changes.
Using this Feature
Administrators use the main dashboard of the Pricing and Lot Admin page to view a high-level summary of all lot data and access specific administrative functions.
Key Information Displayed
-
Lot Name: The full name of the lot and its associated permit sales window.
-
User Types: The specific user types permitted to book permits for the lot.
-
Visibility: Indicates the lot's visibility to users (e.g., Not visible, Visible, Not visible but available).
-
Price: The standard base price for permits in the lot.
-
Permit types: Icons representing the types of permits enabled for the lot (e.g., standard, temporary, flex).
-
Visible to User: The number of permits in the lot currently available for user purchase.
-
Usage: The number of permits currently booked or in use within the lot.
Available Actions & Buttons
-
Show Archived: Click this button to reveal and manage lots that have been historically archived.
-
Add Lot: Click this button to launch the configuration screen for a completely new parking lot.
-
Lot Name (link): Click any listed lot name to open its detailed edit page, where you can modify various settings across different tabs.
-
Export: Click the export button at the far right of each lot row to output the lot's specific configuration information to an Excel file.
-
Search: Click the search button on each lot row to automatically navigate to the permit search page and view all active permits specifically associated with that lot.
Best Practices and Considerations
-
Establish a consistent naming convention: Establish a consistent naming convention for your lots (e.g., "Lot A - Faculty," "Visitor Parking Garage") to significantly improve clarity for both internal administrators and public users.
-
Manage visibility carefully: Carefully consider the Visibility to Users setting for each lot. A lot marked as "Hidden but Accessible" is highly useful for administrative purposes or hidden user groups, as it remains accessible if the direct booking link is provided.
-
Define clear waitlist policies: Organizations should develop a clear business rule for when to remove a user from the waitlist, such as after a permit has been officially offered or after a user has been emailed.
-
Optimize QR code placement: If utilizing QR codes for temporary parking, ensure they are prominently displayed and easily scannable directly at the physical lot location.
-
Conduct regular audits: Periodically review lot configurations, especially pricing structures and sales windows, to ensure they remain current and fully aligned with your organizational parking policies.
Lot Passwords
The Lot Passwords feature allows administrators to restrict access to specific parking lots by requiring a password during the permit booking process. Its primary purpose is to help control lot reservations for specific groups or events, ensuring only authorized users can secure a permit. This article is intended for OPSCOM administrators.
Setup and Configuration
Administrators must configure the password settings directly within the specific lot's profile to enforce the restriction.
-
Hover over Parking Management and click Lot Administration then Pricing & Lot Admin.
-
Click the specific lot name to open the lot editing page.
-
Enter the required password string into the Password field.
-
Enable the Use Lot Password checkbox to enforce the restriction.
-
Save your changes to apply the password protection to the lot.
Feature Dependency: The Use Lot Password setting cannot be enabled if the Password field is left blank. You must set a password first before you can enforce it.
Using this Feature
Once a lot is password-protected, the system handles access differently for end-users and administrators.
User Experience
When an end-user attempts to access a password-locked lot, they are immediately redirected to a password input screen.
-
Enter the required password to access the permit reservation page.
-
Proceed with the standard permit booking process.
Once the password has been input, the user will not need to enter it again for that single lot until their session data is cleared. If they attempt to access a different password-protected lot, they will be prompted for that specific lot's password.
Administrative Access
Administrators are not restricted by lot passwords on the administrative side of the system. You will not be prompted to enter the password when booking or allocating a permit on behalf of a user.
Visual Cues and Status Indicators
-
Lock Icon: When a lot has password usage enabled, a lock icon will appear next to the lot name everywhere it is displayed throughout the system. This includes the main lot administration page, the user-facing portal, and the real-time parking map.
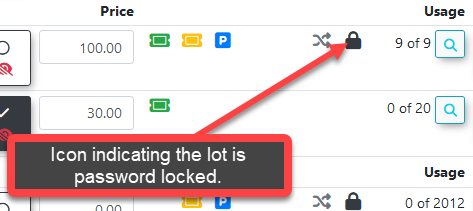
Best Practices and Considerations
-
Event Parking Security: Combine lot passwords with lot visibility settings to create a highly secure booking process for specialized event parking. By hiding the lot from the general public and assigning a password, you ensure that the lot can only be booked by users who have been provided both the direct URL link and the correct password. Instructions for hiding a lot can be found on the Lot Visibility Options page.
-
Password Communication: Ensure you have a clear, documented method for distributing the lot password to your authorized users (e.g., via event registration confirmation emails or targeted internal memos), as they will be completely blocked from securing their parking without it.
Lot Visibility Options
The Lot Visibility Options feature provides administrators with enhanced control over parking lot visibility and accessibility. Its primary purpose is to allow you to define exactly how and when users can view and book permits for specific lots, ensuring that spaces can be precisely tailored for various scenarios, including event parking and restricted access. This article is intended for OPS-COM administrators.
Important: Direct URL links and QR codes function exclusively for Temporary Permits. Standard (regular/recurring) permits require the lot to be set to Visible so users can select it during standard checkout.
Setup and Configuration
Lot visibility can be configured individually within the Lot Edit Page or adjusted in bulk on the View All Lots Page by selecting one of three distinct access options.
Admin Side:
Configuring Visibility on the Pricing & Lot Admin Page
-
Hover over Parking Management, hover over Lot Administration, and click Pricing & Lot Admin.
-
Click the specific Lot Name you wish to configure.
-
Select the desired option via the radio buttons under the Visibility to Users setting on the General tab.
-
Click the Update Lot button to save your changes.
Configuring Visibility on the View All Lots Page (Bulk Action)
-
Hover over Parking Management, hover over Lot Administration, and click Pricing & Lot Admin.
-
Locate the Visibility column for each lot on this main overview page.
-
Click the current visibility icon next to the desired lot (or lots) to immediately change the status using the radio buttons that appear. This allows you to quickly change the visibility status of multiple lots at once without entering the full edit page.
Using this Feature
The three lot visibility options provide granular control over user access. Depending on the setting chosen, the lot will behave differently for end-users interacting with the system.
Visibility Options Explained
-
Not Visible: The lot is entirely hidden from end-users on the permit booking page and the real-time map. Users cannot book permits from this lot, even if they possess a direct link. This option is typically used for lots under active construction, maintenance, or that are no longer in use.
-
Visible: The lot is actively visible to end-users on the standard permit booking page and may prominently appear on the real-time map (if configured). Users can book permits from this lot, provided they meet any other required access criteria (e.g., user type, sales window). This is the standard, default setting for publicly available lots.
-
Hidden But Accessible: The lot is hidden from the general permit browsing page and real-time map. However, users can book temporary permits for this lot if provided with a direct URL link or QR code (e.g., via email, event invitations, or signage). Note: Direct links are compatible with temporary permits only; standard permits cannot be accessed via direct link.
Visual Cues & Status Indicators On the administrative dashboard, each visibility state is represented by a unique icon in the Visibility column. A standard icon indicates a Visible lot, a slashed icon indicates a Not Visible lot, and an alternative icon indicates a Hidden But Accessible status.
Best Practices and Considerations
-
Leverage for Event Parking: The Hidden But Accessible option is ideal for event parking. You can seamlessly provide a direct link to event attendees, allowing them to book permits without the lot being generally visible and consumed by standard daily users.
-
Combine with Passwords: For enhanced security, combine the Hidden But Accessible setting with lot passwords. This ensures that only users with both the direct link and the correct, secret password can successfully book permits for the restricted lot.
-
Prioritize User Communication: If using Hidden But Accessible lots, clearly communicate exactly how users can access the lot. Provide clear instructions alongside your links (e.g., "Scan this QR code upon arrival," or "Click the secure link in your registration email to book your space").
-
Audit Regularly: Periodically review the visibility settings of your lots to ensure they continuously align with current operational needs, seasonal changes, and access policies.
Adding Permits to a Lot (Allocation)
This article outlines the process for adding permits to specific parking lots. Its primary purpose is to enable the efficient management of your permit inventory by allowing permits to be added individually, sequentially, or with custom prefixes and postfixes so lots always have available inventory for sale. This guide is intended for OPS-COM administrators.
Setup and Configuration
This process is a standard administrative function and does not require any specialized system configuration.
Admin Side: Administrators simply need to ensure that the target parking lot has already been created and configured within the system before attempting to allocate permits to it.
User Side: End-users do not interact with the permit allocation process. They will only see the resulting permits available for purchase on the user portal once the allocation is complete and a sales window is active.
Using this Feature
Administrators can use the following instructions to generate new permit inventory and verify that it has been correctly added to the system.
Adding Permits
-
Hover over Parking Management, hover over Lot Administration, and click Allocate.
-
Locate the specific lot to which you want to add permits on the Permit Number Allocation page and click the Add Permits to Lot button.
-
Enter the desired permit numbers into the provided fields using one of the following methods:
-
Individual Permit Numbers: Enter specific, non-sequential permit numbers, separated by commas (e.g., Staff01, Staff02, Visitor123).
-
Range of Permit Numbers: Enter a numerical range using the word "to" (e.g., 1 to 20 or 50 to 200). The system will automatically generate all numbers within that range.
-
Prefix: Enter text in the Prefix field. This text will be added before each generated permit number (e.g., entering "Staff" generates Staff01, Staff02).
-
Postfix: Enter text in the Postfix field. This text will be added after each generated permit number (e.g., entering "-East" generates 01-East, 02-East).
-
-
Click the Add Permits button.
-
Click the Add Permits button again on the confirmation pop-up to confirm and finalize the process. Wait for the success message to confirm that your changes were successfully made.
Preventing Permits From Being Reserved For The Waitlist.
When adding permits to a lot you may find they get reserved for the waitlist immediately which is a great feature if you are adding permits that you plan to assign with the waitlist tool.
If you wish to add a permit to the lot and NOT have it immediately reserved to the wiaitlist you can select "not visible" when adding permits with the allocate tool. The selector button for this is located in the last line of text on the add permit popup window.
Uncheck to have the permits be set as not available upon creation and therefore not visible to the end user. The permit will however, be visible and assignable for an admin.
Viewing Added Permits
After permits are added, you can verify their details by navigating to the permit search utility.
-
Hover over Permits and click Permit Search.
-
Filter by the relevant lot to view the newly added permits and confirm their accurate generation.
Best Practices and Considerations
-
Plan your numbering scheme: Before adding large batches of permits, plan your numbering scheme to ensure consistency and avoid conflicts.
-
Use unique identifiers: While the system inherently handles uniqueness, consider using prefixes or postfixes for different types of permits or lots for much easier identification in reports.
-
Verify your allocation: Always perform a quick check in the Permit Search utility after adding permits to confirm they have been correctly allocated to the desired lot.
Choose the most efficient entry method: For small, specific additions, individual entry is efficient. However, for larger inventories, utilizing ranges combined with prefixes or postfixes will save significant administrative time.
Setting Up A Lot To Be Visible and Available To The End User
This article outlines the critical factors that determine a lot's visibility and availability to end-users when they are purchasing permits in OPSCOM. Its primary purpose is to help administrators understand and configure these settings correctly to ensure that parking lots are accessible to the intended user groups. This guide is intended for OPSCOM administrators.
Setup and Configuration
Configuring lot visibility requires adjusting system-wide settings as well as lot-specific user type permissions.
Admin Side:
System-Wide Visibility Setting
-
Hover over System Configuration and click System Settings.
-
Click the Permits tab.
-
Locate the Show Only Visible lots setting.
Enable the Show Only Visible lots checkbox to only view lots marked as "Visible" across the system. Disable this checkbox to view both visible and non-visible lots in administrative views.
Lot Visibility and User Type Settings
-
Hover over Parking Management, hover over Lot Administration, and click Pricing and Lot Admin.
-
Click Add New Lot (or click an existing Lot Name to edit).
-
Enable the Visible radio button in the Visibility to User setting on the General tab.
-
Select the appropriate User Types that are allowed to see and purchase permits for this lot in the Lot Access section. Hold the Ctrl key to select multiple user types.
-
Click the Update Lot button.
-
Disable the This lot is for temporary parking only checkbox on the Temporary Permits tab.
Allocate Permits to the Lot
-
Follow the steps in the Adding Permits to a Lot (Allocation) article to add and verify your permits.
Set Up a Permit Sales Window
-
Follow the steps in the Permit Sales Window Management article to setup your Sales Window.
User Side: End-users do not configure these settings. They simply log in and view the lots that their specific User Type has been granted access to during active sales windows.
Using this Feature
Administrators should interact with the system using the impersonation tool to test and verify that the lot is properly visible to the correct user types.
Testing Lot Visibility
-
Hover over User Management and click User Registration to create a new test user, or click User Search to find an existing one.
-
Verify that the test user's User Type (e.g., Full Time Staff) matches one of the user types you allowed to access the newly configured lot.
-
Click the Login as User button for your test user.
-
Navigate to Permits on the User-Side Dashboard.
-
Verify if the lot you created is available to be reserved. If the user type you are testing does not match the lot's allowed user types, the lot will remain safely hidden on the user side.
Best Practices and Considerations
-
Test Thoroughly: Always perform a Login as User test with various user types after configuring a new lot or modifying its settings. This ensures that visibility and availability precisely match your intentions.
-
Align User Types: The most common reason a lot isn't visible is a mismatch between the lot's User Types setting and the logged-in user's actual user type. Double-check this setting carefully.
-
Check Sales Window Dates: Ensure your permit sales windows are always current. An expired sales window will make the lot completely unavailable, even if all other settings are correct.
-
Allocate Permits First: A lot without allocated permits, even if marked visible, will not allow users to purchase permits as there is no inventory to sell. Always allocate permits after lot creation.
-
Use Clear Naming Conventions: Use descriptive Lot Names and Lot Short Names that clearly indicate the lot's purpose or location to users.
Public-Facing Lot Pages
This article outlines how to create and configure custom public-facing pages that display parking lots for user booking. This feature allows OPSCOM administrators to provide a streamlined, branded parking selection and purchase experience.
Setup and Configuration
Custom pages are managed through the Pages and Content Blocks section.
Shortcodes must be typed exactly as they appear in the documentation, or they will not function correctly.
Using this Feature
The public-facing lot experience consists of two distinct subpages: the Lots List and the Lot Detail.
Lots List Page
The Lots List page displays all available parking lots to the user. You can place this module on any custom page.
-
Path Configuration: When creating the page, the path you assign will be reflected in the URL. For example, if you set the path to /lots, the module will display at
yourdomain.com/lots. -
Shortcode Options: Use the [lots_list] shortcode to display the list. You can modify this shortcode using the following options:
| Shortcode Option | Description |
| [lots_list include_hidden=1] | Includes lots that are otherwise set to be hidden from the user. |
| [lots_list only_text2parkme=1] | Restricts the list to show only lots with Text2ParkMe enabled. |
You can chain options together in a single shortcode. For example: [lots_list include_hidden=1 only_text2parkme=1].
Lot Detail Page
The Lot Detail page provides specific information for a single selected lot. This page is coded to function specifically when the path is set to --lots-detail, which dynamically fetches information for the selected lot ID.
Use the following shortcodes to customize the layout of your Lot Detail page:
| Shortcode | Description |
| [values show=lotname] | Displays the name of the lot. |
| [values show=lottype] | Displays the initial of the lot type. |
| [values show=lotnameid] | Displays the lot ID. |
| [values show=defaultcost format=currency] | Displays the cost to rent a permit for the lot. |
| [values show=location] | Displays the address or location description. |
| [values show=textcode] | Displays the Text2ParkMe code for the lot. |
| [values show=ratePer10Min format=currency] | Displays the Text2ParkMe rate for the lot. |
| [lot show=buy_now] | Displays the purchase button. Redirects unauthenticated users to the login screen. |
| [lot show=map] | Displays a map based on the lot's stored latitude and longitude. |
| [lot show=photo] | Displays the photo assigned to the lot. |
User-Side Results
-
The Lot List Page: Once configured, users will see a clean, indexed list of all available parking lots based on the parameters defined in your [lots_list] shortcode.
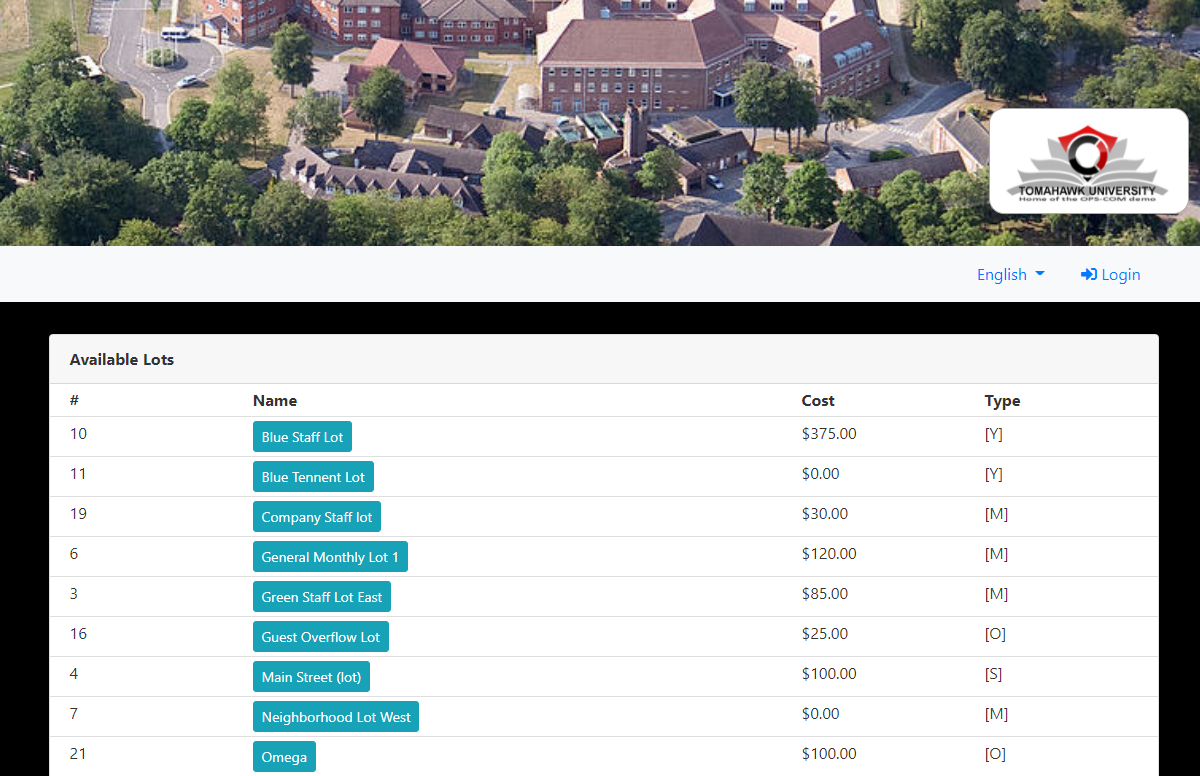
- The Lot Detail Page: When a user selects a specific lot, they are directed to the detail view where they can review location information, pricing, and view a map or photo of the lot before clicking Buy Now to proceed to the purchase process.
Best Practices and Considerations
-
Page Design: While the Lots List is a fixed module, the Lot Detail page is highly customizable. Ensure your Lot Detail page includes the permit cost and the [lot show=buy_now] button to provide a clear path to purchase for users.
-
Photo Configuration: If you choose to display photos, ensure they are correctly assigned to each lot via the Lot Administration page.
-
Pathing: Remember that the Lot Detail page must be set with the path --lots-detail to ensure the system correctly passes the lot ID required to fetch and display accurate information.
Setting Up for Event Parking
The Event Parking feature allows administrators to configure exclusive parking lots that can only be booked by users who have been given a direct link or QR code. Its primary purpose is to help ensure that only authorized event attendees can reserve and purchase parking for specific occasions by utilizing visibility restrictions and passwords. This article is intended for OPSCOM administrators.
Setup and Configuration
Setting up a lot for exclusive event parking involves two main configurations: hiding the lot from the general public and applying an access password.
Because the configuration steps for these features are extensive, please refer to their dedicated wiki articles for full step-by-step instructions:
- Ensure Temporary Permits are active for the lot (direct links do not function for standard permits).
-
Configure the lot to be hidden from standard public view. Instructions can be found on the Lot Visibility Options page.
-
Secure the lot to ensure only authorized users can book space. Instructions can be found on the Lot Passwords page.
Using this Feature
Once your event lot is properly hidden and secured with a password, administrators distribute access to the lot outside of the standard OPSCOM user portal.
-
Locate the direct URL link or QR code on the lot's Temporary Permits tab.
-
Distribute the direct link via email to your event attendees, or display the QR code on physical event signage or ticketing materials.
-
Ensure the attendees are also provided with the configured lot password.
-
When a user clicks the link or scans the QR code, they will be directed to the hidden lot's temporary permit page and prompted to enter the password to complete their parking reservation.
Best Practices and Considerations
Retrieve Direct Link & QR Code: OPS-COM automatically generates a unique direct link and QR code for your lot on the Temporary Permits tab once the lot is saved with a Lot Name and assigned User Types. Administrators can copy the link or download the QR code directly from this tab to use on event signage, ticketing materials, or pre-event emails.
-
Clear Communication: Always include both the direct link and the lot password in your pre-event communications (such as registration confirmation emails). If attendees only have the link but lack the password, they will be unable to book their parking.
-
Testing: Before sending out communications to a large group of attendees, test the direct link and password yourself in an incognito or private browsing window to ensure the lot routes correctly and the password functions as intended.
Pay Station Status
The Pay Station Status lookup tool is used for searching and verifying temporary permits issued by physical pay stations. Its primary purpose is to allow administrators and enforcement personnel to accurately look up a vehicle's pay station status based on various criteria, such as plate number and time. This guide is intended for OPS-COM administrators and enforcement staff.
Setup and Configuration
This tool is a standard administrative feature and does not require any specific system configuration.
Admin Side: Administrators do not need to configure any internal settings. However, this feature strictly relies on a successful, active integration with your organization's external pay station hardware to continually populate its data.
User Side: End-users do not interact with this administrative lookup tool. They only interact with the physical pay station hardware in the parking lots.
Using this Feature
Administrators and enforcement staff can use the following instructions to actively filter for pay station transactions and view specific vehicle details.
Performing a Status Lookup
-
Hover over Parking Management, hover over Temporary Permits, and click Pay Station Status.
-
Enter your criteria into one or more of the following search filters:
-
Plate: Search for a specific license plate.
-
Valid Date/Time: Find permits that were valid on or after the selected date and time.
-
Zones: Filter the results for specific pay station zones.
-
-
Click the Validity Filter drop-down menu to show only Valid, Non-Valid, or All records.
-
Select an option from the Sort Order drop-down menu to logically organize the results by a specific column.
-
Click the Search button to generate the list.
Available Actions
-
Plate Number Link: Click the linked number in the Plate column of any results row to open a new page where you can view or edit that specific vehicle's details.
Best Practices and Considerations
-
Verify infractions instantly: Use the Plate and Valid Date/Time filters together for quick enforcement checks. This targeted search allows you to instantly verify if a specific vehicle had a valid pay station permit at the exact time of a recorded infraction, reducing administrative disputes.
The data displayed on this page is pulled directly from your integrated pay station system. Any discrepancies in the data should first be investigated directly at the physical pay station terminal or within its dedicated management software.
Refundable Parking Deposits
The Refundable Parking Deposits feature allows administrators to associate mandatory deposit fees—such as those for access cards or physical hang tags—with specific parking lots. Its primary purpose is to ensure that required deposits are automatically included in the total cost during the permit purchasing process and to track assigned inventory numbers. This article is intended for OPS-COM administrators.
Setup and Configuration
Before a deposit can be charged during a permit sale, administrators must apply the pre-configured deposit types to the appropriate parking lots.
Admin Side:
-
Hover over Parking Management, hover over Lot Administration, and click Pricing and Lot Admin.
-
Click the specific lot name you wish to apply the deposit to.
-
Click the Standard Permits tab to view the available deposit types.
-
Click the deposit you wish to apply from the Deposits list. Hold the Ctrl or Shift key to select multiple deposit types simultaneously.
-
Save your lot configuration changes.
Once a deposit type is successfully associated with a lot, it will automatically be included in the purchase of a permit in that lot for administrative transactions only.
User Side: End-users do not interact with the setup or configuration of refundable deposits.
Using this Feature
Administrators can use the following instructions to process a permit sale that includes a mandatory deposit and accurately record the assigned physical inventory.
Processing a Permit with a Deposit
Editing Assignable Text (Access Cards and Hang Tags)
During the payment process, administrators can record specific identifiers for the physical items being handed out (such as an access card number or a hang tag number).
-
Click the specific Deposit Item name (e.g., Access Card Deposit) on the payments screen.
-
Enter the physical item's number in the Assigned Text field within the Deposit Information pop-up window.
-
Click the Update Deposit button.
-
Verify that the assigned number now appears on the Payments screen under the Deposits section.
-
Proceed with completing the purchase and processing the payment in the usual manner.
Best Practices and Considerations
-
Understand administrative limitations: Remember that deposit types associated with a lot are only included in the purchase of a permit when processed by an administrator. They are not automatically applied to self-service purchases made by end-users on the public portal.
-
Utilize assignable text: Always use the assignable text feature to record access card or hang tag numbers at the time of sale. This practice maintains accurate inventory records and is essential for properly processing the eventual refund when the physical item is returned.
Access Cards - Search
The Access Cards Search tool allows administrators to locate and review access card assignments within specific parking lots. Its primary purpose is to help efficiently query access card data based on lot assignment or specific card number ranges. This article is intended for OPSCOM administrators.
Setup and Configuration
There is no specific configuration required to access this search tool, provided your administrative user role has the appropriate parking and permit management permissions enabled.
Using this Feature
Administrators can use this tool to filter and review access card assignments based on specific search criteria.
-
Hover over Parking Management and click Permit Management then Access Cards followed by Search.
-
Click the Lot Name drop-down menu and choose the lot you want to search.
-
Enter the numerical parameters in the Access Card Range fields to narrow down the search to specific cards.
-
Click the Retrieve button to generate the report.
Key Information Displayed
-
Search Results: Any access cards that match your search criteria will appear directly below the search fields, displaying the relevant card numbers and their associated assignment details.
Best Practices and Considerations
Lot Visibility: Only lots that currently have access cards associated with them will be listed in the Lot Name drop-down menu. If you do not see a specific lot, verify its setup within your lot configuration settings.
-
Targeted Searching: Utilize the Access Card Range fields when managing high-capacity lots to quickly find a specific card or a block of issued cards without needing to scroll through the entire lot inventory.
Clearing Items Awaiting Payment
Clearing Items Awaiting Payment and its associated system tasks allow administrators to view and automatically clear unpaid permits and lockers sitting in user shopping carts. Its primary purpose is to free up unpaid inventory by returning items to the system after a specified timeframe. This article is intended for OPSCOM administrators responsible for inventory management and system configuration.
How the Clearing Process Works:
The automated clearing process operates in two distinct stages to ensure unpaid inventory is returned to the system:
-
Individual Item Expiration (The Timer): The moment an item (permit or locker) is added to a user's cart, a rolling clock starts. The item expires based on the duration set in the Clear Payments After X Hours setting (for example, an item added at 1:00 PM with a 24-hour setting will expire at 1:00 PM the following day).
-
Periodic System Sweeps (The Task): The Clear - No Payment scheduled task runs periodically based on your configured schedule. When the task executes, it scans all active shopping carts and automatically removes only the items whose individual expiration timers have passed. Unexpired items remain in carts until the next scheduled sweep.
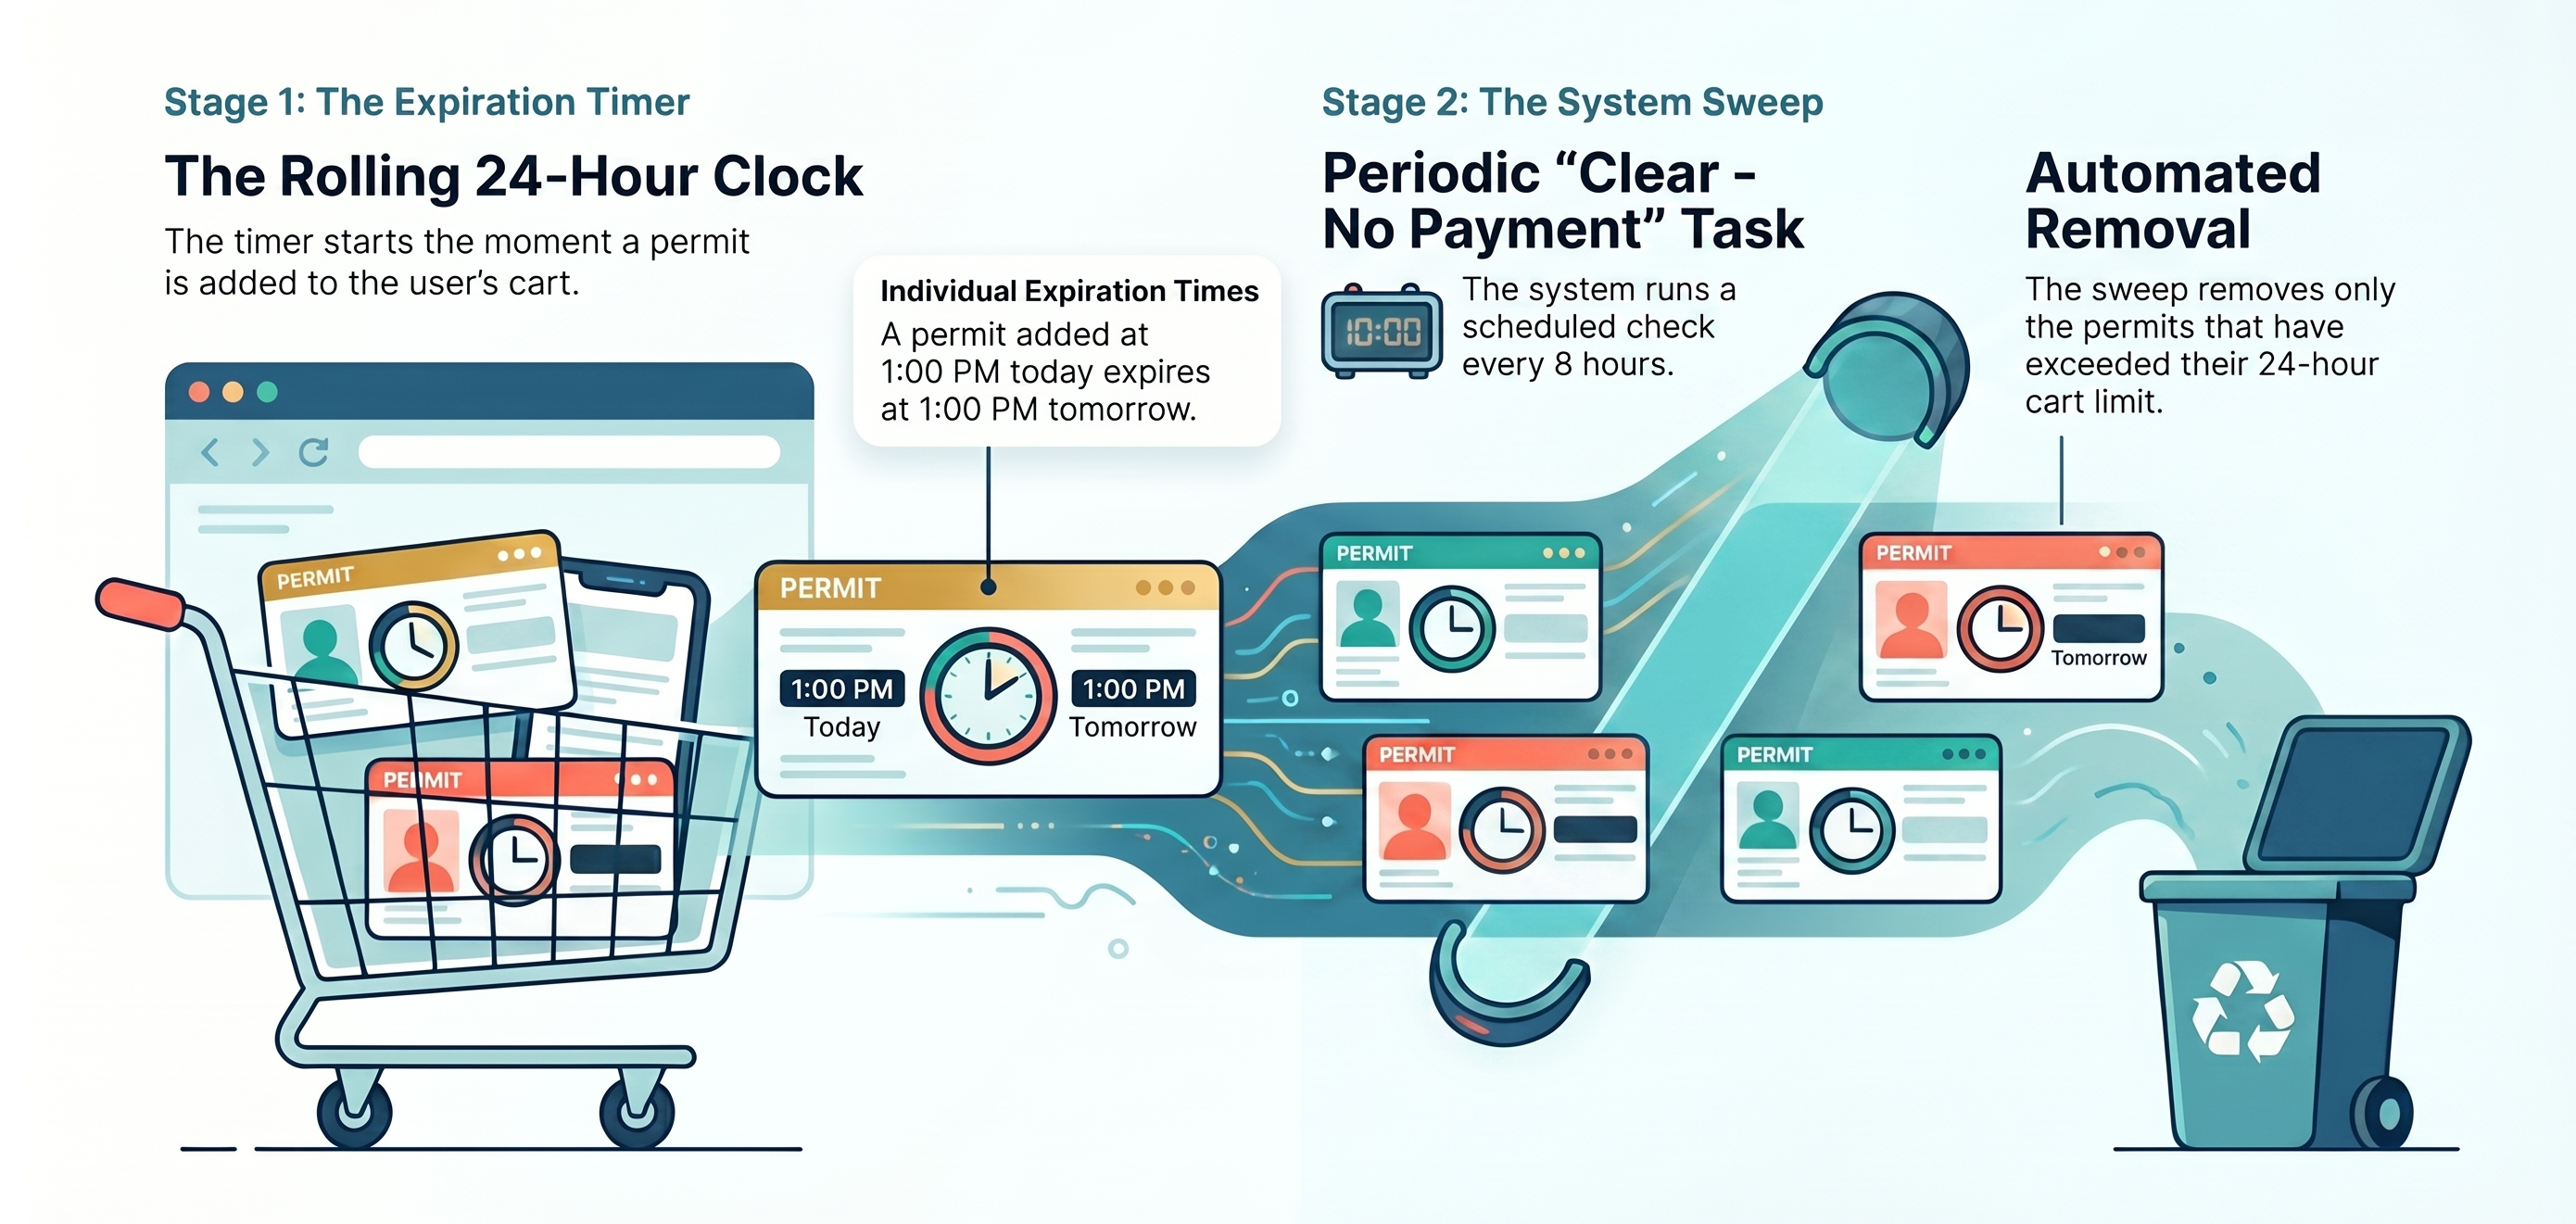
Setup and Configuration
To enable the automated clearing process for permits or lockers, contact support@ops-com.com to have the initial backend settings enabled for your environment (requires Primary Admin authorization). OPSCOM Support will configure the Clear Unpaid Permits toggle, Clear Unpaid Lockers at Midnight toggle, and the Clear Payments After X Hours timeframe on your behalf.
Once Support has enabled these underlying settings, administrators can manage and schedule the clearing task directly within the portal:
Once Support has enabled these underlying settings, administrators can manage and schedule the clearing task directly within the portal:
-
Click Tools, and then click View System Task Logs.
-
Locate the Clear - No Payment task.
-
Click the toggle switch to set it to Enabled.
-
Click the pencil (edit) icon next to the task to open the Edit schedule — Clear - No Payment pop-up modal.
-
Select your desired Schedule type (e.g., Daily at a set time) and set the execution time in the Run at field.
-
Click Save.
Using this Feature
Administrators can manually review the Midnight List for both permits and lockers to see which items are pending removal.
Viewing Permits without Payments
-
Hover over Parking Management, click Reports, and then click Midnight List.
-
Review the report displaying all users with permits in their cart that do not have an associated payment.
Viewing Lockers without Payments
-
Hover over Locker Management and click Midnight List.
-
Review the report displaying all users with lockers in their cart that do not have an associated payment.
Available Actions
From either Midnight List report, you can perform the following actions:
-
See items to be cleared: View the specific inventory sitting in the user's cart.
-
Email the affected users: Send a communication to users reminding them to complete their purchase.
-
Clear their flag: Remove the user from the Midnight List and update the queue.
Best Practices and Considerations
-
Excluded Inventory: Permits that have been rolled over (renewed) or assigned through a managed waitlist are excluded from the automated clearing process. These must be managed manually.
-
Zero Dollar Items: Zero-dollar items cannot be cleared using the Midnight List task. Instead, you must use the Mark Items as Paid functionality to clear these specific transactions from a user's cart.
Parking Logix - Parking Sensor Integration
This article outlines how to configure and enable the Parking Logix integration within OPSCOM, allowing administrators to sync parking sensor data for real-time monitoring and display. This feature is intended for OPSCOM administrators responsible for system configuration and user-facing parking maps.
Setup and Configuration
Follow these steps to integrate Parking Logix sensors with your OPSCOM system.
Enable Parking Logix Integration
Adding the Lot Group
-
Create a new lot group for each lot where you are collecting sensor data.
-
Enter the required API code when configuring each group.
-
Note: It is possible, though unlikely, to have multiple API keys if lot access is split across several keys.
-
-
Navigate to the Lot Administration tool.
-
Open the LPR Settings Tab for the desired lot.
-
Assign the previously created lot group to the lot.
Enable the System Task
-
Contact OPSCOM support by emailing support@ops-com.com to enable the required system task for sensor communication.
-
Once the system task is active, verify the integration by navigating to Manage Parking Lot Groups to confirm that lot counts are updating correctly.
Displaying the Map on the User Side
To display the parking map to end users, you must insert the integration short code into your site pages.
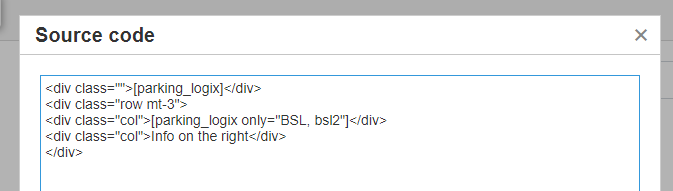
By design, the map will only display lots that have a group assigned and a valid API key stored.
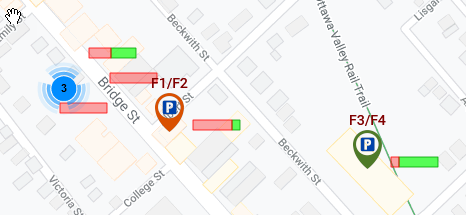
Best Practices and Considerations
-
Data Accuracy: Ensure that every lot intended for display is correctly linked to a lot group containing a valid API key, otherwise, the lot will not appear on the user-facing map.
-
Support Coordination: Because the system task must be enabled by the OPSCOM integration team, initiate your support request early in your setup process to avoid delays in data synchronization.
-
Parameter Usage: Use the filtering parameters within the [parking_logix] short code to provide users with a clean, relevant view of specific parking areas rather than the entire system inventory.
Viewing and Editing LPR Events
The License Plate Recognition (LPR) Capture Log is a tool designed to track, filter, and audit real-time and historical license plate reads. Its primary purpose is to help administrators monitor automatic data ingestion from fixed camera feeds as well as manual or mobile inputs from parking enforcement users. This article is intended for OPSCOM administrators.
Setup and Configuration
This reporting and auditing tool does not require any specific setup or configuration to function. Its capabilities are based on existing camera integrations, handheld device data, and the LPR permissions already assigned to your administrator profile.
Using this Feature
The LPR Capture Log consists of a comprehensive search interface and a detailed results table.
Hover over Violations and click LPR and Chalking then View Events to access the log.
Search and Filtering Interface
Use the top section of the log to locate specific plate records using the following fields:
-
Enter full or partial plate numbers in the Plate field. To perform a strict match, type the exact plate number (e.g., ABC123).
-
Enable the Perform Fuzzy Search checkbox to use approximate string matching, which helps catch optical character recognition (OCR) anomalies or close variations.
-
Click the Make drop-down menu and choose a specific vehicle manufacturer, or leave it as the default Any.
-
Click the Colour drop-down menu and choose a specific vehicle color, or leave it as the default Any.
-
Define a strict search window using the Start Date and Up To and Including date pickers.
-
Click the Toggle More Options button to expand the interface and reveal advanced metadata filters:
-
Cameras: Scroll and select specific physical entry or exit lanes to track exact movement patterns.
-
Event Type: Click the drop-down menu and choose Entry, Exit, Patrol, or Tracking.
-
Device Type: Scroll and select the software agent or integration platform delivering the data (e.g., ANY, PL8RDR / Vaxtor, or User / Other).
-
Key Information Displayed
Once your search is executed, the LPR Captures Results Table displays the following information:
| Column Name | Description |
| Actions | Provides interactive icons to manage the record. |
| Licence Plate Image | Displays the actual image of the captured license plate. |
| Permit | Displays an active permit badge icon if the plate is successfully cross-referenced with a valid parking permit. |
| Plate | Shows the license plate number detected by the camera or handheld device. |
| Make / Model / Color | Lists the declared vehicle descriptors (e.g., NISSAN / WHITE). |
| Writer | Identifies the intake route and assigned user or camera logic. |
| Source | Identifies the software module or entity passing the data. |
| Device | Dictates the hardware source classification, such as a fixed camera name or the handheld device name. |
| Recorded | Provides the exact timestamp log of the capture event. |
Visual Cues and Status Indicators
The Writer column utilizes specific icons and directional tags to quickly communicate how a read was captured:
-
Entry: Indicated by Green >> arrows (Fixed camera).
-
Exit: Indicated by Red << arrows (Fixed camera).
-
Tracking: Indicated by Yellow 🗘 arrows (Fixed camera).
-
Patrol: Indicated by a Blue star (Human writer / handheld device).
-
Actions Icons: Includes a Map/Location icon for viewing the GPS location and an Edit/Pencil icon for updating plate information.
Best Practices and Considerations
The Start Date and Up To and Including date parameters only restrict results generated by Pay Station data and LPR records. These filters do not retroactively filter out base vehicle profiles based on their original database creation date or account history.
-
Fuzzy Searching: Always use the Perform Fuzzy Search option if you are unable to locate a vehicle using an exact plate match. Dirt, weather, or lighting can occasionally cause cameras to misread a character (e.g., reading an "O" as a "0").
-
Tracking Vehicle Movement: When investigating a specific incident, use the Cameras and Event Type filters in tandem to track a vehicle's exact movement pattern through your facilities.
-
Data Verification: Use the Licence Plate Image provided in the results table to manually verify the plate characters if a user disputes a capture or violation.
Improve LPR Read Rates
The Improve LPR Read Rates guide provides administrators and enforcement personnel with instructions on how to physically and digitally optimize License Plate Recognition (LPR) cameras. Its primary purpose is to help increase the accuracy and speed of plate reads through physical adjustments, exposure tuning, bounding box modifications, and system configurations. This article is intended for OPS-COM administrators and enforcement staff.
Setup and Configuration
Optimizing your LPR read rates involves a combination of physical camera adjustments, web interface configuration, and handheld settings.
Physical Camera Setup
-
Optical Range: The sweet spot for plate reads is between 1.5 to 2.5 meters between the camera and the license plate.
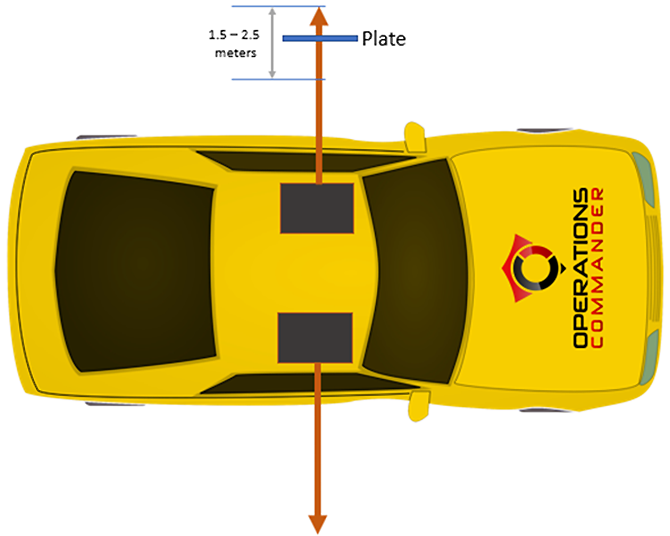
-
Camera Angle: Ensure the optimum angle for the camera is straight on (parallel) to the plate.
-
Maintenance: Always check to make sure the camera lens is completely clean and free of debris.
Web Interface Configuration
Administrators can use the web interface to fine-tune how the camera processes images and characters.
Adjusting Character Dimensions: You can tweak character dimensions to improve regional reads (for example, Ontario plates).
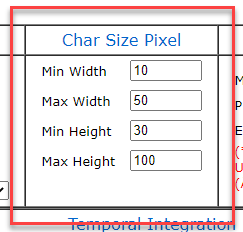
Improving Exposure for Dark Plates:
-
Set Max Shutter to 500.
-
Set Max Gain to 256. If images are too dark, this setting can be increased, but it is not recommended to exceed 1000.
-
Set Iris Level to 15.
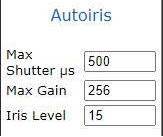
Adjusting the Bounding Box: The bounding box restricts the specific area analyzed by the LPR camera, ignoring unnecessary background information. Measurements for height are calculated from the top of the screen, and width from the left of the screen.
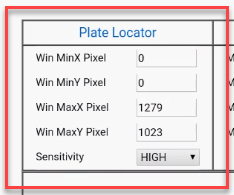
Once the bounding box settings are changed and you click the Apply button, the camera will reboot. This process will take a couple of minutes to complete before you can navigate away from the page.
Handheld Unit Configuration
For NOREAD results, you can adjust settings directly on the Android handheld device to process vanity plates or challenging reads.
-
Tap System Settings.
-
Tap Include NOREAD (ie. vanity) Results.
-
Set the percentage to 50% to start.
-
Tweak this percentage later based on how the system reacts in the field.
Using this Feature
The LPR system utilizes advanced algorithms and human corrections to continually improve its read accuracy during daily operations.
Fuzzy Searching
The PL8-RDR system inherently supports fuzzy searching based on user-supplied values. If the LPR system "sees" ABC123, it will automatically validate against similar visual patterns such as A8C123, ABC128, or A8C12B based on time of day and active permits.
Manual Corrections
You can actively improve plate reads by making manual corrections and verifying correct plates on the system. The system uses an algorithm that includes your human updates as part of its read score. Therefore, if a plate is consistently misread and corrected by an administrator or guard, it is highly probable that the system will return the human-updated version in the future.
If you see a score of 100% in the LPR report, that indicates the system determined a human-updated version was the best match. A raw algorithmic read score of 100% is theoretically impossible with standard LPR cameras.
Best Practices and Considerations
-
Optimize the bounding box: By selectively adjusting the bounding box settings, you can heavily customize the area processed by the LPR read. Focusing the camera on a smaller area forces it to ignore surrounding noise, resulting in faster and significantly more accurate reads.
-
Balance NOREAD noise: While increasing the NOREAD percentage on the handheld can help identify vanity plates, it may also introduce more system noise. Monitor the results and find a balance that captures valid plates without overwhelming the user with false reads.
-
Avoid excessive gain: When adjusting exposure, never increase the Max Gain setting over 1000. Excessive gain will introduce heavy digital noise, actively degrading the camera's ability to perform OCR (Optical Character Recognition).
LPR Audit Log
The LPR Audit Log allows administrators to view and track License Plate Recognition (LPR) camera and chalking events. Its primary purpose is to help monitor entry, exit, patrol, and tracking activities across the parking system. This article is intended for OPSCOM administrators responsible for monitoring LPR activity and auditing vehicle movements.
Setup and Configuration
There is no specific setup or configuration required to use the LPR Audit Log, provided your administrative user role has the appropriate permissions to view LPR and violation data.
Using this Feature
The LPR Audit Log provides a centralized view of all LPR-related events, along with filtering tools to help you find specific records.
- Hover over Violations and click LPR and Chalking then View Audit Log.
- Review the initial screen to see the default audit log display.
- Click Toggle More Options to expose the filtering capabilities.
- Select a specific camera from the Camera selection drop-down menu to filter by location.
- Select a specific event from the Event type drop-down menu to narrow the search results.
Event Type Definitions
When filtering by Event type, you can select from the following five categories:
-
Any Event: Displays all recorded LPR actions across the system.
-
Entry Events: Displays records of vehicles entering a monitored area.
-
Exit Events: Displays records of vehicles exiting a monitored area.
-
Patrol Events: Displays LPR chalking records captured by a Patrol Officer using a handheld unit.
-
Tracking: Displays records from cameras configured to track internal movement, such as a vehicle moving from one floor of a multilevel parking garage to another.
Best Practices and Considerations
-
Targeted Filtering: Use the Camera selection and Event type filters combined to quickly drill down into specific data. This is particularly useful in high-traffic environments where searching without filters may yield an overwhelming number of results.
-
System Monitoring: Regularly review the audit log to verify that both stationary LPR cameras and handheld units are successfully capturing and transmitting data to the system.
-
Handheld Unit Data: Keep in mind that Patrol Events are directly tied to the actions of officers on the ground. Auditing these specific events can help verify patrol routes and coverage times.
The Validator - a Parking Validation Utility
The Validator tool allows administrators to quickly issue temporary parking validations for specific lot zones based on vehicle license plates. Its primary purpose is to help manage guest or temporary parking permissions efficiently, ensuring compliant access for authorized visitors without requiring a full permit purchase. This article is intended for OPSCOM administrators and designated parking validators.
Setup and Configuration
Before staff can use the validation utility, administrators must configure the appropriate roles, assign users, and ensure lots are properly zoned.
Configuring Roles and Users
-
Create a new role specifically for validation staff (e.g., "Parking Validator"). For detailed instructions, refer to the Managing Roles and Permissions page.
-
Add the Create Temp Permit Entries permission to this new role.
-
Create or edit an administrative user profile for the staff member who will manage validations.
-
Assign the newly created validation role to the user.
-
Select the specific lot zones this user is authorized to manage and save the profile.
Configuring Lot Zones
-
Hover over Parking Management and click Lot Administration then Pricing & Lot Admin.
-
Click the specific lot name to open its settings.
-
Click the Zone & Location tab and select the zone associated with the lot to link it to the validator utility.
The zones assigned to the validator's administrative profile must match the zones configured within the specific lots for the tool to function correctly.
Using this Feature
The validation tool can be accessed via the desktop portal, and the resulting permissions are verifiable in real-time by enforcement officers using the Android handheld application.
Creating a Validation Record (Desktop)
-
Log in to the OPSCOM admin portal. Users with restricted, validation-only access will only see the Create Validations menu item.
-
Click Create Validation Records to open the utility.
-
Enter the required license plate numbers into the provided field.
-
Enter a comment for record-keeping purposes.
-
Click the lot zone drop-down menu and choose the area where the vehicle is permitted to park.
-
Select the valid date range for the permission to be in effect.
-
Set the valid time frame by selecting the appropriate hourly blocks (e.g., selecting blocks from 7 AM to 7 PM).
-
Select the specific days of the week you wish the validation to be in effect.
-
Click the Validate button to apply the permission.
Key Information Displayed & Advanced Features
-
Validation List: A list of all successfully validated vehicles will appear directly below the submit form for quick reference.
-
Advanced Access: Administrators with full system access will see additional features beyond the basic creation tool, including the ability to run validation reports and manage existing validation records.
Viewing Validations on Android Handhelds
Enforcement officers can verify these temporary permissions directly from the field.
-
View the active vehicle list. Parkers who are validated through this tool will appear as a Temp Parker on the Android version of OPSCOM.
-
Tap the specific plate number to open an expanded view detailing the validator-created permission and the associated lot zone.
-
Tap the green Validator rectangle to trigger a pop-up showing the validation reference number and the exact expiry date of the permission.
Best Practices and Considerations
-
Restricted Access: Create a dedicated, restricted role for staff who only need to validate parking (such as receptionists or event coordinators). Limiting their access to the validation tool prevents unauthorized changes to broader system settings.
-
Time Frame Blocks: Remember that the time frame selection blocks represent full hours. Always verify your selected blocks completely cover the intended visit duration to avoid accidental citations.
Branding the Validator Tool
This article outlines how to customize the visual appearance of the Validator Tool pages using the system messaging editor. This allows organizations to brand the validator interface with custom headers, text, and layouts to provide a consistent user experience. This guide is intended for OPS-COM administrators responsible for system configuration and design.
Setup and Configuration
To customize the look and feel of the Validator Tool, you must first access the specific system messages associated with these pages.
-
Hover over System Configuration and click Content & Designs then Pages and Content Blocks.
-
Click the Messages tab to access the list of editable system messages.
-
Locate the three specific messages used for the Validator Tool:
-
Validator Entry
-
Validator Manage
-
Validator Report
-
Using this Feature
Administrators can edit the content and layout of the Validator Tool pages using either a visual WYSIWYG editor or direct HTML code.
-
Click the Edit button next to the specific Validator page you wish to modify.
-
Enter a descriptive title for your page in the Title field.
-
Enter a unique identifier for the page in the appropriate field.
-
Select the desired language setting for your page.
-
Modify the page layout and design using the visual WYSIWYG editor.
-
Click the Tools menu and select <>Source code if you prefer to edit the page using straight HTML.
-
Save your changes to apply the new branding to the selected Validator page.
Best Practices and Considerations
-
Unique Identifiers: The identifier entered on the edit screen must be completely unique to prevent page routing conflicts within the system.
-
Image Sizing: When adding a main graphic or header image, it is best practice to maintain a consistent width of 1448 pixels, though the height can be adjusted to your preference (e.g., 227 pixels).
-
File Management: Before inserting a custom graphic into your page design, be sure to upload the preferred image to your system's Files Folder using the Manage Files functionality.
Managing Validator Records
This article outlines the process for adding and managing parking validations using the Validator Tool. Its primary purpose is to allow administrators to manually validate parking for specific vehicles and remove incorrect validation entries to maintain accurate reporting. This guide is intended for OPSCOM administrators.
Setup and Configuration
There is no specific configuration required to manage validator records, provided your administrative user role has the appropriate permissions to access the Parking Validation tools.
Using this Feature
The Validator Tool allows administrators to quickly assign validations to vehicles and manage existing entries if an error was made during data entry.
Adding a Validation Record
-
Enter the vehicle's license plate in the Plate field.
-
Click the Lot Zone drop-down menu and choose the appropriate lot.
-
Enter the required time frame in the Valid Between Dates fields.
-
Click the Validate button to create the record.
Once a record is successfully created, it will automatically appear in the Validate Parking Report.
Deleting a Validation Record
If an entry was made in error, it can be removed using the management tool.
-
Hover over Parking Management and click Parking Validation then Manage Validations.
-
Enter the Plate Number and select the Lot Zone associated with the record you wish to locate.
-
Click the Delete button next to the relevant record to select it with a checkmark.
-
Click the Archive button when prompted to confirm the removal.
A pop-up message will appear confirming the deletion of the record. Once archived, the record is immediately removed from the Validate Parking Report.
Best Practices and Considerations
-
Data Accuracy: Double-check plate numbers and lot zones before submitting a validation. Ensuring data accuracy at the point of entry reduces the administrative overhead of manually deleting and recreating records.
-
Audit Trails: Regularly review the Validate Parking Report to ensure that active validations are legitimate. While deleted records are removed from standard reports, utilizing proper archive procedures ensures system data integrity is maintained behind the scenes.
Validator Admin Groups
The Validator Admin Groups article outlines how to configure, manage, and assign permissions for the Validator Tool. Its primary purpose is to allow administrators to effectively organize validation groups, assign specific roles, and define management zones for permit validation operations. This guide is intended for OPS-COM administrators.
Setup and Configuration
Configuring validator groups involves creating the core group structures, adding members, and assigning management zones to individual administrators.
Admin Side: Administrators must completely configure these groups and permissions before staff can effectively use the validation tools.
User Side: End-users do not interact with validator groups or backend administrative permissions.
Creating a Validator Group
-
Hover over System Configuration and click Admin Management then Manage Groups.
-
Click the Parking Validator module.
-
Click the Add New button in the top right corner.
-
Complete the Group Name, Module, Validator Comment, Admin Members, and Default Validation Hours fields in the newly opened window.
-
Click the Save Group button.
The Default Validation Hours value serves only as an automatically populated preset. There is currently no way to enforce a strict limit, and administrators may manually override this duration.
Adding Members to a Group
-
Hover over System Configuration and click Admin Management then Manage Groups.
-
Click the Edit button next to the relevant Administrator Group.
-
Click on the Admin Members bar to select and add additional members.
-
Click the Save Group button at the bottom of the page.
Zones and How They are Assigned
-
Hover over System Configuration and click Admin Management then Edit Admin Users.
-
Select the specific Admin User you wish to edit.
-
Scroll to the bottom of the page to the Parking Validation Lot Zones window.
-
Select the specific zone or zones that this administrator will manage.
-
Click the Update User button to finalize the changes.
Using this Feature
The Validator Tool utilizes distinct roles to accurately manage access to system data and dictate deletion capabilities. Understanding these roles is critical for secure system operation.
| Role | Access & Deletion Capabilities |
| Super Admin | Has full access to all groups. Can view all current, pending, past, and archived validations, and delete entries at any time. |
| Group Manager | Can view their own groups and associated current/pending validations. Can delete entries pre-validation and up to 15 minutes past the start date. |
| Validator Admin |
Can view and delete their own entries pre-validation or within the 15-minute grace period. |
| Validator Entry |
Can delete any future, current, or past validations. |
Best Practices and Considerations
-
Enable Grace Periods: Set up a 15-minute grace period on deletions in your system settings. This highly recommended setting allows a current validation to be easily deleted up to 15 minutes past the start date in the event of an administrative input error.
-
Configure Visibility Rules: If an Admin name is strictly required for searches, ensure All Admins or individual admins within their group are correctly configured. Proper configuration ensures consistently accurate search results across the system.
Archived information is not purged from the system. While archived entries are functionally considered deleted from active views, the historical data is permanently retained to maintain system data integrity and auditing capabilities.
Validate Parking Report
The Validate Parking Report allows administrators to view and export historical records of parking validations within a specified timeframe. Its primary purpose is to help track, review, and audit validation activity across your system. This article is intended for OPSCOM administrators responsible for managing and auditing parking validations.
Setup and Configuration
Before an administrator can access this report, they must have the correct permissions assigned to their user role.
Using this Feature
Follow these steps to generate and view the Validate Parking Report.
- Hover over Parking Management and click Parking Validation Report.
-
Enter the desired date range into the search fields to define your reporting period.
- Click the Search button to generate the record listing.

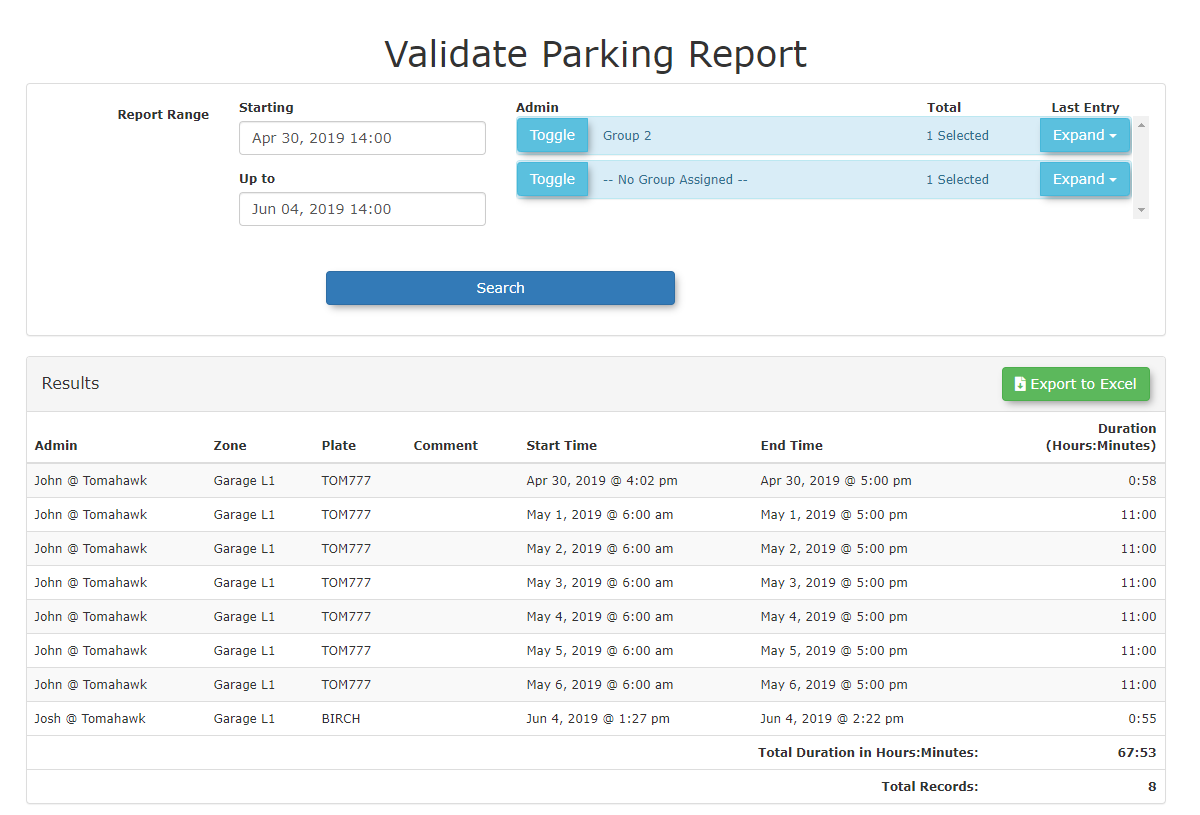
Available Actions
-
Onscreen Viewing: Once generated, the validation records will be displayed directly onscreen for quick review.
-
Data Export: You can export the generated record listing as an Excel file for deeper data analysis and external record-keeping.
Best Practices and Considerations
Excel Exports: Exporting your report data to Excel is highly recommended if you need to filter, sort, or share validation records with external stakeholders or accounting departments.
-
Regular Auditing: Regularly export and review the Validate Parking Report to monitor validation usage, spot any anomalies, and ensure that validation privileges are being used appropriately by your staff.
-
Targeted Searches: When investigating specific validation events, use narrow date ranges to reduce the report generation time and make the onscreen data easier to navigate.
Hang Tag Printing
The Hang Tag Printing feature allows administrators to batch search, email, and physically print parking permit hang tags. Its primary purpose is to streamline the distribution of physical permits by generating appropriately formatted print files that fit standard windowed envelopes and perforated hang tag paper. This article is intended for OPS-COM administrators responsible for permit fulfillment and physical tag distribution.
Setup and Configuration
This feature relies on existing permit data and user profile configurations. However, specific physical printer settings must be configured locally to ensure the hang tags print correctly.
Admin Side: Administrators must configure their local web browser print settings to match the required margins before printing. Do not select the "Shrink to Fit" setting; instead, always use "100%" scale.
Recommended Printer Margins:
| Margin | Inches | Millimeters |
| Left | 0.88 | 22.35 |
| Right | 0.254 | 6.45 |
| Top | 0.96 | 24.38 |
| Bottom | 0.169 | 4.29 |
User Side: End-users must have the correct mailing address properly filled out on their profile if the permits are being physically mailed to them.
Using this Feature
Administrators can use the following instructions to retrieve, email, and print physical hang tags.
Retrieving Permits for Printing
-
Hover over Parking Management, hover over the Permit Management icon, and click Hang Tag Printing.
-
Select the specific time period from the Semester drop-down menu on the Vehicle Hang Tag Printing screen.
-
Select the files that you want to retrieve for printing.
-
Enable the checkbox if you only want to print tags for which the payment has been fully processed.
-
Select the lot from the Permit Lot Name drop-down menu, or enable the corresponding checkbox to disregard the lot type.
-
Select the distribution method and the permitted range.
-
Click the Retrieve button to submit the search criteria.
Visual Cues & Status Indicators The search results will display below the criteria fields. Any permits that were paid via Payroll Deduction will be visually highlighted in the results list.
Available Actions and Buttons
Once your list is generated, you can interact with the results using the following options:
-
Username: Click this link to see an overview of the user. You can also select the User Profile icon to open their complete user profile.
-
Permit Number: Click this link to open the parking permit information screen.
-
Select All / Deselect All: Click these buttons to quickly manage your bulk selections for printing or emailing.
-
Email Selected: Enable the Email checkboxes next to the desired users and click this button to send the hang tag digitally. Fill in the details of your email in the resulting prompt.
-
Print Selected Hang Tags: Enable the Print checkboxes for the desired users. If you do not want to include an expiry date, enable the Do not print date checkbox. Otherwise, select the expiry date to be printed on the hangtag and click this button. This action opens a new window displaying the username and address (positioned to fit in a windowed envelope) in the top left, the lot long name and permit number in the top right, and the actual permit at the bottom.
Best Practices and Considerations
-
Verify user address settings: In order for the correct address to display on the hangtag, you will need to have the Mail Permit to field selected on the user's profile, and the corresponding address fully completed. For example, if you select Local Mailing Address as the destination, but the user only has their Personal Mailing Address completed, the address will securely remain blank and will not print on the hangtag. See the Edit User Profile guide for details.
-
Optimize your physical materials: Consider using perforated paper to make it easier for users to remove and display the permits. The empty space on both sides of the paper can be pre-printed to provide parking information, rules, and regulations to your users. Some organizations also purchase custom holograms to apply to the printed permit for added security.
-
Check printer scaling: Always select the print option from your browser (Ctrl+P) and ensure your scale is set to exactly 100%. Incorrect scaling will cause the printed address to misalign with physical windowed envelopes.
Printing Permit from Home Setup
The Permit Printing from Home feature allows end-users to generate and print a physical copy of their parking permit directly from the user portal. Its primary purpose is to provide administrators with the tools to configure printable permit templates and enable self-service printing to streamline permit distribution. This article is intended for OPS-COM administrators.
Setup and Configuration
Configuring this feature is a two-part process. Administrators must first enable the feature within the system settings and then customize the associated print templates.
Admin Side:
-
Hover over System Configuration and click System Settings.
-
Click the Permits tab.
-
Enable the Enable User Permit Printing checkbox.
-
Click the Save Settings button.
Locating the Permit Print Templates:
The printable permits are generated from standard system messages.
-
Hover over System Configuration, click Content and Design, and then click Pages and Content Blocks.
-
Click the Messages tab.
-
Locate and edit the messages where the System Location column is labeled permitPdf (for regular printed permits) and permitTempPdf (for temporary printed permits).
User Side: Once the global setting is enabled, users will see a new option to print their active permit directly from the user portal interface. For a detailed guide on the user-facing process, please refer to the Printing Your Parking Permits Made Easy! article.
Using this Feature
Administrators interact with this feature primarily by designing and updating the system message templates that generate the final PDF document.
Use the content editor on the permitPdf and permitTempPdf messages to design the layout of your printable permit. You can freely use a combination of text, images (like your organization's logo), and specific shortcodes to dynamically pull in live permit and user information.
Available Shortcodes
The following shortcodes can be inserted within the message body to display dynamic permit information:
-
[permitpdf user=fullname]: Displays the full name of the user.
-
[permitpdf vehicle=all]: Displays a comma-separated list of up to three associated vehicles.
-
[permitpdf vehicle=1]: Displays the first vehicle on the permit. You can also specifically use vehicle=2 or vehicle=3.
-
[permitpdf permit=expiry]: Displays the permit's exact expiry date.
-
[permitpdf permit=permitno]: Displays the unique permit number.
-
[permitpdf permit=lotshortname]: Displays the short name of the associated lot.
-
[permitpdf permit=lotname]: Displays the full name of the associated lot.
-
[permitpdf permit=location]: Displays the location associated with the permit.
To quickly use the recommended default template provided by the system, you can leave the content editor body as the default text. However, ensure you actively edit the document to change any placeholder logos or generic company names to match your specific organizational branding.
Best Practices and Considerations
-
Always test your template before deploying: After creating your message, print it out to ensure the layout, shortcodes, and any images appear correctly on a physical page. Virtual PDFs can sometimes render slightly differently than printed paper, so physical testing prevents scaling or cutoff issues.
-
Include clear display instructions for the user: It is highly recommended to add text to the template that explicitly instructs the user on how to display the permit. Clear instructions (e.g., "Please display this permit face-up on the driver's side of your dashboard so it is fully visible through the windshield") significantly aid your enforcement team in the field.
Zebra Sticker Printers
The Zebra Sticker Printers feature provides a comprehensive guide for configuring dedicated Zebra sticker printers for use with the OPSCOM Admin Portal. Its primary purpose is to enable the accurate printing of physical permit stickers by setting up a custom layout, system messages, and local printer settings. This guide is intended for OPSCOM administrators responsible for hardware setup and permit fulfillment.
Setup and Configuration
This is a one-time, multi-phase setup process. It is highly recommended to complete all phases in the specified order before attempting to print your first sticker.
Phase 1 Create the OPSCOM Layout Template
-
Hover over System Config and click Templates & Design.
-
Click the Create Layout button on the Layouts List page.
-
Enter a descriptive name for the layout (e.g., Zebra Printing) in the Name field and click the Save Changes button.
-
Click Toggle Templates on the next screen and create a Styles section and a Scripts section.
-
Copy the provided styling and script code into the corresponding sections for each language you wish to support.
Phase 2 Create the System Message
Phase 3 Configure Windows Printer Drivers
-
Open Windows Settings and navigate to Devices, then Printers & Scanners.
-
Select your Zebra printer and click the Manage button.
-
Click Printer Properties and go to the Stocks tab.
-
Click the New... button to define a new stock that matches your sticker label dimensions exactly.
Phase 4 Configure Browser Print Settings
Before proceeding, you must temporarily disable the auto-print script. Navigate back to your layout template in OPSCOM (System Config then Templates & Design) and comment out the code in the Scripts section. This will prevent the sticker from automatically printing and allow you to adjust the necessary browser settings.
-
For Chrome: Adjust the print settings to match the required configuration, paying close attention to margins and ensuring headers and footers are disabled.
-
For Firefox: Open the print menu and adjust the page properties to match the required configuration, focusing on orientation, scale, and margins.
Using this Feature
Once all configuration steps are complete, administrators can use the following instructions to print permit stickers directly from the Admin Portal.
Best Practices and Considerations
-
Double-check local print settings: Incorrect Windows driver or browser print settings are the most common cause of printing issues. Always double-check that your margins, headers/footers, and paper/stock size are configured exactly as required for your specific sticker labels.
-
Understand template roles: Ensure both the Layout Template and System Message are configured correctly. The Layout Template exclusively controls the styling and printing action, while the System Message controls the actual content and data that appears on the printed sticker. Both must be accurate for the integration to work seamlessly.
Extend Your Parking
The Extend Your Parking feature sends automated expiration notifications to users, giving them the opportunity to extend their active temporary parking permits before time runs out. System administrators can configure a global default notification time, while registered end-users can customize their personal notification preferences. This article is intended for OPSCOM administrators.
Setup and Configuration
Administrators establish the system-wide default lead time for permit expiration notices. Note that users can overwrite the default setting by signing into their account.
Setting the Default Notification Time
-
Open the System Configuration menu.
-
Select System Settings.
-
Under the Components list on the left side, click Temp Permits.
-
Locate the Default Permit Notification Time drop-down menu.
-
Choose your desired default lead time (e.g., 10 Minutes prior to expiration).
-
Click Save Settings.
Best Practices and Considerations
-
User Preference Overrides: A user's personal profile selection Parking Expiry Reminder will always take precedence over the global Default Permit Notification Time.
-
Account Requirement: Expiration notifications and extensions apply only to signed-in, registered users. Guest checkouts do not support reminders or extensions.
-
Supported Channels: Applies to temporary permits purchased via the User Portal, Real-Time Parking Map, or QR Code express checkout.
-
Recommended Setting: A lead time of 10–15 minutes gives users sufficient time to process an extension before permit expiration.
Violations/Citations and Appeals - OPSCOM ViolationAdmin
OperationsCommander works hard to maintain an up to date product wiki! If you have any questions or if you feel something is missing, post about it in the community.
Violations From Static Cameras / Mailout Violations
The Violations From Static Cameras feature allows administrators to generate parking infractions based on chalk records captured by static License Plate Recognition (LPR) cameras. Its primary purpose is to automate the identification of unauthorized or overtime vehicles, streamlining the workflow for issuing mail-out violations. This article is intended for OPSCOM administrators.
Setup and Configuration
Before you can actively generate violations from static camera logs, there are system prerequisites that must be met and initial mapping that must be configured.
Ensure that the OPSCOM support team has configured your static cameras with the necessary settings to report on the correct lot group and GPS location. Additionally, if you need to change your default ticket prefix (e.g., TT-), you must contact support@ops-com.com to have this adjusted.
Admin Configuration
Using this Feature
Once configured, static camera logs will populate in the system as they are captured, allowing administrators to filter the data and issue violations accordingly.
-
Hover over Violations, hover over LPR and Chalking, and click Create Violations From Static Cameras.
-
Click the Report Type drop-down menu to filter the logs (e.g., choose No Permit & Over Lot Time to only list vehicles that have no permits and have exceeded the lot group's free parking duration).
-
Click the Vehicle Status drop-down menu to further segment the search results based on system registration.
-
Click a specific log row from the generated list to display the violation entry form.
-
Review the entry and exit camera images provided to verify the chalk record.
-
Enter the required infraction details into the form and submit the violation.
Key Information Displayed
-
Vehicle Status Filters:
-
All: Returns all captured plates, regardless of their registration status in the system (this is the default setting).
-
In System: Filters the results to only show vehicles or plates that currently exist in the database.
-
Not in System: Filters the results to only show unknown or unregistered vehicles and plates.
- Registered Users: Filters the results to only show plates that are actively tied to a registered user or driver in the system.
-
- Weekdays Only: When checked, this filter restricts the search results to only show chalk records where both the vehicle's entry and exit occurred between Monday and Friday.

-
Vehicle Record Formats: Vehicles can appear on the creation screen in one of three formats: no existing vehicle record, a single vehicle record, or multiple vehicle records. The violation creation screen will dynamically adjust based on which format is detected.
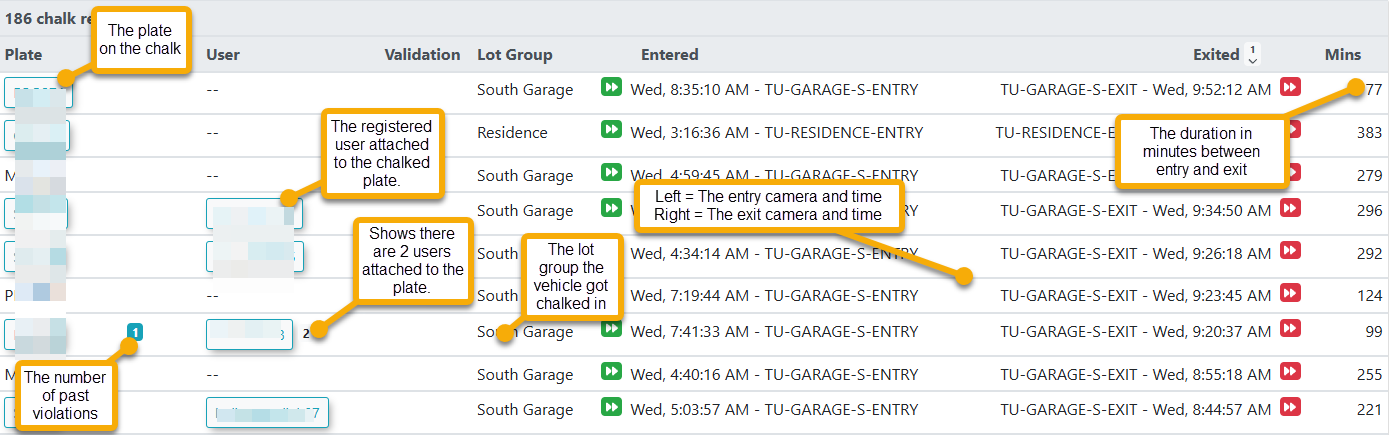
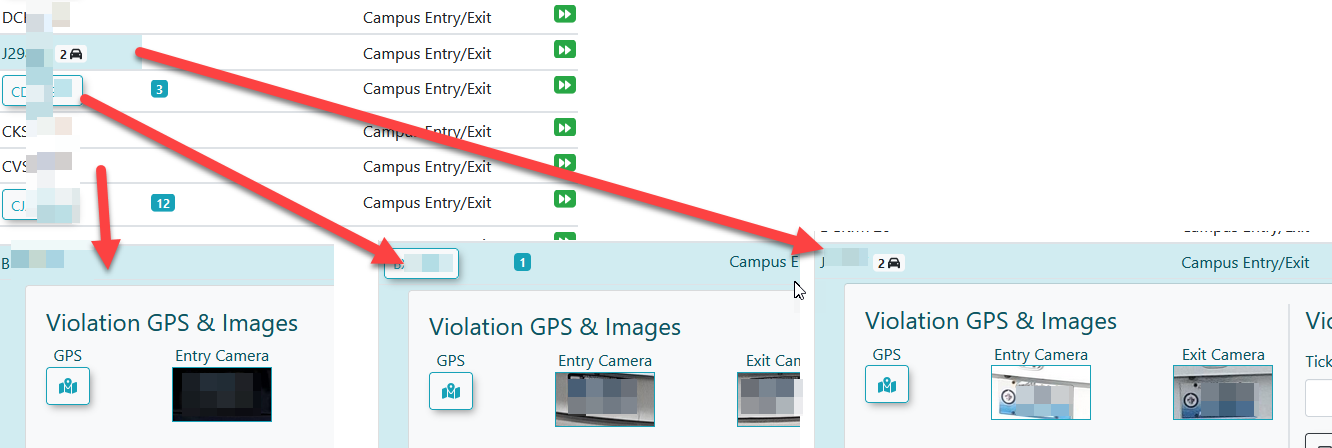
Best Practices and Considerations
-
Verify Photographic Evidence: Always review the entry and exit camera images carefully before finalizing a violation. Confirming that the LPR text accurately matches the physical license plate in the photo prevents easily appealed administrative errors.
-
Automated Log Management: Once the violation details are entered and successfully submitted, the chalk record will automatically disappear from the processing list. The newly created violation can then be found and managed using standard system search tools.
Spoiling a Violation
The Spoiling a Violation feature allows administrators to void or invalidate an issued parking ticket within the system. Its primary purpose is to help correct enforcement errors or dismiss a ticket that was issued incorrectly, effectively removing its active penalty status. This article is intended for OPSCOM administrators.
Using this Feature
Administrators can manually change the status of an active ticket to spoiled by editing the specific violation record.
1. Search for the specific violation using the Quick Search or Violation Search tool.
2. Click the Ticket # link from the search results to open the violation details.

3. Click the Edit button located at the top right of the violation screen.
4. Click the Spoiled drop-down menu and choose Spoiled (changing it from the default Valid - not spoiled).
5. Click the Submit button to save the updated violation details.
Once submitted, the ticket will be successfully updated and will display as Spoiled the next time you query it in a search.
Best Practices and Considerations
-
Audit Trails: Always add a descriptive note or comment to the violation record when changing its status. Documenting the specific reason for voiding a ticket (e.g., officer error, successful appeal, duplicate entry) creates a reliable audit trail that can be referenced if there are questions regarding the user's account history.
-
Financial Impact: Remember that once a violation is successfully spoiled, any associated fines or financial penalties are completely nullified. Verify your changes through the search tool to ensure the ticket status correctly displays as Spoiled so the user is no longer held financially responsible.
Cancelling a Violation
The Cancelling a Violation feature allows administrators to formally dismiss an issued parking ticket within the system using the internal appeals workflow. Its primary purpose is to help correct enforcement errors or process an approved appeal, effectively voiding the ticket and removing any associated financial penalties from the user's account. This article is intended for OPSCOM administrators.
Setup and Configuration
There is no specific system setup or configuration required to use this feature. Cancelling a violation is a standard administrative action available to users with the appropriate violation management and appeals permissions enabled on their account.
Using this Feature
Administrators can manually cancel an active ticket by accessing the appeals section within the specific violation record.
1. Hover over Violations and click Search.
2. Enter the specific ticket number into the Search Text field.
3. Click the Search using only text button.
4. Click the Ticket Number link from the search results to open the violation details.

5. Click on the Edit button
6. Click on the Show Appeals Form link to reveal the administrative action fields.
7. Click the Fine Action drop-down menu and choose Cancelled.
8. Enter the reason for the cancellation into the Appeal Admin Comment field.
8. Click the Update this Violation button to finalize the status change.
Visual Cues and Status Indicators
-
Confirmation Message: Upon successful completion of the steps above, a pop-up message will display in the top right corner of your screen stating that the "Violation has been updated."
Best Practices and Considerations
Appeals Form Utilization: Even if a user did not formally submit an online appeal through their user portal, administrators still utilize the Show Appeals Form section to process a backend cancellation. This ensures the administrative decision and reasoning are officially recorded in the system.
-
Audit Trails: Always provide a clear and detailed reason in the Appeal Admin Comment field when cancelling a ticket. Documenting the specific reason for the dismissal (e.g., successful appeal, valid permit verified, officer error) creates a reliable audit trail for future reference.
-
Financial Impact: Remember that cancelling a violation immediately removes the financial liability from the user. Ensure you have the proper authorization or documentation before updating the fine action to prevent unauthorized dismissals.
Hiding Zero Dollar Violations
The Hiding Zero Dollar Violations setting allows administrators to automatically filter out violations that carry no financial penalty from standard views and searches. Its primary purpose is to declutter the system interface and streamline reporting by only displaying actionable, fine-bearing tickets. This article is intended for OPSCOM administrators responsible for system configuration.
Setup and Configuration
Administrators can enable this global filter directly within the core system settings.
- Hover over 'System Config' and click 'System Settings'
- Click 'Violations' to open the specific Violations settings menu.
-
Enable the Hide Zero Dollar Fines checkbox to automatically hide zero-dollar violations across the system.
- Save your changes to apply the new configuration.
Using this Feature
Once this setting is enabled, no further daily interaction is required. Zero-dollar violations will automatically be excluded from standard administrative searches, ticket lists, and general reports, allowing your team to focus exclusively on violations requiring payment or active follow-up.
Best Practices and Considerations
Data Retention: Keep in mind that while zero-dollar violations are hidden from general administrative views, they are not deleted. They remain permanently recorded in the system backend for auditing purposes and are still factored into automated repeat offender tracking logic.
-
Warning Workflows: Carefully consider your organization's warning workflows before enabling this setting. If your enforcement team frequently issues zero-dollar tickets as formal warnings and requires administrative staff to actively review, process, or appeal these specific records, it is best practice to leave this setting disabled to ensure complete visibility.
Search Repeat Offenders Report
The Search Repeat Offenders report allows administrators to identify vehicles and users that have accumulated multiple parking violations. Its primary purpose is to help enforcement teams track chronic offenders, manage warnings, and apply appropriate penalties or towing actions. This article is intended for OPSCOM administrators.
Setup and Configuration
There is no specific system setup or configuration required to use this report. Access to the Search Repeat Offenders page is a standard administrative feature available to users with the appropriate violation management and reporting permissions enabled on their profile.
Using this Feature
Administrators can use this reporting tool to filter violation data and output specific counts based on either the vehicle or the user profile.
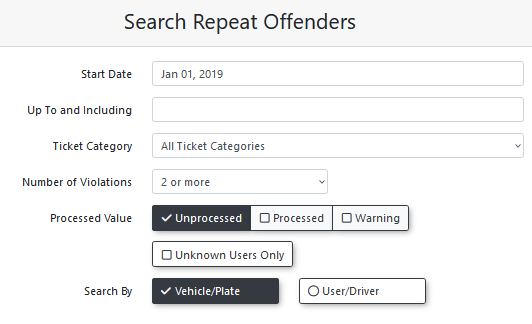
-
Hover over Violations and click Search Repeat Offenders.
-
Enter specific dates into the Start Date and End Date fields to specify the date range in which the violations were received.
-
Click the Ticket Category drop-down menu and choose a specific violation category to narrow the results.
-
Under Search Criteria, select either:
-
Number of Violations: Flags offenders based on ticket frequency. Choose a minimum threshold from the Number of Violations drop-down menu (e.g., 2 or more).
-
Total Cost: Flags offenders based on monetary value. Enter a minimum dollar threshold into the Total Cost field (e.g., $200).
-
-
Click the Processed Value check boxes and choose Unprocessed, Processed, or Warning to categorize violations based on their current status.
-
Enable the Unknown Users Only checkbox to exclusively show violations assigned to vehicles without a known user tied to them.
-
Click the Search By drop-down menu and choose Vehicle/Plate or User/Driver to determine how the output data will be grouped.
-
Click one of the green export buttons located at the top right of the search results to export the data in your chosen format.
Key Information Displayed
The data grouped in the output varies depending on whether you selected Vehicle/Plate or User/Driver in your search parameters.
-
Vehicle/Plate Grouping: Shows the number of violations on each specific license plate and lists any associated drivers of the vehicle.
- User/Driver Grouping: Shows the total number of violations given to the user, including any violations assigned to vehicles where the user is the registered driver.
- Individual Violations: In either grouping view, you can click on the hyperlinked violation count number to view the individual ticket details.
Visual Cues and Status Indicators
-
Warning Icon: When searching by vehicle, a warning icon next to the username will show a targeted list of the violations associated specifically to that user.
-
Breakdown Icon: When searching by user, an icon next to the total violation count displays a breakdown of the total amount (showing the number of violations assigned directly to the user versus the number of violations assigned to that user's vehicles).
Best Practices and Considerations
-
Targeted Reporting: Utilize the Search By filter strategically based on your goals. Searching by Vehicle/Plate is ideal for identifying unregistered cars or scofflaws that frequently violate lot rules, while searching by User/Driver is best for evaluating the overall compliance of a registered permit holder across all of their listed vehicles.
-
Reviewing Warnings: Use the Warning Only option under the Processed Value filter to evaluate if past warnings have been effective, or if a repeat offender has exhausted their leniency and now requires a fine-bearing ticket.
- Monetary vs. Count-Based Thresholds: Use Total Cost when targeting high-balance accounts regardless of ticket count (ideal for identifying vehicles with large outstanding balances), and use Number of Violations to track repeat behavior patterns across multiple lower-cost infractions.
Restricting Payment of Violations in Court Requested Conviction (CRC) Status
The Court Requested Conviction (CRC) payment restriction feature allows administrators to block users from paying for parking tickets that have been escalated to court or a collections agency. Its primary purpose is to ensure that escalated violations are handled through the proper legal or administrative channels, while still allowing authorized staff to override the block if necessary. This article is intended for OPSCOM administrators responsible for system configuration and collections management.
Setup and Configuration
Configuring this feature requires adjusting global system settings to restrict the users, followed by updating role permissions to grant specific administrators override capabilities.
Configuring Global Restrictions
-
Hover over System Configuration and click System Settings.
-
Locate the settings pertaining to collections.
-
Enable the Prevent Violation Payment checkbox to stop users from paying escalated fines.
-
Enable the Prevent Purchases checkbox to stop users with escalated fines from buying new permits.
-
Save your settings.
Configuring Administrative Overrides
-
Hover over System Configuration and click Manage Roles.
-
Select the role you wish to grant override abilities to (e.g., Primary Admin).
-
Click Permissions to access the role settings.
-
Click the Violations tab.
-
Enable the Pay Violations In Collections checkbox. This allows the administrator to manually process payments on violations that are in collections. (A)
-
Enable the Purchase While Outstanding checkbox. This allows the administrator to process purchases (like permits) for a user, even if they have a violation sent to collections. (B)
-
Save your role changes.
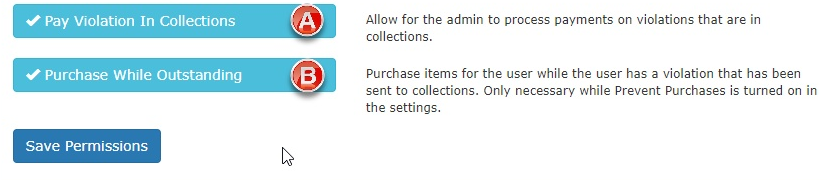
The Purchase While Outstanding administrative permission is only necessary if the Prevent Purchases setting has been enabled in the global system settings.
Using this Feature
Once configured, the system automatically handles how CRC and collections violations are presented to different user types.
End User Experience
When a user views a violation with the "Sent to CRC" status in their portal, they will see a notice indicating the violation has been sent to collections. The system will remove their ability to pay the fine online. If the user attempts to bypass this by using the OPSCOM Quick Pay or Guest Payments portal, they will receive the same message disallowing the transaction.
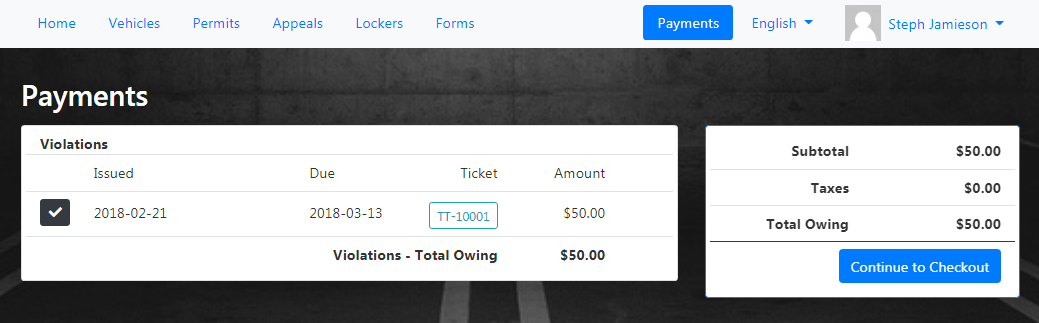
Administrator Experience
Administrators viewing the same user profile will see the "Sent to Collections" status. However, if the administrator's role has the override permissions enabled, the payment fields and buttons will remain active, allowing them to manually collect and process the payment on behalf of the user.
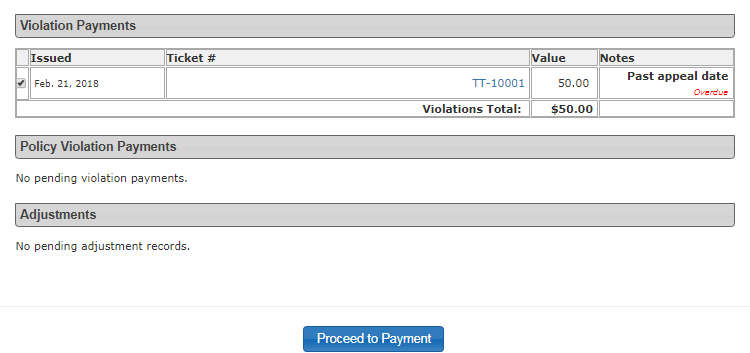
Best Practices and Considerations
-
Business Rules for Overrides: Organizations should develop a clear business rule detailing exactly when an administrator is allowed to use their override permission to accept a payment for a CRC violation, versus when they must direct the user to the court or collections agency.
-
Clear Communication: Consider updating your notice letters and email templates to clearly inform repeat offenders that once a ticket reaches CRC or collections status, their portal payment privileges will be suspended.
Printing the Certificate of Parking Infraction
The Certificate of Parking Infraction (commonly known as Form 11) feature allows administrators to generate and print official legal notices for specific parking violations. Its primary purpose is to produce a properly formatted PDF document that includes all required auto-filled information and officer signatures for legal processing. This article is intended for OPSCOM administrators responsible for violation management and system configuration.
Setup and Configuration
Before you can generate a certificate, you must ensure the Form 11 template is created within your system settings and determine if you require digital signatures from your enforcement officers.
Create and Edit the Form 11 Template
-
Hover over Content & Designs and click Pages and Content Blocks.
-
Click the Messages tab and look for the item with the System Location value of form11.
-
If the template does not exist, click the Create Page/Message button.
-
Select Message from the Page Type drop-down menu.
-
Enter form11 into the Identifier field.
-
Click the Save Messaging button.
To edit an existing template, click the Edit button next to the form11 entry in the Messages tab to access the text editor.
Adding a Digital Signature Requirement
You can configure the system to require enforcement officers to capture a digital signature when issuing a ticket on their handheld devices.
-
Hover over System Configuration and click System Settings.
-
Click Violations to open the violation settings menu.
-
Enable the specific setting to use signatures on tickets.
-
Save your configuration changes.

Using this Feature
Once configured, administrators can generate the document from the web portal, and officers can apply their signatures in the field.
Handheld Signature Capture (Android)
-
Visual Cues & Status Indicators: When the digital signature setting is enabled, a new signature tab will appear when writing a violation on an OPSCOM Android handheld unit.
-
Available Action: The patrol officer must tap the signature tab and physically sign the device screen to proceed. When the ticket is uploaded to the server, this timestamped signature is sent with the other violation images and will automatically display on the printed Form 11.
Print Form 11
-
Hover over Violations and click Search.
-
Locate the specific violation and click the Ticket Number to open the details page.
-
Click the Action drop-down menu and choose Generate (title of form) (e.g., Generate Form 11).
-
Open the downloaded PDF file to view, save, or print the final Certificate of Parking Infraction.
Best Practices and Considerations
Form 11 Content Configuration: Although it is possible for administrators to edit the Form 11 template text manually, it is strongly recommended to request the initial form content configuration directly from OPSCOM support. The layout is highly specific and relies on complex shortcodes to accurately auto-fill dynamic legal information such as dates, license plate numbers, and fine amounts.
-
Signature Verification: Always verify that the digital signature appears clearly on the final downloaded PDF. The timestamped signature serves as a crucial piece of evidence confirming the specific Provincial Offences Officer who issued the ticket.
MTO Annual Report
The MTO Annual Report allows administrators to generate a summary of Ministry of Transportation (MTO) related violation data over a specified timeframe. Its primary purpose is to help compile the necessary yearly statistics and compliance metrics required for official external reporting. This article is intended for OPSCOM administrators.
Setup and Configuration
There is no specific system setup or configuration required to use this feature. The MTO Annual Report is a standard administrative tool available to users with the appropriate violation reporting permissions enabled on their account.
Using this Feature
Administrators can use this reporting tool to pull required MTO data for any given date range, such as a full calendar year.
-
Hover over Violations and click Reports then MTO Report.
-
Enter the desired starting date into the Start Date field.
-
Enter the desired end date into the Up To and Including field (e.g., January 1, 2020, to December 31, 2020, for a full year-end report).
-
Click the Search button to generate the report.
Key Information Displayed
-
MTO Requirements: Once the search is executed, the screen will refresh to display a comprehensive list of items and statistical data explicitly required for the Annual MTO Report based on the date range selected.
Best Practices and Considerations
Reporting Periods: While typically used for year-end reporting, you can adjust the date range to pull data for specific quarters or months if you need to perform internal audits throughout the year.
-
Data Verification: Always verify your date range before finalizing the report to ensure the data accurately reflects the specific fiscal or calendar year required for your organization's official MTO submission.
Collections - Flag as Sent to Collections
The Flag as Sent to Collections feature allows administrators to manually update a violation's status to bypass standard automated notification workflows, such as the Notice of Impending Charge (NIC) and Certificate of Request for Court (CRC) processes. Its primary purpose is to efficiently process violations that are being handled externally by a collections agency or to accommodate users requesting to go directly to trial. This article is intended for OPSCOM administrators handling violation management and collections.
Setup and Configuration
To use this feature, the specific administrative role must have the correct permissions enabled by a Primary Admin.
-
Hover over System Configuration, click Admin Management then Manage Roles.
-
Locate the specific role you want to edit and click the Permissions button.
-
Click the Violations tab.
-
Enable the Manage Collections checkbox.
-
Click the Save Settings button to apply the changes.
Using this Feature
Once the correct permissions are assigned, administrators can manually apply this flag to individual tickets from the search screen.
-
Hover over Violations and click Search.
-
Search for the specific violation you wish to flag.
-
Click the specific ticket # link in the results to open the Violation Information page.
-
Click the Action drop-down menu and choose Flag as Sent to Collections.
-
Click the Ok button to confirm the status change.
Best Practices and Considerations
One-Time Process: Once a violation has successfully gone through the collections workflow, the system permanently marks it as such. A ticket cannot re-enter the collections process a second time.
-
Audit Trails: Always use the Violations Notes feature to add detailed comments to the violation record. Documenting the user's request or the specific reason the ticket was manually escalated to collections ensures a clear, reliable administrative history.
-
Administrative Overrides: Administrators with the appropriate permissions will still retain the ability to pay or cancel the violation within the system as necessary, even after it has been formally flagged for collections.
Municipal Violations and Collections
The Municipal Violations and Collections process allows Ontario-based municipal clients to manage violation offenses through the Provincial Offenses Act (POA) or the Administrative Monetary Penalty System (AMPS). Its primary purpose is to automate the retrieval of vehicle owner data from the Ministry of Transportation (MTO) for unregistered vehicles, facilitating the distribution of notice letters and processing for court collections. This article is intended for OPSCOM administrators managing municipal parking enforcement workflows.
Setup and Configuration
Before utilizing the MTO lookup and Court Requested Conviction (CRC) workflows, your municipality must be approved by the MTO as an Authorized Requester. Contact ARIS@ontario.ca to request a RAW data account.
Once approved, administrators must configure four specific provincial codes within the system to ensure compatibility with the Ontario court system.
-
Hover over System Configuration and click System Settings.
-
Select the Collections component.
-
Enter the required values into the following designated fields based on your specific municipality:
-
Case Court: A 4-digit number (e.g., 3060).
-
Case Jurisdiction: A 3-digit number (e.g., 658).
-
Agency Code: 3 alphanumeric characters followed by 3 numbers (e.g., BYL390).
-
Disbursement Code: 1 alphanumeric character followed by 3 numbers (e.g., M525).
-
-
Click the Save Settings button.
If your municipality uses an extra-detailed version of the notice letter where one notice is sent out for each individual violation rather than in bulk, you must disable the Include All Unpaid Violations setting within this same configuration menu.
Using this Feature
The lifecycle of a municipal violation involves several stages of exporting data, importing MTO responses, and escalating unpaid tickets.
Exporting Data for the MTO
When violations reach a specific age of non-payment (e.g., 15 days), administrators export the unknown vehicle data to request owner information from the MTO.
-
Hover over Violations and click Collections then Vehicle Lookup Export.
-
Configure your search criteria using the Minimum number of violations, Vehicle province or state, and Date range fields.
-
Click the export format button that matches your account type (e.g., Aris Raw Data Account or Aris Abstract Account).
-
The system will generate and download a text file formatted for the MTO.
Importing the MTO Response File
Once the MTO returns the file containing the registered owner information, it must be imported into the system to generate notice letters.
-
Hover over Violations and click Collections then Vehicle Lookup Import.
-
Click to choose the returned MTO file from your local computer.
-
Click the Import button. A confirmation message will appear in the top right of the page once complete.
-
You can now generate and print your mail-out notices using the Notice Letter Report page.
Sending Violations to Court
If a ticket remains unpaid after notice letters are sent (e.g., on day 65), it is eligible to be sent to the Ontario court system for collections.
-
Hover over Violations and click Collections then Send to Court.
-
Specify the number of days since the violation was issued to filter the list.
-
Apply any required administrative fees using the provided field.
-
Click the export button to generate the required text file for the Ontario court system.
-
To generate a printable summary of these cases for your court date, hover over Violations and click Collections then Sent to Court Report, and click Export.
Flagging Paid Records from Court
When the court provides a report indicating a violation was successfully paid, it must be manually updated in OPSCOM.
-
Hover over Violations and click Collections then Flag as Paid by Court.
-
Enter the applicable date range and click the Search button.
-
Select the specific violations that were resolved.
-
Click the Flag as paid button. These tickets will now appear on the Daily Processed Report with a payment type of paid by court.
Best Practices and Considerations
[!WARNING] MTO Data Purging (ARIS Rules): ARIS regulations dictate that information retrieved from the MTO is only temporarily stored within the OPSCOM system. Once a violation has been cancelled, paid, or sent to collections, all associated MTO personal data will be automatically and permanently purged from the system.
-
Establish a Schedule: Organizations should develop a strict, recurring schedule for their violation lifecycle (e.g., exporting MTO lookups every Monday for tickets reaching 15 days old, and sending tickets to court every Friday for tickets reaching 65 days old) to maintain compliance and steady revenue recovery.
-
Testing with Simulators: If you need to test your import workflow before receiving live data back from the MTO, you can generate a mock response file using the Third Party Simulators tool.
Managing Violation/Citation Appeals
The Appeals Report provides administrators with a centralized view to review, manage, and action user appeals against parking violations. Its primary purpose is to allow for the detailed examination of appeal information and the recording of formal decisions (uphold, reduce, or cancel), ensuring a fair and transparent dispute process. This article is intended for OPSCOM administrators.
Setup and Configuration
Before you can process appeals, the module must be enabled and configured within your system settings, and your communication templates must be established.
System Settings Configuration
-
Hover over System Configuration and click System Settings.
-
Click the Violations tab.
-
Ensure the Enable Appeals Module checkbox is enabled. (If it is not, please contact support@ops-com.com).
-
Configure the following fields to dictate how your system handles the appeals process:
-
Appeal Days: Enter the number of days a user has to appeal a violation after issuance.
-
Appeal Notification Email: Enter the email address that should receive notifications when new appeals are submitted.
-
Automated Notification Email: Enter the email address that should receive automated appeal reports.
-
Enable Adjustments: Enable this checkbox if you want to allow fines to be adjusted without going through the formal appeals process.
-
Enable Fax for Appeal Format / Enable Email for Appeal format: Enable these checkboxes to allow appeals to be submitted outside of the OPSCOM portal.
-
Remove Discount when Appeal Made: Enable this checkbox to automatically forfeit any early-payment discounts once an appeal is initiated.
-
Enable Appeal Evidence Uploads: Enable this checkbox to allow users to submit PDF or PNG files as supporting evidence for their appeals.
-
Reset Appeal on Association: Consider enabling the Reset Appeal on Association checkbox. This setting allows users who have a violation associated with their vehicle, but have not yet created an account, the same amount of time to appeal a violation as a registered user. Once they create and associate their account to the vehicle, the appeal timeframe will reset, giving them the full number of days specified in your settings to appeal.
Email Templates
-
Hover over System Configuration, hover over Templates & Design, and click Email Templates.
-
Set up the Appeal Decision email template. Detailed instructions for this can be found on the Email Templates page. This is the template the system will use to automatically communicate your final decision to the appellant.
Using this Feature
Administrators have two distinct methods for actioning an appeal: through the centralized Appeals Report, or directly from an individual violation's information page.
Accessing and Actioning via the Appeals Report
-
Hover over Violations, hover over Appeals, and click Appeals Report.
-
Search for the specific appeal you wish to review.
-
Click the View Info button beside the person's name to access the full details on the User Appeal History screen.
-
Review the user history and vehicle details, then locate the Appeal Management section.
-
Click the Action Taken drop-down menu and choose one of the following options:
-
Uphold: The appeal is denied, and the original fine amount remains.
-
Reduce Violation: The appeal is partially granted. Enter the new, reduced fine amount into the field that appears.
-
Cancel Violation: The appeal is fully granted, and the violation is voided.
-
-
Enter your detailed explanation into the Comments to Send to Appellant box.
-
Click the Submit button to process the appeal and trigger the automated decision email.
Actioning Appeals Directly from Violation Information
-
Access the Violation Information page for a specific ticket by using the Violation Search tool.
-
Click the Edit button.
-
Click the Ticket has not been appealed. Show appeals form link to reveal the hidden appeals section.
-
Review the Appeal Reason provided by the user.
-
Click the Fine Action drop-down menu and choose Upheld, Reduced, or Cancelled.
-
Edit the Offense Value field if you are manually reducing the fine (this automatically sets to 0.00 if cancelled).
-
Enter any private, internal notes into the Appeal Admin Comment field.
-
Select your administrator account from the Actioned per drop-down menu.
-
Click the Update this Violation button to save the changes.
Best Practices and Considerations
Payment Locks: Once a user pays for a violation, the primary comments fields become permanently locked. If you need to add further comments to a paid ticket after the fact, you must use the separate Violation Notes section.
-
Internal vs External Comments: Always double-check which comment field you are using. The Comments to Send to Appellant box is public and will be emailed directly to the user. The Appeal Admin Comment field on the individual violation screen is strictly for private, internal administrative notes.
-
Timely Review: Process appeals promptly to ensure fairness and maintain a positive relationship with your user base.
-
Leverage Reporting: Use the Appeals Report regularly to analyze appeal trends and common dispute reasons. This data is highly valuable for identifying confusing signage or updating enforcement policies.
Related Video
Edit a Violation
The Edit a Violation feature allows administrators to modify the details of an existing parking ticket, including processing appeals and updating fine amounts. Its primary purpose is to help correct enforcement errors, adjust penalties, or formally void a ticket while maintaining an accurate system record. This article is intended for OPSCOM administrators.
Setup and Configuration
There is no specific system configuration required to use this feature. Editing a violation is a standard administrative tool available to users with the appropriate violation management and appeals permissions enabled on their account profile.
Using this Feature
Administrators can update basic ticket information or process manual appeals directly from the violation record.
Accessing the Edit Window
-
Search for the specific violation. Detailed instructions can be found on the Search for a Violation page.
-
Click the specific TICKET# link from the returned records on the Violation Search screen to open the Violation Information window.
-
Click the Edit button located at the top right of the screen, or select it using the Action drop-down menu.
Modifying Violation and Appeal Details
-
Make any necessary changes to the basic violation information on the Edit Violation Information window.
-
Click the Ticket has not been appealed. Show appeals form text link to reveal the appeals section.
-
Configure the specific fields within the Appeals Area as needed:
-
Ticket Appealed: Select the date in the first drop-down menu and how the appeal was filed in the second drop-down menu.
-
Fine Action: Choose Upheld, Reduced, or Cancelled.
-
Offense Value: Manually edit this amount if the ticket is reduced on appeal. If the ticket is cancelled, this value will automatically reduce to 0.00. You can also edit the offense value directly regardless of the appeal status.
-
Appeal Reason: Enter the reason for launching the appeal. This field is viewable by the user.
-
Appeal Admin Comment: Enter your private administrative notes. These notes are not viewable by the user.
-
-
Select the specific administrator account making the changes from the Actioned per: drop-down menu.
-
Click the Update this Violation button to save your changes. A message will appear on the screen confirming that the violation has been updated.
Best Practices and Considerations
-
Finalized Appeals: Appeals that are granted, reduced, or cancelled cannot be edited again through the standard form and are no longer eligible for early payment discounts. Ensure your decisions are final before clicking the update button.
-
Payment Locks: Once a user pays for a violation, the primary comment fields become permanently locked. Administrators must use the separate Violation Notes section for any further comments or documentation regarding the ticket.
-
Overturned Tickets: If a ticket has already been appealed and the user goes to a higher authority to have the ticket overturned, you can edit the ticket and change its status to a warning. This zeros out the financial value and completes the processing while preserving the history of the ticket in the admin portal. Always add a comment to the warning to further explain why the ticket was overturned.
Related Video
Paying a Violation
The Paying a Violation feature allows administrators to manually process fine payments on behalf of users directly from the administrative portal. Its primary purpose is to help facilitate in-person or over-the-phone transactions, ensuring accurate reconciliation within the user's account and the system's financial records. This article is intended for OPSCOM administrators.
Setup and Configuration
There is no specific system setup or configuration required to use this feature. Processing a payment manually is a standard administrative action available to users with the appropriate payment processing and violation management permissions enabled on their account profile.
Using this Feature
Administrators can locate an unpaid violation and guide it through the manual checkout process in just a few steps.
-
Hover over Violations and click Search.
-
Enter the specific violation number into the Search Text field.
-
Click the specific ticket number link in the search results to view the Violation Information window.
-
Click the Make Payment button.
-
Select the items the user wishes to pay by enabling the corresponding checkboxes on the Payment Due screen.
-
Click the Proceed to Payment button.
-
Select the payment type you wish to process the item with (e.g., cash transaction).
-
Click the Submit Payment Information button.
-
Click the Confirm Payment Information button on the confirmation screen to continue.
-
Click the Process Manually button on the Transaction Details window to finalize the payment.
Key Information Displayed
Once the system processes the payment, it will return you to the final Transaction Details page. Several key pieces of information are recorded and displayed here:
-
The unique confirmation number of the transaction.
-
The core violation information (including the User's Name, the amount of the fine, the date submitted, transaction comments, and the payment type).
-
The specific Date Processed and the name of the administrative user who processed the payment.
Visual Cues and Status Indicators
-
User History Status: Once the payment has been successfully completed, navigating to the user's history will visually show that the violation has been paid and its status is now marked as processed.
Best Practices and Considerations
Multiple Item Selection: The Payment Due screen will display all outstanding balances associated with the user's profile. Always ask the user if they wish to clear multiple outstanding items at once. You can select multiple violations or unpaid permits simultaneously by enabling their respective checkboxes, streamlining the checkout process into a single, efficient transaction.
-
Transaction Cancellation: If you make an error or the user changes their mind before the final step is completed, you can click the Cancel Transaction button on the Transaction Details window to safely back out of the action without recording a payment or altering the violation's unpaid status.
Search for a Violation
The Search for a Violation feature allows administrators to locate specific parking citations within the system using text, date, and time parameters. Its primary purpose is to help enforcement teams quickly access, review, and manage ticket records to process payments, handle appeals, or update information. This article is intended for OPSCOM administrators.
Setup and Configuration
There is no specific system setup or configuration required to use this feature. Accessing the search tool is a standard administrative function available to users with the appropriate violation management permissions enabled on their account profile.
Using this Feature
Administrators can perform broad text-based searches, narrow parameters down by specific date types, or utilize advanced search filters to locate records.
Searching by Text
-
Hover over Violations and click Search.
-
Type the license plate number or specific violation number into the Search Text field.
-
Click the Search using only text button.
Searching by Text and Date
- Hover over Violations and click Search.
- (Optional) Enter keywords or ticket details into the Search Text field.
- Under Search By, select your preferred date parameter: Due Date, Issued Date, or Infraction Date.
- Enter your timeframe in the Start Date and up to and including fields.
- Refine results using the status toggles if needed (Outstanding only / All and Warning / Only non-warning / All).
- Click Search with text and date range.
Using Advanced Search Parameters
Click the Toggle More Options button at the top right of the search card to reveal additional search filters:
-
Status & Classification: Filter by Spoiled status type, Appeal State, User Type, Ticket Category, Offence Type, or Warning status.
-
Location & Region: Narrow results by Violation Location or Vehicle Province.
-
Flagged Criteria: Check Towing Charged or Notice Letter Issued to filter for specific actions taken.
-
User Details: Search directly by First Name, Last Name, Student / Employee #, Drivers License, or User State.
Click the Pin icon next to any advanced filter field to keep it pinned to your primary search view for future sessions.
Managing Search Results
Once a search is executed, the returned records will be displayed at the bottom of the screen.
-
Click the specific Ticket Number link from the results list to open the Violation Information window.
-
Click the Edit/Update button to display the modification screen and adjust the ticket details if required.
Available Actions From the Violation Information window, administrators can take several actions, including processing a manual payment, adding internal notes to the violation, or linking the violation to a specific incident if your system utilizes the Incident module.
Best Practices and Considerations
Ticket Number Formats: Ticket numbers are composed of two parts: the core ticket number and the security PIN (e.g., 3-001005-11). While administrators can search using only the core ticket number (the first part), end-users must enter both parts to successfully look up their ticket on the public portal for security reasons.
Configure Violations to a Person
The Configure Violations to a Person feature allows administrators to issue citations directly against an individual's profile rather than attaching them to a specific vehicle license plate. Its primary purpose is to help enforcement teams track non-vehicular offenses, such as smoking, alcohol-related infractions, or personal conduct breaches on property. This article is intended for OPSCOM administrators.
Setup and Configuration
To issue personal violations, you must first enable the system-wide setting and then configure specific ticket categories to accept user-based assignments.
Enabling the Global Setting
-
Hover over System Configuration and click System Settings.
-
Click the Violations tab.
-
Enable the Link violations to users checkbox to allow issuing violations by person.
-
Save your settings.
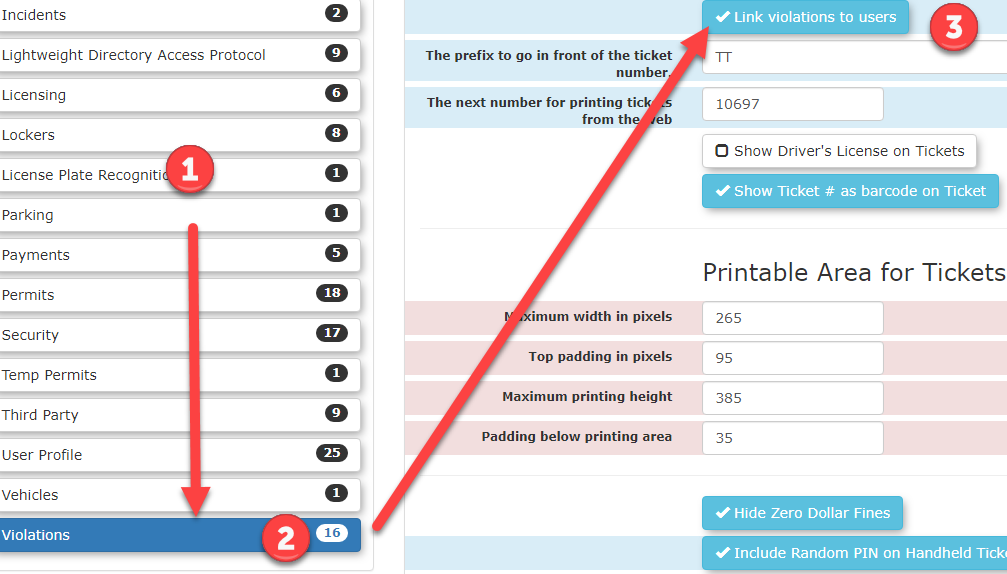
Configuring the Ticket Category
-
Hover over Admin Options and click Violations then Manage Ticket Categories.
-
Select the specific ticket category you wish to update (e.g., Municipal).
-
Locate the Violation Applies To setting.
-
Select Users to restrict this category strictly to individuals.
-
Save your changes.
Using this Feature
Once the category is properly configured, the violation entry form will dynamically adjust when this specific ticket type is selected by an administrator or patrol officer.
-
Begin the standard process for manually entering a violation.
-
Click the Ticket Type drop-down menu and choose the newly configured category.
-
Locate the Apply violation to: section that appears on the form.
-
Click the A Person option to attach the offense directly to the individual instead of a license plate.
-
Search for the specific user and finalize the violation entry.
Best Practices and Considerations
-
Category Management: Clearly define and separate your user-based ticket categories from your vehicle-based ones. Configuring categories specifically for personal conduct ensures that patrol officers do not accidentally issue vehicular tickets (such as parking in a fire lane) to a person without capturing the required license plate data.
-
Patrol Communication: Ensure your field enforcement officers are trained on which ticket types apply to users. They will need to know to search for a user's profile (using a name or ID) rather than scanning a license plate when issuing these specific infractions from their handheld units.
Creating a Violation on the Admin Portal
The Manual Violation Entry feature allows administrators to record parking citations directly into the system via the web interface. Its primary purpose is to digitally log handwritten tickets or citations created from a patrol laptop, ensuring all violation data remains centralized for tracking, reporting, and court processing. This article is intended for OPSCOM administrators.
Setup and Configuration
Before utilizing the web entry portal, administrators can adjust specific global settings to manage how these tickets are generated and printed.
-
Hover over System Configuration and click System Settings.
-
Click the Violations tab.
-
Enter a specific prefix into the Prefix to go in Front of Ticket Number field to easily differentiate admin portal tickets from handheld device tickets (e.g., TT-).
-
Enter the starting sequence into the Next Number for Printing field if you wish to have the system automatically generate your ticket numbers.
-
Enable the Drivers License on Tickets checkbox to print this information on citations issued from a patrol laptop.
-
Enable the Signature Required on Tickets checkbox to include a signature line on the printed ticket.
-
Save your settings.
The exact print dimensions for tickets issued via a laptop can be adjusted within the Printable Area for Tickets section on this same settings page.
Setup and Configuration
Before utilizing the web entry portal, administrators can adjust specific global settings to manage how these tickets are generated and printed.
-
Hover over System Configuration and click System Settings.
-
Click the Violations tab.
-
Enter a specific prefix into the Prefix to go in Front of Ticket Number field to easily differentiate admin portal tickets from handheld device tickets (e.g., TT-).
-
Enter the starting sequence into the Next Number for Printing field if you wish to have the system automatically generate your ticket numbers.
-
Enable the Drivers License on Tickets checkbox to print this information on citations issued from a patrol laptop.
-
Enable the Signature Required on Tickets checkbox to include a signature line on the printed ticket.
-
Save your settings.
The exact print dimensions for tickets issued via a laptop can be adjusted within the Printable Area for Tickets section on this same settings page.
Using this Feature
Administrators can issue violations to a specific vehicle, a specific person, or both, depending on the offense type being cited.
Entering a Violation for a Vehicle
-
Hover over Violations and click Violation Entry.
-
Select the Ticket Writer and choose the Ticket Category from their respective drop-down menus. (The Ticket Number will populate automatically if auto-generation is enabled in your settings).
-
Click the Toggle More Options button to reveal additional parameters, such as the Spoiled checkbox (to void the entry), the Warning checkbox (to issue without a fine), or the Towing fee field.
-
Click the Search Vehicles button to find vehicle information using the license plate or VIN.
-
Click the specific Plate number from the search results to associate it with the violation. If the vehicle is unregistered, follow the prompts to add a new vehicle record.
-
Select the Location and the specific Offences from their respective drop-down menus.
-
Click the Attachments button to upload any supporting photographic evidence from your computer.
-
Click the Record this Violation button to review the details.
-
Click the Record this Violation button again on the confirmation screen to finalize the entry.
Entering a Violation for a Person
-
Hover over Violations and click Violation Entry.
-
Complete the initial ticket details and open the extra options if necessary.
-
Click the Search Users button to locate the individual by name, ID number, or driver's license. If the person refuses to provide ID, enable the Failed to Identify checkbox instead.
-
Click the Select button from the search results to associate that user with the violation. If the user does not exist, follow the prompts to add a new user profile.
-
Complete the remaining location, offense, and attachment fields.
-
Click the Record this Violation button, review the details, and click it again to submit.
Available Actions and Status Indicators
When searching for a vehicle or person during the entry process, several icons provide quick access to related profile data:
Once a violation is successfully submitted, the final completion screen offers quick action buttons allowing you to Print a copy of the ticket, View the newly entered details, Search Violations, view Search Recent Violations, or quickly Enter Another violation.
Best Practices and Considerations
-
Accuracy is Paramount: Ensure all information is precisely transcribed when manually entering violations from a handwritten hard copy. Accurate plate, location, date, time, and offense details maintain critical data integrity for tracking and court purposes.
-
Utilize the Spoiled Option: If your organization uses pre-numbered physical paper tickets, consistently use the Spoiled checkbox during manual entry for any physical tickets that were ruined or otherwise unissued. This ensures a complete and accurate audit trail of your sequential ticket stock.
-
Leverage the Warning Feature: Use the Warning checkbox to easily issue non-fine warnings for first-time offenders without needing to select "Warning" as a completely separate ticket category.
-
Anonymous Tickets: When logging a hard-copy ticket for a vehicle that does not yet exist in the system, create an anonymous vehicle record during the search step. The driver can later use the OPSCOM-Go! - Quick & Easy Guest Payments portal to securely look up and pay the ticket without needing to create a full account.
Security PIN on Violations - How is it used
The Security PIN on Violations feature appends a randomized, two-character code to the end of a printed parking ticket to act as a secure access password. Its primary purpose is to allow unregistered guest users to safely look up, pay, or appeal their citations online while preventing malicious users from searching sequential ticket numbers to view other people's data. This article is intended for OPSCOM administrators.
Setup and Configuration
By default, the system is configured to generate a random PIN on newly issued tickets. Administrators can disable or re-enable this feature directly within the core system settings.
-
Hover over System Config and click System Settings.
-
Click Violations to open the specific violation settings menu.
-
Disable the Include Random PIN on Handheld Tickets checkbox to stop generating PINs on newly printed tickets, or enable it to turn the feature on.
-
Save your configuration changes.
Using this Feature
The ticket PIN primarily impacts how unregistered users access their violations on the public-facing portal. It's the additional dash and two digits at the end of a violations ticket (e.g., the -8T in TT-10016-8T) and is only used as a password for the ticket when appealing it.
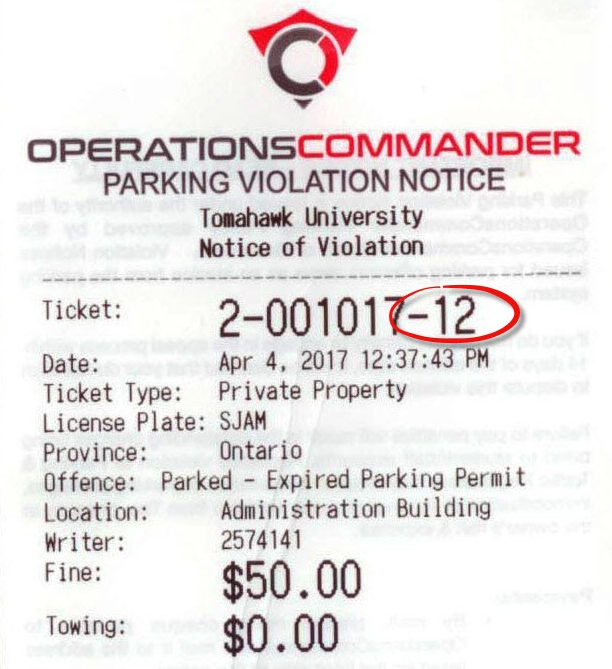
Guest User Access
Once authenticated, the user will be presented with a secure screen allowing them to pay or appeal the ticket. The retrieved ticket record will automatically drop the PIN from the visual display once the user is inside the payment portal.
Administrator Search Access
When an administrator searches for a violation internally via the system search tools, the PIN is not strictly required. Searching for the core ticket number (e.g., TT-10016) will successfully return the violation. Searching for the full string including the PIN (e.g., TT-10016-8T) will also return the exact same ticket record.
Best Practices and Considerations
Reporting and Mailouts: The Security PIN is only utilized for initial online lookup validation. It is intentionally excluded from backend data exports. Automated FTP reports, internal data exports, and physical mailed notice letters will exclusively display the core ticket number (e.g., TT-10016) without the appended PIN.
-
Security Awareness: Keep the PIN feature enabled if you allow guest payments or guest appeals. Disabling the PIN removes the password protection layer, potentially allowing individuals to type in sequential ticket numbers and view citation details that do not belong to them.
Ticket Warnings Explained
This article provides a breakdown of the layout and specific details displayed on both the front and back of OPSCOM violation and warning tickets. Its primary purpose is to help administrators understand the information presented to violators, as well as clarify the operational differences between issuing a warning and spoiling a ticket. This guide is intended for OPSCOM administrators.
Setup and Configuration
There is no specific system setup or configuration required for this overview. Ticket templates and layouts are generally configured in conjunction with OPSCOM support during your initial system onboarding.
Key Information Displayed
Whether an enforcement officer issues a standard violation or a warning, the printed ticket displays specific, standardized information for the user.
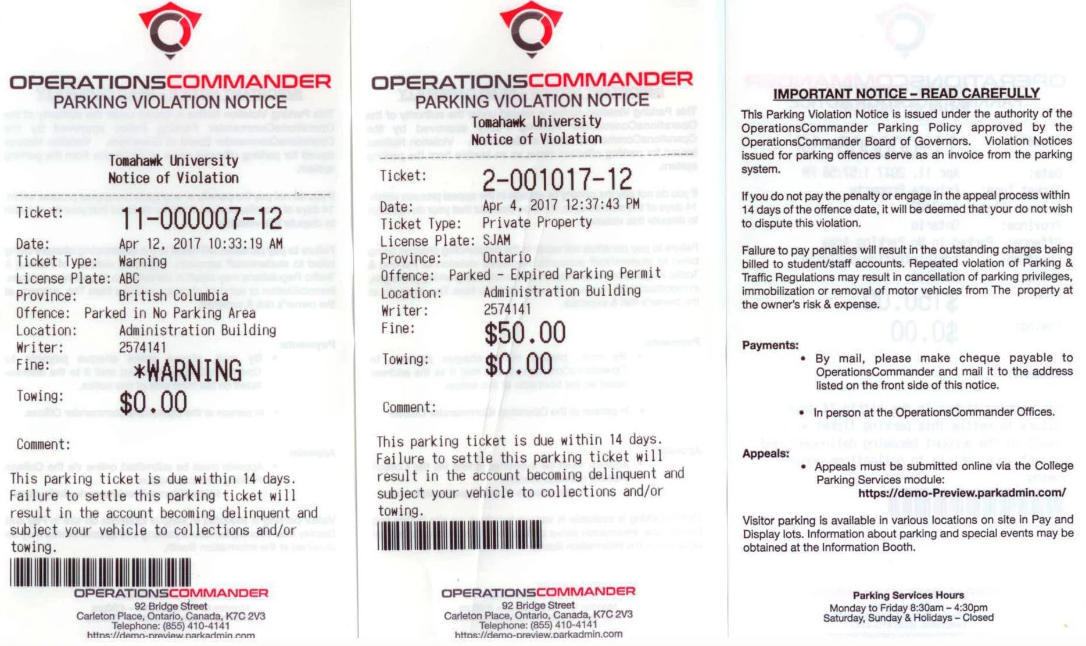
Front of the Ticket/Warning
The front of the ticket contains the core details of the infraction:
-
Ticket Number: A system-assigned number that uniquely identifies the violation or warning.
-
Date: The exact date and time the ticket was issued.
-
Ticket Type: Identifies the broad category of the violation (e.g., Private Property).
-
License Plate: The license plate number of the offending vehicle.
-
Province: The province or state where the license plate is registered.
-
Offense Type: Identifies the specific rule or parking violation that occurred.
-
Location: The specific lot or property area where the violation took place.
-
Writer: A system-assigned unique number identifying the enforcement officer. This protects the officer's privacy in the field, while allowing administrators to easily look up the writer's actual name within the admin portal.
-
Fine: The financial penalty owed for the violation.
-
Visual Cue: On a warning ticket, the fine amount is followed by *Warning. This indicates that no payment is currently due, but demonstrates what the penalty would have been if an actual ticket was issued.
-
-
Towing: The administrative amount due if the offending vehicle had to be towed.
-
Comments: Any additional notes or context provided by the enforcement officer.
Back of the Ticket/Warning
The back of the ticket provides the violator with the necessary administrative details and organizational policies:
-
Payment and Appeal Instructions: Clearly outlines the step-by-step process for how the violator can either pay their fine or submit a formal appeal through the online portal.
-
Sign-off Section: Provides a designated area for the violator to identify themselves and sign the ticket if required by your organization's policies.
-
Organization Details: Lists where to find additional information, your organization's contact details, and your standard office hours.
Best Practices and Considerations
Understanding Warnings vs. Spoiled Tickets: While neither a warning nor a spoiled ticket requires payment from the user, they serve two entirely different purposes within the OPSCOM system.
-
Issuing Warnings: A warning is officially tracked in the system as a zero-dollar violation and is processed immediately upon syncing to the server. Use warnings as an educational tool for first-time offenders or minor infractions, effectively giving the user a "slap on the wrist" while still maintaining a permanent record of the offense on their profile.
-
Spoiling Tickets: The "Spoiled" status is used to void a ticket completely, making it as if the ticket never happened. Officers should spoil a ticket if it was initiated in error, such as accidentally entering the wrong license plate details, or if a driver arrives and moves their vehicle just as the patrol officer begins writing the citation.
Notice Letter Templates
The Notice Letter Templates page allows administrators to manage, create, and edit the content and appearance of system-generated notice letters. Also known as a Notice of Impending Conviction (NIC) letter, its primary purpose is to inform users of outstanding violations slated for the Ontario court system collection process. This article is intended for OPSCOM administrators responsible for system configuration and communication design.
Setup and Configuration
There is no specific system setup required to begin using templates, but you must navigate to the dedicated design menu to access the editor.
-
Hover over System Configuration and click Content & Designs then Notice Letters.
-
Review the overview list of all notice letter content currently in the system.
Multi-Language Support: If your OPSCOM portal supports multiple languages, you must create and configure different content and templates for each language installed on the site.
Using this Feature
The templates page is divided into specific components that control either the text content or the visual styling of the physical letters.
Managing Template Types
Administrators can edit four distinct elements to build a complete notice letter:
-
noticeLetter: The core text template used when printing a notice letter containing a single violation.
-
noticeLetterMultiple: The core text template used when printing a notice letter that contains multiple violations.
-
styles: The CSS (Cascading Style Sheets) template used to apply element styling, such as assigning specific colors and text sizes to the letter.
-
Header: The content template that specifically dictates what appears in the header section of the notice letter.
Editing the Layout
Clicking into any of the templates above will open a WYSIWYG (What You See Is What You Get) content editor. While minor text adjustments can be made directly in the visual view, it is highly recommended to edit the raw HTML source code to prevent print alignment issues.
-
Click Tools in the editor menu.
-
Click Source Code to open the HTML view.
-
Apply your formatting changes directly to the HTML code, or paste in code designed from an external HTML editor.
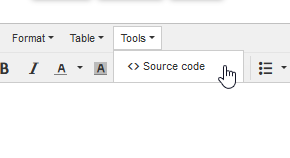
Inserting Short Codes
Notice letters use short codes as placeholders that automatically pull specific user or vehicle data from the database when the letter is generated (e.g., using [values show=vehicle.plate] to output "ABC123").
-
Scroll to the bottom of the edit content page, below the content box, to view the list of usable short codes.
-
Highlight the specific short code you wish to use.
-
Right-click the highlighted text and click Copy.
-
Click the desired area within the content editor where you want the information to appear.
-
Press Ctrl and V on your keyboard simultaneously to paste the short code.
Best Practices and Considerations
[!WARNING] Pasting Short Codes: Always use the keyboard shortcut (Ctrl + V) to paste short codes into the editor. Right-clicking inside the content editor will open a proprietary formatting menu rather than your browser's standard paste option.
-
HTML Editing: Avoid relying entirely on the visual WYSIWYG editor for complex layouts. The visual editor is not optimized for strict print templates. Making your changes through the HTML Source Code view ensures that the final printed PDF aligns correctly with your official municipal letterhead and windowed envelopes.
-
Test Your Templates: After making changes to a notice letter template or adding new short codes, generate a test letter for a sample violation to verify that all placeholders successfully pull the correct database information and the CSS styling renders properly.
Notice Letter Report
The Notice Letter Report allows administrators to identify and manage users who are eligible to receive a Notice of Impending Conviction (NIC) letter. Its primary purpose is to facilitate the Ministry of Transportation (MTO) workflow by generating physical notice documents for outstanding violations before they are escalated to the Ontario court system for collections. This article is intended for OPSCOM administrators.
Setup and Configuration
Before generating letters, administrators must enable the report and configure how the system consolidates these notices.
-
Hover over System Configuration and click System Settings.
-
Click the Violations tab.
-
Enable the Enable Letter Report checkbox to make the report page available in the main menu.
-
Click the Collections tab to configure additional notice settings:
-
Enable the Send Letter To All checkbox to include users in the report list who have already had a notice letter sent to them via email.
-
Enable the Include All Unpaid Violations checkbox to consolidate all of a user's unpaid violations onto a single notice letter. If this is disabled, the system will generate a separate letter for each individual violation.
-
-
Save your configuration changes.
Using this Feature
The Letter Report page is divided into printable and unprintable sections based on whether the system has the required user details to generate the document.
Generating Notice Letters
-
Hover over Violations and click Reports then Letter Report.
-
Review the Printable Violation Notice Report section to see all violations currently eligible for a notice letter.
-
Click the Print button next to a single violation, or select multiple violations and print them simultaneously. The notice letters will be generated as a PDF file and downloaded by your web browser.
-
Click the Upload button to manually attach a document if a letter was already sent to the user outside of the standard system generation process.
Managing the Unprintable Violation Notice Report
-
Key Information Displayed: This section lists violations that cannot currently generate a notice letter due to missing user details (e.g., an unregistered vehicle).
-
MTO Data Import: For these unknown vehicles, you must export the data to the MTO and import the return file. Once the MTO data is imported, the user details will temporarily populate, and the notice letters will immediately become printable.
-
Status Reminders: A reminder will display next to any vehicle that has had its data exported to the MTO but has not yet had the return data imported back into the system.
Viewing and Regenerating Issued Letters
-
Hover over Violations and click Search.
-
Click the Toggle additional options button in the top right to expand the search parameters.
-
Enable the Notice Letter Issued checkbox and perform your search.
-
Click the specific Ticket Number to open the violation information window.
-
Scroll to the bottom of the window to view the attached notice letters.
-
Click the Print button to re-download the letter, or click the Trash icon to archive it.
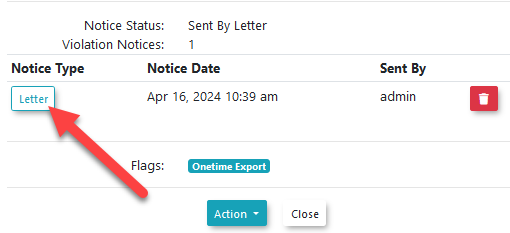
Archiving a notice letter does not delete it from the system. It simply flags it as archived, allowing the violation to reappear on the main Letter Report page so a new notice can be generated (useful if your letter template was recently updated).
Best Practices and Considerations
Notice Letter Templates: The visual appearance and layout of your notice letters are configured separately from this report. To design or edit the content of these templates, hover over System Configuration and click Content & Designs then Notice Letter Templates.
-
MTO Data Security: Be aware that imported MTO user data is temporary. For security reasons and strict compliance with MTO regulations, this imported data will be automatically cleared from the system once all violations associated with that specific vehicle have been resolved (either paid by the driver or officially sent to collections).
-
Reviewing Pending Letters: Enable the Not Ready to be Sent checkbox on the main report page to view upcoming notice letters. These violations will appear in grey text, and the notice-ready column will display a countdown timer indicating the amount of time left before the letter can be officially generated (by default, notice letters are available 7 days after a violation payment becomes past due).
Auto Email Notifications for Warnings
The Auto Email Notifications for Warnings feature allows administrators to automatically dispatch email notices to users who have received a violation marked as a warning. Its primary purpose is to efficiently communicate zero-dollar infractions to users without requiring manual email processing by administrative staff. This article is intended for OPSCOM administrators.
Setup and Configuration
To use this feature, administrators must enable the global setting, configure the email template, and ensure the corresponding system task is active.
Enabling the Global Setting
-
Hover over System Configuration and click System Settings.
-
Scroll down to locate the Violations sub-menu.
-
Enable the Send Notices For Warnings checkbox.
-
Click the Save Settings button.
Configuring the Email Template
-
Hover over System Configuration and click Content & Designs then Email Templates.
-
Click the Edit button next to the New Warning Notice template.
-
Adjust the layout and content of the warning letter as needed and save your changes.

Enabling the System Task
For the warning notices to be sent out automatically, the associated system task must be active.
-
Hover over Tools and click View System Task Logs.
-
Ensure the New Violation Notices task is enabled.
Task Frequency: The frequency at which this system task runs can be adjusted, but it must be updated manually in the database by the OPSCOM team. Please contact support@ops-com.com for assistance with modifying this schedule.
Using this Feature
Once configured, the system handles the distribution of warning notices automatically based on the scheduled system task. No daily manual intervention is required.
Available Actions and Functionality
-
Running Tasks Manually: Like other system tasks, the New Violation Notices task is set to run at a scheduled time. However, administrators can execute it immediately by clicking the Run button next to the task on the system task logs page.
-
Output Filtering: While the Send Notices For Warnings setting is enabled, the system task will include warning violations in its email output. If you choose to disable this setting later, the task will revert to only sending notices out for standard violations issued with a fine.
Best Practices and Considerations
-
Protecting Field Staff: We strongly recommend keeping a longer delay for the task frequency. Delaying the automated warning emails is intentionally designed to prevent unsafe situations where field staff might be approached, pressured, or confronted by a user immediately after issuing a violation in the lot.
Appeal Evidence Uploads Overview
The Appeal Evidence Uploads feature allows users to directly attach supporting files, such as images and text documents, to their violation appeals. Its primary purpose is to centralize all appeal-related information within the system, eliminating the need for administrators to request and track evidence through separate email channels and streamlining the overall review process. This article is intended for OPSCOM administrators.
Setup and Configuration
To use this feature, administrators must ensure both the core appeals module and the specific evidence upload setting are active within the system settings.
-
Hover over System Configuration and click System Settings.
-
Click the Violations tab.
-
Ensure the Enable Appeals Module checkbox is enabled. (If it is not available, please contact support@ops-com.com).
-
Enable the Enable Appeal Evidence Uploads checkbox to allow users to submit files as evidence for their appeals.
-
Save your configuration changes.
Default Settings and Limits: The evidence upload setting is enabled by default for organizations using the appeals module. Users can upload multiple files per appeal. Supported file types include JPG, PNG, and PDF, with a maximum file size limit of 12MB per file.
Using this Feature
This feature seamlessly integrates directly into the existing appeal submission and review workflows for both users and administrators.
Administrator Experience
When an administrator accesses a submitted appeal through the standard appeals report or violation information screen, any attached supporting files will be securely displayed directly on the review page. This provides immediate, centralized access to all relevant evidence without needing to search through external emails or documents before recording a decision.
User Portal Experience
When a user submits an appeal through the public portal, they will be prompted with an intuitive option to attach their supporting image and text files in one single submission. Detailed instructions on how users navigate this specific upload process can be found on the User Portal Experience page.
Best Practices and Considerations
-
Prompt Review: Always review the attached evidence before making a final appeal decision. Because the documentation is now centralized, administrators can resolve disputes faster and with greater accuracy, improving the overall relationship with your user base.
-
Data Security: All uploaded files are securely stored within the OPSCOM system and are strictly accessible only by authorized administrative personnel handling the appeal. You can assure concerned users that their submitted evidence is handled with strict confidentiality.
OperationsCommander Payments and Transaction Flow
OperationsCommander works hard to maintain an up to date product wiki! If you have any questions or if you feel something is missing, post about it in the community.
Payroll Deduction Settings
The Payroll Deduction Settings feature allows administrators to control whether users can select payroll deduction as a valid payment method for parking violations and temporary permits. Its primary purpose is to easily toggle these internal payment options on or off during the user checkout process to align with your organization's current financial policies. This article is intended for OPSCOM administrators.
Setup and Configuration
Controlling the availability of payroll deductions is managed through the global system settings. Because these settings use a "disable" logic, administrators must explicitly uncheck the boxes to make the payment options available to end-users.
Admin Configuration
-
Hover over System Configuration and click System Settings.
-
Click the Payments component to open the payment control menu.
-
Locate the payroll deduction settings area within the menu.
-
Enable the Disable Payroll Deduction for Violations checkbox to stop users from paying for citations via payroll deduction, or disable the checkbox to allow the payment method.
-
Enable the Disable Payroll Deduction for Temp Permits checkbox to stop users from purchasing temporary permits via payroll deduction, or disable the checkbox to allow the payment method.
-
Save your system settings.
Using this Feature
Once configured, the system automatically handles how payment methods are presented to the end-user.
User Checkout Experience
-
Feature Enabled (Checkbox Unchecked): When a user proceeds to the checkout screen to pay a violation or purchase a temporary permit, "Payroll Deduction" will appear as a selectable option alongside standard payment methods like credit card or account balance.
-
Feature Disabled (Checkbox Checked): The payroll deduction option is completely hidden from the user's checkout screen for that specific item type.
Best Practices and Considerations
Reversing the Logic: Remember that these settings are framed in the negative. To turn the payroll deduction feature ON for your users, you must make sure the respective checkboxes are disabled (unchecked).
-
Clear Financial Policies: Ensure your organization has a clear, documented policy regarding employee eligibility for payroll deductions before allowing this payment method in the system.
-
Permit Types: Note that this specific configuration targets temporary permits. If your organization handles payroll deductions for long-term or permanent permits, those are typically managed within the individual permit pricing and eligibility settings, rather than this global toggle.
Setting up Quick Pay/Guest Payments
The Quick Pay and Guest Payments feature allows guest users to look up and pay for violations directly from the user portal without needing to create or log in to an account. Its primary purpose is to streamline the payment process for end-users, thereby reducing the volume of administrative inquiries and support tickets. This article is intended for OPSCOM administrators.
Setup and Configuration
For Guest Payments to function properly, you must first designate which payment types are available for guests and then activate the feature within the system's global settings.
Payment Provider Compatibility: A compatible third-party payment provider that supports guest transactions must be configured in your OPSCOM system before enabling this feature. For detailed instructions, refer to the Setting up a third-party Payment Provider page here.
Enable Specific Payment Types
-
Hover over System Configuration, click Payments, then click Setup Payment Types.
-
Create a new payment type or click the Edit icon next to an existing payment type that you wish to enable for guests.
-
Click the Settings tab.
-
Enable the Enable for Guest Payments checkbox.
-
Click the Save button to confirm the change.
-
Repeat these steps for all payment types you want to make available for guest payments.
Activate Global Setting
-
Hover over System Configuration and click System Settings.
-
Click the Violations tab.
-
Enable the Enable Anonymous Violation Payments checkbox.
-
Click the Save Settings button.
Using this Feature
Once Guest Payments are fully configured, a dedicated button will automatically appear on the public portal's main login page, allowing users to search for and pay their violation fines without logging in.
For detailed instructions on how end-users interact with this interface, please refer to the OPSCOM-Go! - Quick & Easy Guest Payments page.
Best Practices and Considerations
-
Select appropriate payment types: Only enable electronic payment methods (e.g., Credit Card) for Guest Payments. Manual payment types, such as cash or check, cannot be processed automatically through the public portal.
-
Confirm provider compatibility: Guest Payments will not function without a compatible payment gateway configured in OPSCOM. Consult your specific payment provider's documentation or support team if you are unsure about their guest transaction capabilities.
-
Communicate availability: Consider adding a note on your organization's parking information page to proactively direct users to this convenient payment option, ensuring they know they do not need to register for an account just to pay a one-time ticket.
Payment Reconciliation: Submitted / Processed
The Payment Reconciliation page allows administrators to effectively track and manage the status of payments within a defined time period. Its primary purpose is to reconcile the dollar value of received payments with your bank or credit card merchant by accurately comparing the amounts charged between the two systems. This article is intended for OPSCOM administrators responsible for financial reporting and auditing.
Setup and Configuration
To effectively filter reconciliation data, administrators can create designated groups and assign specific members to them.
You must have the View Payments permission enabled on your profile to access this report. This permission can be added to your role by a Primary Admin.
Creating a Payment Reconciliation Group
-
Hover over System Configuration, click Admin Management then Manage Groups.
-
Click the Payment Reconciliation module tab.
-
Click the Add New button in the top right corner.
-
Enter a name for the group into the Group Name field.
-
Set the purpose of the group using the Module drop-down menu.
-
Add the appropriate staff to the group using the Admin Members selection area.
-
Click the Save Group button. The new group will appear at the bottom of the Administrator Groups list.
Adding Members to an Existing Group
-
Hover over System Configuration, click Admin Management then Manage Groups.
-
Click the Edit button next to the specific Administrator Group you wish to modify.
-
Click the Admin Members bar to select and add additional members to the group.
-
Click the Save Group button at the bottom of the window to apply your changes.
Using this Feature
Administrators can filter results to view either submitted or processed payments based on specific criteria.
-
Hover over Payments and click Payment Reconciliation.
-
Define the start and end dates for the payments you wish to view using the Filter by Date Range fields.
-
Select the specific payment methods you want to include in the results using the Filter by Payment Type drop-down menu.
-
Filter reconciliation data based on specific designated groups using the Filter by Admin Group drop-down menu.
-
Click the Search button. The results will display directly below the search criteria.
-
Click any column header within the results table to reorder and sort the data.
Available Export Actions
The report page offers various export options (displayed as green buttons) that allow administrators to generate files for external use:
-
Copy: Copies the row data to your clipboard, allowing you to easily paste it into external programs.
-
CSV: Creates and downloads a Comma-Separated Values (.csv) file for use in spreadsheet software.
-
Excel: Creates and downloads a Microsoft Excel (.xls) file.
-
Print: Prompts your web browser to print the current page view.
Best Practices and Considerations
[!WARNING] Avoid using the Daily Payments Itemized report for reconciliation tasks. While the Daily Payments Itemized report shows received payments, it is not recommended for financial reconciliation. It may display tax differently and can lead to rounding errors, making exact dollar-value comparisons inaccurate.
-
Reconciliation Focus: Always use the Payment Reconciliation report as your primary tool when comparing internal OPSCOM system payments with external bank or merchant settlement statements.
Accepting a Student Account Payment from the Admin Portal
The Student Account Payment feature allows administrators to process transactions by billing a user's internal institutional account directly from the administrative portal. Its primary purpose is to seamlessly facilitate purchases, such as permits or lockers, for students who pay their parking fees through their central student tuition or university finance accounts. This article is intended for OPSCOM administrators.
Setup and Configuration
Before you can accept a student account payment, ensure this specific payment type has been created and enabled within your global payment settings.
For detailed instructions on configuring new payment methods, please refer to the Managing Payment Types page.
Using this Feature
Administrators can guide an unpaid item through the checkout process using a student's central account in just a few steps. The following example demonstrates this process using a permit purchase.
Visual Cues and Status Indicators
-
Receipt Generation: Once the payment is successfully processed, the final screen will display a detailed receipt. Because the payment method selected was Student Account, the item will be permanently marked and tracked in the system history as being paid via a student account.
Best Practices and Considerations
Reconciling Funds: To ensure your institution's finances remain balanced, run a Daily Payments Itemized report filtered specifically by the Student Account payment type. This report should be provided to your financial department on a regular schedule to allow them to manually retrieve the appropriate funds from the central student accounts.
-
Verify User Profiles: Always verify you are processing the transaction on the correct user profile before clicking the final process button. Because student account funds are handled internally, charging the wrong student profile can create complex administrative errors for your finance department to reverse.
Payment for a locker from the Admin Portal
The Locker Payment feature allows administrators to assign a locker and process the associated payment on behalf of a user directly from the administrative portal. Its primary purpose is to seamlessly facilitate locker rentals and handle in-person transactions, ensuring accurate inventory and financial tracking. This article is intended for OPSCOM administrators.
Setup and Configuration
There is no specific system configuration required to use this feature, provided your locker inventory and payment methods are already established. Processing a locker payment is a standard administrative action available to users with the appropriate user management and payment processing permissions enabled on their account profile.
Using this Feature
Administrators can navigate the assignment and checkout process for a locker in just a few steps from a user's profile.
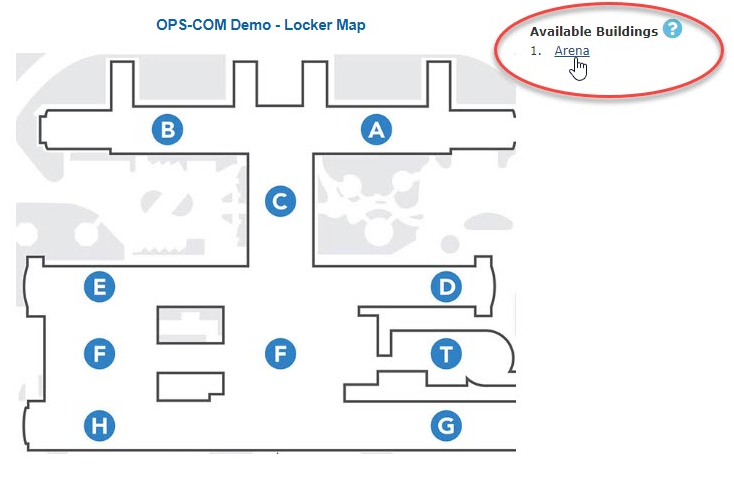
Visual Cues and Status Indicators
-
Receipt Generation: Once the payment is successfully processed manually, the final Transaction Details screen will refresh to display a detailed receipt, confirming the locker assignment and the logged payment.
Best Practices and Considerations
Managing Incomplete Transactions: If a user forgets their wallet or needs to step away during an in-person transaction, use the Cancel and Keep button. This safely holds the specific locker under their profile for future payment without forcing you to restart the entire assignment process when they return.
-
Verify the User Profile: Always verify you are processing the transaction on the correct user profile before clicking the final process button to prevent assigning inventory or logging manual payments to the wrong account.
-
Releasing Inventory: If a user changes their mind at the final checkout step and no longer wants the locker, ensure you click the Cancel and Release button so that the locker immediately becomes available for other users to rent.
Admin Portal Permit Purchase with Credit Card
The Admin Portal Permit Purchase with Credit Card process allows administrators to manually purchase and assign a parking permit on behalf of a user. Its primary purpose is to seamlessly facilitate over-the-phone or in-person permit sales while securely processing payments through your integrated payment provider. This article is intended for OPSCOM administrators.
Setup and Configuration
There is no specific system configuration required to use this feature, provided your third-party payment provider and permit inventory are already established. Processing a permit purchase is a standard administrative action available to users with the appropriate user management and payment processing permissions enabled on their account profile.
Using this Feature
Administrators can navigate the assignment and checkout process for a permit using a credit card in just a few steps.
Key Information Displayed
-
Transaction Record: Once the payment is successfully processed, the screen will display a detailed transaction record. This includes the unique confirmation number, which is permanently stored in the user's payment history and can be easily retrieved using system search tools.
Best Practices and Considerations
[!WARNING] Payment Security: When taking a payment over the phone, never write down or permanently store the user's credit card information. Always enter the details directly into the payment provider's secure gateway in real-time to maintain strict PCI compliance.
-
Verify User Profiles: Always verify you are processing the transaction on the correct user profile before proceeding to the payment gateway. Charging the wrong account can create administrative complications and require manual refunds.
-
Searchable Transactions: Encourage staff to provide the user with the generated confirmation number before ending the call, as this number can be used later to quickly locate the transaction if the user has any future inquiries.
Daily Payments - Itemized
The Daily Payments Itemized report allows administrators to view a detailed breakdown of all submitted and processed payments within a specific date range. Its primary purpose is to help track individual transaction items, such as permits, deposits, and violations, for financial tracking and daily reporting. This article is intended for OPSCOM administrators.
Setup and Configuration
There is no specific system configuration required to access this report. Running the daily itemized report is a standard administrative function available to users with the appropriate financial and payment management permissions enabled on their account profile.
Using this Feature
Administrators can filter the daily payments by date range, payment status, and payment type to generate a highly specific financial report.
-
Hover over Payments and click Daily Payments - Itemized.
-
Select your desired date range using the provided date fields.
-
Filter the results by choosing specific payment types from the drop-down menu.
-
Choose to filter the report by either submitted or processed payments.
-
Click the List Payments button to generate the results.
Key Information Displayed
-
Daily Grouping: Once generated, the results will be displayed directly below the search criteria, automatically organized and grouped by day.
-
Processed Orders Breakdown: A comprehensive table breakdown summarizing all daily processed orders is displayed at the bottom of the page for quick reference.
Available Action & Button
The report offers two distinct Excel export options depending on how you need the data organized for external use:
-
Export to Excel (Group): Click this button to generate a file where payment items (such as permits, deposits, violations, and lockers) that are part of the exact same transaction are grouped together into a single block.

-
Export to Excel (Line): Click this button to generate a file where payment items that are part of the same transaction are separated out and listed on individual rows.

Best Practices and Considerations
Reconciliation Tasks: While this report provides an excellent itemized view of daily transactions, it is not recommended for strict bank reconciliation tasks (comparing system payments directly to bank merchant payments). Itemized reports can occasionally display tax differently and lead to rounding errors. Always use the Payment Reconciliation page for direct bank statement comparisons.
-
Export Formats: Choose the correct export format based on your external accounting software. If your financial department imports this data into a third-party accounting system, verify whether their software requires grouped transaction totals or individual line-item separation before running your export.
Admin Portal Cash, Cheque or Debit Payment
The Admin Portal Manual Permit Payments feature allows administrators to process in-person, offline transactions—such as cash, cheque, money order, or debit card—when assigning a parking permit to a user. Its primary purpose is to facilitate front-desk permit sales while ensuring these off-gateway payments are securely and accurately logged within the system's financial records. This article is intended for OPSCOM administrators.
Setup and Configuration
There is no specific system configuration required to use this feature, provided your manual payment types and permit inventory are already established. Processing a manual payment is a standard administrative action available to users with the appropriate user management and payment processing permissions enabled on their account profile.
If you need to add or edit the manual payment methods available at your front desk, instructions can be found on the Managing Payment Types page.
Using this Feature
Administrators can navigate the assignment and checkout process for a manual permit purchase in just a few steps.
Visual Cues and Status Indicators
-
Receipt Generation: Once the manual payment is successfully processed, the screen will refresh to display a final confirmation screen and transaction record, confirming the purchase is complete and the permit is active.
Best Practices and Considerations
Managing Incomplete Transactions: If a user realizes they forgot their wallet or chequebook during an in-person transaction, use the Cancel and Keep button. This safely holds the specific permit under their profile for future payment without forcing you to restart the entire assignment process when they return.
-
Physical Collection: Always collect the physical funds or process the debit terminal transaction before clicking Process Manually. Clicking this button tells the OPSCOM system that the money has been successfully secured.
-
Releasing Inventory: If a user changes their mind at the final checkout step and no longer wants the permit, ensure you click the Cancel & Release button so that the permit immediately becomes available for other users to purchase.
Paying for a Violation from the Admin Portal
The manual violation payment feature allows administrators to accept and process ticket payments on behalf of users directly from the administrative portal. Its primary purpose is to seamlessly facilitate in-person or over-the-phone ticket resolutions, ensuring all offline transactions (such as cash or cheque) are accurately recorded in the system's financial logs. This article is intended for OPSCOM administrators.
Setup and Configuration
There is no specific system configuration required to use this feature, provided your manual payment types are already established. Processing a manual payment is a standard administrative action available to users with the appropriate violation management and payment processing permissions enabled on their account profile.
Using this Feature
Administrators can locate an unpaid violation and guide it through the checkout process in just a few steps.
Searching for the Violation
-
Type the specific violation number into the quick search bar and click the resulting drop-down link, or hover over Violations and click Search.
-
Enter the ticket number or license plate number into the Search Text field.
-
Click the Search Using Only Text button.
-
Click the specific ticket number link from the search results to open the Violation Information window.

Processing the Payment
-
Click the Action drop-down menu and choose Make Payment.
-
Review the awaiting items displayed on the payment screen. Disable the checkboxes for any items the user wishes to pay for at another time.
-
Click the Proceed to Payment button.
-
Select the specific payment type you wish to use (e.g., Cash) from the available options.
-
Click the Submit Payment Information button.
-
Click the Submit Payment Information button again on the confirmation screen to proceed.
-
Update the Comment field on the Transaction Detail screen if necessary.
-
Click the Process Manually button to finalize the payment and generate the transaction receipt.
Visual Cues and Status Indicators
-
Past Due Items: The initial payment screen displays all items currently awaiting payment, including violations, permits, and deposits. If any items are past due, they will be locked; you will be required to process them and will not be able to toggle them off.
-
Available Payment Types: As an administrator, you will see every payment type available in your system during checkout. Remember that users paying from the public portal will typically only see electronic options, such as Credit Card.
Best Practices and Considerations
[!WARNING] Physical Collection: Always collect the physical funds or process the debit terminal transaction before clicking Process Manually. Clicking this button completes the transaction and logs the money as successfully secured in your system's financial records.
-
Managing Incomplete Transactions: If you need to abort the payment on the final screen, you can choose to cancel the transaction instead of processing it. Canceling a payment for a violation simply places the violation back into an awaiting payment status on the user's profile.
- Search Methods: Using the specific Ticket Number will load that exact ticket, whereas searching by Plate Number will generate a list of all tickets associated with that vehicle.
Payment Data Export via SFTP
The Payment Data Export via SFTP feature automatically exports payment and violation data into a CSV file specifically formatted for integration with the other financial systems like, Workday and Banner. Its primary purpose is to ensure seamless financial data synchronization by appending the necessary detail codes and term codes to user transactions. This article is intended for OPS-COM administrators responsible for system configuration and financial integrations.
Setup and Configuration
There are several items that must be carefully configured across different system modules in order for the right information to display in the exported CSV file.
Admin Side:
User Profile Configuration
-
Configure a unique user ID in the User Profile. This information will likely be populated automatically via a user data import.
Lot Administration Configuration
Each lot requires a unique banner detail code established during the preliminary planning phase of your project.
-
Head to Parking Management, hover over Lot Administration and click Pricing & Lot Admin.
-
Click the specific lot name to access the configuration screens.
-
Click the Additional tab.
-
Enter the required code into the Banner Detail Code field.
-
Save your lot configuration changes.
Ticket Categories Configuration
-
Hover over Violations and select Ticket Categories (or Manage Ticket Categories).
-
Click Edit on the category you wish to configure.
-
Enter the detail code for the ticket category (e.g., entering PRKB for the Boot Fee category).
-
Save your category changes.
Sales Window Configuration
You must enter a Term Code specifically used for permits on the sales window configuration page so it appears on the permit purchases export.
-
Hover over Permits and select Sales Window.
-
Click Edit to access the configuration screen for the desired window.
-
Enter the appropriate code in the Banner Term Code field.
-
Click the Save Changes button.
Activate Script to Run on a Schedule
-
Click View System Task Logs from the main options menu.
-
Ensure the associated system task is set to active and has an active schedule set (e.g., verifying the task is set to run at 2:00 am nightly).
User Side: End-users do not interact with the setup or configuration of the Banner export. They simply select the appropriate payment method during checkout.
Using this Feature
Once configured, the system automatically handles the data export based on your scheduled tasks. Administrators can verify the workflow by performing a test transaction on the user portal.
Performing a Test Transaction
Best Practices and Considerations
-
Understand the export trigger: The Export to Banner process will run automatically whenever the system task is scheduled to execute. It actively gathers any violations or payments that can be sent to Banner that haven't been exported yet. Once an item has been exported by the system task, it is internally flagged to prevent duplicate exports.
-
Anticipate unique file generation: The system does not create a cumulative file that gets more data added to it each day. Rather, it creates a completely new CSV file every single time it runs. This interval isn't necessarily daily; it runs at whatever frequency your organization has decided.
-
Handle missed schedules carefully: If the system task misses a scheduled day, there will be more than one new file in the output folder for your team to process. Administrators must be prepared to process all pending files in Banner to ensure financial records are fully reconciled.
Search Payments
The Search Payments tool provides a dedicated interface to locate specific transactions and run pre-configured payment status reports. Its primary purpose is to help administrators quickly find individual payment records using unique identifiers, as well as audit unprocessed or daily payments for accurate financial tracking. This article is intended for OPSCOM administrators.
Setup and Configuration
There is no specific system configuration required to access this search tool. Running payment searches is a standard administrative function available to users with the appropriate financial and payment management permissions enabled on their account profile.
Using this Feature
Administrators can locate specific transactions using unique identifiers or utilize pre-configured reporting links to pull lists of payments based on their payment type and current processing status.
Searching by Unique Identifier
-
Hover over Payments and click Search.
-
Enter the specific text string into the Confirm Code, Transaction ID, or Order ID field on the Payments Reporting form.
-
Click the associated search button. If the code exists in the system, the screen will automatically refresh to display the specific transaction details for that purchase.
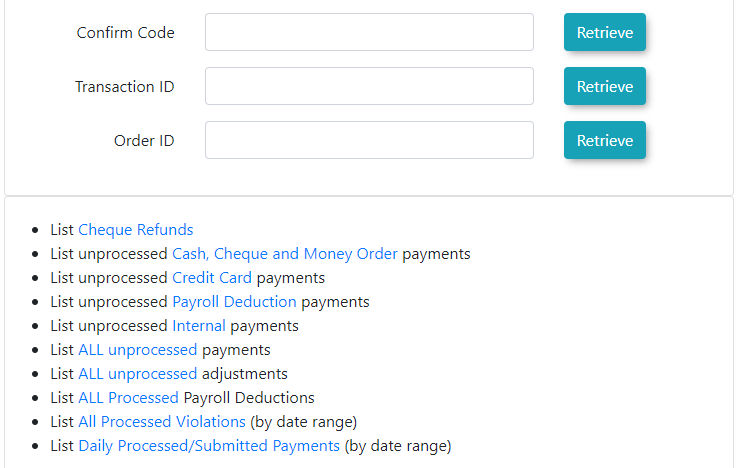
Using Pre-Configured Searches
The search tool includes several pre-configured search links located below the main search fields. These links help you find grouped payment information quickly. Some reports require you to set a date range, while others will automatically pull all relevant data.
Click any of the following links on the search page to generate the respective report:
-
List Cheque Refunds
-
List unprocessed Cash, Cheque and Money Order payments
-
List unprocessed Credit Card payments
-
List unprocessed Payroll Deduction payments
-
List unprocessed Internal payments
-
List ALL unprocessed payments
-
List ALL unprocessed adjustments
-
List ALL Processed Payroll Deductions
-
List All Processed Violations (requires a date range)
-
List Daily Processed/Submitted Payments (requires a date range)
Reviewing the Daily Processed or Submitted Payments Report
When you select the List Daily Processed/Submitted Payments option, you must specify your search parameters.
-
Select the desired date range using the provided fields.
-
Select whether you wish to search for submitted payments or processed payments.
-
Click the search button to generate the report.
Key Information Displayed: The resulting report is divided into two distinct sections. The first section provides a highly detailed itemized list of all individual payments within the selected timeframe. The second section provides a concise daily summary table for quick financial reference.
Best Practices and Considerations
Regular Audits: Regularly use the pre-configured List ALL unprocessed payments search link to identify and resolve any pending transactions. Ensuring all manual cash, cheque, or internal payments are marked as processed keeps your financial reporting accurate and up to date.
-
Quick Access for User Support: If a user contacts the administration office regarding a specific online purchase, ask them for the confirmation code provided on their digital receipt. Entering this into the Confirm Code search field is the fastest way to bypass broad user searches and instantly view the exact transaction details.
Banner Report
Setup and Configuration
There is no specialized system configuration required to access this report, provided your institution utilizes a Banner system for student or staff financials. Generating the report is a standard administrative function available to users with the appropriate financial reporting and payment management permissions enabled on their account profile.
Using this Feature
Administrators can use this tool to define the payment batch parameters, export the data for Banner, and mark the items as resolved in OPSCOM.
Generating and Exporting the Report
-
Hover over Payments and click Banner Report.
-
Select the demographic you wish to report on from the User Types drop-down menu.
-
Select the specific item you are processing (e.g., yearly permits) from the Choose Item Type drop-down menu.
-
Select the end date of the billing period using the Up To and Including date picker.
-
Enter the appropriate payment identification code into the Banner Code field (e.g., 100).
-
Enter the exact item representation code into the Detail Code field (e.g., YP2020).
-
Enter your specific administrator ID into the Admin Code field to track who is making this payment report.
-
Click the Export to Excel button to download a spreadsheet of the selected names and payments. This file can then be imported directly into Banner to facilitate payment through central student or staff accounts.
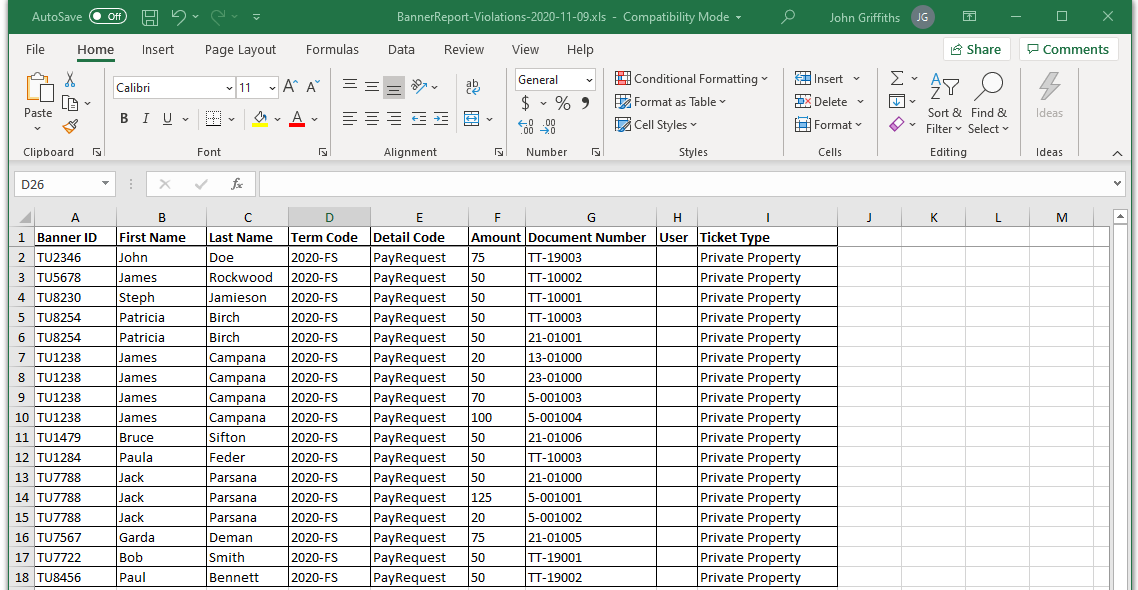
Marking Items as Paid
Once the report parameters are set and you are ready to resolve the balances in OPSCOM:
-
Click the Mark as Paid button to begin the internal payment process.
-
Click the Confirm button on the popup window to finalize the transaction.
Export Before Paying: Always click the Export to Excel button before clicking the Mark as Paid button. Once you mark the items as paid in OPSCOM, they are cleared from the pending queue. If you do not have the exported spreadsheet saved, you will not be able to process the actual transfer of funds within your Banner system.
Key Information Displayed and Status Indicators
-
Transaction Code Generation: Once the bulk payment is confirmed, a final screen will display a unique transaction code for the batch.
-
Payment Status: Searching for this specific transaction code using the standard OPSCOM payment search tools will return a list of all items included in the report, verifying that they are now successfully marked as paid in the system.
Best Practices and Considerations
-
Code Accuracy: Coordinate closely with your finance department to ensure the values you enter into the Banner Code and Detail Code fields perfectly match your external system's current formatting requirements. Incorrect codes will cause the Excel import to fail in Banner.
-
Record Keeping: Keep a log of the generated OPSCOM transaction codes alongside your Banner import records to ensure easy auditing and cross-system reconciliation.
Flex Payments
The Flex Payments process allows administrators to create a prepaid credit balance on a user's account by issuing a zero-dollar placeholder permit and applying a manual negative adjustment. Its primary purpose is to provide flexible funding options for specific user groups, allowing them to apply this prepaid credit toward future parking purchases on the user portal. This article is intended for OPSCOM administrators.
Setup and Configuration
To utilize flex payments, administrators must first configure a dedicated zero-dollar lot and allocate placeholder permits to it.
Configuring the Flex Payment Lot
-
Hover over Lot Administration and click Pricing & Lot Admin.
-
Create a new lot and enter a descriptive name (e.g., Flex Payment Lot).
-
Set the cost of the lot to $0.00.
-
Select the specific demographic utilizing flex payments from the Usertype drop-down menu (e.g., Full Time Staff).
-
Set the Sales Window to Yearly.
-
Save your lot configuration.
-
Hover over Lot Administration and click Allocate.
-
Add a block of dummy permits to this new lot (e.g., FLX001 through FLX010).
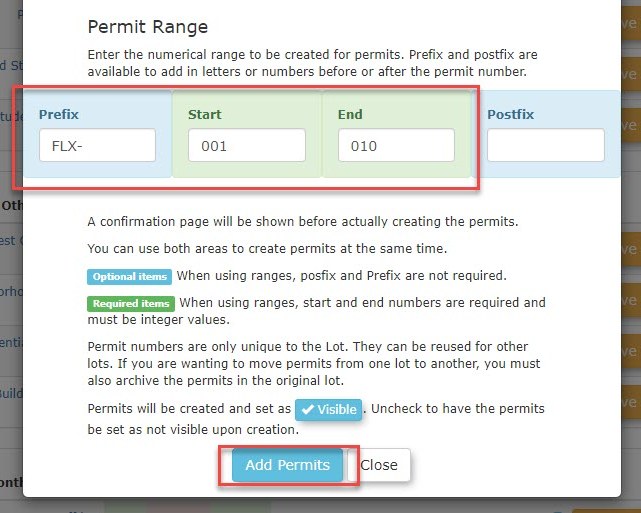
Lot Visibility: This placeholder lot does not need to be visible to standard users, as this functionality is executed exclusively from the administrative portal. You can safely hide this lot from public view in the lot settings.
Using this Feature
Once the placeholder lot is established, administrators can apply a flex credit to a user's account by "selling" them one of the zero-dollar permits and adjusting the transaction total.
Applying the Flex Credit
-
Navigate to the specific user's profile and click the Parking tab.
-
Select a permit from the newly created Flex Payment Lot.
-
Click the Purchase this Permit button to proceed.
-
Click the Proceed to Payment button on the Payments Due screen.
-
Select a manual payment type, such as Cash, and process it as a zero-dollar purchase.
-
Click the Adjust button on the final confirmation screen to open the adjustment interface.
-

-
Enter a negative value to represent the credit amount (e.g., -200.00).
-
Enter a clear description in the Comment field (e.g., Flex Payment Adjustment).
-
Click the Add Adjustment button.
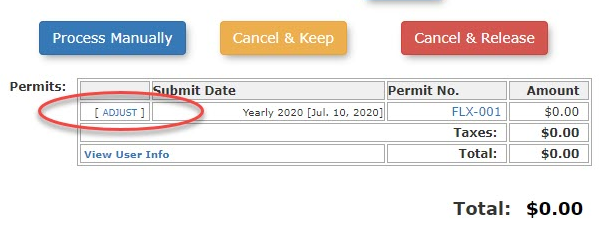
Key Information Displayed
-
User Portal Credit: Once the negative adjustment is applied, the user will see a credit balance displayed directly on their dashboard when they log into the user portal. This balance can then be selected as a valid payment method when they check out to purchase their actual parking permit.
Do Not Process the Credit: After adding the negative adjustment, do not attempt to process a refund or payout for the credit balance. Leave the negative balance on the user's account so the system recognizes it as available funds they can apply toward future permit purchases.
Best Practices and Considerations
-
Audit Trails: Always use clear and standardized comments when adding the negative adjustment (e.g., "Fall Semester Flex Funding"). This ensures your financial team can easily identify why a manual credit was applied to the user's profile during an audit.
Payroll Deduction Workflow
The Payroll Deduction Workflow allows administrators to process permit payments by assigning the transaction cost directly to a user's internal payroll account. Its primary purpose is to seamlessly facilitate staff and employee parking purchases by logging the transaction for deferred collection through your organization's payroll system. This article is intended for OPSCOM administrators.
Setup and Configuration
Before you can process a purchase using this workflow, ensure that the Payroll Deduction payment method is active in your system.
-
Verify that the Payroll Deduction payment type is enabled for the specific user groups (e.g., Staff or Faculty) permitted to use this feature.
-
Check your global payment settings to ensure the deduction option is not disabled for standard permit purchases.
For detailed instructions on configuring these payment toggles, please refer to the Payroll Deduction Settings page.
Using this Feature
Administrators can process a permit purchase using the payroll deduction workflow directly from the administrative portal in just a few steps.
Tracking Deductions: Use the Payroll Deduction Report to accurately track these specific purchases. Generating this report allows you to export the necessary data for your finance or human resources department so they can physically collect the funds from the employees' paychecks.
Visual Cues and Status Indicators
-
Final Transaction Screen: Once the payment is processed manually, the screen will refresh to display a final receipt. At this point, the system considers the permit successfully purchased and active.
Best Practices and Considerations
-
Eligibility Verification: Always verify that the user is eligible for payroll deduction before completing the transaction. Processing a deduction for an ineligible user (such as a temporary contractor or student) can create reconciliation errors for your finance department.
Admin Portal Violation Payments with Credit Card
The Admin Portal Violation Payments with Credit Card process allows administrators to manually process parking ticket payments using a user's credit card directly through the administrative portal. Its primary purpose is to seamlessly facilitate over-the-phone or in-person electronic payments while securely processing the transaction through your integrated payment provider. This article is intended for OPSCOM administrators.
Setup and Configuration
There is no specific system configuration required to use this feature, provided your third-party payment provider is already established and credit card payment types are enabled in your environment. Processing a payment is a standard administrative action available to users with the appropriate violation management and payment processing permissions enabled on their account profile.
Using this Feature
Administrators can locate an unpaid violation and process a credit card payment in just a few steps.
-
Hover over Violations and click Search.
-
Type the specific ticket number into the Search Text box and perform the search.
-
Click the specific Ticket # link from the search results to open the Violation Information window.
-
Click the Actions drop-down menu and choose Make Payment.
-
Review the awaiting items displayed on the user's payment screen. Disable the checkboxes for any items the user does not wish to pay for at this time (such as unrelated permits or deposits).
-

-
Click the Proceed to Payment button.
-
Select the applicable credit card option (e.g., Credit Card, MasterCard, or Visa) from the payment type drop-down menu.
-
Enter the required credit card details into the secure payment form.
-
Click the Submit Payment Information button.
-
Click the Confirm Payment Information button on the confirmation screen to finalize the transaction.

Visual Cues and Status Indicators
-
Transaction Details: Once the payment successfully processes, the system will redirect to a final transaction details page displaying a generated receipt for the purchase.
Available Action for External Payments
-
External Credit Card Transactions: If a customer chooses to pay by credit card in person at the parking office using a physical pin pad or standalone cash register, you should select an external payment type (e.g., "Visa (External)"). This action bypasses the online payment gateway form and simply logs the transaction as paid in the OPSCOM financial records.
Payment Security: When taking a credit card payment over the phone, never write down or permanently store the user's credit card information. Always enter the details directly into the payment provider's secure gateway in real-time to maintain strict PCI compliance.
Best Practices and Considerations
-
Verify Selected Items: Always double-check the selected items on the checkout page before clicking the proceed button. Because all of the user's pending items will appear, you must manually deselect any permits or other violations the user is not actively paying for to avoid overcharging their card.
-
Confirming the User: Verify that you are processing the violation on the correct user profile by matching the license plate and user details before submitting the final payment to prevent complex refund scenarios.
Failed Payments Report
The Failed Payments Report allows administrators to search and review a list of unsuccessful payment transactions within a specific date range. Its primary purpose is to help identify exactly why a user's transaction did not process by providing access to detailed transaction records and specific payment provider error codes. This article is intended for OPSCOM administrators.
Setup and Configuration
There is no specific system configuration required to access this report. Running the failed payments report is a standard administrative function available to users with the appropriate financial reporting and payment management permissions enabled on their account profile.
Using this Feature
Administrators can generate a list of unsuccessful transactions and drill down into the specific error details in just a few steps.
-
Hover over Payments and click Search Failed Payments.
-
Enter the specific date range you wish to report on using the provided date fields.
-
Click the Search button.
-
Review the generated list of failed payments displayed for the selected time period.
-
Click the specific Confirmation Code link to open the full transaction record and view detailed failure information.
Understanding Provider Error Codes: While some payment gateways return a detailed text explanation indicating exactly why a payment failed, other providers will simply supply a numerical error code (e.g., Response Code 481).
Key Information Displayed
-
Failed Payment List: The initial search results display a high-level overview of the failed attempts, including the Pay ID, confirmation code, total amount of the payment, the date the payment failed, and the associated user's name.
-
Transaction Record Details: Drilling down into a specific confirmation code reveals the full transaction record. This includes any detailed information or response codes returned directly by your third-party payment provider.
Best Practices and Considerations
-
Investigating Codes: Perform a quick web search for the specific credit card response code if your gateway only provides a number. For example, searching for "Credit card response code 481" will quickly reveal that there is an error in the information provided by the user, usually an incorrect expiration date or an incorrect billing address.
-
User Support: Use the information found in the transaction record to proactively assist users who call in regarding payment issues, guiding them to double-check specific fields (like their postal code or CVV) based on the gateway's response code.
Mark Items as Paid
The Mark Items as Paid feature allows administrators to efficiently update the payment status of outstanding items in bulk. Its primary purpose is to streamline administrative workflows when resolving unpaid balances for specific user demographics, item types, or lists of recovered violations returned by a collection agency. This article is intended for OPSCOM administrators.
Setup and Configuration
There is no specialized system configuration required to access this tool. Processing bulk payments is a standard administrative function available to users with the appropriate financial reporting and payment management permissions enabled on their account profile.
Using this Feature
Administrators can execute bulk payment updates either by defining broad system criteria or by entering a specific list of ticket numbers.
Marking Items Paid by Criteria
This method is useful for clearing out legacy balances or waiving fees for specific groups up to a certain date.
-
Hover over Payments and click Mark Items Paid.
-
Select the target demographic you wish to update from the User Type drop-down menu (e.g., Full Time Staff).
-
Select the specific item you are marking as paid from the Choose Item Type drop-down menu (e.g., Locker Rentals).
-
Select the end date for the adjustment period using the Up To and Including date picker.
-
Click the corresponding action button to process the bulk payment update for all items matching your selected criteria.
Bulk Marking Violations Paid
This method is primarily used when outstanding violations have been sent to collections, and the administrative office receives a return list of successfully retrieved payments from the collection agency.
-
Hover over Payments and click Mark Items Paid.
-
Click the Bulk by Number button located next to the Violations option.
-
Enter the specific violation numbers into the text tool, ensuring each ticket number is separated by a line return.
-
Select Violations Paid Through Collection (or the most appropriate payment type) from the drop-down list.
-
Click the Mark Listed Paid button to complete the process and apply the payments.
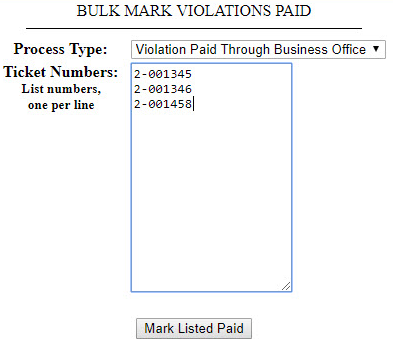
Exclude PINs from Violation Numbers: When entering violation numbers into the bulk tool, you must not include the PIN associated with the ticket. For example, if a ticket is listed as 2-001345-92 (where 92 is the PIN), you should only enter 2-001345.
Best Practices and Considerations
-
Verify Collection Lists: Always double-check your compiled list of ticket numbers before clicking the final submission button. Processing a bulk payment applies a permanent financial status change to all entered records, and manually reversing a large batch of incorrect tickets can be a time-consuming administrative task.
Payment Adjustments
The Payment Adjustments feature allows administrators to process financial refunds, release inventory, and reverse processed transactions for permits, lockers, and violations. Its primary purpose is to correct billing errors or process user cancellations while ensuring accurate financial tracking and inventory management within the system. This article is intended for OPSCOM administrators.
Setup and Configuration
There is no specific system configuration required to access the adjustment and refund tools. Processing payment adjustments is a standard administrative function available to users with the appropriate financial reporting, inventory management, and refund processing permissions enabled on their account profile.
Using this Feature
Administrators can process refunds and release associated inventory directly from a user's transaction history. The process varies slightly depending on the type of item being adjusted.
Releasing a Permit
Releasing a permit removes it from the user's account and makes it available in the system inventory, but it does not automatically issue a financial refund.
Refunding a Violation
Refunding a violation payment reverses the financial transaction and reinstates the fine on the user's account.
Adjusting Violations to $0: Do not attempt to adjust a violation fine directly to $0 using the payment adjustment tool. If a violation fine needs to be removed or zeroed out, administrators should use the designated warning or appeal workflows to waive the fee properly.
- Key Information Displayed: The transaction record will refresh and display the refund as a logged adjustment. If you return to the user's history, the violation will be placed back into an awaiting payment status.
Refunding a Locker or Temporary Permit
Refunding a locker or temporary permit reverses the financial transaction and automatically releases the inventory.

-
Status Indicators: In the user's history, the locker or temporary permit will now show as released. If you check the respective lot or building allocation pages, the item will appear as available inventory.
Processing Multi-Item Refunds
If a single transaction contains multiple item types (e.g., a permit and a violation purchased together), clicking the Refund button on that transaction will process both items according to their business rules. The payment will be refunded, the permit will be released back into available inventory, and the violation will return to an awaiting payment status.
Best Practices and Considerations
-
Provide Clear Comments: Always provide detailed comments when processing refunds or releasing inventory. This ensures a clear, searchable audit trail for your finance department when they reconcile returned funds.
-
Inventory Management: Remember that refunding a physical item (like a locker or permit) automatically releases the inventory for anyone to purchase. If the user intends to keep the item but simply needs to change their payment method, you must be prepared to reassign the item to them immediately after the refund is processed.
Electronic Fund Transfer Configurations
The Electronic Fund Transfer (EFT) feature allows administrators to export batch payment data into a flat file for external bank processing and subsequently reconcile the returned transaction statuses. Its primary purpose is to seamlessly manage recurring subscriptions or bulk payments directly through your banking institution. This article is intended for OPSCOM administrators.
Setup and Configuration
If your organization plans to use EFT as a payment method, you must configure your specific bank client number in the system. This identifier is provided by your banking institution (e.g., Royal Bank of Canada) and dictates where the funds will be deposited.
Tomahawk Assistance: Depending on your initial onboarding process, the Tomahawk support team may have already entered this information for you.
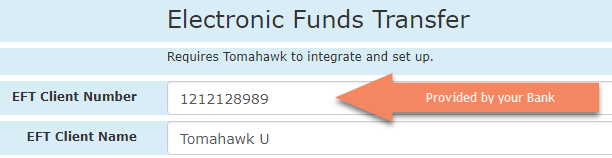
To verify or update this configuration:
-
Hover over System Configuration and click System Settings.
-
Scroll down to locate the Payments section.
-
Enter your bank-provided client number into the appropriate EFT configuration field.
-
Save your system settings.
Using this Feature
The EFT workflow consists of two main administrative phases: generating the export file to send to your bank, and later updating the system based on the bank's transaction report.
Creating EFT Files for the Bank
Once user subscriptions are properly set up and you have performed a system rollover, you can generate the flat file containing the pending EFT information.
-
Hover over Payments and click EFT Export.
-
Download the generated flat file.
-
Submit this file to your banking representative for processing according to your institution's specific procedures.
Marking EFT Items as Paid or Failed
After your bank processes the flat file, they will provide you with a return report detailing which submitted payments were successful and which were declined (e.g., due to insufficient funds). You must manually update these statuses in OPSCOM.
-
Hover over Payments and click EFT Process.
-
Review the list of pending transactions on the Electronic Funds Transfer Process window.
-
Adjust the state for each payment using the available checkboxes.
-
Click the Mark as Indicated button to finalize the process and update the system records.
Available Actions and States:
-
Waiting: This is the default status of all newly exported payments. If a specific payment has not yet been fully processed or confirmed by the bank, leave the record in this default waiting state.
-
Paid: Enable the Paid checkbox to mark the transaction as successfully processed and deposited.
-
Failed: Enable the Failed checkbox if the payment was returned, declined, or flagged as NSF by the bank. Selecting this action will automatically return the specific item to the user's profile as awaiting payment and archive the failed transaction record.
Best Practices and Considerations
-
Prompt Reconciliation: Always process your bank's return report in OPSCOM immediately after receiving it. Delaying the EFT reconciliation process can result in users continuing to hold active permits despite having failed payments on their accounts.
-
Bank Compatibility: The standard flat file generated by the EFT Export tool is specifically formatted to align with the Royal Bank of Canada (RBC). If you are using a different banking institution, please contact support@ops-com.com to confirm compatibility or discuss custom formatting options.
Paying a Violation Anonymously on the Administrator Interface
The Anonymous Violation Payment feature allows administrators to process parking ticket payments without tying the transaction to a registered user account. Its primary purpose is to quickly facilitate in-person or over-the-phone payments from guests or unregistered users who wish to resolve a citation. This article is intended for OPSCOM administrators.
Setup and Configuration
There is no specific system configuration required to access this feature, provided your manual and electronic payment types are already established. Processing an anonymous payment is a standard administrative action available to users with the appropriate violation management and payment processing permissions enabled on their account profile.
If you need to configure new payment methods, instructions can be found on the Managing Payment Types page.
Using this Feature
Administrators can search for an unpaid violation and process the transaction anonymously in just a few steps.
-
Hover over Violations and click Search.
-
Enter either the specific ticket number or the license plate number into the Search Text field.
-
Click the Search using only text button.
-
Click the specific Ticket Number link from the search results to open the Violation Information pop-up screen.
-
Click the Make Anonymous Payment button to proceed to the checkout process.
-
Enable the ticket checkbox to select the specific violation you wish to pay on the Payments Due window.
-
Click the Proceed to Payment button.
-
Select the appropriate method of payment from the available payment type drop-down menu.
-
Click the Submit Payment button.
-
Click the Confirm Payment Information button on the final confirmation screen to complete the transaction.
Confirm Ticket Details: Always verify the license plate and violation details with the user before clicking the Make Anonymous Payment button. Because the payment is not tied to a searchable user profile, correcting a payment applied to the wrong ticket can be administratively difficult.
Visual Cues and Status Indicators
-
Processed Status: Once the payment successfully processes, the screen will refresh to display the final Transaction Detail window. If you search for the violation again in the system, it will be marked as "PROCESSED" to indicate the balance has been cleared.
Best Practices and Considerations
-
Guest Payments: If a guest user calls to pay a ticket but prefers to do it themselves, remind them they can utilize the public portal's guest checkout feature if your organization has anonymous online payments enabled. This reduces administrative overhead at the front desk.
Permit Purchase by an Admin
The Admin Portal Permit Purchase process allows administrators to assign a standard parking permit and process the associated transaction on behalf of a user. Its primary purpose is to seamlessly facilitate in-person or administrative permit assignments while accurately logging the financial transaction in the system. This article is intended for OPSCOM administrators.
Setup and Configuration
There is no specific system configuration required to use this feature, provided your parking lots, permit inventory, and payment methods are already established. Processing a permit purchase is a standard administrative action available to users with the appropriate user management and payment processing permissions enabled on their account profile.
Using this Feature
Administrators can assign a permit and guide it through the checkout process in just a few steps.
Key Information Displayed
-
Lot Availability: When selecting a lot from the drop-down menu, the system will display the number of available spaces. It will only display lots that are available to the specific user's designated user type (e.g., Staff lots will only show for staff users).
-
View Snapshot: Located next to the Submit Date on the transaction screen, this link allows administrators to view a quick summary of the payment information and total values without drilling into the specific item details.
-
Confirmation Number: A unique alphanumeric identifier generated for the transaction, visible on the final receipt screen and accessible via the user's history for future reference.
Available Action & Button
-
Payment Notes: A dedicated text area on the final transaction screen that allows administrators to annotate the purchase, refunds, or payment anomalies. These notes are completely private and are never visible to the end-user.
-
Payment Method Adjustment: Before finalizing the transaction, administrators have the ability to change the selected payment method directly from the Transaction Details screen if the user changes their mind.
Best Practices and Considerations
Managing Incomplete Transactions: If a user needs to finalize their payment at a later time, use the Cancel & Keep button. This safely holds the assigned permit under their profile without forcing you to restart the entire assignment process when they return to pay.
-
Detailed Auditing: Always add clear payment notes if you alter the standard payment process, process an external offline payment, or apply a refund. This creates a reliable audit trail for your finance department.
-
Verify Permit Selection: Always double-check the assigned permit number before clicking the final process button, especially if your organization requires specific users to park in designated, numbered stalls.
Transact Campus/CashNet Hosted Payment Setup
The Transact Campus and CashNet Hosted Payment integration allows institutions to securely process parking and violation transactions through their existing CashNet merchant account. The primary purpose of this configuration is to ensure successful communication and data transfer between the OPSCOM environment and the external CashNet payment gateway. This article is intended for OPSCOM administrators and IT staff responsible for configuring financial integrations.
Setup and Configuration
Setting up this integration requires a coordinated exchange of information between your organization and the OPSCOM support team, followed by specific URL configurations within your CashNet portal.
Information to Provide to OPSCOM Support
To begin the setup process, you must supply specific configuration details from your CashNet system to the OPSCOM support team.
-
Merchant Code: Provide the specific merchant code your institution will be submitting items against from your client system.
-
Item Code: Create a specific item in CashNet for these transactions and provide the exact code to OPSCOM. This item must be configured to allow its value to change dynamically based on the transaction amount.
Exact Matches Required: The item codes provided to OPSCOM must match exactly what is configured in your CashNet system. Any discrepancy between the systems will cause the transactions to fail.
Configuring CashNet Store Settings
Once OPSCOM support has your details, they will provide you with specific URLs containing your unique hosted ID. You must enter these into your CashNet Store Settings.
URL Format Example: The URLs provided by OPSCOM will look similar to [https://hostedpayments.parkadmin.com/hook/cashnet/CLIENTS-UNIQUE-HOSTED-ID/?a=r](https://hostedpayments.parkadmin.com/hook/cashnet/CLIENTS-UNIQUE-HOSTED-ID/?a=r). You must ensure the placeholder text is replaced with your actual unique identifier.
Configuring CashNet HTTP Notifications
You must also configure CashNet to send transaction notification data back to OPSCOM so the system knows when a payment has cleared.
Using this Feature
Because this is a backend payment gateway configuration, administrators do not manually interact with this feature on a daily basis. Once fully configured and tested, the CashNet payment gateway will automatically handle electronic routing when users process transactions on the user portal or when administrators process credit card payments via the administrative portal.
Best Practices and Considerations
-
Firewall Allowlisting: New outbound connections from CashNet will not work until they are explicitly allowed through their security firewall. Contact CASHNet Client Support to enable the new connection before attempting to process live transactions through OPSCOM.
-
Verify Placeholder IDs: Always ensure you replace the sample CLIENTS-UNIQUE-HOSTED-ID in the URLs provided by OPSCOM with the actual unique identifier assigned to you by CashNet before saving your settings.
-
Variable Pricing Configuration: Ensure the specific item code created in CashNet is properly set to accept variable values. Because parking permits and violation fines fluctuate in cost based on user selections, the gateway must be able to accept the dynamic total pushed from the OPSCOM shopping cart.
TouchNet (uPay) Hosted Payments
The TouchNet uPay Hosted Payment integration allows institutions to securely process parking and violation transactions through their existing TouchNet merchant account. Its primary purpose is to ensure successful communication and financial data transfer between the OPSCOM environment and the TouchNet payment gateway. This article is intended for OPSCOM administrators and IT staff responsible for configuring financial integrations.
Setup and Configuration
Setting up this integration requires a coordinated exchange of information between your organization, your TouchNet Account Manager, and your OPSCOM Account Manager.
Gathering Required Credentials
You must obtain the following configuration details from your TouchNet Account Manager for both your Sandbox (Test) and Production (Live) environments:
-
uPay Site ID: A unique identifier, usually a 3-digit number (e.g., 013).
-
uPay URL: A secure URL that uniquely identifies your account.
-
T-Link Web Service URL: Another secure URL that uniquely identifies your account for backend communication.
Providing Details to OPSCOM: Once you have gathered these credentials, you must provide them to your OPSCOM Account Manager to complete the backend configuration. Please note that additional charges for setup may apply.
Configuring the T-Link Web Service
OperationsCommander's parent company, Tomahawk Technologies, is a certified TouchNet Ready Partner.
-
When configuring the T-Link in your TouchNet account, look for a partner selection drop-down menu.
-
Select Tomahawk Technologies from the list.
If you do not have the ability to configure a T-Link web service URL and your TouchNet Account Manager has not supplied one, you must request that TouchNet set up a uPay site for you that explicitly supports T-Link web services.
General Ledger Codes
OperationsCommander's TouchNet integration currently supports multiple General Ledger (GL) codes. This allows you to route funds to different accounts based on the item type.
-
You can specify one GL code for parking permits and a separate GL code for all other payments (such as violations or lockers).
-
Alternatively, you can use the exact same GL code for all purchases.
-
If you are using GL codes, you must provide the exact GL code names configured in your TouchNet account to your OPSCOM Account Manager.
Using this Feature
Because this is a backend payment gateway configuration, administrators do not manually interact with this feature on a daily basis. Once fully configured and tested by the OPSCOM support team, the TouchNet payment gateway will automatically handle electronic routing when users process transactions on the user portal or when administrators process credit card payments via the administrative portal.
Best Practices and Considerations
Sandbox Testing: Always provide both your Sandbox and Production credentials to your OPSCOM Account Manager. This ensures the integration can be thoroughly tested in a safe, simulated environment before live financial transactions are actively processed.
-
GL Code Accuracy: Verify that the GL codes you provide to OPSCOM match exactly with what is configured in your TouchNet system. Incorrect routing codes can cause payments to fail or cause funds to be deposited into the wrong institutional accounts.
SchoolPay
The SchoolPay Hosted Payment Setup process allows administrators to configure SchoolPay as an integrated payment gateway within the system. Its primary purpose is to enable users to securely pay for items—such as permits, lockers, and violations—directly through the SchoolPay platform during checkout. This article is intended for OPSCOM administrators.
Setup and Configuration
Before adding the payment type, ensure you have your specific SchoolPay account credentials (Username, Password, and Item ID) readily available.
-
Hover over System Configuration and click Payments then Setup Payment Types.
-
Click the Add Type button.
-
Select SchoolPay - Hosted from the provider drop-down menu.
-
Click the Next Step button.
-
Enter a clear, descriptive name in the Type Name field (e.g., Online Credit Card Payment).
-
Select the specific user groups who should have access to this payment method from the Enabled for User Types list.
-
Leave the Enable for Text2ParkMe and Enable for Permit Renewal Payments checkboxes disabled.
-
Enable the Enable for Guest Payments checkbox if you intend to allow anonymous checkout on your portal.
-
Select Email Address from the Prompt Information field.
-
Enter your Username, Password, and Item ID into the respective credential fields.
-
Select whether you are using your Production or Sandbox credentials from the environment drop-down menu.
-
Click the Update Payment Type button to save and activate the gateway.
Using this Feature
Because this is a backend payment gateway configuration, administrators do not manually interact with this feature on a daily basis. Once configured, the SchoolPay integration automatically handles electronic routing when users process transactions on the user portal.
The standard user checkout flow proceeds as follows:
-
Select the SchoolPay payment type during the OPSCOM checkout process.
-
Enter a valid email address when prompted by the system.
-
Click the confirmation button to be securely redirected to the external SchoolPay system.
-
Enter the required credit card details on the SchoolPay interface.
-
Click Finish to process the funds and automatically redirect back to the OPSCOM portal.
Visual Cues and Status Indicators
-
Automated Receipts: Upon a successful transaction and redirection back to OPSCOM, the system displays a final payment confirmation screen. Dual email receipts are automatically generated and sent to the user's supplied email address—one standard receipt from SchoolPay and one itemized receipt from OPSCOM.
Best Practices and Considerations
Unsupported Features: The OPSCOM SchoolPay integration does not currently support the Text2ParkMe or Permit Renewal payment features. Do not enable these specific checkboxes during configuration, as they will cause checkout errors.
-
Testing in Sandbox: Always utilize your OPSCOM preview environment to test your Sandbox credentials before going live. This keeps your live production data—such as active permits, users, and financial records—completely separate and clean during the testing phase.
-
User-Friendly Naming: The text you enter into the Type Name field is exactly what your users will see when selecting a payment method during checkout. Choose a clear, recognizable name like "Online Credit Card" or "SchoolPay" to avoid confusion.
-
Check Your Permissions: If you attempt to follow the setup steps but do not see the Setup Payment Types option in your menu, verify your administrative roles. You must have the appropriate system configuration permissions enabled on your account profile to add or edit payment gateways.
PayPal
The PayPal Hosted Payment Setup process allows administrators to configure PayPal as an integrated payment gateway within the system. Its primary purpose is to enable users to securely pay for items—such as permits, lockers, and violations—using their PayPal accounts during checkout. This article is intended for OPSCOM administrators.
Setup and Configuration
Before adding the payment type in OPSCOM, ensure you have successfully created a merchant account with PayPal and have your designated PayPal email address readily available.
-
Hover over System Configuration and click Payments then Setup Payment Types.
-
Click the Add Type button.
-
Select the PayPal option from the provider drop-down menu.
-
Click the Next Step button.
-
Enter your designated PayPal email address into the credential configuration fields.
-
Select your required operational currency from the available options.
-
Select whether you are configuring the gateway for production use (live transactions) or a sandbox environment (testing).
-
Click the Update Payment Type button to save your credentials and activate the gateway.
Using this Feature
Because this is a backend payment gateway configuration, administrators do not manually interact with this feature on a daily basis. Once configured, the PayPal integration automatically handles electronic routing when users process transactions on the user portal.
The standard user checkout flow proceeds as follows:
-
Select the PayPal payment type during the OPSCOM checkout process.
-
Click the confirmation button to be securely redirected to the external PayPal system.
-
Log in to the PayPal interface or enter the required credit card details as a guest.
-
Confirm the payment details to process the funds and automatically redirect back to the OPSCOM portal.
Visual Cues and Status Indicators
-
Automated Redirection: Upon a successful transaction and redirection back to OPSCOM, the system will display a final payment confirmation screen and generate the associated receipt for the user's records.
Best Practices and Considerations
-
Testing in Sandbox: Always utilize a sandbox environment to test your credentials before going live. This allows you to verify the checkout flow and ensure payments are routing correctly without affecting live financial records or requiring real funds.
-
Currency Alignment: Ensure the currency selected in OPSCOM exactly matches your primary PayPal account settings. Mismatched currencies can lead to unexpected conversion fees or cause transactions to fail entirely at checkout.
-
Account Verification: Ensure your PayPal business account is fully verified and unrestricted by PayPal before enabling it for public use on your OPSCOM portal to prevent funds from being held or delayed.
OpenEdge Hosted Payments
This article provides OPSCOM administrators with instructions for configuring OpenEdge Hosted Payments within the system. Setting up this integration allows you to securely process online credit card transactions for permits, violations, and other user fees.
Account Registration and Credentials
Before configuring OPSCOM, you must register for an OpenEdge account and obtain the necessary API credentials.
Your OpenEdge Account Manager will provide you with an Auth Key (multi-digit string), Terminal ID (8-digit numeric), and X-Web ID (12-digit numeric) for both Sandbox and Production environments.
Setup and Configuration
Once you have your credentials, you can create the payment type in the administration portal.
-
Hover over System Configuration and click Payments then Setup Payment Types.
-
Click the Add Type button.
-
Click the provider drop-down menu and choose EdgeExpress - Hosted.
-
Click the Next Step button.
-
Enter a name in the Type Name field. This name is displayed to users during checkout.
-
Select the user types you wish to grant access to this payment method under Enabled for User Types.
-
Enable the Enable for Text2ParkMe checkbox if your organization utilizes this module.
-
Enable the Enable for Permit Renewal Payments checkbox if you use this feature.
-
Enable the Enable for Guest Payments checkbox if you use this feature.
-
Click the Prompt Information drop-down menu and choose Email Address, as this is the only supported option for OpenEdge at this time.
-
Click the environment drop-down menu and choose Production or Sandbox to match your provided credentials.
-
Enter your Auth Key, Terminal ID, and X-Web ID in the respective credential fields.
-
Click the Update Payment Type button to save the configuration.
Using this Feature
Administrators should verify the integration before making it available to end-users.
-
Create a test user account and add a vehicle to the profile.
-
Navigate to the user portal and purchase a low-value item, such as a $1.00 permit or violation.
-
Select your newly created OpenEdge payment method during checkout.
-
Complete the transaction using a valid credit card.
-
Verify that the test user receives an email receipt confirming the successful payment.
-
Confirm with your finance department that the funds have been successfully deposited into your company bank account.
Best Practices and Considerations
-
Test in a preview space: Organizations should utilize their OPSCOM preview environment when testing Sandbox credentials to ensure production data remains clean and untouched during the validation phase.
-
Use descriptive naming conventions: Ensure your Type Name is clear to end-users, as generic names like "Online Credit Card Payment" or specific ones like "OpenEdge Checkout" dictate the clarity of the user experience.
Moneris Checkout
The Moneris Checkout Hosted Payment configuration allows administrators to process secure online transactions through a fully integrated Moneris merchant account. Its primary purpose is to enable reliable payment processing—including pre-authorizations and stored cards for recurring billing—directly within the OPSCOM checkout flow. This article is intended for OPSCOM administrators.
Setup and Configuration
Properly configuring Moneris Checkout involves two key stages: generating and configuring the settings within your Moneris merchant account, and then mirroring those exact settings within your OPSCOM environment.
Gathering Required Credentials
Before beginning the configuration in OPSCOM, you must create a profile in your Moneris account and obtain the following credentials:
-
store_id: Your unique Moneris store number.
-
api_token: Your unique API authentication token.
-
checkout_id: Your specific checkout profile ID.
-
hosted_token_id: Generated from the Hosted Tokenization page (required if using Moneris Vault for stored payments).
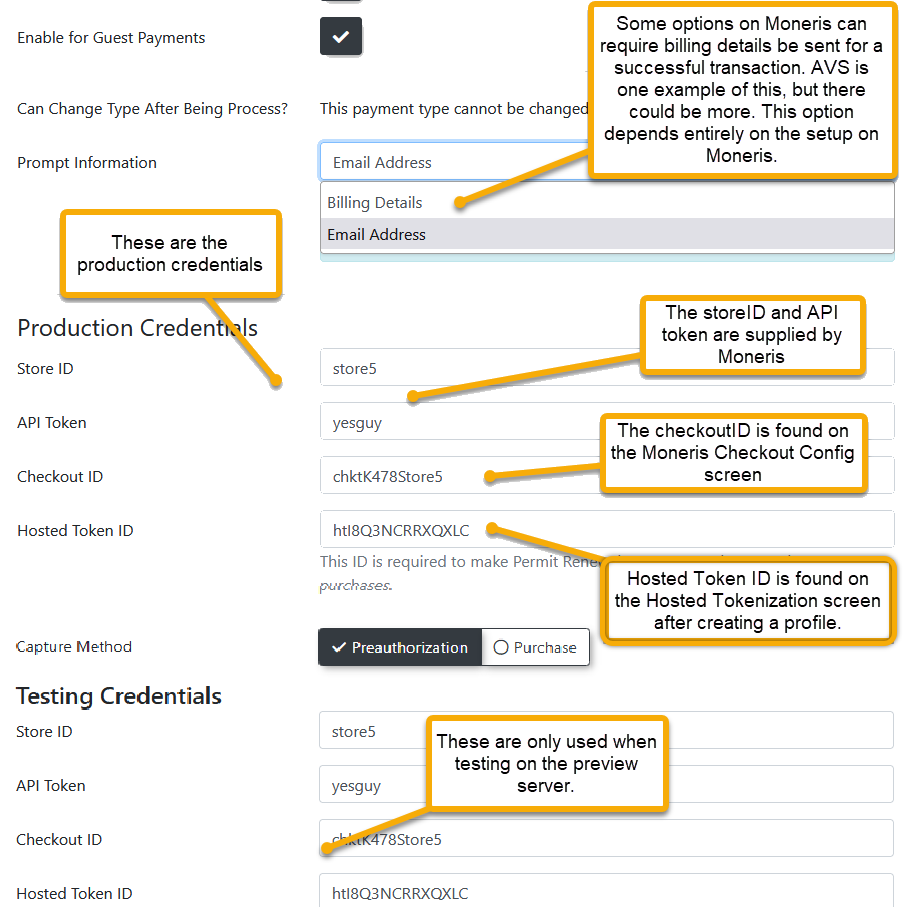
Moneris Portal Configuration
-
Log in to the Moneris Merchant Resource Center.
-
Click Admin in the main menu and select Moneris Checkout Config.
-
Locate your specific checkout profile and click to edit it.
-
Select I have my custom order form and want to use Moneris simply for payment processing under the Checkout Type settings.
-
Navigate to the Payment section and set the Transaction Type to your preferred method (preauthorize is highly recommended).
-
Disable the Tokenize Card option in the Payment section, as card tokenization for recurring payments is handled separately by the Moneris Vault.
-
Disable the Enable Fullscreen checkbox under the Branding and Design section to prevent the form from taking over the entire screen during checkout.
-
Select Use Own Page for the order confirmation setting so Moneris correctly redirects users back to the OPSCOM receipt page.
OPSCOM System Configuration
Once your Moneris portal is configured, you must add the payment type to OPSCOM. Detailed step-by-step instructions for adding the gateway can be found on the Payment Type Setup page.
Important: When configuring the gateway in OPSCOM, your Transaction Type setting (Pre-auth vs. Purchase) and your Security settings (AVS/CVV requirements) must exactly match what you configured in the Moneris portal.
Using this Feature
Because this is a backend payment gateway configuration, administrators do not manually interact with this feature on a daily basis. Once fully configured, Moneris automatically handles electronic routing when users process transactions on the user portal or when administrators process credit card payments via the administrative portal.
Moneris Vault for Stored Payments
Moneris Vault is a complementary service used for tokenizing and storing credit cards for future, automated use. This feature is heavily utilized for parking permit rollovers and the Text2ParkMe feature. To utilize this functionality, ensure your hosted_token_id is actively entered in your OPSCOM payment settings.
Best Practices and Considerations
Moneris Hosted Paypage
Setup and Configuration
Setting up this integration requires you to retrieve unique keys from your Moneris account, provide them to OPSCOM, and configure specific callback URLs within the Moneris portal.
-
Log in to your Moneris account using the Development portal (
[https://esqa.moneris.com/mpg/](https://esqa.moneris.com/mpg/)) or the Production portal ([https://www3.moneris.com/mpg](https://www3.moneris.com/mpg)). -
Hover over Admin and click Hosted Paypage Config.
-
Copy the specific ps_store_id and hpp_key displayed at the top of the configuration page and provide them to your OPSCOM representative to connect the systems.
-
Enter the required OPSCOM callback URL into the Approved URL and Declined URL fields on the main configuration page.
-
Enter the required OPSCOM callback URL into the Async Response URL field within the Response/Receipt Data configuration section.
-
Enter the required OPSCOM callback URL into the Response URL field within the Security Features configuration section.
-
Modify the settings within the Paypage Appearance section to customize the visual design of the checkout page your customers will see. Use the preview button to verify your changes.
-
Enable the desired options within the Email Receipts configuration section.
Environment URLs: The callback URL you must enter into the Moneris configuration fields depends entirely on the environment you are configuring.
Production/Live: Use [https://hostedpayments.parkadmin.com/hook/moneris/](https://hostedpayments.parkadmin.com/hook/moneris/)
Development/Testing: Use [https://hostedpayments.preview.parkadmin.com/hook/moneris/](https://hostedpayments.preview.parkadmin.com/hook/moneris/)
You will use this exact same URL for the Approved URL, Declined URL, Async Response URL, and Security Response URL fields.
Using this Feature
Because this is a backend payment gateway configuration, administrators do not manually interact with this feature on a daily basis. Once fully configured, the Moneris Hosted Paypage automatically handles electronic routing when users process transactions on the user portal.
During checkout, the user is securely redirected to the customized Moneris payment page to enter their card details. Once the payment succeeds or fails, Moneris automatically redirects the user back to the OPSCOM portal where an on-screen receipt is displayed and the transaction is logged in the user's account history.
Best Practices and Considerations
Simulating Payment Declines: When testing your integration in the development environment, Moneris provides a Penny Value Simulator chart in their developer documentation. Use specific penny amounts to force certain callback responses (such as an expired card or insufficient funds error) from the test gateway to ensure OPSCOM handles the declined payments properly.
-
Enable Email Receipts: It is highly recommended to enable email receipts within the Moneris portal. While OPSCOM displays a secure on-screen receipt and logs the payment to the user's history, OPSCOM does not currently send automated email receipts for this specific gateway integration.
-
Test Credit Cards: Always use the official Moneris test credit card numbers provided in their developer documentation when performing your initial penny testing in the development environment. Do not use real credit card data until you are fully configured in the live production portal.
Chase E-xact Hosted Payments
The Chase E-xact Hosted Payment configuration allows administrators to process secure online transactions through the Chase E-xact payment gateway. Its primary purpose is to safely redirect users to a Hosted Payment Page (HPP) during checkout, ensuring sensitive payment data is securely handled outside of OPSCOM before posting the transaction results back to the system. This article is intended for OPSCOM administrators.
Setup and Configuration
To configure the Chase E-xact integration, you must gather specific credentials from your merchant account so they can be entered into the system.
-
Log in to your Chase E-xact merchant portal.
-
Retrieve your exact Company Name, your E-xact ID (Gateway ID), and the Password used to access your account.
-
Hover over System Configuration and click Payments then Setup Payment Types.
-
Click the Add Type button.
-
Select the Chase E-xact option from the provider drop-down menu.
-
Click the Next Step button.
-
Enter your Company Name, E-xact ID, and Password into the respective credential configuration fields.
-
Click the Update Payment Type button to save your credentials and activate the gateway.
Using this Feature
Because this integration utilizes a Hosted Payment Page (HPP) with a Relay Response, administrators do not manually interact with this feature on a daily basis. Once configured, the Chase E-xact integration automatically handles electronic routing when users process transactions on the user portal.
The standard user checkout flow proceeds as follows:
-
Select the Chase E-xact payment type during the OPSCOM checkout process.
-
Click the confirmation button to be securely redirected to E-xact's external payment form.
-
Enter the required credit card details on the secure HPP.
-
Confirm the payment details to process the funds.
Visual Cues and Status Indicators
-
Automated Redirection: Once the payment successfully processes, the transaction results are posted back to the OPSCOM webhook endpoint. The user is then automatically redirected back to the OPSCOM portal, where a final payment confirmation screen and receipt are generated for their records.
Best Practices and Considerations
-
Maintain Credential Security: Always ensure your merchant account password and E-xact ID are kept up to date in the system. If your password expires or is changed within the external Chase portal, you must immediately update it within your OPSCOM payment settings to prevent checkout failures.
-
Webhook Verification: Perform a small test transaction before going live to verify that the Relay Response is correctly posting the results back to the OPSCOM webhook endpoint and properly triggering the final receipt generation.
Bambora Checkout
The Bambora Checkout Hosted Payment configuration allows administrators to process secure online transactions through a fully integrated Bambora (Wordline) merchant account. Its primary purpose is to enable reliable payment processing and tokenized profiles directly within the OPSCOM checkout flow by utilizing secure authorization headers. This article is intended for OPSCOM administrators.
Setup and Configuration
To properly configure your Bambora payment type in OPSCOM, you require two separate encoded authorization headers: the Payment Authorization Header and the Profile Authorization Header. Both require your Bambora Merchant ID (MID) and a specific API access passcode to generate.
Generating the Payment Authorization Header
-
Log in to your Bambora account.
-
Select Administration, click Account Settings, and then select Order Settings from the left navigation menu.
-
Scroll down to the API access passcode section.
-
Click the Generate New Code button if the field is empty.
-
Click the Update button at the bottom of the page to save your changes.
-
Locate and copy your Merchant ID from the top right of your Bambora account.
-
Navigate to the Bambora encoding tool URL provided by your implementation specialist.
-
Paste your Merchant ID and the new API access passcode into the appropriate fields.
-
Click the Encode button.
-
Copy the generated Payment Authorization Header. Ensure you only copy the string starting with the word Passcode (e.g., Passcode MzAw...). Do not copy the Authorization: prefix or the quotation marks.
Generating the Profile Authorization Header
-
Select Configuration and click Payment Profile Configuration from the left navigation menu in Bambora.
-
Ensure the API access passcode option is selected under the Security Settings section.
-
Click the Generate New Code button if the field is empty.
-
Click the Update button at the bottom of the page to save your changes.
-
Navigate back to the Bambora encoding tool.
-
Paste your Merchant ID and this specific Profile API access passcode into the appropriate fields.
-
Click the Encode button.
-
Copy the generated Profile Authorization Header, again ensuring you only copy the string starting with the word Passcode.
Use a Text Editor: Temporarily paste your generated headers into a program like Notepad while switching between Bambora and OPSCOM. This ensures you do not lose the copied strings during the multi-step configuration process.
Adding the Payment Type in OPSCOM
-
Hover over System Configuration and click Payments then Setup Payment Types.
-
Click the Add Type button.
-
Select Bambora - Checkout from the Provider list.
-
Click the Next Step button.
-
Enter a clear, descriptive name into the Type Name field (e.g., Online Credit Card Payment).
-
Select the specific user groups who should have access to this method from the Enabled for User Types list.
-
Enable or disable the checkboxes for Enable for Text2ParkMe, Enable for Permit Renewal Payments, and Enable for Guest Payments based on your operational needs.
-
Select Billing Details from the Prompt Information drop-down menu if you are enforcing AVS in your Bambora account, or select Email Address if AVS is not required.
-
Paste your copied headers into the Profile Authorization Header and Payment Authorization Header fields under the Production Credentials section.
-
Enable the Validate Card when adding subscriptions checkbox if you want the card validated immediately by the payment provider when it is first added as a subscription method in a user's profile.
-
Leave the Phone Number Field set to hidden unless specifically required by your fraud detection settings.
-
Click the Update Payment Type button at the bottom of the page to save your configuration.
AVS and Prompt Settings Match: You must align your OPSCOM prompt information with your Bambora AVS settings. If Address Verification Service (AVS) is enabled in Bambora, you must set OPSCOM to prompt for Billing Details. If you only prompt for Email Address while AVS is active, transactions will fail to process.
Using this Feature
Because this is a backend payment gateway configuration, administrators do not manually interact with this feature on a daily basis. Once fully configured, the Bambora Checkout integration automatically handles electronic routing and card tokenization when users process transactions on the user portal or when administrators process manual credit card payments via the administrative portal.
Best Practices and Considerations
-
AVS Configuration: If using AVS, Bambora recommends enabling only the AVS Postal/Zip Code Mismatch option. The Street Mismatch option is extremely sensitive and may result in a high rate of declined payments due to minor formatting typos.
-
User-Friendly Naming: The text you enter into the Type Name field is exactly what your users will see when selecting a payment method during checkout. Choose a generic and recognizable name, such as "Credit Card", to avoid confusion during the checkout process.
Authorize.Net
Setup and Configuration
Before configuring the payment type in OPSCOM, ensure your Authorize.Net merchant account is fully established and properly configured for online transactions.
Verifying Merchant Profile Settings
Your account must be properly configured for e-commerce transactions to process payments from the portal.
-
Log in to your Authorize.Net portal.
-
Click Account and then select Merchant Profile.
-
Verify that the Product Type is set to Card Not Present (CNP) and the Market Type is set to eCommerce under the Business Information heading.
Generating API Credentials
To connect the systems, you must provide three unique pieces of identification to the Tomahawk Technologies (OPSCOM) support team.
-
Click Account and navigate to the API credentials area.
-
Locate your API Login ID (this was defined during your initial account creation).
-
Select the option to generate a new transaction key and click Submit to reveal your Transaction Key.
-
Select the option to generate a new signature key and click Submit to reveal your Signature Key.
-
Copy these three specific values and supply them to your OPSCOM representative to complete the backend system integration.
Using this Feature
Administrators manage the appearance and security behavior of the hosted checkout page directly from the Authorize.Net portal. Because OPSCOM handles the transaction handoff automatically, administrators do not manually process these specific web payments on a daily basis.
Customizing the Payment Form
-
Click Account and select Payment Form.
-
Adjust the form styling to present a consistent look and feel for your end users.
-
Disable the shipping address fields to remove checkout confusion, as shipping is not required for parking transactions.
Configuring Address Verification Service
If you are utilizing Address Verification Service (AVS) for enhanced fraud protection, you must configure the hosted form to enforce these rules.
Keep Billing Details Visible: Even though OPSCOM automatically connects the final payment to the logged-in user, it is highly recommended to keep the billing details visible and editable on the payment form. Users frequently use credit cards belonging to someone else (such as a spouse, parent, or corporate account), and the billing information must match the cardholder, not necessarily the OPSCOM user profile.
Receipt and Response Pages: You do not need to manually configure the receipt page or response details within Authorize.Net. As part of the secure payment protocol, OPSCOM automatically supplies this routing information and handles the final receipt generation on the user portal.
Best Practices and Considerations
-
Environment Separation: Always use the Sandbox portal (
[https://sandbox.authorize.net/](https://sandbox.authorize.net/)) for initial integration and testing to ensure no transactions are accidentally pushed through a real payment processor. Only use the Production portal ([https://account.authorize.net/](https://account.authorize.net/)) for live, active transactions. -
Simulate Failure States: When configuring your system in the Sandbox environment, review the official Authorize.Net developer testing guide. Use their designated test card numbers and specific penny amounts to generate failure states (like declined cards or AVS mismatches) to ensure OPSCOM handles the checkout errors gracefully before going live.
Hosted Payments
The Hosted Payments functionality allows organizations to integrate secure, third-party payment gateways with the OPSCOM platform. Its primary purpose is to facilitate online transactions for user purchases—such as permits, lockers, and violations—while maintaining strict PCI compliance by redirecting sensitive credit card data to the provider's secure servers. This article is intended for OPSCOM administrators.
Setup and Configuration
Because OPSCOM supports a wide variety of hosted payment providers, the specific configuration steps depend heavily on your chosen merchant gateway. However, all hosted payment integrations are managed from the same centralized administrative menu.
-
Hover over System Configuration and click Payments then Setup Payment Types.
-
Click the Add Type button.
-
Select your specific merchant gateway from the provider drop-down menu.
For detailed, step-by-step instructions on generating the required API credentials and configuring the backend settings for your specific gateway, please refer to the appropriate integrated wiki article below:
Maintain Credential Security: Never share your payment gateway API keys, passwords, or token IDs openly. If your gateway credentials expire or are reset within your merchant portal, you must immediately update them within your OPSCOM payment settings to prevent site-wide checkout failures.
Supported Hosted Payment Providers
- OpenEdge Hosted Payments
- Bambora/Worldline Checkout
- Moneris Hosted Payments
- Paypal Hosted Payments
- SchoolPay
- TouchNet uPay
- Transact Campus/CashNet
Limited Support Providers
Testing Integrations: Always perform a small test transaction before going live with a newly configured hosted payment provider. Most providers offer a sandbox or development environment that allows you to verify the checkout flow and ensure payments are routing correctly back to OPSCOM without affecting real financial records.
Using this Feature
Because hosted payments rely on backend API connections and secure redirects, administrators do not manually interact with the web payment feature on a daily basis once the initial configuration is complete.
The standard user checkout flow for a hosted payment proceeds as follows:
-
Select the designated hosted payment type during the OPSCOM checkout process.
-
Click the confirmation button to be securely redirected to the external provider's hosted payment form.
-
Enter the required credit card details on the secure webpage.
-
Confirm the payment details to process the funds.
Visual Cues and Status Indicators
-
Automated Redirection: Once the payment successfully processes on the provider's end, transaction results are posted back to the OPSCOM system. The user is then automatically redirected back to the OPSCOM portal, where a final payment confirmation screen and receipt are generated for their records.
Best Practices and Considerations
-
User-Friendly Naming: The text you enter into the payment configuration name field is exactly what your users will see when selecting a payment method during checkout. Choose a clear, recognizable name like "Credit Card" or "Online Payment" to avoid confusion.
Technical Schematic - Step #1
This article outlines the system logic and automated workflow for processing new violations and preparing them for collections. Its primary purpose is to help OPSCOM administrators understand how the platform evaluates user contact information to issue notices and automatically flags eligible violations for the collections pipeline.
Setup and Configuration
The initial phase of the collections process relies on automated system logic triggered by the age of the violation and the user's profile data. This workflow requires no daily manual setup, but administrators should understand the underlying conditions that drive the automation.
When a violation reaches an age greater than the configured AutoNoticeDays, the system evaluates the primary driver's profile to determine the appropriate notification method and sets the corresponding flags:
-
Primary Driver with Email Address: The system automatically dispatches an email notification to the user. It then flags the record appropriately by updating the database value Violation.AutoNotice to 1.
-
Primary Driver without Email Address: The system flags the violation to be manually printed and mailed by adding it to the Letter Report. It updates the database value Violation.AutoNotice to 2.
The initial ticket should generally be issued in the system on the same day the physical violation occurred to ensure the AutoNoticeDays calculation remains accurate.
Using this Feature
Administrators interact with this automated workflow primarily through the reporting modules when finalizing which items move to formal collections.
Access the Send to Collections report to review flagged items. Review the populated list of violations. Items will only appear on this report if they have an associated Violation Notice, carry a Violation.AutoNotice flag of 1 or 2, and have aged exactly 30 days past the date they were initially flagged. Select the specific items or users from the generated list that require escalation. Process the selected items to officially send them to collections.
Warning: Items will not appear on the Send to Collections report until the full 30-day waiting period has elapsed following the initial AutoNotice flagging. Administrators must account for this buffer period in their collections schedule.
Best Practices and Considerations
- Establish clear business rules regarding the timely entry of violations into the system to prevent delays in the automated notification and collections pipeline.
- Encourage users to maintain an active email address on their profiles. This maximizes the use of automated email notices (AutoNotice 1) and minimizes administrative overhead associated with printing and mailing items from the Letter Report (AutoNotice 2).
Automatic Violation Notice
The Automatic Violation Notice script automates the delivery of new and past-due violation emails to system users. This feature helps OPSCOM administrators streamline the collections process by ensuring timely communication regarding outstanding citations, whether via email or printed letters. This article is intended for OPSCOM administrators responsible for managing violation notices, appeals, and collections.
Setup and Configuration
Administrators must configure the system settings and notice literature before the automated scripts can accurately process and send emails.
Configuring Notice Settings
-
Hover over System Config and click Notice Literature to configure the text templates for your emails.
-
Hover over Tomahawk Options and click System Settings to set the Auto Notice Days, which dictates the number of days until a violation is considered due.
-
Hover over System Settings and click Collections.
-
Enable the Include All Unpaid Violations checkbox to allow the system to group all violations associated with a user into a single report.
Enabling the Include All Unpaid Violations checkbox means that selecting a single violation in the list will generate a report for all violations associated with that user. This action will subsequently remove all of their associated violations from the pick-list on the Printable Violation Notice Report page.
Configuring the NIC Letter (Ontario MTO)
For organizations processing a Notice of Impending Conviction (NIC) for Ontario courts, a specific letter format must be established.
-
Hover over System Messaging and click the Messages tab.
-
Edit the Notice Letter to match your required NIC formatting.
Using This Feature
Once configured, the Automatic Violation Notice script runs automatically. The primary administrative interaction involves reviewing system emails and managing physical letters for users who cannot be reached digitally.
Notice Email Summary
The system will automatically send four distinct types of emails:
-
User overdue account notice: Informs standard users that they have one or more past-due violations.
-
User new violation notice: Alerts a user that a new violation was issued to them that same day.
-
Admin new violation report notice: Emails the OPSCOM administrator with a summary of how many new violation emails were sent to users.
-
Admin past due violation report notice: Emails the OPSCOM administrator detailing how many past-due emails were sent, and lists users who could not be emailed due to missing email addresses.
Managing the Letter Report
Users without an email address on file are automatically added to the Letter report so administrators can print and physically mail their overdue notices.
-
Hover over Violations and click Letter report.
-
Review the list of users. The results will be divided into two categories:
-
Printable Violation Notices: Notices ready to be printed and mailed.
-
Unprintable: Notices that cannot be processed due to an incomplete or missing mailing address.
-
Resending a NIC Letter
Once a NIC letter has been generated and sent, a copy is stored within the associated violation record.
-
Search for the specific violation ticket or locate it on the user's profile.
-
Click the ticket number to open the detailed ticket view.
-
Click the Overdue Letter button to view and resend the notice.
Best Practices and Considerations
-
Organizations should regularly audit the Unprintable section of the Letter report to identify users with incomplete mailing addresses and update their profiles accordingly.
-
Be aware that the user new violation notice only triggers for violations issued on the current day. It will not retroactively notify users of older "new" violations (e.g., a 3-day-old violation) once the feature is turned on.
Collections Module
The Collections Module provides OPSCOM administrators with a streamlined process for managing and recovering overdue violation funds. Its primary purpose is to identify unknown users through regional vehicle lookups and compile reports of accounts with outstanding balances to be sent to external collection agencies. This article is intended for OPSCOM administrators responsible for financial enforcement and collections.
Setup and Configuration
Before fully utilizing the Collections Module, administrators should verify that the automated system processes are active.
-
Verify that your system is configured to send overdue notices each night.
-
If these automated emails are not being generated, contact Tomahawk Support to have the feature enabled on your system.
Using this Feature
The Collections Module is currently located within the Violations management area. It allows administrators to retrieve owner information from license plates and generate specific reports for collection agencies.
Accessing the Module
Hover over Violations and click Collections to access the module's drop-down menu of reporting and export tools.
Available Actions and Reports
-
Vehicle Lookup Export: Click this option to export vehicle data in an MTO-friendly format. This file can be imported into MTO terminals by staff or automated systems to perform an MTO Lookup Report.
-
Import from Lookup MTO: Click this option to import the registered owner details back into OPSCOM. This action automatically populates the address and contact fields for previously unknown users.
-
Known Report: Click this option to query and package specific user accounts into an Excel export intended for a collection service provider. Generating this report automatically sets an internal SentToCollections flag on the associated violations, ensuring future queries do not duplicate listings.
-
Sent To Known Report: Click this option to generate a report of known user accounts flagged as SentToCollections, filtered by date and user type. This report includes relevant payment details.
-
Sent To Unknown Report: Click this option to generate a report of unknown user accounts flagged as SentToCollections, filtered by date and user type.
Managing Unknown Users
For unknown vehicles, administrators can export license plate data to identify the registered owners.
-
Click Vehicle Lookup Export to download a formatted data file. This file is uploaded to your regional transportation authority (e.g., MTO terminals) to retrieve registered owner details.
-
Click Import from Lookup (MTO) to upload the results file back into OPSCOM. This# Collections Module
The Collections Module allows OPSCOM administrators to manage overdue violation funds, identify unknown users, and process accounts for external collection agencies. This module streamlines the collection workflow by automating overdue notices and facilitating data exchange with provincial transport ministries, such as the Ministry of Transportation Ontario (MTO).
System Logic and Workflows
Understanding the background automation is critical for managing the collections process.
Known Report Inclusion Logic
The system uses specific parameters to determine which accounts are packaged into the Known Report. A user is included based on the user type and days overdue if they meet either of the following conditions:
-
The user has an email address AND an overdue notice was sent to them more than 30 days ago.
-
The user does not have an email address AND the violation is past its due date.
Automated Overdue Notices Workflow
Each night, the system searches for overdue violations and cross-references the associated vehicles and users.
-
If an email address is found, the system formulates a message and delivers the overdue notice to the user.
-
The violation's AutoNotice field is then flagged in the database.
-
If a user does not have an email address, or if the user is completely unknown to the system, a report is compiled with this information and emailed directly to the system administrator.
Best Practices and Considerations
-
Administrators must regularly review the nightly report of unknown users or users without email addresses. This ensures that physical letters or manual lookup processes are initiated for individuals who cannot receive automated digital notices.
-
Organizations should develop a business rule for managing student collections, such as tying unpaid account balances to graduation holds or registration blocks, before sending these accounts to third-party collection agencies.
For a visual representation of the preliminary steps and workflows leading up to a collection, please review the Technical Schematic - Step #1 documentation.
What does a refund look like in the system?
The refund process allows OPSCOM administrators to reverse completed transactions directly from a user's profile. This feature helps administrators return purchased items (like permits or lockers) back to active inventory or reverse payments for accounting purposes, such as handling Non-Sufficient Funds (NSF). This guide is intended for OPSCOM administrators responsible for financial processing and user account management.
Setup and Configuration
Processing refunds is a core administrative function that does not require any additional system setup or configuration. It is accessed entirely through the individual user's profile.
Using this Feature
Administrators interact with the refund feature by locating the original transaction in the user's history and initiating a reversal.
Processing a Refund
-
Search for and open the target user's profile.
-
Click the History tab and select All Records.
-
Locate the specific transaction you wish to refund.
-
For standard permits, temporary permits, or lockers, click the Processed date link.
-

-
For violations, click the Processed text link.
-

-
-
Click the Refund button on the Transaction Details screen to open the refund window.
-
Enter an internal Requisition Code if required by your organization (this is optional).
-
Enter the total Refund Amount, ensuring you include applicable taxes.
-
Enter a required justification in the comment field.
-
Click the Refund Payment Record button to proceed, and accept any on-screen confirmations to continue.
-
Select the desired refund type from the Adjustment Information window.
-
Click the Process This Adjustment button to finalize the transaction.
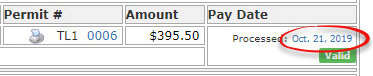

Visual Cues and Status Indicators
Once the refund is processed, the system updates the user's profile to reflect the changes:
-
Transaction Details: The refunded amount will appear as a negative adjustment (e.g., $-395.50) on the transaction record.
-
User History: Under the History tab (All Records), the original purchase will display a Released date alongside a note indicating the item was "Released back to system by refund process." The financial transaction will also be logged under Adjustment Records.
Handling NSF Payments
Sometimes, a payment fails after it is recorded (e.g., a bounced cheque, known as Non-Sufficient Funds or NSF). Administrators must "refund" this payment in the system to create an outgoing record that neutralizes the failed incoming payment, keeping financial reporting accurate.
-
Payment Type: Always select the identical payment type (e.g., Cheque) as the original failed payment when processing an NSF refund. This ensures the Processed Payment Report accurately reflects the attempt and the subsequent removal of funds.
-
Clear Notes: Always leave comprehensive and detailed notes documenting the failed payment. This creates a transparent audit trail for anyone reviewing the accounting later.
Ensure you are certain about releasing all items on a transaction before clicking the Refund Payment Record button. Once a permit is released back to inventory, it can be purchased immediately by another user.
Best Practices and Considerations
-
Partial Refunds: Refunding an entire transaction reimburses all items associated with that confirmation number and releases them back into inventory. If you only need to reimburse a single item from a multi-item purchase, process an adjustment instead of a full refund.
-
Item Status After Refund: Refunding a permit or locker releases the item back to the general inventory to be sold again. Refunding a violation does not cancel the ticket; it simply returns the violation to an "awaiting payment" status.
Cancel Transaction
The Cancel Transaction feature allows OPSCOM administrators to void an incomplete or erroneous payment directly from a user's profile. Its primary purpose is to provide flexibility in managing user accounts by either reserving a permit for future payment or releasing it back into the system's inventory. This guide is intended for OPSCOM administrators responsible for financial processing and user account management.
Setup and Configuration
Canceling a transaction is a core administrative function that requires no additional system setup or configuration. It is accessed entirely through the individual user's profile.
Using this Feature
Administrators interact with this feature by locating the transaction in the user's history and selecting the appropriate cancellation method.
Step-by-Step Instructions
-
Search for and select the target user to open their profile.
-
Hover over the History tab and click All Records.
-
Locate the specific transaction and click the associated link to open the Transaction Details screen.
-
Click either the Cancel & Keep or Cancel & Release button based on the required outcome.
-
Click OK on the confirmation prompt to finalize the cancellation of the transaction.
Available Actions and Buttons
On the Transaction Details screen, you are presented with two distinct options for handling the cancellation:
-
Cancel & Keep: Click this button to cancel the transaction but keep the transaction details on the user's account. This action reserves the permit so that you can process the payment at another time.
-
Cancel & Release: Click this button to cancel the payment and immediately release the permit back into the system.
Best Practices and Considerations
-
Verify user intent before releasing items: Always ensure the user no longer needs the permit before selecting Cancel & Release. Once an item is released, it returns to the active inventory and can be immediately purchased by another user.
-
Manage reserved permits: Organizations should develop a business rule for how long a permit can remain reserved under a Cancel & Keep status (e.g., 48 hours) before it must be either paid for or manually released to prevent inventory hoarding.
The Cancel & Release action is final for that specific transaction. Once the permit is released back into the system, you will need to process a completely new transaction if the user decides they want the permit after all.
Adjustments
The Transaction Adjustments feature allows OPSCOM administrators to modify the financial balance of an existing transaction by adding a charge or applying a partial reimbursement. Its primary purpose is to correct payment discrepancies or issue partial credits without canceling the entire transaction. This guide is intended for OPSCOM administrators responsible for financial processing and user account management.
Setup and Configuration
Making a transaction adjustment is a core administrative function that requires no additional system setup. It is accessed entirely through the individual user's profile within the administrative portal.
Using this Feature
Administrators can initiate an adjustment directly from the transaction record. Adjustments can be made before a transaction is completed or after the payment has been processed.
Step-by-Step Instructions
-
Verify you are working in the correct user profile by checking the name displayed in the top right-hand corner of the screen.
-
Open the Transaction Details screen for the specific item you need to modify.
-
Click the Adjust link located on the transaction record to open the adjustment window.
-
Enter your internal organization's Requisition Code in the associated field, if applicable.
-
Set the amount sign to positive to charge the user an additional amount, or change the amount sign to a negative to apply a reimbursement.
-
Enter the specific dollar amount of the adjustment.
-
Enter a detailed explanation in the comments field to document the reason for the financial change.
-
Click the Add Adjustment button at the bottom of the screen. You will be returned to the Payment Details screen, and the new adjustment will be listed below the original transaction.
-
Click the Not processed link next to the new entry to open the adjustment verification window.
-
Verify that all adjustment details and amounts are correct.
-
Click the Process this Adjustment button at the bottom of the screen to finalize the change.
The adjustment process does not release items back into the system inventory. If an item (such as a permit or locker) needs to be released and made available for another user to purchase, it must be done separately using the system's refund or release functionality.
Visual Cues and Status Indicators
-
Payment Status: Once the adjustment is processed, the status line will automatically update from Not processed to Submitted, accompanied by a date stamp. This indicates the adjustment has successfully altered the dollar amount associated with the item.
Best Practices and Considerations
-
Always provide detailed comments when creating an adjustment record. A clear justification is critical for maintaining an accurate and transparent financial audit trail for future reviews.
-
Organizations should establish clear guidelines on when to use an adjustment versus a full refund. Adjustments are ideal for partial credits, whereas full refunds are necessary when reversing an entire transaction.
Related Video
Adjusting a violation to zero dollars
This article outlines how OPSCOM administrators can adjust a violation fine to zero dollars, convert a ticket to a warning, or process a financial adjustment for a paid citation. These tools allow administrators to correct billing errors, grant leniency, or override existing citations directly from a user's profile.
Setup and Configuration
Adjusting a violation is a core administrative function that requires no special system setup or configuration. All adjustments and edits are performed directly from the user's profile within the administrative portal.
Using this Feature
There are multiple ways to adjust a fine to zero dollars. The method you choose depends on whether the ticket has already been paid and whether you want to maintain the ticket as an active offense or convert it to a warning.
Editing the Ticket Fine Amount
Use this method to reduce the fine to zero before the ticket is paid, while keeping it registered as an active violation.
-
Locate the specific violation you wish to reduce within the user's profile.
-
Click the specific ticket number to access the Violation Information detail screen.
-
Click the Edit button in the upper right corner to open the Edit Violation Information page.
-
Scroll down to the listed offense and change the dollar value of the fine to $0.00.
-
Click Update this Violation to save your changes.
Changing the Ticket to a Warning
Use this method to cancel the fine completely by changing the state of the ticket to a warning.
-
Locate the specific violation within the user's profile and click the ticket number.
-
Click the Edit button in the upper right corner.
-
Enable the Warning checkbox to change the state of the ticket.
-
Click Update this Violation to save your changes.
Processing an Adjustment
Adjustments to fines are performed after the initial fine has already been paid.
Processing an adjustment creates a credit on the user's account in the Payments tab. This adjustment balance can be applied to a future payment or processed fully as a system refund.
Adjusting Through Appeals
A fine can also be adjusted or reduced to zero through the formal appeals process, which allows users to contest the citation before an administrator makes a final ruling.
Best Practices and Considerations
-
Document all changes: Always include a detailed comment when processing an adjustment or editing a ticket amount. This ensures transparency and maintains an accurate financial audit trail for future review.
-
Establish organizational policies: Organizations should establish clear business rules defining when it is appropriate to issue a warning versus when a user must go through the formal appeals process.
-
Understand post-payment workflows: Remember that adjusting a paid ticket does not automatically return funds to the user's credit card or bank account. The adjustment sits as a credit on the user's account until an administrator actively processes a refund.
Types of Reimbursement
The OPSCOM system provides three primary methods for modifying or reversing financial transactions: cancellations, adjustments, and refunds. Understanding the differences between these options helps administrators accurately manage user accounts, correct billing errors, and maintain proper inventory levels. This article is intended for OPSCOM administrators responsible for financial processing and user account management.
Setup and Configuration
Managing reimbursements, adjustments, and cancellations are core administrative functions. They require no special system setup and are accessed directly through the individual user's profile within the administrative portal.
Using this Feature
Administrators must choose the correct financial action based on whether the transaction has been paid and what should happen to the associated items.
Cancel Transaction
Use this action to void a transaction before a payment is processed.
-
When to use: A user decides not to follow through on a promise to pay.
-
System Impact: The promise to pay is removed from the account, meaning the user no longer owes the money. The items associated with the transaction are immediately released back into the system inventory.
Adjustments
Use this action to alter the cost of an item before it is paid for, or to alter the value of a transaction after it has been paid for. Adjustments can be positive (charging more) or negative (reimbursing a portion of the cost).
-
When to use: A user was charged too much or too little for an item, or they require a partial/pro-rated reimbursement because they are no longer using an item.
-
System Impact: The financial value of the transaction changes, but items are not released back into the system.
Refunds
For a detailed look at this process, see What does a refund look like in the system?. Use this action to return funds and cancel a transaction after it has been paid for.
-
When to use: A user has decided against a completed purchase, or the original transaction is completely incorrect and it is easier to reverse it and start over.
-
System Impact: The transaction is reversed, and all transaction items are released back to the system.
Best Practices and Considerations
-
Organizations should establish clear policies outlining when to use full refunds versus pro-rated adjustments to ensure consistent financial reporting and customer service.
-
Always verify the payment status of a transaction before attempting to alter it, as this dictates whether a cancellation (pre-payment) or a refund (post-payment) is the appropriate action.
If there is more than one item in a transaction, processing a refund will reimburse and release ALL items associated with that purchase. If you only need to reimburse a single item within a multi-item transaction, you must process an adjustment for the financial value and manually release the specific item separately.
Payment Processing Models
This article outlines the architectural methods OPSCOM uses to handle financial transactions. Its primary purpose is to help administrators understand the differences between integrated gateways and hosted payment pages, ensuring secure and compliant transaction routing. This guide is intended for OPSCOM administrators.
Setup and Configuration
Selecting and configuring a payment processing model is a foundational step in your system setup. Because the configuration steps vary significantly by provider, you must configure your specific merchant account settings within the system.
For detailed setup instructions regarding your specific provider, please refer to the dedicated wiki articles for your processor (e.g., TouchNet (uPay) Hosted Payments, Moneris Hosted Paypage, or Bambora Checkout).
Understanding the Processing Models
OPSCOM supports different architectures for processing user payments, though the industry standard heavily favors hosted solutions for security reasons.
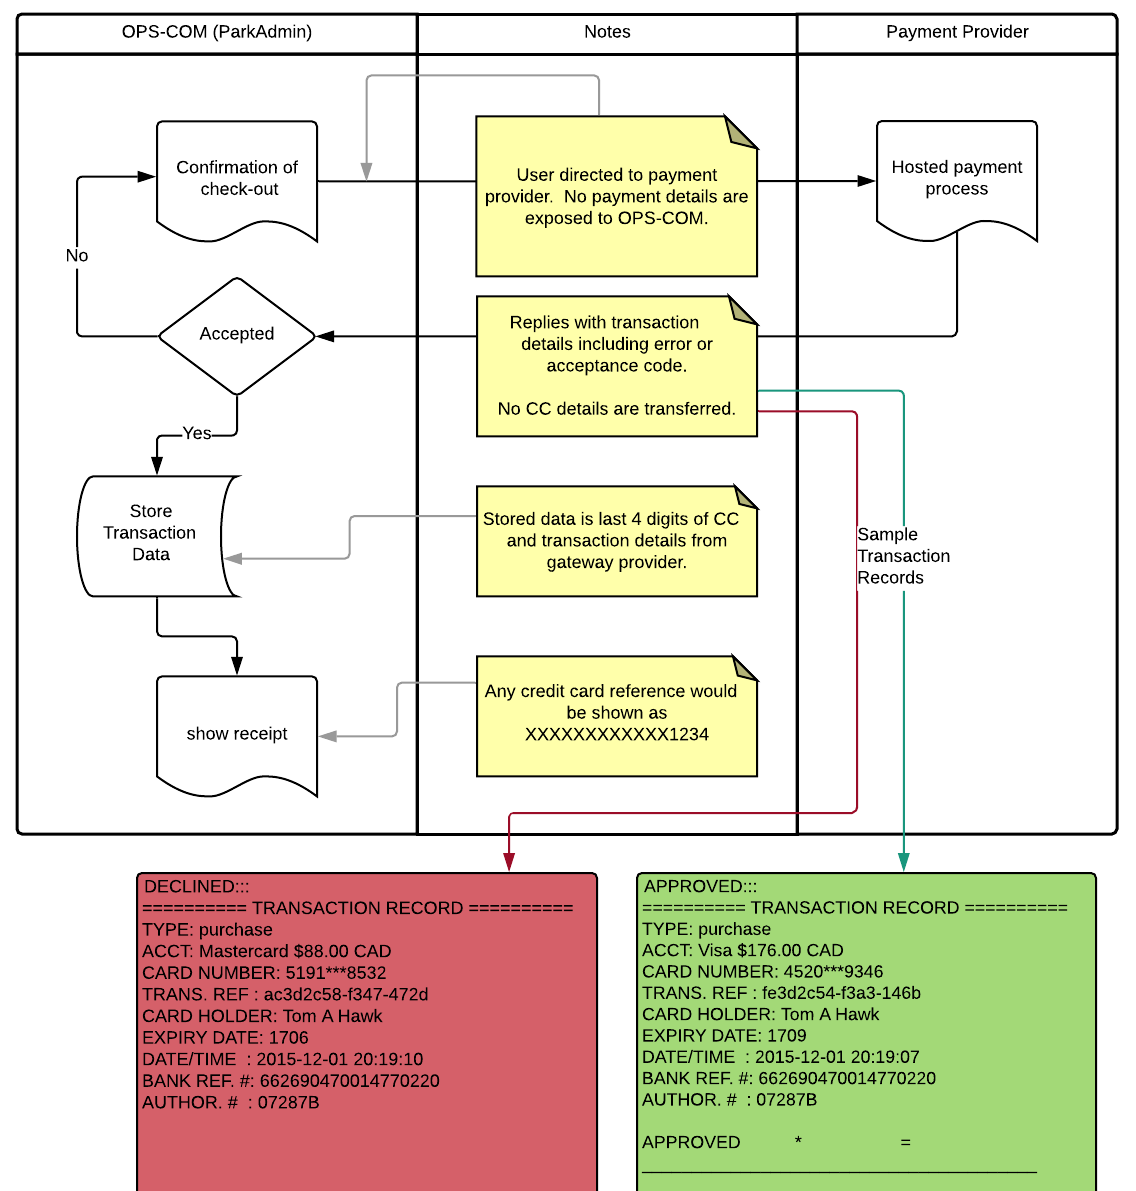
Using Hosted Payments
This is the preferred and industry-standard method for handling payments within the OPSCOM platform.
Key Information Displayed / Process Flow:
-
The user confirms their cart items and initiates the checkout process in OPSCOM.
-
The system directs the user away from OPSCOM to the payment provider's secure hosted payment page.
-
The user supplies their sensitive payment details directly to the payment provider. No payment details are exposed to or captured by OPSCOM.
-
The payment provider processes the transaction and sends a secure notification back to OPSCOM.
-
OPSCOM receives the notification, marks the transaction as complete, and updates the user's profile accordingly.
Using a Gateway
This legacy method involves handling the payment data flow more directly through the application.
The Gateway model is actively being phased out as a method for handling payments. Organizations still using a direct gateway should plan to migrate to a hosted payment solution to maintain security standards.
Best Practices and Considerations
-
Prioritize Hosted Payments: Organizations should always utilize Hosted Payments for new setups. This model drastically reduces your organization's PCI compliance scope because sensitive credit card data never touches your local network or the OPSCOM servers.
-
Audit Legacy Systems: If your organization has been using OPSCOM for many years, review your current payment configuration to ensure you are not relying on a deprecated gateway model.
Need help migrating from a legacy gateway to a modern hosted payment provider? Contact the OPSCOM support team to discuss your transition plan and ensure uninterrupted payment processing.
Payments and Transaction Flow
The OPSCOM system utilizes a standardized three-step transaction flow to manage the lifecycle of user purchases, such as parking permits. Understanding this workflow helps administrators accurately track financial commitments and manage inventory status from the initial reservation to final payment. This guide is intended for OPSCOM administrators responsible for financial processing and user account management.
Setup and Configuration
The payment transaction flow is an inherent system process within OPSCOM and does not require specific module configuration to function. However, administrators should ensure their payment methods and gateways are correctly configured before users attempt to make purchases.
Using this Feature
The lifecycle of an item purchase consists of three primary stages: linking the item, making a payment promise, and processing the payment.
Step 1: Linking the Item to a User
A user or an administrator links an item, such as a permit, to a user's account.
-
The item is placed in an Awaiting Payment status because a payment method has not yet been selected.
-
The specific item is temporarily reserved and is no longer accessible to other users in the system.
The system utilizes an automated midnight clearing list. If a user reserves an item but does not proceed to the next step to establish a promise of payment, the system will automatically release the permit back into the available inventory at midnight.
Step 2: Making a Promise of Payment
The user or administrator selects a specific payment type (e.g., cash, cheque, or payroll deduction) to finalize the reservation.
-
This action constitutes a "promise to pay."
-
The user's transaction is automatically added to the Unprocessed Payments list.
-
This step provides users the flexibility to mail a cheque or visit the parking office in person to finalize their transaction at a later time.
Step 3: Processing the Payment
Once the physical payment (cash, cheque, etc.) is received by the office, the administrator must finalize the transaction in the system.
-
Access the Unprocessed Payments list.
-
Mark the specific transaction as processed.
-
The item is now fully linked to the user's account, and the financial transaction is complete.
Best Practices and Considerations
-
Monitor Unprocessed Payments: Regularly check the Unprocessed Payments list to ensure pending transactions are finalized in a timely manner.
-
Manage Inventory: Organizations should develop a business rule to drop payments and release permits after a set period, such as two weeks. This ensures that valuable inventory is not tied up indefinitely by unfulfilled payment promises.
OPSCOM Company Manager and Invoicing - FinanceAdmin
OperationsCommander works hard to maintain an up to date product wiki! If you have any questions or if you feel something is missing, post about it in the community.
Re-Sending an Invoice
The Re-Sending an Invoice functionality allows administrators to quickly generate and deliver a duplicate copy of a billing statement to a client. Its primary purpose is to assist users who may have accidentally deleted or misplaced their original invoice email. This guide is intended for OPSCOM administrators responsible for account management and billing support.
Setup and Configuration
Resending an invoice is a core administrative function that requires no special system setup or configuration. The feature is accessed directly through standard search modules within the administrative portal.
Using this Feature
Administrators have two options for locating and resending an invoice to a user. You can locate the document by navigating through the specific user's transaction history or by searching for the document directly using the global invoice search tool.
If a client reports not receiving their initial invoice, advise them to check their spam or junk email folders before you issue a duplicate copy.
Resending via User Search
-
Hover over User Management and click User Search.
-
Enter the user's information and initiate the search.
-
Click the username within the results section to access the user's profile.
-
Hover over the History tab and click All Records to access the complete list of the user's transactions.
-
Click the specific invoice number that needs to be resent to open the invoice preview page.
-
Click the Re-send Email button. The invoice email will be immediately resent to the user, and the subject line will indicate that it is a resent invoice.
Resending via Invoice Search
-
Hover over Permits and click Invoice Search.
-
Enter the necessary search criteria and initiate the search.
-
Click the target invoice number from the generated results list to open the invoice preview page.
-
Click the Re-send Email button to issue the duplicate email to the user.
Best Practices and Considerations
-
Always download PDF attachments to a local disk before printing. Printing a PDF invoice directly from a web browser's built-in previewer often results in the document margins being cut off.
-
Instruct users to verify their print scale settings. When opening the downloaded file in a standard PDF reader, users must ensure the print scale is set to 100% in the print dialog box to guarantee proper formatting.
Cancelling an Invoice
This article explains how to cancel an existing invoice within the OPSCOM system. This feature allows administrators to invalidate an issued invoice to make necessary adjustments—such as removing users or modifying permits—before re-issuing a corrected version. This guide is intended for OPSCOM administrators responsible for company billing and financial management.
Setup & Configuration
There is no specific module setup required to use the invoice cancellation feature. It is a standard administrative tool available to staff with the appropriate billing and permit management permissions.
Using this Feature
To cancel an invoice, administrators must use the dedicated search page. Invoices cannot be removed or cancelled directly from a user's individual payment tabs.
Cancelling the Invoice
-
Hover over Permits and click Invoice Search.
-
Enter the necessary search criteria to locate the specific invoice.
-
Click the Cancel button located next to the invoice record you wish to void.
-
Accept the confirmation prompt in the pop-up window to finalize the cancellation.
Invoices cannot be cancelled if they have already been paid. To cancel an invoice that has a completed payment associated with it, you must first access the transaction records and cancel the payment itself before attempting to cancel the invoice.
Visual Cues & Status Indicators
-
Once the cancellation is confirmed, the invoice will automatically update and appear as Cancelled on the invoice report.
Best Practices & Considerations
-
Prevent Revenue Duplication: Always cancel an incorrect invoice from the Invoice Search page before issuing a new one. If the original invoice is not removed, the system will record the revenue twice for that month, and both invoices will incorrectly show as due for payment.
-
Re-issuing an Invoice: After cancelling the invoice, make any required changes to the permits and users. You can then re-issue the invoice through the Prepare Invoices page. The company will be listed as an option for re-issuance as long as the changes made are not further back than a year.
Invoice Search
The Invoice Search feature allows administrators to locate, view, and export billing records within the system. Its primary purpose is to help administrators manage company invoices, audit payment statuses, and generate targeted revenue reports. This article is intended for OPSCOM administrators responsible for financial management and company billing.
Setup and Configuration
The Invoice Search tool is a core administrative feature that requires no additional system setup or configuration.
Using this Feature
Administrators can use this tool to filter and locate specific invoices, view copies of the billed documents, and export financial data for external reporting.
Searching for an Invoice
-
Hover over Permits and click Invoice Search.
-
Enter the desired search criteria (such as date ranges, paid status, or cancelled status) to filter the results.
-
Click the Toggle More Options button in the top right of the search menu to reveal additional search filters if necessary.
-
Click the Search button to generate the list of matching invoices.
-
Click the specific Invoice Number within the results list to view a copy of the actual invoice sent to the user or company.
Available Actions and Buttons
-
Toggle More Options: Click this button to expand the search panel and access more granular filtering criteria, such as specific billing dates or statuses.
-
Search: Click this button to execute the query based on your entered parameters.
-
Export: Click this button (located next to the Search button) to export the current search results to an Excel document.
The document generated by the Export button will specifically display the revenue for the selected date range organized by lot, making it an excellent tool for lot-specific financial auditing.
Best Practices and Considerations
-
Targeted Reporting: When exporting data to Excel for revenue tracking, always specify a clear "Billed On" date range to ensure the generated report is accurate and focused on the desired financial period.
-
Managing Invoices: From the search results, you can locate invoices that need to be re-issued or voided. If you discover an invoice with errors, you must use the search page to locate it before you can proceed with Cancelling an Invoice.
-
Auditing: Regularly use the "Paid Status" and "Cancelled Status" filters to audit outstanding balances and ensure that your financial records are up to date.
Permit Invoicing
The Permit Invoicing feature allows administrators to generate, manage, and distribute billing statements for permit purchases to companies and individual users. Its primary purpose is to streamline financial operations by automating invoice creation and email delivery based on active sales windows. This article is intended for OPSCOM administrators responsible for financial processing and corporate account management.
Setup and Configuration
Before generating invoices, administrators must configure the system's baseline invoice settings and ensure companies and users are properly flagged to receive billing communications.
Configuring Invoice Settings
-
Hover over System Config and click System Settings.
-
Locate and open the Payments menu option.
-
Set your desired starting invoice number.
-
Verify that your permit invoice template is fully configured on the system templates page.
Setting Company Invoice Contacts
-
Hover over User Management and click Companies.
-
Enter the necessary search criteria to locate the target company.
-
Click the Edit button next to the company information.
-
Enter the recipient email addresses into the Invoice Emails field. You can add multiple recipients by separating the addresses with a colon (:) or a comma (,).
Configuring Users for Invoices
Users must be designated correctly within their profiles to receive invoices, whether they are part of a company or acting as an individual.
-
For Company Members: Open the user's profile and designate them as the Company Billing Manager. This specific designation is strictly required to activate invoicing for that company.
-
For Individual Users: Open the user's profile and enable both the Individual checkbox and the Receives Invoice checkbox.
Using this Feature
Once the system and users are configured, administrators can generate and send invoices in batches based on active permit sales windows.
Creating and Sending Invoices
-
Hover over Permits and click Prepare Invoices.
-
Click prepare invoices next to the specific sales window that has outstanding permits.
-
Review the populated list of invoices. All invoices are selected by default; toggle off any specific invoices you wish to exclude from the batch.
-
Set the Billing Date and Due Date for the invoices being processed.
-
Click Send Invoices to schedule the emails for delivery.
-
Click the calendar icon in the top navigation bar to monitor the status of the invoicing task.
-
Click the blue X button to clear the task once it displays as complete.
Key Information Displayed
When the invoice is emailed to the selected companies or individuals, it will automatically include:
-
A detailed list of the users associated with the transaction.
-
The specific permit numbers being purchased.
-
The Billing date, which reflects the exact date the invoice was sent.
-
The Due date, which reflects the deadline for the expected payment.
Best Practices and Considerations
-
Limit Billing Managers: While an organization can have multiple Company Managers, there should only be one designated Company Billing Manager to ensure billing communications are centralized and not duplicated.
-
Determine Rollover Rules: Organizations should establish a clear business rule regarding whether unpaid permits are allowed to roll over to the next period before configuring invoice templates and generating bills.
Please note that currently, only permits assigned to user types other than 'Student' or 'Staff' will be shown as available for invoicing in the system.
Sending Invoices in Advance of Payment
This process allows OPSCOM administrators to roll over active permits and issue formal invoices to users or companies prior to capturing any automated payments. This feature is essential for accommodating clients who require a generated invoice to process payments through their internal accounting departments before authorizing a transaction.
Setup and Configuration
This workflow utilizes the standard permit rollover functionality. Ensure that your target users or companies are already configured to receive invoices within their profiles before beginning this process.
Using this Feature
The process involves initiating a permit rollover, deliberately bypassing the automated payment trigger, and then manually generating the invoice for the reserved permits.
Generating Invoices During a Rollover
-
Hover over the Permits menu and click Active Sales Window.
-
Click Rollover Users to open the permit rollover window.
-
Deselect the preferred payment method within the wizard setup. This critical action ensures the rollover completes without automatically charging the user's saved payment profile.
-
Click Rollover Permits. The system will process the renewal and place the permits into an "awaiting payment" state, making them eligible for invoicing.
-
Hover over the Payments Menu and click Prepare Company Invoices.
-
Review the list of users and companies in the Prepare Invoice window who are now queued for invoicing.
-
Click the Prepare Invoice button. The system will generate an email with the invoice included in the body of the message and send it to the designated contacts.
Re-Sending an Invoice
If a client mistakenly deletes their invoice email or requests a duplicate copy, administrators can easily resend the document using one of two methods.
Method 1: Through User History
-
Search for the specific user and click their username to open their profile.
-
Hover over the History tab and click All Records to view their transactions.
-
Locate and click the specific invoice number to open the preview screen.
-
Click the Re-Send Email button. The system will dispatch a new email featuring a "Re-sent" prefix in the subject line.
Method 2: Through Invoice Search
-
Hover over the Permits menu and click Invoice Search.
-
Enter the target invoice number in the search criteria and click the search button.
-
Click the Invoice Number in the results list to access the invoice preview window.
-
Click the Re-Send Email button.
Best Practices and Considerations
-
Verify Payment Toggles: Always double-check that automated payment methods are explicitly deselected during the rollover wizard when preparing advance invoices. Leaving this selected will result in unintended automatic charges.
-
Printing PDF Attachments: If users wish to print the PDF version of their invoice attached to the email, instruct them to download the file to their computer first rather than printing directly from the web browser's previewer. Browser previews frequently cause the document margins to be cut off during printing.
Advise users to open the downloaded PDF in a dedicated PDF reader and ensure their printer settings are configured with the print scale set to 100%. This guarantees the invoice prints with the correct formatting and layout.
Company Setup and Invoices
The Company Setup and Invoicing process allows organizations to manage bulk permit purchasing and consolidated billing for their employees. Its primary purpose is to centralize account management and simplify the payment workflow for corporate clients. This guide is intended for OPSCOM administrators responsible for managing company profiles and financial transactions.
Setup and Configuration
Creating a company profile and assigning the proper user roles requires configuration from the administrative portal.
Creating a Company (Admin Side)
-
Hover over User Management and click Companies.
-
Click the Create New Company button.
-
Enter the organization's details in the Account Number, Company Name, Address (Company), Invoice Emails, Contact Name, and Address (Contact) fields.
-
Enable the Receives Invoice checkbox to ensure the company can be billed.
-
Click the Add New Company button to save the information. A green confirmation message will display.
Assigning Users to the Company (Admin Side)
-
Hover over User Management and click User Search to locate the target user.
-
Click the user's profile to open it and click the Edit button.
-
Indicate that the user is a Company Member and associate them with the newly created company.
-
Enable the Company Manager and Company Billing Account checkboxes if this user will be responsible for managing and paying for the company's permits.
-
Click the Submit Registration Information for Processing... button to save the profile.
Important Billing Setup Requirements
- Invoice Preparation: Every corporate account requires a designated billing manager. If you do not assign a user with both the Company Manager and Company Billing Account flags, you will be unable to prepare invoices for that company.
-Rollover Processing: You MUST designate a user with a valid subscription as the Company Billing Account for each company. If this is not set, invoices will be skipped and will not be processed by the automated rollover processing.
Using this Feature
Once the company and its users are configured, the designated company manager can reserve permits, and the administrator can generate the corresponding invoices.
Purchasing Permits (User Side)
-
Log into the user portal as the designated company manager.
-
Click the Company Users icon.
-
Click the Login as User button to the right of the specific employee's name. A blue message will appear confirming you are logged in as another user.
-
Click the Parking icon and select the desired permit for the user.
-
Log out of the user portal once the permit is reserved. Do not click the Proceed to payment button if the permits will be paid via a consolidated corporate invoice.
Preparing Invoices (Admin Side)
-
Hover over Allocations and click Prepare Invoices.
-
Click the Prepare Invoices button beside the active sales window.
-
Review the generated invoice, which will display the permits reserved by the company manager.
-
Click the Send Invoices button to email the invoice to the designated company contact. An icon in the top right menu bar will indicate the progress of the invoice creation.
If an error occurs during the invoicing process, you can cancel the invoice from the administrative portal, correct the error on the user's profile, and reissue the invoice.
Paying an Invoice (User Side)
-
Log into the user portal as the designated company manager.
-
Click the Payments icon to view the outstanding invoice.
-
Click Continue to Checkout and submit the payment using the preferred method.
Best Practices and Considerations
-
Configure Email Templates: Ensure an invoice email template is configured in the system before attempting to prepare invoices. You can verify or modify this template by navigating to System Config and accessing Email Templates.
-
Separate End Users from Managers: User accounts created for the company managers are typically administrative accounts. End users (the employees receiving the permits) do not need to log in to manage their own permits if the company manager is handling the purchases.
OperationsCommander Vehicle and People Alarms
OperationsCommander works hard to maintain an up to date product wiki! If you have any questions or if you feel something is missing, post about it in the community.
Generic Alarms
Generic Alarms provide a flexible notification system for various non-specific alerts, often originating from external system integrations or unknown user and vehicle IDs. The primary purpose of this feature is to help administrators capture and manage unprofiled activities or external system events within a single, actionable feed. This article is intended for OPSCOM administrators responsible for monitoring dispatch alerts and configuring system integrations.
Setup and Configuration
To utilize generic alarms, administrators must configure the baseline system settings and assign the appropriate viewing permissions to administrative roles.
System Settings
-
Hover over System Configuration and click System Settings.
-
Navigate to the Alarms tab to configure the following settings:
-
Generic Alarm Append Threshold: Define the number of minutes before an alarm will create a new dispatch log entry instead of appending to an existing one.
-
Generic Alarm Dispatch SubID: Set a specific subID to maintain consistency across all generic alarms.
-
Allowed Alert Emails: Enter the email addresses of the specific external systems that are authorized to populate alerts into OPSCOM.
-
Setting up Alarm Permissions
Administrators must have the appropriate dispatch permissions enabled to view and interact with alarms.
-
Hover over System Configuration, click Admin Management, and click Manage Roles.
-
Click the Permissions button next to the administrative role you wish to modify.
-
Scroll to the Dispatch category within the Editing Permissions screen.
-
Enable the checkboxes for permissions related to alarms, such as View Alarms, Clear Alarms, and Add Alarm Comment.
-
Click Save Permissions at the bottom of the page to apply the changes.
Using this Feature
Generic alarms streamline incoming alerts by parsing external data and grouping repetitive notifications.
How Generic Alarms Get Pushed to the System
Generic alarms are typically triggered by two main mechanisms:
-
Unknown Student/Staff Number: If a People Alarm is sent to the system featuring a student or staff number that does not exist in the OPSCOM database, the alert is automatically categorized as a generic alarm. The resulting message will include details passed from the access point.
-
ITS-Networking Alerts Systems: Organizations can integrate their external IT or networking alert systems with OPSCOM. An email alert is pushed from the external system, which OPSCOM parses to issue a generic alert. This is frequently used for stolen device alerts, where the external system provides the MAC Address and incident details.
Integration with ITS-Networking Alert Systems requires specific configuration by the OPSCOM Team before it can be utilized. Please contact support to discuss setup procedures and potential recurring fees.
Dispatch Logs and Alert Rollups
To prevent notification fatigue and keep the alert feed actionable, OPSCOM manages high volumes of alerts using a rollup feature.
-
Dispatch Logs: The system automatically generates a dispatch report the moment an alert is received. If a valid incident ID was passed to OPSCOM alongside the alert, the incident is automatically linked to this dispatch log.
-
Alert Rollups: If the exact same alert (e.g., the same MAC address) is triggered multiple times within a 30-minute timeframe of the initial alert, all subsequent records are rolled up and added to a single dispatch log record.
Clearing and Viewing Alarms
Administrators can manage their active alerts directly from the personal dashboard.
-
Hover over the bell icon located at the top-right of your screen to display a list of current active alerts.
-
Click a specific alert from the list to reveal the available actions.
-
Click Go To Entry to navigate directly to the Dispatch Log Report and review the specific details of the alert.
-
Click Clear Alarm to acknowledge the alert and remove the icon from your personal dashboard view.
Clearing an alarm from your dashboard does not delete the corresponding dispatch log record, which remains securely accessible for historical tracking. Note that clearing an alarm only removes it from your account; other administrators will continue to see the alert until they clear it themselves.
Best Practices and Considerations
-
Monitor generic alarms regularly: Administrators should routinely check generic alarms, as they often indicate unprofiled physical activity or system-level issues that require immediate attention.
-
Establish consistent alerting protocols: Organizations should develop internal business rules detailing how different types of generic alarms should be responded to by the administrative team.
-
Define clear integration parameters: When integrating with external ITS systems, ensure clear communication with the OPSCOM Team during setup to strictly define your required alert types, data formats (e.g., MAC Address, Incident ID), and desired actions.
-
Analyze dispatch logs: Leverage the Dispatch Log Report to spot trends in generic alarms, identify recurring security issues, and audit team responses over time.
People Alarms
People Alarms provide a critical safety and monitoring feature by allowing administrators to flag specific user profiles with alerts. When an event associated with a flagged user occurs, the system triggers a visual alarm, notifying relevant administrators to take appropriate action. This article is intended for OPSCOM administrators responsible for monitoring user activity, safety protocols, and system alerts.
Setup and Configuration
Before administrators can effectively use the alarm system, the necessary baseline settings must be established and dispatch permissions must be assigned to the correct administrative roles.
System Settings Configuration
-
Hover over System Configuration and click System Settings.
-
Configure the People Alarm Append Threshold to set the number of minutes before an alarm will create a new dispatch log entry instead of appending to an existing one.
-
Configure the People Alarm Dispatch SubID to establish consistency across your logs.
-
Enter the allowed email addresses into the Allowed Alert Emails field to specify which external systems can populate alerts into OPSCOM.
Setting up Alarm Permissions
-
Hover over System Configuration, click Admin Management and click Manage Roles.
-
Click the Permissions button next to the administrative role you wish to modify.
-
Navigate to the Dispatch category within the Editing Permissions screen.
-
Enable the View Alarms, Clear Alarms, and Add Alarm Comment checkboxes.
-
Click the Save Permissions button at the bottom of the page to apply the changes.
Adding People Alarms to Users
-
Hover over User Management and click User Search.
-
Search for and select the specific user you wish to flag.
-
Click the Edit button next to the Basic Profile Information section to open the Edit User Profile window.
-
Enable the People Alarm toggle.
-
Enter a specific, actionable note in the Alarm Comment field.
The License Plate Alarm and Plate Alarm messages will both share this exact same comment. Additionally, even if a user's profile does not have alarms explicitly toggled on or an alarm comment associated, the system will still generate an alert if an API call for a specific student/staff number triggers an alarm.
Using this Feature
Administrators view and manage active alarms and dispatch logs directly from the top-right panel on the administrative dashboard.
Viewing and Managing Alarms

-
Locate the alarms panel in the top-right corner of the screen to view active notifications.
-
Check the generic alarms section, indicated by a bell icon, for alerts routed from an API call containing an unknown student or staff account number.
-
Locate the specific alarm in the panel and click the clear option to dismiss the notification from your active view once it has been addressed.
Clearing an alarm only removes the alert from the specific administrator who cleared it. The alarm will remain visible for all other administrators until they choose to clear it for themselves. Cleared alarms can still be accessed and reviewed from the Dispatch Log Report for historical reference.
Visual Cues and Status Indicators
-
Alarm Rollups: All alarms associated with a specific user profile or license plate are automatically consolidated into a single Dispatch Log entry if the alarm is triggered within 30 minutes of the very first alarm related to that profile/plate. This prevents a large number of individual, repeated alarms from flooding the system. If more than 30 minutes pass, a completely new dispatch record is generated.
Best Practices and Considerations
-
Clear Alarm Comments: Always use concise and actionable alarm comments (e.g., "Student requires escort," "High-risk individual"). This ensures rapid understanding and an appropriate, immediate response from other administrators.
-
Role-Based Notifications: Ensure that only administrators who are actively responsible for responding to people alarms have the correct dispatch permissions configured to avoid unnecessary clutter for non-security staff.
-
Timely Clearing: Encourage your team to clear alarms immediately once they have been addressed. This keeps the active alarm panel relevant and significantly reduces notification fatigue.
-
Integration with Protocols: Integrate the use of People Alarms closely with your organization's established emergency or response protocols. Ensure all relevant staff know exactly what actions to take when a specific type of alarm is triggered.
-
Regular Review of Dispatch Logs: Periodically review the Dispatch Log Report to monitor alarm trends, identify recurring issues, and ensure the overall effectiveness of your team's response.
Plate and Vehicle Alarms
The OPSCOM alarm system provides critical real-time notifications for specific events, such as when a flagged vehicle is scanned or a user triggers a security alert. Its primary purpose is to help administrators and field officers rapidly identify and respond to vehicles of interest. This article is intended for OPSCOM administrators and details how to configure permissions, attach, manage, and clear plate and vehicle alarms for both profiled users and unprofiled vehicles.
Setup and Configuration
To utilize plate and vehicle alarms, administrators must configure the baseline system settings and assign the appropriate dispatch permissions to administrative roles.
System Settings
-
Hover over System Configuration and click System Settings.
-
Navigate to the Alarms tab.
-
Configure the Vehicle Alarm Append Threshold to set the number of minutes before a new alarm creates a new dispatch log entry instead of appending to an existing one.
-
Configure the Plate Alarm Dispatch SubID to establish consistency across your dispatch logs.
-
Enter the approved email addresses into the Allowed Alert Emails field to specify which external systems are permitted to populate alerts into OPSCOM.
Setting up Alarm Permissions
-
Hover over System Configuration and click Admin Management then Manage Roles.
-
Click the Permissions button next to the administrative role you wish to modify.
-
Navigate to the Dispatch category within the Editing Permissions screen.
-
Enable the View License Plate alarms, Receive License Plate alarms via email, View People alarms, and Receive People Plate alarms via email checkboxes.
-
Click the Save Permissions button at the bottom of the page to apply the changes.
Using this Feature
Plate alarms are triggered automatically whenever a flagged license plate is scanned or read by the system.
Understanding Plate Alarms
Alarms will trigger from the following sources:
-
Fixed Cameras: Entrance and exit cameras scanning a lot.
-
Handheld Violation Entries: Manual citation entries by officers in the field.
-
LPR Camera Reads: Both mobile and static License Plate Recognition systems.
When a Plate Alarm is triggered, an alert appears in the OPSCOM system, and an audible ding sounds for officers using mobile LPR units. If a fixed camera triggers the alarm, the specific camera's name will be listed in the alert.
Manually chalking vehicles from the handheld unit does not trigger an alert. Only LPR reads and violation entries initiate the alarm sequence.
Attaching an Alarm to a Plate Without a Profile
Plates can exist in the system without a full user profile if they are initially entered via a new violation, a violation warning, a chalking record, or an incident report.
If a plate only has a chalking record associated with it, you must issue a violation to it or link it to an incident to access the vehicle information fields required to add an alarm. Chalking records alone do not provide direct edit access to vehicle details.
-
Hover over Violations and click Vehicles then Search by Plate.
-
Enter the target plate and execute the search.
-
Click the Vehicle Info icon next to the search result.
-
Click the Edit Vehicle button.
-
Enable the Vehicle Alarm checkbox.
-
Enter an actionable note in the Alarm Comment field.
-
Click the Update Vehicle button to apply the alarm.
Adding Plate Alarms to Specific Profiled Plates
-
Hover over User Management and click User Search.
-
Search for and select the user's profile.
-
Click the Vehicles tab within their profile.
-
Click the target plate to open the vehicle information window.
-
Click the Edit Vehicle button.
-
Enable the Vehicle Alarm checkbox.
-
Enter your note in the Alarm Comment field.
-
Click the Update Vehicle button.
Adding a Plate Alarm to All Vehicles on a User Profile
You can rapidly apply a vehicle alarm to every vehicle associated with a user directly from their primary profile settings.
-
Hover over User Management and click User Search.
-
Search for and select the user's profile.
-
Click the Edit button next to the Basic Profile Information section.
-
Enable the Plate alarm checkbox.
-
Enter your alert message in the comment field.
-
Click the Update button to apply the alarms.
The People Alarms and License Plate Alarms for this user will share the exact same message if both are enabled simultaneously on the user's profile
Best Practices and Considerations
-
Clear and Concise Alarm Comments: Always use brief, highly actionable comments (e.g., DO NOT APPROACH - WARRANT, LOST/STOLEN PERMIT, CONTACT OWNER). This ensures essential information is conveyed immediately to officers and administrators without ambiguity.
-
Understanding Alarm Roll-Up: Multiple alarms triggered for the exact same plate or profile are automatically rolled up into a single dispatch log entry within a 30-minute window. This prevents redundant notifications from flooding the system during an active event.
-
Permission Management: Ensure that only authorized and trained personnel have the ability to set and clear alarms due to the critical nature of these alerts.
-
Regular Review: Periodically review active alarms and dispatch logs to ensure field officers are responding timely and to manually clear alarms that are no longer operationally relevant.
The Differences Between Alerts, Plate, Vehicle Alarms and DNTT
The OPSCOM system provides distinct flagging features—Alerts, Plate and Vehicle Alarms, and Do Not Ticket or Tow (DNTT) statuses—to help administrators and field officers identify specific vehicles during patrols. Understanding the operational differences between these statuses ensures that vehicles are appropriately monitored or properly exempted from enforcement. This article is intended for OPSCOM administrators responsible for managing vehicle profiles and dispatch operations.
Setup and Configuration
These flagging tools are configured directly on individual vehicle profiles within the administrative portal.
Configuring DNTT
The DNTT feature allows administrators to schedule enforcement exemptions and restrict them to specific physical locations.
Configuring Alerts and Alarms
Alerts and Alarms are general security and monitoring flags that are not limited by schedule or location.
Unlike DNTT statuses that expire based on a schedule, standard Alerts and Alarms remain active indefinitely until they are manually removed by an administrator.
Using this Feature
Administrators and enforcement personnel interact with these features primarily through handheld scanning devices or License Plate Recognition (LPR) cameras in the field.
Visual Cues and Status Indicators
-
DNTT Status: When a vehicle with an active DNTT status is scanned, a red exclamation mark icon appears on the handheld device screen. No audible alarm will sound, allowing the officer to silently bypass the vehicle.
-
Alerts and Alarms: When a vehicle with an active Alert or Alarm is scanned by a handheld device or detected by an LPR camera, the system triggers an immediate visual notification and an audible alert to draw the officer's attention.
Available Actions
-
Dispatch Logs: Once an Alert or Alarm is triggered in the field, it can be converted into a Dispatch Log. This allows the security team to actively track, investigate, and document the resolution of the alert.
Best Practices and Considerations
-
Define Clear Business Rules: Organizations should establish clear policies regarding who has the authority to apply a DNTT status and the specific circumstances under which it is granted (e.g., medical exemptions, maintenance vehicles, VIP guests).
-
Maintain Accurate Records: Regularly review active Alerts and Alarms to ensure that outdated or resolved flags are removed. This prevents notification fatigue and unnecessary alerts during standard enforcement activities.
-
Utilize Dispatch Logs: Always convert triggered Alerts into Dispatch Logs to maintain a comprehensive and permanent audit trail of how security personnel responded to the field notification.
IncidentAdmin
OperationsCommander works hard to maintain an up to date product wiki! If you have any questions or if you feel something is missing, post about it in the community.
Active Dispatch Logs (BETA)
The Active Dispatch Logs feature allows administrators and dispatchers to record, track, and manage all incoming inquiries and automated system alerts. Its primary purpose is to provide a centralized dashboard of all open dispatch entries and seamlessly link them to actionable incident reports for further tracking. This article is intended for OPS-COM administrators and dispatch personnel.
Setup and Configuration
The Active Dispatch Logs feature is a core component of the Incident module. While it requires no special setup to operate, users must have the appropriate incident and dispatch management permissions enabled on their administrative role to view, edit, or assign incidents to logs.
Using this Feature
The Active Dispatch Logs page serves as the primary workspace for dispatchers to view all open logs that require follow-up, add new records, and assign tasks to other administrators.
Accessing and Creating Logs
-
Hover over the Incidents icon, click Dispatch, and select Active Dispatch Logs to view all open entries.
-
Click the Add Log button in the top right of your screen to create a new record.
-
Select the appropriate Source and Category from the drop-down menus.
-
Type the necessary details into the Note section.
-
Click Save Log to keep the record open and active, or click Save Log & Close if the dispatch is already resolved.
If a dispatcher clicks the incident number link within a log but receives an error, ensure their administrative role has the proper permissions configured to view and edit incidents.
Adding Additional Log Notes
-
Click the blue plus icon under the actions column of an existing log to add a separate, attached note.
-
Select the Source and Category, and enter the supplemental details.
-
Click Save Log to append the note, or click Save Log & Close to append the note and close the entire dispatch log.
Assigning a Log to an Incident Report
-
Click the Assign button under the actions column to attach the log to an incident or assign an admin user to act on it.
-
Select either A new incident or An existing incident.
-
Assign the log to an admin user. If you selected an existing incident, search for the incidents already assigned to an admin user or manually enter the incident number.
Closing Dispatch Logs
-
Click the red X icon under the actions column when a log has been fully dealt with.
-
Click the Confirm button in the pop-up window to remove it from the active list.
Searching Contacts
-
Click the Search Contacts button to open the Search Contact History window. Depending on the width of your monitor, this button will be located either on the right side of the screen or along the bottom of the page.
Visual Cues and Status Indicators
-
Blue Number Icon: Indicates how many additional notes or rolled-up alerts are linked to the dispatch log. Click the log to view all associated records.
-
Incident Number Link: Once an assignment is made, the incident number appears in the listing of Dispatch Log Records. Click this link to directly view or edit the incident report.
Available Actions and Buttons
-
Refresh: Displays a countdown indicating how long until the page automatically refreshes (the default is one minute). Actions such as adding notes or assigning an incident will temporarily pause the page refresh.
-
Limit To Recent: Toggle this setting to view older dispatch logs in addition to recent ones.
-
View Classic Logs: Click this button to redirect to the legacy dispatch logs view.
Best Practices and Considerations
-
Keep the dashboard clear: Always close dispatch logs once they are resolved using the red X icon or the Save Log & Close button. This ensures your active dispatch view remains uncluttered and focused on actionable items.
-
Leverage external integrations: Organizations should take advantage of API integrations where possible. Systems such as Cisco Prime or ITS-NetworkingAlerts can be configured to push an incident number alongside an alert, automatically creating a dispatch log with the associated incident already attached.
Viewing an Incident
The View Incident screen allows OPSCOM administrators to review, edit, and manage comprehensive details of a security event. Its primary purpose is to provide a centralized hub for tracking dispatch logs, linked individuals, related vehicles, and assigned tasks associated with a specific incident. This article is intended for OPSCOM administrators and dispatch personnel responsible for incident management.
Setup and Configuration
Accessing and interacting with the View Incident screen relies heavily on the administrative roles and permissions configured within the system.
To review and modify these settings, hover over System Configuration, click Admin Management, and click Manage Roles.
Viewing Permissions
To simply view an incident page, an administrator must have one of the following baseline permissions:
-
View All Incidents
-
View Incidents - Self (Must also be the reporter, Primary Investigator, Case Manager, part of an assigned task group, or assigned directly to a task).
If an incident is locked, administrators with the Incident Administrator permission can view the specific reason for the lock. Administrators with the View/Edit Confidential Information permission will see an additional Confidential Info section near the bottom of the page.
Editing Permissions
To access the edit options for an incident, the administrator must meet one of the following requirements:
-
Possess the Custom Permission - Open All permission.
-
Possess the Edit Incidents permission.
-
Possess the View Incidents - Self permission, be the reporting admin, AND the incident must be in an Open state.
Using this Feature
Administrators can navigate to the View Incident screen from multiple areas in the system, including search results, reports, and active dispatch logs. Once on the page, the interface is divided into functional tabs and side buttons.
Managing Tabs and Details
-
Dispatch Logs: Anyone who can view the incident can view its dispatch logs. Click the Log button to manually link a new dispatch entry, or navigate to the Dispatch Logs tab to drop a log. You must have the Add/Drop Dispatch Logs permission to perform these actions.
-
Linking People: Use this tab to associate individuals with the incident. Click show more to view extended details about a user that are not displayed on the primary screen.
-
Linking Other Items: Use the respective tabs to attach vehicles, missing property, and violations to the incident record.
-
Related Incidents: View this section to see and connect multiple occurrences that share common elements.
-
Checklists: Certain subcategories require a checklist to be completed before the incident can be closed. If required, a warning will appear while the issue is open. Fill out the details to proceed with closing the incident. You must have the View All Incidents or Incident Administrator permission to view these checklists.
-
Use of Force Forms: If the Use of Force setting is enabled (applicable for clients in Ontario), the government-mandated Use of Force forms will be displayed as read-only documents on this page.
Managing Tasks and Assignments
-
Case Manager Assignment: Assign the incident to a specific manager. You must have the Assign Incident To Case Manager permission. The individual being assigned must have either the Is Incident Case Manager or Is Incident Shift Manager permission.
-
Primary Investigator Assignment: Assign a lead investigator to the case. You must have the Edit Incident Tasks, Is Incident Shift Manager, or Assign Incident To A Different Investigator permissions (or already be the case manager). The assignee must have the Be Assigned Tasks Directly permission.
-
Editing Tasks and Comments: Add or edit tasks and their associated text. You must be the primary investigator/case manager or have the Edit Incident Tasks / Is Incident Shift Manager permissions. If you are only assigned to a task without these broader permissions, you will only see the option to reassign it.
Side Actions and Buttons
-
Close/Open Incident: Toggles the state of the incident. Requires the Open Incidents permission.
-
Edit / Edit Summary / View: Depending on your permissions (e.g., Edit Incident Summaries, Incident Admin) and the state of the incident (Locked, Open, Closed), this button allows you to modify the full incident or just the summary details.
-
Distribute and Email: Allows you to share the incident report. Requires the Incident Admin permission.
-
Download: Downloads a copy of the incident. Available to any admin who has permission to view the page.
-
Toggle Status: Switches the state of the record back and forth between read and unread.
-
Delete: Appears if the incident is eligible to be purged and the administrator possesses the Delete Incident permission.
Best Practices and Considerations
-
Audit Permissions Regularly: Organizations should strictly control editing and deletion permissions to maintain the integrity of incident reports and preserve accurate historical data for legal or security audits.
-
Complete Checklists Promptly: Ensure required checklists are filled out fully before attempting to close an incident to prevent administrative bottlenecks and ensure compliance with organizational reporting standards.
Filling out the Incident Form (WIP)
The Incident Form allows OPSCOM administrators to record, track, and manage comprehensive details regarding security or operational events. Its primary purpose is to centralize essential incident data, from basic descriptions to involved parties and follow-up tasks, ensuring accurate and organized record-keeping. This article is intended for OPSCOM administrators and security personnel responsible for incident management.
Setup and Configuration
Accessing and filling out the Incident Form is a core function of the IncidentAdmin module. It requires no specialized setup, but administrators must have the appropriate incident creation and editing permissions assigned to their user role to interact with these fields.
Using this Feature
When creating a new incident or modifying an existing record, administrators will interact with two primary sections: the basic overview and the detailed record tabs.
Basic Incident Information
The top section of the report captures the essential, high-level information about the event. Ensure the following core fields are completed accurately:
-
Description: A comprehensive narrative outlining what occurred.
-
Status: The current state of the incident (e.g., Open, Closed).
-
Time: The exact date and time the incident took place.
-
Place: The specific physical location where the event occurred.
-
Related information or events: Any immediate contextual details necessary for understanding the incident.
Detailed Incident Tabs
Below the basic information, the incident report allows administrators to record granular details using a series of specific tabs. Click each tab to link relevant data to the main incident report:
-
Dispatch Logs: Link or review communications and dispatch entries related to the event.
-
People: Record and link the profiles of any individuals involved in or witness to the incident.
-
Vehicles: Attach specific vehicle records and license plates involved in the event.
-
Missing Property: Document any items reported lost or stolen during the incident.
-
Tasks: Assign and track follow-up actions required to resolve the case.
-
Checklist: Complete any custom-generated forms or mandatory procedural checklists required by your organization.
-
Related: Link this incident to other existing issues or incident reports in the system.
-
External: Log follow-up items or external agency involvement.
-
Violations: Associate any parking or moving violations directly connected to the incident.
Best Practices and Considerations
-
Thorough Documentation: Always provide clear, objective, and detailed narratives in the Description field. This ensures the incident report can be accurately interpreted during future audits, investigations, or legal reviews.
-
Cross-Linking Data: Make full use of the detailed tabs to cross-link People, Vehicles, and Violations. Centralizing this data provides a complete picture of the event for investigating officers.
-
Mandatory Checklists: If your organization utilizes custom procedural forms, ensure the Checklist tab is fully completed before attempting to change the incident Status to closed.
Incident Checklist
The Incident Checklist provides a standardized form for administrators and investigators to ensure all critical investigative steps are completed before closing an incident. Its primary purpose is to help maintain comprehensive, consistent, and legally sound records for audits and internal reviews. This article is intended for OPSCOM administrators and security personnel responsible for managing and closing incident reports.
Setup and Configuration
The Incident Checklist is a core component of the IncidentAdmin module and requires no additional system setup. However, administrators must have the appropriate permissions to view and edit incidents to access and complete this form.
Using this Feature
Administrators must navigate to an active incident report to access and fill out the checklist. The form requires users to select standard responses (e.g., Yes, No, Not Required) and provide clarifying remarks for each step of the investigation.
Accessing the Checklist
Depending on your organization's specific subcategory configurations, filling out this checklist may be a mandatory system requirement before an administrator is permitted to close the incident report.
Checklist Fields Defined
When filling out the checklist, provide specific details in the remarks fields to justify your selections.
-
CCTV Reviewed: Indicate if closed-circuit cameras were reviewed. State what was found in the footage or explain why the footage was not reviewed.
-
Other Resources Reviewed: Indicate if external resources were utilized, such as social media, public directories, or OPSCOM records.
-
Witness(es) Interviewed: Note if witnesses were spoken to and summarize their specific contributions to the incident resolution.
-
Suspect(s) / Person(s) of Interest Interviewed: Document any suspect interviews, noting their involvement or statements.
-
Statements Obtained: Confirm if formal, written statements were collected from any involved parties.
-
Other Evidence Collected: Detail any physical or virtual evidence gathered (e.g., photos, physical items) and note its secure storage location.
-
Safe Plan and Community Resources Discussed with Complainant: Note if the complainant was provided with a safety plan or referred to external support resources.
-
Other Departments / Agencies Consulted or Notified: List any internal departments (e.g., Student Housing) or external agencies (e.g., local police) that were briefed on the incident.
-
Community Notified: State if and how the broader community was alerted to the incident (e.g., safety bulletins, campus emails).
-
Security / CPTED Audit Conducted: Indicate if a Crime Prevention Through Environmental Design (CPTED) or general security audit was performed. Note any vulnerabilities discovered and the steps taken to resolve them.
-
Recommendations Made to Prevent a Re-occurrence: Detail any operational or security changes suggested to prevent future similar incidents.
-
Complainant Notified of Outcome: Confirm that the reporting party was updated on the final resolution of the case.
-
Documentation Updated & Filed: Note exactly where related files, audits, or hard copies were saved.
-
Status at time of Closing: Select the final state of the case (Solved, Unsolved, or Unfounded).
-
Reason For Report Being Closed: Click the drop-down menu and choose the primary reason for closing the report.
-
Closing Comments: Provide a final narrative summarizing the resolution and confirming any implemented recommendations.
Best Practices and Considerations
-
Standardize Remarks: Organizations should develop a business rule outlining the minimum level of detail required in the remarks section. Simple "Yes" or "No" answers without context can lead to poorly documented investigations.
-
Complete Before Closing: Ensure all relevant checklist fields are thoroughly completed before attempting to change the overall incident status to closed.
My Incident Tasks
The My Incident Tasks feature provides a centralized dashboard for administrators to view and manage tasks assigned specifically to them. Its primary purpose is to streamline workflow and ensure timely follow-up on active security or operational events. This guide is intended for OPS-COM administrators who are part of an incident investigation or response team.
Setup and Configuration
Accessing the task dashboard requires no special system setup or configuration. It is a core component of the incident management module. However, for a task to appear on this list, an administrator must be actively assigned as a primary investigator, case manager, or individual task owner within an active incident report.
If you are a Case Manager or Shift Supervisor, you can use the blue drop-down menu to view the tasks assigned to other administrators on your team. This allows you to easily monitor the workload and progress of ongoing investigations.
Using this Feature
Administrators can use this page to filter, view, and directly access the incident reports containing their assigned tasks.
Accessing Your Tasks
-
Hover over Incidents and click My Tasks.
-
Click the blue drop-down menu and select your name to populate the list of tasks assigned to your account.
-
Click the specific Incident Number from the results table to open the detailed incident information page and review the task requirements.
Key Information Displayed
Once your name is selected, the task table will display:
-
Relation: Indicates whether the task is assigned directly to you (Mine) or to a group you are a part of (Team).
-
Incident No.: The unique identifier for the related incident.
-
Report Date: The date the initial incident was reported.
Best Practices and Considerations
-
Routine Monitoring: Administrators should make it a habit to check the My Tasks dashboard regularly to ensure critical investigative steps or follow-ups are not missed.
-
Update from the Source: Always update the task status and add relevant comments directly within the incident report after completing an assignment. This ensures the primary investigator and case manager have real-time visibility into the investigation's progress.
View Cameras
The View Cameras feature allows administrators to access integrated security camera feeds directly from the OPSCOM portal. Its primary purpose is to help security personnel and dispatchers monitor live activity and gather visual context for incident management. This article is intended for OPSCOM administrators.
Setup and Configuration
Accessing the camera feeds requires your organization to have an active, configured security camera integration within the OPSCOM system.
Additionally, administrators must have the appropriate incident and camera viewing permissions assigned to their user role to see the menu option. No additional user-side configuration is required once the system integration is complete.
Using this Feature
Administrators can launch the external camera viewer directly from the primary navigation menu.
-
Hover over the Incidents icon and click View Cameras.
-
Click the Launch Cameras button on the center of the page.
-
View and manage the camera feeds in the new browser window that opens.
Available Action and Button
-
Launch Cameras: Click this button to initiate the connection to your organization's camera integration. It forces the camera interface to open in a completely separate window, allowing you to keep your main OPSCOM dashboard active.
If you click the Launch Cameras button and the new window fails to load the video feeds, verify that your active session with your external camera provider has not timed out or require a separate login.
Best Practices and Considerations
-
Configure your browser settings: Ensure your web browser is configured to allow pop-ups from the OPSCOM portal. Because the camera viewer launches in a new window, strict pop-up blockers may prevent the feeds from opening when you click the button.
-
Optimize your dispatch workspace: If you are actively monitoring cameras while managing dispatch logs or filling out incident reports, consider using a dual-monitor setup. This allows you to keep the live camera feeds visible on one screen while interacting with the OPSCOM platform on the other.
Related Occurrences
Setup and Configuration
There is no special module configuration required to use the Related Occurrences feature, as it is a standard component of the incident management system. However, administrators must have the appropriate permissions to view and edit incidents to create and modify related lists.
Using this Feature
Administrators can link incidents by creating a named list and adding the relevant incident numbers to that group.
Creating a Related List and Linking Incidents
-
Hover over Incidents and click Search Incidents.
-
Enter the target incident number in the Occurrence# field and execute the search to open the Incident Information screen.
-
Click the Related tab along the top of the form.
-
Click the Track Related Occurrences button.
-
Click New Related List to begin creating a connection group.
-
Enter a descriptive name in the Name field (e.g., Suspicious Activity March 20) and provide context in the Notes field.
-
Click the Save button. A search box will now appear at the bottom of the screen.
-
Enter the current incident number you are viewing into the search box and click Search.
-
Click the Add button next to the result to add it to your new list.
-
Enter the second incident number you wish to relate into the search box and click Search.
-
Click the Add button to add this second incident to the same list.
You can return to the Track Related Occurrences screen at any time to add additional incidents to an existing list as an investigation develops.
Visual Cues and Status Indicators
Best Practices and Considerations
-
Standardize List Names: Organizations should establish a standardized naming convention for related occurrence lists (e.g., by date, location, or specific event type) to ensure they are easily searchable and understood by all investigators reviewing the case.
-
Provide Context: Always use the notes field when creating a new related list to briefly explain why the incidents are being linked, especially if the connection is not immediately obvious from the individual incident descriptions.
Dispatch Logs
The Dispatch Logs feature allows dispatchers and administrators to record, track, and manage incoming communications, system alerts, and operational tasks. Its primary purpose is to maintain a centralized and actionable record of all dispatch activities to ensure timely follow-up and resolution. This article is intended for OPSCOM administrators and dispatch personnel.
Setup & Configuration
The Dispatch Logs tool is a core component of the incident management system. It requires no specialized setup, but administrators must have the appropriate dispatch and incident management permissions enabled on their user role to view, create, or close log records.
Using this Feature
Administrators can use this page to create new manual logs, review automated system alerts, append notes, assign tasks, and print records.
Reviewing and Creating Logs
-
Hover over the Incidents icon, click Dispatch, and select Dispatch Logs to open the View/Edit Dispatch Log Records page.
-
Select an option from the Create New Log Record drop-down menu to define the source contact for a new log.
-
Select the appropriate Category from the drop-down menu on the Add New Log Record screen.
-
Type any required details into the Note section.
-
Click the Add New button at the bottom of the screen to save the information. The new log will now appear at the top of the Dispatch Log Records list.
Adding Notes and Assigning Logs
-
Click the Add link in the Add column next to a specific log to attach a supplementary note.
-
Enter the source, category, and additional details in the Add Log Note screen.
-
Click the Add button to save the note, or click the Add & Close button to save the note and simultaneously close the entire dispatch log.
-
Click the Assign link at the far right of the log to assign an admin user to act on the log or to attach it to an incident report.
When an assignment is made, the incident number will appear directly in the listing of Dispatch Log Records. You can click this link at any time to quickly access, view, or edit the associated incident report.
Viewing Rolled-Up Alerts
-
Click the + symbol to the left of a specific log to expand and view all available associated records or rolled-up alerts.
-
Click the specific link for the dispatch number if you need to add further information to the initial log.
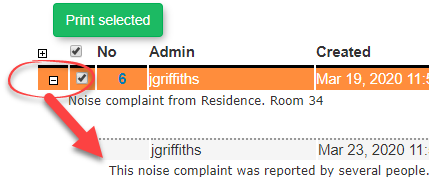
Printing and Closing Logs
-
Select the appropriate source in the list of current dispatch logs and click the Print Selected button to generate a printed list of those specific logs.
-
Click the C in the Status column of a specific log to individually change its status to closed once it has been resolved.
-
Enable the checkboxes next to multiple log records to prepare them for bulk closure.
-
Click the Close Selected button to instantly close all checked logs.
Best Practices & Considerations
-
Maintain an organized dashboard: Dispatchers should establish a routine to close logs immediately once they are resolved or formally assigned to an incident. This keeps the open logs view uncluttered and focused on active issues.
-
Utilize Bulk Actions: When dealing with numerous informational system alerts (such as standard LPR reads or resolved warnings), use the Close Selected bulk action to save time and clear your queue efficiently.
-
Check for Rolled-Up Data: Always click the + symbol to review all related system triggers before closing a dispatch item, ensuring no critical secondary alerts are missed within a rolled-up log.
Incident Distribution Feature
The Incident Distribution feature allows dispatchers to email incident details directly to pre-configured user groups. Its primary purpose is to streamline communication and enable faster response times by eliminating the need to manually copy information to external email clients. This guide is intended for OPSCOM administrators and dispatch personnel.
Setup and Configuration
Before this feature can be utilized, an administrator must create distribution departments and assign users to them. These departments define the pre-configured recipients for incident emails.
Creating a Distribution Department
-
Hover over System Configuration, click Distribution, and select Departments and Users.
-
Click the List All button beside the Departments section.
-
Click the Plus button.
-
Enter a descriptive name in the Department Name field. This name will be visible to dispatchers.
-
Click Save Changes.
Adding a Contact to a Department
Contacts invited to view distributions are not the same as standard parkers or admin users. They exist strictly to access the incident distribution module, and they receive a specific invitation link to view internal incident reports when you click save and send.
Managing Existing Distribution Groups
Using this Feature
Once distribution groups are configured, dispatchers can quickly send vital incident details directly from an active incident's main information page.
Sending an Incident Email
Key Information Displayed
The automated email sent to the distribution group will extract and display the following key details from the incident report:
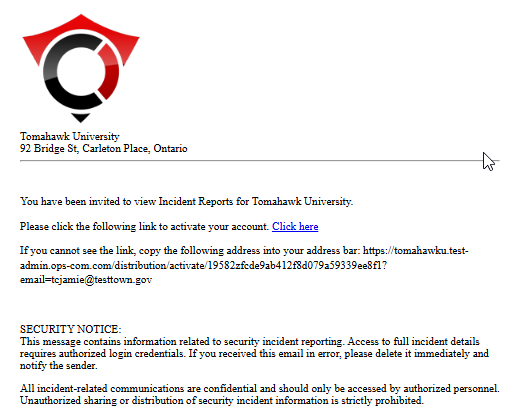
-
Incident Number
-
Location
-
Time of Incident
-
Description of Incident
-
Any optional comments added by the dispatcher
Best Practices and Considerations
-
Audit Distribution Groups: Regularly audit your distribution groups to ensure the email lists are completely up-to-date. Outdated contact information can lead to severely delayed or missed incident notifications.
-
Use Intuitive Naming: Create clear and intuitive group names. Titles like "Day Shift Patrol" or "Weekend Supervisors" are much more effective and recognizable for dispatchers than generic names like "Group 1".
-
Pre-Notify Contacts: Remember to send invited department contacts a separate message letting them know about the system. This ensures they expect the automated invitation and do not accidentally delete your message or lose it in their spam folder.
View Open Incidents
The View Open Incidents feature provides a centralized list of all currently unresolved security or operational events within the system. Its primary purpose is to help administrators and dispatchers easily track, access, and manage active cases that require further attention or investigation. This article is intended for OPSCOM administrators and security personnel.
Setup and Configuration
The Open Incidents report is a core component of the incident management system and requires no specific module setup. However, administrators must have the appropriate incident viewing or editing permissions assigned to their user role to access the page and interact with the records.
Using this Feature
Administrators can use this page to quickly pull up a list of all active cases and navigate directly to the detailed incident form for updates.
Accessing the Report
-
Hover over the Incidents icon and click View Open Incidents.
-
Review the populated list on the Open Incidents Report page.
-
Click a specific Incident No link to open, view, or edit the details of that particular incident.
Key Information Displayed
The Open Incidents Report provides a high-level summary of active cases, displaying the following information:
-
Admin Name: The administrator who reported or is associated with the active incident.
-
Incident No: The unique, clickable numerical identifier for the case.
-
Reported: The exact date and time the incident was initially logged into the system.
While any administrator with access to this report can view the list of open incidents, your ability to make changes or add notes after clicking an Incident No link depends entirely on your specific user role editing permissions.
Best Practices and Considerations
-
Maintain an accurate queue: Administrators should establish a routine to review this list and officially close incidents that have been resolved. Allowing the open incidents report to become cluttered with old or completed cases makes it difficult for the team to track current priorities and active investigations.
Incident Summary Report by Sub-Location
The Incident Summary Report by Sub-Location allows administrators to filter and view incident records based on specific physical areas within their organization. Its primary purpose is to help security and administrative teams quickly analyze incident trends in targeted zones over a specified timeframe. This article is intended for OPSCOM administrators handling security and incident management.
Setup and Configuration
There is no specific module setup required to run this report, as it is a core feature of the incident management system. However, administrators must have the appropriate reporting and incident viewing permissions assigned to their user role. Ensure that your organization's sub-locations are accurately defined within your system settings for the most effective reporting.
Using this Feature
Administrators can use this report to generate an overview table of incidents that occurred within a selected area and timeframe, with the ability to drill down into specific case details.
Running the Report
-
Hover over the Incidents icon, click Reports, and select Sub-Location Report.
-
Select the specific dates you want to search in the date range fields on the Search Incidents page.
-
Select the specific sub-location you wish to analyze from the provided drop-down menu.
-
Click the Search button once all criteria have been entered.
-
Click the Details link to the right of a specific incident in the results table to view or edit that individual report.
Key Information Displayed
-
Sub-Location Overview Table: Once the search is executed, a table appears at the top of the page providing an aggregated overview of all incidents that occurred in the selected sub-location during your specified time frame.
Available Actions and Buttons
-
Search: Click this button to execute the query based on your selected date range and sub-location parameters.
-
Details: Click this link to open the full incident profile, allowing you to review the narrative, dispatch logs, or make necessary edits to the record.
If you click the Details link and cannot edit the resulting incident record, verify that your administrative user role has the required permissions to edit incidents, or check if the incident has already been locked or closed.
Best Practices and Considerations
-
Standardize Location Data: Organizations should establish a clear business rule regarding how sub-locations are selected by staff during initial incident entry. If field officers are inconsistent with how they tag locations, this report will not provide an accurate reflection of localized security trends.
-
Targeted Audits: Use this report on a monthly or quarterly basis to identify specific sub-locations that experience high volumes of incidents, allowing you to strategically deploy additional resources or security personnel to those exact areas.
Incidents Summary Report by Category
The Incident Summary Report by Category allows administrators to filter and view incident records based on specific incident classifications. Its primary purpose is to help security and administrative teams track and analyze event trends across various categories within a specified timeframe and location. This article is intended for OPSCOM administrators responsible for security reporting and incident management.
Setup and Configuration
The Incident Summary Report by Category is a standard reporting feature within the incident management module and requires no specialized system setup to run. However, administrators must have the appropriate incident viewing and reporting permissions assigned to their user role to access this page.
Using this Feature
Administrators can use this report to generate a high-level overview of incidents grouped by category, with the ability to drill down into specific sub-category reports for more detailed information.
Running the Report
-
Hover over the Incidents icon, click Reports, and select Report By Category.
-
Enable the checkboxes next to the specific categories you want to include in your report.
-
Select the desired date range to narrow the reporting window.
-
Select a specific location and sub-location from the drop-down menus if you wish to filter the results geographically.
-
Click the Search Incidents button at the bottom of the screen once you have set your criteria.
You do not need to select an option in every single section or filter. Only apply filters to the specific criteria you want to investigate; leaving a filter blank will simply include all data for that parameter.
Key Information Displayed and Available Actions
Once the search is executed, a results table will appear at the bottom of the page providing an overview of the incidents that occurred in each selected category.
-
Sub-Category Reports: Click any of the linked sub-category names within the results table to generate a deeper Sub-Category Report containing the individual incident records.
-
Sort Data: Click the column headings within the Sub-Category Report to automatically sort the table data by that specific metric.
-
View Details: Click the Details link located beside a particular incident to open, view, or edit the full incident profile.
Best Practices and Considerations
-
Standardized Categorization: Organizations should ensure that field officers consistently apply the correct categories and sub-categories during initial incident entry. If incident types are logged inconsistently, this report will not provide an accurate reflection of security trends.
-
Targeted Audits: Use this report on a monthly or quarterly basis to identify which types of incidents are most prevalent on your property, allowing your organization to strategically adjust enforcement policies or deploy additional resources to mitigate those specific issues.
Incidents Summary Report
The Incident Summary Report allows administrators to generate a comprehensive list of all incident records within a specified time frame. Its primary purpose is to provide a broad overview of security events and facilitate data exports for external analysis or record-keeping. This article is intended for OPSCOM administrators responsible for incident management and reporting.
Setup and Configuration
The Incident Summary Report is a standard reporting feature within the incident management module and requires no specialized system setup to run. However, administrators must have the appropriate incident viewing and reporting permissions assigned to their user role to access this page.
Using this Feature
Administrators can use this report to generate a high-level overview of incident occurrences over a defined period and quickly export the resulting data.
Running the Report
-
Hover over the Incidents icon, click Reports, and select Summary Report.
-
Enter the desired date range in the Start Date and End Date fields.
-
Disable the Show only items with Summaries checkbox if you wish to include all incident records in the results, even those that currently lack a summary.
-
Click the Search Incidents button at the bottom of the criteria section to generate the report.
Key Information Displayed and Available Actions
Once the search is executed, the results will display in a table at the bottom of the Incident Summary Report page.
-
Details: Click this link located to the right of a specific incident to open its full profile, allowing you to review the complete narrative, view dispatch logs, or make necessary edits to the record.
-
Export to Excel: Click this button to download the displayed report data into a spreadsheet for external formatting and analysis.
By default, the system filters the report to only show incidents that contain a completed summary. Ensure you toggle the checkbox if you are auditing incomplete reports or need a raw count of all events.
Best Practices and Considerations
-
Require Incident Summaries: Organizations should establish a business rule requiring officers to write comprehensive summaries before officially closing an incident. This ensures the default view of the Incident Summary Report is consistently populated, highly informative, and actionable for administrators.
-
Leverage Data Exports: Use the Export to Excel feature when you need to combine OPSCOM incident data with other departmental statistics for comprehensive monthly, quarterly, or annual security reviews.
Recent Incidents Summary Report (Last 30 Days)
The Recent Incidents Summary Report provides a quick, pre-filtered overview of all security and operational events logged within the past 30 days. Its primary purpose is to allow administrators to monitor recent activity, track ongoing cases, and identify immediate trends without having to manually configure search dates. This article is intended for OPSCOM administrators responsible for day-to-day incident management.
Setup and Configuration
The Recent Incidents report is a standard feature within the incident management module and requires no specialized system setup to run. However, administrators must have the appropriate incident viewing permissions assigned to their user role to access the page.
Additionally, the ability to download this report requires explicit authorization. To grant this access, ensure the export permission is specifically enabled on the administrative role for any user who needs to extract this data.
Using this Feature
Administrators can use this page to quickly pull up a list of the last 30 days of activity and navigate directly to detailed incident forms.
Accessing the Report
-
Hover over the Incidents icon and click Recent Incidents.
-
Review the populated table containing all incidents recorded in the previous 30 days.
Available Actions and Buttons
-
View Incidents: Click this button located to the right of a specific incident to open the detailed profile, allowing you to review the narrative or make necessary updates.
-
Column Headings: Click any column heading within the table to dynamically sort the displayed data by that specific metric (e.g., date, status).
-
Export: Click the export icon or button to download the report data to an Excel spreadsheet for external analysis. Note that this option is only visible if your administrative role has the required export permission.
This specific report is hardcoded to only display data from the immediately preceding 30 days. If you need to view historical incidents beyond this timeframe, you must use the standard Incidents Summary Report where you can manually define a custom date range.
Best Practices and Considerations
-
Daily Review Routine: Administrators should establish a regular routine to review the recent incidents dashboard. This ensures the security team remains fully aware of recent events and can follow up on pending or newly opened cases promptly.
-
Restrict Export Permissions: Organizations should limit the Excel export permission to senior administrators or management. Incident reports frequently contain highly sensitive or confidential information; controlling who can download the raw data helps maintain privacy and organizational compliance.
Incident Reports
The Incident Reports section provides a centralized hub for tracking, analyzing, and exporting data related to security and operational events. Its primary purpose is to help administrators and security teams monitor incident trends across various timelines, locations, and categories. This article is intended for OPSCOM administrators responsible for incident management and statistical reporting.
Setup and Configuration
The incident reporting suite is a core component of the incident management module and requires no specialized system setup to operate. However, administrators must have the appropriate incident viewing and reporting permissions assigned to their user role to access these pages and generate data.
Using this Feature
Administrators can access a variety of specific reports to filter and analyze incident data based on their exact operational needs.
Accessing Incident Reports
-
Hover over the Incidents menu and click Reports.
-
Select the specific report you wish to run from the available drop-down options.
Available Reports
The following reporting tools are available to help you analyze your organization's incident data. Click on any of the report names below to navigate to their specific instruction articles:
-
Recent Incidents Summary Report (Last 30 Days): Provides a quick, pre-filtered overview of all security and operational events logged within the immediate past 30 days.
-
Incidents Summary Report: Generates a comprehensive list of all incident records within a manually specified date range, with the ability to export the raw data.
-
Incidents Summary Report by Category: Filters and displays incident records based on specific incident classifications and event types.
-
Incident Summary Report by Sub-Location: Filters and groups incident records based on specific physical areas or zones within your organization's property.
Best Practices and Considerations
-
Require accurate field entry: Organizations should establish clear business rules requiring officers to accurately categorize and geotag incidents during initial entry. If incident types and sub-locations are logged inconsistently by dispatchers or field officers, the resulting reports will not provide an accurate reflection of your security trends.
-
Utilize multiple reports for comprehensive analysis: Combine data insights from the Category and Sub-Location reports on a quarterly basis to identify exactly where specific types of incidents (e.g., vandalism, medical emergencies) are occurring most frequently, allowing for better resource deployment.
Editing Incidents
The Editing Incidents feature allows administrators to modify existing incident reports, add new information, and manage the case status. Its primary purpose is to ensure that records remain accurate, detailed, and up-to-date as investigations progress. This article is intended for OPSCOM administrators, dispatchers, and security personnel.
Setup and Configuration
There is no specific module configuration required to edit incidents. However, administrators must have the appropriate incident editing permissions assigned to their user role to view the edit options and make changes to the records.
Using this Feature
Administrators can quickly update incident details directly from the main incident information page.
Modifying an Incident
Available Actions and Buttons
-
Close Incident / Open Incident: Click this button to toggle the incident status between closed and open.
-
Edit Incident: Click this button to toggle between viewing the incident and actively editing its details.
-
Distribute Incident: Click this button to create a distribution report for authorized recipients.
-
Email Incident: Click this button to generate and send an email regarding the incident.
-
Download Incident: Click this button to download a PDF copy of the incident for offline filing or external use.
-
Toggle Read Status: Click this button to change the read status of the report from unread to read, or vice versa.
Clicking the Distribute Incident or Download Incident buttons will automatically lock the incident from being edited further. Ensure all details are final, accurate, and completely resolved before executing these actions.
Best Practices and Considerations
-
Verify before locking: Organizations should establish a business rule requiring investigators to thoroughly review the incident report before downloading or distributing it. Because these actions lock the record, premature distribution can result in incomplete or inaccurate permanent files.
-
Maintain accurate statuses: Always close an incident once the investigation is fully resolved and all checklist items are complete. This keeps your active open incident queues clean and ensures reports correctly reflect your team's current workload.
Incident Entry
The Incident Entry feature allows administrators and dispatchers to formally create and document new security or operational events within the system. Its primary purpose is to capture comprehensive event details, including involved individuals, vehicles, and missing property, to ensure accurate case management and reporting. This article is intended for OPSCOM administrators and security personnel.
Setup and Configuration
The Incident Entry feature is a core component of the incident management module and requires no specialized system setup. However, administrators must have the appropriate incident creation and editing permissions assigned to their user role to access this page and generate new reports.
Using this Feature
The incident entry process is broken down into two main phases: searching for and linking related entities (people, vehicles, property), followed by entering the specific narrative details of the event.
Accessing the Form
-
Hover over the Incidents icon and click Incident Entry.
-
Click the Create a New Incident button on the Opened Incidents page to begin a new report, or click a specific Incident Number link to view the details of an existing active incident.
Step 1 Linking People Vehicles and Property
-
Click the appropriate link on the Step 1 screen to search by Users, Vehicles, or Missing Property.
-
Click the Enter Specific Incident Details button to bypass this step entirely if the incident is not associated with any specific individuals, vehicles, or property.
-
Click the Add User to Incident button at the bottom right once you locate the correct individual via the search fields.
-
Click the Add a New Individual to the Database button if no user is found. This will open the Quick Registration Form where you can enter the new individual's details into the system.
-
Select the appropriate classification from the Relation drop-down menu to identify the person's exact relationship to the incident (e.g., victim, witness, prime suspect).
-
Click the Save User Details button.
-
Click the Search for Additional Individuals button to link more people, or use the appropriate links to attach vehicle and property details.
-
Click the Enter Specific Incident Details button at the bottom right to proceed to the next phase of the report.
Step 2 Entering Incident Information
-
Review the summary of the people, vehicles, and missing property you linked, which will now appear at the top of the Step 2 page.
-
Enter the comprehensive narrative and factual details of the event into the provided Incident Information fields.
-
Click the Choose File button beside the Attach Image line, select your local file, and click Open to upload and attach photographic evidence to the report.
-
Click the Save Incident button at the bottom of the page once all information has been submitted.
When filling out the specific details on the incident form, OPS Number is an abbreviation for the Other Police Services Number used for external tracking, and PON Summons is an abbreviation for Provincial Offences Notice Summons.
Post-Creation Actions
Once the incident has been saved, the system will automatically redirect you to the Recent Incidents Summary Report (Last 30 Days) screen.
-
View Incident: Click this link to the right of your newly created incident if you realize you need to reopen the file and edit any details.
Best Practices and Considerations
-
Link Entities First: Always attempt to link involved individuals and vehicles before moving to the specific incident details. Establishing these links early builds a stronger relational database, making future searches and related occurrence tracking much more effective.
-
Accurate Relations: Ensure the Relation field is accurately selected for every attached user. Misclassifying a witness as a suspect, or vice versa, can lead to severe data integrity and compliance issues down the line.
-
Upload Evidence Immediately: If you possess photographic evidence at the time of report creation, attach it immediately using the image upload tool rather than waiting until the case is updated later.
Search Incidents
The Search Incidents feature allows administrators to locate and review recorded security and parking incidents within the system. Its primary purpose is to help track ongoing investigations, update case statuses, and manage officer task assignments by querying data across incidents, people, and vehicles. This article is intended for OPSCOM administrators.
Setup and Configuration
While the search module is ready for use out of the box, administrators must configure underlying data models to maximize its effectiveness.
-
Ensure that operational locations and compliance classifications are pre-populated. Setup and management instructions can be found on the Viewing an Incident page.
-
Ensure administrative accounts possess the required security clear level toggled within their User Profile to view or modify search results.
Using this Feature
Administrators interact with three tailored search tabs on this screen. Each tab queries a distinct data subset within the incident management database.
Accessing the Search Screen
-
Hover over the Incidents icon and click Search Incidents.
-
Identify the appropriate search section on the screen: Incident Search, People Search, or Vehicle Search.
-
Enter the desired parameters within the chosen module.
-
Click the Search button at the bottom of that specific section to execute the query.
Incident Search Criteria
The Incident Search module filters files based on system metadata, investigative context, and operational timelines.
-
Occurrence #: A unique ID number designated to the incident automatically upon creation.
-
Police Occurrence #: A reference number assigned by partner police forces for cross-agency tracking.
-
Reported by (Officer): A drop-down menu used to narrow searches to incidents filed by specific personnel.
-
Reported Dates: Calendar fields to look up the exact date an incident was officially logged.
-
Status: A drop-down menu to filter records that are currently Open, Closed, or marked as Close Requested.
-
Summary: A text field to scan short descriptions written during intake.
-
Between Dates: A date range filter capturing when the physical event occurred.
-
Location and Sub-Location: Drop-down menus to isolate events by campus quadrants, properties, or specific parking lots.
-
Room Number: An alphanumeric field to pinpoint incidents inside specific building interiors.
-
Category: A drop-down menu classifying the general nature of the incident.
-
Sub Category: A contextual drop-down menu that changes dynamically based on the selection made in the general Category field.
-
PON/Summons Issued: A drop-down selection to filter based on whether a Provincial Offence Notice or legal summons was distributed.
-
Arrest/Apprehension Made: A drop-down selection isolating cases where security or police took individuals into custody.
-
Violence Involved: A selection filter to flag or exclude files involving physical altercations.
-
Weapons Involved: A selection filter to locate files involving hazardous instruments.
-
Text: A keyword index search that checks both the comprehensive narrative text and the custom location descriptions simultaneously.
-
Last Updated Between Dates: A date range filter tracking historical modifications or administrative edits.
-
Has Been Read: A filter with Yes, No, or Either parameters to separate newly submitted reports from audited ones.
-
Case Manager: A drop-down menu to filter files assigned to specific administrative supervisors.
-
Primary Investigator: A drop-down menu isolating files assigned to the lead field officer.
-
Task Assignments: A drop-down menu sorting records by specific backup or support personnel tasked with secondary actions.
-
Requires a Checklist: A selection filter checking if the incident layout demands a compliance checklist.
-
Include Checklist Details: A checkbox that, when enabled, appends the detailed line-item checklist outcomes directly into the visual search results table.
People Search Criteria
This module isolates incident records based on the profile data of involved subjects, including complainants, witnesses, or suspects. Administrators can search using standard identity fields, including first name, last name, phone number, employee or student ID number, or driver's license details.
A dynamic information banner automatically generates at the top of the search results to summarize user profile metrics if the search parameters include at least one complete identifier, the database returns exactly one distinct user profile, and the input data matches the profile field exactly. This banner will not display if the query results in multiple partial matches.
Vehicle Search Criteria
This module locates incident files linked to specific automotive property. Administrators can track down records by entering descriptive vehicle parameters, such as license plate states, makes, models, colors, or permit identifiers associated with the vehicle at the time of the event.
Best Practices and Considerations
-
Establish keyword naming conventions: Organizations should develop strict internal business rules for entering summaries and text narratives. Consistent terminology improves the accuracy of the Text search filter over multi-year lookups.
-
Combine parameters cautiously: Avoid combining highly specific criteria to prevent over-filtering results. Combining a precise Room Number alongside a narrow Between Dates window can easily hide a record. If a known incident is missing, strip away secondary filters and search using the Occurrence # alone.
-
Audit unread files regularly: Utilize the Has Been Read drop-down menu set to No as a weekly operational check to ensure all newly logged field incidents are triaged and assigned in a timely manner.
Configuring Incidents
The Incident Configuration feature provides the foundational settings required before your organization can effectively utilize the incident management module. Its primary purpose is to allow administrators to define standardized categories, identification flags, and descriptive drop-down lists, ensuring consistent data entry across all incident reports. This article is intended for OPSCOM administrators responsible for system setup and maintenance.
Setup and Configuration
Before dispatchers and officers can begin logging events, administrators must pre-configure several standardized data lists.
Configuration Categories
-
Categories: Define the primary types of incidents that occur on your property. Each main category (e.g., Break and Enter) can host multiple sub-categories to allow for precise classification during reporting.
-
Flags: Create custom tags to highlight critical information or flag the severity of an incident (e.g., violence involved, weapons involved). Detailed setup instructions can be found on the Incident Flags page.
-
Ethnicity: Populate a standardized drop-down list of ethnic descriptors to assist officers in identifying individuals related to an incident, whether they are a victim, suspect, or witness.
-
Relations: Define the exact terminology used to describe an individual's relationship or involvement with a specific incident (e.g., Complainant, Witness, Victim, Prime Suspect).
-
Ext. User Profile Options: Create extended value fields used for describing the physical characteristics of an individual involved in an incident (e.g., hair color, hair style, body build type, clothing style).
-
Missing Property Types: Build targeted pick lists that officers can use to describe property involved, damaged, or stolen during an incident (e.g., vehicles, jewelry, computers, electronics, money).
-
Cameras: Configure the required input settings for any integrated surveillance cameras that may capture footage of an incident on your property.
The descriptive data entered into the Ext. User Profile Options fields will only be visible within the incidents module to assist with investigations. These specific physical descriptions will not appear on a user's standard parking or general system profile.
Best Practices and Considerations
-
Standardize your categories: Organizations should establish a clear business rule for incident categorization prior to system launch. Creating too many overlapping sub-categories can confuse dispatchers, lead to inconsistent data entry, and skew your statistical summary reports.
-
Keep descriptors objective: Ensure that all options configured under Ext. User Profile Options and Ethnicity rely on professional and objective terminology. This ensures your organization maintains compliance and accuracy when standardizing suspect and witness descriptions for legal or investigative use.
IncidentAdmin Workflow
The IncidentAdmin workflow provides a comprehensive framework for reporting, tracking, and resolving security events on your property. Its primary purpose is to guide administrators through the complete lifecycle of an incident, from initial dispatch entry and task assignment to final resolution and statistical reporting. This article is intended for OPSCOM administrators and security personnel.
Setup and Configuration
Because this workflow encompasses the entire incident management module, there is no single setup step. Instead, administrators must ensure that all foundational elements—such as categories, flags, and physical locations—are properly established in the system prior to use.
Detailed setup instructions for these prerequisites can be found on the Configuring Incidents Configuring Incidents page. Additionally, administrators must have the appropriate roles and permissions enabled to create, view, edit, and report on incidents.
Using this Feature
The incident workflow generally follows three main phases: initiation, investigation and tracking, and reporting.
Initiating an Incident
Security events are typically brought to the administration's attention through direct observation by patrol staff, phone calls from individuals, administrative requests, or surveillance camera footage.
Entering these events into the system is handled through two primary modules, which can be utilized in any order depending on your organization's procedures:
-
Access the Dispatch Logs page to quickly record incoming calls, alerts, and initial reports.
-
Access the Incident Entry page to formally create and document a comprehensive case file.
While dispatch logs and incident entries can be generated independently, dispatch logs can be directly linked and assigned to an incident report. This preserves the initial call data and integrates it seamlessly into the final investigative file.
Tracking and Managing Investigations
Once an event is recorded in the system, security administrators can track the progress of the investigation and manage follow-up activities. The core workflow highlights during this phase include:
-
Searching, viewing, and editing active incident records as new details emerge.
-
Creating and assigning actionable tasks directly to field officers, primary investigators, case workers, and administrative staff.
-
Reviewing personal responsibilities by checking the My Tasks dashboard.
-
Recording specific procedural steps taken and documenting the final outcomes for all individuals involved.
-
Linking related occurrences and parking or moving violations to the main incident to build a complete case history.
Generating Reports
The final phase of the workflow involves analyzing the collected data. IncidentAdmin provides a suite of reporting tools to help administrators review records and operational efficiency:
-
Recent Incidents Summary Report: Lists all incident records logged within the last 30 days.
-
Search Repeat Offenders: Generates a report on specific individuals involved in multiple incidents over a period of time.
-
Weekly Stat Report: Calculates the total number of various incident types that occurred during a specified time span.
-
Calls for Service: Summarizes service call metrics and dispatch responses.
-
Summary Search: Retrieves a summary of all incidents recorded within a specified time frame.
-
Summary Report: Produces a downloadable, spreadsheet-formatted list of incident summaries based on a defined date range.
-
Report by Category: Filters and displays incidents under defined category classifications within a specific time frame.
-
Sub Location Report: Filters and displays incidents based on specific physical zones or sub-locations on your property.
Best Practices and Considerations
-
Standardize your reporting procedures: Organizations should develop a clear business rule outlining exactly when a situation warrants a simple dispatch log versus a full incident report. This ensures consistency in how daily activities are triaged and escalated.
-
Utilize task assignments: Always use the built-in task assignment features for follow-ups. Assigning specific tasks to investigators or case workers ensures that the investigation maintains momentum and creates an auditable trail of accountability.
Hazing Transparency Report
This article outlines the setup and use of compliance and reporting features designed to be fully congruent with "The Jeanne Clery Campus Safety Act, at 20 U.S.C. § 1092(f)" The primary purpose of these tools is to allow institutions to map existing local incident codes and campus buildings into broader federal reporting classifications without complicating standard data entry. This guide is intended for OPSCOM administrators.
Setup & Configuration
The configuration of these compliance features requires mapping your campus geography and incident categories using the administrative portal.
Location Types Configuration
Location types allow you to classify campus locations according to Clery Act, or other regulatory geography requirements (e.g., On-Campus, Public Property, Non-campus, etc.). This is also critical for the Hazing Transparency report, which groups data by location. Your installation may already have location data, all modules use the same list.
-
Hover over System Configuration, Manage Locations.
-
Review the default classifications provided by the system.
-
Click the Edit icon to rename a type, or click Add New to create a custom classification.
-
Click the Archive button to hide a classification you do not need. Archiving removes it from dropdowns without deleting historical data.
-
Hover over Locations and click Locations List.
-
Click the Edit icon next to a specific building or location.
-
Click the Location Type drop-down menu and choose the appropriate classification for that building.
If no location type exists for a particular location, it will not display on the Hazing Transparency report or the Annual Crime Statistics Report. Sub-locations will automatically have the same location type of the main location.
Category Types Configuration
Category types group your specific incident categories into broader regulatory buckets (usually defined by legal statutes). Your installation may already cover your needs, you can check the category types and edit them by doing the following;
- Hover over System Configuration, Incidents, and click Categories.
- Customize the default list by adding, editing, or archiving types to match your reporting framework.
- You can also configure sub categories by clicking the "Sub" icon, next to each category
You can make an incident category eligible for the Hazing Transparency report by checking that box when editing the incident category. Once you click save, any new incident created with the category you checked the box for, will include the Hazing Transparency form at the bottom.
Ensure the appropriate form checkboxes are enabled for each incident category you wish to use them with. Disabling a form for a specific incident type will make it unavailable when generating reports.
Using this Feature
Create a new incident and select the category you enabled the Hazing Transparency form for, as well as a subcategory.
-
Scroll down the incident edit page to view the supplemental form if the chosen category triggers the Hazing Transparency form.
-
Enter the required data, including the Student organization(s) involved in the hazing incident, relevant dates, and Description of the hazing incident.
-
Save the incident to log the compliance data.
Generating Compliance Reports
Once an incident exists with a Hazing Transparency form filled out, that information is submitted to the Hazing Transparency report. To view this report, do the following;
-
Hover over Incidents, Reports, and click on the Hazing Transparency Report to view university Hazing statistics grouped by building, based on a selected date range.
-
Click the Export to Excel button on either report screen to download the formatted data.
Best Practices & Considerations
-
Always ensure every active location is assigned a Location Type. If an incident occurs at a location missing this metadata, it will not properly map to your Clery geography or the Hazing Transparency Report.
-
Categories lacking a Category Type will still report. If you flag a category for reporting but forget to assign a Category Type, the system will group those incidents under an "Uncategorized" header to ensure data is never silently dropped.
-
Reports feature zero-count transparency. Every configured crime type or location will always show a row on your reports, even if the count is zero.
-
Color shading in reports indicates volume. When reviewing the Annual Crime Statistics Report, pay attention to the red shading in the cells; darker red visually highlights problem areas relative to the highest single count in your dataset.
-
Tip: If a specific crime type is missing from your Annual Crime Statistics report, immediately check that both the Include in Reports switch on the Category and the Reporting switch on the Sub-Category are enabled.
Fire Safety Report
This article outlines the setup and use of compliance and reporting features designed to be fully congruent with "The Jeanne Clery Campus Safety Act, at 20 U.S.C. § 1092(f)" The primary purpose of these tools is to allow institutions to map existing local incident codes and campus buildings into broader federal reporting classifications without complicating standard data entry. This guide is intended for OPSCOM administrators.
Setup & Configuration
The configuration of these compliance features requires mapping your campus geography and incident categories using the administrative portal.
Location Types Configuration
Location types allow you to classify campus locations according to Clery Act geography requirements (e.g., On-Campus, Public Property, Non-campus, etc.). This is also critical for Fire Safety Report, which groups data by building. Your installation may already have location data, all modules use the same list.
-
Hover over System Configuration, Manage Locations.
-
Review the default classifications provided by the system.
-
Click the Edit icon to rename a type, or click Add New to create a custom classification.
-
Click the Archive button to hide a classification you do not need. Archiving removes it from dropdowns without deleting historical data.
-
Hover over Locations and click Locations List.
-
Click the Edit icon next to a specific building or location.
-
Click the Location Type drop-down menu and choose the appropriate classification for that building.
If no location type exists for a particular location, it will not display on the Fire Safety Report or the Annual Crime Statistics Report. Sub-locations will automatically have the same location type of the main location.
Category Types Configuration
Category types group your specific incident categories into broader regulatory buckets (usually defined by legal statutes). Your installation may already cover your needs, you can check the category types and edit them by doing the following;
- Hover over System Configuration, Incidents, and click Categories.
- Customize the default list by adding, editing, or archiving types to match your reporting framework.
- You can also configure sub categories by clicking the "Sub" icon, next to each category
You can make an incident category eligible for the Fire Safety Report by checking that box when editing the category. Once you click save, any new incident created with the category you checked the box for, will include the Fire Safety form at the bottom.
Ensure the appropriate form checkboxes are enabled for each incident category you wish to use them with. Disabling a form for a specific incident type will make it unavailable when generating reports.
Using this Feature
Create a new incident and select the category you enabled the "Fire form" for, as well as a subcategory.
-
Scroll down the incident edit page to view the supplemental form if the chosen category triggers the Fire Safety form.
-
Enter the required data, including the cause of the fire, number of injuries, number of deaths, and value of property damage.
-
Save the incident to log the compliance data.
Generating Compliance Reports
Once an incident exists with a Fire Safety form filled out, that information is submitted to the Fire Safety Report.
-
Hover over Incidents, Reports, and click on the Fire Safety Report to view fire statistics grouped by building, based on a selected date range.
-
Click the Export to Excel button on either report screen to download the formatted data.
Best Practices & Considerations
-
Always ensure every active location is assigned a Location Type. If an incident occurs at a location missing this metadata, it will not properly map to your Clery geography or the Fire Safety Report.
-
Categories lacking a Category Type will still report. If you flag a category for reporting but forget to assign a Category Type, the system will group those incidents under an "Uncategorized" header to ensure data is never silently dropped.
-
Reports feature zero-count transparency. Every configured crime type or location will always show a row on your reports, even if the count is zero.
-
Color shading in reports indicates volume. When reviewing the Annual Crime Statistics Report, pay attention to the red shading in the cells; darker red visually highlights problem areas relative to the highest single count in your dataset.
-
Tip: If a specific crime type is missing from your Annual Crime Statistics report, immediately check that both the Include in Reports switch on the Category and the Reporting switch on the Sub-Category are enabled.
Setting Up for Clery Act Reporting
This is a step-by-step guide for setting up for Clery Act Reporting.
Step 1: Set up your Location Types
Location Types tell the system which of your campus locations count as "on-campus," "on-campus student housing," "public property," or "non-campus" — the categories the Clery Act requires.
Refer to this document for Location Setup details.
You'll see five ready-made types:
-
On-Campus (General)
-
On-Campus Student Housing
-
Public Property (Within Bounds)
-
Public Property (Adjacent)
-
Noncampus Buildings and Property
You can rename these, add new ones, or archive ones you don't need — nothing is fixed. Archiving hides a type everywhere (lists, dropdowns) without deleting its history.
Next, tag your actual buildings: go to your Locations list and, for each building, choose the appropriate Location Type from the dropdown on that location's edit screen. A building with no type assigned won't show up correctly on the Fire Safety Report or the Annual Crime Statistics Report, so this step matters.
Step 2: Set up Category Types & Turn on Reporting
Category Types group your incident Categories into broader buckets — "Criminal Offenses," "Hate Crimes," "Hazing," "VAWA Offenses," "Arrests & Referrals" by default.
Refer to this documentation for Category Setup details.
Same idea as Location Types — five ready-made defaults, fully editable, archivable.
The Annual Crime Statistics report only shows a crime category if two separate switches are both turned on. Missing either one means that category just won't show up at all — not with zeros, it simply won't be there.
In your Incident Categories do the following:
-
Turn on "Include in Reports" on the Category itself. Click the pencil icon next to a Category (e.g. "Homicide/Murder") to open its edit form. There's an "Include in Reports" switch — turn it on.
-
Turn on "Reporting" on each Sub-Category you want included. Click the "Sub" button next to that same Category to open its Sub-Category list. Each row (e.g. "Murder CCC 229") has its own "Reporting" toggle — turn it on for each one you want to appear on the report.
-
Flag which Categories should show the Hazing Form and Fire Form. When someone is entering an incident, the Hazing Transparency Form or Fire Safety Form should pop up automatically based on the incident's Category
-
"Trigger Hazing Form" — turn this on for any Category where a hazing incident
would be logged (e.g. a "Hazing" category). -
"Trigger Fire Form" — turn this on for any Category involving fires (e.g. a "Fire
Reports" category).
How you name and organize Sub-Categories controls what the report looks like. There is no fixed list of crime types built into the system — instead, set up your Categories and Sub-Categories to match what you need reported. For example:
-
-
Category "Homicide/Murder" → Sub-Categories "Murder," "Manslaughter"
-
Category "Sex Offenses" → Sub-Categories "Rape," "Fondling," "Incest," "Statutory Rape"
-
Category "Drug Violations" → Sub-Categories "Arrest," "Judicial Referrals"
-
Category "Liquor Violations" → Sub-Categories "Arrest," "Judicial Referrals"
-
Category "Weapons Violations" → Sub-Categories "Arrest," "Judicial Referrals"
Each Sub-Category becomes its own row on the report, indented under its Category, which
is in turn indented under its Category Type (or "Uncategorized").
Once set, whoever is entering an incident will see the matching form appear the moment
they pick that Category from the dropdown — no page reload needed.
Step 3: (For Hazing reporting) Set up Student Organizations
Where: Incidents → Student Organizations
Add the student organizations you'll need to tag on hazing incidents (fraternities, sororities, clubs, teams, etc.). You can archive an organization later if it's inactive — archived organizations disappear from the selection list but stay on any past hazing report they were already tagged on.
Security with OperationsCommander
OperationsCommander works hard to maintain an up to date product wiki! If you have any questions or if you feel something is missing, post about it in the community.
Enhanced Admin Security: Multi-Factor Authentication (MFA) with OperationsCommander
Multi-Factor Authentication (MFA) provides a critical layer of security for OPSCOM administrator accounts by requiring an email-delivered One-Time Password (OTP). Its primary purpose is to significantly strengthen account protection and prevent unauthorized access to sensitive system data. This article is intended for OPSCOM administrators.
Setup and Configuration
The MFA feature offers three distinct configuration levels for your organization's administrative portal. Currently, modifying your site's overall MFA setting requires assistance from our team. If you wish to adjust your configuration, please contact support@ops-com.com.
Available Configuration Options
Using this Feature
Depending on your organization's configuration, you will interact with the MFA prompt during the standard login process or when performing critical account updates.
Authenticating a Login
When MFA is set to Visible or Required, the system will prompt you to authenticate your identity after entering your username and password.
-
Enter your standard administrator credentials on the login screen.
-
Check your associated email inbox for the automatically generated One-Time Password (OTP).
-
Enter the OTP into the provided MFA prompt on the screen to access the administrative portal.
Mandatory Security Actions
Regardless of your site's overall MFA configuration level (Hidden, Visible, or Required), an OTP is always mandatory when performing the following security-sensitive actions:
-
Admin Account Creation
-
Password Changes
In OperationsCommander, the MFA email is classified as a mandatory security communication. These authentication emails will always be sent to the administrator, even if they have explicitly unsubscribed from all email communication categories on their user profile.
Originally requested on this community item!
Best Practices and Considerations
-
Enforce Maximum Security: Organizations should use the Required setting as their standard business rule. Mandating MFA for every administrative login provides the highest level of protection against compromised credentials and unauthorized system access.
-
Verify Email Addresses: If an administrator does not receive their MFA code, their email address may be missing, outdated, or misspelled on their user profile. They must contact a primary system administrator to have their profile updated before they can log in.
Resetting an Administrator's Forgotten Password
The Administrator Password Reset feature allows users to securely recover access to their OPSCOM administrative accounts. Its primary purpose is to provide a self-service method for resetting forgotten credentials quickly without requiring manual intervention from a primary system administrator. This article is intended for OPSCOM administrators who need to regain access to their portal.
Setup and Configuration
This feature is available by default on the Admin Login page and requires no specialized system setup to function. However, the system relies on the email address recorded in the user's profile to deliver the reset link.
Administrators with system configuration access can customize the automated email sent during this process by navigating to the Email Templates page and modifying the Lost Passwords template.
Using this Feature
If an administrator has forgotten their login credentials, they can initiate a secure reset process directly from the login screen.
If you do not receive the password reset email within a few minutes, check your spam or junk folders. The system will only send the email if the address entered exactly matches an active administrator profile.
Best Practices and Considerations
-
Maintain updated contact information: Ensure that the email address on your admin profile is always accurate and current. If an administrator loses access to the email account on file, they will be entirely unable to use this self-service reset feature and will be locked out until a primary administrator intervenes.
-
Customize the automated email: Organizations should configure the Lost Passwords email template to match internal IT policies. Including specific instructions or support contact details within the template helps reduce confusion if an administrator experiences issues during the reset process.