
Pages and Content Blocks
Accessing System Messaging
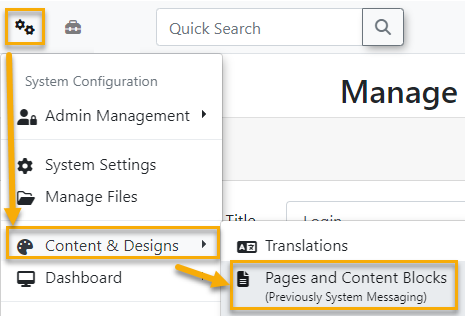
To access and manage your System Messaging navigate to the gears icon  and click on Content & Designs -> Pages and Content Blocks.
Creating Pages
We also provide a video to visually demonstrate how to use system messaging https://drive.google.com/file/d/1DU3qorWnAp_2N9mcNGFYTttNHMeRpXsQ/view
Pages display the visual content found throughout your application. You can edit the contents of your page or post a System Message by using the Disclaimer Shortcode on the Page you want it to show up on. Shortcodes also make it convenient to add interactive content to your pages. For more information on Shortcodes scroll to the bottom of this page.
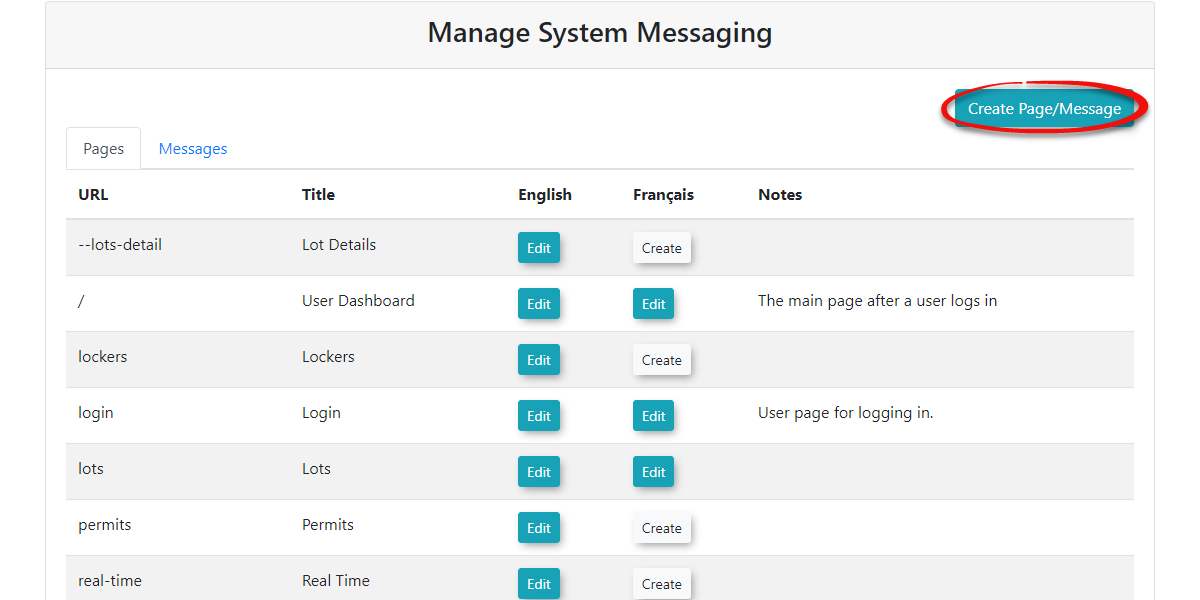
- To create a Page click the Create Page/Message button at the top right of the Manage System Messaging screen. It doesn't matter what tab you're on when you do this as you will specify the Page Type when you go to create the page.

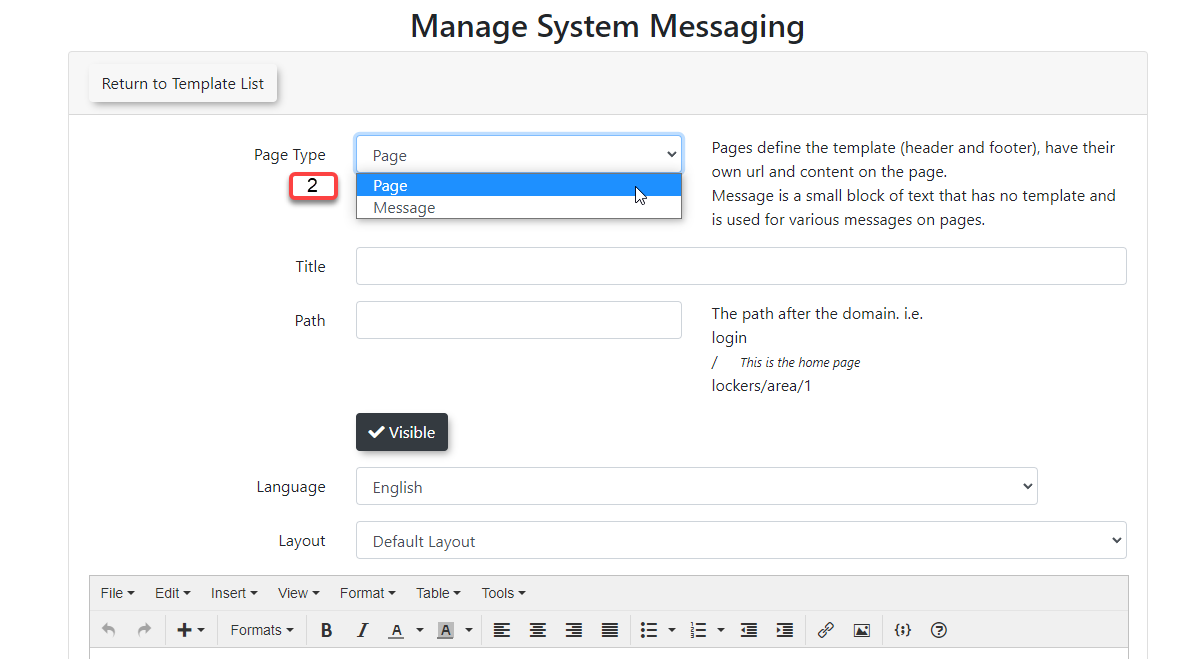
- Once you click this button OPSCOM will take you to a different section where you can set the properties and content of the page. Below is a detailed description of the options available to you when creating new Pages.
| Page Attributes | Short Description |
|---|---|
| Title | The Title of the page you wish to create, which will be the name displayed on the user navigation bar. |
| Path |
The path after the domain. i.e. login/ → This is the home page Changing this to lockers/area/1 will display login/lockers/area/1 as the URL for that page. |
| Visibility | You can toggle the visibility of your pages which will make it so your users can't see the page anymore, but you can still edit it. |
| Language | Use this to select between two language options for a specific page. Tomahawk currently supports English and French. |
| Layout | You can select the layout of your page here. Usually, you will have the Default Layout selected. |
| Content | Your content will be the text on the page you are currently editing. You can also use Shortcodes here to display a body of material or feature. For example, a user login form could be displayed on your homepage. |
Important: Make sure you select Page under the drop-down menu next to Page Type and not Message. Below we will go into detail on how to create a Page field by field. The images below give you a good visual example of what field is being explained, if there is a certain field you are unsure about you can easily find the picture and read from there.
-
Start by giving your page a Title and specify how you would like the URL at the top of your page to be displayed.

- Adjust the visibility of your page by toggling the Visible button on/off. The Page will still be editable in the System Messaging section but it will not be visible to your users who are on your Page or System Message.
| Toggle On(Visible Page) | Toggled Off(Invisible Page) |
|---|---|
|
|
|


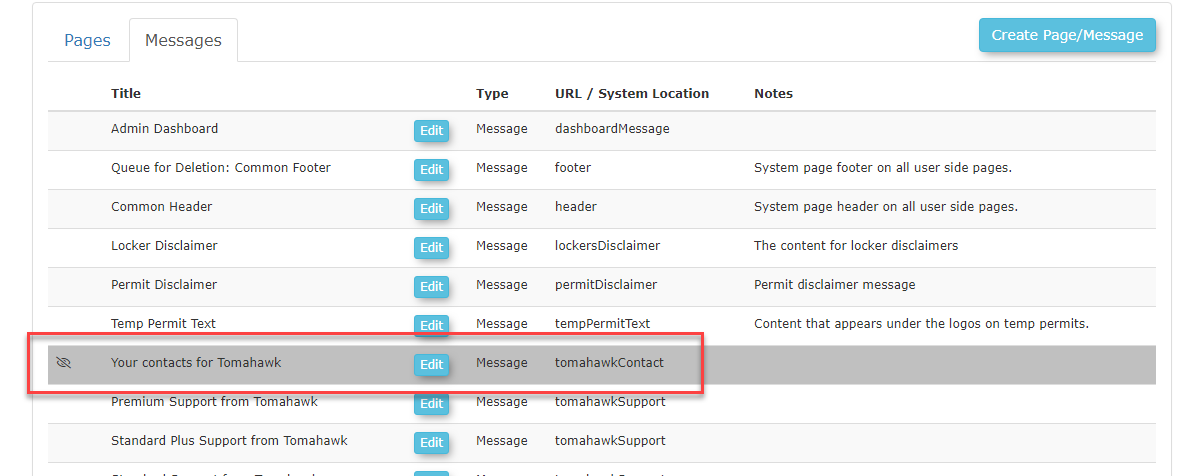
- Toggling the Page as invisible will show it under the Messages tab like seen in the image below to signify it cannot be seen by your users.
- Select the default Language and Layout of your page. If you are not sure which template to use you can leave it as the Default Layout.

- Provide the content of your page in the editor found under the page settings. This content will be the main content of your Pages; you can use Templates & Design to edit the other sections of your pages such as the Header-Content and Footer-Content.
- OPSCOM uses Shortcodes to display a section of interactive or static content like a user login, permits, etc.

Content Placement
Depending on where you place your content it can appear differently. OPSCOM's smart editor reads content top to bottom, left to right. Meaning that placing a user login Shortcode before your content will look dramatically different than if you placed the Shortcode last. You can see a few visual examples of how this works below.
For Example: Shortcodes Before Content

As you can see this displays our lot information before our content.
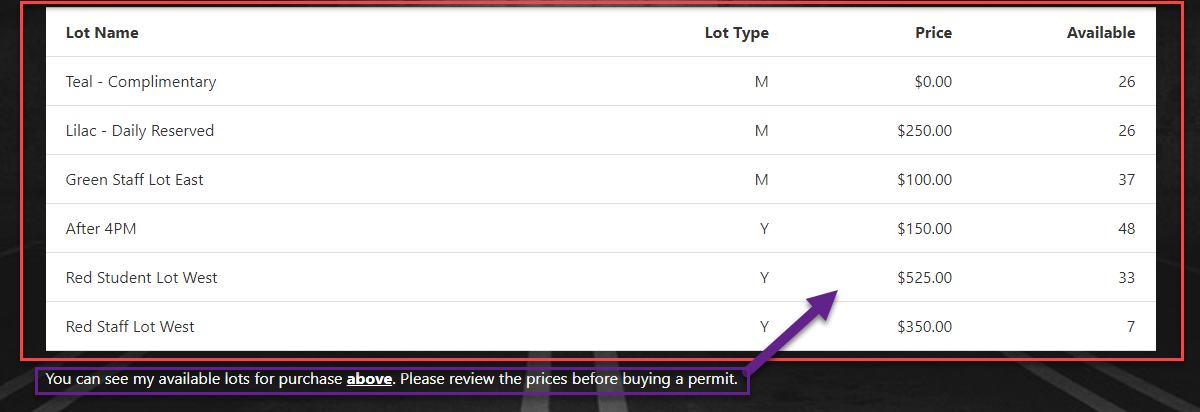
For Example: Shortcodes After Content

As you can see this placed the Shortcode after the lot information

Editing Pages
Keep in mind that the URL / System Location next to the page is the area in OPSCOM that you are updating. Therefore, if you wished to update the permit screen, you want to edit the page with a System Location of /permits.
You can edit your pages attributes such as the Title, Path, Visibility, Language, Layout, and Content after it has already been created.
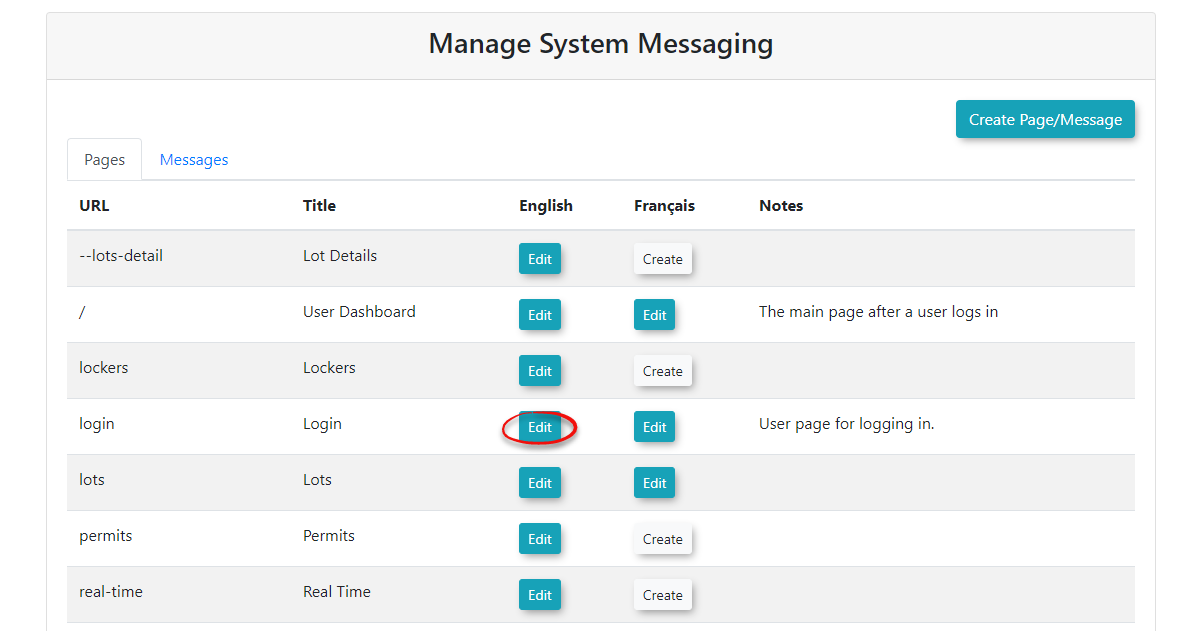
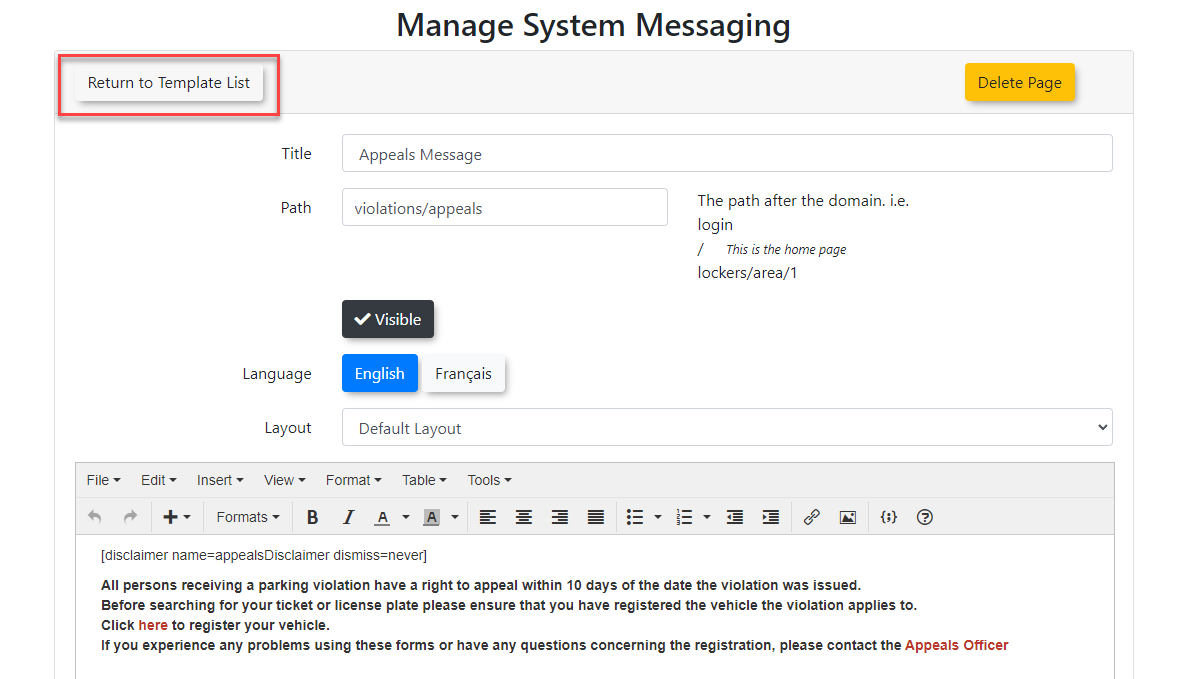
- To Edit a page, simply click on the Edit button next to the page Title you want to edit. As seen in the image below we are going to select and edit the Appeals Message page.
- You can now make any changes to the Pages content or attributes that you like.
See Creating Pages near the top of the page if you are not sure what a specific field does. From here we can edit the format of the text such as the colour, background color, etc..
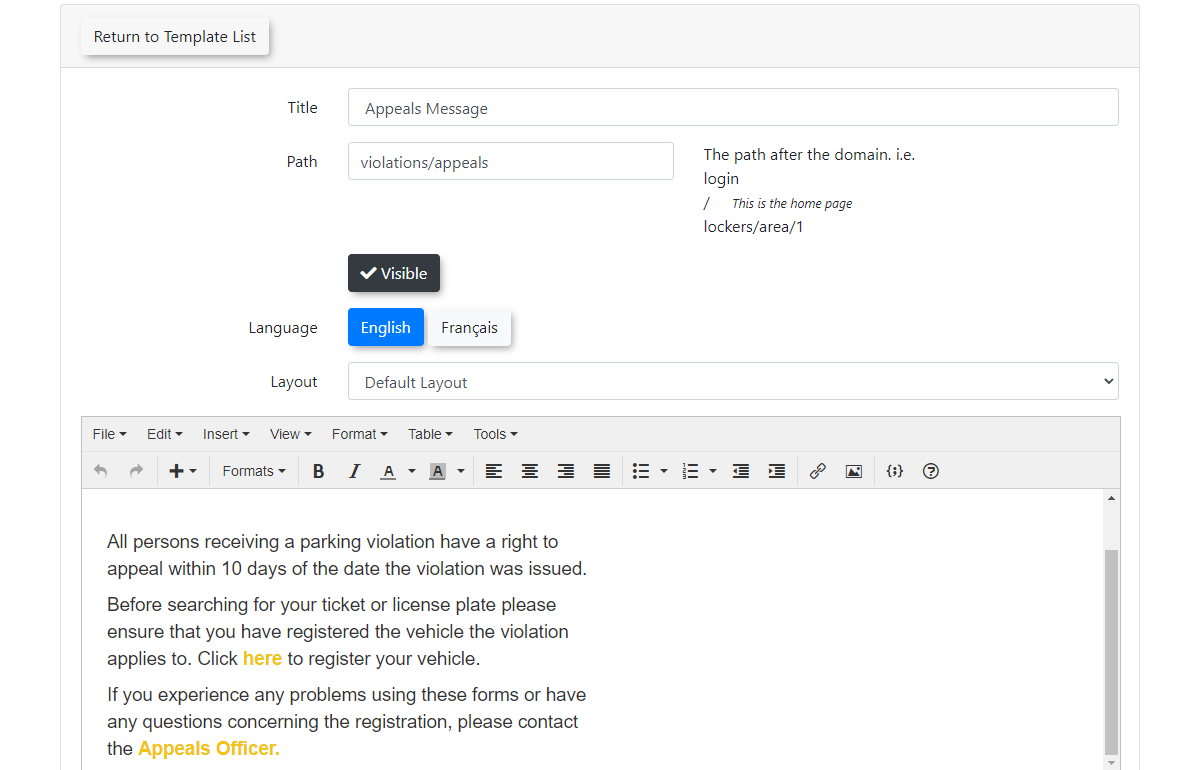
- If you have not made any changes to the page you are Editing, you may go back to the Page List by clicking Return to Page List at the top of the screen. Clicking this button will discard all changes recently made.
- Once you have finished editing the page, click Save Messaging for your changes to take effect.


Creating System Messages
Important: Users will be brought back to the Users page if users do not agree with a System Message. Meaning, we use System Messaging as a convenient way to offer agreements and disclaimers before users make purchases of permits or lockers.
System Messages and How they work with Pages
System Messages and Pages work together using Disclaimer Shortcode's. When you create a System Message, you give that message a unique Identifier. System message identifiers may be used in junction with Disclaimer Shortcodes to display your System Messages onto Pages. The idea may be daunting at first, but once you get a better understanding of how these features work together, it will make more sense.
Visual Example
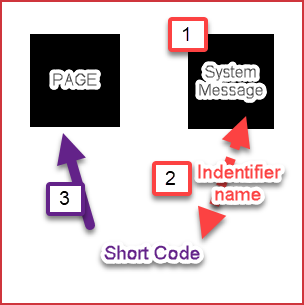
System Messages provide you with a convenient way to add alert messages to your pages that pop-up when a user clicks the page. You may create System Messages to be displayed on specific Pages using Disclaimer Shortcode's.
| Message Attributes | Description |
|---|---|
| Title | The title that will be displayed across the top of the System Message when users navigate to that page. |
| Identifier | The identifier is used to know which page you want to display the message by using Shortcodes. |
| Visibility | This section toggles the visibility of your page which will make it so your users may not see the page, but you can still edit it. |
| Language | Select between two language options for a specific page. Tomahawk current supports English and French. |
| Content | Content is what will display on the actual page. You may use Shortcodes here to view predefined static or interactive content. For example, a user login form could be displayed on your homepage. |
- To create a System Message merely click the Create Page / Message button on the top right of the Manage System Messaging screen.

- Make sure to select the Page Type from the drop-down menu and change this to Message. It is essential that you do not select Page when creating a System Message.

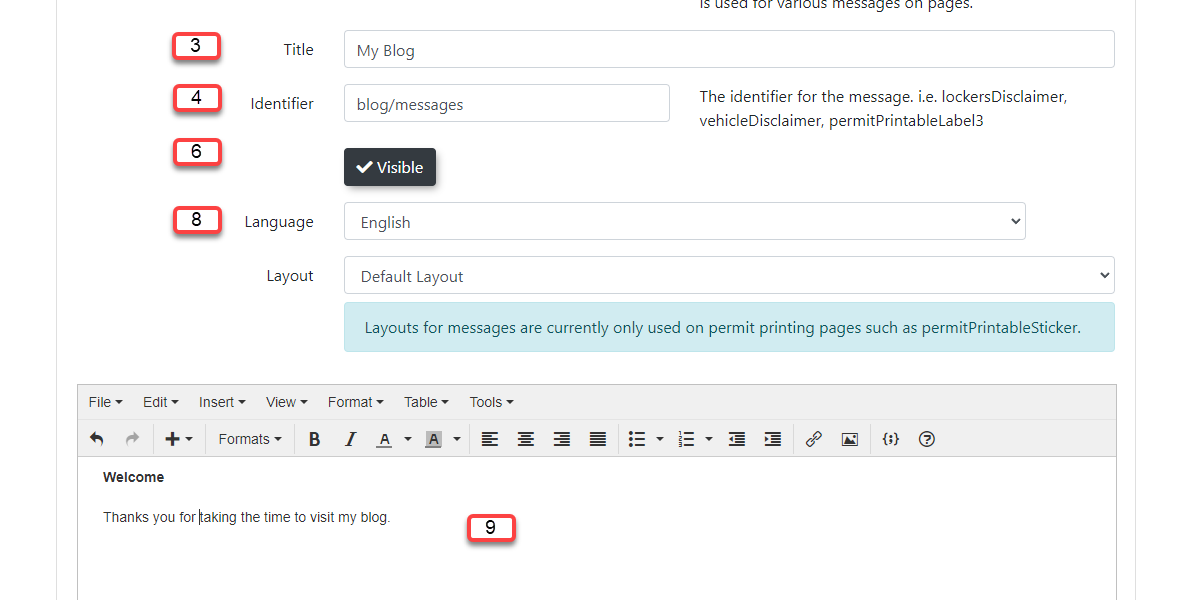
- Create a Title for the message.
- Give the message a unique Identifier so it can be accessed on your Pages using Disclaimer Shortcodes. Shortcodes are codes used to link our Pages and System Messages together.
- Once an Identifier is created, It is essential to note that you may not use it anymore or you will get an error message.
-
You may modify the visibility of your System Message by toggling the Visible button on or off.
Toggle On(Visible) Toggled Off(Invisible) 

- Toggling a System Message as invisible ensures your users won't see it. Although, you can still edit and view the System Message on the admin side, but it will be displayed as seen in the image below.

- Select which Language you would like your content to be in. OPSCOM currently supports two languages which are English and French.
- Edit the contents of your System Message in the editor found below the messages fields. This is the content that your users will see and will allow you to edit and format the way the text looks.
Once finished, click Save Messaging.


Warning: Clicking Return to Template List before Save Messaging will discard all the changes you just made, meaning that the System Message will not get created or your changes will not occur.
Editing System Messages
You can manage your System Messages Title, Identifier, Visibility, Language, as well as modify the content to include text, images, or Shortcodes.
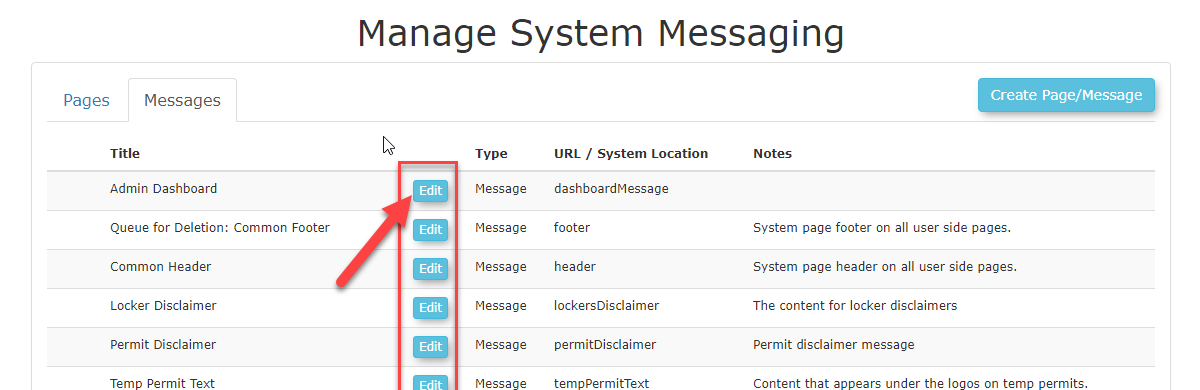
- To Edit your System Messages click the Messages tab under the Manage System Messaging page.
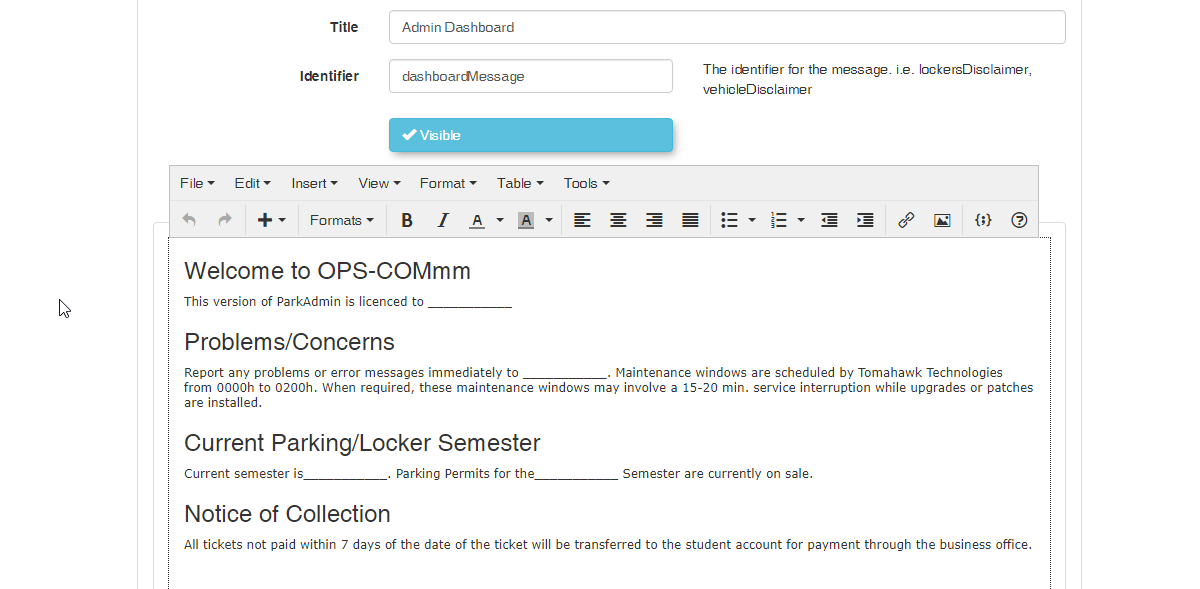
- Select the Edit button next to the System Message you wish to edit. For this example, we will be editing the Admin Dashboard.

-
You will now be able to adjust the message your users will see using the System Messaging editor. Below are the fields in which you can use to edit the System Message.
Message Attributes Description Title The title that will be displayed across the top of the System Message when users navigate to that page. Identifier The identifier is used to know which page you want to display the message by using Shortcodes. Visibility This section toggles the visibility of your page which will make it so your users may not see the page, but you can still edit it. Language Select between two language options for a specific page. OPSCOM currently supports English and French. Content Content is what will display on the actual page. You may use Shortcodes here to view predefined static or interactive content. For example, a user login form could be displayed on your homepage. 
- You may use the Title field to change the Title of the System Message.
- You may use the Identifier field to change text used to display a System Message to a Page, but this will require you to modify all Disclaimer Shortcodes using the old unique Identifier for the message you are replacing.
-
You may click Save Messaging when you are finished making your changes.

Add System Messages to Pages using Shortcodes
Now that you know how to create your Pages and System Messages you can bring them together using a Disclaimer Shortcode. A Shortcode is a small body of code surrounded by [ ] used to display complex templates or features. Shortcodes limit the technicality of our system by offering a convenient way to add interactive content without having to know how to script or code.
Please review the Shortcodes for Use on the User Portal for a detailed description of how shortcodes work. You can also find a list of Shortcodes currently available to you by going to the OPSCOM Shortcode Documentation.