Configuring SAML SSO with OPSCOM
What is Single Sign-On (SSO)
Single Sign-On (SSO) simplifies user access to OPSCOM by allowing them to authenticate using their existing, managed corporate accounts. This eliminates the need for separate OPSCOM usernames and passwords, enhancing convenience and security. This article details the setup and configuration of SAML-based SSO with OPSCOM, explaining the necessary fields, metadata exchange, and user synchronization. For more general information about SSO and OPSCOM refer to this wiki article.
Prerequisites and Considerations
Implementing SSO with OPSCOM, specifically using SAML (Security Assertion Markup Language), requires coordination between your organization's Identity Provider (IdP) and OPSCOM as the Service Provider (SP).
Your OPSCOM Client Success team will be happy to discuss these options to ensure a smooth and successful setup.
Once the prerequisites are addressed, the SAML setup involves configuring fields for both OPSCOM (as the Service Provider) and your external SAML system (as the Identity Provider).
Configuring SAML Setup
- Hover over System Configuration, Users, and click Login Sources.
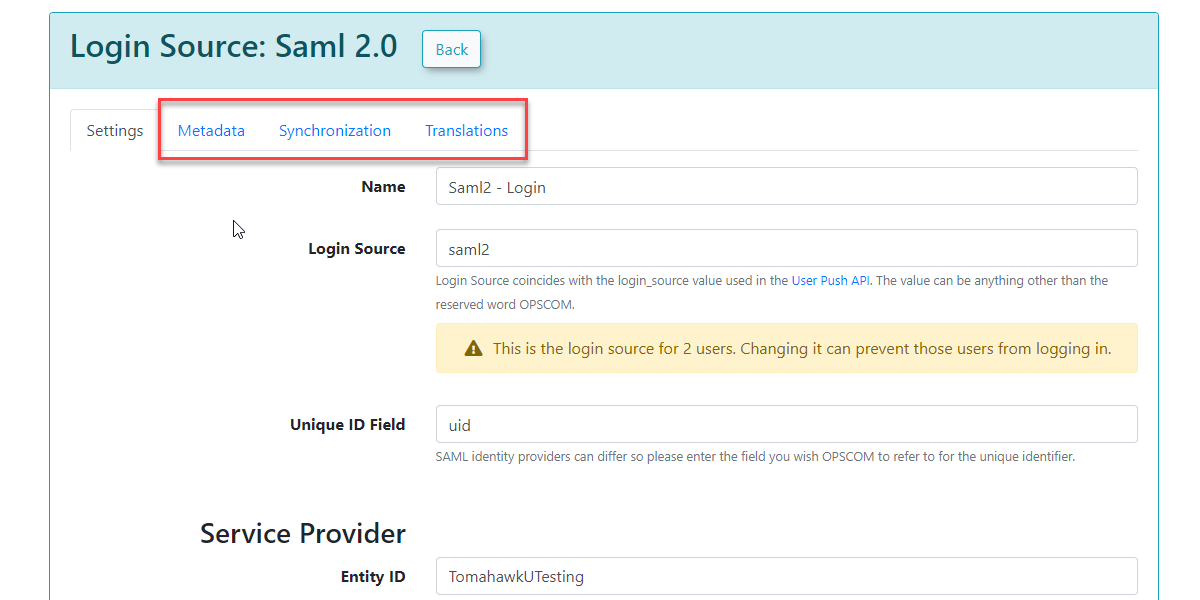
- Click the pencil icon to edit your login source you created already as mentioned above. You should already have configured the login source to the point of the Unique ID field.
The settings below must be filled out correctly and saved before you will see the Metadata tab to continue.
Service Provider Fields (Configured in OPSCOM)
These fields define how OPSCOM will interact with your Identity Provider.
Identity Provider Fields (Configured in OPSCOM, Values from Your SAML System):
These fields capture information from your external SAML system (Identity Provider). You will find these values within your SAML system's metadata (e.g., often displayed under Federation → Show Metadata on your SAML installation page).
Once these settings have been completed and saved in OPSCOM, you will gain access to additional tabs: MetaData, Synchronization, and Translations.
Using this Feature
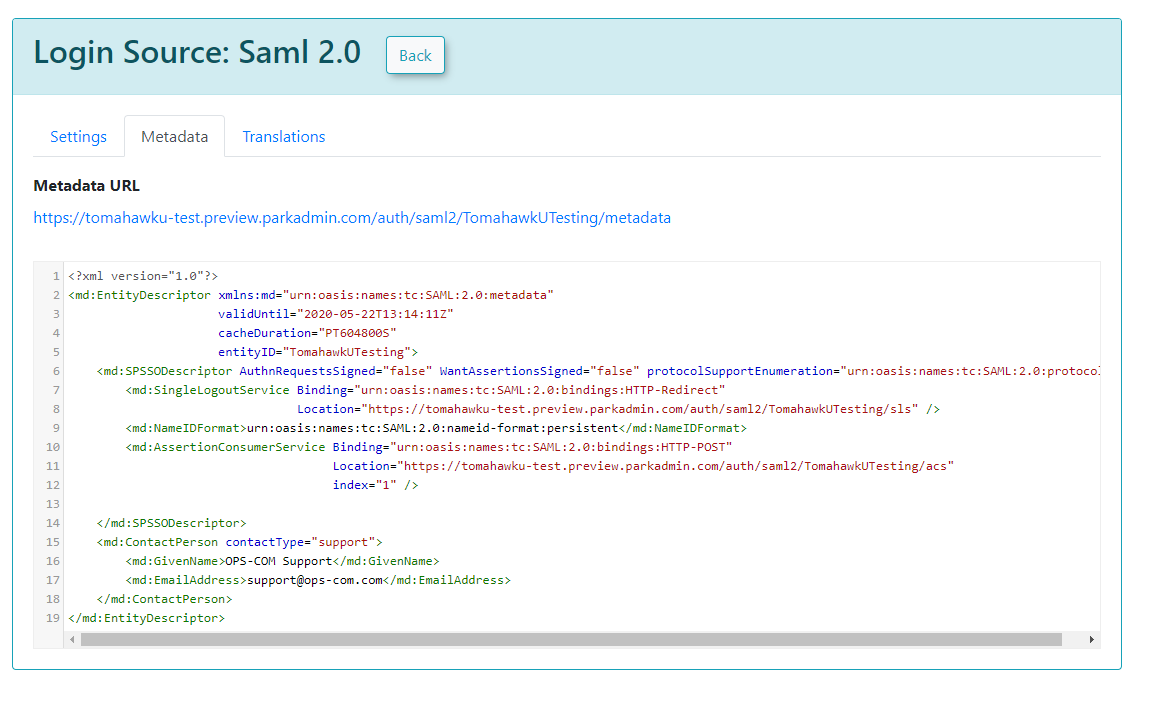
Metadata Tab
The Metadata tab in OPSCOM provides the XML code that you will need to provide to your Service Provider (OPSCOM, in the context of SAML communication from your IdP's perspective). This XML contains all the necessary information for your Identity Provider to communicate correctly with OPSCOM.
Sample XML File
Sample XML File Explanation: When your external system (e.g., a SimpleSAMLPhp service set up as the identity provider) sends a response back to OPSCOM, it includes an saml:AttributeStatement tag containing several attributes. These attributes are required for OPSCOM to match to a user within its system. The most important field in this attribute section is the value used as the permanently unique identifier for a user. For example, if the XML response shows [uid] => Array ( [0] => 6ddf4027-3397-4e45-8628-0189f60fe91e ), then uid should be entered as the Unique ID Field in your Identity Provider Fields configuration within OPSCOM. If the unique ID is something else, such as SAMaccountName, then that should be used instead.
<?xml version="1.0"?> <samlp:Response xmlns:samlp="urn:oasis:names:tc:SAML:2.0:protocol" xmlns:saml="urn:oasis:names:tc:SAML:2.0:assertion" ID="_aa1963115aa6490e728c7376f4c8849813bbb..."> ... <saml:Assertion xmlns:xsi="http://www.w3.org/2001/XMLSchema-instance" xmlns:xs="http://www.w3.org/2001/XMLSchema" ID="_9efd79bf6425983ee9176f3d33a99d1a9176180..."> ... <saml:Subject> <saml:NameID SPNameQualifier="MinionOpsComStaff" Format="urn:oasis:names:tc:SAML:2.0:nameid-format:transient">_7a426e0be71f14c1f349db00d7d543b6f7dcb52baa</saml:NameID> <saml:SubjectConfirmation Method="urn:oasis:names:tc:SAML:2.0:cm:bearer"> <saml:SubjectConfirmationData NotOnOrAfter="2021-08-24T16:00:41Z" Recipient="https://minion-3.dev.parkadmin.com/auth/saml2/MinionOpsComStaff/acs" InResponseTo="ONELOGIN_bb8a09203c888cf59af4c621a71cfa8f7559c016"/> </saml:SubjectConfirmation> </saml:Subject> <saml:Conditions NotBefore="2021-08-24T15:55:11Z" NotOnOrAfter="2021-08-24T16:00:41Z"> <saml:AudienceRestriction> <saml:Audience>MinionOpsComStaff</saml:Audience> </saml:AudienceRestriction> </saml:Conditions> <saml:AuthnStatement AuthnInstant="2021-08-24T15:34:46Z" SessionNotOnOrAfter="2021-08-24T23:34:46Z" SessionIndex="_a7a68666092117d24aab8adecf1b0830622855b85..."> <saml:AuthnContext> <saml:AuthnContextClassRef>urn:oasis:names:tc:SAML:2.0:ac:classes:PasswordProtectedTransport</saml:AuthnContextClassRef> </saml:AuthnContext> </saml:AuthnStatement> <saml:AttributeStatement> <saml:Attribute Name="uid" NameFormat="urn:oasis:names:tc:SAML:2.0:attrname-format:basic"> <saml:AttributeValue xsi:type="xs:string">6ddf4027-3397-4e45-8628-0189f60fe91e</saml:AttributeValue> </saml:Attribute> <saml:Attribute Name="full name" NameFormat="urn:oasis:names:tc:SAML:2.0:attrname-format:basic"> <saml:AttributeValue xsi:type="xs:string">Sarah Knowles</saml:AttributeValue> </saml:Attribute> <saml:Attribute Name="email" NameFormat="urn:oasis:names:tc:SAML:2.0:attrname-format:basic"> <saml:AttributeValue xsi:type="xs:string">sknowles@tomahawk.ca</saml:AttributeValue> </saml:Attribute> </saml:AttributeStatement> </saml:Assertion> </samlp:Response> |
Synchronization Tab
The Synchronization tab allows you to configure how user information is managed between your SSO system and OPSCOM.
After you have provided the information in each field, click Save Changes.
Your users will then begin to be created or updated automatically upon their SSO login attempts. If any of the supplied fields are incorrect or don't match, the corresponding information will be blank in OPSCOM when the user logs in, or it will remain unchanged if the user already existed.
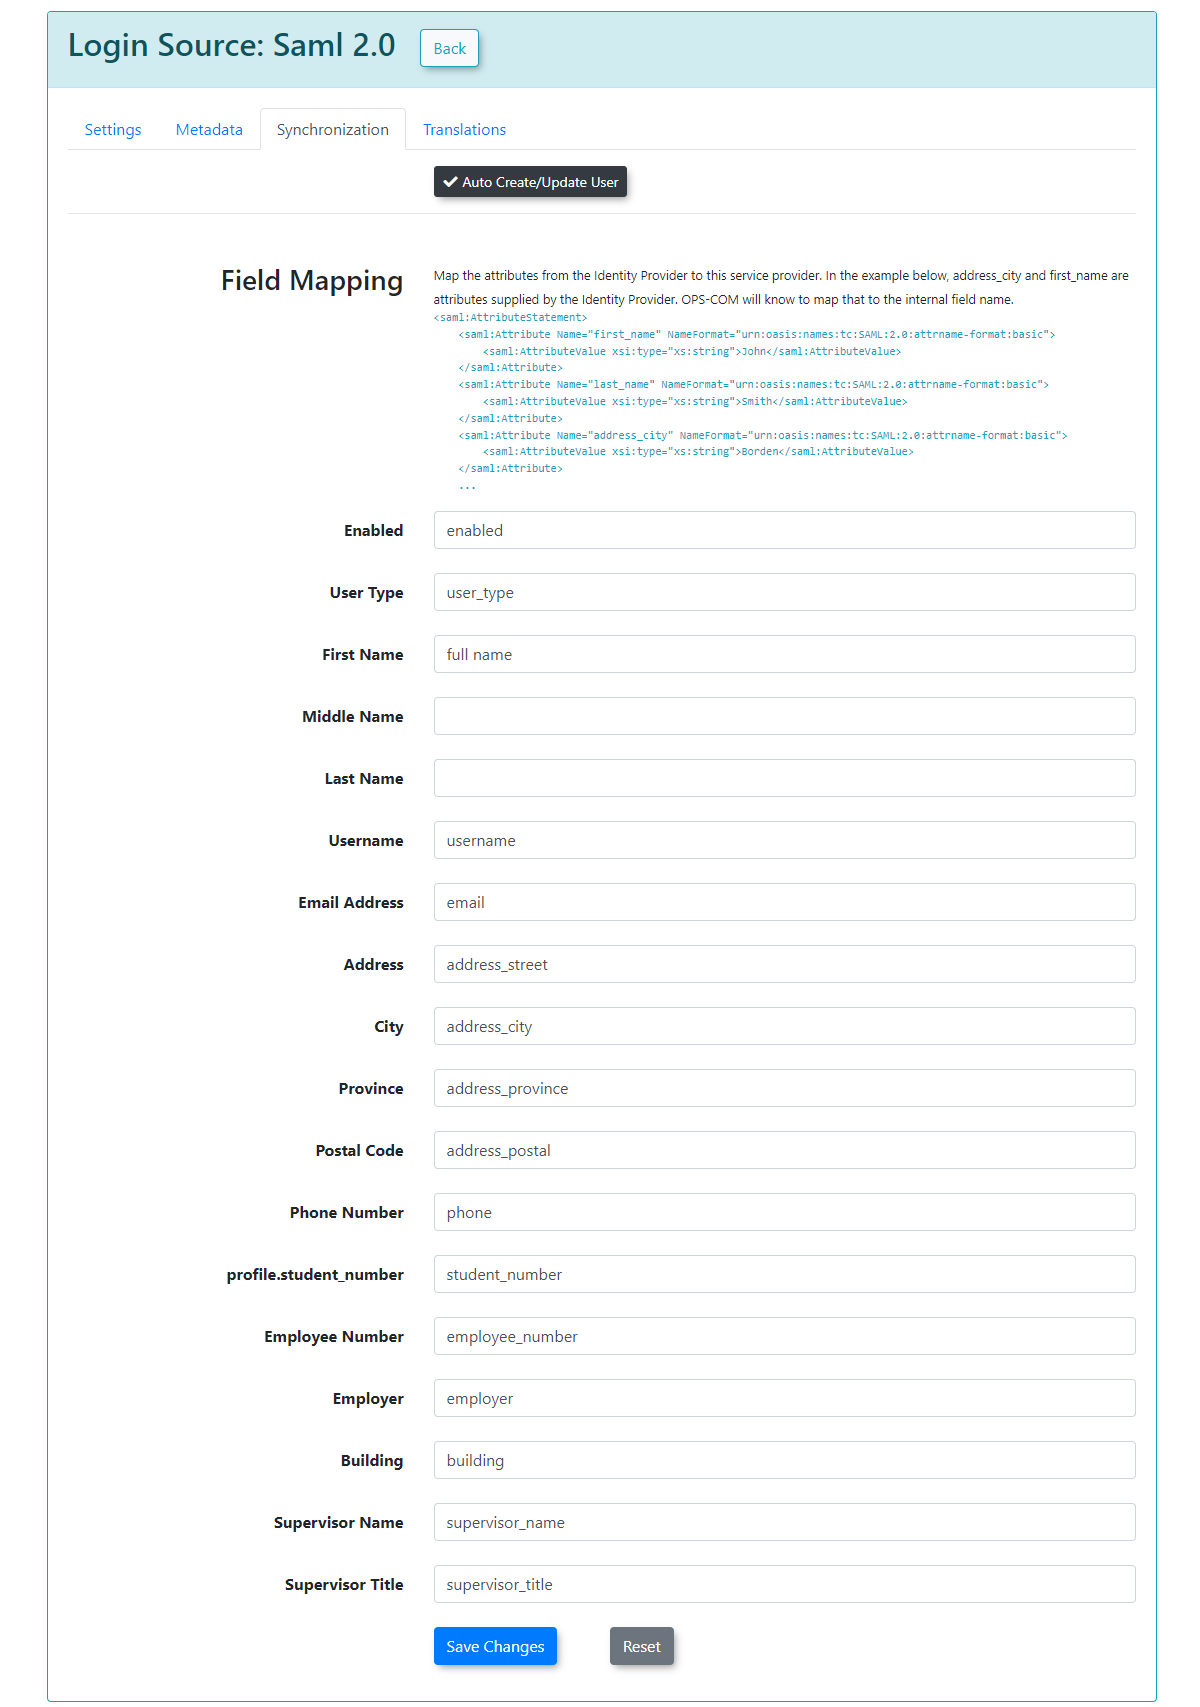
The exact sample values from our test system may differ from your actual SAML system attributes.
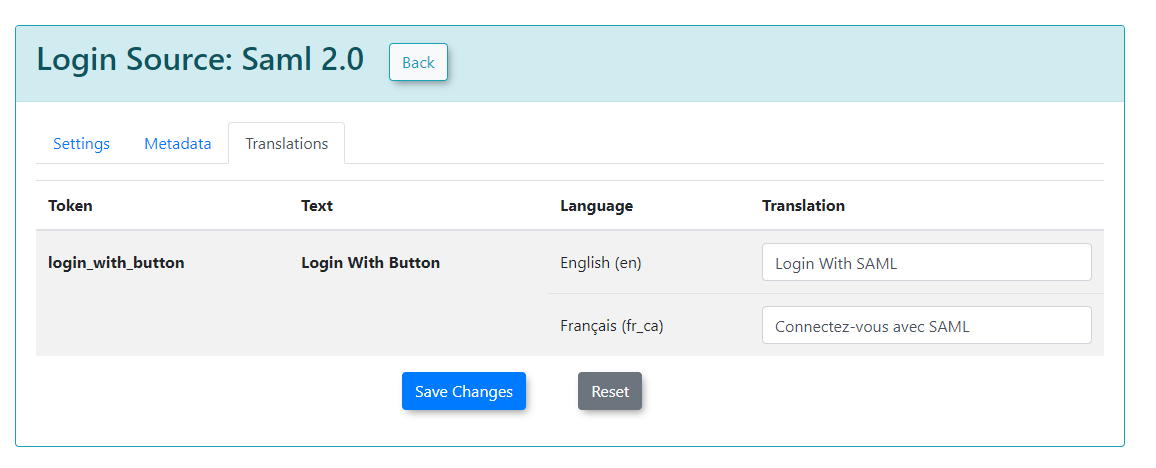
Translations Tab
The Translations tab allows you to customize the text displayed on your login button from the user side. You can create as many different translations as are available in your system (e.g., English and French). This ensures that the SSO login experience is localized for your users.