Adjustments
Making an Adjustment as an Admin
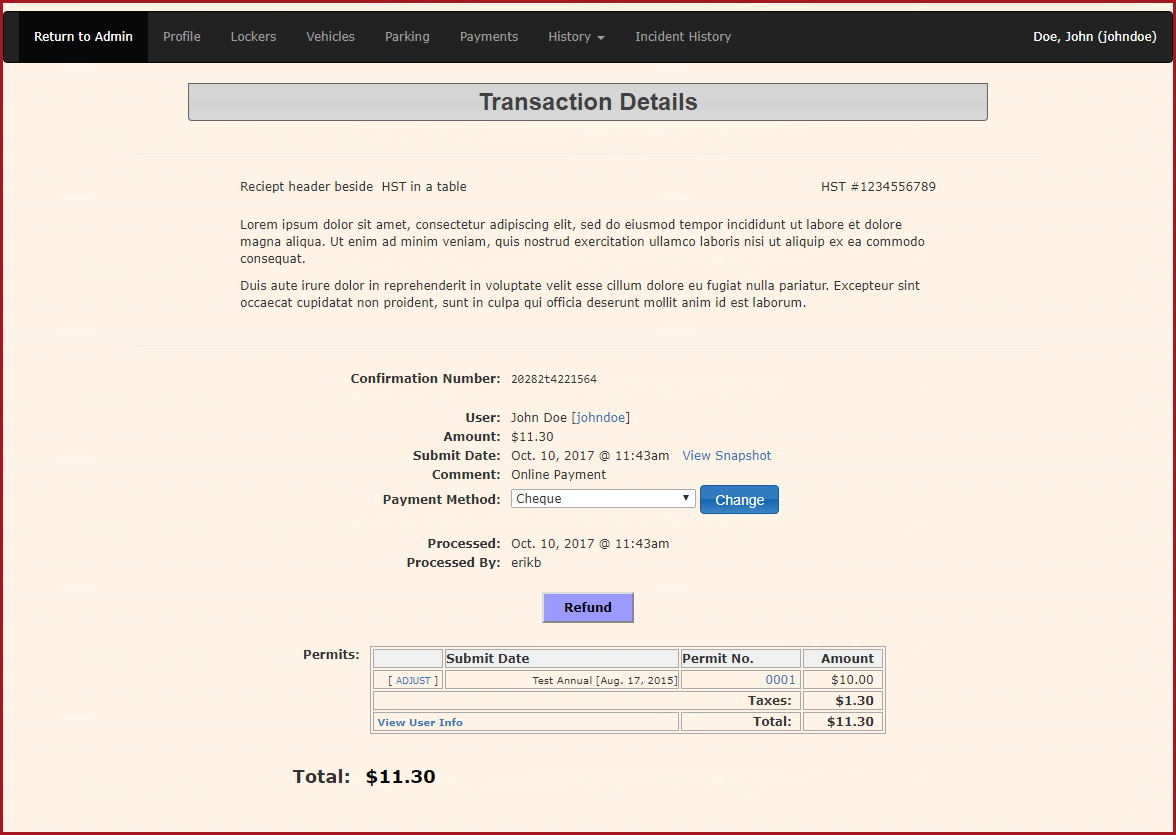
1. Note that the top right-hand corner will always identify the name of the user file that is being worked in.
2. For this example, when finished going through the payment process, on the Transaction Details screen, select the Adjust link.
(Note the process is the same if you select the adjustment link before a transaction is completed.)
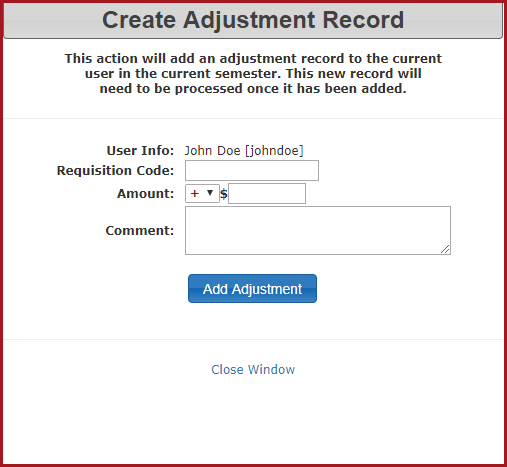
This will bring up the Create Adjustment Record pop-up screen. Enter in the internal organization Requisition Code, change the amount sign to positive if you are charging the user more or change the amount sign to a negative if you are reimbursing the user, enter the dollar amount of the adjustment, enter any comments to be associated with the adjustment and select the Add Adjustment button at the bottom of the screen. This will bring you back to the Payment Details screen with the adjustment listed below the original transaction. Note, at this point, the adjustment is not processed.
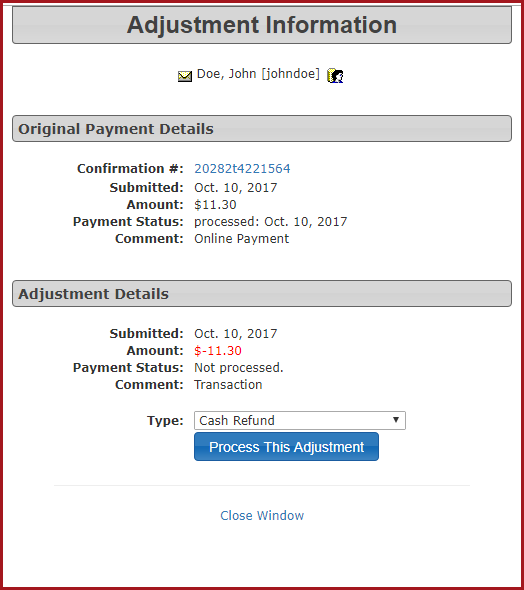
3. Select the Not processed link. This will bring up the Adjustment Information pop-up screen where you verify the adjustment details are correct.
4. If the adjustment details are correct, select the Process this Adjustment button at the bottom of the screen. You will notice the Payment Status line will change from Not Processed to Submitted and the date. This completes the adjustment process, altering the dollar amount associated with the item. Note, no items are released back into the inventory system using the adjustment process. If an item needs to be released back into the inventory, this will need to be done separately.


