Payment for a locker from the Admin Portal
Paying for a locker.
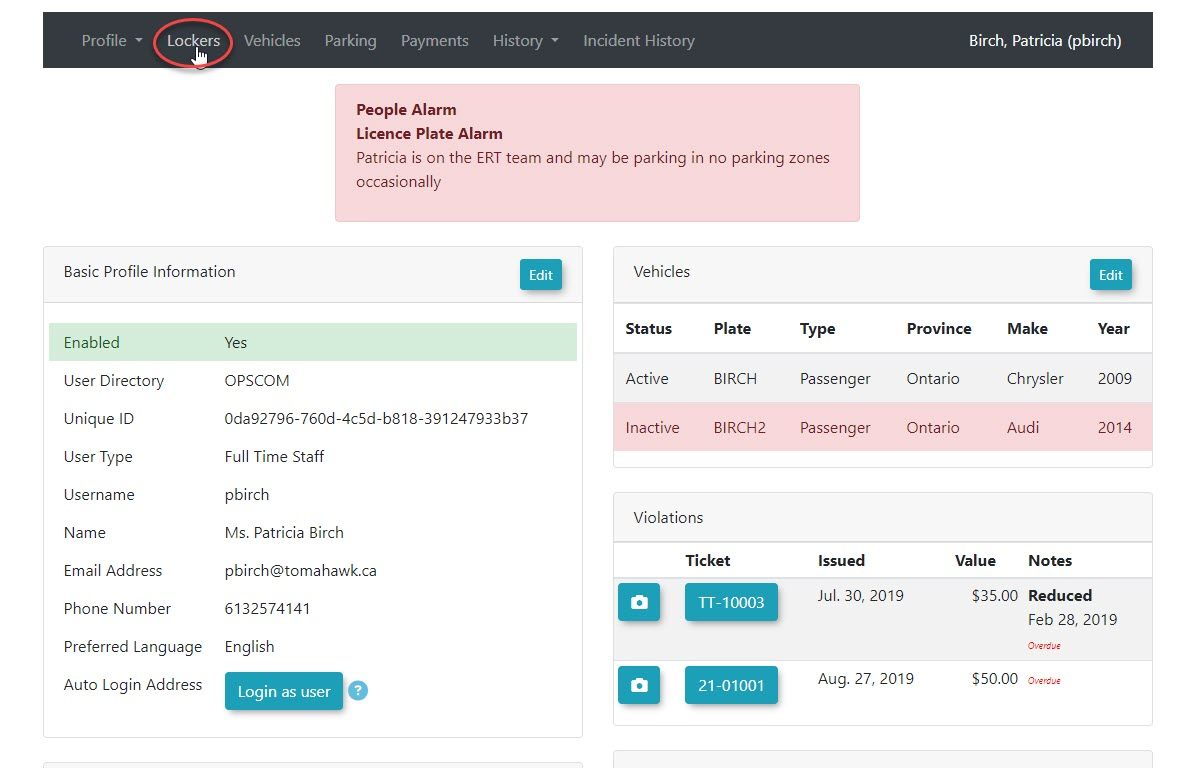
To begin click on the Lockers menu item in the user's profile on the admin portal.
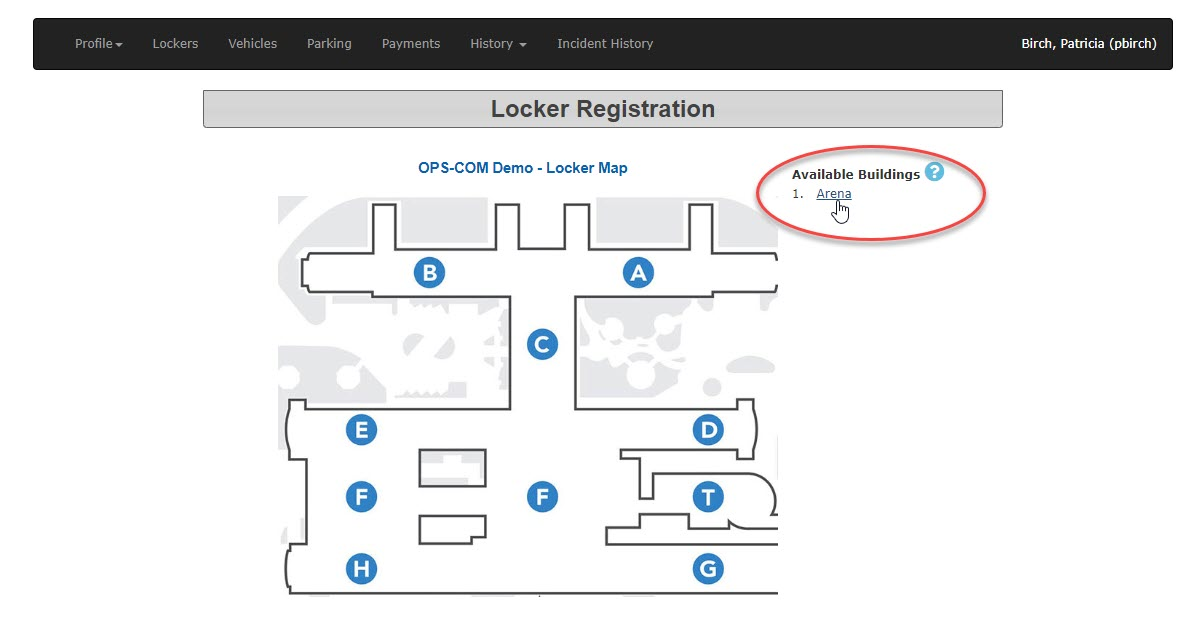
The locker registration page appears with a list of buildings with lockers available.
The locker selection page will open allowing the admin to chose the locker area within the building chosen. In this case we are looking for a locker in the women's locker room.
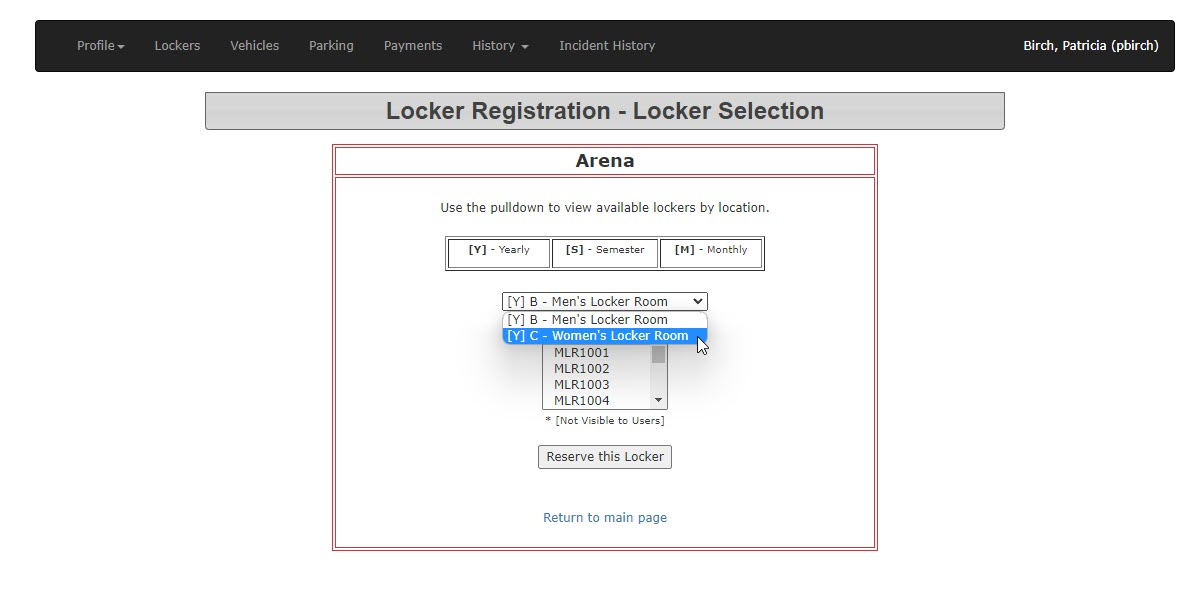
The admin may then select the specific locker number they wish to assign to the user. Click on Reserve Locker to continue.

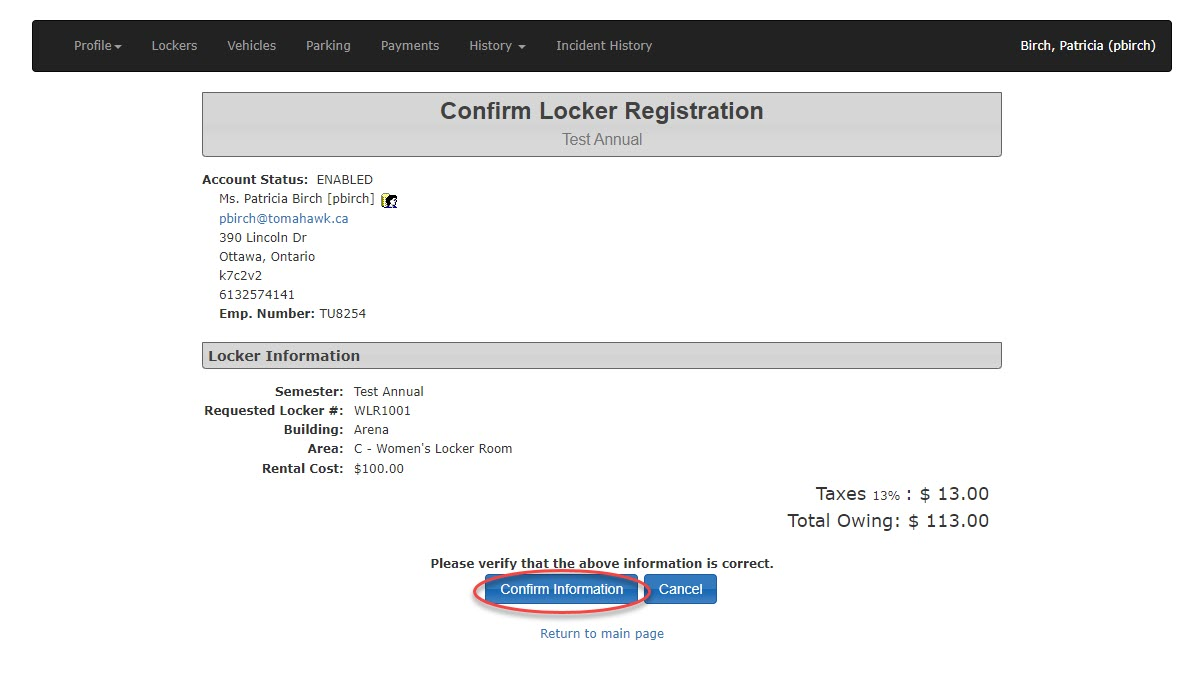
The confirm Locker Registration page will open where the admin can verify the information about the locker being assigned. Click on Confirm Info to continue.
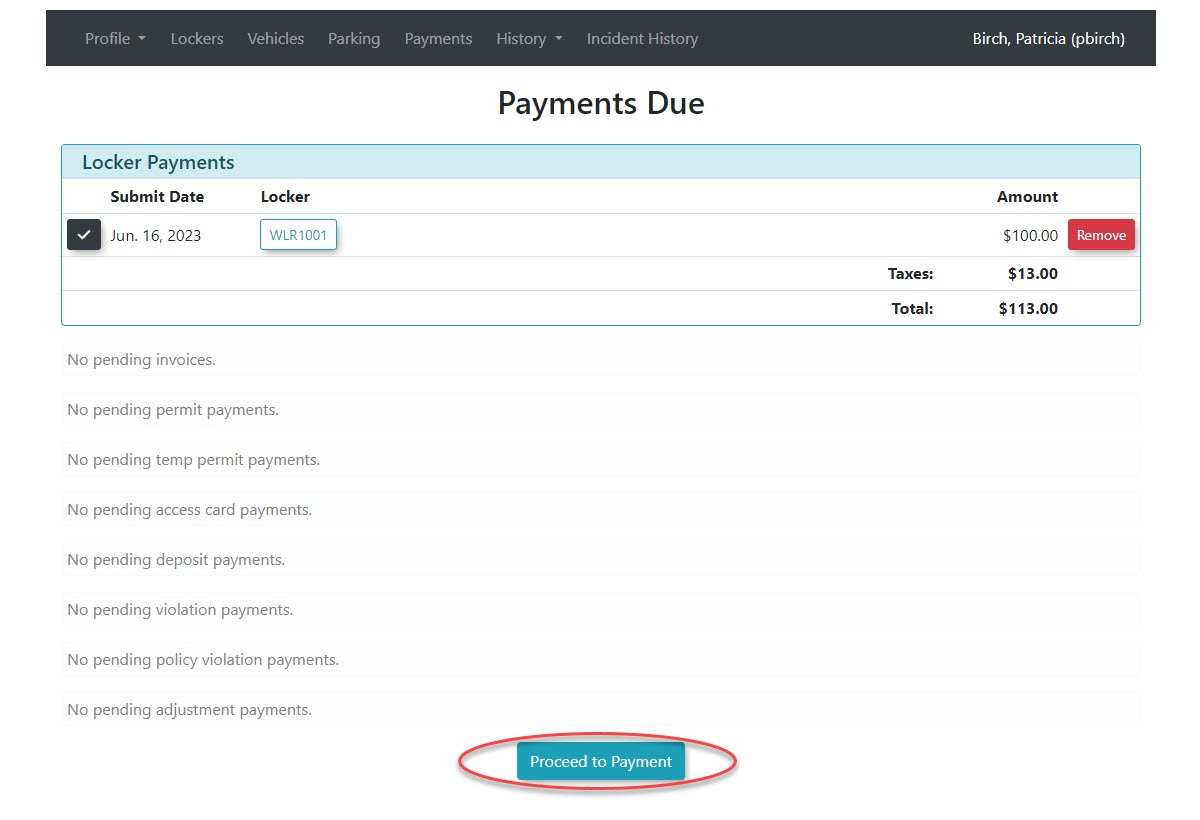
The payment due page will appear. Click on Proceed to Payment to continue.
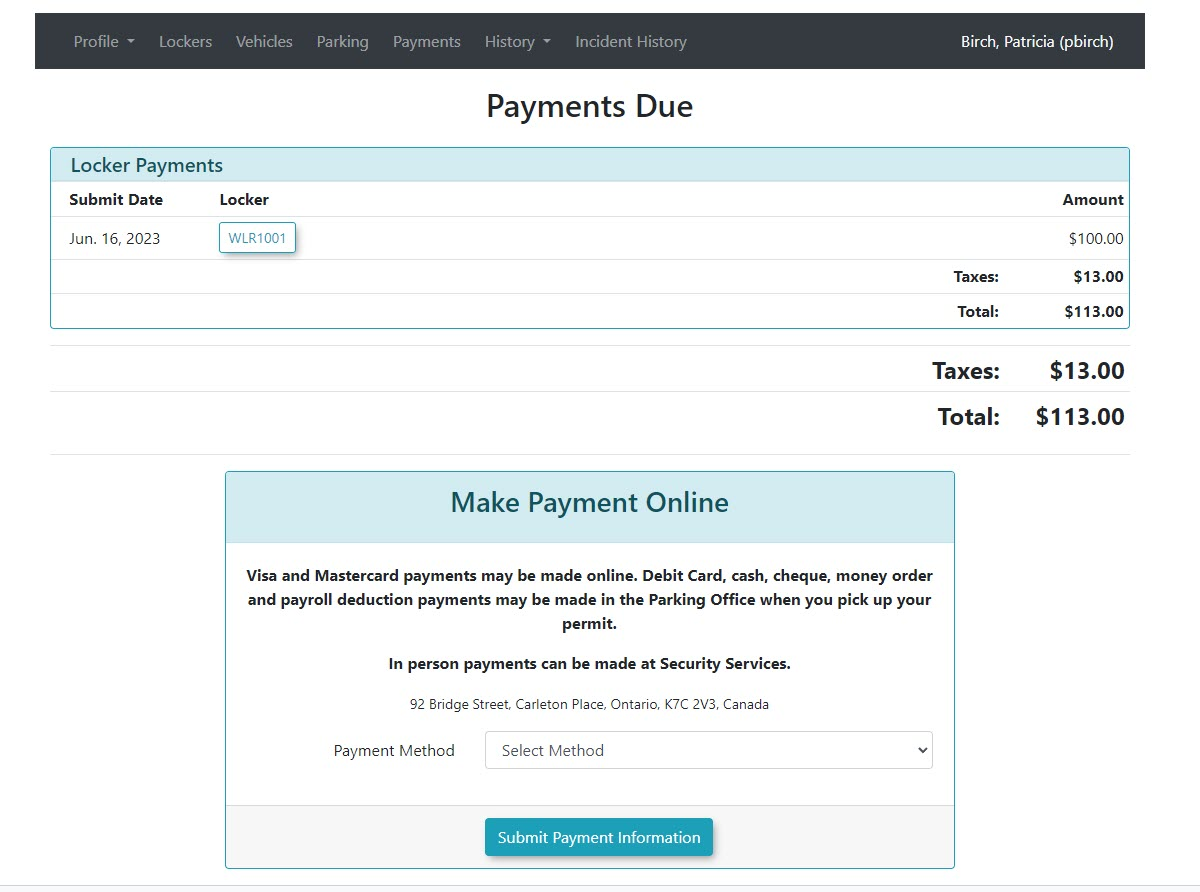
The screen will refresh and the admin will be presented with the Payment Selection section of the process.
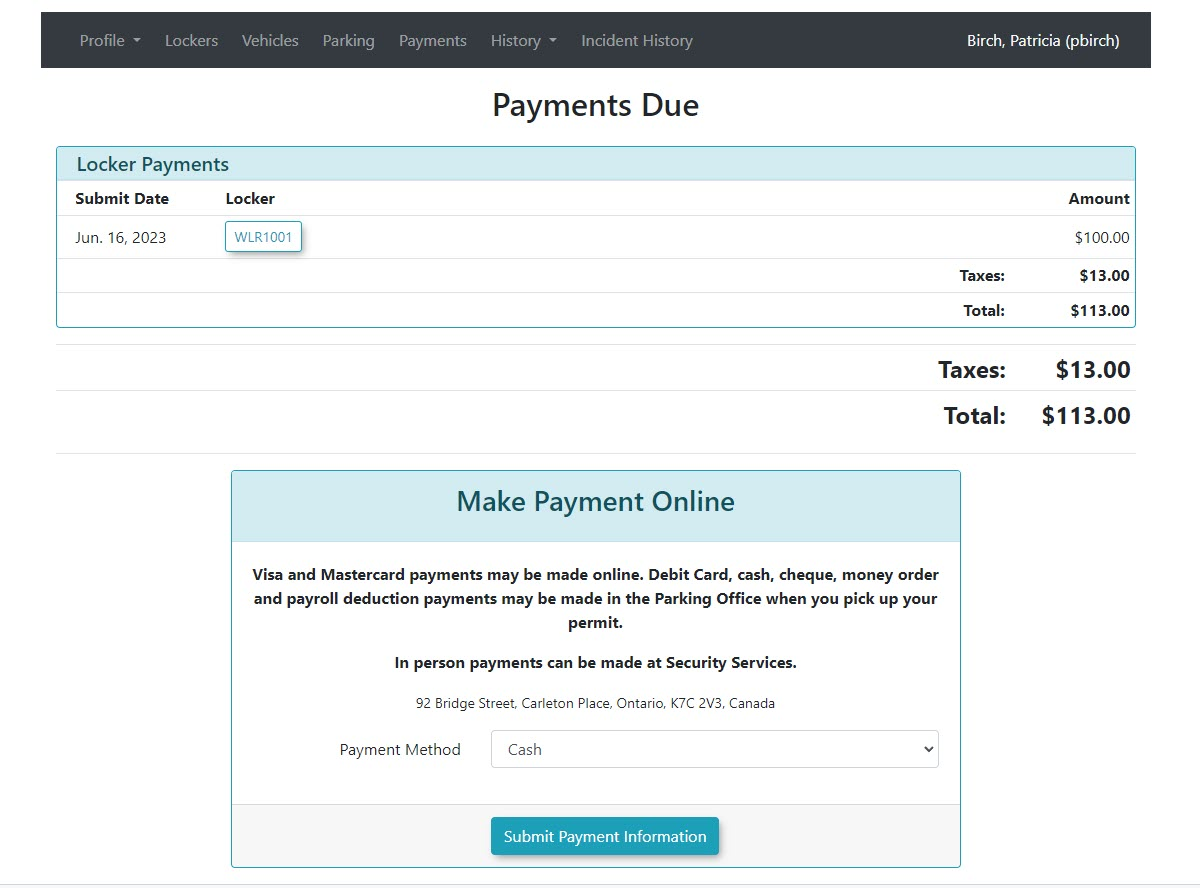
In this case we have selected a Cash payment. Click Submit Payment to continue.
The transaction Details screen will appear. There are three choices available.
- Process Manually which will complete the transaction
- Cancel and Keep which will terminate the transaction but return the locker to awaiting payment status
- Cancel and Release which will also terminate the transaction and release the locker back into the pool of available lockers to rent.
IN our example we will select Process Manually to complete the transaction.
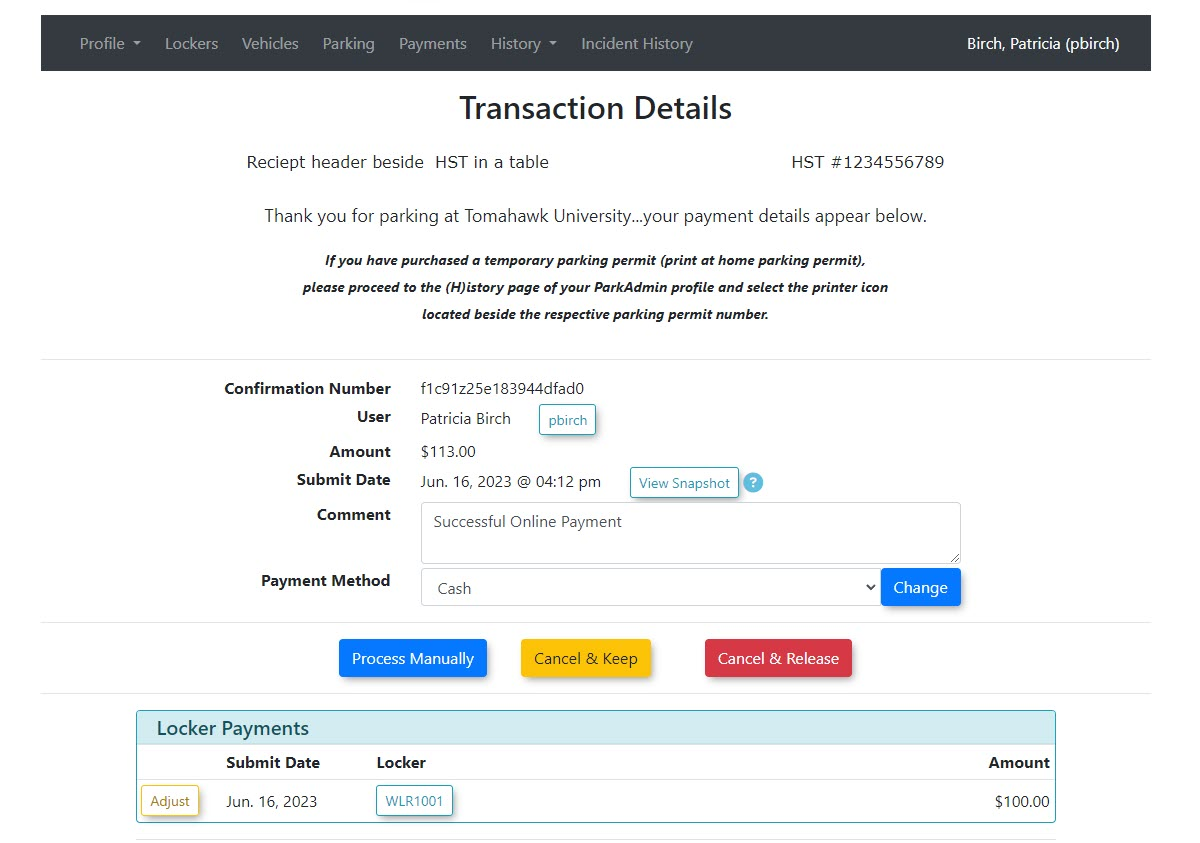
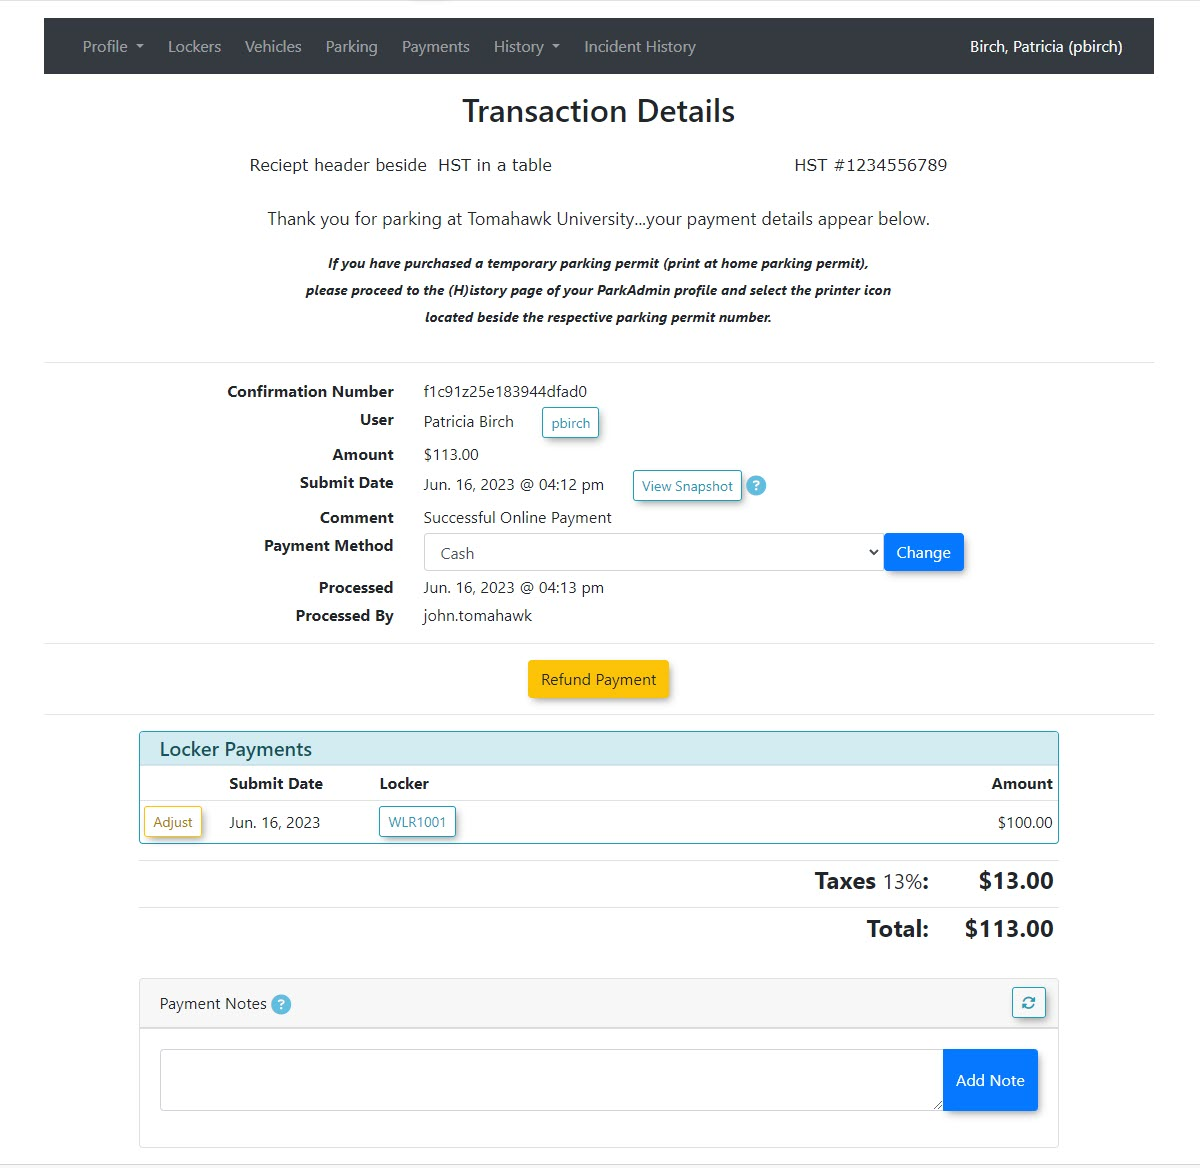
The payment will be processed and the Transaction Details screen will display a receipt.