
What does a refund look like in the system?
What does a Refund do in OPSCOM?
Think of a refund as hitting the "undo" button for a completed transaction. When you process a refund:
- Money Back: The customer gets their payment reversed.
- Item Released: The item(s) they purchased become available again in our inventory, ready to be sold to someone else.
Important Note: When you refund an entire transaction, all items within that transaction will be reimbursed, and all of them will be released back into inventory. If only one item needs to be reimbursed, do an adjustment and release the item separately.
1. Locate the user profile for the user you want to refund for.
Note: The top right-hand corner will always identify the name of the user that is being worked on. In our example we will refund Permit #1 at $395.50 but keep in mind the process is identical for and refund such as Standard Permits, Temporary Permits, Locker rentals, violations etc.
2. From the History Tab select All Records.
For Standard & Temporary Permits or Lockers
3. Find the permit you want to refund and click on the Processed date link.
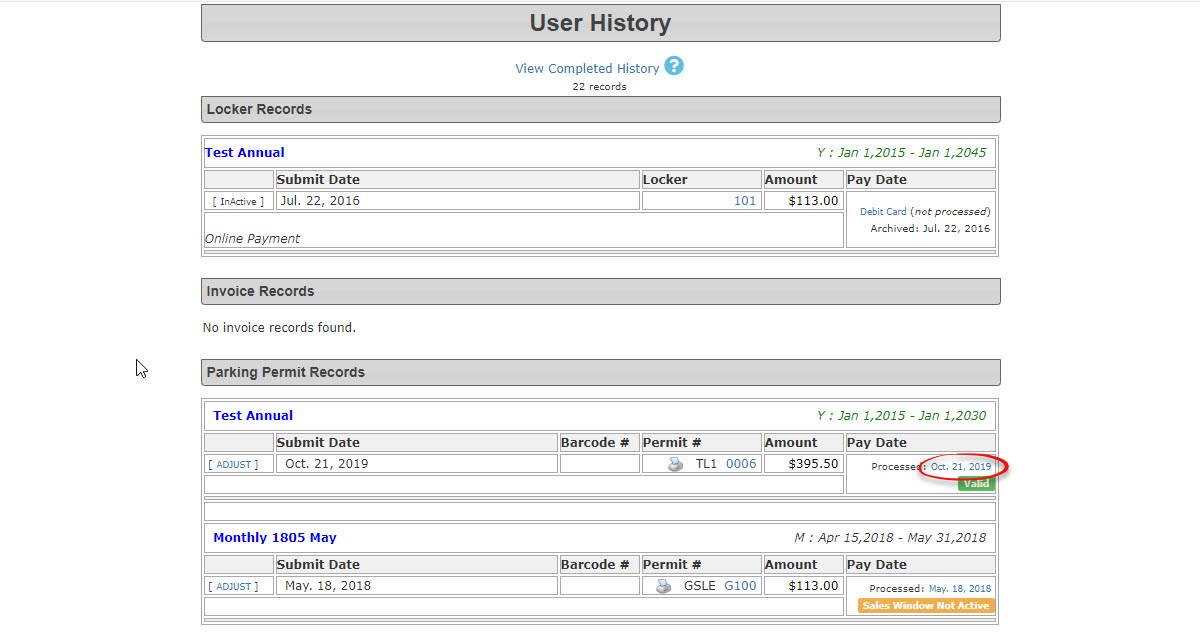
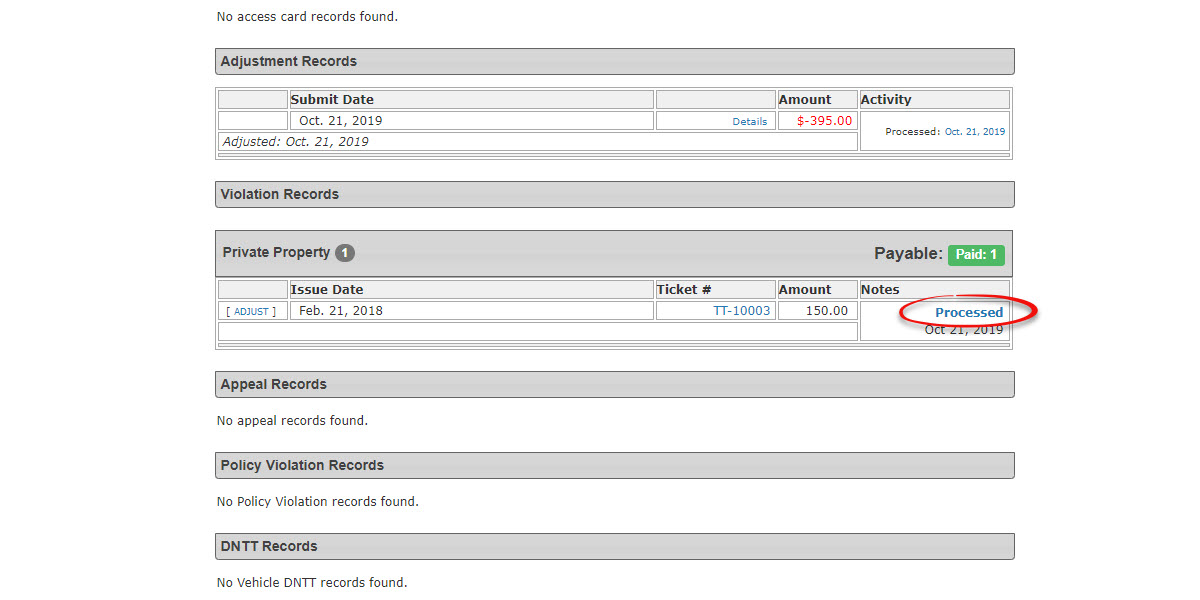
For Violations
Click on the word Processed to access the transaction details.
4. The Transaction Details screen appears. Click on the Refund button to begin the refund process.
The Refund Payment Record window will pop up. Enter the internal organization Requisition Code (optional) and the Refund Amount (including taxes). You are required to enter a comment in order to proceed.
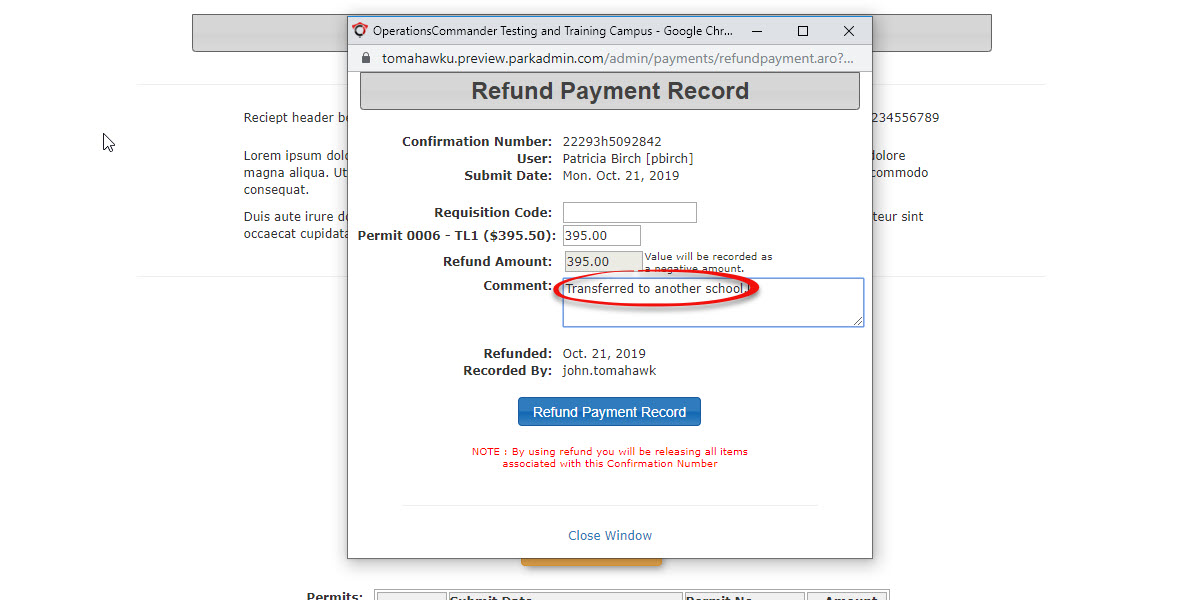
5. Click the Refund Payment Record button to continue. A confirmation pop-up will appear. Click OK to continue.
IMPORTANT: By using refund for permits and lockers you will be releasing all items associated with this Confirmation Number. Violations however will simply go back to awaiting payment status.
6. The Adjustment Information pop-up will display showing the refund details. You have the ability to select the type of refund in this window.
7. Click on Process This Adjustment to proceed. You will return to the Transaction Detail window showing the details of the refund. Notice the refund amount of $-395.50 is listed as an adjustment.
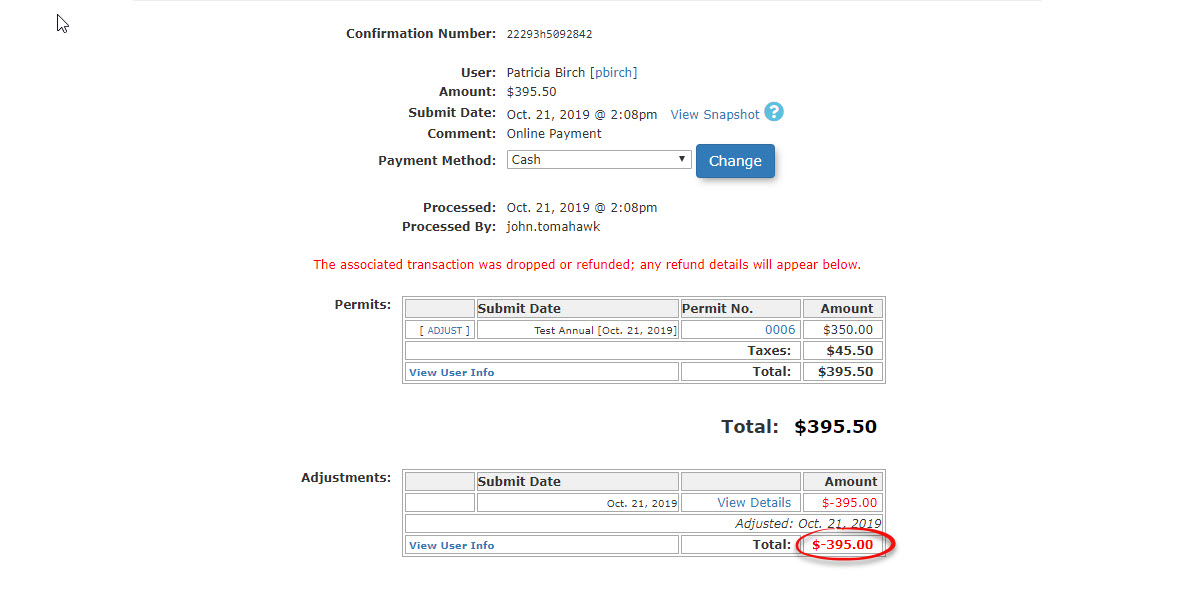
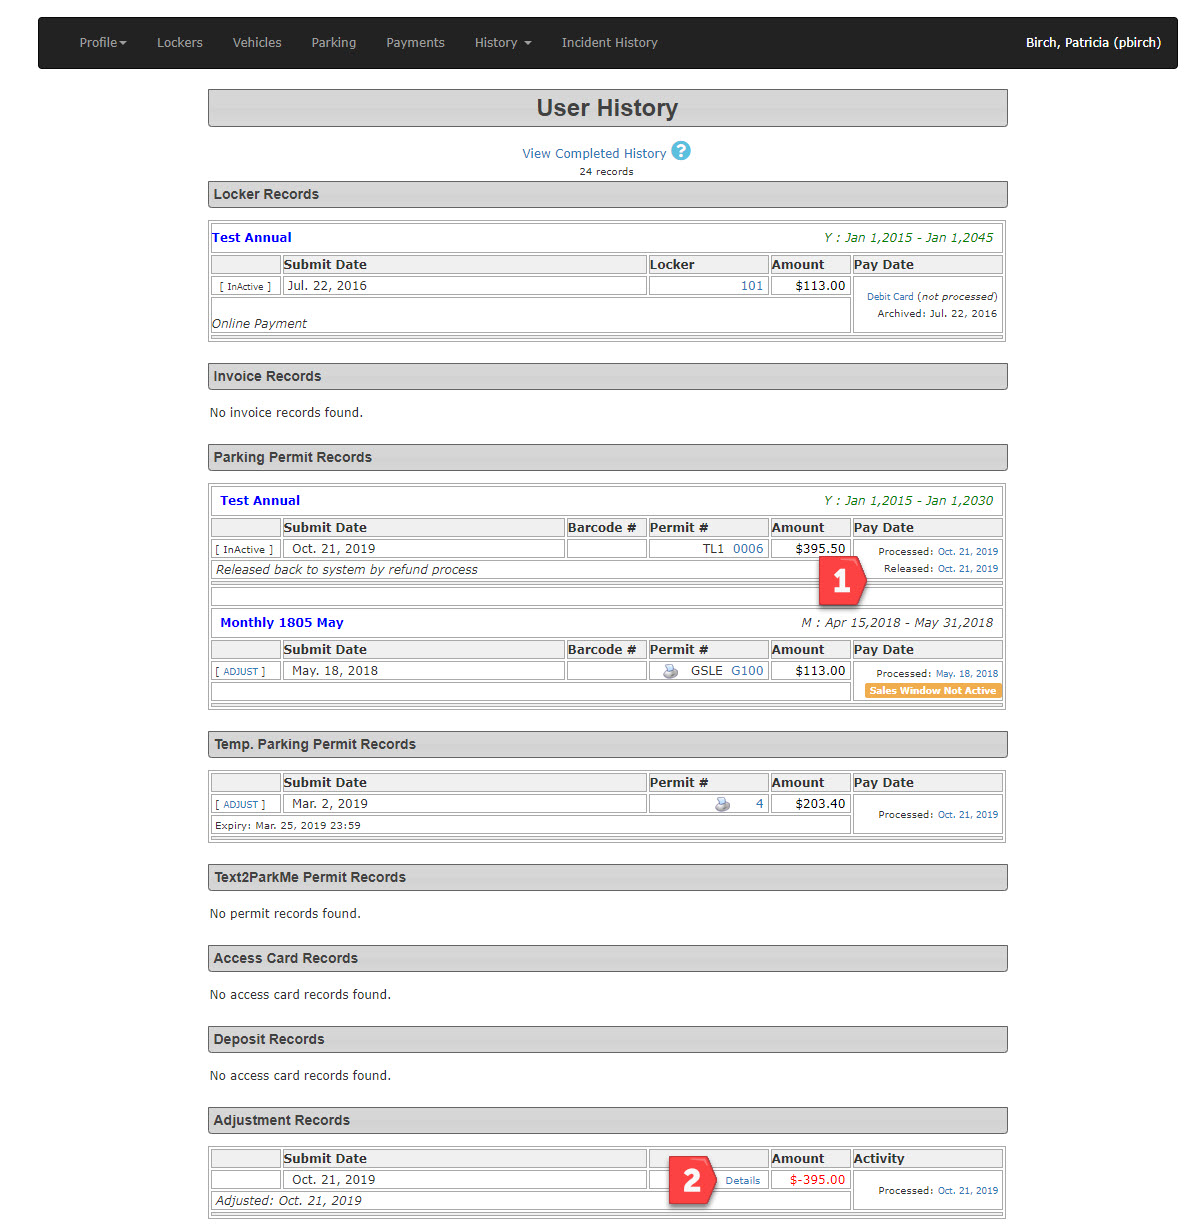
8. To see how this appears in the user's profile on the admin side, go back into the history tab and select All Records. In the user history we see the record of the original purchase as well as; (1) Released date and a note indicating the permit is "Released back to system by refund process" and (2) we can also see the refund under Adjustment Records.
Refunding to Deal with a NSF Payment
Sometimes, a payment fails (like a cheque bouncing – known as "NSF" for Non-Sufficient Funds). When this happens, we need to "refund" that payment in the system to keep our financial records accurate.
Why do we refund a NSF Payment?
It's essentially a bookkeeping task. Imagine a cheque came in and was recorded as a payment. If that cheque then bounces, we need to remove that "incoming" payment from our system. By performing a refund, we create an "outgoing" record that balances out the initial "incoming" record of the failed payment. This way, our system accurately reflects that the money never actually arrived.
After you process the refund for an NSF payment, reports (like the Processed Payment Report) will show both the initial "payment" and the subsequent "refund." This is perfectly normal and correct! It records the attempt to pay, and then the removal of that payment due to the NSF.
Key Tips for NSF Refunds:
- Payment Type: When you process the refund for an NSF, be sure to select the same payment type (e.g., "Cheque") as the original failed payment. This makes sense for anyone reviewing your accounting.
- Clear Notes: It's super important to leave clear and detailed notes documenting the failed payment and the exact reason for the refund. This helps everyone understand the situation later on!