Incident Distribution Feature
This article describes the Incident Distribution feature, which allows dispatchers to email incident details directly to pre-configured user groups. Its primary purpose is to streamline communication and enable faster response times by eliminating the need to manually copy information to external email clients. This guide is intended for OPSCOM administrators and dispatch personnel.
Setup & Configuration
Before this feature can be used, an administrator must create distribution departments. These departments define the recipients for incident emails.
-
Go to System Configuration, then Distribution, and click on Departments and Users
Creating a New Distribution Department
-
On the Distribution Department Dashboard page, click the List All button beside for Departments. Then click the plus button.
-
Enter a descriptive name in the Department Name field (e.g., Patrol Group A, Security Supervisors). This name will be visible to dispatchers.
-
Click Save Changes.
Adding a Contact to a Distribution Department
- On the Distribution Department Dashboard page, click the List All button, but this time for the Users menu. Then click the plus button, again.
- Select the Department you want this contact to belong to, and then add the contact information, including email address.
- Click Save & Send Invite
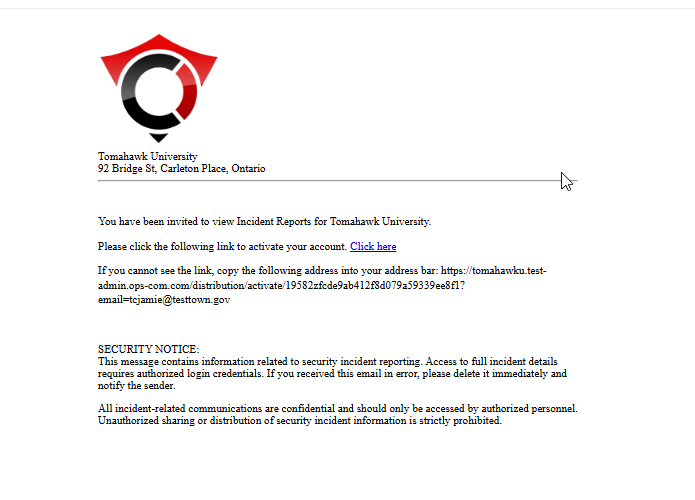
Once you click the button to save and send, this email address will receive an invitation with a link inviting them to view internal incident reports. This is why the email address is required. Contacts who are invited to view distributions are not the same as parkers, or admin users. They can only access the incident distribution module.
Managing Existing Distribution Groups
From the Distribution Group Admin page, you can perform the following actions for any existing group:
-
Click the Edit button to modify the Group Name or the list of Email Addresses.
-
Click the Delete button to permanently remove a group.
Using this Feature
Once distribution groups are configured, dispatchers can send incident details directly from an incident's information page.
Sending an Incident Email
Key Information in Email The email sent to the distribution group automatically includes the following key details from the incident report:
-
Incident Number
-
Location
-
Time of Incident
-
Description of Incident
-
Any optional comments added by the dispatcher
The invitation email looks like this:
Best Practices & Considerations
- Regularly audit your Distribution Groups to ensure the email lists are up-to-date. Outdated information can lead to delayed or missed incident notifications.
- Use clear and intuitive Group Names. Names like Day Shift Patrol or Weekend Supervisors are more effective for dispatchers than generic names like Group 1.
- Remember the send invited Department Contacts/Users a message letting them know about the system, so they do not delete your message, or loose it in the spam folder.

