Payment Data Export via Banner SFTP
Configuration
There are several items that must be configured in order for the right information to display in the exported CVS file.
User Profile
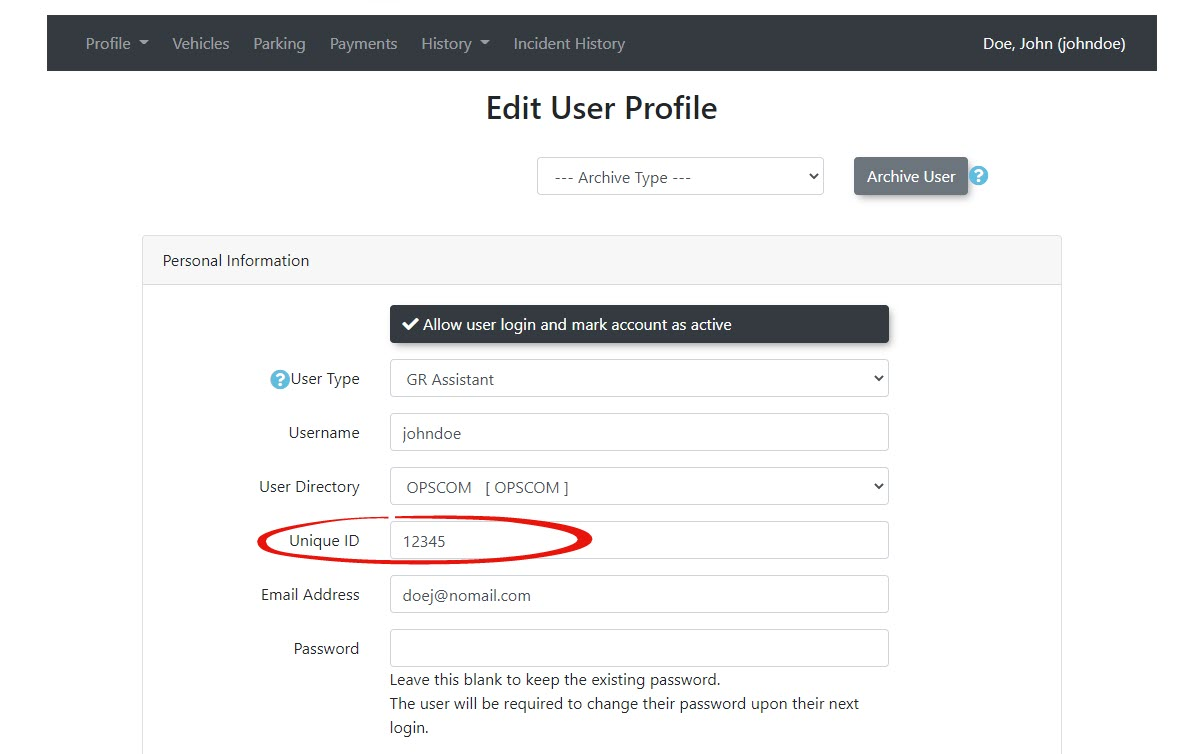
In the user profile, a unique user ID must be configured.
This information will likely be populated by a user data import.
Lot Administration
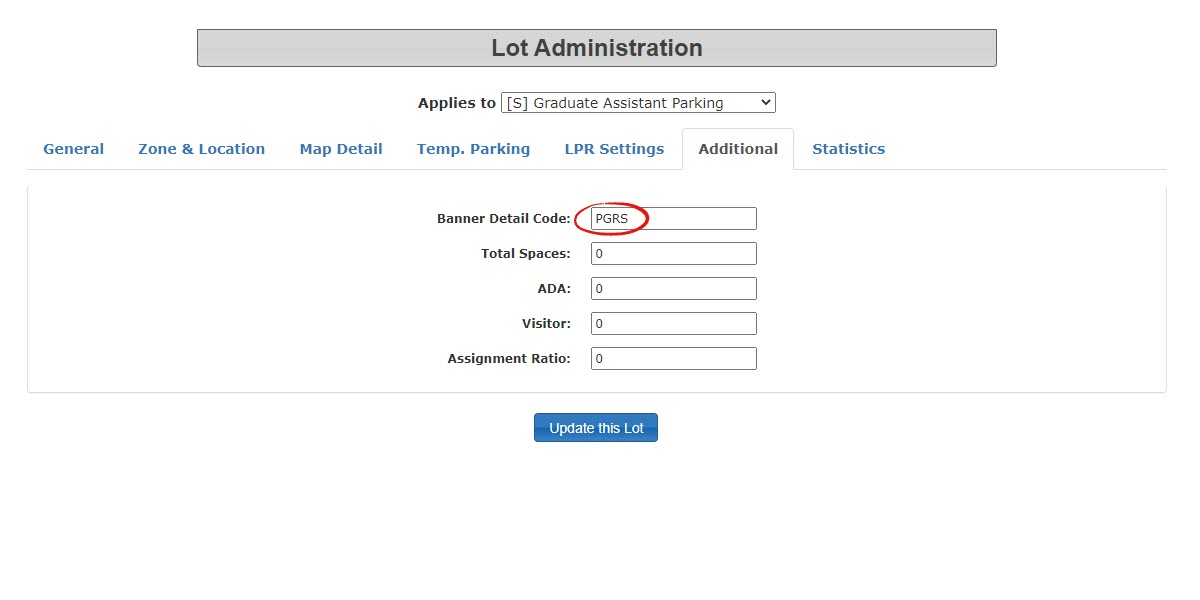
Each lot requires a unique banner detail code.
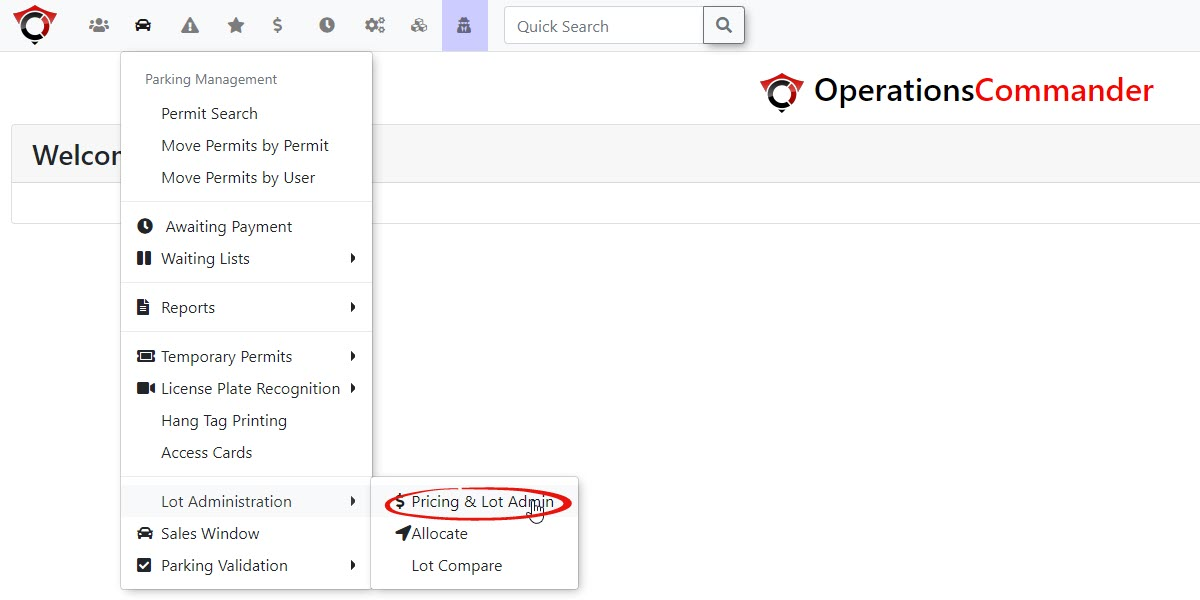
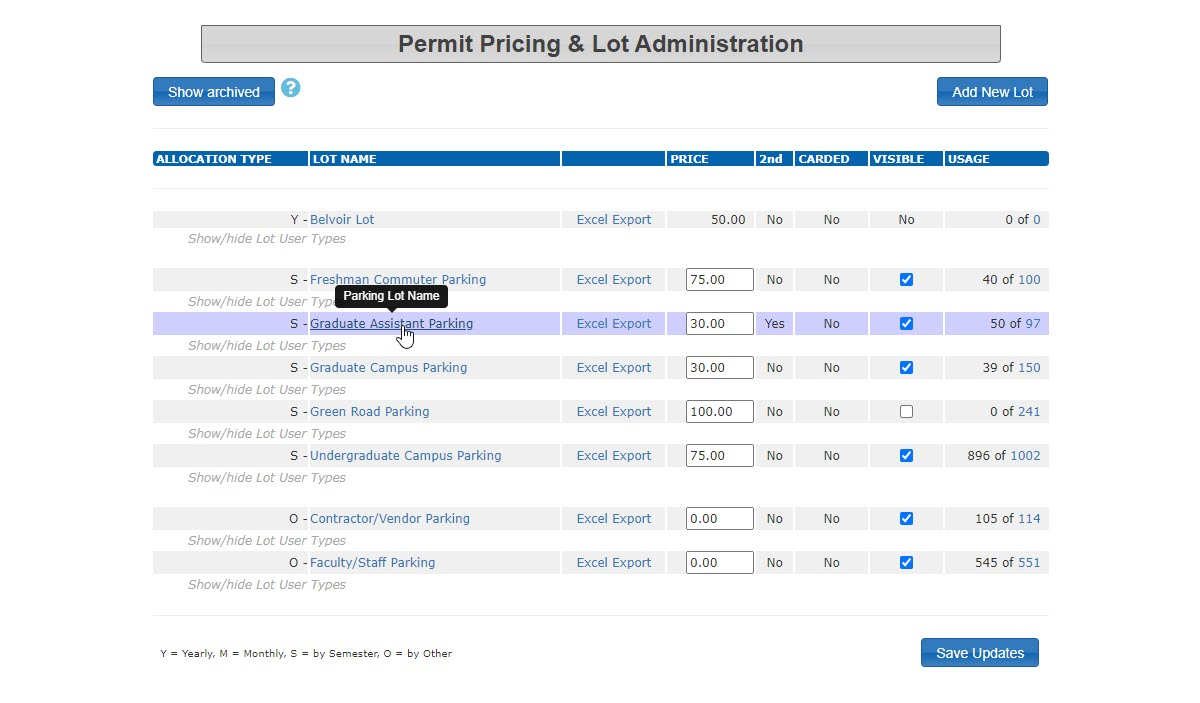
Select the lot you wish to add the detail code to. Click on the lot name to access the configuration screens.
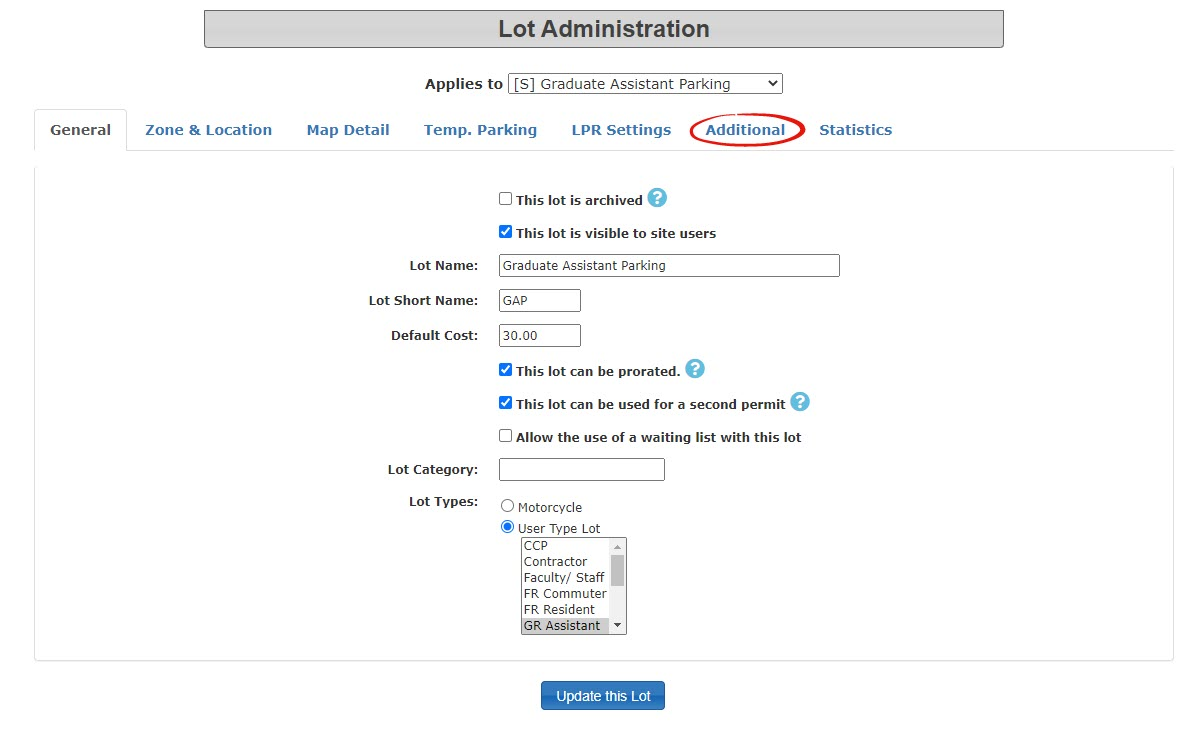
Once you are in the lot configuration tool, select the Additional tab.
Enter the Lot Detail Code. (These codes are established in the preliminary planning phase of the project)
Ticket Categories
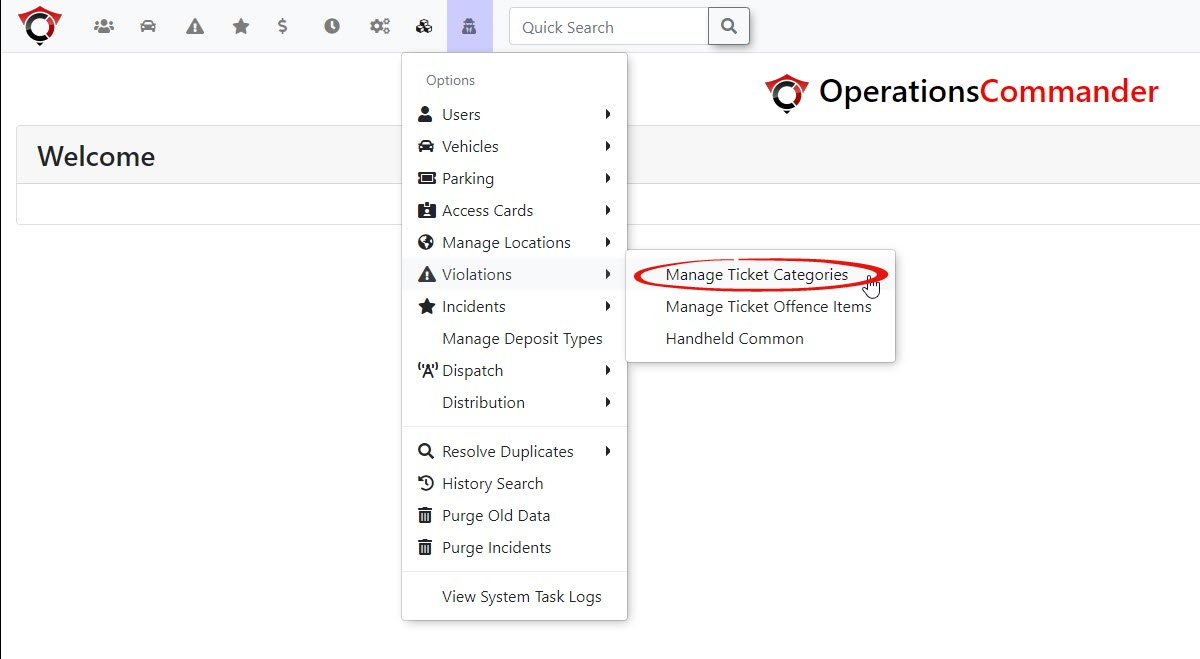
From the Options Menu, hover over Violations and select Manage Ticket Categories.
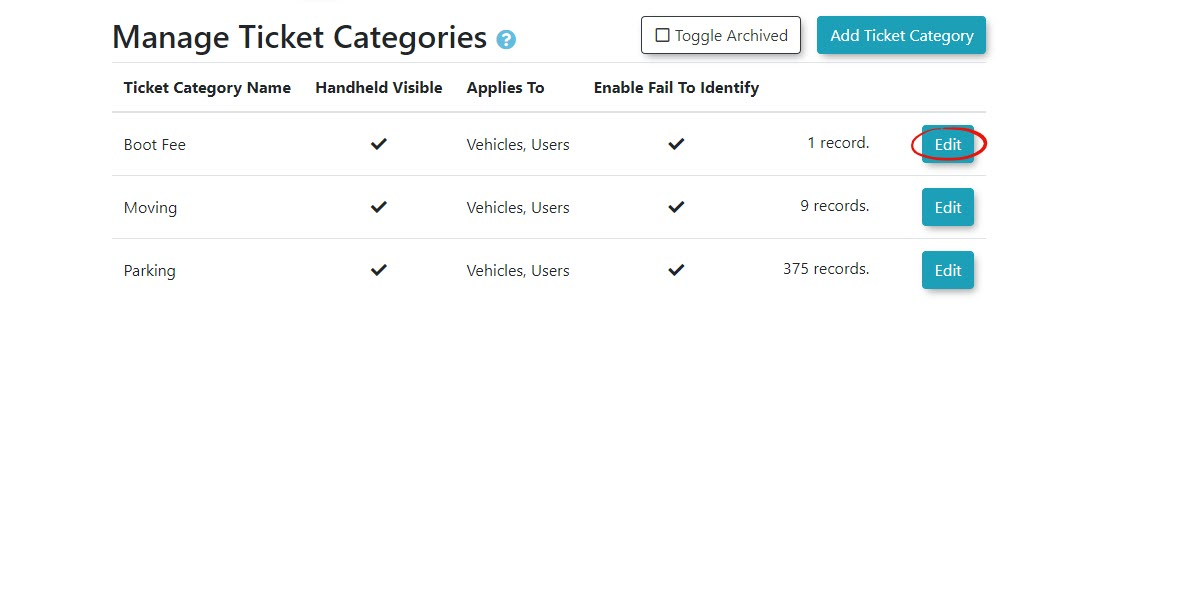
Click Edit on the Category you wish to configure.
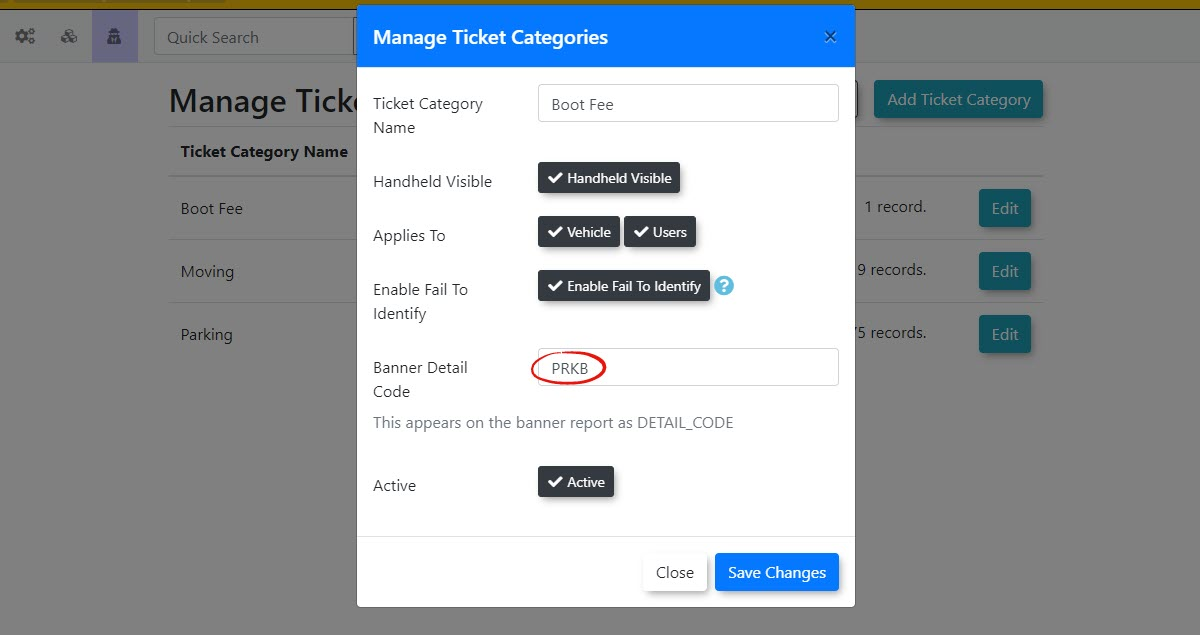
Enter the detail code for the ticket category.
In this case, the Detail Code is PRKB for the Boot Fee category.
Sales Window
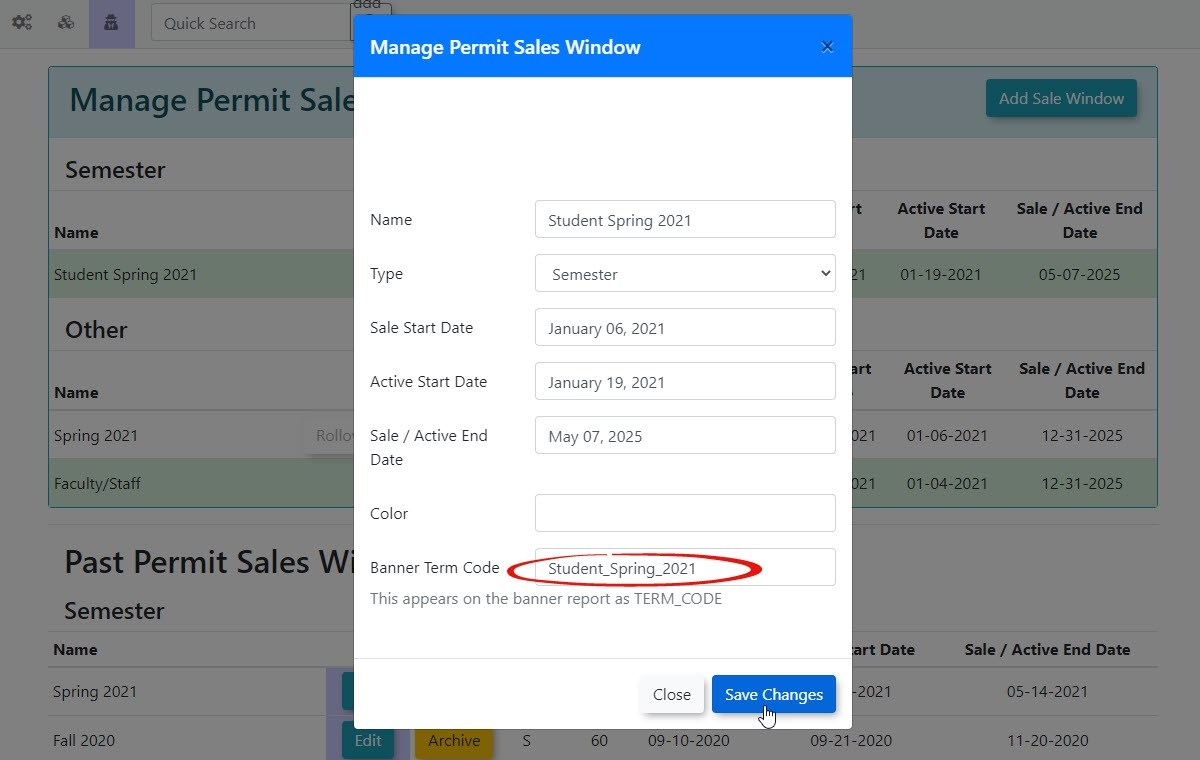
On the sales window configuration page, we need to enter a Term Code used for Permits only.
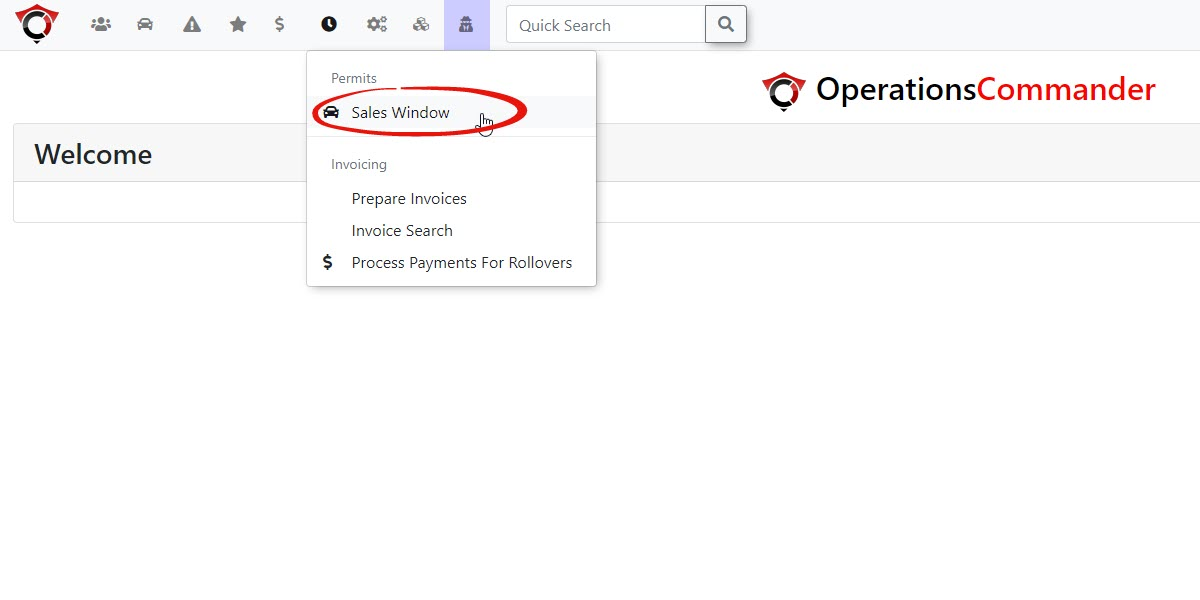
To do so go to the Permits Menu and select Sales Windows
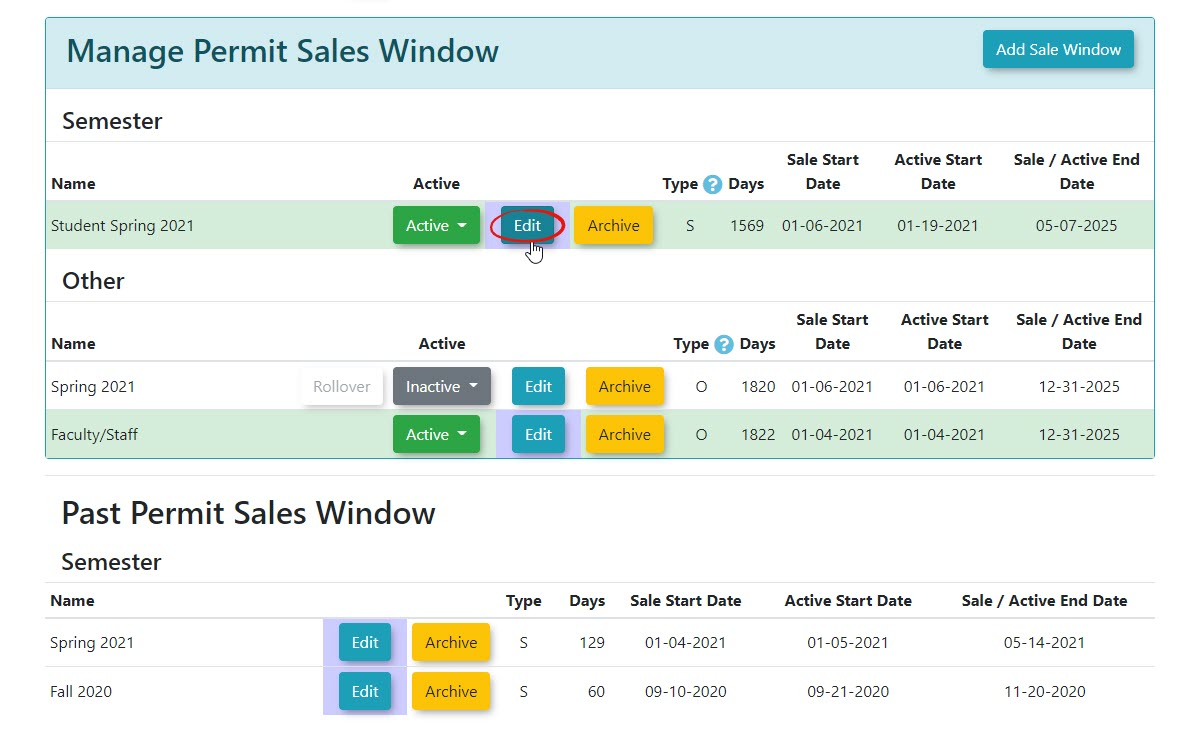
To access the configuration screen, click on EDIT.
Here you will enter the Term Code for the selected Sales Window that you want to appear on the permit purchases export.
Activate Script to Run on a Schedule
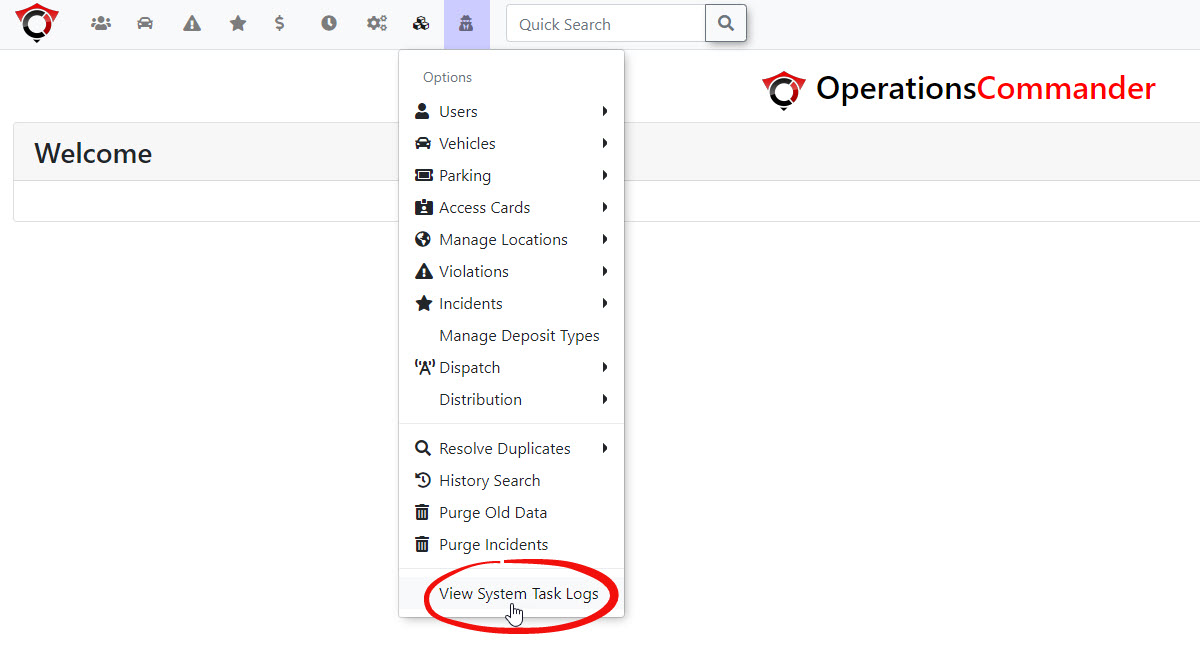
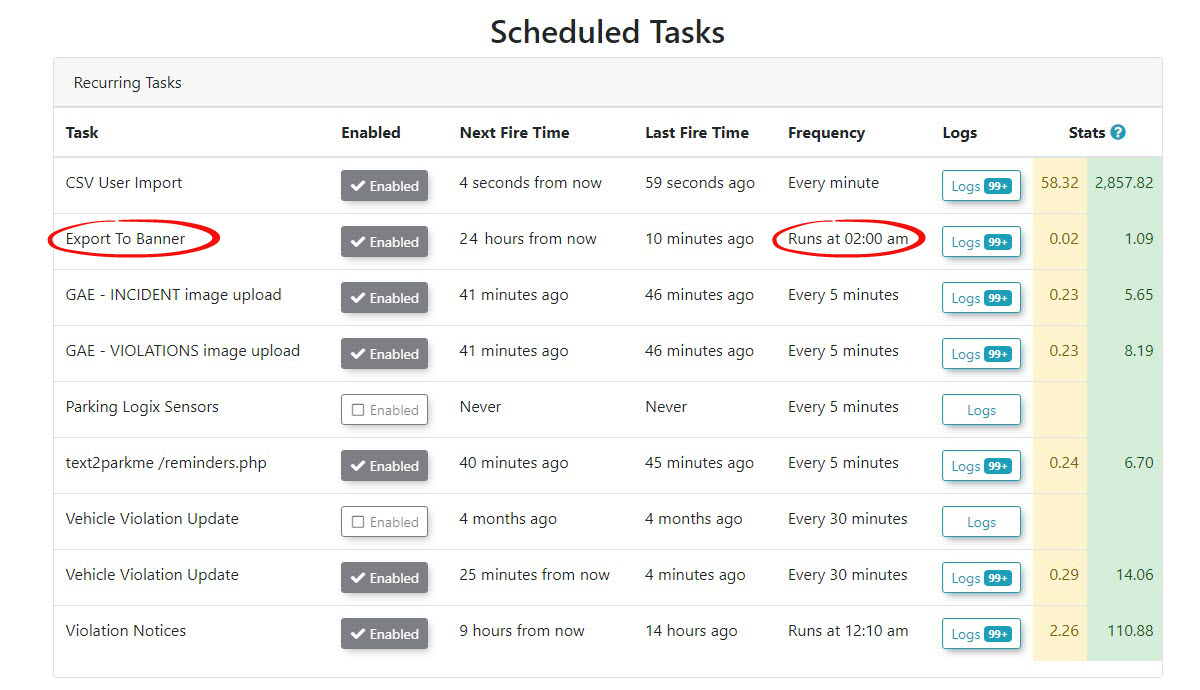
You must now ensure the System Task is set to active and has an active schedule set.
In this example, the Task is set to run at 2:00 am Nightly
The User Portal
You are now set to make a payment on the user portal. In this example, we will purchase a permit.
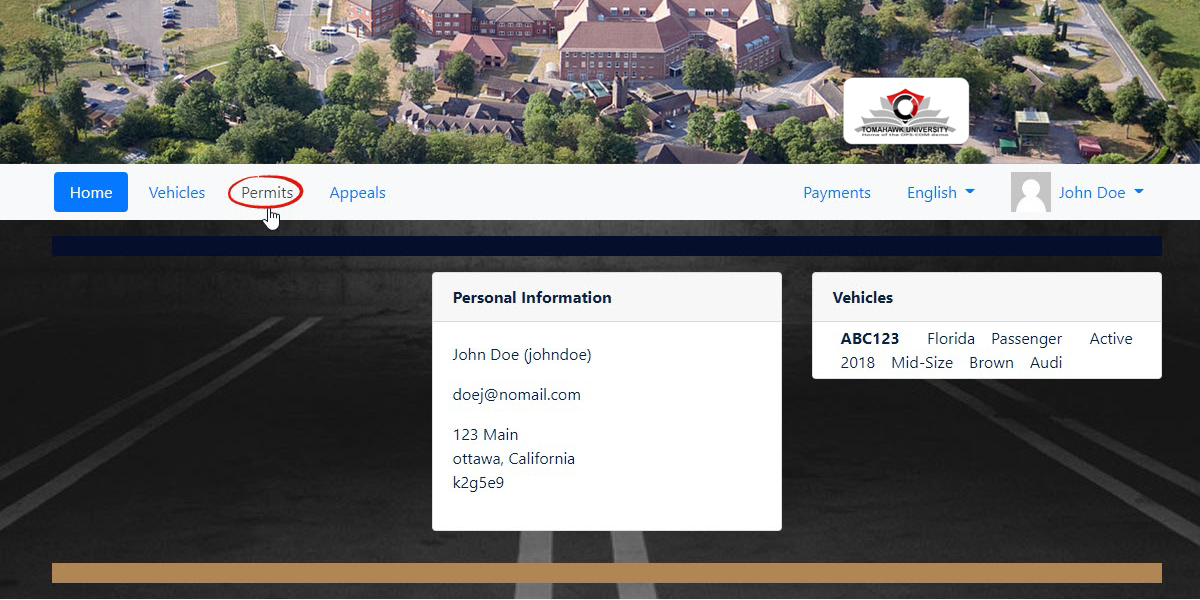
Go to the user portal and click on the Permits menu item.
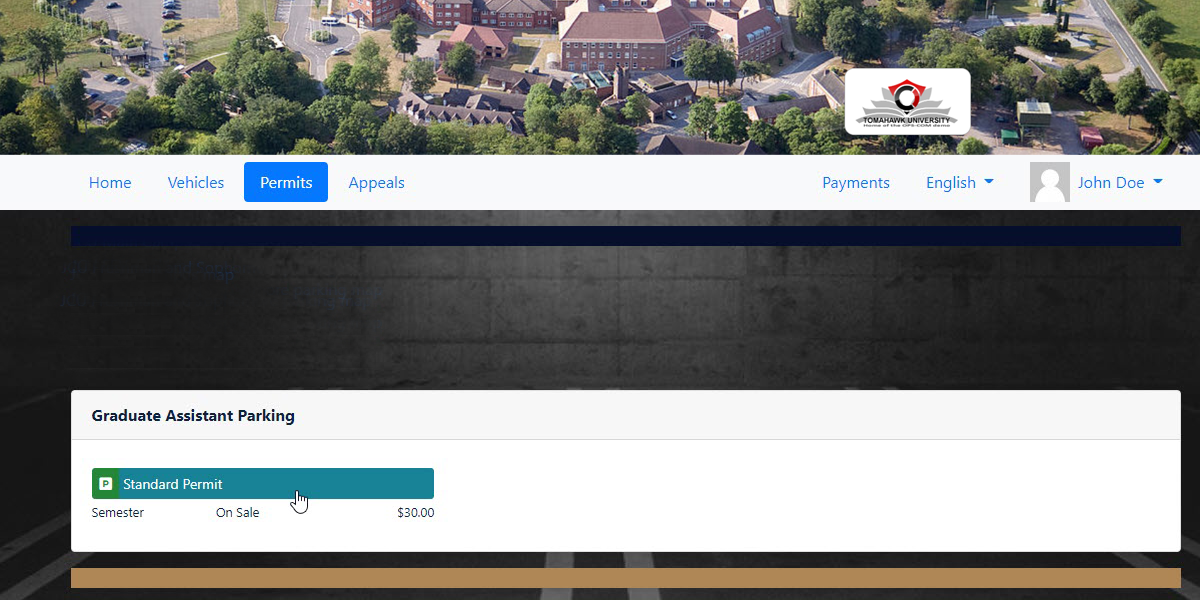
Select the Lot you wish to purchase a permit in.
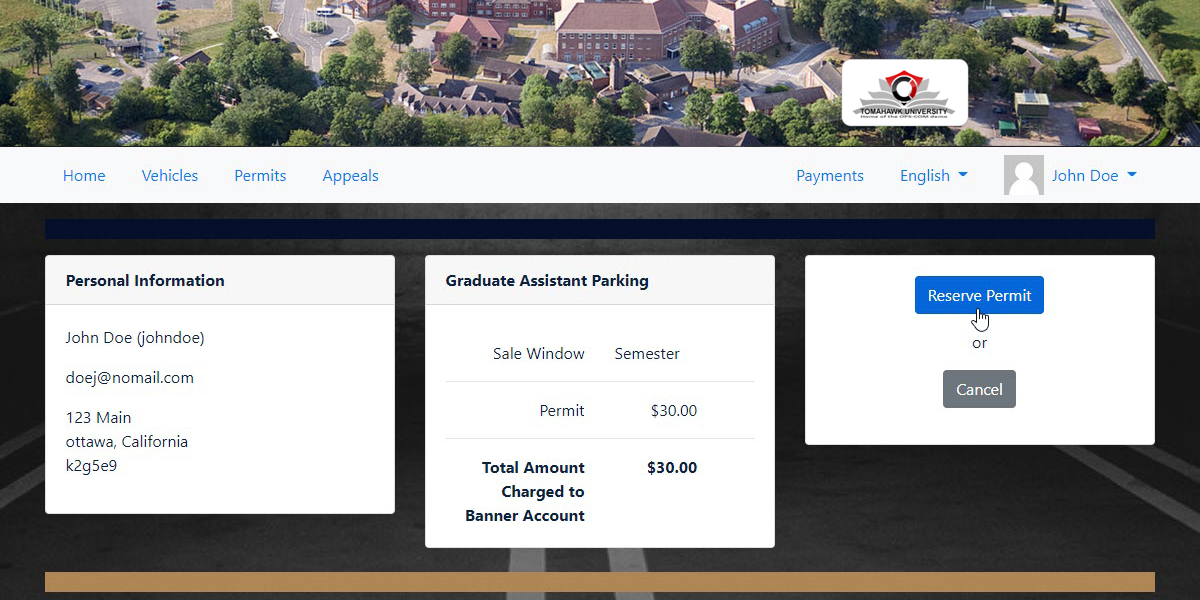
Click Reserve Permit
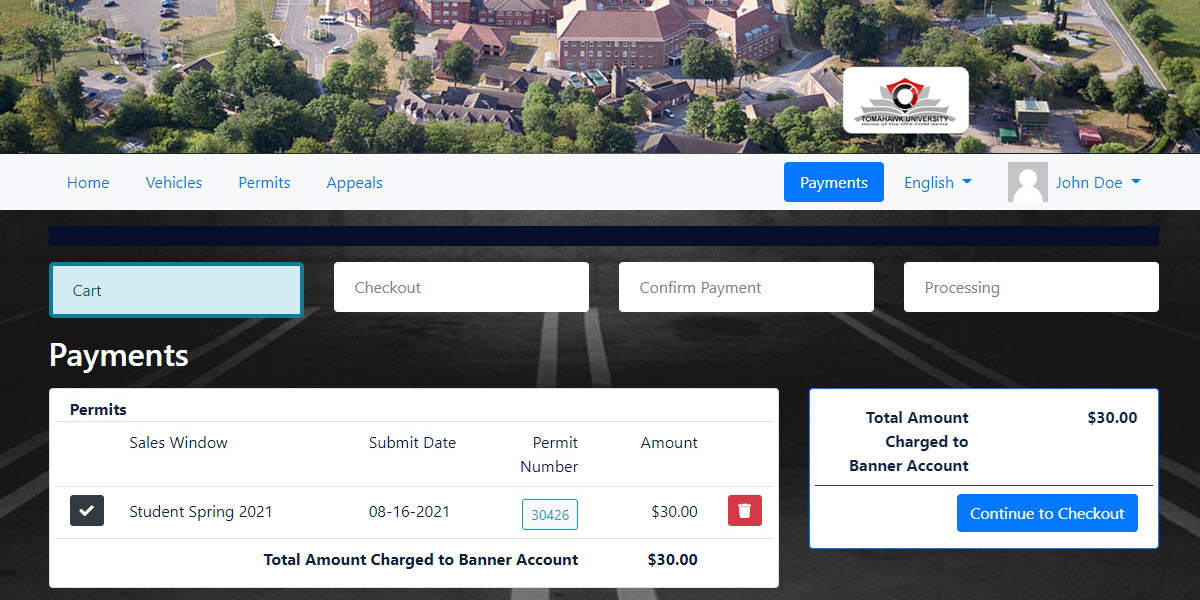
Continue to Checkout to view your Cart.
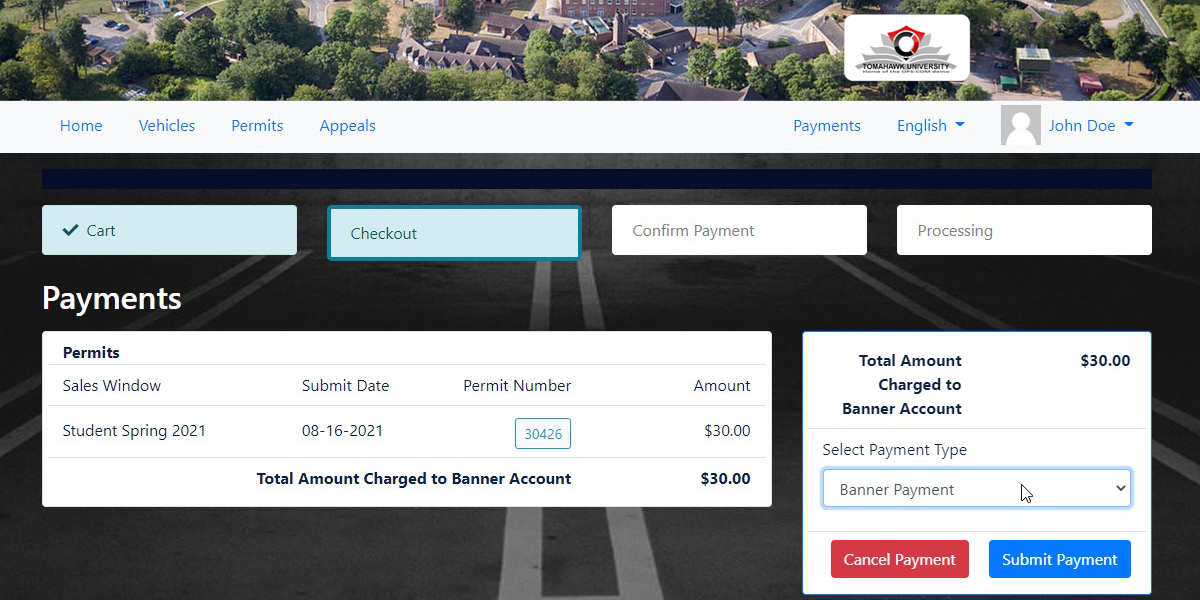
This can be configured so that Banner Payment is your only selection available.
Click Submit Payment.
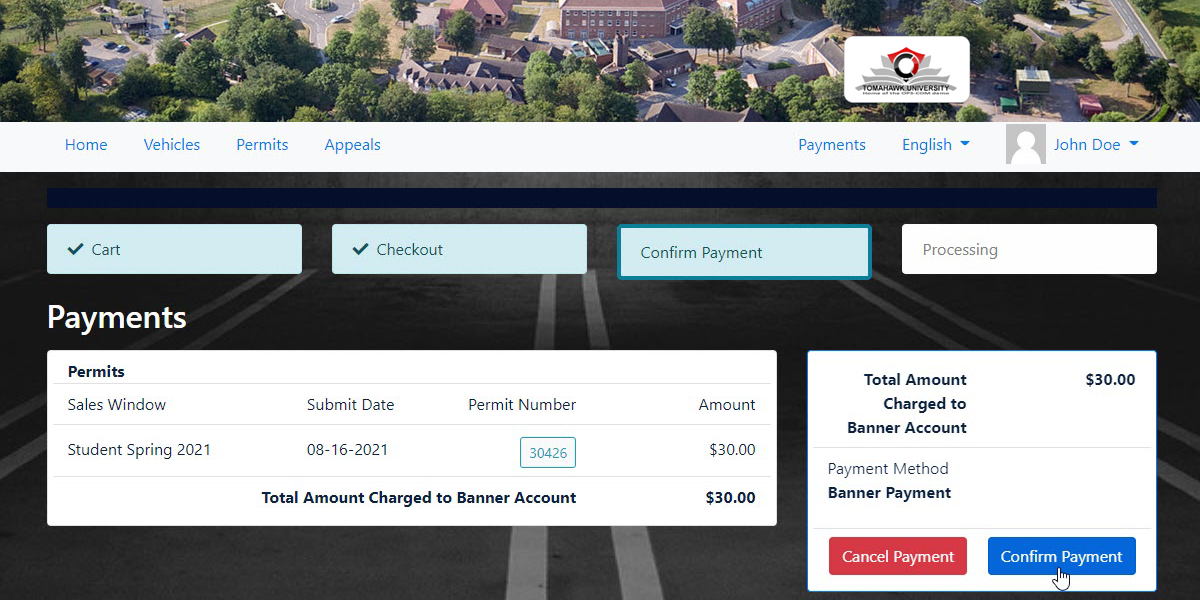
The screen will refresh to show the Confirm Payment page.
Click on Confirm Payment.
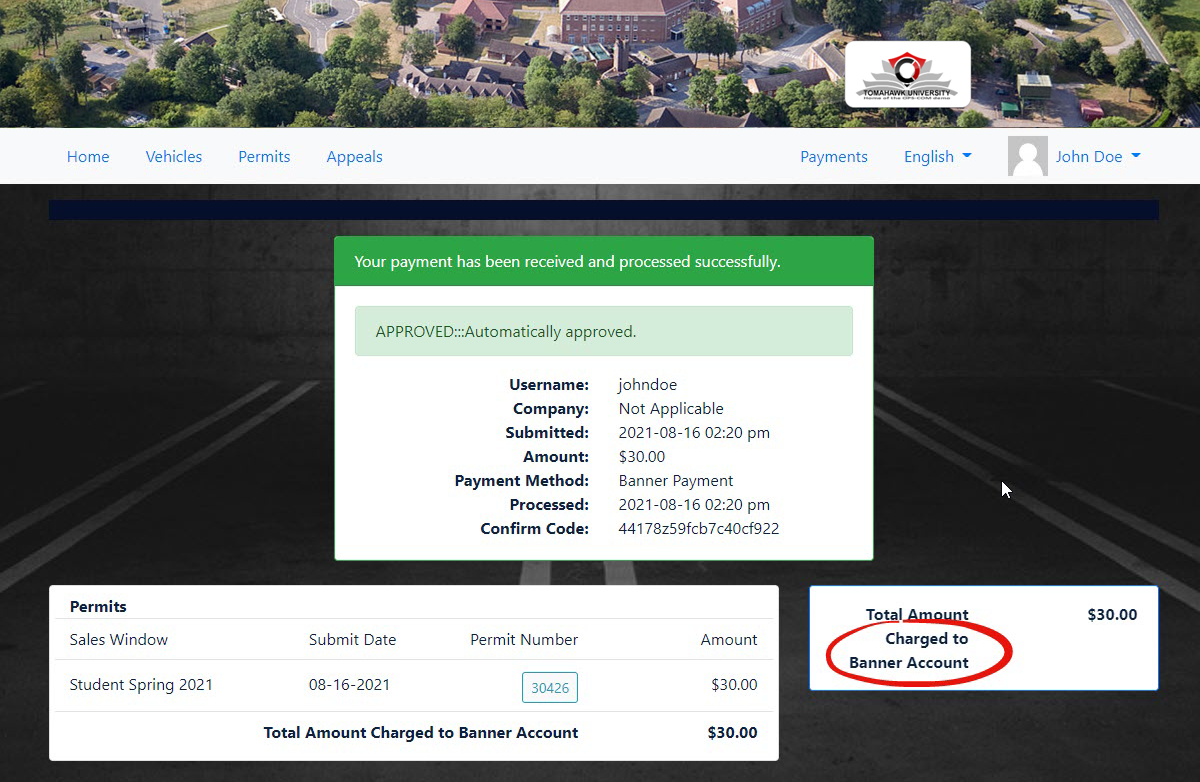
Once the payment is processed, you will get an online receipt.
Some additional information on how the Banner export process works:
It will export the violations it found into a new file, and does not affect any previously output files, meaning it doesn't create a cumulative file that gets more added each day. Rather, it creates a new file every time it runs; this isn't necessarily daily, it runs at whatever interval the client has decided for it.
This would mean if they missed a day, there would be more than one new file in the output folder for them to process in Banner.

