Managed WaitList
If Managed Waitlist is enabled, the Admin will be notified when a permit becomes available to be assigned to users on a waitlist. It will automatically be reserved to be assigned to the users on the wait list. The admin will be able to choose who to assign this permit to add it to the user's cart. The Admin will email the user and give them a specific amount of time to pay for the permit before it expires and can be given to someone else.
Setup & Configuration

Enabling the Managed Waitlist setting makes the core waitlist system active, but you must still enable waitlists on individual lots for them to be used.
Enabling Waitlists on Individual Lots
Waitlists must be configured on the lots before users can join them. You can find the instructions for enabling this on the Pricing & Lot Admin page under the Standard Permits section.
User Side Setup and Experience
Users will not see the option to join a Waitlist unless all permits are sold out for a designated lot. You can configure the option to allow users to see their rank on the wait list or not. To do this, follow the steps below:
Waitlist Email Templates
There is a standard email template you can configure for communicating with your users. This can be found on the System Messaging Checklist page under Waitlist Selected.
Working with the Managed Waitlist
Assigning a User a Permit from the Wait list
When a permit becomes available in a lot with a waitlist the admin will be notified via the email address that was setup for Waitlist Email Managers. The permit will be reserved for assignment to users on the wait list.
To assign the permit to a specific person on the waitlist, follow the instructions below.
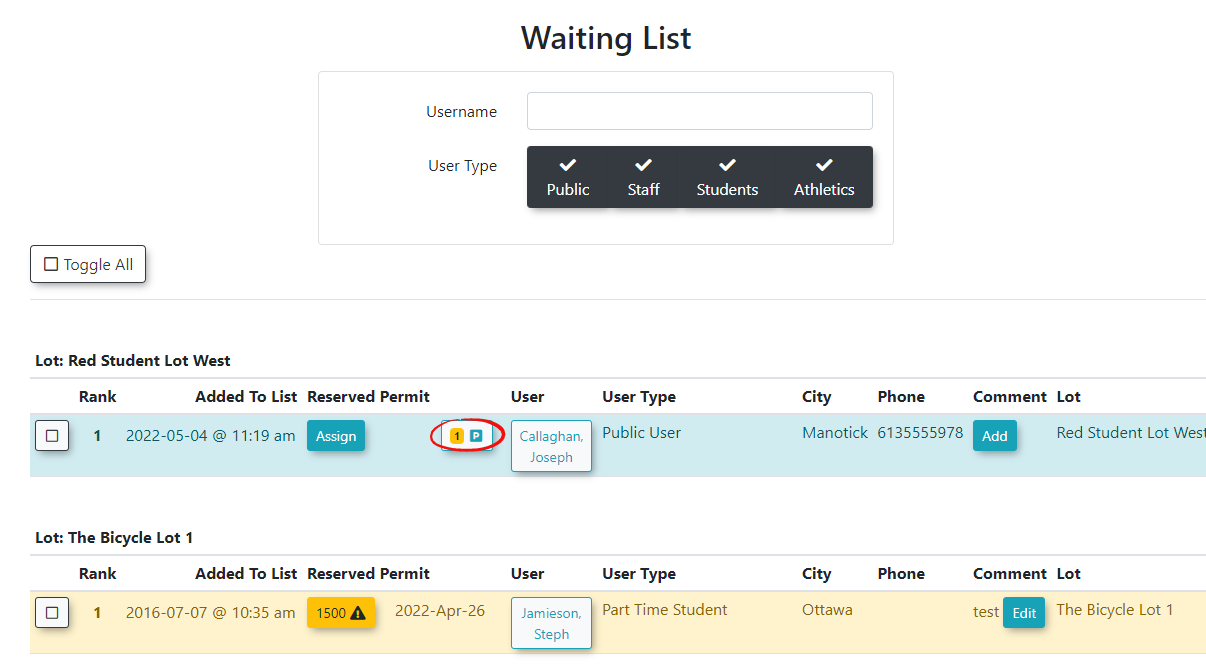
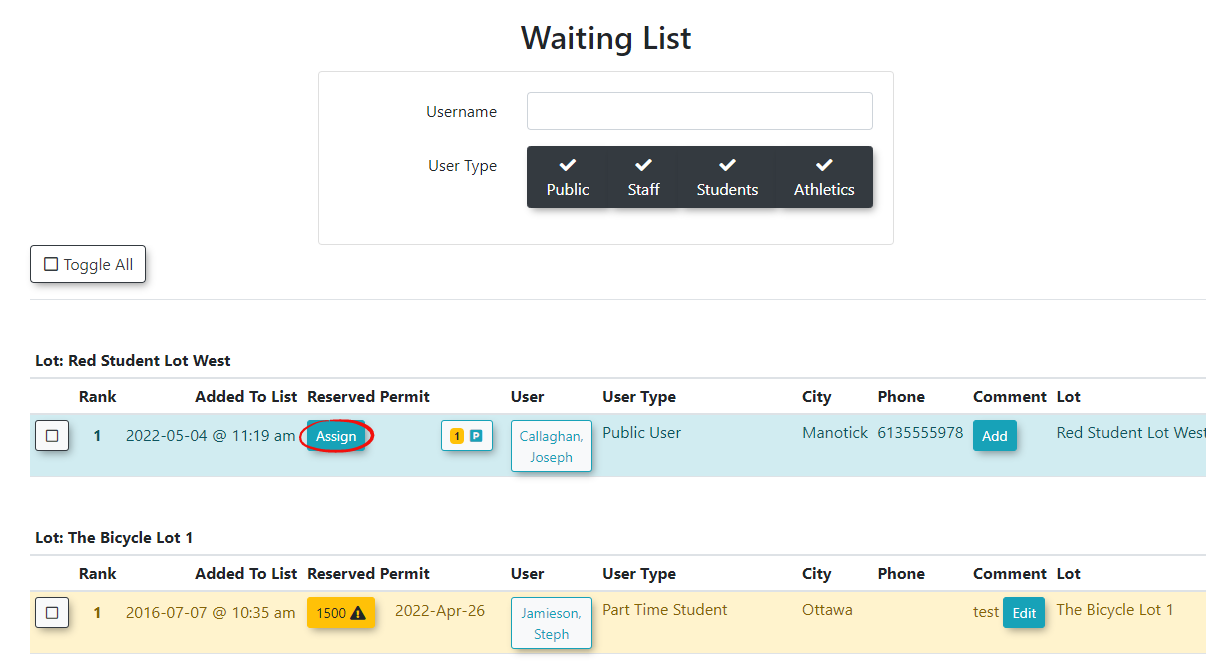
- Click Parking Management, hover over Waiting Lists and click Waiting List.
- The Waiting List screen opens. Select Assign to associate the selected user to the permit you wish them to have.
Releasing or Extending an Assigned Permit
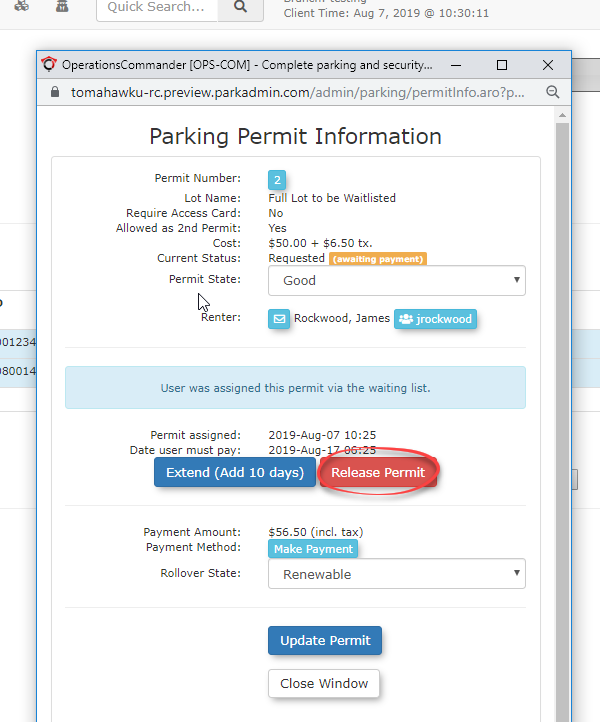
If the amount of time you set in the Waitlist Reservation Duration passes and the user hasn't purchased a permit, the admin will be sent an email. The admin has the option to release the permit, so that it can be assigned again or to Extend the users time to pay for the permit. To do this:
- Return to the Waiting List page, and select the Permit icon beside the username.

- From the Parking Permit Information page, select Release Permit or click Extend to add 10 more days.