
Creating a Violation on the Admin Portal
Manual Violation Entry in OPS-COM allows administrators to record violations directly into the system via the web interface. This feature is crucial for digitally logging hand-written tickets, or citations created with a laptop instead of a handheld device, ensuring all violation data is centralized for tracking, reporting, and court purposes.
Setup & Configuration
There are a few settings that relate to Violations issued from the Admin Portal and not on handheld devices. To access these settings:
- Hover over System Configuration, and click System Settings.
- On the Violations tab, locate the Prefix to go in Front of Ticket Number setting. If you want to easily differentiate between tickets created on the Admin portal and tickets created on the Handheld devices you can set a prefix here. By default it is TT.
- If you wish to have tickets Auto Generated, you can set the Next Number for Printing setting as well.
- For Tickets that are issued on Car laptops through the Admin Portal, there is a setting that show Drivers License on Tickets if you wish that to print.
- Enable the Signature Required on Tickets setting if you want there to be an area to include a signature.
- The Print settings for tickets issued via a laptop are included in the Printable Area for Tickets section.
Using this Feature
Offence types can apply to a Vehicle, a Person or both. Refer to this wiki article for information about setting up your Offence Type items.
Enter a Violation for a Vehicle
- Hover over Violations, and click Violation Entry. The Enter Basic Violation Information screen provides several fields and options to detail the violation.
- Enter all known information into the provided fields:
- Ticket Writer - Admin user who is issuing the ticket.
- Ticket Number, if Auto Generated is enabled, ticket numbers will be automatically generated by the system.
- Ticket Category from the dropdown list.
- Click the Toggle More Options button to show:
- Spoiled: This is used to cancel a manual ticket. Enabling this allows incrementally numbered paper violations to be accounted for even if they are not issued (e.g., if a physical ticket was ruined).
- Warning: All violations can now be issued as a warning by enabling this checkbox. You no longer need to pick "Warning" as a separate Ticket Type.
- Towing: if there is a towing charge you would enter the dollar amount here.
- Search Vehicles: Click the Search Vehicles button to find vehicle information using the license plate or VIN number.
- From the search results, you can:
- Click the Plate number to select and associate that vehicle with the violation.
- Click the Edit button to edit the vehicle details if needed.
- Click the Permit icon to view the permit details for the vehicle.
- Click the Red Flag icon to view Alarms related to this individual.
-
(This is only available if the Alarms feature is enabled).
-
- Click the Red Alerts button to see Incident Alerts associated with this individual.
-
(This is only available if the Incidents feature is turned on).
-
- If the vehicle does not exist in the system, you will have the option to add a new vehicle. This is crucial for logging hard-copy or anonymous tickets.
- From the search results, you can:
- Enter the Location from the dropdown list, the Offences you are issuing, the Comments if any can also be added.
- Add any pictures as evidence by using the Attachments button.
- After selecting the correct fields and associating a vehicle/person, click the Record this Violation button.
- On the next screen, confirm your violation details by clicking the Record this Violation button, or click the back button on the browser to make changes.
-
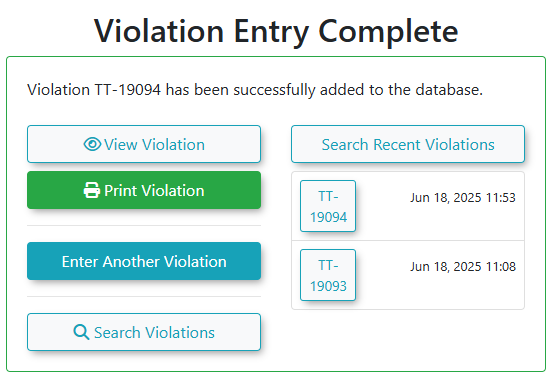
Once you have submitted the violation, the Violation Entry Complete screen will appear. From here, you have options to:
- Print: Print a copy of the violation.
- View: View the newly entered violation's details.
- Search Violations: Navigate to the Violation Search page to find other violations.
- Search Recent Violations: Recent tickets you have entered will show up here.
- Enter Another violation
Enter a Violation for a Person
- Follow steps 1-3 as above.
- Search Person: Enable the Failed to Identify checkbox if the person refuses to give you their ID and to identify themselves. If you do have User details, click the Search Users button to find the user by Name, Student or Employee number, or Drivers License.
- From the search results, you can:
- Click the Select button associate that user with the violation.
- Click the Pencil icon to edit the user details if needed.
- Click the Permit icon to view the permit details for the vehicle.
- Click the Red Flag icon to view Alarms related to this individual.
-
(This is only available if the Alarms feature is enabled).
-
- Click the Red Alerts button to see Incident Alerts associated with this individual.
-
(This is only available if the Incidents feature is turned on).
-
- If the user does not exist in the system, you will have the option to add a new user.
- From the search results, you can:
- Follow steps 5-9 to record this violation
Some Offence types will require both a vehicle and a person to be added.
Manually Entering Hard Copy or Anonymous Tickets
The manual violation entry process allows for entering tickets that do not have an associated user profile or are hard-copy tickets.
- By searching for a vehicle that does not yet exist in the system, you can write an anonymous ticket to that plate or transcribe details from hard-copied tickets that have no linked user.
- The system typically allows users to navigate to the login screen and pay for such tickets using OPS-COM Quick Pay/Guest Payments without needing to log in.
Best Practices & Considerations
- Accuracy is Paramount: When manually entering violations, ensure all information (plate, location, date, time, offence, fine) is precisely transcribed from the hard copy or incident details to maintain data integrity for tracking and court purposes.
- Utilize "Spoiled" Option: If you are using pre-numbered paper tickets, consistently use the Spoiled checkbox in OPS-COM for any physical tickets that were not issued, to maintain an accurate audit trail of all ticket numbers.
- Leverage Warning Feature: Use the Warning checkbox to issue non-fine warnings, which can be useful for educating parkers or for first-time offenders.
- Vehicle vs. Person Violations: Understand when to apply a violation to a Vehicle versus a Person based on the nature of the offence and your organizational policies.
- Comprehensive Linking: Ensure all relevant photos and documents from your PC are uploaded and linked to the digital violation record for a complete court-ready package.
- Training: Train staff thoroughly on the manual entry process, especially regarding correct data fields, vehicle/person selection, and the use of "Spoiled" and "Warning" features.